In this document I will be making a copy of the latest MyITCRM from github, then make my own project in redmine which will be linked to a Subversion repository and controlled via a NetBeans project which is my prefered IDE.
- I will have a local Subversion Server
- I will have the real files on my local xampp server so I can edit them and see the results straight away
- I will store the NetBeans metadata in a different folder so the files do not get messey
- The SVN metadata will also be stored elsewhere if there is any
It is worth reading this article - http://php.dzone.com/articles/creating-a-netbeans-php-projec
Prerequsites
- Make sure your Subversion server is running
- NetBeans is installed
- Redmine is running
- A download of the latest version of MyITCRM from github
- MyITCRM installed to an appropriate folder in the development server:
D:\Documents\websites\design\htdocs\development\myitcrm
Create a Repository in SVN
General
This is only required if you are creating your own repository or one has not already been setup.
- Log in to Collabent subversion
https://svn.quantumwarp.com:4434/csvn/ - Go to repositories tab
- Click create
- Use the name ‘MyITCRM’
- this creates a repository using MyITCRM in the path
- it does not reduce the URL to lowercase letters D:\Documents\Developer\SubversionEdge\data\repositories\MyITCRM
- It cannot be renamed later
- Select Template, with ‘Create standard trunk/branches/tags structure’, this is a standard SVN configuration
- Click create
Configure User
- Goto users tab
- Click create
- Fill in the details with a decent password and leave the default user role unless you need anything different (should just be ROLE_USER – Basic User Authority)
Configure Access Rules
These access rules are not really GUI Driven but can be accessed through the console.
https://svn.help.collab.net/entries/24785311-Define-repository-access-rules
- Got oto repositories tab
- Click on ‘Access Rules’ in the left menu
- By default all repositories are configured for read/write access by all users (not public)
[/]
* = rw
- I could restrict this to only my shoulders account to prevent unauthorised access
[/]
shoulders = rw
Configure Hooks
Once you have created your repository it is important to create a hook that tells the redmine project tracker that changes have been mnade to this repository (you can set a global lookup command that does all repositories instead)
See my other notes
Accessing the repository
From the command line
svn checkout https://svn.quantumwarp.com:18080/svn/MyITCRM/trunk MyITCRM --username shoulders
This is the hook file
@ECHO OFF

#curl http://<redmine url>/sys/fetch_changesets?id=<project identifier>&key=<your service key>
#curl "http://<redmine url>/sys/fetch_changesets?key=<your service key>"

curl "http://svn.quantumwarp.com:81/redmine/sys/fetch_changesets?id=myitcrm&key=xxxxxxxxxxxxxxxxxxxx"
#curl "http://svn.quantumwarp.com:81/redmine/sys/fetch_changesets?key=xxxxxxxxxxxxxxxxxxxx"
Notice the project identifier is all lower case, this is the identifier is the redmine one.
The access key is taken from redmine (administration/settings/repositories/’API Key’), generate a key if none is present and then populate the selected line above with the repository id (if required) and the API key.
The above code should be added to a file called post-commit.bat and placed in:
D:\Documents\Developer\SubversionEdge\data\repositories\MyITCRM\hooks
Create Project in Redmine
General
Create a new project by going in to redmine and use the following settings
- Call the project MyITCRM (the identifiers is reduce to all lowercase)
- Only enable Bug and Feature trackers
- Leave Public
- This creates a project at
http://svn.quantumwarp.com:81/redmine/projects/myitcrm
Configure Repository
- Goto the MyITCRM/settings/repositories
- Click ‘new repository’
- Fill the’New Repository’ with the following information
- SCM – subversion
- Main repository – leave ticked
- Identifier – myitcrm (only lowerc ase is allowed)
- URL - https://svn.quantumwarp.com:18080/svn/MyITCRM
- Login – shoulders
- Password - xxxxxxxxxxxxxxxxxxxxxx
currently not working, perhaps the url is not quite right or I am getting the
- Click create
Check the repository is working
Load files into the repository
Now that the blank repository has been setup you need to load the files into it. This has to be done by a SVN client and in respect of this tutorial can be done in 1 of 2 ways:
- Use tortoiseSVN to initially load the files in to the repository
- Use netbeans inbuilt client to load the files
Again this assumes that you are creating your own repository and not just connecting to one that is already live
Configure a NetBeans Project (your SVN Repository is empty)
These instructions do not involve a subversion server yet
If you have already loaded you SVN project up via tortoiseSVN or you are using a Subversion server then you should use ‘PHP Application with Existing Sources’ but select a Subversion Server as the source
---------EOF-----------
https://netbeans.org/kb/docs/php/project-setup.html - setting up a php project
https://netbeans.org/kb/docs/php/quickstart.html - php quick start
https://netbeans.org/kb/trails/php.html - PHP and HTML5 learning Trail
http://wiki.netbeans.org/ConfiguringNetBeansProjectForWordPress - similiar setup to this one
In NetBeans pressing F1 will bring up the context sensitive help page.
- Open netbeans
- Create a new project
- Select PHP
- And then an appropriate option form the list below
(I selected 'PHP Application with Existing Sources')
- ‘PHP Application’ – starting with no files
- ‘PHP Application with Existing Sources’ – use this when you already have installed a system such as wordpress or MyITCRM already on your local webserver. Same configuration options as above but will scan the folders and add them to your project and possibly import any netbeans metadata.
- ‘PHP Application from Remote Server’ - use this when you already have installed a system such as wordpress or MyITCRM already on your remote webserver. Same configuration options as above but will scan the folders and add them to your project and possibly import any netbeans metadata.
Possibly + This is where the live files are not the ones you work on but are ones that have been published.?
should look like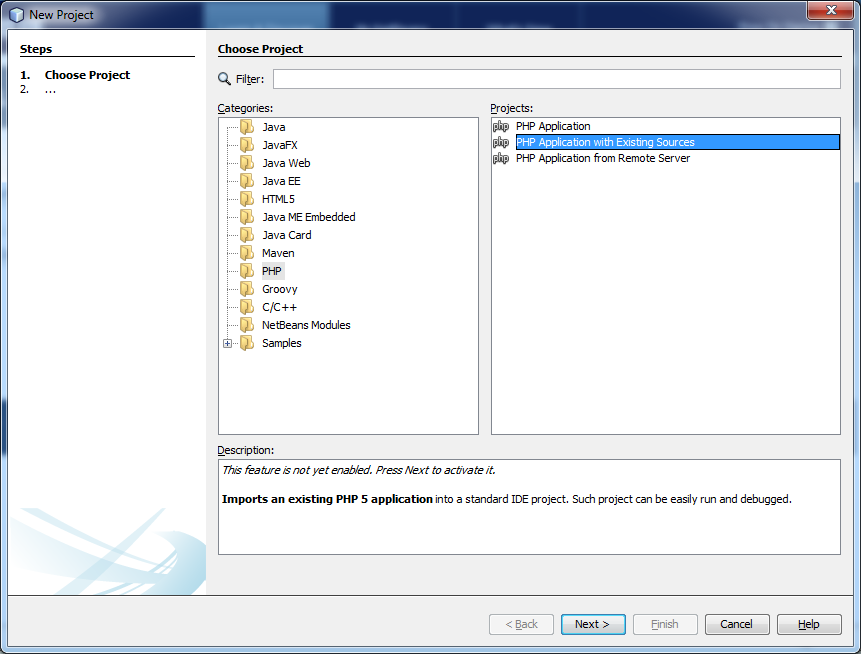
- Fill in the page ‘New PHP Project with Existing Sources’
- Set the ‘Sources Folder’, this is where your actual files are
- ‘Project Name’ give your project a name. this will default to the name of the sources folder but it is ok to change it.
- ‘PHP Version’ = The PHP version that your project uses. Note that you do not affect your PHP code by your choice in this field. Only the IDE's code completion feature uses the value in this field. Either select the latest version of PHP or the one that matched your local webserver.
- ‘Default Encoding’ – this should be left at UTF8
- Tick ‘Put NetBeans metadata into a separate directory’ – this ensures that the NetBeans metadata is not present in the live folder on the webserver. This can be very messey if they are not separate. Ignore the warning, no-one ever seems to have a problem with this and everyone ticks this feature.
should look like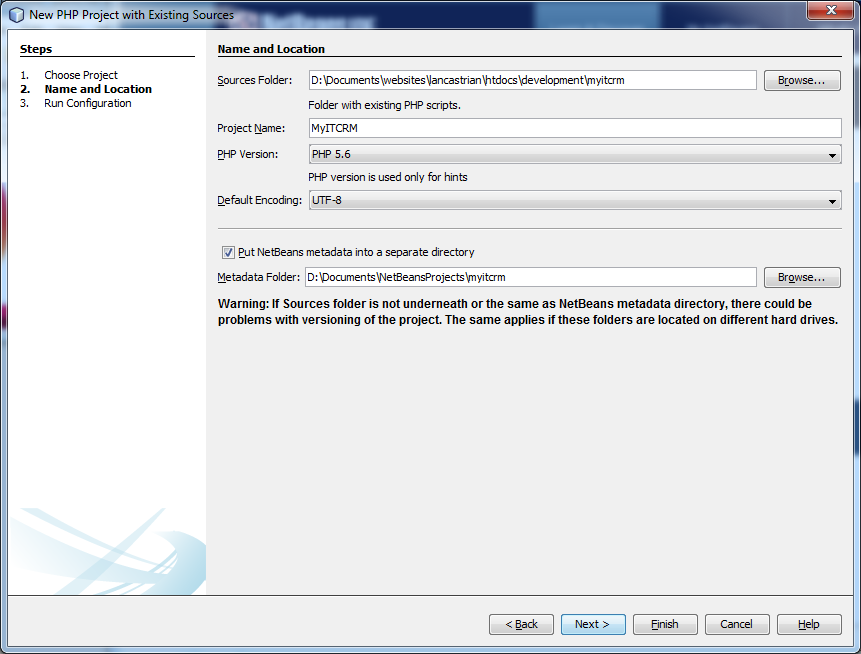
- Click next
- Configure with the following settings
- ‘Run As´- leave this as ‘Local Web Site (running on local web server)’, this is your xampp server
- ‘Project URL’ - this is the web URL of your project.
- ‘Index File’ – this is obviously the default file to load.
- ‘Copy files from Sources Folder to another location’ – not sure what I would use this for. It is not something I need
should look like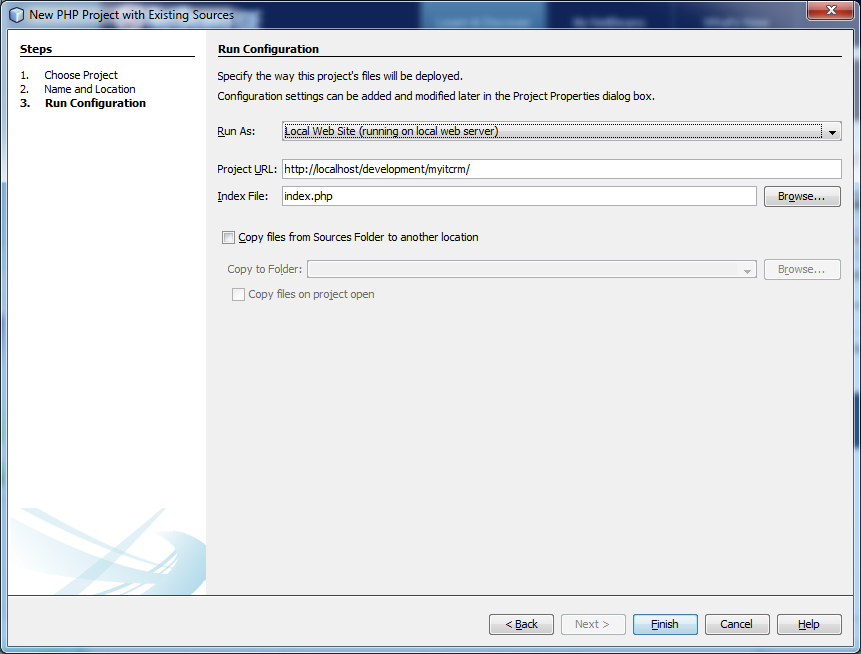
- Click finish
- If prompted to enable SMARTY support, click and enable it.
- Run any updates that are pending
Import into a subversion
- In the projects tree on the left hand side of netbeans, slect the ‘Source Files’ for your MyITCRM project
- Goto Team/subversion/’Import into Repository’
- paste in https://svn.quantumwarp.com:18080/svn/MyITCRM - the boxes will change to match this protocol
- fill in the following details
- username – shoulders
- password - xxxxxxxxxxxxxxxxxxxx
- tick ‘Save Username and Password’
- ‘Client Certificate File’ – I think this is the SSL certificate, might also be the fak Certificate Authority (CA) file – ignore this
- Passphrase – this is the passphrase for the SSL certificate – ignore this
- Ignore Proxy Configuration
should look like this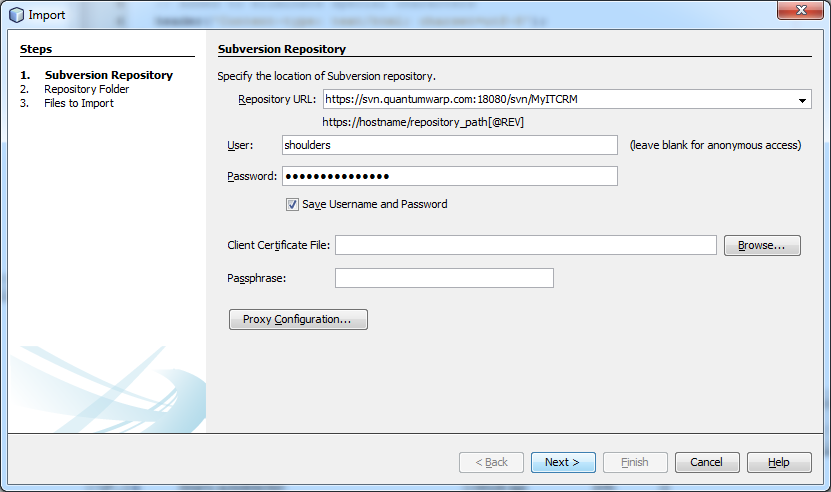
- Click next
- The Repository URL might get perverted to https://svn.quantumwarp.com:18080/svn/MyITCRM
- You will now get a SSL error about the certificate. Accept permanently.
- Click browse and select trunk
- Now enter a message eg ‘First Import’
It should now look like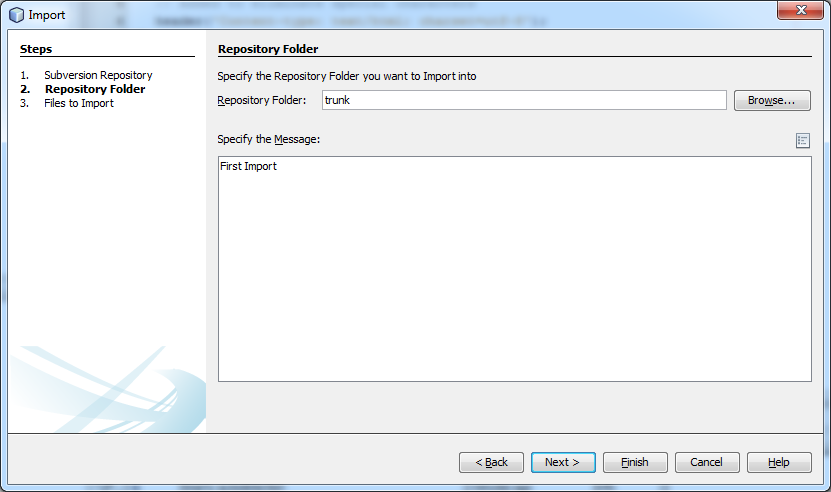
- Click next
- You should get a warning about ‘Import into exisiting folder?’, click yes
- It might take a while but then you should see

- Click finish
you should now see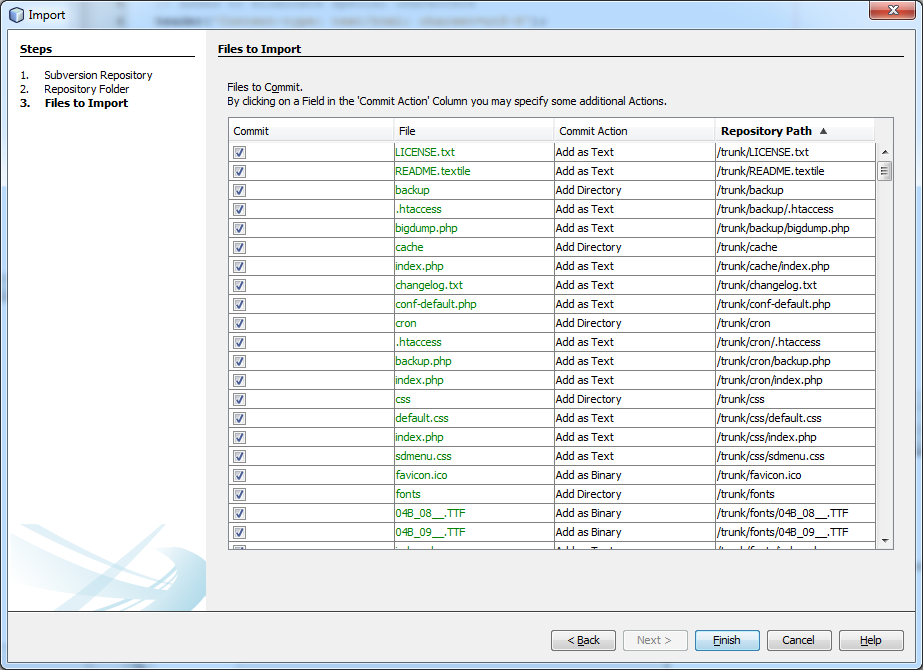
- The files are now imported in to subversion and should be connected to this project and as a consequence the team menu options have changed.
Notes
The subversion information is saved in the files, so while testing these will need deleting
Files already in Subversion Repository
- Goto Team/subversion/checkout
Using NetBeans
Ie svn when should I use trunk/branches etc… what is the difference. Should I just use the trunk if it is me or should I create my own branch.