There are different ways you can set this up and I will show you the best way of setting this combination up whilst still being able to use your 3rd party email address from your Outlook.com account.
I will cover using webmail, Outlook.com, Webmail and mobile phones and the different setups there.
The setup I am going to outline will remove the need to ever access your email via your 3rd party server, but obviously does require it to keep running.
The reason you would want to set this up is:
- Exchange functionality (for free)
- Out of office replies
- Email rules
- Calendar
- Etc.....
- 50GB mailbox
- Limited mailbox size at your 3rd party supplier
Instructions
Obviously for this to work you will need a Outlook.com email address that has been upgraded to the new version of Outlook.com account which supports Exchange (live and Hotmail email accounts will be ok) and Outlook 2013+ if you want to setup email in Outlook the software client.
Configuration Options
You need to configure each item in the list below for your selected configuration. The instructions for the different options are after this section. You basically just mix and match as per the menu below to get your preferred option. I have done this way because I am not 100% which way I am going to set things up yet but at least you can figure out the best configuration for you.
- Webmail Only – suitable for most clients
- Outlook Webmail
- Send and receive 3rd party email from Outlook Webmail
- Set 3rd party email address to be default from Outlook Webmail
- No Outlook client software
- Outlook Webmail
- Minimal – This setup is for people who want to use Outlook client software
- Outlook Webmail
- Send and receive 3rd party email from Outlook Webmail
- Set 3rd party email address to be default from Outlook Webmail
- Outlook Software Client Exchange setup
- 3rd Party emails are received via Outlook.com to your Exchange account
- Local 3rd party email send only (SMTP)
- Set 3rd party email address to be default from Outlook client Software
- Outlook Webmail
- Full – This setup is for people who want to use Outlook client software and get there emails as quick as possible.
- Outlook Webmail
- Send and receive 3rd party email from Outlook Webmail
- Set 3rd party email address to be default from Outlook Webmail
- Outlook Software Client Exchange setup
- 3rd Party emails are received via Outlook.com to your exchange account
- Local 3rd party email send and receive (SMTP and POP3)
(would this cause issues with outlook.com and outlook software sending and receiving) – definitely quicker for receiving emails - Set 3rd party email address to be default from Outlook client Software
- Outlook Webmail
- Outlook Software Client Only – This setup is for people who want to use Outlook client software and getting their emails as quick as possible but only have the 3rd party emails sent and received from their Outlook client software. This could be useful if you have lots of email accounts or specific needs. You will still be able to read all of your emails via Outlook.com but not send from those 3rd Party email addresses. You would also probably need to leave your PC on to get the benefit of this setup.
- Outlook Webmail
- Outlook software Client Exchange setup
- Local 3rd party email send and receive (SMTP and POP3)
- 3rd Party emails are uploaded to Outlook.com via your Exchange account
- Set 3rd party email address to be default from Outlook client Software
Configuration Items
Outlook Webmail
Obviously for this to work you will need an Outlook.com email address that has been upgraded to the new version of Outlook.com account which supports Exchange (live and Hotmail email accounts will be ok).
This item just requires you to create an Outlook.com account with an Outlook.com email address unless you already have one.
Send and receive 3rd party email from Outlook Webmail
Outlook.com uses your own server for sending email rather than sending from Microsoft servers so there will be no issue of address spoofing or your emails going into SPAM folders. To this end we need to give the email account details to Outlook.com.
- Login to outlook.com

- Click on the settings cog (top right)
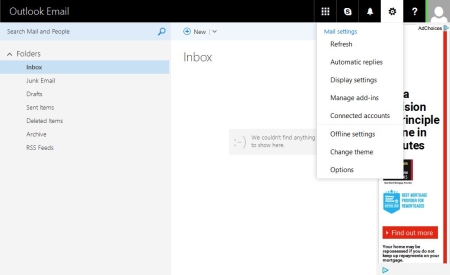
- Connected Accounts
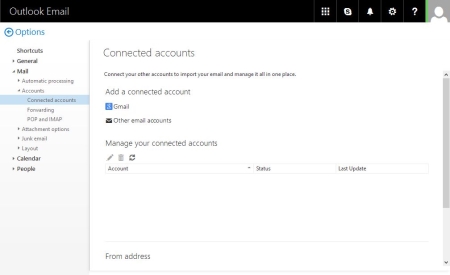
- Add a connected account Selecting ‘Other email accounts’
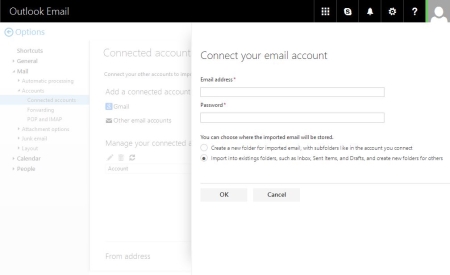
- Follow the setup procedure for the account
- Connect your email account – importing into existing folders is my preferred option because I can setup email rules later
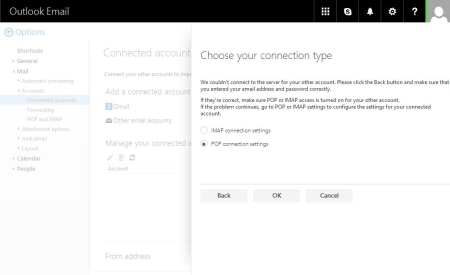
- Choose your connection type – Outlook.com will try and connect your account automatically but will almost certainly fail and then will prompt you to select your account type, select POP.
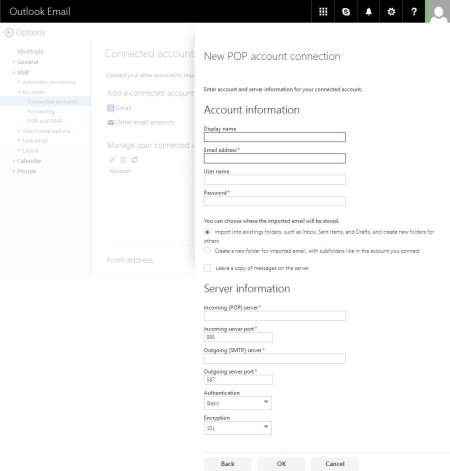
- New POP account connection – Fill in your details here. Select to import into existing folders but untick ‘Leave a copy of messages on the server’, this will make sure the 3rd party mailbox is always kept empty to prevent mixed up emails. SSL settings are more secure.
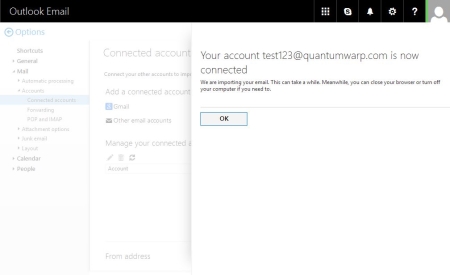
- Your account test123@quantumwarp.com is now connected
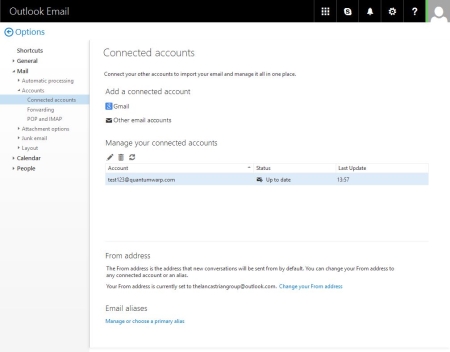
- Connected Accounts now showing your newly connected account
- Click back and return to your inbox
- Depending on whether you selected to import into current folders or create news ones, your inbox will look slightly different.
Merge / Import into current folders then there will be no change for either IMAP or POP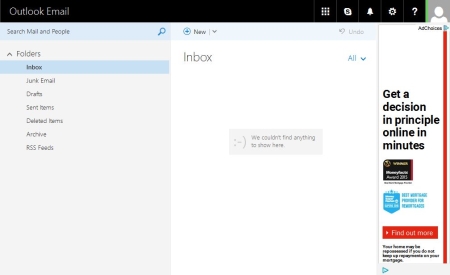
If you selected new folders (POP3) you will get this layout.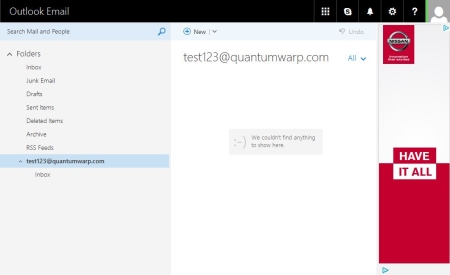
Just for completeness, IMAP with seperate folders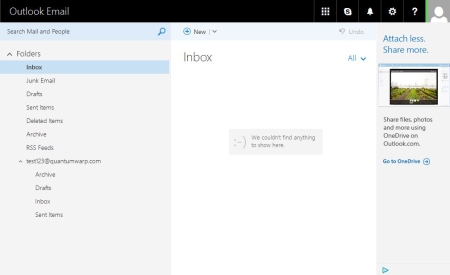
- You have now configured Outlook.com to grab your emails.
Your emails will only be fetched every 10 – 15mins from 3rd Party servers, this cannot be changed. If you use IMAP the emails are not received instantly either.
Set 3rd party email address to be default from Outlook Webmail
- Click on the settings cog (top right)
- Select Connected accounts
- If you scroll to the bottom of the screen you will see the From Address option
- Click on “Change your From Address” and select your 3rd party email address. This will now become the default email address in your Outlook.com Account.
Outlook Software Client Exchange setup
Recently Microsoft upgraded all Live/Hotmail/Outlook.com to support full Exchange features with a 50GB mailbox which allows Outlook client software to take full advantage of this such as the calendar which will sync to your calendar on Outlook.com, emails rules and out of office replies
Configuring Outlook Software Client
You need to have Office 2013 or later to be able to recognise Outlook.com as an Exchange server.
For these instructions I am using Outlook 2016
To Add the Exchange Account
- Go to File --> Account Settings --> Account Settings and click on new
There are different ways to get to the next step to add new email accounts and these methods are ok as well.
- The auto Account Setup dialog box will now appear.
- Fill in your details and click next
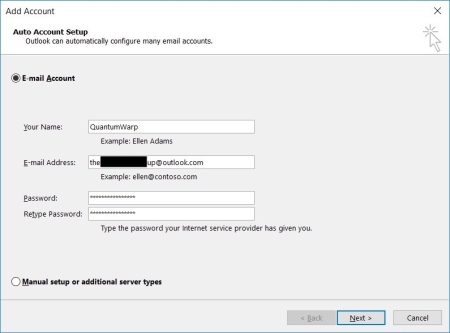
- Outlook will now auto-discover all of the required settings Outlook.com and configure your exchange account.
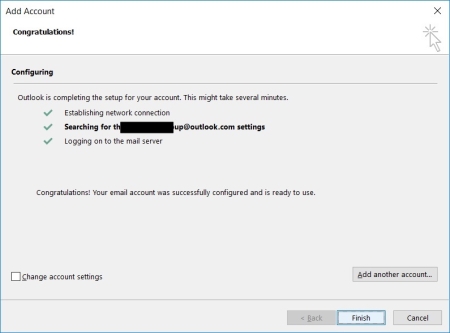
- Click Finish and restart Outlook if prompted
Local 3rd party email send and receive (SMTP and POP3)
Now we need to add your 3rd party email account into exchange. The difference is that we will have the delivery location be the Exchange .OST file. When emails are delivered to the .OST via Outlook client software it is synced up to Outlook.com and therefore all of your other devices. Emails will be sent from your 3rd party email account as normal via the Outlook client software.
- Select ‘Manual setup or additional server types’ Click next (Auto setup does not always work but you can try it if you want)
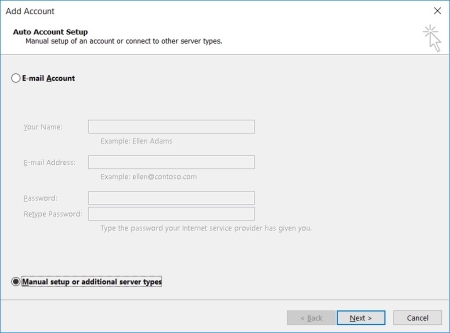
- Select POP or IMAP
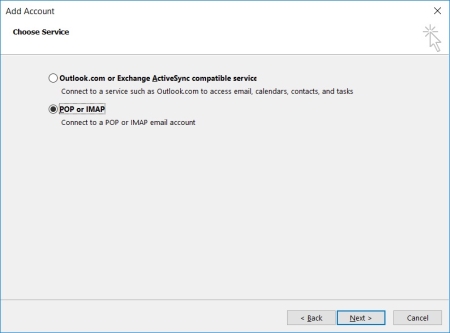
- The POP and IMAP Account Settings dialogue will appear
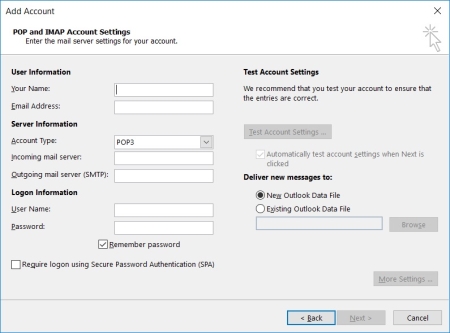
- Fill in User Information/Server Information/Logon Information
- Untick ‘Automatically test account settings when Next is clicked’
- We now need to set the delivery location of the 3rd party email to your Exchange account/.OST file
- Under Deliver new message to: select ‘Existing Outlook Data File’
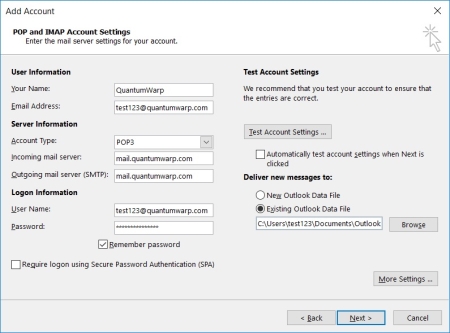
- Select your Exchange .OST file.
If you are using default locations, the Exchange .OST should be listed in the browse windows as soon as it opens. If it does not you need to browse to where you Exchange .OST file sis and select it. The default location in Outlook 2016 is
"C:\Users\{windows account}\AppData\Local\Microsoft\Outlook\"
- Click on more settings
- General Tab
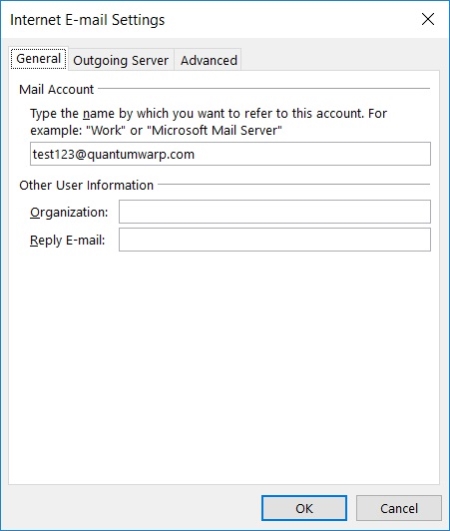
- Configure as required
- Outgoing Server Tab
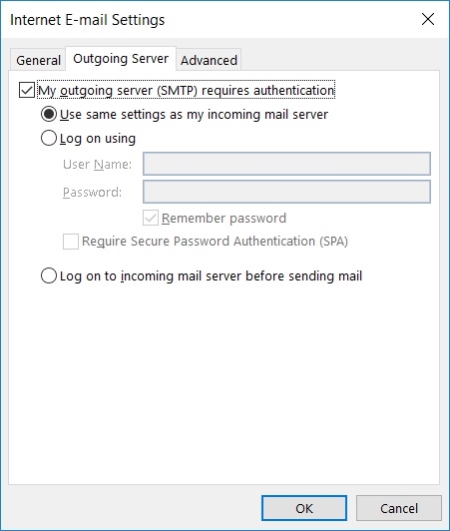
- Configure your Outgoing Server as required. In my case I just have to turn on ‘My outgoing server (SMTP) requires authentication’
- Advanced Tab
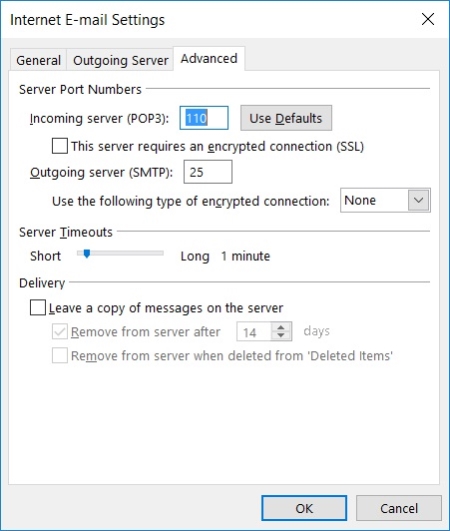
- Configure the ‘Server Port Numbers’ as required, SSL and TLS is preferable.
- Delivery – In this configuration you do not want to leave any emails on your 3rd party server because your Outlook.com Account will be your primary account. This will also prevent emails getting doubled up when Outlook.com interrogates your email server.
- Click OK to return to the POP and IMAP Account Settings
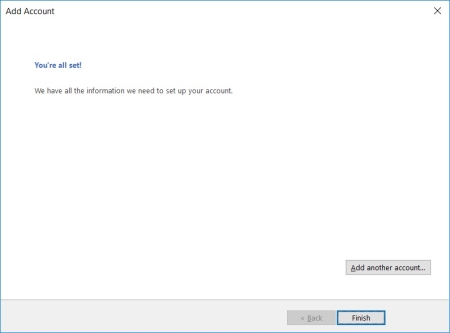
- Click Next
- You are all set now will appear, click finish
- You are returned to the E-mail Accounts page where you can see both accounts
- Check the 3rd party email delivery location ion the E-Mail tab. If you have accidentally created a new .PST file you need to change the delivery location and remove the unneeded .PST file.
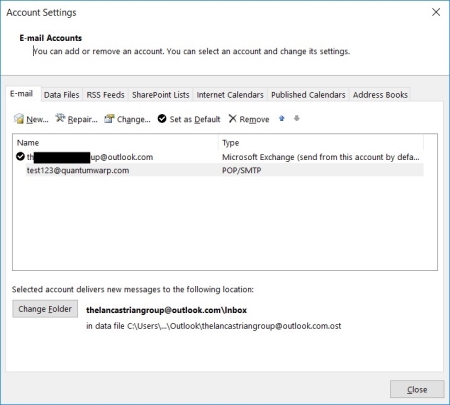
- Click on the 3rd party email address
- At the bottom a Change Folder button will appear, click this
- Select the inbox folder of the Exchange Account in the tree and click Ok
- Now delete the unwanted .PST file form the Data Files tab. If this fails, restart the Outlook client software and then retry the .PST deletion process.
- Click close
- Click Close
You can now send and receive emails from your 3rd party email account and those emails, both sent and receive will be saved in to your Outlook.com Exchange account and synced to all of your devices. The 3rd Party email address has been set as the default email address so you might not even notice you are using an Outlook.com Exchange Account.
Local 3rd party email send only (SMTP)
This option would be suitable if you just want Outlook.com to manage your email grabbing or if issues arising from both Outlook.com and Outlook client software polling your email server.
We are basically going to remove the 3rd party email account from the send/receive group preventing POP3 integration.
Do the same as above section ”Local 3rd party email send and receive (SMTP and POP3)” but make sure the internet is turned off first and then do the following.
- Go to the Send / Receive Tab
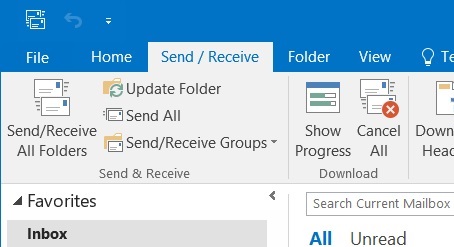
- Click on “Send/Receive Groups” drop down menu
- Select “Define Send/Receive Groups”
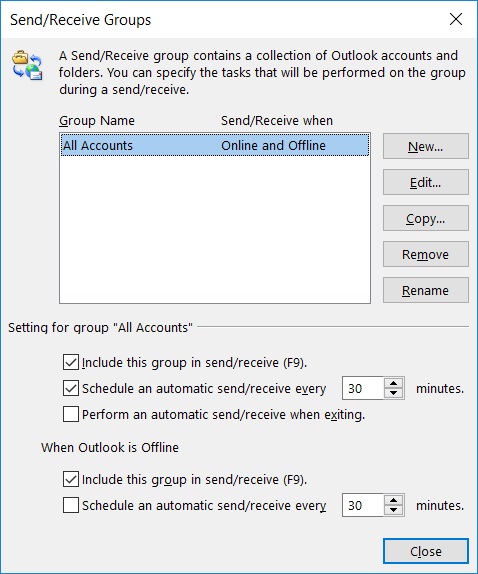
- Edit “All Accounts”
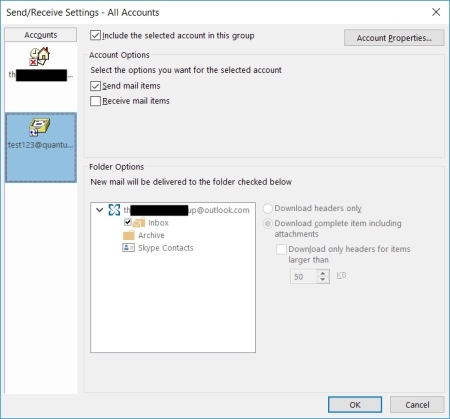
- Select the 3rd party email account on the left
- Untick “Receive mail items”
- Click OK
- Click Close
- Re-Enable the internet
You have now disables your 3rd party email account from receiving email so the POP3 server will never be polled by you Outlook client software but you can still send emails
Set 3rd party email address to be default from Outlook client software
The Exchange account should still be the default account. Simply set the 3rd party email account as the default.
- Open up the E-Mail Accounts page
- Highlight your 3rd party email account
- Click “Set as Default”
- Done
Mobile phone / outlook.com app
This section needs updating when there is a method to use an alias in the Microsoft Outlook App.
- You cannot send emails via and alias in the Ooutlokk App but you can see all emails that have been received in the main account.
- You can only add 3rd part IMAP accounts. This probably would allow you to send emails but things would get messy
Notes
Outlook.com Webmail
- The emails will not show up immediately in your inbox
- Frequency of email collection is every 10 – 15 mins and cannot be changed
- Logging in and out of your outlook account does not trigger your emails to be polled from your connected account
- The emails will appear automatically in your outlook.com inbox and you do not need to refresh your webpage
- Outlook.com might not immediately start downloading your emails when you add the connector. You have to wait for the cron job as it were
- When I added the connector back on to use separate folders using the same email address (i.e. folders already there) I had to wait for emails to be brought in.
- When I then added the same email address again but to use the primary folder structure they were downloaded immediately.
- You can set outlook.com to remove the messages or leave them on the remote server
- You can set the new account to be merged with the primary account folder structure or use its own.
- Outlook uses your own server to send emails when using connected so you should set any SPF or DKIM settings on your own server as normal.
- You can set your 3rd party email to be the default email account in Outlook Webmail
- can connect to the outlook.com via POP or IMAP (if you enable it)
- Rules created on outlook.com are translated down to outlook(software) and I guess vice versa
- If you have already created the connected account with separate details (i.e. under a folder with the email name) when you recreated the connector account to use separate folders it just re-uses the same folder and does not recreate another folder set. (pop3 checked)
- The pop3 method with When I added the connector back on to use separate folders using the same email address (i.e. folders already there) I had to wait for emails to be brought in.
- The connection in pop3 seems to be duplicate content aware after I did some experimentation but only to the prescribed delivery location i.e. main inbox or separate folder structure. It seems to check the configured delivery location for duplicate emails., not both
- When you send items from outlook.com or outlook when using pop3 the emails go in the sent folder
- If you struggle to delete a previous IMAP/POP3 folder group from prior connected accounts then use outlook client software once connected via exchange and delete the folders from and empty the recycle bin and the folder will be gone for good.
- Office 2013+ is required to use outlook.com email accounts for full exchange support.
- If you recieve the following error "This message can't be sent right now. Please try again later" it is most likely because you are trying to send with your 3rd party email address and the SMTP settings are wrong.

IMAP
- when you connect an IMAP account and ask for separate folders you get the following layout
- test123@quantumwarp.com
- Sent
- Archive
- Drafts
- INBOX
- The email delivery is not instant either, seems to be 10 -15mins
- Does not give you the option of removing the emails from the remote source when using IMAP.
- When you delete in outlook.com it does not delete in the remote IMAP so is a bit pointless. It literally works like pop but without being able to remove the email
- test123@quantumwarp.com