
Health (2)
Health related stuff
TL;DR I am not a doctor. These are notes for myself that other people might find useful. Your health and body are your problem and if you have any health issues consult your doctor, not me.
I have had some general health issues which are probably due to bad diet and lifestyle. The advise I got from a Urinary Consultant was limited and in one particular case wrong, so I have decided to figure this out myself and write it up here for a reference.
My Regime
TL;DR
- For a Man
- Reduce Visceral Fat
- Reduced Cortisol Levels
Food
Shopping Order
For 28 days.
this not complete and I might move it or remove this section. It should be a list of what I need to go and buy so I don't have to think about it.
- Supplements
- Omega 3
- Multi viatamin
- Vitamin d
- Meal replacements (for dinner)
- Electrlyte tables
- B12 tables
- Creatine
- Aswaganda
- For the ken get melatonin and l-theanine
- Foods (buy weekly)
- Yakult
- Salt and honey – what type of salt? See cotriosol videos
- Steak
- Chicken
- eggs
Timetable
| Time | Food | Fluids | Supplements | Exercise | Notes |
| 00:00 | |||||
| 01:00 | |||||
| 02:00 | |||||
| 03:00 | |||||
| 04:00 | |||||
| 05:00 | |||||
| 06:00 | |||||
| 07:00 | Breakfast Meal |
|
|
NB: Keep heart in fat burn zone |
|
| 08:00 | |||||
| 09:00 | |||||
| 10:00 | |||||
| 11:00 | |||||
| 12:00 | Meal Replacement / Protein Drink |
|
|||
| 13:00 | |||||
| 14:00 | |||||
| 15:00 | |||||
| 16:00 | |||||
| 17:00 | Normal Meal |
|
|||
| 18:00 | |||||
| 19:00 | Stop Eating | Stop Drinking |
|
|
|
| 20:00 | |||||
| 21:00 | |||||
| 22:00 | |||||
| 23.00 |
|
|
- = Sleep
Diet Rules
For things that are not obvious in the table above.
- General
- Total water per day = 2.5l - 5.0l (i am working on this)
- 1g of protein per pound of ideal weight
- Once you have diet sorted, fast 1 day a week (TBA), you must be doing the diet for a while and it be your routine.
- At least one meal needs bulk/fibre to block up the gut. This allows for proper water absourbstion by stopping the water just going straight through.
- Meal target types
- Breakfast = Protein
- Dinner = Protein + Carbs + Fibre
- Tea-Time =
- Food for Exercise
- Before: Carbs
- After: Protein
Meals I can eat
- Breakfasts
- Meal 1
- Steak piece (butcher)
- 2 x Scrambled eggs with a little milk
- Meal 2
- 2 x Boiled Eggs
- Lettuce
- Meal 1
- Normal Meals
- Meal 1
- Pickled Onions
- Iceberg Lettuce
- Meat (pick one)
- 2 x Butcher's pork sausages
- Chicken Piece
- Steak Piece
- Spoonful of cheese
- Meal 2
- Pickled Onions
- 2 x eggs that are omega3 enriched (at least free range) (3 eggs a day is safe)(this guy eats 3 -6)
- Steam mixed vegetables
- Meat (pick one)
- 2 x Butcher's pork sausages
- Chicken Piece
- Steak Piece
- Meal 3
- Steamed Vegetables
- Chicken
- New Potatoes
- Ppickled Beetroot/Onions
- Meal 1
- Snacks
- Hard boiled eggs for snacks
- Banana
Diet Suggestions
These are just some a collection of ideas.
- Values
- Exactly How Much Protein You Should Be Eating, According To Your Age And Stage | British Vogue - The “right” amount of protein is highly individual, says nutritionist Jessica Shand.
- Meal Plans
- This is what humans were meant to eat. #organicfood #organic #nutrition #health #realfood - YouTube | Revealiaorganic - A weeks supply of only whole foods.
- General
- Low carb diet seems to be a good thing
- More protein in diet causes
- more metabolism of it burning up my calories
- more protein in diet tend to remove belly fat (see articles)
- Eating six eggs 3 x 3 (breakfast/dinner/tea) not a bad thing
- Brussels sprouts are really high in protein
- Smaller portions (trick yourself by using a smaller plate at the same time)
- Do not buy processed food.
- No processed, get meat from a butcher that has not been processed
- Most processed foods tend to be high load GI and not good for you because all of the fibre and other stuff is removed.
- Steam, not Boil
- Grill rather than Fry
- Low Glycemic rate food is better?
- The glycemic index (GI) is a measure of how quickly carbohydrates raise blood sugar levels after consumption.
- Foods with a high GI cause a rapid rise in blood sugar, while those with a low GI lead to a slower rise.
- Glycaemic index and diabetes | Diabetes UK
- High Protein Foods: 16 Foods for High Protein Meals - Research shows it's really important to eat enough protein. These high protein foods can help you lose weight, gain muscle, and feel great.
- When buying food
- Don't just go to the shop, you will buy junk.
- Plan your meals, then only buy what is needed, better still, order online and don't go to the shop.
- You should by at least 1 week's worth of stuff, after this fresh food might go off.
- Specific Foods
- Eggs
- Eggs are a super food
- Whole eggs are among the healthiest and most nutritious foods on the planet.
- They are loaded with vitamins, minerals, healthy fats, eye-protecting antioxidants and brain nutrients that most people don’t get enough of.
- Whole eggs are high in protein, but egg whites are almost pure protein.
- Protein content: 35% of calories in a whole egg. 1 large egg contains 6 grams of protein, with 78 calories
- Eggs with omega3 in and/pasture from fed chickens is better
- Egg, whole, cooked, hard-boiled | USDA FoodData Central - USDA FoodData Central produces thorough resources for navigating and understanding nutritional info to support dietary choices and nutritional analysis.
- how much protein in an egg | Google Search
- Nice lookup table
- Egg, boiled: 13% protein
- Egg, fried: 14% protein
- Egg Nutrition - Official UK Information | Egg info
- Eggs are a natural source of many nutrients including high quality protein, vitamins and minerals. Including B2 (riboflavin) and B12. Find out more about the nutritional value of eggs.
- Protein in egg | How much protein in an egg | Egg info
- On average, a medium-size egg contains around 6.4 grams of protein which makes up around 12.6% of the overall edible portion. Find out more about protein in eggs.
- There are on average between 5.2 and 7.5 grams of protein in an egg, depending on its size. For information on all sizes see below.
- Eggs and a balanced diet | Egg Recipes | Egg info
- Our bodies require a broad range of different nutrients to stay healthy - these nutrients ensure we are able to carry out our basic functions to keep alive and well.
- A healthy diet can be achieved by consuming foods in their correct proportions and quantities which provide us with all the vital nutrients we need.
- The Eatwell plate illustrates how to get your proportions right for a healthy diet.
- How Many Eggs Can You Eat in a Day? The Surprising Truth - YouTube
- For many decades, people have been advised to limit their consumption of eggs, because the yolk is high in cholesterol.
- It was thought that if you ate cholesterol, it would raise cholesterol in the blood and contribute to heart disease... That was wrong.
- What Happens When You Eat 3 to 4 Eggs Daily? - YouTube | Dr. Eric Berg
- Eggs have gotten some bad press, but what’s the truth? Are eggs bad for you? What about eggs and cholesterol? In this video, find out about the unique nutrition profile of eggs and the benefits of eating 3-4 eggs daily.
- Eat Eggs Daily for 14 Days and THIS Happens to Your Body - YouTube | Dr. Eric Berg
- What would happen if you ate eggs every single day for 14 days? The results might surprise you.
- Eggs are one of the most misunderstood foods, but when you look at the science, they’re packed with nutrients that can seriously upgrade your health. In this video, we break down exactly what happens inside your body when you eat eggs daily.
- Boiled Egg on an Empty Stomach - How Your Body Digests It ð¥ #digestivehealth #healthyeating - YouTube - AI 3D video showing what happens to an egg when you eat it.
- Eggs
Shopping / Where and What to Buy?
- MyProtein Product I have looked at:
- THE Electro | Electrolyte Tablets Myprotein UK
- £6.49 for 20 Tablets
- THE Electro | Electrolyte Sachets Myprotein UK
- £14.99 for 20 Sachets
- THE Electro - HYROX | Electrolyte Powder Myprotein UK
- £14.99 for 30 servings
- Extended periods of high-intensity exercise result in significant fluid loss through sweating, which depletes your stores of sodium, potassium, and magnesium.
- Research by B. Murray (2014) concluded that sodium is crucial for fluid retention and preventing dehydration, particularly during long durations of intense physical activity.(3)
- Replenishing these electrolytes with THE Electro after exercise, along with proper hydration, helps supports normal muscle function.(1,2 )
- Potassium contributes to normal muscle function
- Magnesium contributes to electrolyte balance
- Murray, B. (2014). Hydration and physical performance. Journal of the American College of Nutrition, 26(5 Suppl), 542S-548S. doi:10.1080/07315724.2007.10719661
- THE Electropower | Creatine & Electrolytes Myprotein UK
- £21.99 for 30 servings
- Essential Omega-3 Tablets | MYPROTEIN
- Buy Essential Omega-3 for a fatty acid that can be expensive to get from diet alone.
- Our capsules are rich in both EPA and DHA essential fatty acids.
- Ashwagandha KSM66 Capsules | Myprotein UK - Check out Ashwagandha KSM66 Capsules from Myprotein, the World's No.1 Online Sports Nutrition Brand. Free Delivery Available.
- THE Electro | Electrolyte Tablets Myprotein UK
- Amazon
- Vitamin B12 Tablets - 450 Tablets (1+ Year Supply) - 1 Per Day - 1000mcg - 6mm (WeightWorld) : Amazon.co.uk: Health & Personal Care
- Enjoy a long-lasting supply of high-potency 1000mcg methylcobalamin B12 tablets. Supports energy, metabolism, and overall health. Vegan-friendly, 450 tablets (1+ year).
- How to use: Take 1 tablet daily, preferably with a meal or as directed by your healthcare professional.
- Vitamin B12 Tablets - 450 Tablets (1+ Year Supply) - 1 Per Day - 1000mcg - 6mm (WeightWorld) : Amazon.co.uk: Health & Personal Care
- Other
- ZERO | Electrolyte Drink Tablets | Sugar Free Hydration | HIGH5
- HIGH5 ZERO hydration tablet is a refreshing sugar free electrolyte drink with zero calories that makes it easy to stay hydrated throughout the day. Natural Flavours.
- Buy on Amazon or elsewhere a lot cheaper.
- I like Orange and Cherry
- ZERO | Electrolyte Drink Tablets | Sugar Free Hydration | HIGH5
- MyProtein Alternatives
- Dolphin Fitness - Shop from our extensive range of sports supplements, health and wellbeing products, novelty and specialist foods and drinks, and fitness accessories.
- Home of Ultimate Sports Nutrition, Health and Wellbeing Supplements. – SCI-MX - SCI-MX high protein powder, shakes and bars. The highest quality formulas and supplements for muscle and bodybuilding development, backed by science for proven results.
- Home Bargins
- Sci-Mx Creatine Monohydrate 250g | Home Bargains
- £7.49 / 50 servings / 5g of Creatine per serving
- Pure Creatine power
- The beneficial effect is obtained with a daily intake of at least 3g of Creatine.
- CREATINE MONOHYDRATE Powder | Increase Muscle Mass & Strength | SCI MX – SCI-MX - Creatine Monohydrate is an effective workout supplement that helps gym-goers & athletes to increase muscle mass & strength, reduce fatigue & speed up recovery times. Shop our range, fast UK delivery.
- Vit Direct Ashwagandha Capsules 30s | Home Bargains
- Vitawell Magnesium Glycinate Capsules 60s | Home Bargains
- not bought yet
- Sci-Mx Creatine Monohydrate 250g | Home Bargains
- Holland and Barrett
- Ashwagandha KSM-66 600mg - 30 Capsules | Holland & Barrett - KSM -66 is a superior clinically studied form of Ashwagandha. Supports emotional balance, relaxation, and general wellbeing. Suitable For Vegans.
- WeightWorld
- Vitamin B12 Methylcobalamin Tablets 1000μg | 450 Tablets | WeightWorld - Buy Vitamin B12 1000µg Tablets, offering high-absorbing methylcobalamin. 100% vegan. 1+ years supply. GMP-certified. Free UK delivery. 100% money-back guarantee
- Ashwagandha KSM-66 Tablets | 1500mg 180 Tablets | WeightWorld.UK - Our Ashwagandha Tablets offer 1500mg of max-absorbing Ashwagandha KSM-66/tablet. 100% vegan. 6-month supply. Free UK delivery.
- How to use: Take one tablet daily with a full glass of water, preferably with a main meal. For consistency, take your tablet at the same time each day.
- Biotin Vitamin B7 Tablets | 12000µg 365 Tablets | WeightWorld
- Shop our premium biotin tablets for hair, skin and nails. Vegan & non-GMO biotin B7 vitamin supplement. Enjoy a 90-day money-back guarantee.
- Our unique biotin B7 vitamin supplement provides a potent 12,000µg of pure biotin, which is known to contribute to the maintenance of normal skin and normal hair.
Gym
Timetable
| Day | Time | Exercise | Notes |
| Monday | 11.00 - 12.30 | ||
| Tuesday | |||
| Wednesday | 11.00 - 12.30 | ||
| Thursday | |||
| Friday | 11.00 - 12.30 | ||
| Saturday | Walk | ||
| Sunday | Walk |
Exercises
- Treadmill
- 10 Mins
- Pec Fly / Rear Deltoid
- 3 x 10
- This is the joysticks one
- do both far back where i pull in, and close together where I push out
- The leg one / Leg Curl
- 3 x 10
- push and pull
- Seated Row
- 3 x 10
- Pad in chest
- Start with arms straight with a little tensions
- keep arms in tight on my chest and back
- Biceps / Triceps
- 3 x 10
- Dog Rope
- arms at 90 and pull down keeping shoulders straight
- keep arms in tight on my chest and back
- Abdominal / Low Back
- 3 x 10
- Hug the roller
- Keep back straight
- Lat Pull Down
- 3 x 10
- ones with the thumb issue
- keep back straight
- this one gets me
- Multipress
- 3 x 10
- Chest press / incline press / shoulder press
- This is too nar at the minute
- This is the lifting and pushing one
- Assisted Pull Ups
- 3 x 10
- I just sank on this one
- not for me yet
- Swimming
- This is great for stretching and not being bored with exercising.
Notes
- Getting down on toes and forearms exercises most muscles in the body
Recommended Daily Nutrient Intake
Recommend intakes of various stuff.
Vitamins and Minerals
| Vitamin / Mineral | Nutrient Reference Intake (NRV) | Notes |
| Beta-Carotene |
|
|
| Biotin (Vitamin B7) |
|
|
| Calcium |
|
|
| Chromium |
|
|
| Copper |
|
|
| Folic Acid / Folate (Vitamin B9) |
|
|
| Glycine |
|
|
| Iodine |
|
|
| Iron |
|
|
| Magnesium |
|
|
| Manganese |
|
|
| Molybdenum |
|
|
| Niacin (Vitamin B3) |
|
|
| Omega 3 |
|
|
| Pantothenic Acid (Vitamin B5) |
|
|
| Phosphorus |
|
|
| Potassium |
|
|
| Riboflavin (Vitamin B2) |
|
|
| Selenium |
|
|
| Sodium Chloride (Table Salt) |
|
|
| Taurine |
|
|
|
Thiamin |
|
|
| Vitamin A |
|
|
| Vitamin B6 |
|
|
| Vitamin B12 |
|
|
| Vitamin C |
|
|
| Vitamin D |
|
|
| Vitamin E |
|
|
| Vitamin K1 |
|
|
| Zinc |
|
|
Vitamin Bottle values might be different to the NHS ones because:
- They are rounded.
- They are European values.
- The NHS values on the article are out of date.
Life Style Nutrients
These are not needed for a normal life but aid in improving it.
| Nutrient | Recommended Intake (RI) | Potential Benefits for | Notes |
| Ashwagandha (a.k.a Indian Ginseng) |
|
|
|
| Creatine Monohydrate |
|
|
|
| L-Theanine |
|
|
|
| Magnesium Glycinate |
|
|
|
| Melatonin |
|
|
|
| Modafinil |
|
|
|
Typical Values / Food Groups
The different types of food you should eat as part of a healthy diet
| Reference Intake of an average adult. | |
| Typical Values | Reference Intake (RI) |
| Energy | 8,400kJ / 2000kcal |
| Fat | 70g |
| of which saturates | 20g |
| Carbohydrates | 260g |
| of which sugars | 90g |
| Fibre | - |
| Protein | 50g |
| Salt | 6g |
Units and Measures
- General
- SI multiples - Kilogram - Wikipedia - Gives the various names and symbols of the different measurements.
- Microgram - Wikipedia
- The abbreviation
mcgis preferred for medical information in the United States (US), but prescription writing guidance in the United Kingdom advises that "microgram" should not be abbreviated.
- The abbreviation
- RNI vs DRV vs RDA vs NRV: Nutrient Intakes Explained - DRV, RDA, NRV or RNI? Nutritionist Sarah Dumont-Gale explains the confusing terminology surrounding dietary recommendations and nutrient intakes.
- Traditional Measurements
g(Gram)- 1g = 1000mg = 1000000μg
mg(Milligram)- 0.001g = 1mg = 1000μg
μg / mcg(Microgram)- 0.000001g = 0.001mg = 1μg
- Types
RI= Reference IntakeNRV= Nutrition Reference Value
- International Unit (IU)
- To convert international units (IU) to grams (g), you need to know the specific conversion factor for the substance you are measuring.
- International unit - Wikipedia
- In pharmacology, the international unit (IU) is a unit of measurement for the effect or biological activity of a substance, for the purpose of easier comparison across similar forms of substances. International units are used to quantify vitamins and biologics (hormones, some medications, vaccines, blood products and similar biologically active substances).
- International units as used in pharmacology are not part of the International System of Units (SI)
- What Is an International Unit (IU) Measurement? - Biology Insights - Learn what the International Unit (IU) is and how this standard ensures consistent biological activity and potency for essential substances globally.
- International units converter (between IU and g/mg/mcg) — MY PHARMA TOOLS - Easily convert between IU and g/mg/mcg
- RE, α-TE, and N
- When you see RE, α-TE, and NE on nutrition labels or in dietary tables, they are standardised units used to express vitamin activity, not just raw weight. Here’s what each means:
- RE – Retinol Equivalents
- Used for Vitamin A.
- Vitamin A comes in different forms:
- Preformed vitamin A (retinol) from animal foods
- Provitamin A carotenoids (like beta-carotene) from plant foods
- Because these forms have different biological activity, they’re converted into a common unit: Retinol Equivalents (RE).
- Classic conversion (older system):
- 1 µg retinol = 1 µg RE
- 6 µg beta-carotene ≈ 1 µg RE
- 12 µg other provitamin A carotenoids ≈ 1 µg RE
- Note: Many countries now use RAE (Retinol Activity Equivalents) instead of RE, which has slightly different conversion factors.
- α-TE – Alpha-Tocopherol Equivalents
- Used for Vitamin E.
- Vitamin E exists in multiple forms (tocopherols and tocotrienols), but alpha-tocopherol is the most biologically active form in humans.
- So vitamin E content is expressed as α-TE, meaning the amount adjusted to reflect the activity of alpha-tocopherol.
- 1 mg alpha-tocopherol = 1 mg α-TE
- Other forms of vitamin E are converted into alpha-tocopherol equivalents based on their biological potency.
- NE – Niacin Equivalents
- Used for Vitamin B3 (Niacin).
- Niacin can come from:
- Niacin (nicotinic acid)
- Nicotinamide
- Tryptophan (an amino acid the body can convert into niacin)
- to account for this, it’s expressed as Niacin Equivalents (NE).
- Conversion:
- 1 mg niacin = 1 mg NE
- 60 mg tryptophan ≈ 1 mg NE
Hydration
- General
- Not drinking enough can cause frequent pee-ing. This behaviour can become normal, especially over time.
- 8 Signs That You Are Dehydrated - Dehydration can have dire consequences if left untreated that extend to unconsciousness, coma, organ failure, and even death.
- How To Stay Hydrated With These 12 Easy Habits | British Vogue - “Everything in your body depends on optimal hydration, from organ function to hormone balance.”
- Water, drinks and hydration - NHS - Find out how water and other drinks fit into a healthy diet and lifestyle.
- Salt & Water - Barbara O'Neill - YouTube
- How much water do you drink? Water is the 2nd most vital element needed for life, which is why you can only survive a couple of weeks without water.
- Celtic Sea Salt
- Himalayan Pink Salt
- Does Drinking Water Lower Blood Pressure? - While drinking water won't treat high blood pressure, it may help you better control hypertension. Learn how dehydration influences blood pressure.
- 6 Exercise Hydration Mistakes - Here’s what you need to know about choosing the right post-workout beverage, finding the right carbs to rehydrate, and avoiding other common hydration mistakes.
- Can Dehydration Cause Numbness and Tingling? Causes, Effects, and Solutions - Discover how dehydration can cause numbness and tingling, chest pain, or elevated heart rate. Learn the science behind it and how Warrior Salt can help.
- Coffee
- Mold and Your Morning Brew What You Need to Know! - Are you concerned about mold toxins - YouTube | Biohacking Pathway
- Are you concerned about mold toxins in your coffee? Research shows that some coffee samples contain ochratoxin A (OTA), a mycotoxin from molds.
- However, the levels are generally low and well-regulated for safety. Choosing high-quality, specialty-grade coffee can further minimize the risk, ensuring a delicious and safe cup.
- Stay informed about your coffee choices to prioritize your health while still enjoying your favorite beverage.
- Tl;DR = don't drink coffee.
- Mold and Your Morning Brew What You Need to Know! - Are you concerned about mold toxins - YouTube | Biohacking Pathway
- Tea Vs Coffee
- english breakfast tea caffeine vs coffee - Bing Search - Intelligent search from Bing makes it easier to quickly find what you’re looking for and rewards you.
- English Breakfast tea typically contains about 40 to 70 mg of caffeine per 8-ounce cup, while coffee contains approximately 95 to 200 mg of caffeine per cup, making coffee the stronger option for a caffeine boost.
- Tea or coffee: which is better for you? - BBC Food - Brits love tea and coffee. They are the two beverages we drink most of in the UK but which one is best for us?
- This Is How Your Brain Becomes Addicted to Caffeine | Smithsonian magazine - Regular ingestion of the drug alters your brain’s chemical makeup, leading to fatigue, headaches and nausea if you try to quit
- english breakfast tea caffeine vs coffee - Bing Search - Intelligent search from Bing makes it easier to quickly find what you’re looking for and rewards you.
- Does drinking water make you hungry?
- Drinking water does not directly cause hunger and often acts as an appetite suppressant by filling the stomach and reducing the sensation of hunger. While it can temporarily increase metabolism, it is generally used to reduce caloric intake rather than increase it. Many people mistake thirst for hunger, so drinking water may alleviate feelings of hunger.
- Yes, drinking more water may help you lose weight | Hub - Water does more for the body than just quench your thirst—it might even help you drop some pounds
- Increasing water intake influences hunger and food preference, but does not reliably suppress energy intake in adults | ScienceDirect
- Increasing water intake is often purported to reduce energy intake, and is recommended as a weight loss strategy.
- The few experimental studies that have been conducted to verify these claims have examined the impact of a single pre-load of water before a meal.
- Can Drinking Water Help You Lose Weight? | Henry Ford Health - Detroit, MI - Weight loss advice often includes a tip to drink more water. But why? Learn how water affects hunger, metabolism and weight loss.
- The role of water in weight loss: does it help? | Jane Plan
- Many people believe that drinking more water can also help them shed unwanted pounds, but is this just another one of those weight loss myths?
- In this article, we explore the science behind water consumption for weight loss and share the optimal amount of water to drink for weight loss benefits.
- Why when I drink water does it go straight through me
- Why Does Water Go Straight Through Me? - Biology Insights - Ever wonder why water seems to go straight through you? Discover how your body efficiently processes hydration and when to be concerned.
- Caffeine is diuretic
- Rapid consumption of a large volume of water can also trigger a quicker excretory response. The body’s systems respond promptly to large fluid inputs to prevent imbalances. While the small intestine rapidly absorbs water, the kidneys work to process this influx, especially if the body perceives it as an excess.
- Why Does Water Go Right Through Me? Understanding the Science Behind Frequent Urination - Water Filter Spruce - Have you ever wondered why water seems to go right through you? Perhaps you’ve noticed that you need to go to the bathroom frequently after drinking water, or maybe you’ve experienced a feeling of bloating or discomfort in your abdomen. Whatever the case may be, there are a number of reasons why water might seem to pass through your body quickly, and in this article, we’ll explore some of the most common explanations.
- Caffeine is diuretic
- Tips for Optimizing Hydration
- Consume electrolytes
- Drink enough water
- Limit diuretics
- Monitor urine color : Monitoring the color of your urine can help determine whether you are properly hydrated. Aim for a light yellow color, indicating adequate hydration.
- Tips for Staying Hydrated
- Carry a water bottle with you wherever you go
- Flavor your water
- Set reminders
- Eat water-rich foods: Many fruits and vegetables, such as watermelon, cucumbers, and strawberries, are high in water content and can help you stay hydrated.
- Avoid sugary drinks: Sugary drinks like soda and sports drinks can actually dehydrate you, so it’s best to stick with water or other low-sugar options.
- Most people urinate between six and eight times per day.
- Tips for Optimizing Hydration
- Avoid These Big Mistakes When Drinking Water - YouTube - Tired of hearing conflicting information about how much water you should drink? Watch this video to learn about some common myths surrounding drinking water and what the truth really is.
- Your urine should not be clear.
- You ned electrolytes and Sea Salt (t=150)
- 2.5 litres of water a day
- Don't drink lots before you eat
- Low carb ketogentic diet + lots of water --> Keto flu of Keto Fatigure = need more salt to fix
- Vegetables: 80% - 90% is water
- Meat: 60% and 65% is water
- When you oxidise fat (exercise), you generate water and CO2
- diabetes or to much calcium in the blood (Hypercalcemia) makes you thirsty, can cause excessive urination, which is probably why you are thirsty.
- Caffeine is diuretic
- Jons Thoughts on drinking
- Dont drink 1Litre in one go, your kidneys will go into overdrive to get balance.
- You must work out the max amount of water you can drink per hour eg: 1 x 300ml drink per hour
- Which does not cause you to piss it out 1 hour later. This is no hydrating you if it happens.
- NB: When you drink water you effectively dilkute your electrolytes, so drinking water with electrolytes should be a consideration in formualting a drinking pattern.
- Nurse said
- He drinks between 4-5 litres a day and that 2 litres a day is not enough for me.
- If you get dry lips, you are not drinking enough
- When you drink a lot of water, you dilute the electrolytes currently in your body and also cause them to get flushed out of your system quicker than you want via urination. They will need replacing.
- Definitely do not drink the water all in one go
- Amount of water
- Don't drink lots of water in one go, it will cause the kidneys to go into overdrive.
- 500ml max an hour, and this is the most you should do in one go.
- 750ml is classed as a full bladder, you can go up to 950/1000ml if you hold very strongly.
- Nurse said 4-5 litres
- Work up to it from 2l by 500ml every couple of days to find my balance.
- If my lips are dry at any pint of the night or day my water intake is not enough
- I must make sure I take on electrolytes because the more water you use the more dilute they become and could obviously be excreted out at a greater rate.
- Why Does Water Go Straight Through Me? - Biology Insights - Ever wonder why water seems to go straight through you? Discover how your body efficiently processes hydration and when to be concerned.
Health Issues and Causes
Bad diet and lifestyle can lead to these issues.
- Cause of Fatigue
- Too much exercise
- Electrolyte depletion
- Not enough energy (usually in the form of carbohydrates)
- Dehydration
- Causes of frequent Urination
- Drinking to much on one go - The kidneys will try and get rid of most of the liquid to regain balance.
- Cortisol presence during sleep cycle
- Too much Caffeine
- Diabetes
- Hypercalcemia (lack of calcium)
- Constant Pee-ing at night can be caused by
- drinking to much before bed (i.e. after 18.00)
- The body is trying to get rid of excess sugar
- What compulsive peeing REALLY means - YouTube | Foot Doc Dana
- Can be linked to OCD or anxiety.
- Causes of getting up through the night (not always urination)
- Cortisol presence during sleep cycle
- Drinking after 18.00
- not leaving 3-4 hours after last meal before going to bed.
- Night Eating Syndrome (NES)
- Investigate
- Lead Poisoning
- Health effects from exposure to lead - HSE - Provides information about when you are most at risk from lead.
- Lead Blood Test: What to Expect | WebMD - If you or your child has been exposed to lead, you both should be tested. A lead blood test is simple, and it provides information that could save your life. WebMD explains what you should know.
- Blood Lead Levels - Test For Lead - UK CLAW regulations and EU directives on medical surveillance of workers' blood lead levels.
- Lead Test | LabTestsOnlineUK - Describes how the lead test is used, when a lead test is requested, and what the results of a lead test might mean.
- Painful/Sore Foot
- Foot hurts when walking: Causes, treatment, and diagnosis | MedicalNewsToday - There are a variety of reasons why a person's foot may hurt when they walk. Learn more about the possible causes and how doctors diagnose and treat them.
- Plantar Fasciitis: Symptoms, Causes, Diagnosis, Treatment | WebMD - Plantar fasciitis is inflammation in the plantar fascia — the ligament that connects your heel to your toes. Learn more about its causes, symptoms and treatment at WebMD.
Lifestyle Recommendations
General
- After a meal need to do 20mins of walking (while burning virseral fat off)
- It's Embarrassingly Simple - YouTube | Papa Tates - Fitness and nutrition is really that simple
- Carbs before lift
- Protein after lift.
- Fruits before and after.
- Water and electrolytes all day
- Caffeine when you're lazy.
- It's really that simple.
- Stop overcomplicating.
- 4 Ways to Lose Weight Without Counting Calories - YouTube
- This video outlines 4 evidence-based ways to lose weight without counting calories or consciously controlling portions. We all know that the standard advice to "eat less, move more" doesn't work that well.
- hi carb foods: reducing these helps loose weight: sugars, sodas, bread, pasta
- How Long Does It Take to Put on Muscle? | The Art of Manliness - Don't be fooled by unrealistic expectations. Learn the truth about building muscle and how long it takes to see noticeable results.
- Do You Chew Your Food Enough? Doctor Explains - YouTube | Dr Sermed Mezher
- Chewing your food thoroughly is more than just a mechanical step in digestion; it is a critical signal to your endocrine system.
- The process of mastication, or chewing, triggers a complex hormonal cascade that communicates with the brain to signal satiety.
Alternative Diets
- 30-30-30
- 80-20 diet ?
- Collagen diet
- Anatoly uses this
- Wisey 28 day plan
- Paleo Diet
- Paleo Diet Recipes & Tips | The Paleohacks Website - No meta description
- 30-10-30
- I Tried the 30-10-30 Workout Method – It’s Low Volume, Maximum Effort and Highly Effective - This high-intensity protocol packs 90 seconds of tension into every set. I put it to the test to see if seven working sets were really enough.
- Keto diet with intermittent fasting
- 4 months hard keto intermittent fasting | Google Search
- A four-month commitment to a "hard" keto and intermittent fasting (IF) regimen is a highly restrictive approach that combines high-fat, ultra-low-carb intake (under 30-50g per day) with 16:8 or 18:6 eating windows, or even One Meal A Day (OMAD). Many individuals in this scenario report significant weight loss—often ranging from 30 to over 50 pounds depending on starting weight—due to accelerated fat-burning and reduced calorie consumption.
- Here is a breakdown of what to expect based on 4 months of hard keto and IF:
- 4-Month Results and Experience
- Rapid Initial Weight Loss: Many report losing 10-15 pounds in the first month alone, with, in some extreme cases, up to 100 pounds lost over 4 months.
- Fat Loss vs. Weight Loss: The focus often shifts from scale weight to body composition changes, as the combination of keto and IF helps preserve lean muscle while burning stubborn body fat.
- Adaptation Phase: The first 2-4 weeks often involve the "keto flu" (fatigue, headaches, irritability), which typically subsides as the body becomes fat-adapted.
- Physical Changes: Clothes become noticeably looser, and people often experience a significant reduction in bloating and inflammation.
- Sustainability Challenges: After 3-4 months, many find strict keto difficult to maintain due to limited food variety, leading to potential "cheating" or burnout.
- Benefits of the Combination
- Enhanced Ketosis: IF accelerates the depletion of glycogen, forcing the body into ketosis faster.
- Reduced Appetite: High-fat meals paired with reduced eating windows often lead to a natural, effortless decrease in calorie consumption.
- Increased Mental Clarity: Participants frequently report sharper focus and increased energy levels.
- Challenges and "Hard" Side Effects
- Physical Side Effects: Constipation, bad breath (ketosis breath), insomnia, and reduced energy during workouts can occur.
- Nutrient Deficiencies: Long-term strict keto (3-6 months) can lead to deficiencies in vitamins A, C, K, and folate.
- Potential for Overeating: Due to small eating windows, some may feel pressured to overeat, causing stomach discomfort.
- Heart Health Concerns: Sustained high saturated fat intake can lead to increased LDL cholesterol in some individuals.
- Tips for Success over 4 Months
- Stay Hydrated: Drink plenty of water to avoid side effects like low blood pressure.
- Electrolytes are Crucial: Replenish sodium, potassium, and magnesium to prevent keto flu symptoms.
- Listen to Your Body: If extreme fatigue sets in, consider easing the fasting window (e.g., move from 18:6 to 16:8).
- Focus on Whole Foods: Avoid relying solely on processed, high-fat "keto snacks" to ensure adequate nutrition.
- Disclaimer:
- It is important to consult a healthcare professional before starting such a restrictive diet, particularly if you have underlying health conditions or are taking medication.
- 4-Month Results and Experience
- Sources
- 15 Burning Questions About the Keto Diet, Answered - The ketogenic diet involves eating few carbs and a whole lot of fat. But since the diet is restrictive and causes some weird side effects, it’s more complex than other diets. Here are answers to 15 frequently asked questions about keto!
- Intermittent fasting for weight loss - Mayo Clinic Health System - One of the latest diet trends is intermittent fasting. Learn about the approaches and if itâs a safe weight-loss option for you.
- Ketogenic and Intermittent Fasting Diets - YouTube | Health e-University - Popular diet trends include Intermittent Fasting and the Ketogenic Diet. During this session Fatim and Veronica will answer 3 main questions: 1) Are these diets safe? 2) Can these diets be maintained? 3) Are these diets based on facts?
- Can you lose weight on the keto diet and keep it off? | ZOE - Some people lose weight on the keto diet short term but often put it back on. Diets like keto can slow your metabolism and come with other health concerns.
- Keto vs. Intermittent Fasting for Weight Loss | Everlywell - What's the difference between the keto diet and intermittent fasting when it comes to weight loss? Find out more here.
- Should You Add Intermittent Fasting to Your Keto Therapy? - YouTube | Metabolic Mind
- Can intermittent fasting support ketosis and help treat serious mental illnesses like bipolar disorder, schizophrenia, depression, and anxiety?
- In this video, Dr. Bret Scher breaks down how intermittent fasting may fit into metabolic psychiatry and the potential role of intermittent fasting in ketogenic therapy for mental health.
- In this video, you’ll learn:
- What intermittent fasting is
- How fasting can impact ketone levels and metabolic health
- Why it might support (but isn’t required for) ketogenic therapy
- How to approach fasting safely, especially when mental health is a concern
- Why fasting is highly individual and may not be right for everyone
- Whether you’re exploring ketogenic therapy for yourself or supporting someone else on the path to recovery, this video will help you better understand whether or intermittent fasting could be a helpful complementary strategy to ketogenic therapy.
- Intermittent Fasting on Keto: What to Know Before You Combine the Diets for Weight Loss - Learn about combining intermittent fasting with the ketogenic diet. This guide explains how IF keto works for ketosis and weight loss, exploring expert-backed benefits and associated risks, as well as a sample menu.
- Can I Do Intermittent Fasting on the Keto Diet? | Green Chef - Is intermittent fasting during the keto diet a good idea? What about a juice cleanse or a 60 hour fast? Find all the answers in our keto fasting guide.
- How Long Does It Take to Lose Weight on Keto? - Are you on the keto diet and interested in how fast you can see results? Learn here how long it takes to lose weight on keto the safe way!
- Ways to lose belly fat: 15 practical, science-backed tips for lasting results | Zing Coach - Ways to lose belly fat: Learn science-backed workouts, nutrition, and stress strategies for lasting, sustainable results.
- 4 months hard keto intermittent fasting | Google Search
- Fasting
- Misc
- Gut health expert DR MEGAN ROSSI shows you how to add many more years to your life | Daily Mail Online - DR MEGAN ROSSI: Cutting out red and processed meat was seen to have a positive impact on lifespan, too, though not quite as impressive as adding more legumes, wholegrains and nuts.
Other Stuff
- Get rid of Thigh FAT
- 10 Tips to Lose Thigh Fat - Check out these 10 tips to lose weight and target pesky thigh fat for leaner, more toned legs.
- 9 Super Quick Ways To Get Rid Of Thigh Fat - Get rid of unsightly thigh fat as quickly as possible with these 9 super-effective methods
- How to Get Rid of Inner Thigh Fat: What You Should Know
- The best and healthiest ways to burn off extra fat and tone your thighs.
- Many people struggle with having fat on their inner thighs. While you cannot get rid of fat from only a specific part of your body, you can do exercises to build the muscles in your thighs to make them look toned.
- 5 Simple Exercises to Build Your Lower-Body Strength | Lose It! - Try this quick, beginner-friendly workout to tap into the many benefits of a strong lower body.
- Healthy Diet Advices
- NHS
- Recipe bank | NHS England - We provide nutritious recipes that promote low carbon and seasonal ingredients that help reduce emissions, that can be locally sourced and produced and can support local farmers and economies.
- Eat well - NHS - Information and guidance about eating a healthy, balanced diet.
- 8 tips for healthy eating - NHS - Start eating well with these 8 tips for healthy eating, which cover the basics of a healthy diet and good nutrition.
- 6 High-Protein Foods That Are Super Healthy - YouTube
- People argue about carbs, fats and everything in between. However, almost everyone agrees that protein is important and has numerous benefits including increased strength and muscle mass, and helping you to lose weight.
- In this video we're looking at 6 delicious high protein foods that are super healthy. The last one is part of a super controversial meme that has been shared hundreds of thousands of times that I just wanted to clarify.
- Flat Stomach Diet: Stomach Toning Foods for & Bloating Weight Loss | Glamour UK - A comprehensive guide.
- The Food Pyramid | Safefood - A healthy diet means eating a variety of foods from the major food groups and eating less salt, sugar and fat. The Food Pyramid shows how much of each food group to eat.
- Arnold Schwarzenegger Shared His Go-To Salad and Protein Shake - Including a very special ingredient.
- I'm a Dietitian, and I'll Never Give Up Pasta. Here's Why | EatingWell - Pasta gets a bad rap from some, but there are many benefits to eating pasta. Here are a few of them.
- Fish and shellfish - NHS
- Find out why most of us should eat more fish, including oily fish for omega-3. Learn how to eat fish and shellfish safely, including information on fish and shellfish allergies.
- A healthy, balanced diet should include at least 2 portions of fish a week, including 1 of oily fish.
- 8 Foods That Help Lower Your Cholesterol - If you want to lower your cholesterol, you may want to think about changing your diet. Learn more about these foods that can help lower cholesterol.
- The 7 Best Sources of Resistant Starch and How to Work These Nutritious Carbs Into Your Diet | Lose It! - Resistant starches have a deservedly good rep for keeping your gut happy and helping you lose weight, say dietitians. Here’s more about this healthy carbohydrate choice and the best foods to increase your resistant starch.
- High Protein Foods: 16 Foods for High Protein Meals - Research shows it's really important to eat enough protein. These high protein foods can help you lose weight, gain muscle, and feel great.
- 7 Potato Recipes That Are Actually Good for You - Potatoes have an unhealthy reputation, but it's more about how they're prepared that matters. These recipes for healthy baked fries, potato skins, potato salad, and more are a better way to eat and enjoy potatoes.
- 11 Healthy Foods That Help You Burn Fat - Several natural foods and beverages have been shown to increase metabolism and promote fat loss. These 11 healthy foods can help you burn fat.
- How to cook the perfect steak - Nicky's Kitchen Sanctuary - I’m going to teach you how to cook steak like a pro - answering all of your questions so you can cook the perfect, juicy, delicious steak.
- Chocolate
- How Hot Chocolate Helps Regenerate Stem Cells - YouTube - New research reveals a fascinating benefit of dark hot chocolate—drinking two cups daily can double the number of circulating stem cells in your bloodstream!
- Dark Chocolate Increases Stem Cells! What About Heavy Metals Found In Chocolate? - YouTube | Plant Based Science London
- In this video we look at an intriguing piece of research presented by Dr William Li on the powerful effect of dark chocolate on stem cells!
- We also look at the high heavy metals like lead and cadmium found in chocolate products and cocoa powder! Is there a cocoa powder Dr Greger recommends and uses himself?
- NHS
- Blood pressure
- General
- Blood pressure test - NHS
- Find out why a blood pressure test is important, how it's done and what your blood pressure reading might mean.
- Your blood pressure is usually considered high if it's either:
- 140/90 or higher when checked by a healthcare professional
- 135/85 or higher when checked at home
- Blood pressure test - NHS
- High Pressure
- High blood pressure - NHS
- Find out about high blood pressure, including how to find out if you have it, what causes it and what you can do to lower it.
- can cause serious problems like strokes or heart disease, but it does not usually have any symptoms. The only way to find out if you have high blood pressure is to get it checked.
- What are high blood pressure numbers? | Penn Medicine
- Cardiologist Ross Biggs, DO, explains hypertension guidelines and how to reduce your blood pressure without medication.
- But what is normal and what is high blood pressure? Here are the current guidelines:
- Normal: less than 120/80
- Elevated: systolic between 120-129 and diastolic less than 80
- High blood pressure (hypertension) stage 1: systolic between 130-139 or diastolic between 80-89
- High blood pressure stage 2: systolic 140 or higher or diastolic 90 or higher
- Hypertensive crisis (consult your doctor immediately): systolic higher than 180 and/or diastolic higher than 120
- Michael's Mosley's favourite vegetable for weight loss that 'helps high blood pressure' - Daily Record - The diet guru issued some helpful advice on the latest instalment of his podcast.
- Does High Blood Pressure Make you Tired, Sleepy? - Feeling tired can be a symptom of heart or kidney damage as a result of high blood pressure. It may also be due to hypertension medications or coexisting conditions.
- What to avoid eating or drinking with high blood pressure - Diet can have a big impact on your blood pressure. We look at key foods that increase your blood pressure, as well as foods to eat and to avoid to lower it.
- Does Drinking Water Lower Blood Pressure? - While drinking water won't treat high blood pressure, it may help you better control hypertension. Learn how dehydration influences blood pressure.
- How to Lower Systolic Blood Pressure - A high systolic blood pressure can lead to heart attack, stroke, and even death. Here are some changes you can make right now to lower yours.
- The 10 Min Daily Habit To Lower Blood Pressure In Older Adults - YouTube | Dr. Mitch Rice (The Blood Pressure Doc) - Lowering your blood pressure doesn’t have to mean more pills or complicated routines. In this video, I’ll share the 10 minute daily routine that adults 60+ can start doing to lower blood pressure naturally
- High blood pressure - NHS
- Low Pressure
- Low blood pressure (hypotension) - NHS
- Find out about low blood pressure (hypotension), including what the symptoms are, when to get your blood pressure checked and treatments for low blood pressure.
- can cause symptoms such as dizziness or fainting.
- Low blood pressure headache: Causes and treatment - While many people with low blood pressure (hypotension) may not have symptoms, some people do experience headaches as well as other symptoms.
- Low blood pressure (hypotension) - NHS
- General
- Reduce Cholesterol
- 8 Foods That Help Lower Your Cholesterol - If you want to lower your cholesterol, you may want to think about changing your diet. Learn more about these foods that can help lower cholesterol.
- Health recommendations by WHO
- Water Intake: Drink 8-10 glasses of water daily
- Exercise: 150 minutes moderate activity per week
- Sleep: 7-9 hours of quality sleep nightly
- Steps: Aim for 10,000 steps daily
- Sleeping
- No more than 8 hours should be needed normally.
- Unless you fall asleep with 20 minutes of going to bed, you are not ready for sleep
- Try THIS if you can't fall asleep! - YouTube | Doctor Myro
- If you cant fall asleep in 20 minutes your brain is stuck in an active thinking loop.
- Your brain has evolved to stay alert when something feels uncertain or unresolved.
- Staying in bed when your mind is racing is just training your brain to associate your bed with anxiety.
- To quiet your brain you need to switch from thinking to sensing, get up go to a quite room, dark environment, absolutely no screens and then read, listen to music, try a wind down exercise, but only go to bed when you are ready to sleep. If it is still not happening half an hour later, take 0.5mg of Melatonin, not more, it is a common misconception, but more just gives you more side effects. 200mg - 400mg of Magnesium Glycinate can also work wonders.
- How long should naps REALLY last? - YouTube | Dr Myro - How long do you nap?
- Your naps should never be 30 minutes because that is how long it takes for your body to enter deep sleep, even REM sleep. cutting that off and you're going to wake up groggy. Might as well be a walking zombie.
- 10 - 20 mins is where it's at. Even if you don't fall asleep, you enter non-sleep deep rest and that's great for midday brain fog, alertness, memory retention. There's even a 60% dopamine increase with a non-sleep deep rest. It's like loving life again and you're more productive.
- Now you want the same benefits as 8 hours of restorative sleep, 90 minute nap. That's all it takes.
- why do i get hungry before bed | Google Search
- You get hungry before bed due to insufficient daytime calories, unbalanced meals (low protein/fibre), poor sleep disrupting hunger hormones (ghrelin/leptin), stress, boredom, dehydration, or your body's natural circadian rhythm signaling a need for fuel after activity, with hormonal shifts like your period also playing a role. It signals your body needs energy, but it could also be emotional, so assess if you're truly hungry or just craving. (Google AI)
- Nighttime hunger often happens because of inadequate daytime eating, high activity levels, or habits that trigger the brain to crave a late-night snack. Other common factors include stress-induced high cortisol, poor sleep quality, or needing more fiber and protein to stay full. A light, balanced snack can help, but regular, intense hunger might require reviewing your daily diet.
- Key Reasons for Pre-Bed Hunger:
- Insufficient Daytime Nutrition: Not eating enough or skipping meals during the day, particularly neglecting protein or fiber, causes hunger to catch up with you at night.
- Habit and Conditioning: If you regularly eat before bed, your body becomes conditioned to expect food at that time, triggering hunger signals on autopilot.
- High Activity Levels: If you had an intense workout, your body may be demanding more energy to recover.
- Stress and Emotional Eating: Stress and anxiety can trigger increased hunger and make you crave comfort, leading to late-night snacking.
- Poor Sleep/Hormones: Poor sleep quality messes with hunger-regulating hormones (ghrelin and leptin), often causing late-night hunger.
- Dehydration: Sometimes, the body mistakes thirst for hunger
- How to manage it:
- Eat Balanced Meals: Ensure your dinner includes a mix of carbohydrates, fiber, and protein to keep you satiated.
- Smart Snacking: If you must eat, choose nutrient-dense, light options like nuts, yogurt, or fruit.
- Hydrate: Drink herbal tea or water to help calm cravings
- If you are constantly waking up famished, it could be due to blood sugar issues, and you should consider consulting a healthcare professional.
- Sources:
- Why You’re Waking Up Hungry in the Middle of the Night—and How to Fix It - Healthcare professionals explain why you're waking up hungry at 2 a.m.—and the best way to fix it.
- Why You Feel Hungry Before BedâAnd What to Do About It, According to a Registered Dietitian | SELF - An R.D. helps break down what's going on.
- Why Am I Hungry At Night? | Nourish - You should be in bed, but instead, you’re back in the kitchen with a grumbling stomach. An occasional snack is fine, but being hungry every night is too frequent. This article will teach you how you can stop getting hungry when you should be sleeping.
- Hungry at Night? Causes & How to Curb Cravings | Juniper UK - Constantly hungry at night? Here's everything you should know about nighttime eating: why it happens, how to manage it and the best late-night snacks.
- What To Eat If You're Hungry Right Before Bedtime, According To Nutritionists | HuffPost UK Food & Drink - Snacking before sleep isn't often recommended, but sometimes it's necessary. Here's what to grab.
- 6 Reasons Why You're Waking Up Hungry | EatingWell - Here’s what your appetite might be trying to tell you.
- Insanely Hungry Before Bed Every Night - Any Tips? | Reddit
- I normally sleep from 10pm to 6am on a normal night, around 8pm I start getting these intense cravings for food and sweets, even if I had a huge dinner earlier that evening. I tried pushing my dinners later into the evening but it didn't make a difference, even if I was overly-full I still got the cravings.
- Anyone here get these cravings and have tips for something I could get away with eating before bed? I read that if you eat before bed it will just sit in your stomach all night and get converted to a fat source.
- Ok, let me clarify, I have hunger cravings that keep me from being able to sleep. This helps.
- Sleeping on the Floor: Is It Good or Bad for You? | Casper Blog - Updated 9/25/2025 Sleeping on the floor may improve posture, circulation, and help you stay cool, but it can also cause discomfort, worsen allergies, or lead to restless nights. If you try it, ease in gradually, use proper support, and choose a position that keeps your spine aligned - or consider a firmer mattress for similar benefits without the downsides.
- Sleep After a Workout: Is It Good or Bad? | healthline - After doing intense exercise, some people feel the urge to take a nap. We'll discuss the pros and cons of sleeping after exercise.
- REM, Light, Deep: How Much of Each Stage of Sleep Are You Getting? - Fitbit Blog - Discover how to read and interpret your sleep-stage data with these tips from the scientists who helped develop it.
- Oversleeping Secretly RUINS Your Day! DON'T DO THIS! #shorts - YouTube - Sleeping 13 hours to 'catch up' actually causes sleep inertia, a groggy state that impairs cognition for hours. It's like a computer rebooting from deep shutdown, not standby. Worse, it shifts your circadian rhythm, making Sunday nights harder and perpetuating sleep debt.
- Sugar
- I Quit Sugar for 30 Days. I Didn't Expect This... - YouTube | Mike Dee
- I Quit Sugar for 90 Days (it's changing my life) - YouTube | Mike Dee
- What happens to your brain when you give up sugar - Having high levels of sugar in your diet is known to be bad for your health, but cutting it out can be difficult, particularly as it can trigger a range of unpleasant symptoms.
- What Eating Too Much Sugar Does To Your Body - While sugar in moderation is totally fine if you're in good health, it becomes the devil when you eat too much. Here's what happens when you eat too much sugar.
- Salt
- When You Stop Eating Salt, This Is What Really Happens To Your Body - When you stop eating salt, a few things happen, as we often eat plenty of it in our day-to-day lives. Here's what sorts of physical changes you can expect.
- The Cheapest Supplement Most People Ignore - YouTube - Baja Gold salt, it has all of the esssential minerals in it.
- Upgrade Your Salt Game for Better Health! - Ditch the regular table salt that's devoid - YouTube
- Don't use Pink Himalyan salt.
- Use Celtic Salt, Baja Gold
- Elevated Sodium levels are caused by being dehydrated.
- When and how should I take my Supplements
- The Truth About Supplements: Timing, Pairing & Usage Mistakes You Didn’t Know | Health and Me
- Supplements can support your health, but using them the wrong way may limit their benefits. From the best times to take them to which foods enhance absorption, and the subtle mistakes many of us make without realizing, this guide explores everything you need to know to get the most from your routine.
- Supplements should complement, not replace, a balanced diet and professional guidance.
- This has a nice table and tells you when and with or witout food.
- When to Take Vitamins and Supplements - YouTube - Are you taking supplements or vitamins that arenât as effective as you thought theyâd be? It could be that youâre just taking them at the wrong time of day. ...
- Is timing everything? Why it matters when you take your supplements
- Taking all your supplements in one go? There's a better way. Your routine can make or break how your body benefits from those nutrients, according to our expert
- Can’t I just take a multivitamin in the morning and call it a day?
- Some vitamins are better absorbed on an empty stomach, while others require food. And if certain ingredients interact negatively, they won’t be absorbed properly.
- When is the best time of day to take protein? | H&B
- Our nutritionist has done the heavy lifting and found the facts about when to take protein. Here's what you need to know about choosing the right type and fitting it into your routine
- If we look at someone who trains in the morning, then having a protein-rich breakfast such as protein-fortified cereal, eggs on toast or a protein shake will aid their recovery and help the muscles to repair after their workout.
- When we exercise to a high intensity, we need to compensate for the muscle protein breakdown, so we need an additional intake of protein.
- “A lot of people think that they need to have a source of protein immediately after exercise – or within about 30 minutes – but research suggests that it might actually extend to several hours,”
- The Truth About Supplements: Timing, Pairing & Usage Mistakes You Didn’t Know | Health and Me
- Heart Rate
- Your heart rate - BHF - Your heart rate (also known as your pulse rate) is the number of times your heart beats per minute (bpm). Everyone’s heart rate is different and can change over time.
Exercising
General
- Physical Activity Basics and Your Health | Physical Activity Basics | CDC - Benefits, recommendations, and tips for physical activity across the lifespan.
Motivation
Best Time
- The Best Time To Exercise -YouTube | Dr. Berg
- In this video, we’re going to talk about the best time to exercise.
- The best time to work out is in the evening. When you work out in the evening, you recover much more quickly than if you work out in the morning. You also burn more fat.
- Keep in mind that exercising in the evening will spike your cortisol a small amount, but it normalizes much faster.
- If you are an adrenal body type, you may benefit from walking in the morning. However, for those who are not, high-intensity interval training is ideal in the evening.
- If you work out twice a day, try doing your light workout in the morning and more intense exercises in the evening.
- You should see a big difference in your results and recovery when you work out in the evening.
- When is the best time to exercise? - BBC REEL - YouTube - There is no doubt that a healthy lifestyle should include some sort of exercise regime. But recent scientific studies have explored the benefits of time-specific workouts.
Working out Symptoms
- General
- Why am I feeling very weak during my workout routine?
- Feeling weak during workouts is common and usually results from one or more physiological, nutritional, recovery, or environmental factors. Below is a concise, structured checklist to identify likely causes and practical fixes you can apply immediately and over the short term.
- Immediate causes to consider (and quick fixes)
- Why am I feeling very weak during my workout routine?
- Twitching Muscles
- Why do my muscles twitch? | Ohio State Health & Discovery - Most people experience muscle twitching several times throughout their lives. An @OSUWexMed expert explains why they happen and when to be concerned.
- Muscle Fatigue
- Muscle Fatigue: Causes, Symptoms, and Treatment - Muscle fatigue is a symptom that decreases your muscles' ability to perform over time. As you exercise, over time your muscles may begin to feel weaker and tired. This is muscle fatigue. But exercise isn't the only thing that can cause muscle fatigue. Learn the symptoms of muscle fatigue and its many causes.
- Weak after a workout
- What to Do to Stop Feeling Tired After Cardio | Livestrong.com | Archive.org - It's not abnormal to feel a little worn out after finishing a cardio workout. What you shouldn't feel is exhausted and completely drained.
- What Causes Weakness After Exercise? | livestrong | Archive.org - Feeling weak after a workout is a sign that something's wrong. Common trouble areas are breathing, hydration, nutrition, lack of cool down and overtraining.
- Shaking after a workout
- I'm Shaking After a Workout | livestrong | Archive.org - Shaking after a workout can be alarming, but it might just be a side effect of your hard work. Shaking can also be caused by muscle fatigue or low blood sugar.
- Mission.org - Life Changing Programs for Cancer Survivors | Survivorship - Why Do Muscles Shake After a Workout? - While it may feel alarming to experience muscle shakes after a workout, most of the time it is completely normal. Involuntary muscle shaking is typically caused by muscle fatigue or low blood glucose.
Exercises
- General
- 15 things Dua Lipa swears by to keep fit - How the singer exercises, eats and clears her mind
- Athlean-x Shares Dynamic Tension Method for Bodyweight Exercises - Athlean-X's Jeff Cavaliere shares seven of his top exercises to use dynamic tension for more gains.
- He's unimpressed with his physique, but wins bodybuilding competitions ... at 90 | Guinness World Records | The Guardian - Jim Arrington, who was recognized as the planet's oldest bodybuilder in 2015, explains how a'low opinion' motivated him
- Chest
- Posture
- Misc
- Rowing Machine : TECHNIQUE and BENEFITS - YouTube - Learn how to row so you can have an amazing low impact cardio workout. If your new to rowing or new to fitness rowing machine is a great low impact alternative to running for cardio exercise.
- Squats
- The stronger your thighs the longer you live - YouTube | WayWeMove - The stronger your thighs the longer you live
- Squatting is not an exercise. It is a resting position and pose showing the overall health of a body - YouTube | WayWeMove
- 10 squats instead of 10K steps. Join my workshop - 5 steps to your youth - YouTube | WayWeMove - Let's develop 5 main qualities of your body: strength, flexibility, mobility, plasticity and elasticity during my worship starting from 32 March.
- Walking
- NEW Walking Method 2x Better Than Running?! (Tested) - YouTube | Jeremy Ethier
- Cardio is one of the most misunderstood parts of fitness, and despite how much information is out there, many myths still refuse to die. In this video, I put the biggest cardio myths to the test using real data, controlled experiments, and gold-standard calorie and fat-burn tracking.
- We'll go through cardio myths like cardio vs diet, cardio for fat loss, best cardio workout, cardio vs weights, HIIT cardio vs steady state cardio, 10,000 steps per day - and more.
- NEW Walking Method 2x Better Than Running?! (Tested) - YouTube | Jeremy Ethier
- Push-Ups
- Abs
- Weight loss: Three at-home ab exercises to tone your stomach, improve posture and enhance performance
- Belly fat is more common as we age but a number of factors can be the cause of extra weight around the midriff.
- Speaking to GB News, an expert shared the best exercises to help you tone up.
- These will also help improve posture and enhance performance in other activities.
- Intense Abs Workout - 3-Move Advanced Abs Workout - It only takes five minutes.
- 15-Minute Abs Workout - YouTube | elfersp - A 15-minute abs workout with our own Coach Nicole!
- Weight loss: Three at-home ab exercises to tone your stomach, improve posture and enhance performance
- Kegels (Pelvic Floor muscle exercises)
- kegels for men | Google Search - No meta description
- Kegel exercises for men strengthen the pelvic floor muscles, aiding in bladder control, preventing urine leakage (incontinence), and improving sexual function (erectile dysfunction). Perform them by squeezing and holding the muscles that stop urine flow for 5–10 seconds, relaxing for the same time, repeating 10–20 times daily.
- How to Perform Kegel Exercises for Men
- Locate the Muscles: Identify your pelvic floor muscles by trying to stop your urine flow mid-stream or by tightening the muscles that keep you from passing gas.
- Perform the Squeeze: Tighten these muscles, hold for 5 seconds, and relax for 5 seconds.
- Repetitions: Aim for 10–20 repetitions per session.
- Frequency: Do 3–4 sessions per day, which can be done while sitting, standing, or lying down.
- Routine: Incorporate them into daily habits, such as during your morning commute, brushing teeth, or after urinating.
- Key Tips and Benefits
- Avoid Common Mistakes: Do not hold your breath or tighten your stomach, thighs, or buttocks during the exercise.
- Do Not Use While Urinating: Avoid performing Kegels while actively urinating, as this can weaken the muscles over time and lead to bladder issues.
- Results: Improvements in bladder control or erectile function can be seen within one to several months.
- Additional Benefits: They help treat dribbling after urination and improve sexual satisfaction.
- If you have trouble locating the muscles, a healthcare professional can assist with techniques like biofeedback or electrical stimulation.
- Kegel exercises for men: Understand the benefits - Mayo Clinic - Men can benefit from these exercises. Follow these tips to strengthen your pelvic floor muscles.
- Kegel exercises tips for men - Mayo Clinic Health System - Kegel exercises for men can help improve bladder control and improve sexual function. Here are tips for doing Kegel exercises correctly.
- How To Do Kegel Exercises For Men | Kegel8 - Did you know that Kegel Exercises For Men can help with a whole range of health issues too? Pelvic floor exercises are just as important for men as for women. Read our guide now.
- How to Do Kegel Exercises for Men - Prostate Cancer | UCLA Health Jonsson Comprehensive Cancer Center - Kegel exercises for men can help with the incontinence that is sometimes a result of prostate cancer treatment. Learn how to do Kegel exercises for men.
- Kegel Exercises for Men: Benefits & How To Do Them | Cleveland Clinic - Kegel exercises can benefit everyone by helping strengthen the pelvic floor muscles. Learn more about Kegels and how they can benefit you.
- Kegel Exercises for Men: Do They Work? | healthline - Kegel exercises are used to treat a variety of conditions in women, but research suggests they may also help men. Learn how Kegel exercises might benefit you.
- The Benefits Of Kegel Exercises For Men | Superdrug Online Doctor - Kegel exercises strengthen the muscles around the pelvis, which can improve erections and orgasms for men. Learn more about the benefits of kegels for men
- How to Do Kegel Exercises for Men | Advanced Urology - Why do Kegel exercises and what are its benefits for men? To find out all the answers, it is essential to learn everything about Kegel exercises.
- Kegels Exercises For Men | LloydsPharmacy Online Doctor UK - Discover the benefits of Kegel exercises for men with our expert guide. Combat erectile dysfunction today with our effective pelvic floor movements.
- kegels for men | Google Search - No meta description
- Arnold Schwarzenegger
- How To Train For Mass | Arnold Schwarzenegger's Blueprint Training Program - YouTube - Learn some of Arnold Schwarzenegger's favorite classic bodybuilding exercises and preferred training techniques for building muscle. Get the knowledge you need to train for mass!
- Three game-changing muscle-building techniques from Arnold Schwarzenegger, 74 | Fit&Well - Three essential muscle-building tips from Arnold Schwarzenegger's long career
- Arnold Schwarzenegger's Fastest Way to Lose Belly Fat: Exclusive Interview & Fitness Tips - YouTube - Welcome to our special interview with the famous Arnold Schwarzenegger! In this fun and interesting chat, Arnold talks about the best and quickest ways to lose belly fat and shares helpful fitness tips for a healthy lifestyle. If you're looking for effective weight loss strategies, this video is for you.
- 21s Bicep Curls Workout - Arnold Schwarzenegger's Arm Finisher - This count-up series can build your guns and help to mix up your training for other muscle groups, too.
- The Evolution of Arnie's Training – and the Workouts Keeping Him Strong and Lean at 78 - After 60 years of lifting, Schwarzenegger's focus has shifted to 'staying lean and avoiding injury'
- Anatoly
- Anatoly Fit - Strength training, smart programming and results - Evidence-based strength training, smart programming, and long-term physical development. Articles, systems, and principles that actually work.
- Anatoly's secrets to powerlifting success: training, nutrition, and more! - YouTube - Want to know Anatoly's secrets? Discover the training and nutrition secrets behind Anatoly's incredible powerlifting success! You won't believe his simple yet effective approach!
- Anatoly Workout Routine & Diet | FitDominium
- Vladimir Shmondenko more commonly known as “Anatoly” on Youtube and other social media platforms is a Ukrainian lifter that is freakishly strong. While he may appear like your regular, fit guy, his strength exploits and pranks have propelled him to stardom.
- In this guide we will go over the full Anatoly workout routine and diet.
- How is Anatoly So Strong? A Deep Dive into His Strength - Curious about Anatoly's strength? Explore his training, diet, and mental strategies. Learn how Anatoly achieves his incredible power.
- Anatoly’s Workout Routine – Achieve Anatoly’s Strength! | PumpX - Welcome to Anatoly’s inspired Workout routine for maximum strength, where we detail the workout and methods!
- FINALLY Arnold Schwarzenegger Meets Anatoly - YouTube | Anatoly army
- Wolverine Diet and Training
- Wolverine Workout Part 1 - YouTube - Enjoy the videos and music that you love, upload original content and share it all with friends, family and the world on YouTube.
- "The Wolverine" 4 Week Diet & Training Transformation Challenge- Final Reveal - YouTube | Cosplay Chris - After 28 days of bland food and torturous training, the Wolverine 4 week diet and training transformation challenge is complete. Probably one of the most mentally and physically challenging things I've ever embarked upon. I'd like to do a follow up video on the exact diet and training process so let me know your thoughts. A
- "The Wolverine" Diet & Training Walkthrough - YouTube | Cosplay Chris - So as promised here is my step by step diet and training routine that I followed for four weeks that led to "The Wolverine" cosplay photo shoot.
- Calisthenics
- Calisthenics - Wikipedia - Calisthenics (American English) or callisthenics (British English) is a form of strength training that utilizes an individual's body weight as resistance to perform multi-joint, compound movements with little or no equipment.
- How To Start Calisthenics: The Complete Beginners Guide (2026) - Calisthenics 101 - Learn how to start calisthenics with our step-by-step guide covering essential exercises, equipment, progressions, and workout plans for beginners.
- How To Do Your First Pull Up - YouTube - Start Calisthenics - no matter your fitness level.
Notes
- Tools
- BMI Calculator
- Free Body Mass Index calculator gives out the BMI value and categorizes BMI based on provided information from WHO and CDC for both adults and children.
- Symptom Checker with Body from WebMD - Check Your Medical Symptoms
- WebMD Symptom Checker is designed with a body map to help you understand what your medical symptoms could mean, and provide you with the trusted information you need to help make informed decisions in your life for better health.
- BMI Calculator
- Nutrition
- Nutrition Assessment, Vitamins and Safety | Dr Alan Stewart - A referenced resource for professionals and public interested in nutrition, nutritional assessment and safety of nutritional supplements.
- Guide to Nutritional Supplements | Dr Alan Stewart - Guide to Nutritional Supplements
- Foods Nutritional Values
- USDA FoodData Central - USDA FoodData Central produces thorough resources for navigating and understanding nutritional info to support dietary choices and nutritional analysis.
- Nutritional Values For Common Foods And Products - Nutritional facts database with detailed analysis, advanced search and tools.
- Composition of foods integrated dataset (CoFID) - GOV.UK
- McCance and Widdowson’s 'composition of foods integrated dataset' on the nutrient content of the UK food supply.
- Download McCance and Widdowson’s The Composition of Foods Integrated Dataset 2021: user guide
- McCance and Widdowson’s The Composition of Foods integrated dataset is the official UK national food composition database, providing comprehensive macronutrient and micronutrient profiles of more than 3000 most commonly consumed food and recipes in the UK.
- EuroFIR » European Food Information Resource
- EuroFIR AISBL is an international, member-based, non-profit Association under Belgian law was set up in 2009 to ensure sustained advocacy for food information in Europe.
- Our mission is to be an independent provider of validated food composition and supporting information across Europe and beyond in cooperation with FAO Infoods. We are committed to advancing FAIRification of food-related data and fostering its application through research and commercial endeavours to support improved nutrition and health amongst citizens
- Food composition data is at the heart of what we, at EuroFIR, do. It feeds into the numerous Food Composition Databases (FCDBs) we have in FoodEXplorer.
- Glycemic Index – Glycemic Index Research and GI News | The University of Syndney - Search our comprehensive database of GI tested foods. Complete with data for Glycemic Index, Glycemic Load, serving size, direct references to the studies used to CALCULATE the VALUES, and more!
- Nutrient Information / Recommended Intake (RI)
- Vitamins and minerals - NHS - Find out about common vitamins and minerals, including what they do, how much you need, and how to ensure you get enough.
- Government Dietary Recommendations PDF (2016) | Public Health England - This document provides a concise summary of the government's recommendations for energy and nutrients for males and females aged 1 – 18 years and 19+ years.
- What we SHOULD be eating every day (according to the Government) | Daily Mail Online - The new dietary advice, published by Public Health England (PHE), the Government’s public health quango, is intended to help the meet official nutrient requirements.
- UK government's healthy eating guidelines (PDF)
- The UK government's healthy eating guidelines are represented in the Eatwell Guide, which illustrates the proportions of different food types needed for a balanced diet.
- The guide emphasizes the importance of including a variety of foods from all food groups, such as fruits, vegetables, carbohydrates, proteins, and dairy, to maintain a healthy lifestyle.
- You can find more detailed information in the official guide.
- Foods and their Benefits / Help sites
- The Eatwell Guide - GOV.UK
- The Eatwell Guide is a policy tool used to define government recommendations on eating healthily and achieving a balanced diet.
- Tis is a plate of food that illustrates how to get your proportions right for a healthy diet.
- The Eatwell Guide - NHS - Read about the Eatwell Guide, which shows how much of what we eat overall should come from each food group to achieve a healthy, balanced diet.
- The Eatwell Guide and Resources | Food Standards Agency - The Eatwell Guide makes healthy eating easier to understand by giving a visual representation of the types of foods and drinks we should consume and in what proportions to have a healthy, balanced diet.
- Food facts - Healthier Families - NHS - We're here to help your family be healthier and happier. Find out more about what's really in the food we eat and how to make healthier food swaps to cut back on the sugar, salt and fat in your family's diet.
- Weight Loss & Diet Plans - Find healthy diet plans and helpful weight loss tools - From healthy diet plans to helpful weight loss tools, here you'll find WebMD's latest diet news and information.
- Action on Sugar - Action on Sugar - Action on Sugar is a group of specialists concerned with sugar and its effects on health. Learn more here about sugar and it's effect on health.
- SELF Magazine - Women's Workouts, Health Advice & Beauty Tips
- The Eatwell Guide - GOV.UK
- OMAD
- One Meal a Day
- Electrolytes
- Water vs Electrolytes: What You Need to Know About Hydration - YouTube - What's the difference between plain water and electrolytes? Who needs to add electrolytes to their water?
- Drinking to much water without adding electrolytes can make dehydration works
- Sodium, potassium and magnesium
- when you exercise, sweat or are on a low carb diaet you are loosing electolytes
- if you are only drinking plain water you are diluting your electrolyte conecntration even more, this can lead to symptoms such as fatigue, muscle cramps, brain fog adn dizzinessor headaches
- so if you are someone who does not eat a lot of processed food, if you eat a lower carbohydrate diet, if you are an athelete or use saunas regulary you need to be replenishing your eletrolyrtes.
- but before you grab any electrolyte drink, make sure to check the label, most have added sugar and dont actually have a lot of eletroytes = use SODIE (15% off with code HCK15)
- Do electrolytes make a difference? Experimenting with SaltStick! - YouTube - Electrolytes are minerals including sodium, potassium, calcium, and more that everyone's body requires. But they seep out in sweat, so as we demonstrate in this experiment, it's important to replace them any time you sweat a lot. Water alone is not enough.
- Electotlyes are minerals, including salt that our body needs to function.
- runing drinking loads of water but mouth is still dry
- Low electrolyte symptoms include:
- cramping
- fatigue
- headaches
- confusion
- Heat exhaustion
- They demo'ed: SaltStick Tablets
- Adding This To My Water Changed Everything - YouTube
- Use Celtic Salt
- Most people think hydration is just about drinking more water. But if water is going straight through you... or you feel bloated, tired, or still dehydrated... it’s not a water problem, it’s a cellular hydration problem.
- Hydration happens inside the cell, not just in your bottle.
- That’s why minerals matter.
- That’s why electrolytes matter.
- And that’s why how you hydrate is just as important as how much.
- Once I understood this, my energy stabilized, headaches became less frequent, and I stopped feeling like I needed to constantly chug water all day.
- Do electrolytes make a difference? Experimenting with SaltStick! - YouTube
- Electrolytes are minerals including sodium, potassium, calcium, and more that everyone's body requires. But they seep out in sweat, so as we demonstrate in this experiment, it's important to replace them any time you sweat a lot. Water alone is not enough.
- We've tried tons of electrolytes, and SaltStick is our favorite because it's EASY. You just eat it like candy in addition to drinking water (it tastes as good as candy too)! The alternatives are bottles of sports drink or electrolyte powders that you mix into water, both of which add complexity to a hike or workout. With FastChews, you don’t need to mix or wait… just chew ‘em!
- Water Isn’t Enough: The Importance of Electrolytes for Hiking and Running – Thruhikers: Renee and Tim
- So, what are electrolytes? They’re the minerals in our bodies that carry an electrical charge. They include sodium, potassium, calcium, magnesium, and more.
- This is a deep dive.
- Water vs Electrolytes: What You Need to Know About Hydration - YouTube - What's the difference between plain water and electrolytes? Who needs to add electrolytes to their water?
- Viseral Fat
- Visceral fat is a type of body fat located deep inside the abdomen, wrapping around organs such as the liver, pancreas, intestines, heart, and kidneys. Unlike subcutaneous fat, which lies just under the skin and can be pinched, visceral fat is not visible from the outside and cannot be felt easily. It is sometimes called “active fat” because it actively influences how your body functions, including hormone regulation and metabolism.
- Visceral Fat: Why It's Dangerous and How to Lose It - Visceral fat is hidden fat that wraps around your abdominal organs. Find out why this belly fat is dangerous and how to get rid of it.
- What Is Visceral (Belly) Fat? Weight Loss & Getting Rid of Body Fat - Visceral fat is belly fat that wraps around the abdominal organs inside your body. Unlike subcutaneous fat, you cannot feel or see visceral fat, making it harder for weight loss.
- What Is Visceral Fat & How To Get Rid of It
- Visceral fat is a type of body fat everyone has. Learn about how it can impact your health.
- some excellent ways of getting rid of it including fasting.
- Cortisol / Viseral Fat
- These sources include Cortisol Notes which helped for my new diet.
- General
- I Might Get Banned for Saying This About Cortisol & Insulin (not what you think) - YouTube
- Why Your Belly Fat Won't Budge (The Cortisol-Insulin Connection)
- Discover the hidden hormonal pattern that keeps belly fat stuck—even when you eat clean and exercise daily. This video explains the science behind visceral fat, cortisol receptors, insulin resistance, and provides 6 evidence-based solutions you can implement today.
- 10 to 20 minute walk after meal, and must be within 30 mins
- Salt and honey before bed
- Once you have diet sorted, fast 1 day a week You must be doing the diet for a while and it be your routine.
- Meal target types
- Breakfast = protein
- Dinner = carbs
- 12 Signs of HIGH CORTISOL You Can See - Doctor Explains - YouTube
- Cortisol is your body’s main stress hormone, and while it’s essential for survival, too much of it over time can cause real harm. In this video, Dr. Barron goes over 12 physical signs that may point to elevated cortisol levels, like facial puffiness, stretch marks, and easy bruising, and explains what sets normal stress responses apart from more serious conditions like Cushing’s syndrome or the effects of long-term steroid use. She also covers what causes cortisol to rise, when to consider testing, and how to bring levels down naturally through sleep, nutrition, and recovery. If you’ve noticed changes in your body and you’re wondering whether cortisol could be involved, this video will help you make sense of what’s going on and what to do next.
- Cushings Syndrome = a severe condition that can cause the symptoms below
- 12 Signs:
- Moon Facies (only for severe) (a.k.a Cortisol Face)
- Buffalo Hump - Hump at the top of the neck (only for severe)
- Purple Striae - Stretch marks on the upper legs and gut.
- Easy Bruising caused by thin skin
- Central Obesity (i.e. viseral fat). This is hard to fix with addressing the cause of the high cortosol
- Muscle Weakness
- High cortosol can cause your muscles to break down over time
- You may notice weakness in your arms and legs.
- Find it hard to get out of a chair or climb stairs
- Insomnia or restless sleep
- Hair thinning
- Acne and Oily skin (leading to adult achne)
- Elevated Blood pressure
- Cortosol causes you blood to retain sodium increasing tension in your blood vessels
- Recurrent infections or slow healing
- cuts, scrapes or injuries take longer to heal than they use to
- get sick more often
- Anxiety, Irritability, or Emontional Numbness
- Causes of High Cortisol
- Medical, chronic stress or lifestyle
- Cushing’s syndrome
- Causes the body to uncontrollably produce cortisol
- Rare
- Can be caused by a tumor
- Corticosteroid Medications.
- Long term use of steroids is the highest cause ofr medically induced high cortisol
- Long term use can give symptoms to cushing's syndrome
- Physiologic Elevation
- Chronic Stress
- Pain
- Illness
- Sleep Distruption
- NB:In the short term it's a healty survival response. But over tiome is the stress is not addresses, those elevated levels can begin to wear down the body.
- Pseudo-Cushings
- Can be caused by:
- Alcoholism
- Major Depression
- Sever Obesity
- Uncontrolled diabetes
- NB: The key difference is that once the underlying problem is treated, cortisol level usually goes back to normal
- Can be caused by:
- How to lower cortisol
- Go to bed at the same time every night and try to sleep 7 to 9 hours.
- Avoid screens like phones or TV before bed. They keep your brain alert and can raise cortisol.
- Along with sleep mental rest is just as important.
- Deep Breathing
- Stretching
- Yoga
- Quiet time (without ditractions)
- NB: These can calm your nerveous system. These activities tell your body that it's safe, whihc helps lower stress hormones like cortisol.
- Your diet plays a major role too.
- Don't dkip meals
- Choose food with protein, fibre and healthy fats instead of sugary snacks.
- When you blood sugar goes up and down too quickly, your body may release too much cortisol.
- Natural Suppliments can help
- Ashwagandha: is a herbal supplement that has been shown in some studies to gently lower cortisol levels.
- Balance your physical activity
- Exercise is good, but too much intense exercise without enough rest can raise your cortisol level instead of lowering it.
- Make sure your body has tome to recover between workouts and mix in lighter activity like walking or stretching.
- Always Waking Up at Night? - 1 TBSP Kills Cortisol FAST To Fall Back Asleep - YouTube
- If you’re waking up at 3 a.m. with your heart racing and your mind wired — it’s not a sleep problem, it’s a cortisol problem. In this episode, Ben explains why your body wakes up during “liver time,” the real reason behind nighttime cortisol spikes, and the 1-tablespoon sleep hack that shuts it down fast.
- You’ll learn exactly how raw honey and sea salt work to stabilise blood sugar, balance hormones, and calm the nervous system — plus five long-term steps to reset your metabolism, improve sleep, and burn fat more effectively.
- Take these (Honey, Salt, Magnesium)
- 1 table spoon of raw organic unfiltered honey with sea salt right before bed or even when you wake up at 3am
- Also take a high quality magnesium supplement before bed. There are 7 different types and you can get a supplement with them all in.
- Has links in description.
- 5 steps to fix this issue long term
- Stop eating 3-4 hours before bed.
- Cut out seed oils and refined sugar.
- Support the live daily.
- Get morning sunlight exposure
- Get Vitamin G
- first thing in the morning and last thing at night.
- This is a social thing, not chemical.
- Vitamin Gratitude, it is the feeling of gratitude.
- Nighttime routine to prevent 3 AM Wakeups
- Dim lights 1 hour before sleep.
- Do 5 minutes of slow breathing or gratitude journaling.
- Avoid screens or blue light after 9p.m. (or at least an hour before bed)
- Take Magnesium Glycinate or L-theanine if you're under stress.
- End the night with your 1 tablespoon of honey and sea salt mix. (right before bed)
- FAQ
- honey and salt trick should be only for 7 - 14 days as you fix the other things. it is not for long term but can be re-introduced if required in the future.
- It has to be unrefined sea salt. normal salt will not work.
- You can test Cortisol levels at home using saliva, and it is called the `Dutch Test`, or via urine. can only be got from practitioner.
- Do You Have a Cortisol Face? - YouTube | Drberg
- Are you struggling with a round, puffy face—even though your diet hasn’t changed? It might not be what you're eating… it could be your stress hormones.
- When your body produces too much cortisol, it starts to break down muscle from your legs and butt, turning it into fat around your belly and face. This leads to the classic “Cortisol Face” – a bloated, swollen face caused by chronic stress, not overeating.
- It's coming from stress not your diet.
- When your body has too much cortisol it robs protein from your legs and your butt and turns it into fat around your midsection, it also puts it around the face, giving you this roundish face.
- On of the best antidotes to lowering cortisol is something called L-Theanine. It increases Alpha brain waves to help calm you down so you can get into a really nice deep sleep and sleep through he entire night.
- L-Theanine also increases GABA and Serotonin as well as melatonin which is the sleep hormone.
- the best time to take L-Theanine is about an hour before you go to sleep at night.
- This Miracle Liquid Melts Belly Fat & Kills Cortisol In Just 1 Day - YouTube | Ben Azadi
- This Miracle Liquid Melts Fat & Kills Cortisol in Just 1 Day! (Scientific Proof) | Dr. Ben Azadi - YouTube - What if one simple liquid could help lower cortisol, reduce belly fat, and calm your body in just 24 hours? In this video, Dr. Ben Azadi breaks down the real science behind a powerful drink that supports fat loss by targeting stress hormones, not starvation.
- How to Force Your Body to Burn Visceral Fat (Drop Cortisol) - YouTube | ChillFit Mode - If you are "skinny fat" or struggling with a stubborn belly that won't go away despite caloric restriction and cardio, the problem isn't your willpower. It’s your survival mechanism.
- Waking Up at 3AM & Can't Lose Belly Fat? Do THIS to Drop Cortisol - YouTube | ChillFit Mode - If you consistently wake up between 2 AM and 4 AM, staring at the ceiling with your heart pounding, it is not "just insomnia." It is a biological fire alarm called Nocturnal Hypoglycemia.
- If I Wanted to Lose Belly Fat By Summer, I'd Do This - YouTube | Jeremey Ethier
- 8 Foods to Eat Every Day to Destroy Visceral Fat (Backed by Science) - YouTube | Leonid Kim MD - Visceral fat is not just a storage of energy, but it’s a biologically active tissue, which is why it can be so hard to lose it. Visceral fat responds better to certain biochemical signals, so in this video, I want to go over what those signals are and the rights foods to target to help lose visceral fat faster.
- This Will Get You to 0% Visceral Fat in 30 Days (Drops Cortisol) - YouTube | Thomas DeLauer
- How to Force Your Body to Burn Visceral Fat (Drop Cortisol) - YouTube | Health Systems Explained - If you’ve been dieting and exercising but stubborn belly fat refuses to go away, the issue may not be discipline — it may be biology.
- Drop Cortisol to Force Your Body to Burn Visceral Fat (Morning Routine) - YouTube | Stay Fit With Dom - Are you struggling with stubborn belly fat that just won’t go away — no matter how clean you eat or how hard you work out? The problem might not be your calories… it could be your cortisol levels.
- Drop Cortisol to Force Your Body to Burn Visceral Fat (Morning Routine) - YouTube | Science Within Your Body
- Waking up with stubborn belly fat—even when you eat clean and sleep well—can be a sign your Cortisol Awakening Response (CAR) is out of sync.
- In this video, we break down a simple morning protocol designed to calm stress hormones right after you wake up, switch off the body’s “fat storage” signals (including the LPL pathway), and help your metabolism stay in a fat-burning state for the rest of the day.
- I Might Get Banned for Saying This About Cortisol & Insulin (not what you think) - YouTube
- Tests
- Cortisol Test: Understanding High vs. Low Cortisol Levels - Cortisol is an important hormone that regulates blood pressure, sugar, and metabolism. Learn about blood, saliva, and urine tests conducted for cortisol.
- Cortisol Exeter Clinical Laboratory International - Test information and an explanation behind the bio-mechanics.
- Cortisol Test | South of Tyne and Wear Pathology Centre - Test information and ranges.
- Levels
- expected cortisol levels during the day | Google Search
- Cortisol levels follow a strict circadian rhythm, peaking early in the morning (6 a.m. to 8 a.m.) at 10–20 mcg/dL and declining throughout the day to their lowest levels around midnight. Levels typically drop to 3–10 mcg/dL by 4 p.m., ensuring the highest concentration upon waking.
- Typical Daily Cortisol Rhythm (Blood Serum)
- Morning (6 a.m. – 8 a.m.): Highest levels, typically 10 to 20 mcg/dL (roughly 275–555 nmol/L).
- Late Afternoon (Approx. 4 p.m.): Significant decline, usually 3 to 10 mcg/dL (roughly 85–275 nmol/L).
- Midnight: Lowest levels (nadir).
- Key Details on Cortisol Variation
- Cortisol Awakening Response (CAR): Levels often surge by 50–60% in the 30–40 minutes immediately after waking.
- Measurement Units: Results are generally measured in micrograms per deciliter (mcg/dL) or nanomoles per liter (nmol/L).
- Factors Affecting Levels: Stress, infections, illness, and medication (such as steroid use) can significantly influence these levels.
- Exceptions: People working night shifts may have a reversed rhythm.
- If testing for deficiency, doctors usually order a morning test; for excess (like Cushing's syndrome), a late-day test is more likely.
- Sources
- Cortisol Test: What It Is, Purpose, Types & Results - A cortisol test can help diagnose certain conditions, like Addison’s disease or Cushing syndrome. Learn more here.
- Interpreting serum cortisol | Buku Medicine
- Cortisol in Blood Test | Healthwise
- A cortisol test is done to measure the level of the hormone cortisol in the blood.
- The cortisol level may show problems with the adrenal glands or pituitary gland.
- Cortisol is made by the adrenal glands.
- Cortisol levels go up when the pituitary gland releases another hormone called adrenocorticotropic hormone (ACTH).
- expected cortisol levels during the day | Google Search
- Simple vs Complex Carbohydrates
- Simple vs. Complex Carbohydrates: Function and Examples - You may have heard that eating complex carbohydrates is better than eating simple carbs. But why? And if itâs so important to know, why donât nutrition labels tell you if the carbohydrate content is simple or complex? We explain the importance of carbohydrates and how to identify simple carbs vs. complex carbs.
- Simple vs. Complex Carbohydrates / Nutrition / Carbs - As a dietitian, I'm often asked to explain the difference between simple and complex carbohydrates. While most people have heard that complex carbohydrates are better for you than simple carbohydrates, what's often unclear is how the two differ, and why the differences between the two affect your health.
- Good Carbs and Bad Carbs: The Truth about Carbohydrates - Carbs have a bad reputation in the dieting world but should not be completely eliminated from our diets. There are good carbs and bad carbs we explain which ones are good for you.
- The Carbohydrate Advantage - Choose Complex Carbohydrates for Lasting Energy and Good Health
- Good vs. Bad Carbohydrates: How Do You Tell the Difference? - Not all carbs are healthy. Here’s how refined and complex carbs differ, and which sources to choose.
- Are Potatoes Good Carbs? Week& - Most nutrient-rich complex carbohydrates like potatoes have a welcome role in a healthy diet. Unfortunately, the impact of the starch in potatoes can place them in the "bad carb" category for some people.
- Dangerous Carbohydrate
- The #1 Most Dangerous Carb in the World - YouTube | Dr. Berg
- You could be consuming the world’s most dangerous carbohydrate without even realizing it. This hidden carb spikes your blood sugar, even more than actual sugar. Find out about the #1 most dangerous carb in this video.
- This Carb Spikes Blood Sugar WORSE Than Sugar - YouTube | Dr. Berg
- The most dangerous carb in the world is not sugar. It’s not even classified as a sugar, yet it spikes blood sugar higher than sugar itself.
- This factory-engineered carbohydrate bypasses every warning label you’ve been taught to look for. It’s marketed as “zero sugar,” costs pennies per pound, and is added to thousands of everyday products, including gluten-free foods, baby formula, baked goods, and sports nutrition.
- And the health consequences are massive. The average person consumes 65–250 pounds per year of this industrial starch without realizing it.
- The #1 Most Dangerous Carb in the World - YouTube | Dr. Berg
- Pooping / Stool
- General
- if your digestive track is not full enough, when you drink water it will get processed really quickly and you will want to excrete/urinate often due to the amount of fluids getting immediately absourbed and processed.
- This is my own thought and is not verified.
- Pooping mid afternoon to later on in the day allows the food to be mashed up and squashed in my digestive tract.
- Tighter abdominal would also aid this.
- 11 Icky but Interesting Facts About Poop | Everyday Health - Taking a peek at what's in the toilet can benefit your health! Read on to find out everything from what it means when your poop floats to how often you should go number 2.
- if your digestive track is not full enough, when you drink water it will get processed really quickly and you will want to excrete/urinate often due to the amount of fluids getting immediately absourbed and processed.
- When
- Why Do I Poop In The Morning — And Sometimes Twice? - Many people poop in the mornings — and sometimes they poop twice or multiple times — but is that normal? Poop experts answer all your bowel movement questions.
- When Is the Best Time to Poop? - At least according to one bowel expert.
- Black Poo, What does it mean?
- Why Is My Poop Black? What's Normal and When to Worry | verywellhealth - Black poop can be harmless or a sign of a serious condition. Learn the causes of black stool and when to consult a healthcare provider
- What Do Different Poop Colors Mean? | WebMD - What does it mean if your poop is green? What about red, yellow, white, or black? Find out possible causes and when to call a doctor.
- Why Is My Poop Black? 7 Causes of Black or Tarry Stool | WebMD - If you notice your poop is black or tarry, it might be due to something as simple as a change in your diet. Sometimes it's a sign of a medical problem. Learn why your stool may have a different color and when you should call your doctor.
- Changes in stool colour or texture (black stool) in adults | WebMD | Boots.com | WayBackMachine - Poo, also known as stool, can change colour in adults. When is this normal and when is it a cause for concern?
- General
- Oxygen Saturation
- What Is Your Normal Oxygen Level - Nonin
- The “normal”range of SpO2 is 95% to 100%
- Oxygen saturation: normal values & measurement - cosinuss°
- What Is Your Normal Oxygen Level - Nonin
- Hair
- Dandruff - NHS - Find out what causes dandruff, what you can do to get rid of it and when to get medical advice.
- Balding man stops washing his hair – and 6 years later has a full head of locks - Daily Star
- A balding man says he rescued his thinning head of hair by stopping to wash it and joining the #nopoomovement.
- Nick Coetzee now has thick and healthy hair and only rinses it with water.
- Strange Signs you're actually healthy
- Itchy when you exercise ---> healthy circulation
- Enjoy peeing --> nervous system working well
- Get oosebumps easily --> sharp nervous system
- Hungry same time daily --> hormaones in sync
- Crave bitter foods --> liver + bile flow support
- Pass gas daily --> healthy gut microbiome
- Feel naturally sleepy at night --> balanced circadian rhythm
- Wake up without an alarm some days --> nervous system and cortisol regulation
- Breathe deeply without effort -- strong respiratory and oxygen efficiency
- Your pee is light yellow --> you're hydrated and not flushing too much.
- Cure Migraines
- Could this simple hack cure a migraine?! - YouTube | Doctorm Myro
- Could this simple hack cure a migraine?!
- Use a hair clip on your eyebrow
- This life hack can cure a migraine! - YouTube | Doctor Myro
- This life hack can cure a migraine!
- Get hot water and soak your feet in it.
- Could this simple hack cure a migraine?! - YouTube | Doctorm Myro
- Cure Anxiety
- Could THIS cure anxiety?! - YouTube | Doctor Myro
- Listening to this particular song massively reduces anxiety.
- The song is: Weightless ny Marconi Union
- Did it work for you?
- Could THIS cure anxiety?! - YouTube | Doctor Myro
- Reverse Aging
- Mental Improvement
- The Real Life Limitless Pill - YouTube | TruthHurtsShow - It sounds like something out of a movie, but the idea is real. The question is whether you should use it or not. Do you think this is the future of performance?
General Treadmill Questions
Slippery Treadmill Belt / Why are my trainers slipping on the Running Belt?
This is dealing with you and your trainers slipping on the treadmill belt, not about the belt slipping on the motor.
Scenarios
- Visually it looks like it should still have traction. when I clean it, it looks pretty gross and seems to help a little bit but gets slippery again soon after.
- When I try to google anything the results are mostly people talking about "slipping" as in the belt itself is slipping.
- New trainers don't make a difference
- The belt feels slippy underfoot
- My trainers started to slip while walking, running is no longer safe.
- Cannot push and pull the belt while the Treadmill is off with just my feet and trainers (Belt surface is very slippy).
Causes
- The belt is smooth because it is covered in dirt.
- The belt is too smooth to provide grip.
- The belt is now porous and is letting the lube through from the underside of the belt to the top layer which you walk on.
- When I wipe the belt down, black grease comes off.
- It sounds like you are slipping on the lube for the belt. The lube is on the underside of the belt to keep it from dragging on the walk platform but sometimes some of it can work its way out of the edges and might have gotten onto the top of the belt. In that case you can wet a cloth in warm water and mild soap and use it to remove the lube from the walking surface.
- Since you already tried wiping away the lube with no success it might be that your belt has worn to the point where the lube can soak through the belt itself to the walking surface. Unfortunately, in that case the lube will continue to work through every time that you clean the belt and the only way to get your treadmill back to normal will be to replace the walk belt.
- The belt has completely worn out.
Solutions
- Take a bucket of warm soapy water and bristled scrub brush and scrubbed the whole thing, then towel it off. This will remove any lube that has come trough the mat.
- Roughen up the belt with sandpaper.
- Hold down sand paper on the belt while it's running.
- It seemed to help a little but I think the sandpaper I used was to fine grit.
- Don't use too abrasive sandpaper or you will ruin your belt.
- Buy a new treadmill belt (because it is worn out)
- Carl Lewis MOT25 | Euro Treadmill Belts - I bought my new belt here
- GYM PARTS - Treadmill Belt CARL LEWIS CTM003 - This site also sells pare parts from Treadmills.
- Carl Lewis Treadmill Service
Example of Bad Running Belt
The images below show the underside of my failed Running belt.

Treadmill Running Belt is slipping on the motor
This section deals with issue relating to the belt not being correctly moved by the motor.
- Why is Your Treadmill Belt Slipping or Skipping? (How to Fix) – Treadmill Reviews 2022 – Best Treadmills Compared - A really good article, why re-invent the wheel.
- The Belt Needs Lubrication
- Drive Belt May Be Loose (needs more tension)
- The Pulley on the Front Roller May Have Lost its Grip
- Walking/Running Belt May Be Too Lose
The Running Belt might need oiling/Lubrication?
- If the belt slips on the motor.
- The treadmill is making a droning noise.
- The speed is inconsistent, i.e. when your feet touch the belt, it slows down.
How to lubricate your Treadmill Running Belt
- How To Lubricate A Treadmill Belt | YouTube - Give your machine a longer life and help it run smoothly with this instructional video on how to lubricate your treadmill belt.
Carl Lewis MOT25 - General
Description
The Carl Lewis MOT25 Foldable Motorised Treadmill comes with a 0-9mph speed range and a full 15% maximum power incline, adding more variation to your workouts. Workout programmes and pulse monitor provides motivating and safe exercise. The running deck folds up at the press of a button and can be wheeled away for easy storage.
Features
Walking and running are some of the best forms of exercise for improved general fitness. Using a treadmill puts less impact on your joints and also offers a more varied workout with performance feedback.
- Power incline 0 - 15%
- 3.0 HP peak
- 0 - 10 mph speed range
- Cut off key
- Power folds for storage
- 41 x 132cm running area
- Computer Displays; speed, distance, time and pulse
- Product dimensions: (H)117, (W)160, (D)80cm
- Max body weight: 115kg
Links
Servicing Carl Lewis MOT25 Treadmill
Servicing the Console
On my console I found I had the following issues
- Buttons did not work properly, and would stick often.
- Console was very loose and so would not stay upright
- LCD displays were not always working properly
Follow these instructions and you should be able to fix both.
Obviously make sure the unit is not plugged in
- Sellotape the console to the handles as shown below. This prevents the unit falling while you are taking it apart.


- Unscrew the 15 screws at the BACK of the unit. There are 4 screws under the sticker on the front which would allow access but it would make a mess of your console so i decided not to go this route.

- Carefully pull the back casing away from the unit and you will find some wires fall out. Make a note of these wires and how they look for easier re-installations, a photo with your phone is probably best.

- Put the case back to one side. I would put the screws in this to keep them safe.
- Reposition the case for easier access to the PCB.
- Remove the Sellotape holding the case in place
- Push the case forwards and it will come off the main crossbar
- place the console case flat on the arms of your treadmill

- Remove the 2 rubber grommets making not of their position
- the flat bit goes at the bottom and allows the screw cylinders to meet each other when you put the case back together
- Clean the rubbers and crossbar (this fixes the console not standing up straight)
- simply was the rubber grommets in warm water (no soap) with your hands to remove all of the dirt and then let them air dry some where warm in your house.
- If the rubber has perished, use a fine grain sandpaper to roughen them up a little.
- Clean the cross bar with a lint free cloth and some Isopropanol Alcohol
- If you want to remove the wires from the PC to make things easier, make notes of what went where or take several photos.
- I personal left all of the mains wires connected and just disconnected the heart monitor sensors after putting labels on them and then motor control plug.
- I personal left all of the mains wires connected and just disconnected the heart monitor sensors after putting labels on them and then motor control plug.
- Remove the 2 screws from the heart rate monitor module.

- Remove the other black screws from the main PCB.

- Note how tight them were.
- Also the image above still has the Heart Rate monitor attached. There are 2 more screws underneath it for the main PCB.
- You can now remove the PCB from the case.
- Some of the LCDs and their rubber connectors will still be attached and some left on the PCB, so make note of what went where
- Pull the rubber buttons out and clean them
- Warm water in your sink (no soap) and wash with your hands gently.
- Shake of the majority of the water and then place the rubber buttons somewhere warm in your house to air dry. You should make sure both sides get dried.
- Do not use any cloths to clean these as the fibres will get stuck on the button and you will have to start again.
- The button pads on the PCB need cleaning.
- Using a lint free cloth and some Isopropanol Alcohol just rub on the pads gently until they are clean
- Cleaning the display feed PCB pads - I have not done this bit.
- Using the same technique as the cleaning the button pads, clean the display PCB pads
- Cleaning the display rubber signal transfer pads - I have not done this as I am not sure if this will damage them
- Clean them with Isopropanol Alcohol
- Re-install the dry and clean buttons
- Re-install the main PCB
- Correctly locate the display transfer pads either on the PCB on on in the main case ready for mating.
- Place the PCB back in the main case
- Screw the PCB down making sure that you lightly press the board down while doing this to get a good compression of pads.
- Re-install the Heart Rate monitor daughter board.
- place down correctly and screw in
- Re-install the dry and clean rubber grommets (in the correct direction)
- Push the case back on
- Correctly locate the wires (as per photo you took earlier)
- push the case back on to the crossbar with the rubber grommets going into their appropriate slots.
- The 2 metal stops should be push against the black blocks on the cross bar. This should put the console in the upright position.
- Sellotape the case in position (as before) so we can work on it easier.
- Reconnect the heart rate monitor
Now is a good time to check if all of the buttons, displays and functions work before continuing. Be safe when messing with mains voltage. Fix any issues before going any further.
- Change to/from Miles/Kilometres if required.
- see notes below
- Push the rear case back onto the main case
- When you do this make sure no wires are trapped where they should not be as this will stop the case going back together.
- If in doubt consult your photo from earlier on how the wires should go back in.
- Done
Your buttons and displays should now work with no issues for years to come.
Changing from Miles to Kilometres
Assuming you have the console opened as described above, the change from Miles to Kilometers or the other way around is easy.
There is a jumper on the PCB that controls this feature and only has 2 positions:
- Closed (Jumper present) = Miles
- Open (Jumper missing) = Kilometres
The location is shown in the image below (currently closed), set to your preference as required:

This option is set in the factory due to the region it was going to get sold in.
Removing the Running Belt
- Put the treadmill flat with no incline
- Because there is a large capacitor in the motor housing you should leave the unit to discharge over night or be very careful.
- Make sure the treadmill is off and unplugged
- Remove the Rear Roller Adjustment covers by removing the 2 screws that hold each of them in.

- Remove the side rails by pulling sliding them off the end.

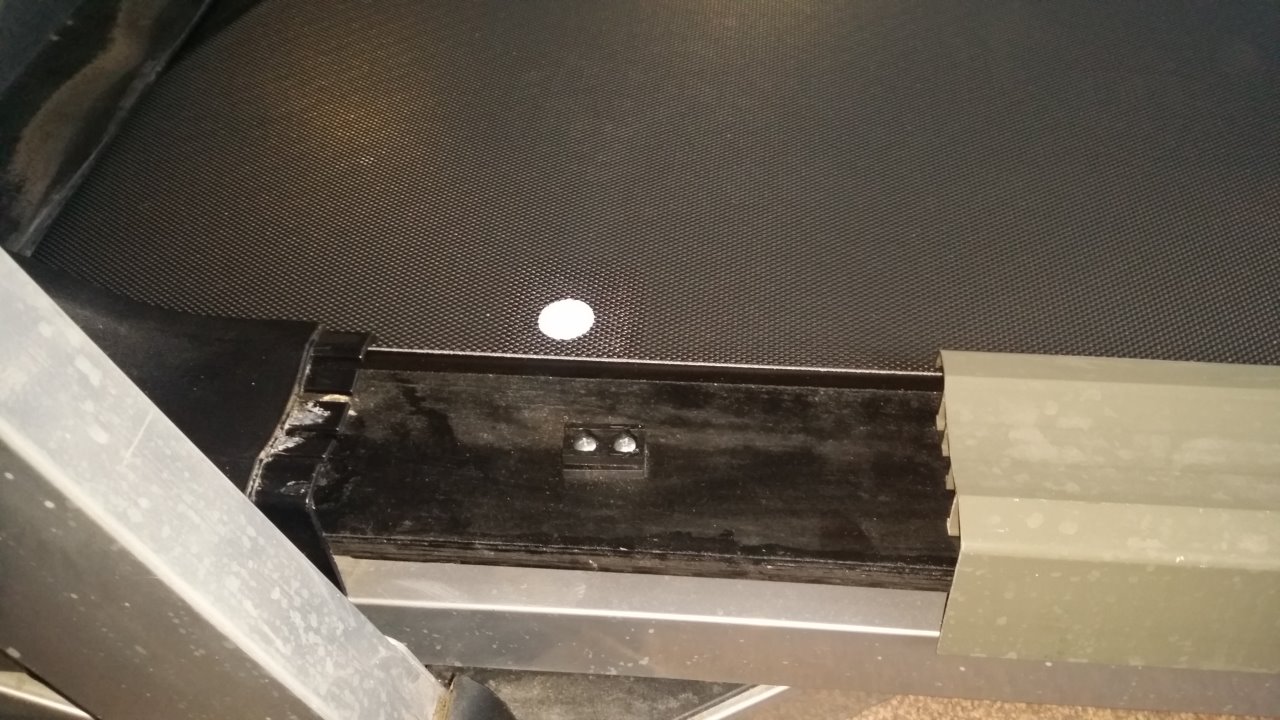
- Your treadmill should now look like this with the Main Motor Cowling still present at the back
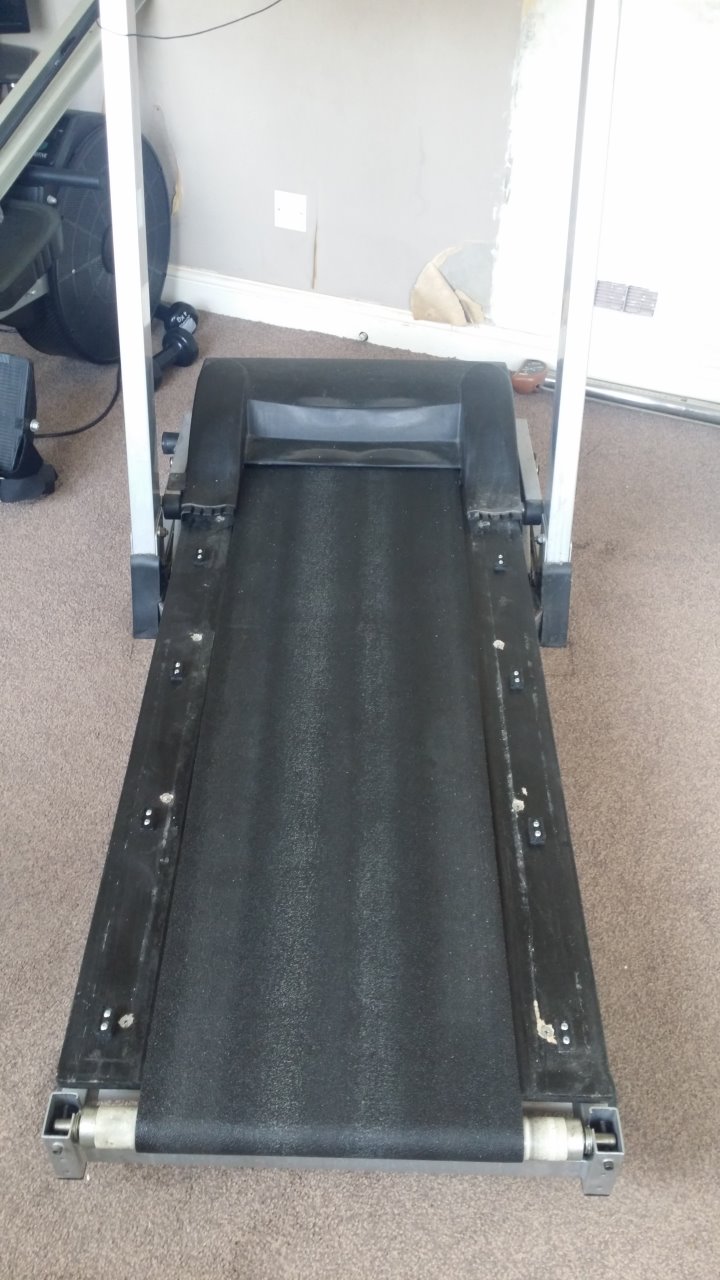
- Remove the Power Supply and Main Motor area cowling.
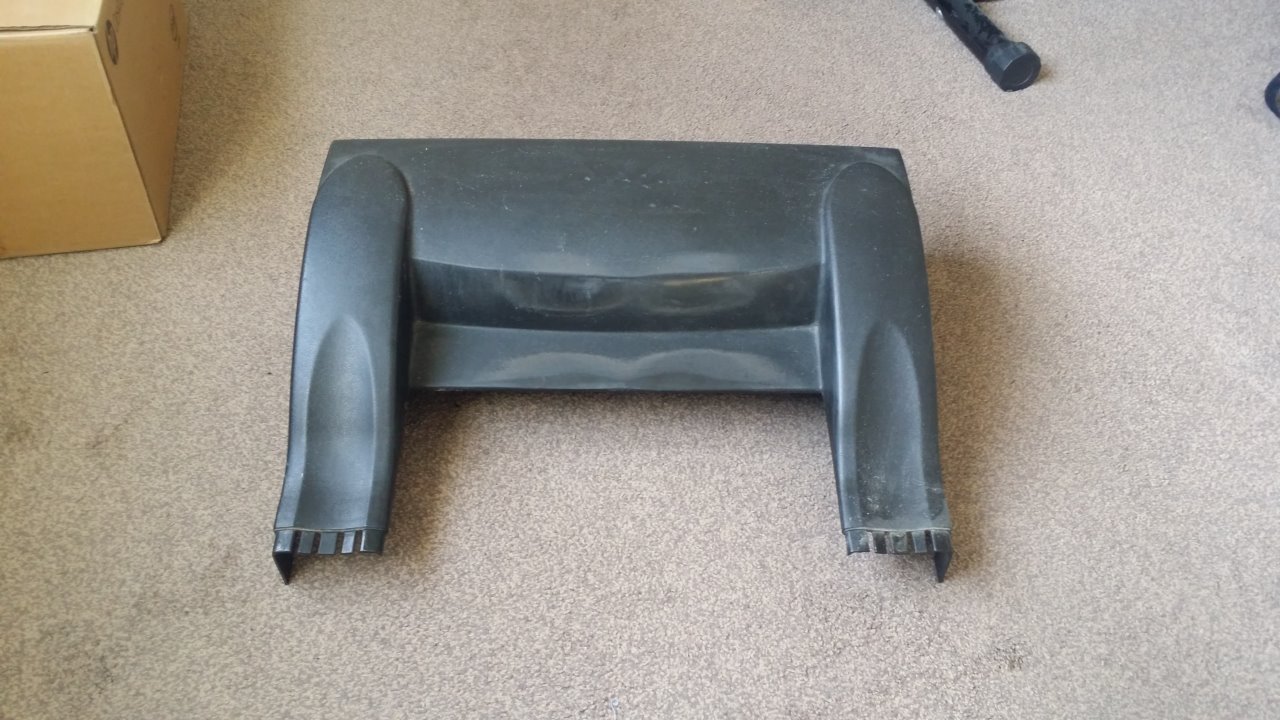
- removing the 4 holding screws
- lift the covering straight up. It should move with relative ease.
- The will now expose the power supply and main motor
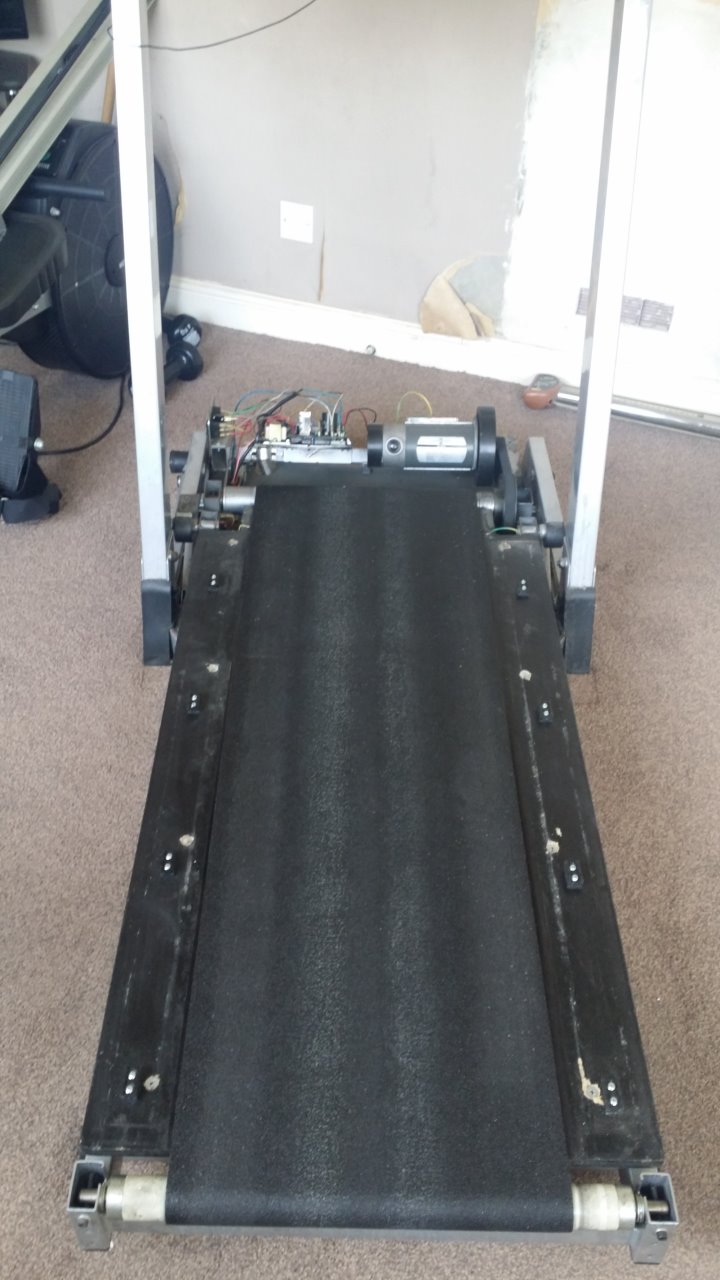
- Remove the Rear Roller (not the motor end)
- Unscrew the adjustment bolts a little bit on one side and then the other, so the bolts are released evenly otherwise the roller could become stuck or damaged. Keep doing this until the bolts have been removed.
- Put the bolts to one side
- Take a photo of the roller so you know how it was installed
- The roller is now loose and can be removed by pushing it towards the motor
Make sure you do not loose the metal washers
- Place the roller on a piece of clean plastic or surface. A bin/Trash bag should do.

- Put one of the adjustment bolts back in the roller and the other placed back in the treadmill. This is so you can identify which way around the roller fit in the treadmill.
- Unscrew the adjustment bolts a little bit on one side and then the other, so the bolts are released evenly otherwise the roller could become stuck or damaged. Keep doing this until the bolts have been removed.
- Remove the front motor roller
- Before removing the bolt, put some Tipex on the shaft so when you take it out you know the insertion depth it was set at.
- The adjustment bolt should be unscrewed all the way.

- Remove the motor belt whilst making a note of what direction it goes in
- Remove the roller and place next to your other roller.
- Remove the the Deck (and belt)
- Unscrew the anti-static plates from the Deck and then put the screws back in the board for safe keeping

- Unscrew the Deck fixing screws in the order as shown below but only partway before you move to the next screw.
- They have to be removed in this way because the screws sometime unscrew the rubber mounting below instead of coming out on their own and this method prevents the Deck from getting damaged by lifting the Deck evenly irrespective of which screws fail to come out of their rubber mounting on their own.
- Take your time doing this section and make sure you use a the correct screw fitting (low profile fat cross)
- When you think you have undone the all of the a screws, lift the Deck and see if it is free.
- When free lift both the Deck and the belt away from the treadmill.
- They have to be removed in this way because the screws sometime unscrew the rubber mounting below instead of coming out on their own and this method prevents the Deck from getting damaged by lifting the Deck evenly irrespective of which screws fail to come out of their rubber mounting on their own.
- Separate the belt from the Deck
- The running belt is removed.
- Remove any rubber mountings still present on the underside of the deck.
- Your treadmill should now look like this
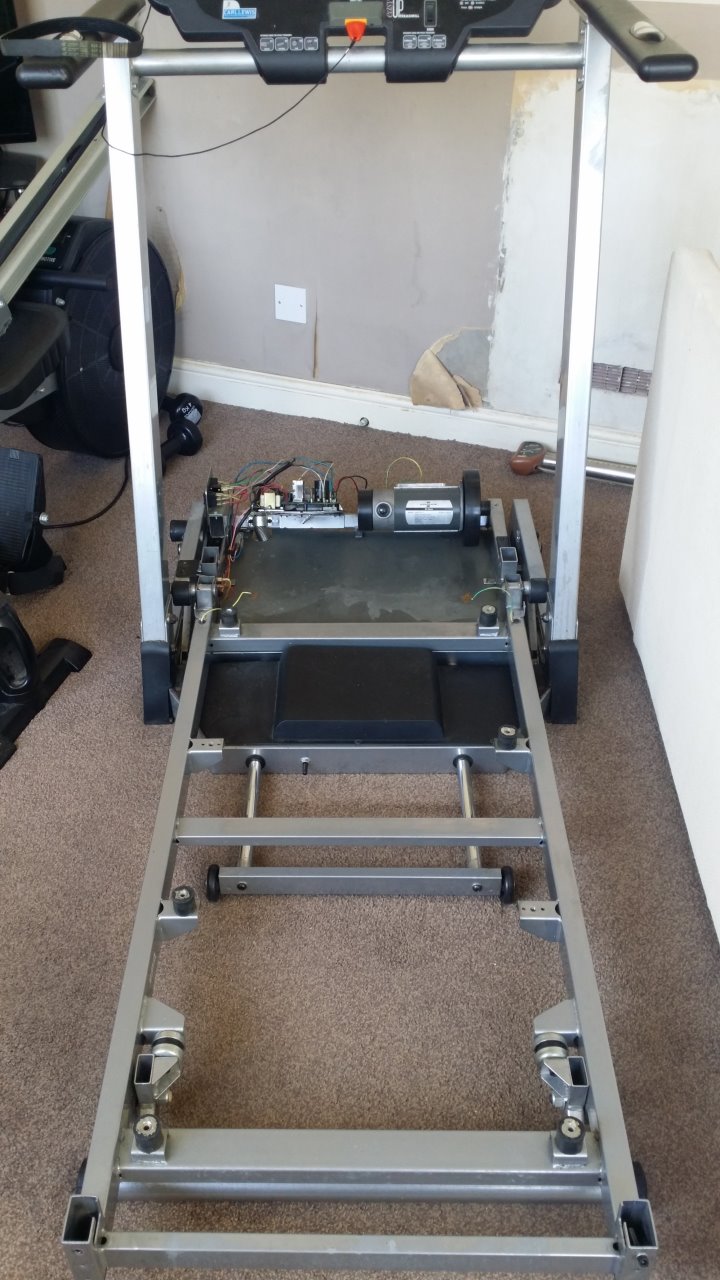
- Replace any rubber mounts that came off with the Deck back onto the frame of the Treadmill.
- Unscrew the anti-static plates from the Deck and then put the screws back in the board for safe keeping
Cleaning the Running Belt area
This assumes you have just removed the old one and your treadmill following the instructions above.
This is optional but highly recommend because you don't swap your running Belt everyday.
While your treadmill is open, clean the following parts with warm soapy water:
- The rollers
- Clean only with a lint free cloth by wiping the rollers clean of any dirt.
- They do not need to be oiled
- So dirt might just need some encouragement with your finger nails to come off, again be gentle.
- Deck
- avoid the slippery running surface with soapy water, this should be cleaned with a clean lint free cloth only
- Anti-Static plates
- The side rails
- The corner covers
- The Motor Housing/Cowling
- The Motor area
Installing a new Running Belt
This assumes you have just removed the old one and your treadmill following the instructions above.
- Follow the instructions above in reverse with the following exceptions:
- Before running or configuring the belt, Check to see if your Running Belt needs Lubrcation. If it does, apply some lubrication sparingly to the slide surface of the Deck. This is important to prevent damage.
- Done
Front Roller Angle Configuration
Not all Treadmills have this adjustable front roller
This is required otherwise your Running Belt will always track left and no amount of adjustment will fix it.
Method 1
- Screw the thread in to the Tipex mark you made earlier on the adjustment bolt
Method 2
- Pull the belt tight against the Front roller
- With your hands evenly placed on the belt (so both sides are pulled the same)
- Palm down and pulling the running belt towards you
- Not much force is required
- The motor will make a bit of a weird noise, but this is normal
- You should now see that the running belt is probably on an angle
- Using the drive roller adjustment bolt
- Tighten this slowly until the Front Roller and therefore the Running Belt are in alignment (parallel) with the Deck. Check with a ruler as shown below.
- The belt should be in the middle of the slide surface.
- Every few turns you might need to re-pull the belt with you hands to make sure it is sitting right and the adjustment is applied correctly.
- Tighten this slowly until the Front Roller and therefore the Running Belt are in alignment (parallel) with the Deck. Check with a ruler as shown below.
How to configure the Running Belt's tension (Euro Treadmill Belts Method)
Video: Replacement treadmill belt - how to tension your belt | EuroTreadmillBelts.com
These are my notes for this method which I have used successfully.
You can use masking or electrical tape instead of Tipex
- This method creates a 0.5% pre-tension on the belt.
- This is a precise method and so should your measurements
- Before starting, the belt should be installed but not tensioned
- Tensioning your belt
- Make 2 marks on each side, exactly 1 meter apart. It does not really matter where these marks are as long as they are 1m apart.
- Leaving the tape measure on the treadmill (not on the Running Belt), tension one side untill you have stretched it my 5mm. You will see the Running Belt stretch against the tape measure.
- Now do the other side.
- See if the belt is now gripping, if not, tension each side up a little more (not too much)
- Dynamically Track
- If the belt is gripping, you can make adjustments using the tension screws independently to correct any issue with the left/right tracking.
- After Fitting
- Ideally the belt should allow enough room to fit the belt and give about 50-60% of the adjustment potential to tension the bel. This allows for further tensioning during the belts lifetime.
Stomp Test
After you believe you have configure/tensioned your Running belt correctly as per the method above, we now need to do a final test.
- How To Adjust A Treadmill Belt | Treadmill Maintenance
- This is best to be done with the cowling of so you can see the actually motor, but is not required.
- Video time is set to the part where the stomp test is demonstrated
- This video also shows you how to track a Treadmill but not pre-tension it.
Re-assemble the Treadmill
This is pretty much the reverse as above (after installing your new belt), but here is an overview:
- Replace the motor cowling
- Put the side rails back on
- Put the Rear Roller Adjustment covers back on.
Cleaning the Incline and Vertical Store motor areas
This area is only possible to access if you put the treadmill into it's vertical storage mode.
- Put the treadmill in to it's vertical storage mode
- Because there is a large capacitor in the motor housing you should leave the unit to discharge over night or be very careful.
- Make sure the treadmill is off and unplugged
- Remove the feet protectors
- Remove the Vertical Storage and Incline Motor Cowling
Parts Close Up Pictures
- Power Supply and Main Motor Area (Front)

- Power Supply and Main Motor Area (Rear)

- Main Motor

- Main Motor Belt

- Power Supply

- Power Supply Switches
- as