Linux is hard to setup via the command line and most people coming from Windows would like a familiar interface to ease them into Linux. With the ever escalating price of cPanel I am putting together a list of cPanel alternatives that cover a range of functionality. This list is mainly for my research so I can pick the best GUI. I currently use CWP as it is the most comprehensive replacement for cPanel and is great for hobbyists.
My Reviews / Research
A lot of these panels are wrappers and read the configurations straight from the disk.
I will be using Ubuntu Server LTS (Minimal) with no extra packages except for OpenSSH. You can also use AlmaLinux Server (Minimal). Ubuntu has far more support across different software so is my preferred OS and unless specified use the real root account and not sudo.
Always use the Long Term Support (LTS) version of the OS you are going to use because you want stability and support for the software, bleeding edge shinies (features) are not needed.
It should be noted that while I assess what the software comes with natively if you understand Linux a lot of these panels can be extended manually with features they do not have or to turn on things that do not have a button in the panel.
Table of Contents
The Panels (in no particular order)
Other Stuff
The Shortlist (TL;DR)
This is my personal selection of panels that I would look at first. The other might suit you better so might still be worth looking at. The liss is roughly ordered to be Business+Paid first, down to Hobbyist+Free and you will pick the one that suits you best by starting at the top.
- Webuzo
- Cost: Paid
- Suitable for: Hosting Company, Small Hosting Company
- Notes:
- Ideal cPanel/Plesk replacement for business.
- From the company that makes Softaculous, a very nice looking panel, how cPanel should be.
- The price is great for hosting companies if you take out the unlimited package.
- My20i / StackCP
- Cost: Free (can only be used with 20i.com or their resellers)
- Suitable for: Hosting Company, Small Hosting Company
- Notes:
- Ideal cPanel/Plesk replacement for business.
- The price is great for hosting companies.
- Althought not a separate panel, this British SaaS offering should be considered.
- DirectAdmin
- Cost: Paid
- Suitable for: Hosting Company, Small Hosting Company
- Notes:
- Ideal cPanel/Plesk replacement for business.
- The price is great for hosting companies if you take out the unlimited package.
- Also check your requirements because of the paid add-ons model.
- Control Web Panel (CWP)
- Cost: Free + Paid
- Suitable for: Hosting Company, Small Hosting Company, Hobbyists
- Notes:
- KeyHelp
- Cost: Free + Paid
- Suitable for: Small Hosting Company, Hobbyists
- Notes:
- Virtualmin
- Cost: Free + Paid
- Suitable for: Small Hosting Company, Hobbyists
- Notes:
- The most Feature rich of the Free and some of the Paid panels.
- Because of the theme, the layout, the number of options and features, this is not suitable for the casual user or clients.
- myVesta
- Cost: Free
- Suitable for: Hobbyists
- Notes:
- This panel will get the job done and is actively being developed.
- HestiaCP
- Cost: Free
- Suitable for: Hobbyists
- Notes:
- This panel will get the job done and is actively being developed.
- Nice dark theme
- You can't use 'Apache only' mode any more with this panel.
Hosting Company
These panels are designed for companies selling hosting of any size, but can be used for hobbyists or techies running their own servers from home. These panels have all of the features required to sell hosting to end users. One key feature of these panels is that they have reseller accounts.
cPanel / WHM

| Features |
Status |
| |
|
| Primarily Designed For |
Hosting Company |
| Free/Paid |
Paid |
| License |
Proprietary |
| Supported OS |
CentOS 7 / RHEL 7 / CloudLinux 6,7,8 / AlmaLinux 8 / Rocky Linux 8 / Ubuntu (on cPanel/WHM version 102 and higher) |
| Supported Cloud Providers |
× |
| Install Method(s) |
Script |
| Web Console |
|
| |
|
| Virtualization |
× |
| Web Server |
Apache / NGINX |
| TLS 1.3 |
√ |
| HTTP/2 |
√ |
| HTTP/3 & QUIC |
× |
| AutoSSL |
LetsEncrypt / Sectigo |
| DNS Server |
BIND / PowerDNS |
| DNS Zone Manager |
√ |
| DNSSEC |
√ |
| Multi-PHP |
√ |
| Database Server |
MariaDB / PostgreSQL |
| Database Admin |
phpMyAdmin / phpPgAdmin |
| Email Server |
Exim / Dovecot |
| Webmail |
Horde |
| FTP Server |
Pure-FTPd / ProFTPD |
| Caching |
OPcache / Memcached |
| |
|
| Email Validation |
SPF / DKIM / DMARC |
| Spam Protection |
SpamAssassin / Greylisting |
| Firewall |
iptables / CSF / cPHulkd |
| WAF |
ModSecurity / OWASP |
| Virus / Malware Scanning |
ClamAV / ImunifyAV / Imunify360 |
| |
|
| Reseller Accounts |
√ |
| User Accounts |
√ |
| Separate Panels (Admin / Users) |
√ |
| Hosting Packages |
√ |
| Quotas |
Disk / Bandwidth |
| Traffic Statistics |
AWStats / Webalizer |
| Cron Jobs |
√ |
| Local Backup |
√ |
| External Backup |
FTP / AWS S3 |
| File Manager |
√ |
| |
|
| Extendable by Plugins |
√ |
| API |
√ |
| WHMCS Support |
√ |
| Panel Account Restrictions |
Tiers based on number of accounts |
| Server and Package Updates |
GUI / CLI |
| Automatic Updates |
√ |
| Can be Uninstalled |
× |
cPanel is an industry leader and has everything you need for hosting and reselling. It is a web hosting control panel with a user-friendly interface and many features.
- Pros
- Complete hosting package.
- Auto updating.
- All features you will need for a modern hosting server.
- Cons
- Expensive.
- The more accounts, the more you pay.
Notes
- Sites
- General
- Settings
- Plugins
- File Locations / Repo Locations / Key Locations
- Install
- Update / Upgrade
- Uninstall
- Installation Instructions
- Misc
Plesk

| Features |
Status |
| |
|
| Primarily Designed For |
Hosting Company |
| Free/Paid |
Paid |
| License |
Proprietary |
| Supported OS |
Debian / Ubuntu / CentOS 7 / RHEL / CloudLinux / AlmaLinux / Rocky Linux / Virtuozzo Linux 7 / Windows / Windows Server |
| Supported Cloud Providers |
× |
| Install Method(s) |
Script |
| Web Console |
|
| |
|
| Virtualization |
× |
| Web Server |
Apache / NGINX / IIS |
| TLS 1.3 |
√ |
| HTTP/2 |
√ |
| HTTP/3 & QUIC |
× |
| AutoSSL |
LetsEncrypt / Sectigo |
| DNS Server |
PowerDNS / BIND |
| DNS Zone Manager |
√ |
| DNSSEC |
√ |
| Multi-PHP |
√ |
| Database Server |
MariaDB / PostgreSQL |
| Database Admin |
phpMyAdmin / phpPgAdmin |
| Email Server |
Exim / Dovecot |
| Webmail |
Horde |
| FTP Server |
Pure-FTPd / ProFTPD |
| Caching |
OPcache / Memcached |
| |
|
| Email Validation |
SPF / DKIM / DMARC |
| Spam Protection |
SpamAssassin / Greylisting |
| Firewall |
Plesk Firewall / Firewalld |
| WAF |
Fail2Ban / ModSecurity / Atomic / OWASP / CWAF (Comodo) |
| Virus / Malware Scanning |
ClamAV / ImunifyAV / Imunify360 |
| |
|
| Reseller Accounts |
√ |
| User Accounts |
√ |
| Separate Panels (Admin / Users) |
× |
| Hosting Packages |
√ |
| Quotas |
Disk / Bandwidth |
| Traffic Statistics |
AWStats / Webalizer |
| Cron Jobs |
√ |
| Local Backup |
√ |
| External Backup |
FTP / AWS S3 |
| File Manager |
√ |
| |
|
| Extendable by Plugins |
√ |
| API |
√ |
| WHMCS Support |
√ |
| Panel Account Restrictions |
3 Tiers, Top one is unlimited |
| Server and Package Updates |
GUI / CLI |
| Automatic Updates |
√ |
| Can be Uninstalled |
× |
Plesk is an industry leader and has everything you need for hosting and reselling. It is a web hosting control panel with a user-friendly interface with many features.
- Pros
- Complete hosting package.
- Auto updating.
- All features you will need for a modern hosting server.
- Can run on Windows.
- Cons
Notes
- Sites
- General
- Software Requirements for Plesk Obsidian
- Read all about the software requirements, specifications and other important details to take full advantage of Plesk Obsidian.
- Full technology lists.
- Plesk Web Admin SE (Free Version) is only available on Vultr, DigitalOcean, AWS and Alibaba cloud platforms.
- Settings
- Plugins
- File Locations
- Install
- Update / Upgrade
- Uninstall
- Installation Instructions
- Misc
Control Web Panel (CWP)

| Features |
Status |
| |
|
| Primarily Designed For |
Hosting Company |
| Free/Paid |
Both |
| License |
Proprietary |
| Supported OS |
CentOS / CentOS 8 Stream / Rocky Linux / AlmaLinux / Oracle Linux |
| Supported Cloud Providers |
× |
| Install Method(s) |
Script |
| Web Console |
|
| |
|
| Virtualization |
× |
| Web Server |
Apache / NGINX / LiteSpeed Enterprise / Varnish |
| TLS 1.3 |
√ |
| HTTP/2 |
√ |
| HTTP/3 & QUIC |
× |
| AutoSSL |
LetsEncrypt |
| DNS Server |
BIND |
| DNS Zone Manager |
√ |
| DNSSEC |
× |
| Multi-PHP |
√ |
| Database Server |
MariaDB / PostgreSQL / MongoDB |
| Database Admin |
phpMyAdmin / PostgreSQL Database Manager / Mongo Database Manager |
| Email Server |
Postfix / Dovecot |
| Webmail |
Roundcube |
| FTP Server |
Pure-FTPd |
| Caching |
OPcache / Varnish |
| |
|
| Email Validation |
SPF / DKIM |
| Spam Protection |
SpamAssassin / SpamHause / SpamExperts / Amavis |
| Firewall |
CSF |
| WAF |
ModSecurity / CWAF (Comodo) / OWASP |
| Virus / Malware Scanning |
ClamAV / Maldet / RKHunter / Lynis / Snuffleupagus |
| |
|
| Reseller Accounts |
√ |
| User Accounts |
√ |
| Separate Panels (Admin / Users) |
√ |
| Hosting Packages |
√ |
| Quotas |
Disk / Bandwidth |
| Traffic Statistics |
GoAccess |
| Cron Jobs |
√ |
| Local Backup |
√ |
| External Backup |
FTP |
| File Manager |
√ |
| |
|
| Extendable by Plugins |
× |
| API |
√ |
| WHMCS Support |
√ |
| Panel Account Restrictions |
× |
| Server and Package Updates |
GUI / CLI |
| Automatic Updates |
Panel Only |
| Can be Uninstalled |
× |
Control Web Panel (CWP) is a free modern and intuitive control panel for servers and VPS that enables the day to day management and their security easy. Considerations were taken into account through the development of the web panel in terms of security functionalities and the interface.
- Pros
- Complete hosting package.
- All features you will need for a modern hosting server.
- It has great potential.
- The Pro version is so cheap it should be considered a donation and I would recommend to go straight for the Pro version
- Ideal cPanel/Plesk replacement for business, but great for hobbyists aswell.
- Cons
- Some bugs and are not fixed quickly.
- The Admin panel is dated.
- There needs to be a better road map for this software for it to live in the commercial world.
- Does require some work to setup and keep running.
Notes
- Sites
- General
- Settings
- Plugins
- File Locations / Repo Locations / Key Locations
- Install
- Update / Upgrade
- Installation Instructions
- Misc
DirectAdmin

| Features |
Status |
| |
|
| Primarily Designed For |
Hosting Company |
| Free/Paid |
Paid |
| License |
Proprietary |
| Supported OS |
RHEL / CentOS / AlmaLinux / Rocky Linux / Debian / Ubuntu |
| Supported Cloud Providers |
× |
| Install Method(s) |
Script |
| Web Console |
|
| |
|
| Virtualization |
× |
| Web Server |
Apache / Nginx / OpenLiteSpeed / LiteSpeed Enterprise |
| TLS 1.3 |
√ |
| HTTP/2 |
√ |
| HTTP/3 & QUIC |
× |
| AutoSSL |
LetsEncrypt |
| DNS Server |
BIND |
| DNS Zone Manager |
√ |
| DNSSEC |
√ |
| Multi-PHP |
√ |
| Database Server |
MySQL / MariaDB |
| Database Admin |
phpMyAdmin |
| Email Server |
Exim / Dovecot |
| Webmail |
Roundcube / SquirrelMail |
| FTP Server |
ProFTPD / Pure-FTPd |
| Caching |
Redis |
| |
|
| Email Validation |
SPF / DKIM / DMARC |
| Spam Protection |
SpamAssassin / Rspamd / RBL / Easy Spam Fighter / BlockCracking / Pigeonhole |
| Firewall |
iptables / CSF / Firewalld |
| WAF |
ModSecurity / Comodo WAF (CWAF) / Snuffleupagus |
| Virus / Malware Scanning |
ClamAV / Imunify360 (Paid Addon) |
| |
|
| Reseller Accounts |
√ |
| User Accounts |
√ |
| Separate Panels (Admin / Users) |
× |
| Hosting Packages |
√ |
| Quotas |
Disk / Bandwidth |
| Traffic Statistics |
AWStats / Webalizer |
| Cron Jobs |
√ |
| Local Backup |
√ |
| External Backup |
JetBackup (Paid Addon) / Acronis (Paid Addon) |
| File Manager |
√ |
| |
|
| Extendable by Plugins |
√ |
| API |
√ |
| WHMCS Support |
√ |
| Panel Account Restrictions |
Number of domains (not subdomains) depends on your tier |
| Server and Package Updates |
CLI / GUI |
| Automatic Updates |
√ |
| Can be Uninstalled |
× |
DirectAdmin is modern web hosting control panel with regular updates. I found its control panel to be uncomfortable to use because of the hidden menus and low contrast ultra-bright theme, ultraclean gone to far. The menu can be stickied which helps a lot and if I ever find where to enable the dark theme that would probably fix the theme. This panel is definately feature rich and for the price is ideal for hosting your own websites at home if you are willing to pay it, and for the hosting companies out there this is definately a good replacement for Plesk or cPanel.
- Pros
- Subdomains do not count toward the domain limit, so you could theoretically have unlimited subdomains.
- Updated often.
- DirectAdmin is widely supported like cPanel and Plesk.
- Integrated Ticketing System
- Modern and responsive UI
- Feature rich
- Has a GIT server option
- Reseller features
- Ideal cPanel/Plesk replacement for business.
- Cons
- They removed the `Personal Tier` so is a bit expensive to run at home.
- Not sure how much control over the Apache setup you have.
- The demo is crippled so you cannot look at most features.
- The default theme and menu settings are bad.
- Pricey unless you go for the unlimited plan which is only suitable for business.
- There seems to be a lot of paids add-ons that should be included, such as server level backup (JetBackup / Acronis). This might point to a business model that we have seen before.
Notes
- Sites
- General
- Settings
- Plugins
- File Locations / Repo Locations / Key Locations
- Install
- Update / Upgrade
- Uninstall
- Installation Instructions
- Misc
Geek Panel

| Features |
Status |
| |
|
| Primarily Designed For |
Hosting Company |
| Free/Paid |
Free |
| License |
Proprietary |
| Supported OS |
CentOS / AlmaLinux / Rocky Linux / Debian / Ubuntu / Fedora |
| Supported Cloud Providers |
× |
| Install Method(s) |
Script |
| Web Console |
|
| |
|
| Virtualization |
√ |
| Web Server |
Apache |
| TLS 1.3 |
√ |
| HTTP/2 |
√ |
| HTTP/3 & QUIC |
× |
| AutoSSL |
LetsEncrypt |
| DNS Server |
BIND |
| DNS Zone Manager |
√ |
| DNSSEC |
× |
| Multi-PHP |
√ |
| Database Server |
MariaDB / SQLite / PostgreSQL |
| Database Admin |
phpMyAdmin |
| Email Server |
Postfix / Dovecot |
| Webmail |
Roundcube |
| FTP Server |
VsFTPd |
| Caching |
Memcached |
| |
|
| Email Validation |
SPF / DKIM |
| Spam Protection |
Sending rate restriction |
| Firewall |
× |
| WAF |
× |
| Virus / Malware Scanning |
ClamAV |
| |
|
| Reseller Accounts |
√ |
| User Accounts |
√ |
| Separate Panels (Admin / Users) |
√ |
| Hosting Packages |
√ |
| Quotas |
Disk / Bandwidth |
| Traffic Statistics |
Bandwidth |
| Cron Jobs |
√ |
| Local Backup |
√ |
| External Backup |
FTP / SCP |
| File Manager |
√ |
| |
|
| Extendable by Plugins |
√ (seems to be planned) |
| API |
√ |
| WHMCS Support |
? |
| Panel Account Restrictions |
× |
| Server and Package Updates |
CLI |
| Automatic Updates |
? |
| Can be Uninstalled |
× |
Geek Panel (a.k.a. bbPanel) is a new control panel and this shows because although it looks very close to cPanel it still has bugs, is not feature complete, has no community or issue tracker. Too confuse things, there are several websites for this one product and they are all slightly different.
GeekPanel is built with security in mind, to meet everyone needs from Beginners to top Admin Professionals for web hosting control panel management. A smart scalable and secure hosting control panel a comprehensive Linux system for server admins, and a broad toolset for customers to manage shared web hosting, VPS, Cloud, and Dedicated Servers with their domains emails websites, with a ton of rich features.
- Pros
- It does have a small bank of installable platforms such as Joomla and WordPress.
- Has grest potential as a cPanel clone.
- Ideal cPanel/Plesk replacement for business.
- Cons
- Many bugs.
- Not feature complete.
- Confusing websites.
- You cannot raw edit the php.ini file in the GUI or a lot of other settings which are hidden from the admin.
Notes
- Sites
- Homepage
- Demo
- Changelog
- Code Repository
- Forum
- Docs
- Plugins
- General
- Settings
- Plugins
- File Locations / Repo Locations / Key Locations
- The panel files /geekpanel/
- Install
- Update / Upgrade
- Uninstall
- Installation Instructions
- Misc
OVIPanel
| Features |
Status |
| |
|
| Primarily Designed For |
Hosting Company |
| Free/Paid |
Free |
| License |
Proprietary / GPLv3 / MIT / Apache |
| Supported OS |
CentOS / AlmaLinux / Cloud Linux |
| Supported Cloud Providers |
? |
| Install Method(s) |
Script |
| Web Console |
|
| |
|
| Virtualization |
× |
| Web Server |
Apache / Nginx / OpenLiteSpeed |
| TLS 1.3 |
√ |
| HTTP/2 |
√ |
| HTTP/3 & QUIC |
× |
| AutoSSL |
LetsEncrypt |
| DNS Server |
BIND |
| DNS Zone Manager |
√ |
| DNSSEC |
× |
| Multi-PHP |
√ |
| Database Server |
MySQL / PostgreSQL / MongoDB |
| Database Admin |
phpMyAdmin / phpPgAdmin |
| Email Server |
Postfix / Dovecot |
| Webmail |
Roundcube / RainLoop |
| FTP Server |
ProFTPD |
| Caching |
Varnish |
| |
|
| Email Validation |
SPF / DKIM |
| Spam Protection |
SpamAssassin |
| Firewall |
CSF |
| WAF |
ModSecurity |
| Virus / Malware Scanning |
Imunify360 / Linux Malware Detect (LMD) |
| |
|
| Reseller Accounts |
√ |
| User Accounts |
√ |
| Separate Panels (Admin / Users) |
√ |
| Hosting Packages |
√ |
| Quotas |
Disk / Bandwidth |
| Traffic Statistics |
Webalizer |
| Cron Jobs |
√ |
| Local Backup |
√ |
| External Backup |
? |
| File Manager |
√ |
| |
|
| Extendable by Plugins |
√ |
| API |
√ |
| WHMCS Support |
√ |
| Panel Account Restrictions |
× |
| Server and Package Updates |
CLI / GUI |
| Automatic Updates |
× |
| Can be Uninstalled |
× |
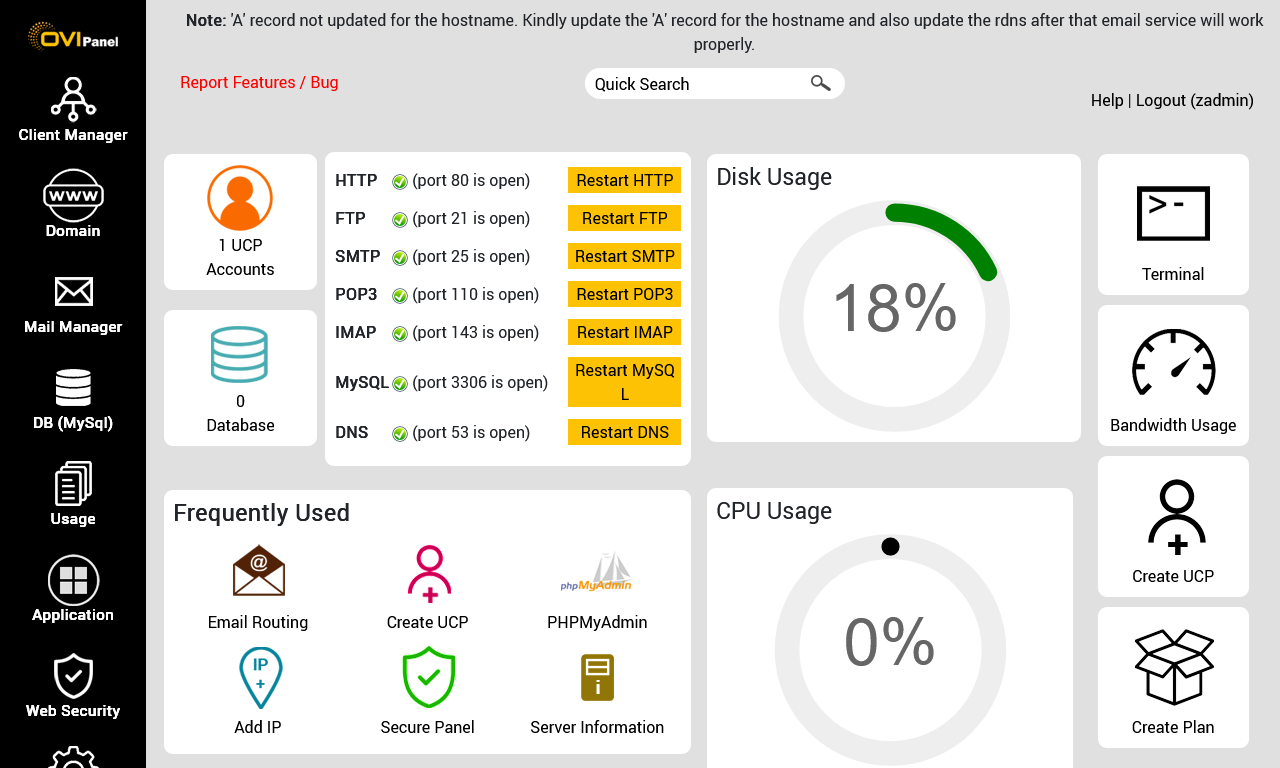
OVIPanel is web hosting control panel (based on Sentora) that has a modern UI with separate panels for users and the admin. The admin GUI does need some work on the UI and additional features adding because a lot of features that you expect to be in the GUI are absent. The free panel has massive potential and a growing community. This panel does have regular updates and is developed by a large hosting company in India.
There is a paid version which adds support but no extra features. The paid tiers are very reasonable and can give you some reassurance that you can get technical questions answered within 4-6 hours.
- Pros
- One Click cPanel to OVIPanel Migration.
- Cons
- Some of the documentation is out of date.
- The UI needs some tidying up
- Apache modules can be configured from the GUI but not all modules are availabe.
Notes
- Sites
- General
- Settings
- Plugins
- File Locations / Repo Locations / Key Locations
- Install
- Update / Upgrade
- Uninstall
- Installation Instructions
- Misc
Webuzo

| Features |
Status |
| |
|
| Primarily Designed For |
Hosting Company |
| Free/Paid |
Paid |
| License |
Proprietary |
| Supported OS |
RHEL / CentOS / AlmaLinux / Rocky Linux / Ubuntu / CloudLinux / Scientific Linux |
| Supported Cloud Providers |
Amazon Web Services (AWS) / DigitalOcean / Google Cloud Platform (GCP) / Microsoft Azure / Akamai (formerly Linode) |
| Install Method(s) |
Script / Cloud Quick Launch |
| Web Console |
|
| |
|
| Virtualization |
× |
| Web Server |
Apache / Nginx / OpenLiteSpeed / LiteSpeed Enterprise / Lighttpd / NodeJS |
| TLS 1.3 |
√ |
| HTTP/2 |
√ |
| HTTP/3 & QUIC |
√ |
| AutoSSL |
LetsEncrypt |
| DNS Server |
BIND |
| DNS Zone Manager |
√ |
| DNSSEC |
× |
| Multi-PHP |
√ |
| Database Server |
MySQL / MariaDB / PostgreSQL / SQLite / MongoDB |
| Database Admin |
phpMyAdmin / phpPgAdmin |
| Email Server |
Exim / Dovecot |
| Webmail |
Roundcube / RainLoop / WebMail Lite |
| FTP Server |
Pure-FTPd |
| Caching |
Redis / Memcached / Varnish |
| |
|
| Email Validation |
SPF / DKIM / DMARC |
| Spam Protection |
SpamAssassin / RBL / MailChannels |
| Firewall |
CSF / CXF |
| WAF |
ModSecurity / OWASP / Brute Force Detection |
| Virus / Malware Scanning |
ClamAV / ImunifyAV / ImunifyAV+ / Imunify360 / Linux Malware Detect (LMD) / Linux Environment Security (LES) |
| |
|
| Reseller Accounts |
√ |
| User Accounts |
√ |
| Separate Panels (Admin / Users) |
√ |
| Hosting Packages |
√ |
| Quotas |
Disk / Bandwidth |
| Traffic Statistics |
AWStats |
| Cron Jobs |
√ |
| Local Backup |
√ |
| External Backup |
FTP / SFTP / AWS S3 / Google Drive |
| File Manager |
√ |
| |
|
| Extendable by Plugins |
√ |
| API |
√ |
| WHMCS Support |
√ |
| Panel Account Restrictions |
Tiers based on number of accounts |
| Server and Package Updates |
CLI / GUI |
| Automatic Updates |
√ |
| Can be Uninstalled |
× |
Webuzo is a Multi User Control Panel built for Hosting Providers, Resellers and Website Owners designed and built by Softaculous. Its a powerful and easy to use Web Hosting Control Panel used by users around the world which helps you manage your cloud or dedicated server.
This panel can be installed on dedicated servers, cloud servers and virtual private servers. You can launch Webuzo instances in various clouds like Amazon Web Services, Google Cloud Platform (GCP), Microsoft Azure, Linode, DigitalOcean, etc. You can automate various admin tasks with the API and SDK.
Webuzo now has reseller capabilites and is definately a candidate for a cPanel replacement. The top tier is a fair price which includes unlimited domains, unlimited accounts and free support but the lower tiers also allow the hobbyist to run this platform on their kit at home. The killer feature is that Webuzo offers and inplace conversion of your cPanel and WHMCS to use their platform with no losss of data and no need to performa migration to another IP address.
- Pros
- An excellent cPanel replacement.
- Has a tool to convert your cPanel server into a Webuzo server rather than doing a migration.
- Has a tool to convert your WHMCS (cPanel) to WHMCS (Webuzo).
- The 'Personal Cloud' tier has Softaculous included for free.
- The GUI's are a modern design and feels relaxing to use. Nice to look at, nice to use.
- Lots of plugins
- This is how cPanel should look.
- Ideal cPanel/Plesk replacement for business.
- Cons
- The pricing and plans need their descriptions making better.
- The demo is only for the client's section and not everything is available (i.e. email section is missing).
- Putting together the list of technologies this panel uses was hard.
- Need to sort the VPS/Dedicated pricing. Why should the price be different because of the platfrom when it is already limited by accounts.
- Pricey unless you go for the unlimited plan which is only suitable for business.
Notes
- Sites
- General
- Settings
- Plugins
- File Locations / Repo Locations / Key Locations
- Install
- Update / Upgrade
- Uninstall
- Installation Instructions
- Misc
SPanel
| Features |
Status |
| |
|
| Primarily Designed For |
Hosting Company |
| Free/Paid |
Paid |
| License |
Proprietary |
| Supported OS |
Rocky Linux |
| Supported Cloud Providers |
Amazon Web Services (AWS) / DigitalOcean / Hetzner Cloud / Google Compute Engine (GCE) / Google Cloud Platform (GCP) / Microsoft Azure / Vultr / Akamai (formerly Linode) / Alibaba Cloud / Contabo / OVH |
| Install Method(s) |
SaaS |
| Web Console |
|
| |
|
| Virtualization |
× |
| Web Server |
Apache / Nginx / OpenLiteSpeed / LiteSpeed Enterprise |
| TLS 1.3 |
√ |
| HTTP/2 |
√ |
| HTTP/3 & QUIC |
√ |
| AutoSSL |
LetsEncrypt |
| DNS Server |
BIND |
| DNS Zone Manager |
√ |
| DNSSEC |
× |
| Multi-PHP |
√ |
| Database Server |
MariaDB |
| Database Admin |
phpMyAdmin |
| Email Server |
Exim / Dovecot |
| Webmail |
Roundcube / RainLoop |
| FTP Server |
Pure-FTPd |
| Caching |
Memcached |
| |
|
| Email Validation |
SPF / DKIM / DMARC |
| Spam Protection |
SpamAssassin |
| Firewall |
CSF |
| WAF |
ModSecurity |
| Virus / Malware Scanning |
SShield |
| |
|
| Reseller Accounts |
√ |
| User Accounts |
√ |
| Separate Panels (Admin / Users) |
√ |
| Hosting Packages |
√ |
| Quotas |
Disk / Bandwidth |
| Traffic Statistics |
GoAccess |
| Cron Jobs |
√ |
| Local Backup |
SBackups |
| External Backup |
? |
| File Manager |
√ |
| |
|
| Extendable by Plugins |
× |
| API |
√ |
| WHMCS Support |
√ |
| Panel Account Restrictions |
√ |
| Server and Package Updates |
CLI / GUI |
| Automatic Updates |
√ |
| Can be Uninstalled |
× |
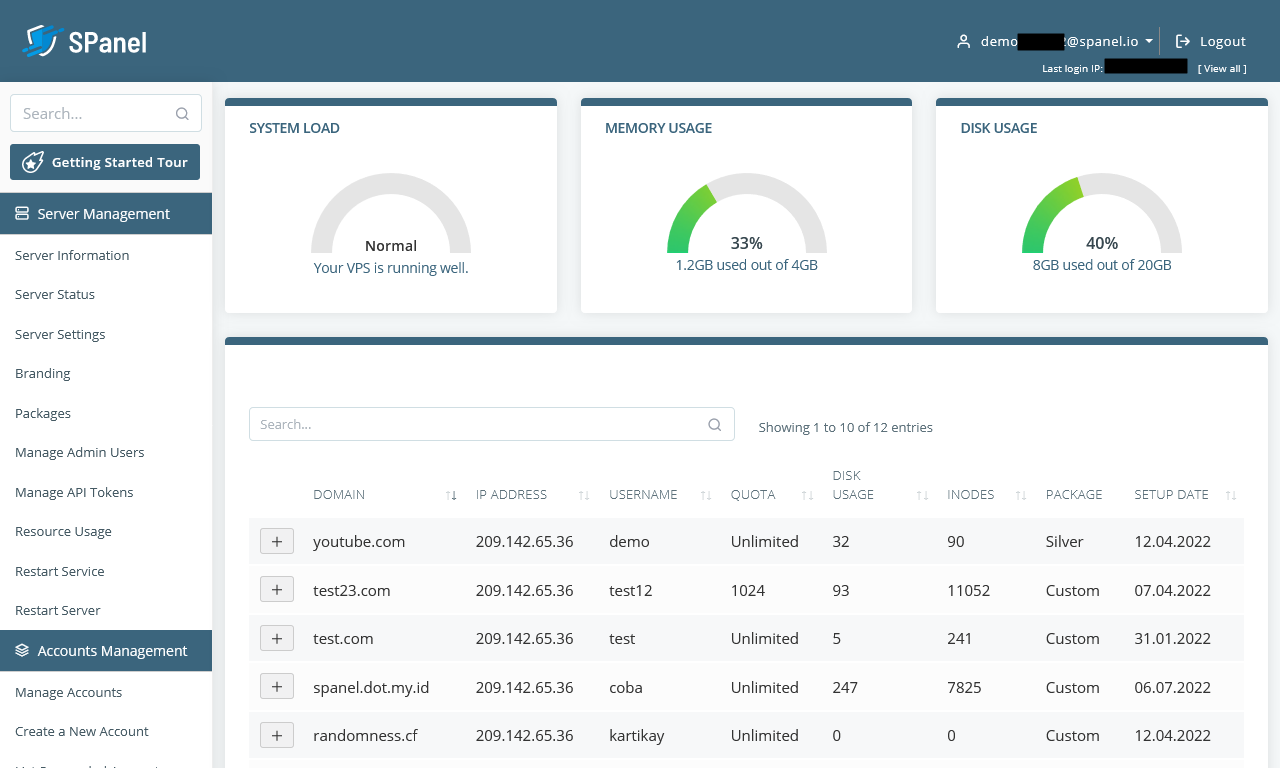
SPanel is web hosting control panel developed by Scala Hosting and was developed because of the ever increasing cost of cPanel. The next generation cloud management platform, allowing every website owner to easily manage their server in a secure environment. This panel is an ALL-IN-ONE cloud hosting platform allowing every site owner to host multiple websites on their own fully managed cloud VPS and as such is not designed for your own local servers, you must use a cloud based provider that this software supports.
SShield is the all-in-one security solution of SPanel and is unique because it doesn’t just rely on the existing virus and malware databases. Instead, it follows advanced algorithms for predictive analysis and cyber threat prevention. A predictive AI for detecting and removing cyber threats.
SPanel is available for free with any Scala Hosting VPS plan.
- Pros
- A good cPanel clone with professional support
- SShield
- A feature request site where votes turn into features getting implemented
- Cons
- No demo unless you sign up
- No forum
- Expensive
- The documentation is terrible, there is hardly any information.
Notes
- Sites
- Homepage
- Demo - Request only
- Changelog
- Code Repository
- Forum
- Docs
- Plugins
- General
- Managed = They will remotely dial into your server and fix things
- Self Managed = The software only. This should be renamed software only
- Settings
- Plugins
- File Locations / Repo Locations / Key Locations
- Install
- Update / Upgrade
- Uninstall
- Installation Instructions
- Misc
My20i / StackCP
| Features |
Status |
| |
|
| Primarily Designed For |
Hosting Company |
| Free/Paid |
Free (can only be used with 20i.com or their resellers) |
| License |
Apache |
| Supported OS |
CentOS / Windows Server |
| Supported Cloud Providers |
in-house / Amazon Web Services (AWS) / Google Cloud Platform (GCP)
*Reseller hosting platform has been built in-house. AWS and Google Cloud are available as Managed Hosting products.
|
| Install Method(s) |
SaaS |
| Web Console |
|
| |
|
| Virtualization |
× |
| Web Server |
Apache |
| TLS 1.3 |
√ |
| HTTP/2 |
√ |
| HTTP/3 & QUIC |
× |
| AutoSSL |
LetsEncrypt |
| DNS Server |
Google DNS |
| DNS Zone Manager |
√ |
| DNSSEC |
√ |
| Multi-PHP |
√ |
| Database Server |
MariaDB / MSSQL (extra cost for license) |
| Database Admin |
phpMyAdmin |
| Email Server |
Exim / Dovecot |
| Webmail |
Roundcube (Stackmail) |
| FTP Server |
ProFTPD |
| Caching |
OPCache / CDN (in-house) / in-house WordPress cache plugin (StackCache) |
| |
|
| Email Validation |
SPF / DKIM |
| Spam Protection |
Rspamd |
| Firewall |
iptables / Firewalld / Voxility / DDOS protection (via Voxility) |
| WAF |
ModSecurity / Brute Force Detection |
| Virus / Malware Scanning |
ClamAV |
| |
|
| Reseller Accounts |
× |
| User Accounts |
√ |
| Separate Panels (Admin / Users) |
√ |
| Hosting Packages |
× |
| Quotas |
Disk / Bandwidth |
| Traffic Statistics |
AWStats / Webalizer |
| Cron Jobs |
√ |
| Local Backup |
√ |
| External Backup |
√ (only 20i.com can access, disaster recovery only) |
| File Manager |
√ |
| |
|
| Extendable by Plugins |
× |
| API |
√ |
| WHMCS Support |
√ |
| Panel Account Restrictions |
× |
| Server and Package Updates |
CLI / GUI |
| Automatic Updates |
√ |
| Can be Uninstalled |
× |
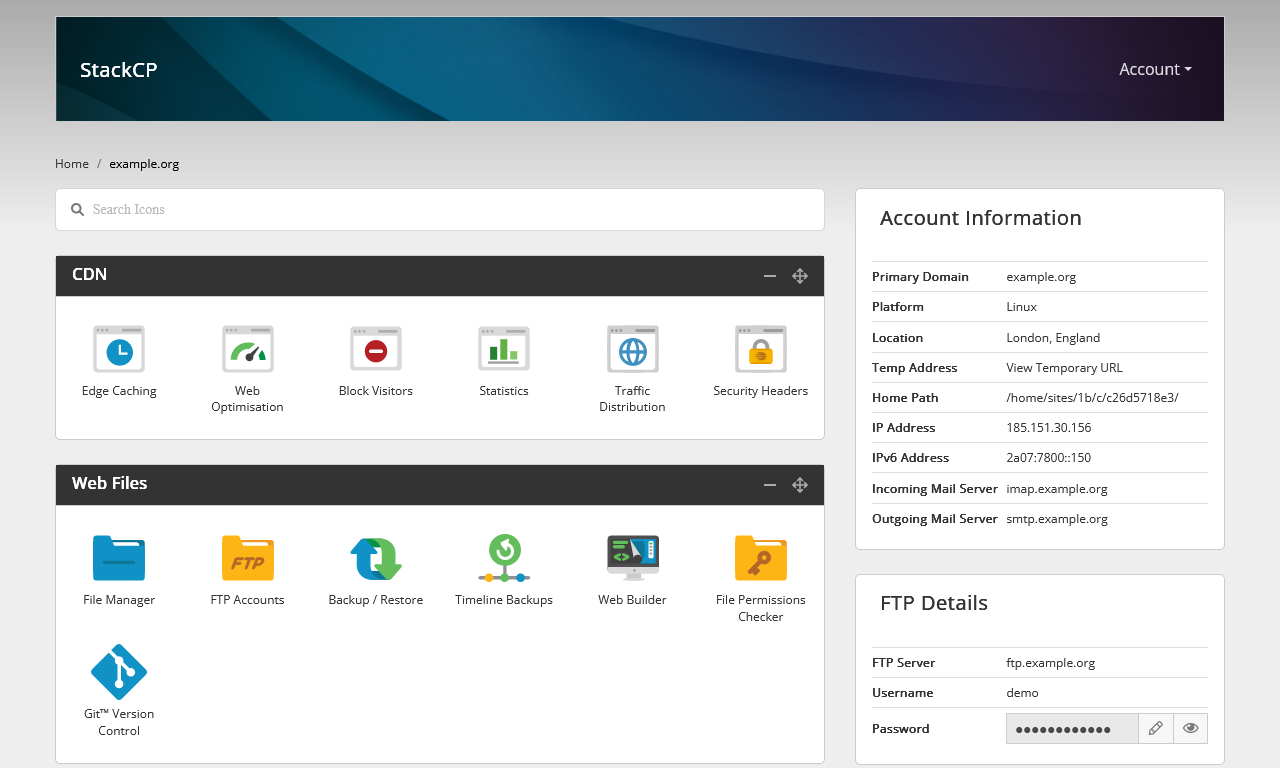
My20i and StackCP form a hosting platform from 20i.com and is a direct rival to cPanel except that you need to take out hjosting from 20i.com to use this panel, and best of all it is free with no account limits.
20i.com develops My20i amd StackCP in-house which their resellers can use for free. They refer to their platform as My20i.
The free version works ....................
- Pros
- You change all of the login domains (my20i.com, stackcp.com, stackmail.com) to those of your choosing with CNAMEs if you require.
- All support is based in the UK
- The SaaS hosting model is truley unlimited.
- Hostshop the in-house billing software is free.
- Reseller Hosting comes with a free WHMCS module and get can a discount on their WHMCS license.
- High load sites will be hived off to a fast server when a peak load occurs.
- Free migrations
- Free CDN
- No restrictions on accounts, bandwidth, space with the following exceptions:
- MySQL dB max size 1024mb (might be overall or a single DB, not sure)
- Cannot use more than 10% of the 20i.com server resources
- Email mailboxes are max 10GB
- What limits are place on the individual user accounts? Is there a link to the specs ie: indoes, processor, RAM, entry points….
- With regards to your query, there are not any inode limits in place and resources are scaled based on demand.
- when a website receives a large number of hits it is quickly isolated and moved to it’s own dedicated backend - this is raw hardware with no overhead at all - Multiple, 48 cores machines for the site that is busy. Power that would quite literally costs hundreds per month to buy for a site otherwise. Once the “busy period” is over, your site is moved back to the normal infrastructure.
- 1TBps DDOS protection (via Voxility).
- Documentation is excellent.
- Cons
- You have to use 20i.com hosting to use this panel (but the hosting is actually good)
- MSSQL = additional £10.00 /pm (but this is for the license so not 20i.com fault)
- 20i.com only does wildcard LetsEncrypt certificates for each account which means the platform does not support A record forwarding from remote DNS servers. This is because LetsEncrypt requires that the requester has full control over their DNS (i.e. their nameservers point to 20i.com servers).
Notes
- Sites
- General
- Email
- SSL (LetsEncrypt)
- How to auto-activate SSLs for websites | 20i
- With this feature you, as a hosting reseller, can provide an extra service to your customers. With SSL certificates being installed automatically your customer has not to worry about this security feature for the website.
- Please note that for 20i Resellers, this option is turned on by default.
- Can I use the free SSL if my site doesn’t use the 20i nameservers? | 20i
- Let’s Encrypt require the authoritative nameservers are set to our own to issue their Wildcard Certificates under the ACME DNS verification method - That is not something we control.
- this means you can only install the free SSL if the nameservers of the website point to 20 and not external point A records to the 20i platform and get SSL certificates automatically installed from LetsEncrypt.
- Q:
- We have a lot of accounts that only have the A records pointed to our server, cPanel manges ok. How can this be got around as this is a very common practice?
- Can you not revert to using SAN? Perhaps share this as a feature request?
- A: ??? No solutution yet.
- Does Let’s Encrypt issue wildcard certificates? | Let's Encrypt
- Questions to Sales Rep
- Fair usage explained
- There is no fair usage policy for number of hosting accounts, space and bandwidth but there is a max size of 1024mb/1GB for a database.
- is .htaccess supported?
- Yes .htaccess is supported
- is mail() allowed?
- Is deactivate same as suspend (i.e. for 50 days then it is terminated)?
- Yes this is the same as suspended where the website is not accessible via the internet but the data and web space are still in your 20i account.
- Can we do remote backups of our client accounts to Wasabi/ASW S3?
- We do not have a feature where you can remotely store backups. However, you can take a back up of all your websites and databases using the backup/restore tool.
- You can do a bulk backup with this and this will create a .zip file for you to download.
- You will also have access to FTP for individual hosting control panels and Master FTP for all websites and remote MySQL for individual control panels.
- Do you get choice of Linux or Windows on which My20i/StackCP sits on?
- Yes, when you create a webspace for a domain, you will be given the option to host on Linux, WordPress or Windows.
- Can we move away if needed ie. cPanel compatible transfer sort of thing?
- You can move away if you need to do so, however we do not have an automated transfer out tool available.
- You can download a copy of your website files and database into a zip file and then upload the data into your new host.
- Do you offer an API (i.e. cPanel/WHM compatible) that external/alternative hosting providers can use to transfer out my accounts from your servers to theirs?
- We unfortunately don't have a API or other kind of tool that can be used to migrate hosting packages off of our Platform I'm afraid. Apologies about that.
- Q: So once we are on your servers, we are stuck unless we want move everything manually?
- A: I'm afraid you would have to manually backup the sites in order to move off our platform yes.
- Are StackCP.com and www.20i.com only for 20i.com and their resellers?
- Yes, stackcp.com and my.20i.com are only available for Resellers and 20i.com
- Do we get access to a command line (CLI), jailed or otherwise?
- Settings
- Plugins
- File Locations / Repo Locations / Key Locations
- Install
- Update / Upgrade
- Uninstall
- Installation Instructions
- Misc
Small Hosting Company
These panels can be used for selling hosting but are aimed towards small hosting companies becasue they generally need more admin input to keep going or do not have all of the required features as the ones above. Hobbyists or techies running can use these to run their own servers from home.
KeyHelp

| Features |
Status |
| |
|
| Primarily Designed For |
Small Hosting Company |
| Free/Paid |
Both |
| License |
Proprietary |
| Supported OS |
Debian / Ubuntu |
| Supported Cloud Providers |
× |
| Install Method(s) |
Script |
| Web Console |
|
| |
|
| Virtualization |
× |
| Web Server |
Apache |
| TLS 1.3 |
√ |
| HTTP/2 |
√ |
| HTTP/3 & QUIC |
× |
| AutoSSL |
LetsEncrypt |
| DNS Server |
BIND |
| DNS Zone Manager |
√ |
| DNSSEC |
× |
| Multi-PHP |
√ |
| Database Server |
MySQL / MariaDB |
| Database Admin |
phpMyAdmin |
| Email Server |
Postfix / Dovecot |
| Webmail |
Roundcube / RainLoop / SnappyMail |
| FTP Server |
ProFTPD |
| Caching |
× |
| |
|
| Email Validation |
SPF / DKIM / DMARC |
| Spam Protection |
SpamAssassin / Amavis / Greylisting (in Debian version only) |
| Firewall |
iptables |
| WAF |
Fail2Ban |
| Virus / Malware Scanning |
ClamAV |
| |
|
| Reseller Accounts |
× |
| User Accounts |
√ |
| Separate Panels (Admin / Users) |
× |
| Hosting Packages |
× - Limits are set by the admin on the User's account |
| Quotas |
Disk / Bandwidth |
| Traffic Statistics |
AWStats |
| Cron Jobs |
√ |
| Local Backup |
Backups with Snapshots feature
|
| External Backup |
FTP / SFTP / WebDAV / KeyDisc / Dropbox / Custom with Restic / Rclone
|
| File Manager |
√ |
| |
|
| Extendable by Plugins |
× |
| API |
√ |
| WHMCS Support |
√ |
| Panel Account Restrictions |
× |
| Server and Package Updates |
GUI |
| Automatic Updates |
√ |
| Can be Uninstalled |
× |
KeyHelp is a Control Panel for Users and Server Administrators. Regardless of whether you are a user of a web hosting plan or an administrator of a server – an easy-to-use management interface with many functions and options is appreciated by everyone equally. The Server Hosting Panel KeyHelp is aimed at administrators, resellers and users. The KeyHelp server hosting panel is developed by the Thuringian (German) hosting provider Keyweb and made available to the public free of charge.
The free version is not crippled and the UI is ultra modern and responsive. If you plan to use this to sell web hosting be aware that it does not have a reseller component and you realistically will need to buy the Pro version for those little extras it gives you. Great for the inexperienced Linux convert who wants to do web hosting.
This responsive and stylish panel is not as mature as cPanel but has a passionate team behind it's development and is one to watch. This should be in your shortlist becasue of how easy it is to use and setup.
- Pros
- The client panel is very nice.
- Can Export/Import server settings
- Linux knowledge will be required for some features and maintenance.
- There is an easy login link to phpMyAdmin
- 2FA is available
- Specialist SSH connection for KeyHelp staff (enabled by default) similair to Divi's Help system.
- Settings --> Configuration --> Miscellaneous --> Support Access
- Active community (German and English)
- Developed in Germany.
- Service Monitor (via port monitoring)
- Allows remote database access
- Clients can change their PHP version
- Available in 19 different languages.
- Easy to swap/add additional versions of PHP
- Can import and export KeyHelp settings
- Backup can support many different endpoints using Restic and Rclone
- For business, the paid plan is very acceptable.
- Cons
- Doesn't not work behind a NAT Router
- Linux knowledge is required for some tasks.
- No CSF firewall
- There is a user workaround below, but it is not official.
- No GUI option to install ModSec
- Can not advance tune Apache in the GUI.
- No Reseller accounts
- Resources and permissions are set per user, there are no packages.
- No DNSSEC
- Cannot change the Panel's port, but it is a planned feature.
- SPAM control limited
- No GUI to edit PHP.ini
- No Client GUI to control PHP settings
- No Package manager
- File Manager has some limitations including not being able to zip up the root www directory.
- No root filemanager (this was mentioned as security measure)
- No Terminal in the GUI
- No Integrated phpMyAdmin Session (Developer says he choose not do do this by design)
- My Wishlist
Notes
- Sites
- General
- Settings
- Changing a user's PHP settings
- The are controled by editing the users profile in the admin panel.
- post_max_size and upload_max_filesize - KeyHelp Community
- If you change the template afterwards it does not affect existing customers. You must change the user php settings.
- or re-apply the account template in the user management of the corresponding users.
- Email
- Email functionality is not enabled immediately, maybe dependent on a CRON?
- Forwarding email without a mailbox
- Features are missing in the client area
- Edit their resoucres in the admin area. If there is a 0, this means none rather than the usual unlimited.
- API
- Database
- By default Database names and usernames are automaitcally generated but this can be turned off:
- Settings --> Configuration --> System --> Database Server --> Rules for assignment of database / usernames
- Session Timeout
- Configuration --> Security --> Login & Session --> Session idle time:
- Default = 24mins
- php.ini
- This has to be set manually unless the settings in the 'user reources'/'Account Templates' is enough
- Allow the use of NAT network (workaround 1 - tested)
- Edit the network interface and add your external IP as an alias to the real adapter (not the loopback).
sudo nano /etc/network/interfaces
- Identify your network card's ID, in my case eth0
- Add the following code after your network card's definition making sure you update the eth0:0 to match your card (eth0 = your network card, :0 = alias definition.), and update the external IP to match the one you want.
#Secondary IP Address
auto eth0:0
iface eth0:0 inet static
address 31.31.31.31
netmask 255.255.255.255
- Retart the network service
sudo systemctl restart networking
- Goto KeyHelp --> Settings --> Configuration --> System --> IP Addresses

- You now can see your local IP ticked, and your external IP is present but unticked. Swap them over and save.
- KeyHelp --> Miscellaneous --> Bulk Operations --> Rewriting user configuration files
- You only need to redo 'DNS server configurations'
- This will add a job to the system to run when the systen CROn is next triggered (usually every minute)
- All your domains should now have there A records updated to your external IP address.
- Edit the network interface and remove the alias.
- Retart the network service
sudo systemctl restart networking
- Done
- All your DNS records should now have your external IP for their A record.
- As long as the external IP (in ...System --> IP Addresses) stays selected it will remain as it is stored in the database.
- If this workaround is removed upon an update, repeat the procedure and re-apply.
- I think this should be permanent but I cannot gurantee what is changed during an update, but I am sure it can be re-applied.
- The IP addresses that you are changing takes a minute or two to update.
- alias - How do I add an additional IP address to an interface in Ubuntu 14 - Ask Ubuntu - This will work for Debian as well.
- Allow the use of NAT network (workaround 2 - untested)
- Goto KeyHelp --> Settings --> Configuration --> System --> IP Addresses
- Edit the DOM and change the local IP to the external IP and then submit.
- This might take a bit of fiddling to get write, but you get the idea
- Plugins
- Rspamd (Fast, free and open-source spam filtering system.)
- General --> System Status --> Email --> Rspamd Web Interface
- Official Rspamd documentation
- Filtering out spam with rspamd workaround.org - You have come a long way in this guide and your mail server is already fully functional. Now it's time to deal with the dark side: spam.
- File Locations / Repo Locations / Key Locations
- Configuration Files & Storage Paths - KeyHelp Knowledge Base
- Panel, phpMyAdmin, webmail and other web apps
/home/keyhelp/www/
- The .htpasswd created by KeyHelp, is stored at:
/etc/apache2/keyhelp/htpasswd/.htpasswd_superadmin_xxxxx52984ec401ebedf74286a243e4e
- Settings, Templates and Domain zones backup - KeyHelp Community
- KeyHelp stores all mentioned items in its database, which is always part of a backup (server backup).
- Additionally, the KeyHelp related databases (`keyhelp`, `roundcube`, `rainloop`, `phpmyadmin`) are backed up daily to /home/keyhelp/keyhelp.backup/dumps/.
- Apache Configs
/etc/apache2/keyhelp/
This has invisible redirects as shown in this example
# Rspamd
RewriteEngine on
RewriteRule ^/rspamd$ /rspamd/ [R]
ProxyPreserveHost On
ProxyPass /rspamd http://localhost:11334/
ProxyPassReverse /rspamd http://localhost:11334/
- phpMyAdmin
- /home/keyhelp/www/phpmyadmin/config.inc.php
- Changes to phpMyAdmin confic will get wiped out upon KeyHelp updates
- Apps are all access from the root accounts domain even if instigated from the client account, ie:
- Install
- After you have created a user's account and domain, you need to go back into the account and correctly configure the resources it is allowed.
- OS upgrades are taken care of by custom scripts the KeyHelp team write.
- No GUI to add and remove PHP extensions, this has to be done by apt?
- Update / Upgrade
- Uninstall
- Installation Instructions
- Misc
- Backup
- Ubuntu vs Debian
- KeyHelp adds new Debian version first when they depned on the underlying technology and package avaiablily, i.e. the new SPAM system.
- Ubuntu is always 6 months behind Debain updates
- Ubuntu or Debian? Which One is good for KeyHelp? - KeyHelp Community
- Ubuntu isn't as good as Debian as it's not always free of upgrade/update bugs.
- My advise, Servers is Debian, no question about it.
- Also Debian has a far longer lifespan in support then any other distro.
- Data Collector Script for Community Support - KeyHelp Community - Jolinar along with some community members has developed a shell script that gathers essential system information on a KeyHelp Server and provides it in a text file. This allows them to offer proper support in the forum without having to painstakingly request and compile all the necessary information each time.
Froxlor

| Features |
Status |
| |
|
| Primarily Designed For |
Small Hosting Company |
| Free/Paid |
Free |
| License |
GPLv2 |
| Supported OS |
Debian / Ubuntu |
| Supported Cloud Providers |
× |
| Install Method(s) |
Script |
| Web Console |
|
| |
|
| Virtualization |
× |
| Web Server |
Apache / NGINX / LigHTTPd (for backend) |
| TLS 1.3 |
√ |
| HTTP/2 |
√ |
| HTTP/3 & QUIC |
× |
| AutoSSL |
LetsEncrypt |
| DNS Server |
BIND / PowerDNS |
| DNS Zone Manager |
√ |
| DNSSEC |
× |
| Multi-PHP |
√ |
| Database Server |
MariaDB |
| Database Admin |
× |
| Email Server |
Postfix / Dovecot |
| Webmail |
× |
| FTP Server |
Pure-FTPd |
| Caching |
OPcache |
| |
|
| Email Validation |
SPF / DKIM |
| Spam Protection |
× |
| Firewall |
× |
| WAF |
× |
| Virus / Malware Scanning |
× |
| |
|
| Reseller Accounts |
√ |
| User Accounts |
√ |
| Separate Panels (Admin / Users) |
× |
| Hosting Packages |
√ |
| Quotas |
Disk / Bandwidth |
| Traffic Statistics |
√ |
| Cron Jobs |
√ |
| Local Backup |
× |
| External Backup |
× |
| File Manager |
× |
| |
|
| Extendable by Plugins |
× |
| API |
√ |
| WHMCS Support |
√ |
| Panel Account Restrictions |
× |
| Server and Package Updates |
CLI |
| Automatic Updates |
× |
| Can be Uninstalled |
√ |
Froxlor is the lightweight server management software for your needs. Developed by experienced server administrators, this open source (GPL) panel simplifies the effort of managing your hosting platform. Froxlor is ideal for a hobbiest due to the fact a lot of stuff needs to be setup manually and requires knowledge of Linux but also has no dedicated reseller system. This system calls resellers, admins, and customers can be assigned to them. Developed by experienced server administrators, this open source (GPL) panel simplifies the effort of managing your hosting platform.
The panel will generate scripts for you for some actions and you will need to run these as root in the terminal manually, but this is not hard, just an extra step. Froxlor will need to have all of its settings checked upon first installation but this task is not hard and only needs to be done once.
- Pros
- The GUI is really modern and clean and is easy to navigate around.
- OPcache is setup from the start with a nice statistics page showing you various metrics.
- There is an active community and developers working on this project. I found it very easy to setup and use.
- Froxlor could be used with a more in-depth apache config panel such as Cockpit or other webservers panel as it reads all settings from the config files.
- Can be uninstalled.
- Uses the raw config files on the system rather than it's own.
- Cons
- Linux experience needed for some features and changes.
- You will need to use the command line to do certain tasks.
- phpMyAdmin is not installed.
- You will need Linux knowledge becasue not everything is performed through the panel.
- Very Stable
Notes
- Sites
- General
- Admin / Resellers
- Admins / Resellers | Froxlor Documentation
- Admin and reseller accounts in froxlor are administrative users. This means they can not have a website, email-accounts or similar for themselves. Both of the administrative users are only separated by permissions given from the parent administrative user. So an admin with fewer permissions might be considered a reseller
- Not all settings are exposed in the panel
- Changes can take up to 5 minutes when the cron is run
- it has a cron system
- PHP settings are stored in froxlor and then i guess merged opn to the real php.ini which is probably a good thing, allows settings to survive updates.
- Supports perl
- The Froxlor frontend itself uses the Froxlor API backend too.
- Froxlor is the fork of Syscp.
- Froxlor has been going since at least 2012 which means it is very stable.
- Settings
- Change the panels port
- Resources --> IPs and Ports
- Edit both the 80 and 443 as follows
- 80 --> 2082 + make sure 'Create Listen statement' is on, change nothing else
- 443 --> 2083 + make sure 'Create Listen statement' is on, change nothing else
- Add a new on on mapping
- Port 80 and your server IP. this will get rid off the ubunt/apachge default landing page
- Custom docroot = ? | If this is not set then Froxlor will load once again on port 80
- Wait up to 5 minutes for the changes to be applied
- You should replace this file (located at /var/www/html/index.html) before continuing to operate your HTTP server. when you remove the froxlor of port 80, you need to replace this
- Force Froxlor control panel to be HTTPS
- System --> Settings --> Froxlor VirtualHost settings --> Enable SSL-redirect for the froxlor vhost
- Reset admin password
SSH to your server

root@froxlor:~# mysql -u root -p
Enter in the SQL root password   (should be the same as your `froxroot`)

MariaDB [(none)]> USE froxlor;

MariaDB [(froxlor)]> UPDATE `panel_admins` SET `password` = MD5('my-secret-password') WHERE `adminid` = '1';
or
MariaDB [(froxlor)]> UPDATE `panel_admins` SET `password` = MD5('my-secret-password') WHERE `loginname` = 'admin';

Query OK, 1 row affected (0.020 sec)
Rows matched: 1  Changed: 1  Warnings: 0

Done
- Plugins
- File Locations / Repo Locations / Key Locations
- Froxlor control panel files: /var/www/html/froxlor/
- Default Skeleton File: /var/www/html/froxlor/templates/misc/standardcustomer/index.html
- Customer data: /var/customers/
- Add your own template in Froxlor
- Install
- Update / Upgrade
- Uninstall
- Uninstall Froxlor - General Discussion - Froxlor Forum
- Uninstall tutorial? What more then "rm -rf /var/www/froxlor/" and possibly the auto-generated vhost-configs in the corresponding directory do you need? Froxlor does not bind itself deep to the system like others...there's not more to it then just remove our files (and database if you like, doesnt matter).
- Installation Instructions
- Always use your external IP when setting Froxlor up
- These are my notes to help me quickly install. However the Froxlor installation notes are excellent and this section might get removed.
- Login as root
- Run these commands
apt-get -y install apt-transport-https lsb-release ca-certificates gnupg
curl -sSLo /usr/share/keyrings/deb.froxlor.org-froxlor.gpg https://deb.froxlor.org/froxlor.gpg
sh -c 'echo "deb [signed-by=/usr/share/keyrings/deb.froxlor.org-froxlor.gpg] https://deb.froxlor.org/ubuntu $(lsb_release -sc) main" > /etc/apt/sources.list.d/froxlor.list'
apt-get update && apt-get upgrade
apt-get install froxlor
- Which services should be restarted?
- General mail configuration type:
- Option 2 if you don't know
- Enter the MySQL daemon
mysql -u root
- Run these MySQL commands to create a privileged user. Swap CHANGEM3 for a password of your choice.
CREATE USER 'froxroot'@'localhost' IDENTIFIED BY 'CHANGEM3';
GRANT ALL PRIVILEGES ON *.* TO 'froxroot'@'localhost' WITH GRANT OPTION;
FLUSH PRIVILEGES;
EXIT;
- Run these commands
- Run this command (this prevents a PHP module issue in the WebInstaller)
service apache2 restart
- Now go to the webinstaller:
http://{your-ip-address}/froxlor
- Follow the wizard
- Done
- Misc
CyberPanel
| Features |
Status |
| |
|
| Primarily Designed For |
Small Hosting Company |
| Free/Paid |
Both |
| License |
Proprietary / GPLv3 |
| Supported OS |
AlmaLinux / CentOS / Ubuntu |
| Supported Cloud Providers |
× |
| Install Method(s) |
Script |
| Web Console |
|
| |
|
| Virtualization |
Docker |
| Web Server |
OpenLiteSpeed / LiteSpeed Enterprise |
| TLS 1.3 |
√ |
| HTTP/2 |
√ |
| HTTP/3 & QUIC |
√ |
| AutoSSL |
LetsEncrypt |
| DNS Server |
PowerDNS |
| DNS Zone Manager |
√ |
| DNSSEC |
× |
| Multi-PHP |
√ |
| Database Server |
MariaDB |
| Database Admin |
phpMyAdmin |
| Email Server |
Postfix / Dovecot |
| Webmail |
SnappyMail |
| FTP Server |
Pure-FTPd |
| Caching |
Memcached / Redis / LiteSpeed Cache (LSCache) |
| |
|
| Email Validation |
SPF / DKIM |
| Spam Protection |
SpamAssassin / MailScanner / Rspamd (Paid Addon) |
| Firewall |
iptables / CSF / Firewalld |
| WAF |
ModSecurity / OWASP |
| Virus / Malware Scanning |
ClamAV / MailScanner / ImunifyAV / Imunify360 |
| |
|
| Reseller Accounts |
√ |
| User Accounts |
√ |
| Separate Panels (Admin / Users) |
× |
| Hosting Packages |
√ |
| Quotas |
Disk / Bandwidth |
| Traffic Statistics |
× |
| Cron Jobs |
√ |
| Local Backup |
√ |
| External Backup |
SFTP / AWS S3 |
| File Manager |
√ |
| |
|
| Extendable by Plugins |
√ |
| API |
√ |
| WHMCS Support |
√ |
| Panel Account Restrictions |
× |
| Server and Package Updates |
CLI / GUI |
| Automatic Updates |
× |
| Can be Uninstalled |
× |
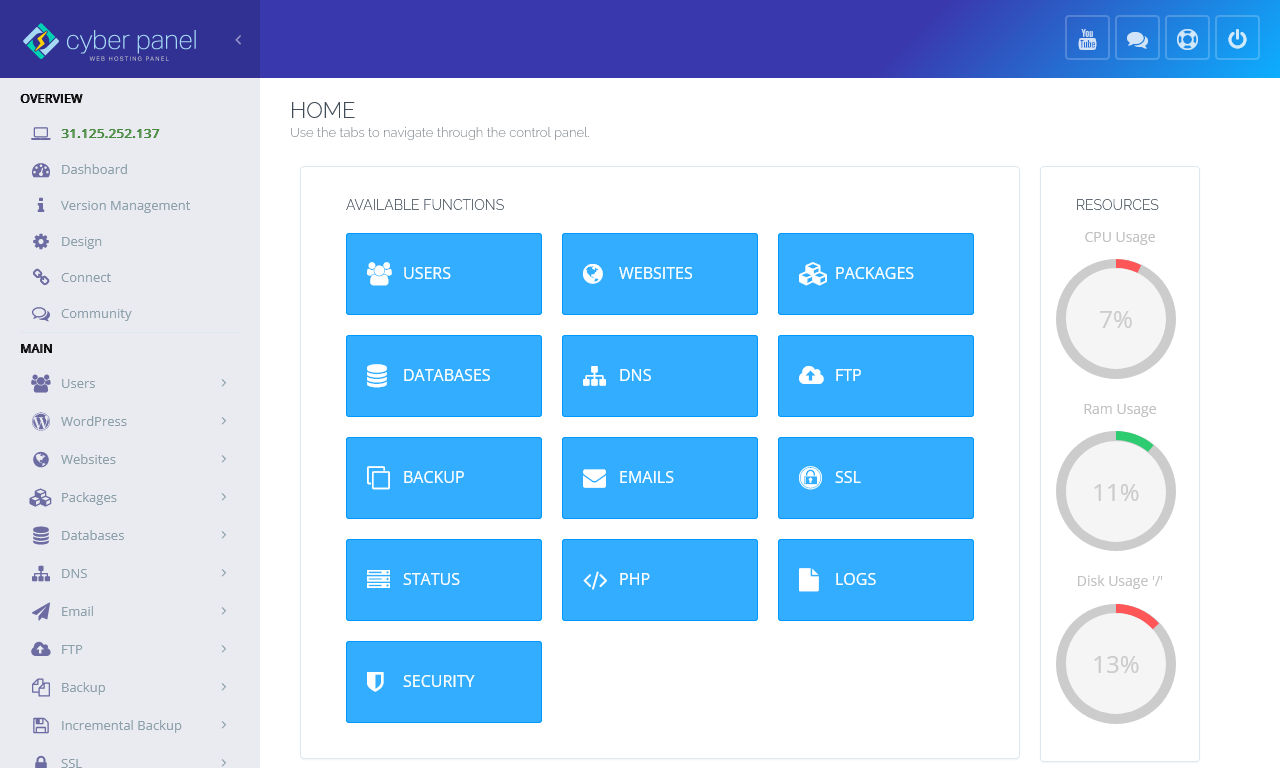
CyberPanel is web hosting control panel which is based on OpenLitespeed. Comes with built-in support for DNS, FTP, Email, File Manager and automatic SSL.
The free version works well but the webserver is crippled so could not be used for professional webhosting. Ideal for running your multiple website on a budget. LiteSpeed Enterprise is a powerful webserver and is ideally suited for professional webhosting but it does come at a cost. OpenLightSpeed does not support all Apache .htaccess commands where as LiteSpeed Enterprise as is a complete Apache drop-in replacement and does.
To use the full power of this panel it can get quite expensive and the free version does have some other crippled stuff like no root file manager. A one time payment for all the addons is not too bad and if you like this panel I encourage you to purchase as a one time payment rather that pay every month. I do not know if this covers all future versions of the panel and plugins.
CyberPanel with OpenLiteSpeed allows you to host unlimited domains at no cost. However, with LiteSpeed Enterprise you can host 1 domain for free, for further domains/details visit the pricing page.
- Pros
- Uses OpenLitespeed/LightSpeed Enterprise Web Server.
- Docker manager.
- Can be extended by plugins.
- HTTP/3 and QUIC support.
- LiteSpeed introduces for end users is the LSCache module. This allows users to enable the LSCache plugins on a number of content management systems such as WordPress, Joomla, and Magento.
- Cons
- Linux experience needed for some features and changes.
- Free version is crippled and the paid version can get expensive.
- Free version does not have a root file manager
Notes
- Sites
- General
- Settings
- Plugins
- File Locations / Repo Locations / Key Locations
- panel files: /usr/local/CyberCP/
- Install
- Update / Upgrade
- Uninstall
- Installation Instructions
- Misc
Virtualmin
| Features |
Status |
| |
|
| Primarily Designed For |
Small Hosting Company |
| Free/Paid |
Both |
| License |
Virtualmin Professional / GPLv3 |
| Supported OS |
RHEL / AlmaLinux / Rocky Linux / Oracle Linux / CentOS / Debian / Ubuntu |
| Supported Cloud Providers |
× |
| Install Method(s) |
Script |
| Web Console |
|
| |
|
| Virtualization |
Xen / KVM / OpenVZ / Vservers / Amazon EC2 / Solaris Zones / Google Compute Engine (GCE) / Docker (limited functionality)
Via Cloudmin (Free/Pro)
|
| Web Server |
Apache / Nginx |
| TLS 1.3 |
√ |
| HTTP/2 |
√ |
| HTTP/3 & QUIC |
× |
| AutoSSL |
LetsEncrypt |
| DNS Server |
BIND |
| DNS Zone Manager |
√ |
| DNSSEC |
√ |
| Multi-PHP |
√ |
| Database Server |
MariaDB / PostgreSQL / SQLite |
| Database Admin |
phpMyAdmin / phpPgAdmin |
| Email Server |
Postfix / Dovecot / QMail / Sendmail |
| Webmail |
Usermin / Roundcube / SquirrelMail |
| FTP Server |
ProFTPD / WU-FTP / VsFTPd |
| Caching |
? |
| |
|
| Email Validation |
SPF / DKIM / DMARC / DANE (TLSA) |
| Spam Protection |
SpamAssassin / Greylisting |
| Firewall |
CSF / Linux Firewall / Shorewall / Firewalld |
| WAF |
Fail2Ban / Comodo WAF (CWAF) |
| Virus / Malware Scanning |
ClamAV |
| |
|
| Reseller Accounts |
√ |
| User Accounts |
√ |
| Separate Panels (Admin / Users) |
√ |
| Hosting Packages |
√ |
| Quotas |
Disk / Bandwidth |
| Traffic Statistics |
Webalizer |
| Cron Jobs |
√ |
| Local Backup |
√ |
| External Backup |
FTP / SSH / AWS S3 / Dropbox (Pro only) / Azure Blob Storage (Pro only) / Google Cloud Platform (GCP) (Pro only) / Backblaze (Pro only) / Rackspace Cloud Files / Bacula |
| File Manager |
√ |
| |
|
| Extendable by Plugins |
√ |
| API |
√ |
| WHMCS Support |
√ |
| Panel Account Restrictions |
Unlimited number of accounts for Free tier.
The Pro version has more features such as 100+ install scripts, Reseller Accounts, User limits (Bandwidth, CPU, Memory...), More Stats and other features aimed at people who run businesses with Virtualmin. Pro customers can also file support tickets.
The Pro tiers are limited by the number of domains you want. Domains and Sub-Domains count towards this total.
|
| Server and Package Updates |
CLI / GUI |
| Automatic Updates |
√ |
| Can be Uninstalled |
√ |
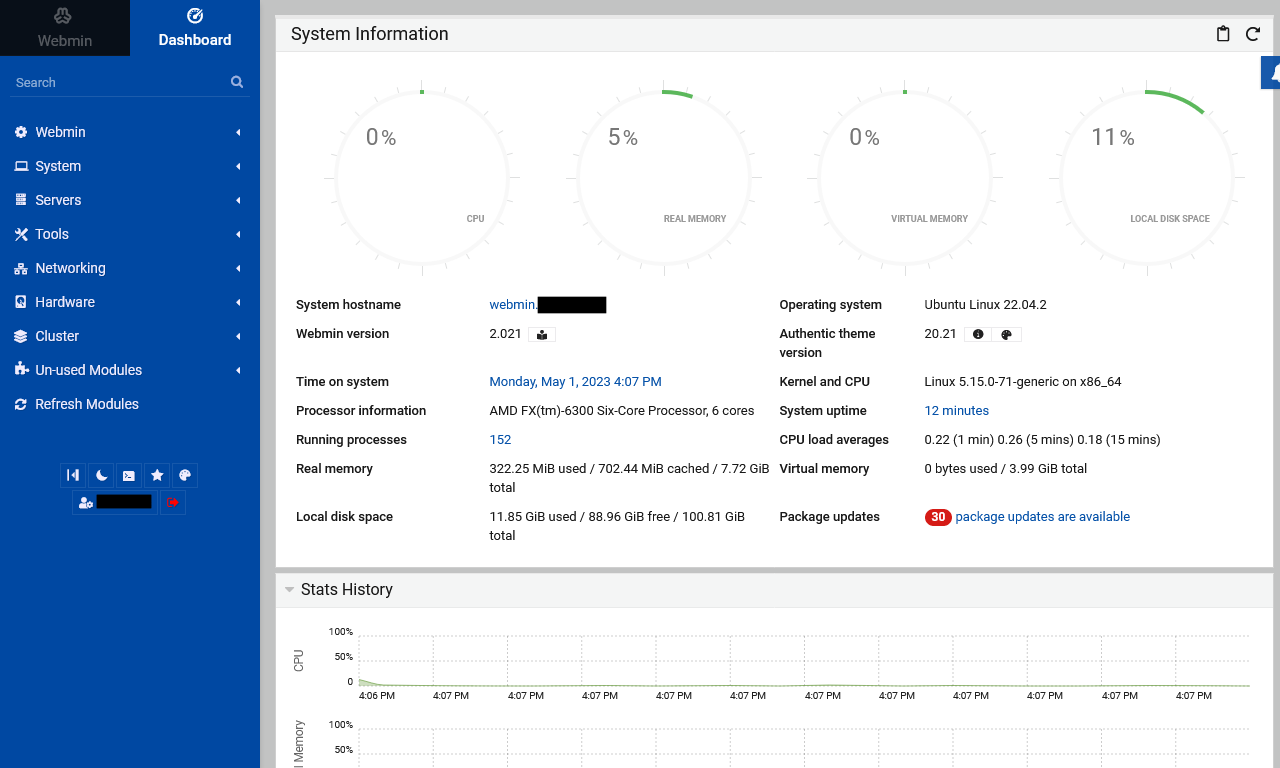
Virtualmin is a Webmin module for managing multiple virtual hosts through a single interface, like Plesk or cPanel. It supports the creation and management of Apache or Nginx virtual hosts, BIND DNS domains, MariaDB databases, and mailboxes and aliases with Postfix or Sendmail. It makes use of the existing Webmin modules for these servers, and so should work with any existing system configuration, rather than needing it’s own mail server, web server and so on.
Virtualmin can also create a Webmin user for each virtual server, who is restricted to managing just his domain and its files. Webmin’s existing module access control features are used, and are set up automatically to limit the user appropriately. These server administrators can also manage the mailboxes and mail aliases in their domain, via a web interface that is part of the module.
Virtualmin is a powerful and flexible web hosting control panel for Linux and BSD systems. Available in an Open Source community-supported version, and a more feature-filled version with premium support, Virtualmin is the cost-effective and comprehensive solution to virtual web hosting management. And, Virtualmin is the most popular and most comprehensive Open Source control panel with over 150,000 installations worldwide.
- Pros
- Very easy to install
- Updated often
- Very Stable
- Feature rich
- Covers all aspects of Linux server
- Can send push messages through your browser
- Can configure Apache modules in the GUI
- Can backup configuration
- Can backup files
- Can be expanded with plugins
- Heavily tested
- The most Feature rich of the Free and some of the Paid panels
- Email Greylisting
- Support Multi-PHP
- Supports Apache and Nginx out of the box.
- phpMyAdmin can be installed by a script (per account)
- Lots of documentation and is well written
- Very active community
- This has much more control over the server than any of the other panels.
- The interface and all of its CLI commands are Perl.
- Making it hard to kill your server.
- It is not relient on any of the services it controls.
- Each domain gets it's own separate resources.
- Extremely active and passionate development team.
- Cons
- You need some Linux experience to use this.
- You cannot select the version of MariaDB installed. The latest is installed. This is a Linux distro issue and can be changed manually.
- phpMyAdmin can only be installed on a per account basis using the install script. This leaves it open to the internet. It should run on a different port or be protected using the session ID.
- The Pro tiers are limited by the number of domains you want. Domains and Sub-Domains (Sub-Servers) count towards this total.
- Because of the theme and the layout, this is not for the casual user, many options all over the place and you should not let your end-client login.
- This is being improved constantly.
Notes
A lot of Webmin tutorials and information will apply to Virtualmin because Virtualmin is a plugin/module of Webmin so you should also check the Webmin section for information.
- Sites
- General
- Settings
- Greylisting
- Greylisting using Postgrey can now be setup using Virtualmin, via the new Email Greylisting page. In addition, whitelists for SMTP servers and email recipents can be managed.
- This feature was ported from the Pro version.
- VIrtualmin --> Email Messages --> Email Greylisting
- Plugins
- File Locations / Repo Locations / Key Locations
- Virtualmin - Shared!
- Virtualmin Professional
- Virtualmin GPL
- GPG Keys
- Install
- Install CSF (ConfigServerFirewall)
- If you have an administrative user with sudo ALL privileges, commonly the first user on an Ubuntu system, you can use that user to login to Virtualmin.
- Downloading and Installing Virtualmin – Virtualmin | Official method)
- Virtualmin Professional – Virtualmin - Virtualmin GPL is already an extremely powerful and flexible virtual hosting control panel, so we're frequently asked about the differences between Virtualmin GPL and Virtualmin Professional. So, if you were wondering whether you should upgrade, you've come to the right place.
- Once you hve downloaded the install script you can run the script with a help switch`install.sh --help` and it will give you help information and will not install anyting or modify your system.
- Automated Virtualmin Installation – Virtualmin
- There are two methods for installing Virtualmin. The first is a fully automated script described in this document, and the other is a manual installation documented in the Manual Virtualmin Installation page.
- This is the recommended method.
- Manual Installation – Virtualmin
- Unlike the Automated Virtualmin Installation, to make use of this installation type, your OS does not need to be freshly installed, nor does it need to be a supported operating system.
- This method, however, requires significantly more knowledge on the part of the person doing the installation, and a much larger time investment to insure that all necessary configuration is performed and all Virtualmin managed services are working correctly.
- The install will appear to get stuck but it is just slowly downloading assets. In total the installation took about 20mins.
- Should put certificates in the /etc/ rather than the custoemrs home directory?
- The MySQL module installs MariaDB
- Update / Upgrade
- Uninstall
- Installation Instructions
- Misc
- Convert from Apache to Nginx
- Install Virtualmin + Nginx
- HTTP/2
- HTTP/2 (Nginx)
- To edit virtual host
- Webmin --> Servers --> Nginx Webserver --> Virtual Hosts --> <your domain> - The HTTP2 option is here
- Apply settings
- This edits: /etc/nginx/sites-enabled/virtualmin.mydomain.com.conf
- Create http2 nginx virtual server - Help! (Home for newbies) - Virtualmin Community
- Virtualmin Nginx module configuration page (button with cog icon on the top left) has an option for it to be enabled by default.
- SPF / DKIM / DMARC
- Docker (via Cloudmin)
- Setting Up Docker Virtualization – Virtualmin
- Docker is not a true virtualization type like KVM, Xen or even LXC - instead it is a very lightweight container system that is typically used to run server processes in an environment that includes all their dependencies. Docker images normally contain a very basic Linux distribution and the files needed to run a single server like Apache, Nginx or MySQL.
- Webmin Docker module - An easy way to deploy containers - Webmin Docker module allows to create and manage Docker containers easily. It involves setting up a Docker Host, adding docker images, etc.
ISPConfig
| Features |
Status |
| |
|
| Primarily Designed For |
Small Hosting Company |
| Free/Paid |
Free |
| License |
BSD 3-Clause |
| Supported OS |
CentOS / Debian / Ubuntu |
| Supported Cloud Providers |
× |
| Install Method(s) |
Script |
| Web Console |
|
| |
|
| Virtualization |
OpenVZ |
| Web Server |
Apache / Nginx |
| TLS 1.3 |
√ |
| HTTP/2 |
√ |
| HTTP/3 & QUIC |
× |
| AutoSSL |
LetsEncrypt |
| DNS Server |
BIND / PowerDNS |
| DNS Zone Manager |
√ |
| DNSSEC |
√ |
| Multi-PHP |
√ |
| Database Server |
MySQL / MariaDB |
| Database Admin |
phpMyAdmin (not native) |
| Email Server |
Postfix / Dovecot |
| Webmail |
Roundcube / SquirrelMail / Exchange |
| FTP Server |
Pure-FTPd |
| Caching |
? |
| |
|
| Email Validation |
SPF / DKIM / DMARC |
| Spam Protection |
SpamAssassin / Rspamd / Amavis / Greylisting |
| Firewall |
√ |
| WAF |
× |
| Virus / Malware Scanning |
ClamAV / RKHunter / ISPProtect (Paid Addon) |
| |
|
| Reseller Accounts |
√ |
| User Accounts |
√ |
| Separate Panels (Admin / Users) |
× |
| Hosting Packages |
√ |
| Quotas |
Disk / Bandwidth |
| Traffic Statistics |
AWStats / Webalizer / GoAccess |
| Cron Jobs |
√ |
| Local Backup |
√ |
| External Backup |
? |
| File Manager |
× |
| |
|
| Extendable by Plugins |
√ |
| API |
√ |
| WHMCS Support |
√ |
| Panel Account Restrictions |
× |
| Server and Package Updates |
GUI |
| Automatic Updates |
√ |
| Can be Uninstalled |
× |
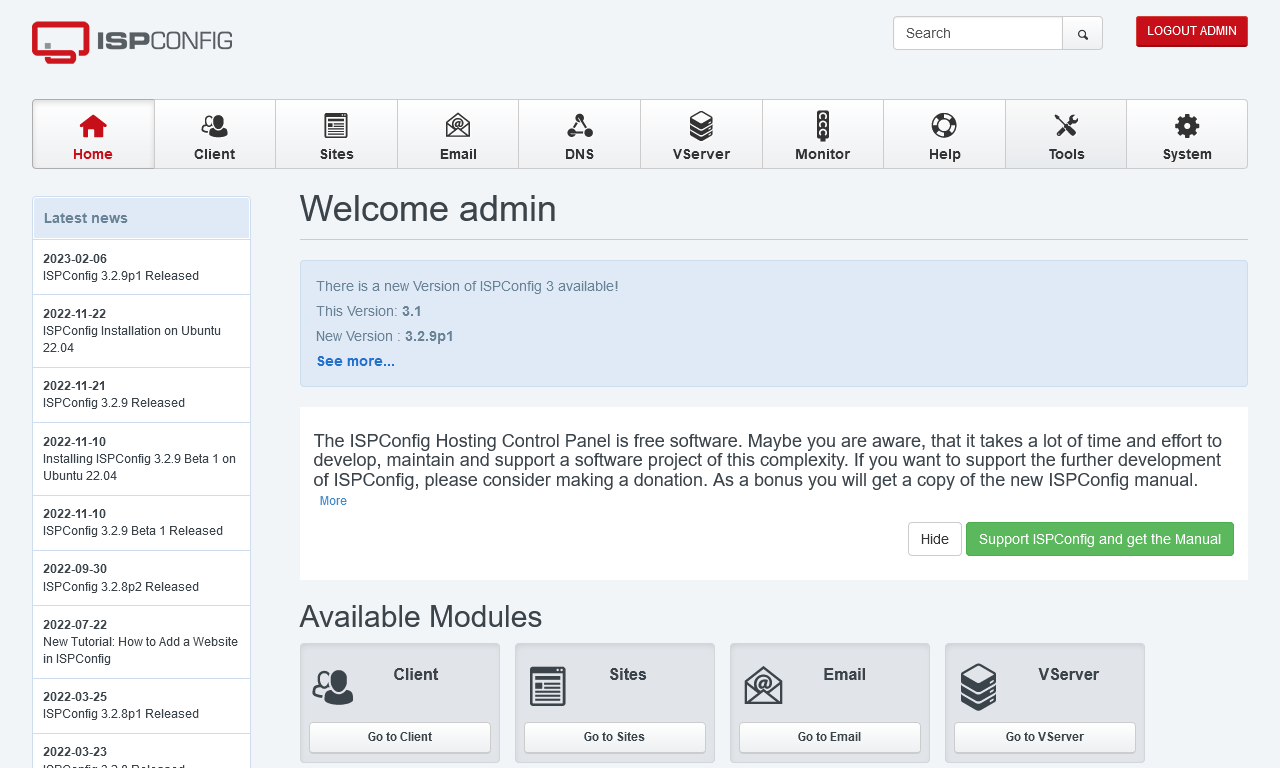
ISPConfig is an open source hosting control panel for Linux which allows website owners to easily administer their sites, similar to cPanel and Plesk. It also allows resellers to manage multiple accounts on multiple physical or virtual servers from one control panel. This panel has a lot of potential when it removes the need for manually installing the basics such as phpMyAdmin and a filemanager.
- Pros
- Can grab email from a remote email mailbox.
- Manage multiple servers from one control panel.
- Single server, multiserver and mirrored clusters.
- Virtualization
- This panel has a lot of technology added.
- The layout is very staright forward and easy to use.
- OpenVZ – allows virtual machines for client sites.
- Cons
- Some things have to be installed manually.
- The plugin system needs to be inproved (not verified this)
- The panel theme is a bit dated.
Notes
- Sites
- General
- Settings
- The SPF/DKIM/DMARC settings tabs in the DNS zone are really easy to use.
- phpMyAdmin
- Install phpMyAdmin (Instructions below not verified)
- Login as admin in ISPConfig, go to Management -> Update Manager -> Update
- install the phpMyAdmin package from www.ispconfig.org ( http://www.ispconfig.org/downloads/phpmyadmin-2.6.4-pl3.pkg ) using Management -> Update Manager -> Update.
- Opening phpMyAdmin directly from ISPConfig - Set the URL to your phpmyadmin installation under (System --> Interface config)
- Protect phpMyAdmin On An ISPConfig 3 Server (Debian) - With this small howto I explain how to protect your phpmyadmin installation on your Debian server with ISPConfig3 against hack attempts as much as possible.
- HTTP/2
- Plugins
- File Locations / Repo Locations / Key Locations
- Install
- Update / Upgrade
- Uninstall
- Installation Instructions
- Misc
FASTPANEL

| Features |
Status |
| |
|
| Primarily Designed For |
Small Hosting Company |
| Free/Paid |
Both |
| License |
Proprietary |
| Supported OS |
AlmaLinux / Rocky Linux / CentOS / Debian / Ubuntu |
| Supported Cloud Providers |
× |
| Install Method(s) |
Script |
| Web Console |
|
| |
|
| Virtualization |
× |
| Web Server |
Apache / Nginx |
| TLS 1.3 |
× |
| HTTP/2 |
√ |
| HTTP/3 & QUIC |
× |
| AutoSSL |
LetsEncrypt |
| DNS Server |
BIND |
| DNS Zone Manager |
√ |
| DNSSEC |
× |
| Multi-PHP |
√ |
| Database Server |
MySQL / PostgreSQL |
| Database Admin |
phpMyAdmin / phpPgAdmin |
| Email Server |
Exim / Dovecot |
| Webmail |
Roundcube |
| FTP Server |
ProFTPD |
| Caching |
Redis / Memcached |
| |
|
| Email Validation |
SPF / DKIM / DMARC |
| Spam Protection |
SpamAssassin |
| Firewall |
iptables |
| WAF |
Fail2Ban |
| Virus / Malware Scanning |
AI-Bolit |
| |
|
| Reseller Accounts |
√ |
| User Accounts |
√ |
| Separate Panels (Admin / Users) |
× |
| Hosting Packages |
× |
| Quotas |
Disk |
| Traffic Statistics |
AWStats |
| Cron Jobs |
√ |
| Local Backup |
√ |
| External Backup |
FTP / SCP / Dropbox / Google Drive |
| File Manager |
? |
| |
|
| Extendable by Plugins |
√ |
| API |
? |
| WHMCS Support |
? |
| Panel Account Restrictions |
× |
| Server and Package Updates |
× |
| Automatic Updates |
√ |
| Can be Uninstalled |
× |
FASTPANEL is a simple and functional server management panel. Create sites in a few clicks, manage mail, databases, backups; plan tasks, and analyze traffic. Set and configure access rights as you like: each site can be assigned to a single user. To improve the security of your account, enable two-factor authentication. Dynamic notifications allow you to be aware of the server and sites' status. Moreover, FASTPANEL includes a Web SSH client, site preview, and a favicon editor.
The free version is for most people and is not crippled in anyway. FASTPANEL only becomes a 'paid for' platform when you start selling it or supplying it to your clients for a fee. The relevant license is available on their website and you should check this license yourself to make sure you can follow the terms because I am not a lawyer. FASTPANEL seems to be made by the company FASTVPS. The code is 'Closed Source' but is updated regularly.
I found the panel to be designed in such a way that it hides all of the techincal stuff and just leaves options that you would need to resell and manage hosting. It is aimed at hosters and not techies who like to play, and this is a good thing because I dont think an admin could easily break this panel. It also features automatic updates which is one less thing to think about. The Apache/Nginx Reverse proxy setup (by default) gives excellent speed and requires no technical input to get working other than enabling a website. You need to make sure you setup the BIND DNS server before creating your website accoutns to make sute they get their DNS zone up automatically.
- Pros
- The GUI is beautiful and only has what the admins and users needs, everything else is hidden and taken care of.
- Very easy to setup and use.
- Documentation is brilliant.
- If you use Apache it has an option to use Nginx for static files (Reverse Proxy)
- Can create wildcard SSL certificates with lets encrypt.
- Can do self-signed SSL.
- Cons
- There is no community forum.
- Closed Source
- After installation you will need to install BIND (Local DNS Server) from the Applications page (but this is not hard) to allow you to configure DNS zones for your websites.
- The DNS can be a bit fiddly to setup.
- The default SPF record has `~all`
- Can only enable HTTP/2 if you have a cert installed
- phpMyAdmin has a not default theme applied.
Notes
- Sites
- General
- Settings
- Plugins
- File Locations / Repo Locations / Key Locations
- Install
- Update / Upgrade
- Uninstall
- Installation Instructions
- Misc
Sentora

| Features |
Status |
| |
|
| Primarily Designed For |
Small Hosting Company |
| Free/Paid |
Free |
| License |
GPLv3 |
| Supported OS |
CentOS / Ubuntu |
| Supported Cloud Providers |
× |
| Install Method(s) |
Script |
| Web Console |
|
| |
|
| Virtualization |
× |
| Web Server |
Apache |
| TLS 1.3 |
× |
| HTTP/2 |
× |
| HTTP/3 & QUIC |
× |
| AutoSSL |
× |
| DNS Server |
BIND |
| DNS Zone Manager |
√ |
| DNSSEC |
× |
| Multi-PHP |
× |
| Database Server |
MySQL / MariaDB |
| Database Admin |
phpMyAdmin |
| Email Server |
Postfix / Dovecot |
| Webmail |
Roundcube |
| FTP Server |
ProFTPD |
| Caching |
× |
| |
|
| Email Validation |
SPF |
| Spam Protection |
× |
| Firewall |
× |
| WAF |
× |
| Virus / Malware Scanning |
× |
| |
|
| Reseller Accounts |
√ |
| User Accounts |
√ |
| Separate Panels (Admin / Users) |
× |
| Hosting Packages |
√ |
| Quotas |
Disk / Bandwidth |
| Traffic Statistics |
Webalizer |
| Cron Jobs |
√ |
| Local Backup |
√ |
| External Backup |
× |
| File Manager |
× |
| |
|
| Extendable by Plugins |
√ |
| API |
√ |
| WHMCS Support |
× |
| Panel Account Restrictions |
× |
| Server and Package Updates |
× |
| Automatic Updates |
× |
| Can be Uninstalled |
× |
Sentora is based on an original fork of ZPanelCP and is an open-source web hosting control panel written in PHP and is designed to work with with Linux, UNIX and BSD based servers or computers. The Sentora software can turn a domestic or commercial server into a fully fledged, easy to use and manage web hosting server. In reality the panel needs a lot of development at the time or writing this article.
- Pros
- Very nice UI
- Has a lot of potential.
- Has an interactive installer.
- Cons
- The panel is on port 80.
- You MUST have setup DNS for the sub-domain that will be assigned to Sentora panel PRIOR to install. It is helpful but not mandatory.
- The installer ask for daft information like your timezone, address and email. If these are needed then they should be asked for in the GUI.
- Post Install: All passwords are saved in file /root/passwords.txt = Dangerous. Some users might not remove this file.
- A lot of required features are missing.
- Not everything is managed in the GUI.
- Cannot configure Apache from the GUI.
Notes
- Sites
- General
- Settings
- Plugins
- File Locations / Repo Locations / Key Locations
- Install
- Update / Upgrade
- Uninstall
- Installation Instructions
- Misc
Hepsia

| Features |
Status |
| |
|
| Primarily Designed For |
Small Hosting Company |
| Free/Paid |
n/a |
| License |
Proprietary / GPLv3 |
| Supported OS |
Debian |
| Supported Cloud Providers |
× |
| Install Method(s) |
? |
| Web Console |
|
| |
|
| Virtualization |
× |
| Web Server |
Apache / Nginx / OpenLiteSpeed / LiteSpeed Enterprise |
| TLS 1.3 |
√ |
| HTTP/2 |
√ |
| HTTP/3 & QUIC |
× |
| AutoSSL |
LetsEncrypt |
| DNS Server |
? |
| DNS Zone Manager |
√ |
| DNSSEC |
√ |
| Multi-PHP |
√ |
| Database Server |
MySQL / PostgreSQL |
| Database Admin |
phpMyAdmin / phpPgAdmin |
| Email Server |
√ (has email but i cannot identify the server) |
| Webmail |
Roundcube |
| FTP Server |
Pure-FTPd |
| Caching |
Memcached / Redis / Varnish |
| |
|
| Email Validation |
SPF |
| Spam Protection |
SpamAssassin |
| Firewall |
× |
| WAF |
ModSecurity |
| Virus / Malware Scanning |
× |
| |
|
| Reseller Accounts |
√ |
| User Accounts |
√ |
| Separate Panels (Admin / Users) |
× |
| Hosting Packages |
√ |
| Quotas |
Disk / Bandwidth |
| Traffic Statistics |
AWStats / Webalizer |
| Cron Jobs |
√ |
| Local Backup |
√ |
| External Backup |
Dropbox / Google Drive |
| File Manager |
√ |
| |
|
| Extendable by Plugins |
× |
| API |
? |
| WHMCS Support |
? |
| Panel Account Restrictions |
× |
| Server and Package Updates |
? |
| Automatic Updates |
? |
| Can be Uninstalled |
× |
Hepsia is a proprietary control panel only available through LiquidNet Ltd. resellers.
LiquidNet Ltd. is a UK-based company, headquartered in London, which was established in February 2003. Since then, our company has been offering a large number of professional services in the fields of web hosting, reseller hosting and domain registration.
- Pros
- Cons
- Not open source.
- Only availabe as part of reseller package from authorised various companies.
- Not all modern security features are present, eg DKIM, DMARC, AV file scanning.
Notes
- Sites
- General
- Hepsia Control Panel - Become a hosting reseller with no deposits & no reseller charges. Sell cloud web hosting at low prices with the help of our private-label reseller hosting program.
- Settings
- Plugins
- File Locations / Repo Locations / Key Locations
- Install
- Update / Upgrade
- Uninstall
- Installation Instructions
- Misc
SolidCP

| Features |
Status |
| |
|
| Primarily Designed For |
Small Hosting Company |
| Free/Paid |
Free |
| License |
CC BY-SA 4.0 |
| Supported OS |
Windows Server
|
| Supported Cloud Providers |
× |
| Install Method(s) |
Installer |
| Web Console |
Admin (HTTP) - http://<server-ip>:9001
|
| |
|
| Virtualization |
Hyper-V / Proxmox Virtualization |
| Web Server |
IIS |
| TLS 1.3 |
√ |
| HTTP/2 |
√ |
| HTTP/3 & QUIC |
√ |
| AutoSSL |
? |
| DNS Server |
BIND / PowerDNS / Microsoft / SimpleDNS Plus |
| DNS Zone Manager |
? |
| DNSSEC |
√ |
| Multi-PHP |
√ |
| Database Server |
MySQL / MariaDB / MSSQL / ColdFusion / ODBC (Access/Excel) |
| Database Admin |
× |
| Email Server |
Exchange / Ability / ArGoSoft / hMailServer / IceWarp / MailEnable / MDaemon / Merak / SmarterMail |
| Webmail |
OWA |
| FTP Server |
Microsoft / Filezilla / Gene6 / Serv-U |
| Caching |
? |
| |
|
| Email Validation |
SPF / DKIM / DMARC |
| Spam Protection |
Mailcleaner / Spam Experts |
| Firewall |
Microsoft |
| WAF |
× |
| Virus / Malware Scanning |
Mailcleaner |
| |
|
| Reseller Accounts |
√ |
| User Accounts |
√ |
| Separate Panels (Admin / Users) |
× |
| Hosting Packages |
√ |
| Quotas |
Disk / Bandwidth |
| Traffic Statistics |
AWStats / SmarterStats |
| Cron Jobs |
? |
| Local Backup |
× |
| External Backup |
× |
| File Manager |
? |
| |
|
| Extendable by Plugins |
× |
| API |
√ |
| WHMCS Support |
√ |
| Panel Account Restrictions |
× |
| Server and Package Updates |
? |
| Automatic Updates |
√ |
| Can be Uninstalled |
√ |
SolidCP is a complete management portal for Cloud Computing Companies and IT Providers to automate the provisioning of a full suite of Multi-Tenant services on servers. The powerful, flexible and fully open source SolidCP platform gives users simple point-and-click control over Server applications including IIS 10, Microsoft SQL Server 2022, MySQL, MariaDB, Active Directory, Microsoft Exchange 2019, Microsoft Sharepoint 2019, Microsoft RemoteApp/ RDS, Hyper-v and Proxmox Deployments.
We now make your system admin job a lot easier to freshly deploy a new server, and to keep them all up to date without much hassle! Setup all the software you need automatically from a Single Web server up to an Active directory based setup with Microsoft Exchange while having the system optimized for security.
SolidCP is a fork of WebsitePanel.
- Pros
- Sits on top of Microsoft Server and IIS.
- Cons
- This panel is not developed enough to be used in a commercial environment yet but is fine for running your own server at home if you want to use IIS and Microsoft Server.
- No plugins support.
Notes
- Sites
- General
- Settings
- Plugins
- File Locations / Repo Locations / Key Locations
- Install
- Update / Upgrade
- Uninstall
- Installation Instructions
- Misc
ZesleCP

| Features |
Status |
| |
|
| Primarily Designed For |
Small Hosting Company |
| Free/Paid |
Both |
| License |
Proprietary |
| Supported OS |
CentOS / AlmaLinux / Rocky Linux / Ubuntu |
| Supported Cloud Providers |
DigitalOcean |
| Install Method(s) |
Script |
| Web Console |
|
| |
|
| Virtualization |
× |
| Web Server |
Apache / Nginx / OpenLiteSpeed |
| TLS 1.3 |
√ |
| HTTP/2 |
√ |
| HTTP/3 & QUIC |
√ |
| AutoSSL |
LetsEncrypt |
| DNS Server |
BIND |
| DNS Zone Manager |
√ |
| DNSSEC |
× |
| Multi-PHP |
√ |
| Database Server |
MySQL |
| Database Admin |
phpMyAdmin |
| Email Server |
Exim / Dovecot |
| Webmail |
Roundcube |
| FTP Server |
Pure-FTPd |
| Caching |
Redis |
| |
|
| Email Validation |
SPF / DKIM / DMARC |
| Spam Protection |
× |
| Firewall |
× |
| WAF |
× |
| Virus / Malware Scanning |
× |
| |
|
| Reseller Accounts |
√ |
| User Accounts |
√ |
| Separate Panels (Admin / Users) |
× |
| Hosting Packages |
√ |
| Quotas |
Disk / Bandwidth |
| Traffic Statistics |
× |
| Cron Jobs |
√ |
| Local Backup |
√ |
| External Backup |
× |
| File Manager |
√ |
| |
|
| Extendable by Plugins |
√ |
| API |
√ |
| WHMCS Support |
√ |
| Panel Account Restrictions |
× |
| Server and Package Updates |
CLI |
| Automatic Updates |
× |
| Can be Uninstalled |
× |
ZesleCP is light-weight Web Hosting Control Platform. DigitalOcean's ZesleCP image provides a One-Click installer to automatically install Apache/Nginx, PHP, MySQL database server, Email servers with auto-configured SPF/MX/DKIM records, FTP server, One-click WordPress App, and many more useful features. The panel is beautifully designed panel with a lot of emphasis on easy of use, however is not very mature so a lot of things are missing or not implemented. I think this panel will become a lot better in the near future as it develops.
The Roadmap for this product is can easily be access from the website or from within the panel so the devlopers do want you to know what is going on with the software.
There are many different tiers and packages you can choose from to usit your needs from lifetime (check the LTS for the `lifetime of the product`) to free. I feel there are too many tiers of license but cost the top version for a business is quite acceptable.
- Pros
- The licensing tiers are well priced for businesses.
- There is a free tier.
- There is a lifetime license option.
- Beautifully designed and easy to navigate.
- No external backup.
- Public Roadmap
- The documentation is easy to follow.
- Cons
- The lower tiers do not allow you to have packages whichs means you cannot set a quota for these accounts which can be a bad thign just for security of your own personal sites.
- To use the free version you still need to create a license but this is easy to create.
- A lot of features you expect are missing or not implmented yet.
Notes
- Sites
- General
- Settings
- Plugins
- File Locations / Repo Locations / Key Locations
- Install
- Update / Upgrade
- Uninstall
- Installation Instructions
- Misc
InterWorx
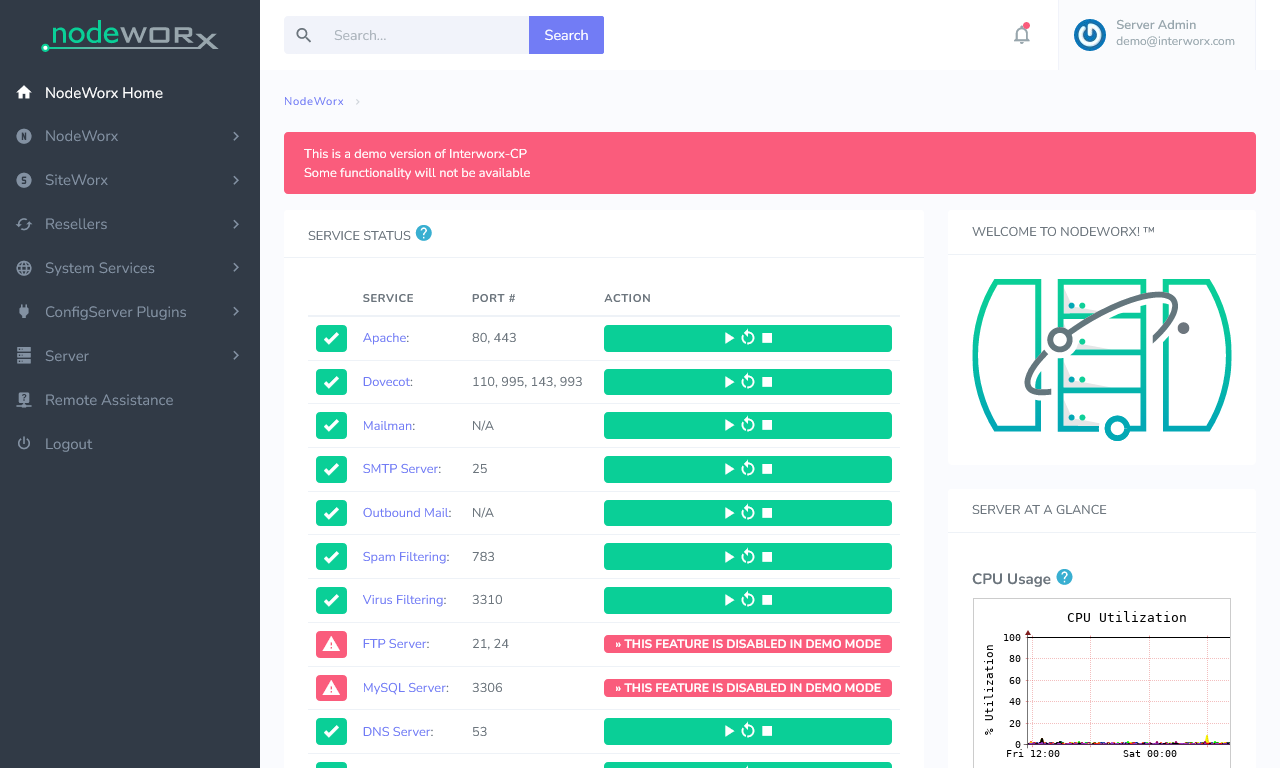
| Features |
Status |
| |
|
| Primarily Designed For |
Small Hosting Company |
| Free/Paid |
Free |
| License |
Proprietary |
| Supported OS |
RHEL / CentOS / AlmaLinux / Rocky Linux / CloudLinux |
| Supported Cloud Providers |
× |
| Install Method(s) |
Script |
| Web Console |
|
| |
|
| Virtualization |
× |
| Web Server |
Apache / LiteSpeed Enterprise |
| TLS 1.3 |
√ |
| HTTP/2 |
√ |
| HTTP/3 & QUIC |
√ |
| AutoSSL |
LetsEncrypt |
| DNS Server |
djbdns |
| DNS Zone Manager |
√ |
| DNSSEC |
× |
| Multi-PHP |
√ |
| Database Server |
MySQL / MariaDB |
| Database Admin |
phpMyAdmin |
| Email Server |
Dovecot / Mailman / QMail |
| Webmail |
Roundcube / Horde |
| FTP Server |
ProFTPD |
| Caching |
x |
| |
|
| Email Validation |
SPF / DKIM / DMARC |
| Spam Protection |
SpamAssassin |
| Firewall |
CSF / InterWorx-native APF firewall |
| WAF |
Fail2Ban / ModSecurity |
| Virus / Malware Scanning |
ClamAV / ImunifyAV / ImunifyAV+ / Imunify360 |
| |
|
| Reseller Accounts |
√ |
| User Accounts |
√ |
| Separate Panels (Admin / Users) |
× |
| Hosting Packages |
√ |
| Quotas |
Disk / Bandwidth |
| Traffic Statistics |
AWStats / Webalizer / Analog |
| Cron Jobs |
√ |
| Local Backup |
√ |
| External Backup |
FTP / SFTP / SCP / JetBackup / Acronis |
| File Manager |
√ |
| |
|
| Extendable by Plugins |
√ |
| API |
√ |
| WHMCS Support |
√ |
| Panel Account Restrictions |
√ The VPS tier restricts you to 4 vCPUs |
| Server and Package Updates |
CLI / GUI |
| Automatic Updates |
√ |
| Can be Uninstalled |
× |
InterWorx is web hosting control panel which is made of 2 panels, NodeWorx for the admin (similar to WHM) and SiteWorx for the end-user (similar to cPanel).
It is not as feature rich as cPanel and has a long way to go, but for the price it is not expensive. The UI is easy to use but is sparse and not always friendly and because the demo is crippled I struggled to get a feel for it as at every turn I just kept on getting told this feature has been turned ofd due to demo mode. The target market is larger hosting companies but even if the platform is stable, it is not ready (for me anyway) to be used for one of these companies but could be ok for a smaller hoster who likes hands on with Linux.
- Pros
- Not expensive.
- The different tiers are based on your server specs and not the number of accounts.
- The install script has a lot of caveats.
- Cons
- Activating an InterWorx license, either via the web browser or the command line, can only be attempted once on a server.
- If the license fails to activate you have to re-install the whole server. This on it's own stops me from using this panel.
- Port 2443 has to be open to the public internet to be able to use this panel becasue of the license server.
- The demo is crippled and most stuff you cannot see.
- The whole setup process is a pain.
- Website does not give much information on the technologies used.
- Missing lots of modern technologies.
- You will probably have to use the CLi for a lot fo things.
- The documentation and it's search could be better.
Notes
- Sites
- General
- Settings
- Plugins
- File Locations / Repo Locations / Key Locations
- Install
- Update / Upgrade
- Uninstall
- Installation Instructions
- Misc
LiveConfig

| Features |
Status |
| |
|
| Primarily Designed For |
Small Hosting Company |
| Free/Paid |
Paid |
| License |
Proprietary |
| Supported OS |
CentOS / Debian / Ubuntu / CloudLinux / openSUSE |
| Supported Cloud Providers |
× |
| Install Method(s) |
Script |
| Web Console |
|
| |
|
| Virtualization |
× |
| Web Server |
Apache / Nginx |
| TLS 1.3 |
× |
| HTTP/2 |
√ |
| HTTP/3 & QUIC |
× |
| AutoSSL |
LetsEncrypt |
| DNS Server |
BIND |
| DNS Zone Manager |
√ |
| DNSSEC |
√ |
| Multi-PHP |
√ |
| Database Server |
MySQL / MariaDB |
| Database Admin |
phpMyAdmin / phpPgAdmin |
| Email Server |
Postfix / Dovecot |
| Webmail |
Roundcube |
| FTP Server |
ProFTPD |
| Caching |
× |
| |
|
| Email Validation |
SPF / DKIM / DANE (TLSA) |
| Spam Protection |
SpamAssassin / Greylisting / DNSBL |
| Firewall |
× |
| WAF |
× |
| Virus / Malware Scanning |
ClamAV |
| |
|
| Reseller Accounts |
√ |
| User Accounts |
√ |
| Separate Panels (Admin / Users) |
× |
| Hosting Packages |
√ |
| Quotas |
Disk / Bandwidth |
| Traffic Statistics |
AWStats / Webalizer |
| Cron Jobs |
√ |
| Local Backup |
√ |
| External Backup |
Restic / Borg |
| File Manager |
√ |
| |
|
| Extendable by Plugins |
× |
| API |
√ |
| WHMCS Support |
√ |
| Panel Account Restrictions |
× |
| Server and Package Updates |
CLI |
| Automatic Updates |
√ |
| Can be Uninstalled |
× |
LiveConfig is a lightweight control panel software which has been developed by German programmers. It simplifies server configuration and cares for reliable and safe operation.
The simple licensing jas only three different editions, very competitive pricing but the lower tier with DNSSEC or SSL certificates should be avoided at all cost.
After having a look through this panel I feel it has a lot of work required to bring it anywhere near useable for a commercial client. I am sure it is stable but the distinct lack of features and the old style of GUI rules it out for me to use it or recommend it at this time.
You definately need to be familiar with the Linux CLI to use this panel.
- Pros
- Cons
- Old style GUI
- The lower price tier should not even be an option. DNSSEC and SSL certificates and an absolute must nowadays.
- Not updated oftern considering the lack of features.
Notes
- Sites
- General
- Settings
- Plugins
- File Locations / Repo Locations / Key Locations
- Install
- Update / Upgrade
- Uninstall
- Installation Instructions
- Misc
Websites and Email
These will typically be used for hobbyists or techies running their own servers from home but are not suitable to use in a commercial enviroment where you are selling hosting as they are missing a lot of the required features.
These can usually do a lot of the functions for your server via a GUI but are not suitable for hosting companies because they lack packages, resource restrictions, required features or do not offer a full range of services.
BlueOnyx

| Features |
Status |
| |
|
| Primarily Designed For |
Websites + Email |
| Free/Paid |
Free with Paid Addons |
| License |
Sun modified BSD license |
| Supported OS |
AlmaLinux / Rocky Linux / CentOS / RHEL |
| Supported Cloud Providers |
× |
| Install Method(s) |
ISO / Script / VirtualBox Image / VMware Image |
| Web Console |
|
| |
|
| Virtualization |
× |
| Web Server |
Apache / Nginx |
| TLS 1.3 |
√ |
| HTTP/2 |
√ |
| HTTP/3 & QUIC |
× |
| AutoSSL |
LetsEncrypt |
| DNS Server |
BIND |
| DNS Zone Manager |
√ |
| DNSSEC |
× |
| Multi-PHP |
√ |
| Database Server |
MariaDB |
| Database Admin |
phpMyAdmin |
| Email Server |
Postfix / Dovecot / Sendmail |
| Webmail |
Openwebmail (Paid Addon) / Roundcube (Paid Addon) |
| FTP Server |
ProFTPD |
| Caching |
× |
| |
|
| Email Validation |
SPF / DKIM |
| Spam Protection |
AV-SPAM (Paid Addon) / Greylisting |
| Firewall |
iptables / APF (Paid Addon) / Firewalld |
| WAF |
Fail2Ban (Paid Addon) |
| Virus / Malware Scanning |
AV-Spam (Paid Addon) |
| |
|
| Reseller Accounts |
× |
| User Accounts |
× |
| Separate Panels (Admin / Users) |
× |
| Hosting Packages |
× |
| Quotas |
Disk |
| Traffic Statistics |
Webalizer |
| Cron Jobs |
× |
| Local Backup |
Automated Backup (Paid Addon) |
| External Backup |
? |
| File Manager |
× |
| |
|
| Extendable by Plugins |
√ |
| API |
√ |
| WHMCS Support |
√ |
| Panel Account Restrictions |
× |
| Server and Package Updates |
CLI / GUI |
| Automatic Updates |
× |
| Can be Uninstalled |
× |
BlueOnyx is designed to be installed using the official ISOs (which contains the OS) so the disk is laid out correctly. There are VirtualBox and VMware images that you can use instead but for the keen Linux admins you can install manually using a script.
It is the mission of BlueOnyx to provide a fully-integrated Internet hosting platform that includes web, e-mail, DNS and file transfer services from a simple, user-friendly web-based interface that is easily installed on commodity hardware or virtual private server.
I found the software to be buggy. I had trouble installing BlueOnyx so I had to install it again and even then I was still getting warnings about PHP and email services not running. When you try and connect in to the web console by using the server IP it will sometimes redirect you to the hostname you configured earlier. After the installation is complete the console will give you 2 IP addresses and only one of them will work, it looks like the script is not reading the IP correctly or some sort of issue caused by Cockpit being installed aswell. I would like the links to not be hardcoded to use the domain name, this is especially useful for testing on local networks.
Once I logged you will find the web console is very dated which isn't a blocker but the lack of features is. A lot of expected features are via paid addons (AV-Spam and Webmail) via the shop which are not all cheap. The addons in the shop are dated and might not come with updates, meaning they are buy each time you need them updating. I don't mind paying for stuff but I think their revenue model is broken. They should have 2 versions, free and paid. The paid one should have all the apps in it, I hate having to roll my own and that is why I want a panel to do it all for me.
If the developers stopped building all of the ISO and VM images and just concentrated on the script install I think they would have more time to work on the project itself. The version I used is the end product of months of work and the developers said there might be issues so hopefully these will all get sorted out.
- Pros
- Comes does with Cockpit pre-installed (not activated) allowing server a management via a web console.
- You can submit bug reports through BlueOnyx itself which is useful
- BlueOnyx now has a GUI interface to easily manage usage of Docker images and containers via the GUI interface.
- Software is Buggy.
- Most required software is by addons and these are paid for.
- It supports HTTP/2 and TLSv1.3 out of the box for all relevant services and provides a better FTP integration, true SFTP and Chrooted Jails for siteAdmin's and Users.
- Server Management via Cockpit.
- Cons
- You need to manually enable suPHP on each account. This should really be on by default.
- There is no forum or community support which is a big issue for me, even if the devlopers don't respond on there the community can flag up issues that are found.
- Software repos are from BlueOnyx which means the software packages might not be updated as quickly as other repos.
- The free version needs to be expanded by expensive addons to make useable.
Notes
- Sites
- General
- Settings
- File Locations / Repo Locations / Key Locations
- Install
- Update / Upgrade
- Uninstall
- Installation Instructions
- Misc
aaPanel
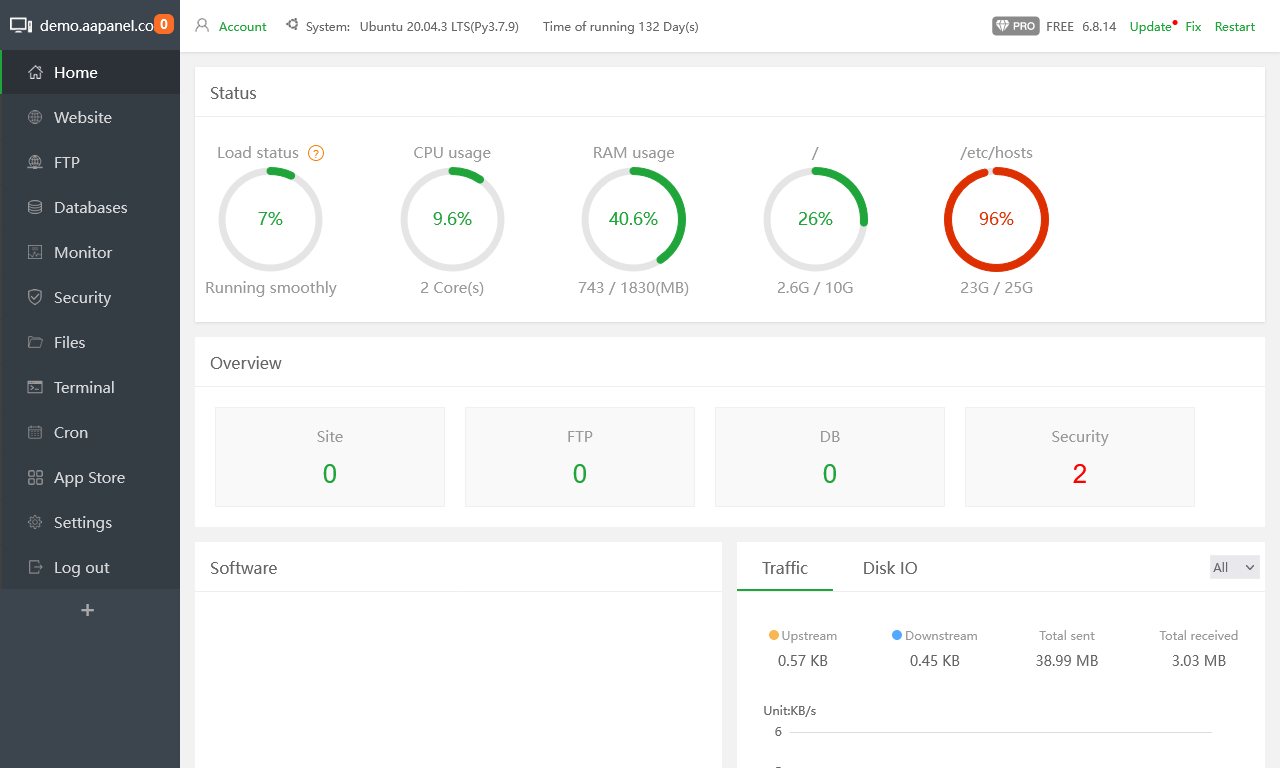
| Features |
Status |
| |
|
| Primarily Designed For |
Websites + Email |
| Free/Paid |
Both |
| License |
Pagoda Open Source License Agreement |
| Supported OS |
CentOS / Ubuntu / Deepin / Debian |
| Supported Cloud Providers |
× |
| Install Method(s) |
Script |
| Web Console |
|
| |
|
| Virtualization |
Docker (Paid Addon) |
| Web Server |
Apache / Nginx / OpenLightSpeed / NodeJS |
| TLS 1.3 |
√ |
| HTTP/2 |
√ |
| HTTP/3 & QUIC |
× |
| AutoSSL |
LetsEncrypt |
| DNS Server |
PowerDNS |
| DNS Zone Manager |
√ |
| DNSSEC |
× |
| Multi-PHP |
√ |
| Database Server |
MySQL / MariaDB / MongoDB / PostgreSQL |
| Database Admin |
phpMyAdmin |
| Email Server |
Postfix / Dovecot / Sendmail |
| Webmail |
Roundcube |
| FTP Server |
Pure-FTPd |
| Caching |
Redis / Memcached |
| |
|
| Email Validation |
SPF / DKIM |
| Spam Protection |
Anti-Spam Gateway (Amavis / SpamAssassin / ClamAV) / Rspamd / Greylisting |
| Firewall |
SYS Firewall / Firewalld / Nginx free firewall |
| WAF |
Fail2Ban / Apache WAF (Paid Addon) / Nginx WAF (Paid Addon) / Website Tamper-proof (Paid Addon) |
| Virus / Malware Scanning |
× |
| |
|
| Reseller Accounts |
× |
| User Accounts |
× |
| Separate Panels (Admin / Users) |
× |
| Hosting Packages |
× |
| Quotas |
× |
| Traffic Statistics |
Website Statistics (Paid Addon) |
| Cron Jobs |
√ |
| Local Backup |
√ |
| External Backup |
AWS S3 |
| File Manager |
√ |
| |
|
| Extendable by Plugins |
√ |
| API |
√ |
| WHMCS Support |
√ (Paid Addon from WHMCS) |
| Panel Account Restrictions |
× |
| Server and Package Updates |
GUI |
| Automatic Updates |
× |
| Can be Uninstalled |
√ |
aaPanel is a software that improves the efficiency of managing servers supports more than 100 functions such as one-click LEMP/LNMP/monitor/FTP/database. After more than 80 iterations, it is fully functional and safe, and has been approved and installed by millions of users around the world. aaPanel is the International version for BAOTA panel (www.bt.cn).
Free version is great for hobbyists but has no security. The paid version is not for hosting companys because it is single user admin Panel. So I am not sure who the paid version is targeted at.
aaPanel is a simple but powerful control panel for linux server with one-click install LNMP/LAMP/OpenLiteSpeed developing environment and software.
- Pros
- The paid version for the price is quite good value for money which includes all paid and free plugins in the store. Don't purchase plugins seperately.
- The panel is easy to use and has a very modern feel.
- A widely used panel.
- Docker support.
- Can be extended by plugins.
- Python support.
- Web Terminal
- Admin Access key - After setting, you can ONLY log in to the panel through the specified URL.
- Cons
- Free version has no security.
- Support is in China.
- Single user admin Panel.
- Security plugins are paid for.
- Installation depenmds on a hardcoded nameserver of 8.8.8.8
- No reseller functionality - It's not designed to work as a reseller platform.
- File manager does not show hidden dot files.
- Relies on assets in China.
Notes
- Sites
- General
- How to change your webserver to OpenLiteSpeed(beta)
- 'bt' - This is command not in the docs that brings up a menu on the termninal with some really useful commands.
- Paid for version
- If you want any of the paid plugins, go for the yearly subscription becasue it is not tha expensive.
- pro advantages - aaPanel - Hosting control panel
- 1 License per server
- Pro will enable you to access all of the items in the App Store that are paid, as long as your subscription is active.
- You can disconnect your previous server and connect your pro to another server, the stipulation is that you can only have one license per server at a time. I would recommend PRO over buying the App Store items individually.
- PRO can use all plugins.
- The difference between the free and professional version is whether you can use paid plugins, which can be viewed in the app store.
- Each VPS can only have one license. If the old VPS is no longer used, it can be replaced with a new VPS.
- Settings
- Plugins
- Linux Tools - Will allow you to change the nameservers
- Mail Server - After it is installed. Add the button to the home page, then go to the home page and click on 'Mail Server' button to configure.
- DNS Manager - This resets the nameserver back to 8.8.8.8
- MySQL/MariaDB
- phpMyAdmin
- one-click deployment - Quickly deploy common programs. These programs are not in the 'App Store'. Icludes Roundcube.
- File Locations / Repo Locations / Key Locations
- Install
- aaPanel Linux panel 6.8.12 installation tutorial - aaPanel - Detailed installation tutorials
- Install aaPanel
- This page has install instructions and a collection of terminal commands to configure the panel after installation.
- Run script as root.
- After you have selected your initial setup you need to wait for a while for it to finsih especially if it has to compile. You can watch the tasks complete in the 'Message Box' (Top-Left and click the orange ball)
- aaPanel wants port 888 open for some reason, don't open this unless you know what it is for.
- Issues with installing
- Update / Upgrade
- Uninstall
- Installation Instructions
- Disable all DNSBL / IP Blocklists / GEO-IP / DNS-Hijacking before you start installation.
- You can alter the /etc/resolv.conf and use your own DNS server.
- Misc
VestaCP (might be dead)
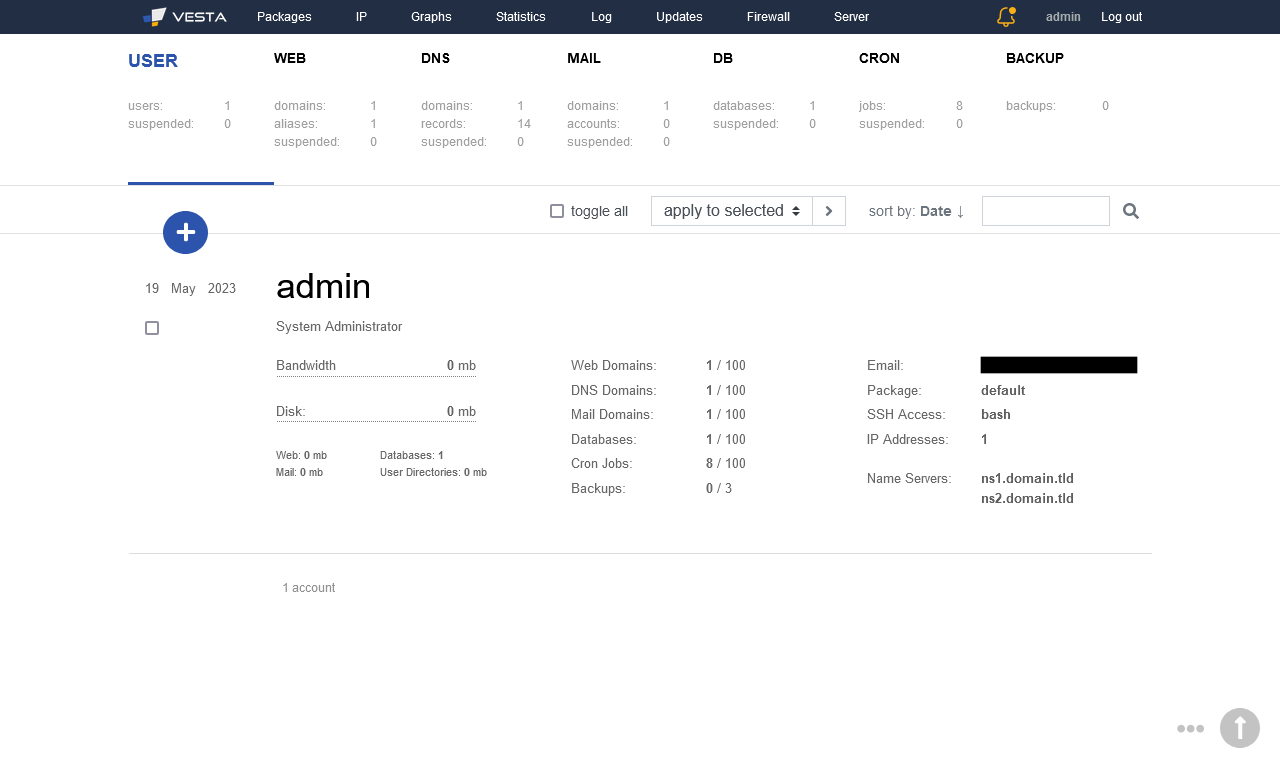
| Features |
Status |
| |
|
| Primarily Designed For |
Websites + Email |
| Free/Paid |
Free |
| License |
GPLv3 |
| Supported OS |
RHEL / CentOS / Ubuntu |
| Supported Cloud Providers |
× |
| Install Method(s) |
Script |
| Web Console |
|
| |
|
| Virtualization |
× |
| Web Server |
Apache / Nginx |
| TLS 1.3 |
× |
| HTTP/2 |
× |
| HTTP/3 & QUIC |
× |
| AutoSSL |
LetsEncrypt |
| DNS Server |
BIND |
| DNS Zone Manager |
√ |
| DNSSEC |
× |
| Multi-PHP |
√ |
| Database Server |
MariaDB / PostgreSQL |
| Database Admin |
phpMyAdmin (via URL) / phpPgAdmin (via URL) |
| Email Server |
Exim / Dovecot |
| Webmail |
Roundcube |
| FTP Server |
ProFTPD / VsFTPd |
| Caching |
× |
| |
|
| Email Validation |
SPF / DKIM / DMARC |
| Spam Protection |
SpamAssassin / ClamAV |
| Firewall |
iptables |
| WAF |
Fail2Ban |
| Virus / Malware Scanning |
× |
| |
|
| Reseller Accounts |
× |
| User Accounts |
√ |
| Separate Panels (Admin / Users) |
× |
| Hosting Packages |
√ |
| Quotas |
Disk / Bandwidth |
| Traffic Statistics |
AWStats / Webalizer |
| Cron Jobs |
√ |
| Local Backup |
√ |
| External Backup |
? |
| File Manager |
√ (Paid Addon) |
| |
|
| Extendable by Plugins |
√ |
| API |
√ |
| WHMCS Support |
√ |
| Panel Account Restrictions |
× |
| Server and Package Updates |
CLI / GUI |
| Automatic Updates |
√ |
| Can be Uninstalled |
√ |
VestaCP is web hosting control panel which has given brith to many forks. It is a simple panel that allows some one to manage their multiple websites. Vesta is an open source hosting control panel with a clean and focused interface without the clutter.
- Pros
- Has an advanced install wizard on the website where you can configure your install script to fit your requirements.
- Has a massive 381 command line commands that you can use.
- Supports Ioncube
- Softaculous plugin
- can add a secret key for the admin panel (called password on the installer configurator)
- Customer install script configurator available on the website with many options.
- Nice usage graphs.
- Cons
- Linux experience needed for some features
- You need to purchase a plugin called SFTP CHROOT that "Restrict user so that they cannot use SSH and access only their home directory."
- It is lacking many features that required today.
- Cannot manage the server from the panel.
- No Web Terminal
- Mulitple PHP is only avaiable with the `Apache only` setup and must be configured in the hosting package.
- File Manager is a paid for plugin.
Notes
- Sites
- General
- Settings
- Enable the file manager (Workaround)
- Change a user's password
- Multiple-PHP
- Plugins
- File Locations / Repo Locations / Key Locations
- Control Panel: /usr/local/vesta/
- Commands: /usr/local/vesta/bin/
- Install
- use wget and not curl for the install script.
- Update / Upgrade
- Uninstall
- Installation Instructions
- Misc
myVesta

| Features |
Status |
| |
|
| Primarily Designed For |
Websites + Email |
| Free/Paid |
Free |
| License |
GPLv3 |
| Supported OS |
Debian |
| Supported Cloud Providers |
× |
| Install Method(s) |
Script |
| Web Console |
|
| |
|
| Virtualization |
× |
| Web Server |
Apache / Nginx |
| TLS 1.3 |
× |
| HTTP/2 |
× |
| HTTP/3 & QUIC |
× |
| AutoSSL |
LetsEncrypt |
| DNS Server |
BIND |
| DNS Zone Manager |
√ |
| DNSSEC |
× |
| Multi-PHP |
√ |
| Database Server |
MySQL / MariaDB / PostgreSQL |
| Database Admin |
phpMyAdmin (via URL) / phpPgAdmin (via URL) |
| Email Server |
Exim / Dovecot |
| Webmail |
Roundcube |
| FTP Server |
ProFTPD / VsFTPd |
| Caching |
OPCache |
| |
|
| Email Validation |
SPF / DKIM / DMARC |
| Spam Protection |
SpamAssassin / ClamAV |
| Firewall |
iptables |
| WAF |
Fail2Ban |
| Virus / Malware Scanning |
× |
| |
|
| Reseller Accounts |
× |
| User Accounts |
√ |
| Separate Panels (Admin / Users) |
× |
| Hosting Packages |
√ |
| Quotas |
Disk / Bandwidth |
| Traffic Statistics |
AWStats / Webalizer |
| Cron Jobs |
√ |
| Local Backup |
√ |
| External Backup |
? |
| File Manager |
√ |
| |
|
| Extendable by Plugins |
√ |
| API |
√ |
| WHMCS Support |
√ |
| Panel Account Restrictions |
× |
| Server and Package Updates |
CLI / GUI |
| Automatic Updates |
√ |
| Can be Uninstalled |
× |
myVesta is a security and stability-focused fork of VestaCP, exclusively supporting Debian in order to maintain a streamlined ecosystem. Boasting a clean, clutter-free interface and the latest innovative technologies, our project is committed to staying synchronized with official VestaCP commits. We work independently to enhance security and develop new features, driven by our passion for contributing to the open-source community rather than monetary gain. As such, we will offer all features built for myVesta to the official VestaCP project through pull requests, without interfering with their development milestones.
This panel is Debian fork of VestaCP that is under development by one of the VestaCP developers. Focused on security and stability, with a lot of security improvements and because only Debian is supported this allowa myVesta to focus on only one eco-system and not wasting energy on compatibility with other Linux distributions.
- Pros
- Has an advanced install wizard on the website where you can configure your install script to fit your requirements.
- Has a massive 381 command line commands that you can use.
- Supports Ioncube
- Softaculous plugin
- can add a secret key for the admin panel (called password on the installer configurator)
- Customer install script configurator available on the website with many options.
- Nice usage graphs.
- Security focused.
- Active community
- Has some one click installers
- You can host NodeJS apps
- Can handle Laravel
- Cons
- No apache only mode, it has been removed
- Linux experience needed for some features
- You need to purchase a plugin called SFTP CHROOT that "Restrict user so that they cannot use SSH and access only their home directory."
- It is lacking many features that required today.
- Cannot manage the server from the panel.
- No Web Terminal
- Mulitple PHP is only avaiable with the `Apache only` setup and must be configured in the hosting package.
- Can only use on Debian which can be difficult to use.
- Mulit-PHP can be enabled on installation.
- No terminal in the GUI.
Notes
- Sites
- General
- Settings
- Plugins
- File Locations / Repo Locations / Key Locations
- Control Panel: /usr/local/vesta/
- Commands: /usr/local/vesta/bin/
- Install
- Update / Upgrade
- Uninstall
- Installation Instructions
- Misc
HestiaCP

| Features |
Status |
| |
|
| Primarily Designed For |
Websites + Email |
| Free/Paid |
Free |
| License |
GPLv3 |
| Supported OS |
Debian / Ubuntu |
| Supported Cloud Providers |
× |
| Install Method(s) |
Script |
| Web Console |
|
| |
|
| Virtualization |
× |
| Web Server |
Apache / Nginx |
| TLS 1.3 |
√ |
| HTTP/2 |
√ |
| HTTP/3 & QUIC |
× |
| AutoSSL |
LetsEncrypt |
| DNS Server |
BIND |
| DNS Zone Manager |
√ |
| DNSSEC |
√ |
| Multi-PHP |
√ |
| Database Server |
MySQL / MariaDB / PostgreSQL |
| Database Admin |
phpMyAdmin (via URL) / phpPgAdmin (via URL) |
| Email Server |
Exim / Dovecot |
| Webmail |
Roundcube / RainLoop |
| FTP Server |
ProFTPD / VsFTPd |
| Caching |
× |
| |
|
| Email Validation |
SPF / DKIM / DMARC |
| Spam Protection |
SpamAssassin / ClamAV |
| Firewall |
iptables |
| WAF |
Fail2Ban |
| Virus / Malware Scanning |
× |
| |
|
| Reseller Accounts |
× |
| User Accounts |
√ |
| Separate Panels (Admin / Users) |
× |
| Hosting Packages |
√ |
| Quotas |
Disk / Bandwidth |
| Traffic Statistics |
AWStats |
| Cron Jobs |
√ |
| Local Backup |
√ |
| External Backup |
FTP / SFTP / Rclone |
| File Manager |
√ |
| |
|
| Extendable by Plugins |
√ |
| API |
√ |
| WHMCS Support |
√ |
| Panel Account Restrictions |
× |
| Server and Package Updates |
CLI / GUI |
| Automatic Updates |
√ |
| Can be Uninstalled |
× |
HestiaCP is designed to provide administrators an easy to use web and command line interface, enabling them to quickly deploy and manage web domains, mail accounts, DNS zones, and databases from one central dashboard without the hassle of manually deploying and configuring individual components or services.
The goal of each panel might be different, especially as HestiaCP does not neccessarily aim at the things cPanel, Plesk or Directadmin do, instead it strives to be something that a system admin likes to use to make his tasks more easy or compact - while keeping as many options as possible to still manually change things in the system whereas I think most of the so called “competitors” want to be a replacement for a system admin at all. HestiaCP are not interested in competing in that area at all, but rather find what’s helping people who manage servers on a daily basis and for us it is very important that people see that from the beginning to have their expectations set correctly.
The project is a fork of VestaCP and is currently in active development.
- Pros
- Has an advanced install wizard on the website where you can configure your install script to fit your requirements.
- Has a massive 381 command line commands that you can use.
- Supports Ioncube
- Softaculous plugin
- Has its own one click installer for some apps.
- can add a secret key for the admin panel (called password on the installer configurator)
- Customer install script configurator available on the website with many options.
- Nice usage graphs.
- Security focused.
- Automated backups to SFTP, FTP and via Rclone with 50+ Cloud storage providers
- Excellent documentation
- A multi-member development team
- Has a new file manger with the normal features.
- Nice dark theme which is easy to navigate
- Active Community
- Cons
- Linux experience needed for some features
- You need to purchase a plugin called SFTP CHROOT that "Restrict user so that they cannot use SSH and access only their home directory."
- It is lacking many features that required today.
- Cannot manage the server from the panel.
- No Web Terminal
- You can't use 'Apache only' mode anymore with this panel.
- Can only use on Debian which can be difficult to use.
Notes
- Sites
- General
- Comparison between HestiaCP and other panels - Hestia Control Panel - Hestia Control Panel - Discourse
- It would be interesting to read some comparisons between HestiaCP and other panels, particularly the 3 biggest commercial CPs (cPanel, Plesk and Directadmin) and the popular FOSS CPs (e.g. Virtualmin/Webmin and ISPconfig). We might discuss aspects like performance, features, security, ease of use, integration with third party software (e.g. WHMCS, CSF firewall, Softaculous commercial script library etc).
- The goal of each panel might be different, especially HestiaCP does not neccessarily aim at the things cPanel, Plesk or Directadmin do, instead it strives to be something that a system admin likes to use to make his tasks more easy or compact - while keeping as much options as possible to still manually change things in the system. whereas I think most of the so called “competitors” want to be a replacement for a system admin at all. We are not interested in competing in that area at all, but rather find what’s helping people who manage servers on a daily basis. and for us it is very important that people see that from the beginning to have their expectations set correctly.
- Settings
- Plugins
- File Locations / Repo Locations / Key Locations
- Control Panel: /usr/local/vesta/
- Commands: /usr/local/vesta/bin/
- Install
- Make sure the is no system account called 'admin' preset as this is created during the install.
- "Hestia must be installed on top of a fresh operating system installation to ensure proper functionality. If on a VPS/KVM, and there is already an admin account, either delete that default admin ID, or use --force to continue with the installation. See custom installation below for further details."
- Install HestiaCP without installing Nginx - Install & Set-Up - Hestia Control Panel - Discourse
- I want to use Apache alone without using Nginx reverse proxy. Is there a way to install HestiaCP without installing Nginx? If it’s not possible, I’d like to disable Nginx and only use Apache.
- Cannot disable Nginx anymore.
- Update / Upgrade
- Uninstall
- Installation Instructions
- Misc
TinyCP
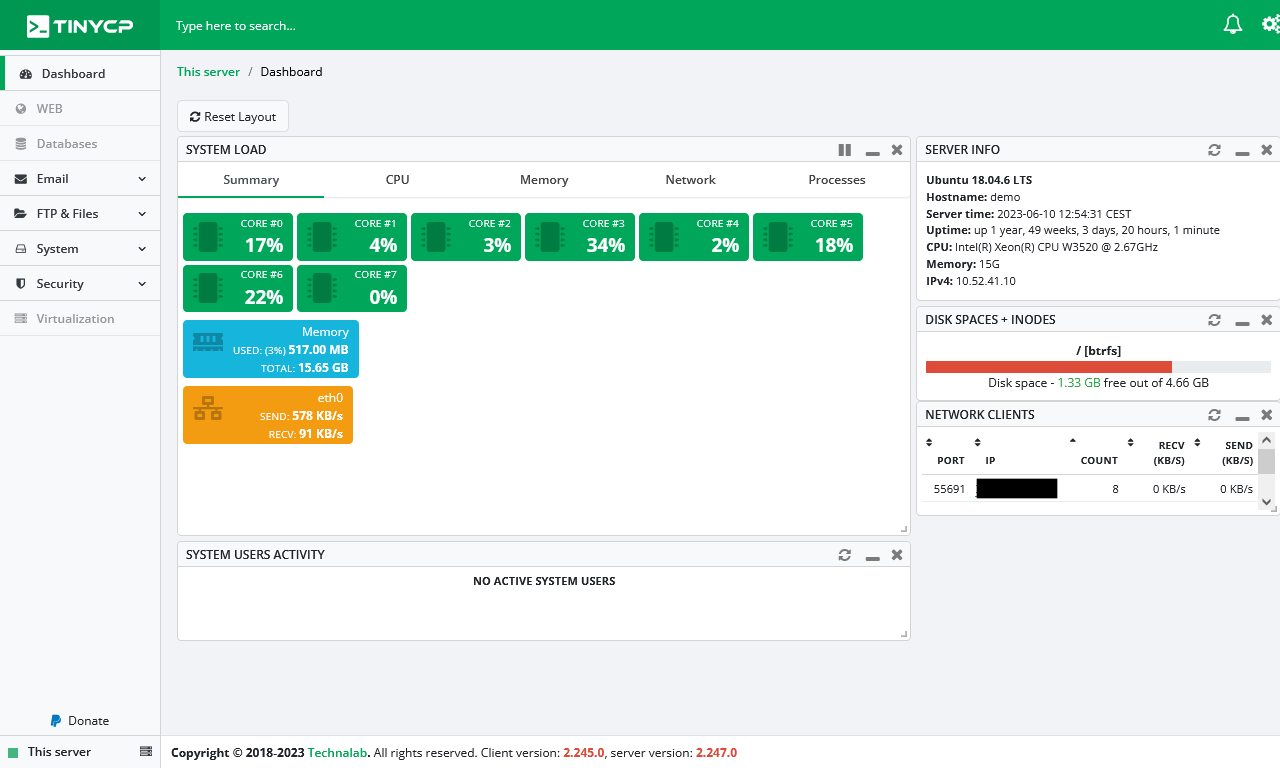
| Features |
Status |
| |
|
| Primarily Designed For |
Small Hosting Company |
| Free/Paid |
Free |
| License |
Proprietary / GPLv3 / MIT / Apache |
| Supported OS |
Debian / Ubuntu |
| Supported Cloud Providers |
× |
| Install Method(s) |
Script |
| Web Console |
|
| |
|
| Virtualization |
× |
| Web Server |
Apache / Nginx |
| TLS 1.3 |
√ |
| HTTP/2 |
√ |
| HTTP/3 & QUIC |
× |
| AutoSSL |
LetsEncrypt |
| DNS Server |
? |
| DNS Zone Manager |
√ |
| DNSSEC |
× |
| Multi-PHP |
√ |
| Database Server |
MySQL / MariaDB |
| Database Admin |
phpMyAdmin / phpPgAdmin |
| Email Server |
Exim / Dovecot |
| Webmail |
× |
| FTP Server |
VsFTPd |
| Caching |
× |
| |
|
| Email Validation |
SPF / DKIM |
| Spam Protection |
× |
| Firewall |
iptables |
| WAF |
Guard (Alternative to Fail2Ban) |
| Virus / Malware Scanning |
× |
| |
|
| Reseller Accounts |
× |
| User Accounts |
× |
| Separate Panels (Admin / Users) |
× |
| Hosting Packages |
× |
| Quotas |
× |
| Traffic Statistics |
× |
| Cron Jobs |
√ |
| Local Backup |
× |
| External Backup |
× |
| File Manager |
√ |
| |
|
| Extendable by Plugins |
× |
| API |
× |
| WHMCS Support |
× |
| Panel Account Restrictions |
× |
| Server and Package Updates |
GUI |
| Automatic Updates |
× |
| Can be Uninstalled |
√ |
TinyCP is originally designed for the company behind it Technalab. They made it free to use so its easier to catch bugs. Beside that they truly listen to the community. The way this control panel has been created is the best available compared to any other control panel! TinyCP doesn't have its own php,nginx,apache libraries and so when you do not want it anymore or experience issues you can easily just remove TinyCP and reinstall it without having the troubles of making a complete new install on your server.
This control panel is extremely easy to use and has a lot of potential. It needs to have some more features added and a few edges smoothed of but definately one to watch. Syle and ease of use over more features is definately the motto.
- Pros
- To keep your system clean and healthy, TinyCP does not install system packages by default.
If you need this functionality, just install required packages. This could also be a con if they were not so easy to install when prompted.
- Can add and remove Apache modules from the GUI.
- Can add and remove PHP modules from the GUI.
- Cons
- Not as feature rich as some panels.
- Technical information is not easy to find.
Notes
- Sites
- General
- Settings
- Plugins
- File Locations / Repo Locations / Key Locations
- Install
- Update / Upgrade
- Uninstall
- Installation Instructions
- Misc
ISPmanager

| Features |
Status |
| |
|
| Primarily Designed For |
Websites + Email |
| Free/Paid |
Paid |
| License |
Proprietary |
| Supported OS |
CentOS / AlmaLinux / Rocky Linux / Debian / Ubuntu / VzLinux |
| Supported Cloud Providers |
× |
| Install Method(s) |
Script |
| Web Console |
|
| |
|
| Virtualization |
Docker |
| Web Server |
Apache / Nginx / OpenLiteSpeed / NodeJS / ihttpd (for backend) |
| TLS 1.3 |
√ |
| HTTP/2 |
√ |
| HTTP/3 & QUIC |
× |
| AutoSSL |
LetsEncrypt |
| DNS Server |
BIND |
| DNS Zone Manager |
√ |
| DNSSEC |
√ |
| Multi-PHP |
√ |
| Database Server |
MySQL / MariaDB / Percona / PostgreSQL |
| Database Admin |
phpMyAdmin / phpPgAdmin |
| Email Server |
Exim / Dovecot |
| Webmail |
Roundcube / Custom |
| FTP Server |
ProFTPD |
| Caching |
× |
| |
|
| Email Validation |
SPF |
| Spam Protection |
SpamAssassin / DNSBL |
| Firewall |
iptables |
| WAF |
× |
| Virus / Malware Scanning |
ImunifyAV (paid) / Dr.Web (paid) |
| |
|
| Reseller Accounts |
× |
| User Accounts |
√ |
| Separate Panels (Admin / Users) |
× |
| Hosting Packages |
× |
| Quotas |
× |
| Traffic Statistics |
Custom |
| Cron Jobs |
√ |
| Local Backup |
√ |
| External Backup |
× |
| File Manager |
√ |
| |
|
| Extendable by Plugins |
√ |
| API |
√ |
| WHMCS Support |
√ |
| Panel Account Restrictions |
Each Tiers has domain limits |
| Server and Package Updates |
CLI / GUI |
| Automatic Updates |
√ |
| Can be Uninstalled |
× |
ISPmanager is a Linux-based control panel for managing dedicated and game and VPS web servers, as well as selling shared hosting. This panel is not really developed for reselling hosting although it does it. There are many expected features missing which would make managing more than a few customers tiresome. This panel might have its place but I am not sure where. Over the coming years ISPmanager might be worth revisiting.
ISPmanager uses Docker to support alternate versions of the database servers. Each MySQL-server is deployed in a separate container, and this eliminates the conflict of libraries. ihttpd is used as a lightweight web-server for the admin GUI.
- Pros
- WireGuard VPN server
- Actively developed
- Cons
- Limited features
- The website is chaotic and feels like several softwares bolted together
- No live demo, but you can get one on request.
Notes
- Sites
- General
- Settings
- Plugins
- File Locations / Repo Locations / Key Locations
- Install
- Update / Upgrade
- Uninstall
- Installation Instructions
- Misc
Web Applications
These stacks are primarily for developing and hosting your apps and not traditional websites, but some may have the option to create a website. These 'Panels' are usually hosted in the Cloud but can be hosted on your own server with the same effect.
If you only need to Web Applications, this category is for you. If you need to host email these platforms are not a good solution for you. In that case, you should consider standard control panels. The apps created with these platforms usually send emails.
Wordpress websites are Apps and this is why some of these platforms refer to Web Hosting for clients. these platforms deploy 1 server for each website.
These platforms usual have some type of remote server monitoring as this goes hand in hand in deploying software to remote servers.
CloudPanel
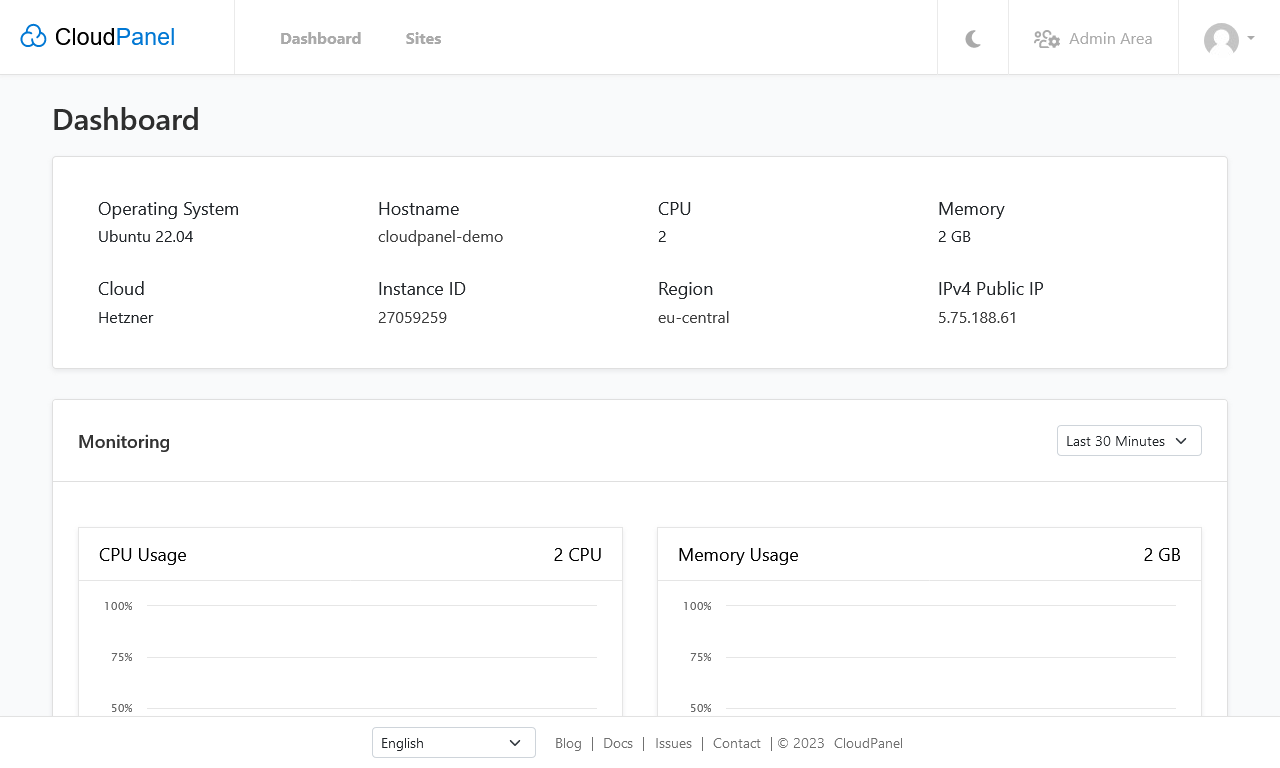
| Features |
Status |
| |
|
| Primarily Designed For |
Web Applications |
| Free/Paid |
Free |
| License |
Proprietary |
| Supported OS |
Debian / Ubuntu |
| Supported Cloud Providers |
Amazon Web Services (AWS) / DigitalOcean / Hetzner Cloud / Google Compute Engine (GCE) / Microsoft Azure / Vultr |
| Install Method(s) |
Script / Cloud Quick Launch |
| Web Console |
|
| |
|
| Virtualization |
× |
| Web Server |
Nginx |
| TLS 1.3 |
√ |
| HTTP/2 |
√ |
| HTTP/3 & QUIC |
× |
| AutoSSL |
LetsEncrypt |
| DNS Server |
× |
| DNS Zone Manager |
× |
| DNSSEC |
× |
| Multi-PHP |
√ |
| Database Server |
MySQL / MariaDB |
| Database Admin |
× |
| Email Server |
× |
| Webmail |
× |
| FTP Server |
ProFTPD |
| Caching |
Redis / Varnish |
| |
|
| Email Validation |
× |
| Spam Protection |
× |
| Firewall |
iptables / Uncomplicated Firewall (UFW) |
| WAF |
Fail2Ban |
| Virus / Malware Scanning |
× |
| |
|
| Reseller Accounts |
× |
| User Accounts |
√ |
| Separate Panels (Admin / Users) |
× |
| Hosting Packages |
× |
| Quotas |
× |
| Traffic Statistics |
× |
| Cron Jobs |
√ |
| Local Backup |
√ |
| External Backup |
AWS S3 |
| File Manager |
× |
| |
|
| Extendable by Plugins |
× |
| API |
× |
| WHMCS Support |
× |
| Panel Account Restrictions |
× |
| Server and Package Updates |
× |
| Automatic Updates |
× |
| Can be Uninstalled |
√ |
CloudPanel is a free and modern server control panel to configure and manage a server with an obsessive focus on simplicity. Run PHP, NodeJS, Static Websites, Reverse Proxies and Python applications in no time on a High-Performance Technology Stack.
CloudPanel is a free web hosting control panel with advanced features for server management. It offers a fast technology stack built with lightweight components for maximum performance. The control panel provides a suite of tools to strengthen security at the server level.
This panel supports all big cloud providers such as AWS, DigitalOcean, and Google Cloud Platform (GCP) and it comes with advanced cloud functionalities. The control panel provides a suite of tools to strengthen security at the server level. You can also install this panel on Debian or Ubuntu. I would recommend the administrator having Linux knowlege when using this panel as it seems very basic.
- Pros
- Free (No contract or hidden costs)
- Supports ALL PHP Apps.
- Easy to use interface
- Up and running within 60 seconds
- Maximum performance & security
- Advanced cloud functionalities
- Supports Multiple PHP Versions & all PHP Apps
- Specific PHP configuration for each domain
- NGINX Support
- Free SSL Certificates
- No restrictions
- Supports > 10 languages
- Actively developed and supported
- 30+ configured vHost templates for various apps (see here)
- Cons
- No File Manager
- Niche audience
- Very basic
- Assumes you are already behind a firewall/WAF already becasue it is designed for the cloud.
Notes
- Sites
- General
- Settings
- Plugins
- File Locations / Repo Locations / Key Locations
- Install
- Update / Upgrade
- Uninstall
- Installation Instructions
- Misc
ApisCP

| Features |
Status |
| |
|
| Primarily Designed For |
Web Applications |
| Free/Paid |
Both |
| License |
Proprietary |
| Supported OS |
RHEL / CentOS |
| Supported Cloud Providers |
× |
| Install Method(s) |
Script |
| Web Console |
|
| |
|
| Virtualization |
Docker (not directly supported yet) |
| Web Server |
Apache |
| TLS 1.3 |
√ |
| HTTP/2 |
√ |
| HTTP/3 & QUIC |
× |
| AutoSSL |
LetsEncrypt |
| DNS Server |
BIND / PowerDNS / Cloud via API |
| DNS Zone Manager |
√ |
| DNSSEC |
× |
| Multi-PHP |
√ |
| Database Server |
MySQL / PostgreSQL |
| Database Admin |
phpMyAdmin / phpPgAdmin |
| Email Server |
Postfix / Dovecot |
| Webmail |
× |
| FTP Server |
VsFTPd |
| Caching |
Redis |
| |
|
| Email Validation |
SPF / DKIM / DMARC |
| Spam Protection |
SpamAssassin / Rspamd / Pigeonhole |
| Firewall |
iptables / Rampart |
| WAF |
Fail2Ban / ModSecurity / Evasive / Fortification |
| Virus / Malware Scanning |
ClamAV |
| |
|
| Reseller Accounts |
× |
| User Accounts |
√ |
| Separate Panels (Admin / Users) |
× |
| Hosting Packages |
× |
| Quotas |
Disk |
| Traffic Statistics |
Google Analytics / Bandwidth |
| Cron Jobs |
× |
| Local Backup |
√ |
| External Backup |
Git (for Snapshots) / Bacula / Duplicity / JetBackup (under consideration) |
| File Manager |
√ |
| |
|
| Extendable by Plugins |
√ |
| API |
√ |
| WHMCS Support |
× |
| Panel Account Restrictions |
× |
| Server and Package Updates |
CLI / GUI |
| Automatic Updates |
√ |
| Can be Uninstalled |
√ |
ApisCP is an open-source hosting platform for your PHP, Ruby, Node, Python, and Go projects. Set-it-and-forget-it SSL with 1-click, automatically update web apps, securely isolate and clone WordPress sites, block threats real-time, fix OS configuration drifts, resolve service defects, and keep your site operating at peak performance.
ApisCP is built by a hosting company for hosting. It's the only hosting platform built for its original audience by its intended audience. ApisCP integrates a wealth of knowledge rolled up into best practices that achieves higher throughput, lower TTFB, fewer burnt CPU cycles, and denser servers than any other product on the market.
ApisCP automatically configures services, tunes on demand, and provides defect monitoring including monthly integrity checks through Bootstrapper.
- Pros
- Modern interface.
- Affordable and fair pricing for the panel.
- Mail server.
- Access to free DNS-only & development licenses.
- Lifetime licenses are available.
- Cons
- You need to be a devloper to take advantage of this software.
- No webmail.
Notes
- Sites
- General
- Client-level backups
- Files are only backed up when requested by the user and they are downloaded to the local machine.
- Snapshots are uploaded to a Git provider and can be automatic.
- Database files are backedup automatically every night.
- Settings
- Plugins
- File Locations / Repo Locations / Key Locations
- Install
- Update / Upgrade
- Uninstall
- Installation Instructions
- Misc
Moss (Dead)
| Features |
Status |
| |
|
| Primarily Designed For |
Web Applications |
| Free/Paid |
Both |
| License |
Proprietary |
| Supported OS |
Ubuntu |
| Supported Cloud Providers |
Custom Server (via SSH) |
| Install Method(s) |
PaaS |
| Web Console |
|
| |
|
| Virtualization |
Docker / OpenVZ / Hyper-V / Proxmox Virtualization |
| Web Server |
Apache / Nginx / NodeJS |
| TLS 1.3 |
? |
| HTTP/2 |
? |
| HTTP/3 & QUIC |
× |
| AutoSSL |
-LetsEncrypt |
| DNS Server |
× |
| DNS Zone Manager |
× |
| DNSSEC |
× |
| Multi-PHP |
× |
| Database Server |
MySQL / MongoDB |
| Database Admin |
phpMyAdmin / phpPgAdmin |
| Email Server |
Postfix |
| Webmail |
× |
| FTP Server |
? |
| Caching |
Redis / Memcached |
| |
|
| Email Validation |
? |
| Spam Protection |
× |
| Firewall |
iptables |
| WAF |
Fail2Ban |
| Virus / Malware Scanning |
× |
| |
|
| Reseller Accounts |
× |
| User Accounts |
× |
| Separate Panels (Admin / Users) |
× |
| Hosting Packages |
× |
| Quotas |
× |
| Traffic Statistics |
? |
| Cron Jobs |
× |
| Local Backup |
? |
| External Backup |
? |
| File Manager |
× |
| |
|
| Extendable by Plugins |
× |
| API |
× |
| WHMCS Support |
× |
| Panel Account Restrictions |
× |
| Server and Package Updates |
GUI |
| Automatic Updates |
? |
| Can be Uninstalled |
√ |
Moss is SaaS control panel aimed at App developers. After a lot of reading of their website and guessing, I think I figured out how works.
After everything is setup, you develop your App on your Git repo as normal and then Moss can automatically provision the code directly onto a webserver. This means changes and updates can be pushed very quickly without having to setup servers or push code.
Moss concentrates on apps that use the web technoloigies : PHP, NodeJS NodeJS, PHP, or static (Javascript + HTML + CSS),Laravel, Symfony and WordPress, but is not limited to them.
The Workflow:
- Link Moss.sh with yur Git provider
- Link moss.sh with your fresh Ubuntu LTS server.
- SSH is used here so there are no restrictions on server location, but you must use Ubuntu LTS.
- Build your App on your Git repository.
- Deploy a pre-configured web stack on your Ubuntu server using Moss.
- This deploys and configures the web and database server for your web app – either NodeJS, PHP, or static (Javascript + HTML + CSS) sites. In addition, Moss natively supports web development frameworks like Laravel, Symfony and WordPress, but is not limited to just them.
- Use Moss to take the code from the Git repository and deploy it straight to the webserver either manually or setup an automated task based on code pushes.
- Further code updates will just repeat the last task and the rest of the configuration is already done.
- Moss.sh can also monitor servers for issues that might occur.
- Pros
- Automates App development
- Can actively monitor servers for issues.
- Cons
- Only supports Ubuntu LTS for the server OS.
- Limited technologies supported.
- Website documentation is limited.
Notes
- Sites
- General
- What is Moss? - Moss - What Moss can do and what makes it unique Moss may be different things to different people. Moss may be different things to different people. Some users think of it as a modern, cloud-based control panel for their servers. Others see it as a kind of PaaS they can use on their own infrastructure. To us, Moss is a virtual sysadmin that helps you deploy, manage, and monitor your servers and websites easily and securely.
- Basic concepts - Moss - Users, resources, actions, and operations: everything you need to know to get started with Moss.
- Create sites vs deploy sites - Moss - What's the difference between creating a site in a server, and actually deploying it?
- How to deploy your WordPress site with Bedrock and Moss - Moss - Create and deploy WordPress sites using Bedrock and the Free Plan of Moss. Follow a typical PHP development workflow and deploy without downtime.
- Settings
- Plugins
- File Locations / Repo Locations / Key Locations
- Install
- Update / Upgrade
- Uninstall
- Installation Instructions
- Misc
ClusterCS

| Features |
Status |
| |
|
| Primarily Designed For |
Hosting Company |
| Free/Paid |
Both |
| License |
Proprietary |
| Supported OS |
RHEL / CentOS / Amazon Linux 2 |
| Supported Cloud Providers |
Amazon Web Services (AWS) / DigitalOcean / Microsoft Azure / Vultr / UpCloud |
| Install Method(s) |
SaaS |
| Web Console |
|
| |
|
| Virtualization |
× |
| Web Server |
Apache / Nginx / Lighttpd / NodeJS |
| TLS 1.3 |
√ |
| HTTP/2 |
√ |
| HTTP/3 & QUIC |
× |
| AutoSSL |
LetsEncrypt |
| DNS Server |
× |
| DNS Zone Manager |
√ |
| DNSSEC |
× |
| Multi-PHP |
× |
| Database Server |
MySQL / MariaDB |
| Database Admin |
phpMyAdmin |
| Email Server |
Postfix / Dovecot |
| Webmail |
Roundcube |
| FTP Server |
ProFTPD |
| Caching |
Redis / Memcached / Varnish |
| |
|
| Email Validation |
SPF / DKIM / DMARC / DANE (TLSA) |
| Spam Protection |
SpamAssassin |
| Firewall |
iptables |
| WAF |
Fail2Ban |
| Virus / Malware Scanning |
ClamAV |
| |
|
| Reseller Accounts |
√ |
| User Accounts |
√ |
| Separate Panels (Admin / Users) |
× |
| Hosting Packages |
√ |
| Quotas |
√ |
| Traffic Statistics |
× |
| Cron Jobs |
√ |
| Local Backup |
× |
| External Backup |
FTP / AWS S3 |
| File Manager |
× |
| |
|
| Extendable by Plugins |
× |
| API |
√ |
| WHMCS Support |
× |
| Panel Account Restrictions |
Different amount of servers and domains on each tier |
| Server and Package Updates |
GUI |
| Automatic Updates |
√ |
| Can be Uninstalled |
√ |
ClusterCS is a SaaS cloud based control panel. It deploys an agent that communicates between your server and the management engine through SSH, and does not require any server pre-install, making it easy to manage and monitor your web server. All the configurations are done using standard configuration files without any vendor lock in options. With ClusterCS, you have a platform that unifies all your servers and instances into a single location, making it easy for you to manage them. Management of your servers, such as creating domains and databases, will be done via SSH.
This panel has a unique selling point that you can configure server clusters for things like HA (High Availability) configurations. The GUI is located on the companies servers so is a true SaaS platform whereas the servers are where you put them. High availability is indeed a unique selling point, but you can also manage multiple servers from the same panel interface.
ClusterCS is a SaaS platform. The entire logic runs on our systems which stay connected to your servers to issue configuration commands so the actual install of ClusterCS is on your servers, it is a cloud mangement platform? Your servers and data is completely independant, ClusterCS only issue linux command to reflect the changes you request via the panel. You can think of ClusterCS just as any other panel, the only difference being that it configures your servers via SSH commands instead of running them locally.
Reselling is an important part of ClusterCS and it contains a wide range of features. Currently it doesn't support integration with WHMCS but that will be available fairly soon and ClusterCS are actually releasing a major new version of ClusterCS that has been under development for about a year. There are many new features and there is a new interface for the panel in the upcoming release. When released ClusterCS will support API integrations with major Cloud providers to create servers from within our interface but until then currently commands are only supported by SSH.
- Pros
- Free personal account (No CC needed, Free forever, for 1 server and 5 domains max).
- The GUI is very clean and easy to use.
- Build and manage HA clusters with ease.
- Cons
- Limited configurations (Recipes) due to a small set of options.
Notes
- Sites
- General
- Settings
- Plugins
- File Locations / Repo Locations / Key Locations
- Install
- Update / Upgrade
- Uninstall
- Installation Instructions
- Misc
RunCloud
| Features |
Status |
| |
|
| Primarily Designed For |
Web Applications |
| Free/Paid |
Paid |
| License |
Proprietary |
| Supported OS |
Ubuntu |
| Supported Cloud Providers |
Amazon Web Services (AWS) / DigitalOcean / Google Cloud Platform (GCP) / Vultr / Akamai (formerly Linode) / Webdock.io |
| Install Method(s) |
SaaS |
| Web Console |
|
| |
|
| Virtualization |
Docker |
| Web Server |
Apache / Nginx / OpenLiteSpeed / NodeJS |
| TLS 1.3 |
√ |
| HTTP/2 |
√ |
| HTTP/3 & QUIC |
√ |
| AutoSSL |
LetsEncrypt |
| DNS Server |
× |
| DNS Zone Manager |
× |
| DNSSEC |
× |
| Multi-PHP |
√ |
| Database Server |
MySQL / MariaDB |
| Database Admin |
phpMyAdmin |
| Email Server |
Postfix |
| Webmail |
× |
| FTP Server |
× |
| Caching |
Redis / Memcached |
| |
|
| Email Validation |
? |
| Spam Protection |
× |
| Firewall |
iptables / Firewalld |
| WAF |
Fail2Ban |
| Virus / Malware Scanning |
× |
| |
|
| Reseller Accounts |
× |
| User Accounts |
× |
| Separate Panels (Admin / Users) |
× |
| Hosting Packages |
× |
| Quotas |
× |
| Traffic Statistics |
× |
| Cron Jobs |
√ |
| Local Backup |
× |
| External Backup |
Custom |
| File Manager |
√ |
| |
|
| Extendable by Plugins |
× |
| API |
√ |
| WHMCS Support |
√ |
| Panel Account Restrictions |
Different Tiers, Different Options |
| Server and Package Updates |
GUI |
| Automatic Updates |
× |
| Can be Uninstalled |
√ |
Runcloud is SaaS panel that will allow you to quickly deploy websites as Web Applications.
RunCloud is basically a server management panel, a step towards autonomy and control over your own servers, giving you access to install multiple websites, easy database setup, enhanced security measures, and automatic updates.
RunCloud serves as a control panel that offers one-click solutions to common tasks including web deployment with Git, script installation to install common Content Management Systems, and provides the most optimized server stack including Nginx, Apache, Redis, MariaDB, Memcached, and more.
They don't have a specific fully-managed subscription for now, But we'll help you with any issues regarding RunCloud services.
- Pros
- No manual deployment is needed since RunCloud lets you push your code to GitHub, BitBucket or even custom Git repository and then automatically deploys them into your staging or production server.
- Cons
Notes
- Sites
- General
- Settings
- Plugins
- File Locations / Repo Locations / Key Locations
- Install
- Update / Upgrade
- Uninstall
- Installation Instructions
- Misc
ServerPilot
| Features |
Status |
| |
|
| Primarily Designed For |
Web Applications |
| Free/Paid |
Paid |
| License |
Proprietary |
| Supported OS |
Ubuntu |
| Supported Cloud Providers |
Amazon Web Services (AWS) / DigitalOcean / Google Cloud Platform (GCP) / Microsoft Azure |
| Install Method(s) |
SaaS |
| Web Console |
|
| |
|
| Virtualization |
Docker / OpenVZ / Hyper-V / Proxmox Virtualization |
| Web Server |
Apache / Nginx |
| TLS 1.3 |
√ |
| HTTP/2 |
√ |
| HTTP/3 & QUIC |
× |
| AutoSSL |
LetsEncrypt |
| DNS Server |
× |
| DNS Zone Manager |
× |
| DNSSEC |
× |
| Multi-PHP |
√ |
| Database Server |
MySQL |
| Database Admin |
× |
| Email Server |
Postfix |
| Webmail |
× |
| FTP Server |
× |
| Caching |
× |
| |
|
| Email Validation |
× |
| Spam Protection |
× |
| Firewall |
iptables |
| WAF |
× |
| Virus / Malware Scanning |
× |
| |
|
| Reseller Accounts |
× |
| User Accounts |
× |
| Separate Panels (Admin / Users) |
× |
| Hosting Packages |
× |
| Quotas |
× |
| Traffic Statistics |
Custom |
| Cron Jobs |
× |
| Local Backup |
× |
| External Backup |
× |
| File Manager |
× |
| |
|
| Extendable by Plugins |
× |
| API |
√ |
| WHMCS Support |
√ |
| Panel Account Restrictions |
No. of Servers and No. Apps |
| Server and Package Updates |
GUI |
| Automatic Updates |
√ |
| Can be Uninstalled |
√ |
ServerPilot is a cloud service for hosting WordPress and other PHP websites on servers at DigitalOcean, Amazon, Google, or any other server provider. You can think of ServerPilot as a modern, centralized hosting control panel.
If security is critical to your business and you only need to run fast PHP applications, you should use ServerPilot. If you need to host email, ServerPilot is not a good solution for you. In that case, you should consider cPanel or other control panels. However, you might want to consider other options for hosting mail.
- Pros
- Cons
- You have to do a lot of things manually.
Notes
- Sites
- General
- What Is ServerPilot? - ServerPilot - ServerPilot is a cloud service for hosting WordPress and other PHP websites on servers at DigitalOcean, Amazon, Google, or any other server provider.
- Settings
- Plugins
- File Locations / Repo Locations / Key Locations
- Install
- Update / Upgrade
- Uninstall
- Installation Instructions
- Misc
Ploi
| Features |
Status |
| |
|
| Primarily Designed For |
Web Applications |
| Free/Paid |
Both |
| License |
Proprietary |
| Supported OS |
Ubuntu |
| Supported Cloud Providers |
Amazon Web Services (AWS) / DigitalOcean / Hetzner Cloud / Vultr / Akamai (formerly Linode) / Custom Server (via SSH) |
| Install Method(s) |
SaaS |
| Web Console |
|
| |
|
| Virtualization |
Docker |
| Web Server |
Nginx / NodeJS |
| TLS 1.3 |
√ |
| HTTP/2 |
√ |
| HTTP/3 & QUIC |
× |
| AutoSSL |
LetsEncrypt |
| DNS Server |
× |
| DNS Zone Manager |
√ |
| DNSSEC |
× |
| Multi-PHP |
× |
| Database Server |
MySQL / MariaDB / PostgreSQL |
| Database Admin |
phpMyAdmin / phpPgAdmin |
| Email Server |
WildDuck |
| Webmail |
× |
| FTP Server |
× |
| Caching |
Redis |
| |
|
| Email Validation |
× |
| Spam Protection |
× |
| Firewall |
iptables / Uncomplicated Firewall (UFW) |
| WAF |
Fail2Ban |
| Virus / Malware Scanning |
× |
| |
|
| Reseller Accounts |
× |
| User Accounts |
× |
| Separate Panels (Admin / Users) |
× |
| Hosting Packages |
× |
| Quotas |
× |
| Traffic Statistics |
× |
| Cron Jobs |
√ |
| Local Backup |
√ |
| External Backup |
FTP / SFTP / AWS S3 / Dropbox / Google Drive / DigitalOcean Spaces |
| File Manager |
√ |
| |
|
| Extendable by Plugins |
× |
| API |
√ |
| WHMCS Support |
× |
| Panel Account Restrictions |
× |
| Server and Package Updates |
CLI / GUI |
| Automatic Updates |
√ |
| Can be Uninstalled |
√ |
Ploi is a modern looking SaaS platform which has a lot of features and a free tier, however the deploy security options are very weak and lacking.
- Pros
- Can install an email server
- Tehre is a free tier
- Cons
- Limited security options
- No forum.
Notes
- Sites
- Homepage
- Demo
- Changelog
- Code Repository
- Forum
- Docs
- Plugins
- General
- Settings
- Plugins
- File Locations / Repo Locations / Key Locations
- Install
- Update / Upgrade
- Uninstall
- Installation Instructions
- Misc
GridPane
| Features |
Status |
| |
|
| Primarily Designed For |
Web Applications (WordPress only) |
| Free/Paid |
Both |
| License |
Proprietary |
| Supported OS |
Ubuntu |
| Supported Cloud Providers |
Amazon Web Services (AWS) / DigitalOcean / Hetzner Cloud / Google Compute Engine (GCE) / Vultr / Akamai (formerly Linode) / OVH / UpCloud / Custom Server (via SSH) |
| Install Method(s) |
SaaS |
| Web Console |
|
| |
|
| Virtualization |
× |
| Web Server |
Nginx / OpenLiteSpeed |
| TLS 1.3 |
√ |
| HTTP/2 |
√ |
| HTTP/3 & QUIC |
√ |
| AutoSSL |
LetsEncrypt |
| DNS Server |
× |
| DNS Zone Manager |
√ |
| DNSSEC |
× |
| Multi-PHP |
× |
| Database Server |
MariaDB / Percona |
| Database Admin |
× |
| Email Server |
× |
| Webmail |
× |
| FTP Server |
× |
| Caching |
Redis |
| |
|
| Email Validation |
× |
| Spam Protection |
× |
| Firewall |
iptables / Uncomplicated Firewall (UFW) |
| WAF |
Fail2Ban / ModSecurity / OWASP / 7G |
| Virus / Malware Scanning |
ClamAV / Maldet |
| |
|
| Reseller Accounts |
× |
| User Accounts |
× |
| Separate Panels (Admin / Users) |
× |
| Hosting Packages |
× |
| Quotas |
× |
| Traffic Statistics |
× |
| Cron Jobs |
√ |
| Local Backup |
√ |
| External Backup |
AWS S3 / Wasabi / Backblaze |
| File Manager |
× |
| |
|
| Extendable by Plugins |
× |
| API |
× |
| WHMCS Support |
× |
| Panel Account Restrictions |
Different tiers, different options |
| Server and Package Updates |
GUI |
| Automatic Updates |
√ |
| Can be Uninstalled |
√ |
GridPane is a SaaS that has a modern feel. While offering a free tier the first paid level is quite high and is definately aimed at small developers and agencies.
- Pros
- Public Roadmap
- App development on your Git repo that can be pushed to live sites
- Snapshot Failover™ is a proprietary high availability setup that allows you to clone all of the sites on one server over to another server and set a syncing schedule for those paired servers of as little as one hour.
- Documentation is well written.
- The website is modern and easy to navigate
- Cons
- Only works for WordPress Apps.
- No Apache
- No .htaccess support
Notes
- Sites
- General
- Settings
- Plugins
- File Locations / Repo Locations / Key Locations
- Install
- Update / Upgrade
- Uninstall
- Installation Instructions
- Misc
Cleavr
| Features |
Status |
| |
|
| Primarily Designed For |
Web Applications |
| Free/Paid |
Paid |
| License |
Proprietary |
| Supported OS |
Ubuntu |
| Supported Cloud Providers |
Amazon Web Services (AWS) / DigitalOcean / Hetzner Cloud / Vultr / Akamai (formerly Linode) / Oracle Cloud / UpCloud / Custom Server (via SSH) |
| Install Method(s) |
SaaS |
| Web Console |
|
| |
|
| Virtualization |
Docker |
| Web Server |
Nginx / NodeJS |
| TLS 1.3 |
√ |
| HTTP/2 |
√ |
| HTTP/3 & QUIC |
× |
| AutoSSL |
LetsEncrypt |
| DNS Server |
× |
| DNS Zone Manager |
√ |
| DNSSEC |
× |
| Multi-PHP |
× |
| Database Server |
MySQL / MariaDB / PostgreSQL |
| Database Admin |
× |
| Email Server |
× |
| Webmail |
× |
| FTP Server |
× |
| Caching |
Redis / Memcached |
| |
|
| Email Validation |
× |
| Spam Protection |
× |
| Firewall |
iptables / Uncomplicated Firewall (UFW) |
| WAF |
Fail2Ban |
| Virus / Malware Scanning |
× |
| |
|
| Reseller Accounts |
× |
| User Accounts |
× |
| Separate Panels (Admin / Users) |
× |
| Hosting Packages |
× |
| Quotas |
× |
| Traffic Statistics |
× |
| Cron Jobs |
√ |
| Local Backup |
√ |
| External Backup |
AWS S3 / DigitalOcean Spaces / Wasabi / Backblaze |
| File Manager |
× |
| |
|
| Extendable by Plugins |
× |
| API |
× |
| WHMCS Support |
× |
| Panel Account Restrictions |
× |
| Server and Package Updates |
CLI / GUI |
| Automatic Updates |
× |
| Can be Uninstalled |
√ |
Cleavr is Saas that has quite a few options but is not exhaustive and does not use Apache. The spread of Apps that can be deployed is better than some other providers and with the price is goog value for money.
The cleavr website is modern, not cluttered so is eay to navigate.
- Pros
- Push-to-deploy : Automatically deploy your apps when you push updates to GitHub, GitLab, or Bitbucket.
- Many different Apps that can be deployed.
- Pricing is excellent.
- Cons
- Documentation is limited and the search is broken.
- Limited security options.
- Only uses Nginx as the webserver.
Notes
- Sites
- General
- Settings
- Plugins
- File Locations / Repo Locations / Key Locations
- Install
- Update / Upgrade
- Uninstall
- Installation Instructions
- Misc
SpinupWP
| Features |
Status |
| |
|
| Primarily Designed For |
Web Applications (WordPress only) |
| Free/Paid |
Paid |
| License |
Proprietary |
| Supported OS |
Ubuntu |
| Supported Cloud Providers |
-Amazon Web Services (AWS) / -DigitalOcean / Hetzner Cloud / -Google Compute Engine (GCE) / Google Cloud Platform (GCP) / Microsoft Azure / -Vultr / -Akamai (formerly Linode) / Oracle Cloud / Webdock.io / Alibaba Cloud / Contabo / OVH / UpCloud / Webdock.io / -Custom Server (via SSH) |
| Install Method(s) |
SaaS |
| Web Console |
|
| |
|
| Virtualization |
× |
| Web Server |
Nginx |
| TLS 1.3 |
√ |
| HTTP/2 |
√ |
| HTTP/3 & QUIC |
× |
| AutoSSL |
LetsEncrypt |
| DNS Server |
× |
| DNS Zone Manager |
× |
| DNSSEC |
× |
| Multi-PHP |
√ |
| Database Server |
MySQL |
| Database Admin |
× |
| Email Server |
× |
| Webmail |
× |
| FTP Server |
× |
| Caching |
Redis |
| |
|
| Email Validation |
× |
| Spam Protection |
× |
| Firewall |
iptables / Uncomplicated Firewall (UFW) |
| WAF |
Fail2Ban |
| Virus / Malware Scanning |
× |
| |
|
| Reseller Accounts |
× |
| User Accounts |
× |
| Separate Panels (Admin / Users) |
× |
| Hosting Packages |
× |
| Quotas |
× |
| Traffic Statistics |
× |
| Cron Jobs |
√ |
| Local Backup |
× |
| External Backup |
AWS S3 / Google Cloud Platform (GCP) / DigitalOcean Spaces / Wasabi / Backblaze |
| File Manager |
× |
| |
|
| Extendable by Plugins |
× |
| API |
√ |
| WHMCS Support |
× |
| Panel Account Restrictions |
Number of servers |
| Server and Package Updates |
CLI / GUI |
| Automatic Updates |
√ |
| Can be Uninstalled |
√ |
SpinupWP is a SaaS product aimed at App developers utilising WordPress. It is not for hoster reselling. The price point and limited fuctionality makes the personal tier pointless as you might aswell setup your own WordPress server.
If you are an experienced developer and need a cloud platform to automat WordPress deploys you might as well look at this to see if it gives you the features you need. One interesting thiing is that theya re developing their own aPI whic is currently in Beta.
- Pros
- Push-to-deploy
- WordPress focussed
- API (in beta)
- Cons
- Limited security options.
- No Apache
Notes
- Sites
- General
- Settings
- Plugins
- File Locations / Repo Locations / Key Locations
- Install
- Update / Upgrade
- Uninstall
- Installation Instructions
- Misc
Cloudways
| Features |
Status |
| |
|
| Primarily Designed For |
Web Applications |
| Free/Paid |
Paid |
| License |
Proprietary |
| Supported OS |
Ubuntu |
| Supported Cloud Providers |
in-house / Amazon Web Services (AWS) / Google Cloud Platform (GCP) |
| Install Method(s) |
PaaS |
| Web Console |
|
| |
|
| Virtualization |
× |
| Web Server |
Apache / Nginx |
| TLS 1.3 |
√ |
| HTTP/2 |
√ |
| HTTP/3 & QUIC |
√ |
| AutoSSL |
LetsEncrypt |
| DNS Server |
× |
| DNS Zone Manager |
√ |
| DNSSEC |
× |
| Multi-PHP |
√ |
| Database Server |
MySQL / MariaDB |
| Database Admin |
× |
| Email Server |
× |
| Webmail |
× |
| FTP Server |
× |
| Caching |
Redis / Memcached / Varnish / Cloudflare CDN (paid) / in-house WordPress cache plugin (Breeze) |
| |
|
| Email Validation |
× |
| Spam Protection |
× |
| Firewall |
DigitalOcean Cloud Firewall |
| WAF |
Cloudflare WAF |
| Virus / Malware Scanning |
× |
| |
|
| Reseller Accounts |
× |
| User Accounts |
× |
| Separate Panels (Admin / Users) |
× |
| Hosting Packages |
× |
| Quotas |
× |
| Traffic Statistics |
× |
| Cron Jobs |
× |
| Local Backup |
Droplet Backups (paid) |
| External Backup |
× |
| File Manager |
× |
| |
|
| Extendable by Plugins |
√ |
| API |
√ |
| WHMCS Support |
× |
| Panel Account Restrictions |
More money, more server resources |
| Server and Package Updates |
CLI / GUI |
| Automatic Updates |
√ |
| Can be Uninstalled |
√ |
Cloudways is PaaS (from DigitalOcean) and actually runs on top of AWS and Digital Ocean (and a bunch of other IaaS platforms as well). When you buy infrastructure on Cloudways, you can specify the underlying infrastructure provider. They’ll automatically do the configuration, set up your servers, and customize (usually, with a single click) your applications on those servers. Plus, they offer actual humans 24-7-365 that can provide you with support.
The Cloudways platform features >99.9% uptime, super fast page load time, pro-active app monitoring, dedicated workflows, leading security including add ons from Cloudflare and 24/7 premium support.
- Pros
- Widely supported
- Their infrastructure is large.
- Backed by DigitalOcean
- Staging environment
- Cons
- Backups are not easy and are an additional cost.
- No outward going backups. you have to use an external 3rd part (i.e. BackupSheep or SnapShooter).
- Only for advanced users or hobbyiest to have a play.
- The stack offered has no security.
Notes
- Sites
- General
- What is DigitalOcean used for? - WebsiteBuilderInsider.com - DigitalOcean is a cloud hosting company that allows customers to deploy and manage applications online. It offers a wide range of cloud services, including compute, storage, and networking, as well as platform-as-a-service offerings.
- Settings
- Plugins
- File Locations / Repo Locations / Key Locations
- Install
- Update / Upgrade
- Uninstall
- Installation Instructions
- Misc
ZoomAdmin (might be dead)
| Features |
Status |
| |
|
| Primarily Designed For |
Web Applications |
| Free/Paid |
Paid |
| License |
Proprietary |
| Supported OS |
Ubuntu |
| Supported Cloud Providers |
Amazon Web Services (AWS) / DigitalOcean / Microsoft Azure / Custom Server (via SSH) |
| Install Method(s) |
SaaS |
| Web Console |
|
| |
|
| Virtualization |
Docker |
| Web Server |
? |
| TLS 1.3 |
× |
| HTTP/2 |
√ |
| HTTP/3 & QUIC |
× |
| AutoSSL |
LetsEncrypt |
| DNS Server |
× |
| DNS Zone Manager |
× |
| DNSSEC |
× |
| Multi-PHP |
× |
| Database Server |
MySQL / PostgreSQL |
| Database Admin |
phpMyAdmin / pgAdmin |
| Email Server |
× |
| Webmail |
× |
| FTP Server |
× |
| Caching |
Redis |
| |
|
| Email Validation |
× |
| Spam Protection |
× |
| Firewall |
× |
| WAF |
× |
| Virus / Malware Scanning |
× |
| |
|
| Reseller Accounts |
× |
| User Accounts |
× |
| Separate Panels (Admin / Users) |
× |
| Hosting Packages |
× |
| Quotas |
× |
| Traffic Statistics |
Disk |
| Cron Jobs |
√ |
| Local Backup |
× |
| External Backup |
× |
| File Manager |
× |
| |
|
| Extendable by Plugins |
× |
| API |
× |
| WHMCS Support |
× |
| Panel Account Restrictions |
× |
| Server and Package Updates |
CLI / GUI |
| Automatic Updates |
× |
| Can be Uninstalled |
× |
ZoomAdmin is web hosting control panel which provides a cloud-based platform to easily manage and maintain your servers and apps, using intuitive web interface and modern technology.
This platform utilises Docker containers for all of its apps rather than seperate servers.
- Pros
- Many different programming languages supported.
- Quickly create/deploy apps in your favorite tech, e support Ruby, Ruby and Rails, ASP.NET Core, PHP, Python, NodeJS, Go, JAVA, PostgreSQL, and many more.
- Host multiple apps on your Servers
- 1-Click Deployments of many of the popular apps, i.e. WordPress, Jenkins, Redis, nopCommerce and many more.
- Pre-configured app containers make it super easy for anyone to start creating container apps with default settings without deep knowledge of containers.
- Advanced Docker settings, including having your own Dockerfile.
- All apps are run in a separate Docker container.
- Cons
- Website is looking old.
- You have to do a lot of things manually.
Notes
- Sites
- Homepage
- Demo
- Changelog
- Code Repository
- Forum
- Docs
- Plugins
- General
- Settings
- Plugins
- File Locations / Repo Locations / Key Locations
- Install
- Update / Upgrade
- Uninstall
- Installation Instructions
- Misc
HC - Website Hosting Module
| Features |
Status |
| |
|
| Primarily Designed For |
Hosting Company / Small Hosting Company / Websites + Email / Web Applications / Web Applications (WordPress only) / Personal Server |
| Free/Paid |
Paid |
| License |
Proprietary |
| Supported OS |
Windows / Linux |
| Supported Cloud Providers |
? |
| Install Method(s) |
SaaS |
| Web Console |
? |
| |
|
| Virtualization |
? |
| Web Server |
? |
| TLS 1.3 |
? |
| HTTP/2 |
? |
| HTTP/3 & QUIC |
? |
| AutoSSL |
? |
| DNS Server |
? |
| DNS Zone Manager |
? |
| DNSSEC |
? |
| Multi-PHP |
? |
| Database Server |
? |
| Database Admin |
? |
| Email Server |
? |
| Webmail |
? |
| FTP Server |
? |
| Caching |
? |
| |
|
| Email Validation |
? |
| Spam Protection |
? |
| Firewall |
? |
| WAF |
? |
| Virus / Malware Scanning |
? |
| |
|
| Reseller Accounts |
√ |
| User Accounts |
√ |
| Separate Panels (Admin / Users) |
? |
| Hosting Packages |
√ |
| Quotas |
? |
| Traffic Statistics |
? |
| Cron Jobs |
? |
| Local Backup |
? |
| External Backup |
? |
| File Manager |
? |
| |
|
| Extendable by Plugins |
? |
| API |
√ |
| WHMCS Support |
? |
| Panel Account Restrictions |
? |
| Server and Package Updates |
? |
| Automatic Updates |
? |
| Can be Uninstalled |
× |
HC - Website Hosting Module integrates into the Hosting Controller Cloud Automation Platform and is not a standalone panel. This software is aimed at corporate entities with a substancial amount of technical staff and a company that wants a wide reach without running out of resources.
Notes
- Sites
- Homepage
- Demo
- Changelog
- Code Repository
- Forum
- Docs
- Plugins
- General
- Settings
- Plugins
- File Locations / Repo Locations / Key Locations
- Install
- Update / Upgrade
- Uninstall
- Installation Instructions
- Misc
Cloud Management Platform (Apps?)
These panels are designed for deploying and managing remote servers in the cloud, usually from the larger providers. They provide such things as turnkey installations, cloud service configuration, package updates and other server related things but without requiring serious indepth configuration of the underlying hardware. These platforms allow easy deployment and a more efficient use of server resources as you only pay for what you use in most cases. `Web Development Agencies` and `Software Design Houses` will benefit greatly from using this setup.
You also find there are a few different types of these platforms aimed at different areas: Web Hosting, Apps and General Server deployments.
Cipi

| Features |
Status |
| |
|
| Primarily Designed For |
Server Management / Cloud Management.........?????? |
| Free/Paid |
Free |
| License |
MIT |
| Supported OS |
Ubuntu |
| Supported Cloud Providers |
Amazon Web Services (AWS) / DigitalOcean / Google Cloud Platform (GCP) / Microsoft Azure / Vultr / Akamai (formerly Linode) |
| Install Method(s) |
Script / Cloud Quick Launch |
| Web Console |
|
| |
|
| Virtualization |
× |
| Web Server |
Nginx |
| TLS 1.3 |
√ |
| HTTP/2 |
√ |
| HTTP/3 & QUIC |
× |
| AutoSSL |
LetsEncrypt |
| DNS Server |
× |
| DNS Zone Manager |
× |
| DNSSEC |
× |
| Multi-PHP |
√ |
| Database Server |
MySQL |
| Database Admin |
phpMyAdmin |
| Email Server |
× |
| Webmail |
× |
| FTP Server |
× |
| Caching |
Redis |
| |
|
| Email Validation |
× |
| Spam Protection |
× |
| Firewall |
iptables / Firewalld / Uncomplicated Firewall (UFW) |
| WAF |
Fail2Ban |
| Virus / Malware Scanning |
× |
| |
|
| Reseller Accounts |
× |
| User Accounts |
× |
| Separate Panels (Admin / Users) |
× |
| Hosting Packages |
× |
| Quotas |
× |
| Traffic Statistics |
× |
| Cron Jobs |
× |
| Local Backup |
× |
| External Backup |
× |
| File Manager |
× |
| |
|
| Extendable by Plugins |
× |
| API |
√ |
| WHMCS Support |
× |
| Panel Account Restrictions |
× |
| Server and Package Updates |
CLI / GUI |
| Automatic Updates |
√ |
| Can be Uninstalled |
× |
Cipi is a Laravel based cloud server control panel that supports DigitalOcean, AWS, Linode, Azure, Vultr, Google Cloud Platform (GCP) and other VPS. It comes with nginx, Mysql, multi PHP-FPM versions, multi-users, Supervisor, Composer, npm, free Let's Encrypt certificates, Git deployment, Fail2Ban, Redis, API and with a simple graphical interface useful to manage Laravel, Codeigniter, Symfony, WordPress or other PHP sites.
Cipi is easy, stable, powerful and free for any personal and commercial use and it's a perfect alternative to Runcloud, Ploi.io, Serverpilot, Forge, Moss.sh and similar software.
Install and manage your server like a pro! With Cipi you don’t need to be a Sysadmin to deploy and manage websites and PHP applications powered by cloud VPS. Cipi monitors itself and remote servers for issues.
- Pros
- Cons
- Limited options
- No forum or community
Notes
- Sites
- General
- Settings
- Plugins
- File Locations / Repo Locations / Key Locations
- Install
- Update / Upgrade
- Uninstall
- Installation Instructions
- Misc
ServerAuth
| Features |
Status |
| |
|
| Primarily Designed For |
Server Management / Cloud Management.........?????? |
| Free/Paid |
Paid |
| License |
Proprietary |
| Supported OS |
CentOS / Debian / Ubuntu / Fedora |
| Supported Cloud Providers |
DigitalOcean / Hetzner Cloud / Vultr / Akamai (formerly Linode) / Custom Server (via SSH) |
| Install Method(s) |
SaaS |
| Web Console |
|
| |
|
| Virtualization |
× |
| Web Server |
× |
| TLS 1.3 |
× |
| HTTP/2 |
× |
| HTTP/3 & QUIC |
× |
| AutoSSL |
× |
| DNS Server |
× |
| DNS Zone Manager |
× |
| DNSSEC |
× |
| Multi-PHP |
× |
| Database Server |
MySQL |
| Database Admin |
× |
| Email Server |
× |
| Webmail |
× |
| FTP Server |
× |
| Caching |
× |
| |
|
| Email Validation |
× |
| Spam Protection |
× |
| Firewall |
Uncomplicated Firewall (UFW) |
| WAF |
× |
| Virus / Malware Scanning |
× |
| |
|
| Reseller Accounts |
× |
| User Accounts |
× |
| Separate Panels (Admin / Users) |
× |
| Hosting Packages |
× |
| Quotas |
× |
| Traffic Statistics |
Custom |
| Cron Jobs |
√ |
| Local Backup |
× |
| External Backup |
× |
| File Manager |
× |
| |
|
| Extendable by Plugins |
× |
| API |
√ |
| WHMCS Support |
× |
| Panel Account Restrictions |
× |
| Server and Package Updates |
GUI |
| Automatic Updates |
× |
| Can be Uninstalled |
√ |
ServerAuth is web-based server management panel with limited functionality. On the website it says that `Website Management` and `1-click package installers` are coming soon.
ServerAuth provides a whole host of management tools, from controlling who can access your server, to adding cron jobs, securing your servers and installing packages. And with an ever growing suite of tools you'll always be one step ahead!
This platform works by asking you to install their open source agent on your server which in turn calls back to our system to retrieve the public SSH keys that should have access to that server and system account.
I suspect this SaaS will develop from `Server Management` only to being focused on `Web applications` and it might be that this is a new company and development is on the way. The website does certainly have some out of date information on it.
- Pros
- Cons
- Not many features
- No forum
- Webiste has some out of date information.
Notes
- Sites
- Homepage
- Demo
- Changelog
- Code Repository
- Forum
- Docs
- Plugins
- General
- Settings
- Plugins
- File Locations / Repo Locations / Key Locations
- Install
- Update / Upgrade
- Uninstall
- Installation Instructions
- Misc
Server Management - local server admin - Cloud Server Admin - Local Server admin - Server Admin (Cloud) - Server Admin (Local)
These panels are used to directly change settings on a single server on which they are installed and because of this they usually are feature rich and allow you to do most of the configuration through the panel and not the command line.
Cockpit
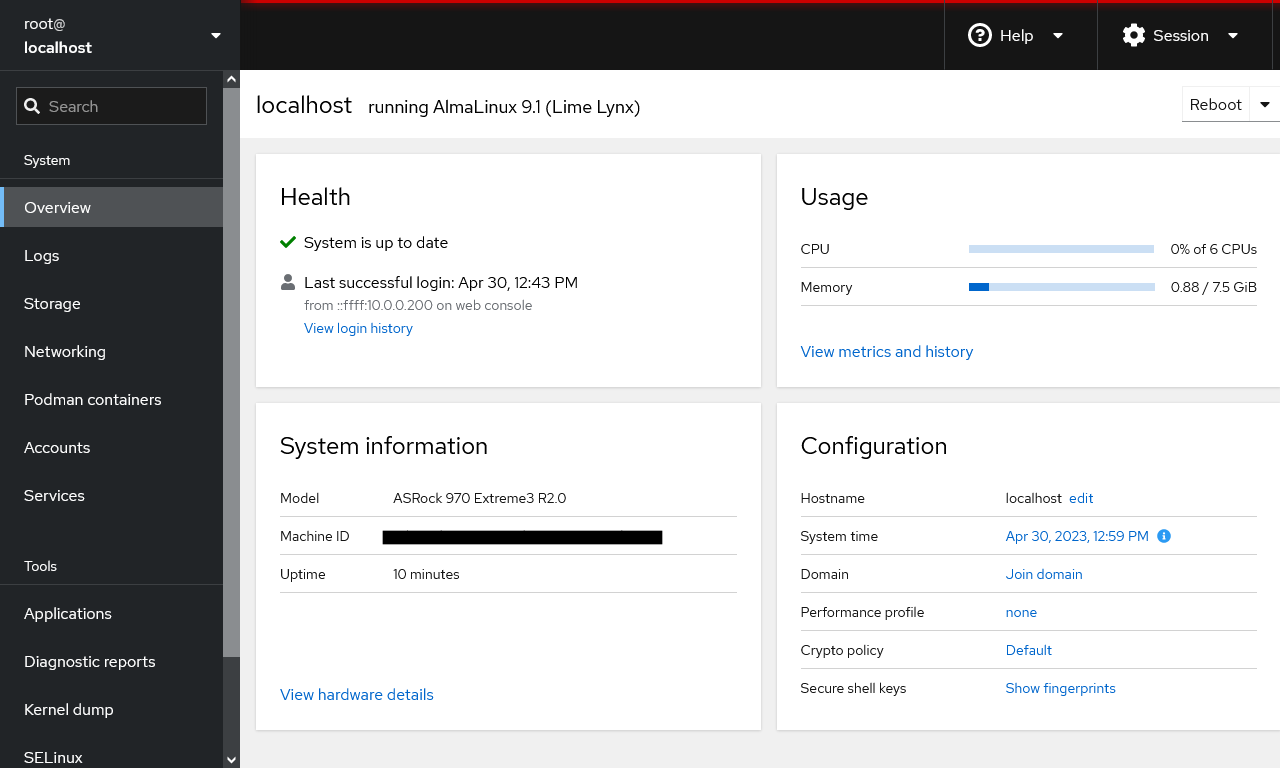
| Features |
Status |
| |
|
| Primarily Designed For |
Server Management |
| Free/Paid |
Free |
| License |
LGPLv2.1+ |
| Supported OS |
Fedora / RHEL / Fedora CoreOS / CentOS / Debian / Ubuntu / Clear Linux / Archlinux / Tumbleweed / SUSE |
| Supported Cloud Providers |
× |
| Install Method(s) |
Script |
| Web Console |
|
| |
|
| Virtualization |
KVM / Docker / Podman (this replaces Docker) |
| Web Server |
× |
| TLS 1.3 |
√ |
| HTTP/2 |
× |
| HTTP/3 & QUIC |
× |
| AutoSSL |
× |
| DNS Server |
× |
| DNS Zone Manager |
× |
| DNSSEC |
× |
| Multi-PHP |
× |
| Database Server |
× |
| Database Admin |
× |
| Email Server |
× |
| Webmail |
× |
| FTP Server |
× |
| Caching |
× |
| |
|
| Email Validation |
× |
| Spam Protection |
× |
| Firewall |
Firewalld |
| WAF |
× |
| Virus / Malware Scanning |
× |
| |
|
| Reseller Accounts |
× |
| User Accounts |
× |
| Separate Panels (Admin / Users) |
× |
| Hosting Packages |
× |
| Quotas |
× |
| Traffic Statistics |
√ |
| Cron Jobs |
× |
| Local Backup |
Automated Backup (Paid Addon) |
| External Backup |
? |
| File Manager |
√ |
| |
|
| Extendable by Plugins |
√ |
| API |
√ |
| WHMCS Support |
× |
| Panel Account Restrictions |
× |
| Server and Package Updates |
CLI / GUI |
| Automatic Updates |
√ |
| Can be Uninstalled |
× |
Cockpit is a server manager that makes it easy to administer your Linux servers via a web browser. Jumping between the terminal and the web tool is no problem. A service started via Cockpit can be stopped via the terminal. Likewise, if an error occurs in the terminal, it can be seen in the Cockpit journal interface.
Cockpit is perfect for new sysadmins, allowing them to easily perform simple tasks such as storage administration, inspecting journals and starting and stopping services. You can monitor and administer several servers at the same time. Just add them with a single click and your machines will look after its buddies.
The Cockpit Web Console enables users to administer GNU/Linux servers using a web browser. It offers network configuration, log inspection, diagnostic reports, SELinux troubleshooting, interactive command-line sessions, and more.
Once Cockpit is installed, enable it with "systemctl enable --now cockpit.socket".
- Pros
- Basic Server management.
- Works on many distros.
- Can manage Virtual Machines and Podman Containers.
- Can be extended by plugins.
- The console is very clean and modern.
- Web Based Terminal.
- Cockpit comes pre-installed in a lot of Linux distros, but not activated (usually not on the Minimal installations).
- Widely used
- Cons
- Cannot install packages from the GUI (but you can use the web based terminal)
- Not all packages can be installed with a click of a button.
- No Cron support
Notes
- Sites
- General
- Manage Your Servers with Cockpit Linux - Learn how to simplify the management of your server, from networking to containers, with the Cockpit Linux web console!
- Using the Cockpit Web Console | Oracle - Oracle Linux includes a web console you can use for system administration. The web console is called Cockpit. For non-minimal installations, Cockpit is automatically installed, although not automatically enabled. Cockpit provides a web browser interface for performing system configuration and administration tasks, either locally or remotely on multiple servers.
- How I use Cockpit for my home's Linux server management | Opensource.com - Cockpit is a service for Linux that provides a web-based interface for managing and monitoring hosts. It can be deployed in any size organization, even a small office, and it's a great way for home users to maintain the family IT infrastructure. I use it to manage and monitor all of the computers in my house—including Raspberry Pi.
- SSL/TLS Usage - Cockpit usually requires that web browsers communicate with it using HTTPS, for security reasons.
- How to Manage Linux Servers with the Cockpit Web Interface - You can easily monitor and manage multiple Linux computers with Cockpit, a browser-based administration and dashboard tool. It’s self-contained, simple to set up, and easy to use. We’ll show you how to get started.
- Cockpit - A Web Interface for your Linux servers » EasyCode - In this tutorial, we’ll be learning how to set Cockpit. Cockpit offers an easy to use Web Interface for your Linux servers
- Cockpit | An Easy to Use Web GUI for Your Linux Servers | Linode, now Akamai - Cockpit is a free and open source application that gives you a GUI for your server, which can be accessed via a web browser.
- GitHub - 45Drives/cockpit-navigator - A Featurefull File Browser for Cockpit. This can be install on any cockpit install not just 45drives stuff.
- An introduction to Cockpit, a browser-based administration tool for Linux | Enable Sysadmin - Need to monitor or administer a server remotely via the web? Look no further than Cockpit.
- How to Monitor and Administer a Server with Cockpit | Linode (with YouTube Video) - This guide explains how to install and configure Cockpit, a system monitoring and administration tool.
- Linux Cockpit File Manager Version 0.5.8 | InMotion Hosting - Cockpit Navigator is a third party application for the Cockpit Linux server control panel. The Cockpit file manager app lets you use the web interface to easily: Modify files Edit file ownership and permissions Create symbolic links Upload and download files Using the Cockpit File Manager (Navigator) Log into the Cockpit terminal or SSH.
- Linux Server Web GUI - management with cockpit - YouTube
- In this video, I will show you how to install a Web GUI for your Linux server with cockpit. I will show you the features of cockpit and how to use it to manage virtual machines and install custom plugins.
- Covers fixing the network manager when using Ubuntu
- Virtual machines
- Community plugin for ZFS (not for production environments).
- Best on RHEL or CentOS but works on Ubuntu and other flavours of Linux.
- These issues might be fixed already.
- Manage Your Virtual Machines With Cockpit - YouTube - Manage your virtual machines locally or remotely using Cockpit, which is the successor to Virt-Manager (now deprecated). You access your VMs in Cockpit via a web interface using your web browser. The interface is friendly and it has most of the features that I would expect to be there.
- How to Use Cockpit to Setup a Web Interface for Your Linux Server - YouTube
- In this video, I will show you how to access and manage your Linux servers with Cockpit. Cockpit is a GUI tool that helps you to manage your Linux servers and other infrastructure.
- Covers fixing the network manager when using Ubuntu
- Settings
- Change hostname: Overview --> Configuration --> Hostname --> edit
- Plugins (of note and not bundled with Cockpit. Not all will be available on all OS or have to be built from source... Mostly available for Ubuntu)
- 389 Directory Server
- ZFS Manager
- File Sharing
- Navigator
- Benchmark
- Sensors
- File Locations / Repo Locations / Key Locations
- Install
- Update / Upgrade
- Uninstall
- Installation Instructions
- Misc
Webmin
| Features |
Status |
| |
|
| Primarily Designed For |
Server Management |
| Free/Paid |
Free |
| License |
BSD 3-Clause |
| Supported OS |
RHEL / CentOS / AlmaLinux / Rocky Linux / Oracle Linux / Debian / Ubuntu / Fedora / Kali |
| Supported Cloud Providers |
× |
| Install Method(s) |
Script |
| Web Console |
|
| |
|
| Virtualization |
Xen / KVM / OpenVZ / Vservers / Amazon EC2 / Solaris Zones / Google Compute Engine (GCE)
Via Cloudmin (Free/Pro)
|
| Web Server |
Apache |
| TLS 1.3 |
√ |
| HTTP/2 |
√ |
| HTTP/3 & QUIC |
× |
| AutoSSL |
× |
| DNS Server |
BIND |
| DNS Zone Manager |
√ |
| DNSSEC |
√ |
| Multi-PHP |
× |
| Database Server |
MariaDB / PostgreSQL |
| Database Admin |
× |
| Email Server |
Postfix / Dovecot / Sendmail / QMail |
| Webmail |
Usermin |
| FTP Server |
ProFTPD / WU-FTPD |
| Caching |
× |
| |
|
| Email Validation |
× |
| Spam Protection |
SpamAssassin |
| Firewall |
iptables / CSF / Linux Firewall / Shorewall / Firewalld |
| WAF |
Fail2Ban / Comodo WAF (CWAF) |
| Virus / Malware Scanning |
× |
| |
|
| Reseller Accounts |
× |
| User Accounts |
√ |
| Separate Panels (Admin / Users) |
√ |
| Hosting Packages |
× |
| Quotas |
Disk / Bandwidth |
| Traffic Statistics |
Webalizer |
| Cron Jobs |
× |
| Local Backup |
√ |
| External Backup |
RSH / SSH / FTP / Bacula |
| File Manager |
√ |
| |
|
| Extendable by Plugins |
√ |
| API |
√ |
| WHMCS Support |
× |
| Panel Account Restrictions |
× |
| Server and Package Updates |
CLI / GUI |
| Automatic Updates |
√ |
| Can be Uninstalled |
√ |
Webmin is a web-based system administration tool for Unix-like servers, and services with about 1,000,000 yearly installations worldwide. Using it, it is possible to configure operating system internals, such as users, disk quotas, services or configuration files, as well as modify, and control open-source apps, such as BIND DNS Server, Apache HTTP Server, PHP, MySQL, and many more.
- Software Roles
- Webmin - Your server manager administrator. Hardware, software packages, server configuration, software configuration.
- Virtualmin - Something like WHM of cPanel. Your client accounts, domains, hosting packages, e-mail configurations.
- Usermin - Is a webmail client with some other stuff. It is not for administrative tasks.
- Cloudmin - Is a UI built on top of Webmin for managing virtual systems, such as Xen, KVM and OpenVZ instances.
Webmin is the base platform that Virtualmin and Usermin use. It is Webmin that is extended by plugins/modules. Virtualmin is Webmin plugin/module and therefore requires Webmin to be installed. Usermin is a standalone package but has a Webmin plugin/module but I feel it's role outsite of Webmin is limited and I would not install it as a standalone package.
Usermin is a web-based interface for webmail, password changing, mail filters, fetchmail and much more. It is designed for use by regular non-root users on a Unix system, and limits them to tasks that they would be able to perform if logged in via SSH or at the console. Most users of Usermin are sysadmins looking for a simple webmail interface to offer their customers. Unlike most other webmail solutions, it can be used to change passwords, read email with no additional servers installed (like IMAP or POP3), and setup users’ configurations for forwarding, spam filtering and autoreponders. Usermin also provides web interfaces for viewing and managing data in MySQL and PostgreSQL databases, editing Apache .htaccess configuration files, running commands on the server, and full featured File Manager. The administrator has full control over which of these modules are available to users.
If you want to install Webmin, you might aswell install Virtualmin.
- Pros
- Very easy to install
- Covers all aspects of Linux server
- Can send push messages through your browser
- Can configure Apache modules in the GUI
- Can backup configuration
- Can backup files
- Can be expanded with plugins
- Heavily tested
- Lots of features
- Lots of documentation and is well written
- Forum is very active
- Cons
- You need Linux experience to use this
- Doesn't natively support Multi-PHP
- Only covers Apache out of the box
- No phpMyAdmin. You can manage the server and some settings from the GUI.
- You cannot select the version of MariaDB installed. The latest is installed.
Notes
- Sites
- General
- The MySQL module installs MariaDB
- Add a normal repo in the GUI
- System --> Software Package Updates --> Package Repositories --> Create
- Cannot do DNS lookups after installation
- For me this was caused by DNS Hijacking preventing DNS lookup, even to root servers.
- Solution is to add another DNS server to BIND (Servers --> BIND DNS Server --> Other DNS Servers --> IP Address = 10.0.0.1 --> Save
- Backups
- Settings
- Plugins
- Software Packages - Webmin Documentation
- Installing, upgrading and uninstalling.
- This chapter covers the installation and management of software on your system using packages. It also covers the differences between the various Unix package formats, such as RPM, DPKG and Solaris.
- Re-install apache module / Other core module
- This is useful if you accedenally delete a pre-installed module.
- Webmin --> Webmin Configuration --> Webmin Modules --> Install from `From HTTP or FTP UR` --> https://download.webmin.com/download/modules/apache.wbm.gz --> Install Module
- Refresh modules (to see the changes
- Install or Reinstall AWstats on Webmin or Virtualmin – Adnan Halilovic Blog - If you may have experienced issues with AWStats after installing Virtualmin on your server, or if you uninstalled it from Virtualmin, you should review this post to learn how to restore it.
- Uninstall a plugin
- System --> Software Packagges --> Package Tree --> [find package and selecte i.e. apache2]
- Usermin
- Usermin is a standalone package but has a Webmin plugin/module.
- How to Install Usermin on Ubuntu 20.04
- Usermin is a web-based interface mainly for webmail designed for non-root users to perform routine tasks including, reading mail, changing passwords, setting up databases and a web-basedSSH terminal. It is a stripped-down version of Webmin intended for regular users without always system administrators. It provides a rich set of features.
- These instructions will show you how to install webmin as a standalone package.
- Adding Webmin & Usermin to your Ubuntu Server 16.04 LTS - YouTube - This shows you Usermin, albeit an older version.
- Comodo WAF
- CSF Firewall
- ionCube
- Repo Locations / Key Locations / Modules
- Webmin Modules
- Webmin GPL
- GPG Keys
- Local Repo Store
- Shared
- /etc/apt/trusted.gpg - I think the is file that the old apt-key stores the information in.
- /etc/apt/sources.list.d/ - This folder contains repo locations without them appearing in the main repo list in linux/ubuntu/virtualmin/webmin etc..
- Local Repo Store (Webmin)
- /etc/apt/sources.list.d/webmin.list
- This has || deb [signed-by=/usr/share/keyrings/debian-webmin.gpg] https://download.webmin.com/download/repository sarge contrib
- This defines the webmin repo
- /usr/share/keyrings/debian-webmin.gpg - this key is used to verify the Webmin repo is correct because all of the assets are signed
- Local Repo Store (Virtualmin)
- /etc/apt/sources.list.d/virtualmin.list
- This has || deb [signed-by=/usr/share/keyrings/debian-virtualmin-7.gpg] https://software.virtualmin.com/vm/7/gpl/apt virtualmin main
- This defines teh virtualmin repo
- /usr/share/keyrings/debian-virtualmin-7.gpg - This key is used to verify the virtualmin repo is correct because all fo the assets are signed
- Installed Files
- Install Script
- Install
- How to Install Webmin with free Let's Encrypt SSL Certificate on Ubuntu 22.04 - Webmin is a web-based application for managing Linux-based operating systems. It is designed for beginner users who are not familiar with the command line interface. It helps users to edit the configuration file, set up a web server, FTP server, run commands, install packages or manage email forwarding and manage everything via a web browser. It offers a simple and web-based user interface to manage your remote Linux systems.
- Update / Upgrade
- Uninstall
- Installation Instructions
- Misc
- Adding Virtualmin repo into Webmin (reference only)
Don't do this.
- You should never mix Webmin and Virtualmin repos, this comes from the developers.
- This is my research I used to workout how to install Nginx onto Webmin, and is just for my reference.
- Install error - The repository 'https://software.virtualmin.com/vm/7/gpl/apt virtualmin Release' does not have a Release file - Virtualmin - Virtualmin Community
- Try running: apt install --reinstall ca-certificates
- If that doesn’t help, try fixing your Virtualmin repos by running:
- wget -O virtualmin-install.sh https://software.virtualmin.com/gpl/scripts/install.sh; /usr/bin/sudo /bin/sh virtualmin-install.sh --setup
- If that still doesn’t work, edit
- /etc/apt/sources.list.d/virtualmin.list (replacing https with http in the URL.)
- In-fact technically, it’s okay to download packages using http as we check for the package signature anyway.
- NO_PUBKEY E8DD3FA0A0BDBCF9
- This error is caused by the signing key not being present in the GPG store.
- To fix you need to add the Key. See notes below for using GPG and examples.
- apt-key is now depreceated and all commands for this are old and should not be used. It has been replaced by gpg.
- Install Nginx (reference only)
- Installing Nginx (reference only)
Ajenti

| Features |
Status |
| |
|
| Primarily Designed For |
Server Management |
| Free/Paid |
Free |
| License |
MIT |
| Supported OS |
RHEL / CentOS / Debian / Ubuntu / Gentoo |
| Supported Cloud Providers |
× |
| Install Method(s) |
Script |
| Web Console |
|
| |
|
| Virtualization |
Docker |
| Web Server |
× |
| TLS 1.3 |
× |
| HTTP/2 |
× |
| HTTP/3 & QUIC |
× |
| AutoSSL |
× |
| DNS Server |
× |
| DNS Zone Manager |
× |
| DNSSEC |
× |
| Multi-PHP |
× |
| Database Server |
× |
| Database Admin |
× |
| Email Server |
× |
| Webmail |
× |
| FTP Server |
× |
| Caching |
× |
| |
|
| Email Validation |
× |
| Spam Protection |
× |
| Firewall |
× |
| WAF |
× |
| Virus / Malware Scanning |
× |
| |
|
| Reseller Accounts |
× |
| User Accounts |
× |
| Separate Panels (Admin / Users) |
× |
| Hosting Packages |
× |
| Quotas |
× |
| Traffic Statistics |
× |
| Cron Jobs |
× |
| Local Backup |
× |
| External Backup |
× |
| File Manager |
√ |
| |
|
| Extendable by Plugins |
√ |
| API |
√ |
| WHMCS Support |
× |
| Panel Account Restrictions |
× |
| Server and Package Updates |
GUI |
| Automatic Updates |
× |
| Can be Uninstalled |
√ |
Ajenti is a Linux & BSD modular server admin panel. Ajenti 2 provides a new interface and a better architecture, developed with Python3 and AngularJS.
Ajenti Project itself consists of Ajenti Core itself and a set of stock plugins forming the Ajenti Panel. Ajenti Core is a web interface development framework which includes a web server, IoC container, a simplistic web framework and set of core components aiding in client-server communications. Ajenti Panel consists of plugins developed for the Ajenti Core and a startup script, together providing a server administration panel experience. The Panel’s plugins include: file manager, terminal, notepad, etc.
This does not have enough features to be able to fully manage your servere or to run websites. It is actively being developed so will grow over time. So far the interface is nice and the ability to extend by plugins is a positive feature. The developer needs to remove the old version of the software from his homepage as I find this confusing.
- Pros
- Simple to use
- Free
- Extensible by plugins
- Activately being devloped
- Modern GUI
- Cons
- Not feature rich yet.
- No web hosting functionality
Notes
- Sites
- General
- What’s Ajenti and how it works — Ajenti 2.2.4 documentation
- Different Versions on the Homepage.
- I found the different versions listed on the homepage confusing so I will clarify them.
- Ajenti 2 (Panel)
- The new version of the panel and is still in development.
- Is a suite of essential plugins for the graphical interface including file, network, and system service management tools.
- This might not have all of the features or plugins as version 1.
- Lightweight admin panel.
- Ajenti v1.x (Panel)
- An old version of the panel and is not longer supported.
- Is a suite of essential plugins for the graphical interface including file, network, and system service management tools.
- Server admin panel.
- Ajenti Core
- is the actual platform with an HTTP server and plugin management capabilities.
- Exentensible Web-UI framework
- Ajenti V for v1.x
- is an optional plugin suite for Ajenti 1.x (not the latest version) with applications necessary for common web server hosting environments.
- There is no equivalent version of Ajenti 2.
- Ajenti V is a plugin suite for Ajenti 1.x, which adds fast, efficient and easy-to-setup web hosting capabilities
- Using Ajenti in Managing Linux Servers - Make your life as a system administrator easier and learn how to manage your Linux servers with Ajenti in this ATA Learning tutorial!
- Settings
- Plugins
- File Locations / Repo Locations / Key Locations
- Install
- How to Install Ajenti Server Admin Panel | InMotion Hosting - Ajenti is a powerful, lightweight control panel for Debian, Ubuntu, and Enterprise-based Linux servers like AlmaLinux. Ajenti developers state that the web panel may work on other *nix-based distributions but recommend using the manual installation method to do so (not covered in this tutorial).
- Using Ajenti in Managing Linux Servers - Make your life as a system administrator easier and learn how to manage your Linux servers with Ajenti in this ATA Learning tutorial!
- Update / Upgrade
- Uninstall
- Installation Instructions
- Misc
Personal Server
Although these are not what I would class as `Control Panels` they are related and this category can also be known as `Sovereign Computing`.
These platforms can run on NAS, Cloud servers or your own hardware which you keep locally and they allow you run apps in your own mini cloud (SaaS) rather than deploying Apps to remote platforms (PaaS). `Personal Servers` usually have an App eco-system which allows the installation of a single instances of the App and they will be located on server itself rather than remotely deployed.
Extensibly `Personal Servers` are a preconfigured server platform with an App eco-systems, mainly GUI driven and designed for easy of use by the end user rather than directed at techies.
StartOS
- StartOS is an elegant, plug-and-play personal server for running self-hosted software, built by Start9 Labs.
- Start9 make their own hardware which you can buy.
- Formerly known as `embassyOS`
- Sites
- General
- Settings
- Plugins
- File Locations / Repo Locations / Key Locations
- Install
- Update / Upgrade
- Uninstall
- Installation Instructions
- Misc
YunoHost
- YunoHost is an operating system aiming for the simplest administration of a server, and therefore democratize self-hosting, while making sure it stays reliable, secure, ethical and lightweight. It is a copylefted libre software project maintained exclusively by volunteers. Technically, it can be seen as a distribution based on Debian GNU/Linux and can be installed on many kinds of hardware.
- Sites
- General
- Settings
- Plugins
- File Locations / Repo Locations / Key Locations
- Install
- Update / Upgrade
- Uninstall
- Installation Instructions
- Misc
- Umbrel
- A beautiful home server OS for self-hosting with an app store. Buy a pre-built Umbrel Home with umbrelOS, or install on a Raspberry Pi 4, any Ubuntu/Debian system, or a VPS.
- Umbrel make their own hardware which you can buy.
- Sites
- General
- Settings
- Plugins
- File Locations / Repo Locations / Key Locations
- Install
- Update / Upgrade
- Uninstall
- Installation Instructions
- Misc
Cloudron
- Cloudron is a complete solution for running apps on your server and keeping them up-to-date and secure.
- Free version (2 apps) and paid
- If you have 2 Wordpress websites, this is classed as 2 Apps I think.
- They say: Cloudron is the perfect platform for Web-hosters, Web Agencies and Content Managers. Manage WordPress, Analytics and Email marketing tools in one place(see here). I think it is basic support.
- Sites
- General
- Settings
- Plugins
- File Locations / Repo Locations / Key Locations
- Install
- Update / Upgrade
- Uninstall
- Installation Instructions
- Misc
TrueNAS
- TrueNAS SCALE is the latest member of the TrueNAS family and provides Open Source HyperConverged Infrastructure (HCI) including Linux containers and VMs. TrueNAS SCALE includes the ability to cluster systems and provide scale-out storage with capacities of up to hundreds of Petabytes. This server also allows you to install apps of a wide variety so this platform is more than a NAS.
- iXsystems make their own hardware which you can buy.
- Sites
- General
- Settings
- Plugins
- File Locations / Repo Locations / Key Locations
- Install
- Methods: Script / Cloud Quick Launch
- Update / Upgrade
- Uninstall
- Installation Instructions
- Misc
Synology DSM
- Just mentioned here because a lot of people use these NAS for their personal server.
- Synology come with their own `Cloud type` software on that allow you install and run apps from their eco system.
- The heart of the device is its Synology operating system DSM (Disk Station Manager), which is used in all devices produced by Synology. It is a well-optimized Linux kernel, most of the changes which aims to work with hard disk drives and Raid arrays. As well it is composed of many Open source packages, details of which you will find just the manufacturer’s website.
- Sites
- Homepage
- Demo
- Changelog
- Code Repository
- Forum
- Docs
- Plugins
- General
- Settings
- Plugins
- File Locations / Repo Locations / Key Locations
- Install
- Update / Upgrade
- Uninstall
- Installation Instructions
- Misc
Xpenology
Running Xpenology is illegal, as you are accessing the Synology DSM for free instead of paying for it. It is also not guaranteed to be stable.
- Synology DSM on x86
- Sites
- Homepage
- Demo
- Changelog
- Code Repository
- Forum
- Docs
- Plugins
- General
- Settings
- Plugins
- File Locations / Repo Locations / Key Locations
- Install
- Update / Upgrade
- Uninstall
- Installation Instructions
- Misc
Dead
These panels I have come across but the projects are dead or have not been updated in a while. I wanted to included them here so you know not to bother with them. If a project is revived, I can update this article if someone lets me know.
- TS Web Hosting Panel
- This project is inspired by DirectAdmin and developed for machines which are not supported and to create an open source, free solution, for Website Hosting on most Linux machines.
- Kloxo
- From Kloxo HostInaBox, a light and efficient webhosting platform, to Kloxo Enterprise, a truly distributed hosting platform. Kloxo is a fully scriptable, distributed and a 100% object oriented hosting platform.
- Kloxo-MR
- This is special edition (fork) of Kloxo with many features not existing on Kloxo official release (6.1.12+).
- This fork named as Kloxo-MR (meaning 'Kloxo fork by Mustafa Ramadhan').
- ZPanel
- A free and complete web hosting control panel for Microsoft® Windows™ and POSIX (Linux, UNIX and MacOSX) based servers.
- Replaced by Sentora.
- Virtual Hosting Control System (VHCS)
- VHFFS - Mass virtual hosting software
- Developped by TuxFamily.org admins, it can be used for massive hosting on several shared servers or for personal hosting on a single compute
- JavaMin
- JavaMin enables server administrators to monitor and manage regular server tasks with a web-based interface. JavaMin is still in a very early stage and more features will be added gradually.
- GNUPanel
- GNUPanel is a free and open source control panel with is developed to run on Debian based systems. It is written in PHP and uses PostgreSQL database to store its data
- Easy Hosting Control Panel (EHCP)
- Ehcp is a tool in a server to facilate the process of hosting domains, emails, adding domains, ftp users and so on.
- AlternC
- AlternC is a hosting control panel, a software suite which makes web and mail server management easier.
- i-MSCP
- internet Multi-Server Control Panel
- An open-source project aimed to build an impressive and powerful Multi-Server Control panel.
- MaestroPanel
- A Windows Server panel.
- Could of been a great product.
- WebsitePanel
- WebsitePanel is a complete portal for Cloud Computing Companies and IT Providers to automate the provisioning of a full suite of Multi-Tenant services on Windows servers. The powerful, flexible open source WebsitePanel platform gives users simple point-and-click control over Windows Server applications including IIS 8.5, SQL Server 2014, MySQL 5, Exchange 2013, Sharepoint 2013, Lync 2013, Webdav, Microsoft RemoteApp and Hyper-V2 Deployments.
- Sites
- License: BSD 3-Clause "New" or "Revised" License
- Windows Server
- IIS Webserver
- Ægir Hosting System
- A `Personal Server` that delivers Apps.
- The VHCS - Virtual Hosting Control System Open Source Project | on Open Hub
- VHCS provides complete hosting automation for Linux - Web, Mail (pop&imap), FTP, DNS , DBs, Quota, Traffic, graphic user interfaces for the administrators, resellers and users.
- Core-Admin
- Not just another server administration panel, Core-Admin is designed as a centralized and highly connected solution that provides instant access to all your servers with a single crendential over a secure connection (with additional IP-blocking features if you wish).
Blank Template
| Features |
Status |
| |
|
| Primarily Designed For |
Hosting Company / Small Hosting Company / Websites + Email / Web Applications / Web Applications (WordPress only) / Personal Server |
| Free/Paid |
Free / Paid / Both |
| License |
Proprietary / GPLv3 / MIT / Apache / BSD 3-Clause / CC BY-SA 4.0 |
| Supported OS |
RHEL / CentOS / AlmaLinux / Rocky Linux / Oracle Linux / Debian / Ubuntu / Fedora / CloudLinux / Clear Linux / Archlinux / Tumbleweed / SUSE / openSUSE / Amazon Linux 2 / Kali / Scientific Linux / Gentoo / VzLinux / Windows / Windows Server |
| Supported Cloud Providers |
in-house / Amazon Web Services (AWS) / DigitalOcean / Hetzner Cloud / Google Compute Engine (GCE) / Google Cloud Platform (GCP) / Microsoft Azure / Vultr / Akamai (formerly Linode) / Oracle Cloud / Webdock.io / Alibaba Cloud / Contabo / OVH / UpCloud / Webdock.io / Custom Server (via SSH) |
| Install Method(s) |
Script / Cloud Quick Launch / Installer / SaaS / PaaS / IaaS |
| Web Console |
|
| |
|
| Virtualization |
Docker / OpenVZ / Hyper-V / Proxmox Virtualization |
| Web Server |
Apache / Nginx / OpenLiteSpeed / LiteSpeed Enterprise / IIS / Lighttpd / NodeJS / Caddy |
| TLS 1.3 |
√ |
| HTTP/2 |
√ |
| HTTP/3 & QUIC |
× |
| AutoSSL |
LetsEncrypt |
| DNS Server |
BIND / PowerDNS / Microsoft / SimpleDNS Plus / djbdns / Cloud via API / Google DNS |
| DNS Zone Manager |
√ |
| DNSSEC |
× |
| Multi-PHP |
√ |
| Database Server |
MySQL / MariaDB / Percona / PostgreSQL / SQLite / MongoDB / MSSQL / ColdFusion / ODBC (Access/Excel) |
| Database Admin |
phpMyAdmin / phpPgAdmin / pgAdmin |
| Email Server |
Exim / Postfix / Dovecot / Sendmail / QMail / Mailman / WildDuck / Exchange / Gmail SMTP |
| Webmail |
Roundcube / Horde / SquirrelMail / RainLoop / SnappyMail / OWA / WebMail Lite / Custom |
| FTP Server |
ProFTPD / Pure-FTPd / WU-FTP / VsFTPd / Microsoft / Filezilla / Gene6 / Serv-U |
| Caching |
Redis / Memcached / Varnish / OPCache / CDN (in-house) / Cloudflare CDN / in-house WordPress cache plugin (<name-here>) |
| |
|
| Email Validation |
SPF / DKIM / DMARC / DANE (TLSA) |
| Spam Protection |
SpamAssassin / Amavis / Rspamd / Greylisting / RBL / DNSBL / Easy Spam Fighter / BlockCracking / Pigeonhole / Mailcleaner / Spam Experts / MailChannels |
| Firewall |
iptables / nftables / CSF / CXF / Firewalld / Linux Firewall / Shorewall / Uncomplicated Firewall (UFW) / Rampart / Microsoft / DDos Protection |
| WAF |
Fail2Ban / ModSecurity / Comodo WAF (CWAF) / OWASP / Snuffleupagus / Brute Force Detection / Evasive / Fortification / 7G / Cloudflare WAF |
| Virus / Malware Scanning |
ClamAV / Maldet / MailScanner / ImunifyAV / ImunifyAV+ / Imunify360 / RKHunter / Linux Malware Detect (LMD) / Linux Environment Security (LES) / AI-Bolit / Dr.Web |
| |
|
| Reseller Accounts |
× |
| User Accounts |
√ |
| Separate Panels (Admin / Users) |
× |
| Hosting Packages |
× |
| Quotas |
Disk / Bandwidth |
| Traffic Statistics |
Disk / Bandwidth / AWStats / Webalizer / GoAccess / SmarterStats / Analog / Google Analytics / Custom |
| Cron Jobs |
√ |
| Local Backup |
√ |
| External Backup |
FTP / SFTP / SCP / SSH / RSH / WebDAV / Git / AWS S3 / Dropbox / Azure Blob Storage / Google Drive / Google Cloud Platform (GCP) / DigitalOcean Spaces / Wasabi / Backblaze / Rackspace Cloud Files / Rclone / R1Soft / Restic / Borg / Bacula / Duplicity / KeyDisc / JetBackup / Acronis / Custom |
| File Manager |
√ |
| |
|
| Extendable by Plugins |
√ |
| API |
√ |
| WHMCS Support |
× |
| Panel Account Restrictions |
× |
| Server and Package Updates |
CLI / GUI |
| Automatic Updates |
√ |
| Can be Uninstalled |
× |
Blank Template is web hosting control panel which ...................
The free version works ....................
Notes
- Sites
- Homepage
- Demo
- Changelog
- Code Repository
- Forum
- Docs
- Plugins
- General
- Settings
- Plugins
- File Locations / Repo Locations / Key Locations
- Install
- Update / Upgrade
- Uninstall
- Installation Instructions
- Misc
Notes
- General
- What is the difference between ImunifyAV, ImunifyAV+ and Imunify360?
- ImunifyAV provides only malware scanning.
- ImunifyAV+ provides malware scanning, cleanup and Reputation Management.
- Imunify360 provides complete web server protection that includes all ImunifyAV+ features as well as firewall, WAF, Proactive Defense, Hardened PHP, KernelCare and Backup integration.
- Iass vs Paas vs SaaS
- DigitalOcean, Cloudways and Google Compute Engine (GCE) are PaaS becasue they supply all of their own hardware and platform.
- IaaS vs. PaaS vs. SaaS | IBM - Understand the IaaS, PaaS and SaaS cloud service models and their benefits.
- What is PaaS (Platform-as-a-Service)? | IBM - PaaS is a cloud-based computing model that allows development teams to build, test, deploy, and scale applications faster and more cost-effectively.
- IaaS vs SaaS vs PaaS: A guide to Azure cloud service types | Nigel Frank - Don’t know your IaaS from your elbow? Find out the differences between SaaS, IaaS, PaaS and other cloud service types, and how you can utilize them with Microsoft Azure.
- What Is PaaS? | Google Cloud Platform (GCP) - Learn about Platform as a Service, how it works, and the benefits of using a complete development and deployment environment in the cloud.
- RunCloud vs. Cloudways: Quite similar with a few differences | Computan
- RunCloud and Cloudways do not have their cloud infrastructure but assist you in managing other cloud services. Both are cloud hosting technologies.
- PaaS is an acronym used for the Platform as a Service. The kit available in PaaS has both the Software and hardware required for hosting web applications. It is just another type of cloud computing model with modern functionalities.
- RunCloud is an example of SaaS, still, it is difficult for the new developers to understand the working. Again, Runcloud is not a managed service itself. It is a tool to manage your server in an easier way. You have to do everything else
- Cloudways is an example of a leading provider having all the PaaS-related service.
- What Is IaaS, PaaS, and SaaS? Examples and Definitions: A Cloud Report | Mindsight
- Are you using cloud computing effectively? Many ask what is IaaS, PaaS, and SaaS - and are already using all three models. Read for examples, definitions, and to find out the most common use cases.
- An excellent diagram
- iptables
- iptables is not a firewall, it is a WAF
- iptables - Wikipedia
- iptables is a user-space utility program that allows a system administrator to configure the IP packet filter rules of the Linux kernel firewall, implemented as different Netfilter modules.
- iptables - Unix, Linux Command | Tutorialspoint - iptables Unix Linux Command - Each chain is a list of rules which can match a set of packets. Each rule specifies what to do with a packet that matches. This is called a target, which may be a jump to a user-defined chain in the same table.
- Fail2Ban
- 7G Firewall (WAF)
- 7G Firewall | Perishable Press - The 7G Firewall is here! 7G is now out of beta and ready for production sites. So you can benefit from the powerful protection of the latest nG Firewall.
- The “7-G” firewall is actually just a set of web-server rules (published by Perishable Press) to filter out some well-known bad traffic before the requests hits the WordPress site. The idea with this type of “firewall” is that traffic requesting PHP/WordPress resources is expensive. It’s much cheaper and faster to weed them out at the webserver level before it gets that far.
- Using the GridPane 7G Web Application Firewall on OpenLiteSpeed (OLS) | GridPane - The GridPane OpenLiteSpeed stack incorporates the 7G Web Application Firewall (the predecessor, 6G, is Nginx only). The 7G WAF was originally developed by Jeff Starr at Perishable Press for Apache…
Alternative Panels Research
Various Lists
- 18 popular web hosting control panels [List] - A list of the most popular web hosting control panels on the market; which make management and automation tasks easier for sysadmins & ISPs.
- Top 11 cPanel Alternatives to Help Manage Your Websites | Kingsta - cPanel is a popular and stable control panel. However, there are a lot of cPanel alternatives to choose from if you want something different.
- Best cPanel alternatives of 2023 | TechRadar - Discover the best cPanel alternatives available today.
- cPanel Alternatives: 10 Best Options for Managing Websites (2023) - Are you on the hunt for cPanel alternatives? cPanel is the web server control panel of choice for many shared hosts, but it's not the only option out
- 8 Alternatives to cPanel Web Hosting Control Panels - Free & Paid Options - WHSR
- There are many cPanel alike hosting control panel in the market, many of which are just as powerful and competent. In case you are tired of cPanel license price hikes and looking for an alternative - this article is for you.
- Nice list
- The 12 Best cPanel Alternatives In 2023
- If you’re looking for better cPanel alternatives, this article will help you make a better decision based on your needs and feature requirements.
- Nice list
- What are the best alternatives to cPanel? - VPSBG.eu
- This article will focus on the best and most viable alternatives to cPanel in relation to pricing, features and server compatibility.
- Nice list
- The Top 7 Free cPanel Alternatives - Control Your Server Your Way - Every web hosting service needs to include some kind of control panel and cPanel is the most popular by far, but are there any free cPanel alternatives you can use?
- 15 Best FREE cPanel Alternatives (2023 Update) | Guru99 - cPanel is one of the most famous web hosting control panel. It enables website owners to efficiently manage the website from a web-based interface in a single dashboard.
- 7 Free Alternatives to cPanel - cPanel is a very popular Web Hosting Control Panel (WHCP) but it isn’t the only one in the market. These powerful applications allow users to easily control and manage their web hosting accounts. Most WHCPs are Graphic User Interface-driven making them easy to use for many people.
- 5 Best cPanel Alternatives – 2 Are 100% FREE (2023 Update) - With cPanel's massive price increases, it's time to find a new hosting management solution. Our hosting expert reviews and compares the best alternatives.
- 10+ cPanel Alternatives (Free and Paid) With a Winner Solution - Magenticians - cPanel is a good solution for startups but not reliable for everyone Learn about paid free cPanel alternatives and a perfect solution for ecommerce hosting.
- cPanel Price Increase And Alternative Control Panels - Interserver Tips - In this tutorial, we can check alternative control panels for cPanel.
- Top 10 Free Open Source Web Hosting Control Panels – Ultimate Comparison - Top 10 Free Open Source Web Hosting Control Panels – Ultimate Comparison - HostNamaste1) ISPConfig | 2) Ajenti | 3) CWP (CentOS Web Panel) | 4) Virtualmin | 5) Webmin | 6) Sentora | 7) VestaCP | 8) Kloxo-Mr | 9) ZPanel | 10) Froxlor | 11) EHCP (Easy Hosting Control Panel)When you’re a blogger, you have to deal with lots of web hosting services. The same goes for any website owner. One has to have extensive technical knowledge regarding web hosting and its functions as the hosting market is exploding with competition in this day and age.
- 8 Best free Cloud Web hosting Control Panels for 2023 - Host your website on cloud using best free and open source Control panels for VPS hosting and cloud services such as AWS, Google and more...
- The 12 Best cPanel Alternatives (2020 Edition) | Serverwise - Still looking for a cPanel alternative? We've got you covered, in this article – we compare the best server control panels to help you make the right choice.
- Free alternative for cPanel, DirectAdmin or Plesk? - YouTube - Is there a free web hosting control panel with enough features, reliability and security to replace cPanel, DirectAdmin or Plesk and help you manage your dedicated, cloud or virtual private server?
- Best FREE CPanel Alternatives For 2023 | Itsubuntu.com - Best free cPanel alternatives for 2021. free web hosting software in 2021. Paid cPanel vs Free open source cPanel alternatives. Install free cPanel.
- Best Free CPanel Alternatives In 2023 [Test & Reviewed] - In this article, we will tell you about the top best free cPanel alternatives you can use to maintain and manage website's files.
- 10 Best Free CPanel Alternatives 2023 - Rigorous Themes
- 8 cPanel Open Source Alternatives - Looking into the top cPanel open-source alternatives? We tested the leading solutions and shortlisted the best.
- 8 Best cPanel Hosting Alternatives in 2023 (Compared) - Bored of cPanel or just don't fancy using it for your server? We've researched the best cPanel alternatives for your website's control panel.
- Plesk Alternative: Top 10 Free Open-source Web Hosting Panel - A detailed list of all the Plesk Alternative. Free Open-source Web Hosting Panel for quick and easy server management and control.
- Best cPanel Free Alternatives in 2023: Top Control Panels - Get free cPanel alternatives for cost-effective website administration. Compare features and choose the best control panel for you.
- 10 Best open source web hosting control panel (Cpanel) 2022 - H2S Media - Here are few well known free & open source Web hosting control panel also alternatives to WHM CPanel to install on Linux OS like CentOS & Ubuntu...
- 8 Top Ubuntu server Web GUI Management Panels - H2S Media - Few best Web GUI for Ubuntu server to control & manage different aspects such as Apache web server, database etc. from intuitive graphical user interface.
- cPanel Alternatives - BRS MEDIA TECHNOLOGIES - Aside from that, for most, cPanel just isn’t the best option available anymore. So – without further ado, let’s take a look at all of the best cPanel alternatives and help you make an informed decision.
- Best cPanel Alternatives 2023: Plesk, DirectAdmin and More - Web hosting control panels are one of the most important tools for hosting service providers and web administrators. Until recently, cPanel is by far the most popular panel. However, recent price hikes forced especially hosting service providers to look for alternatives.
- Best OpenSource cPanel alternative for linux | LinTut - cPanel is a Unix based web hosting control panel but is not free. In this article i will show you 6 Open Source cPanel alternatives (Kloxo, Webmin, ISPConfig, Ajenti, Zpanel, EHCP)
- 5 Best Free cPanel Alternatives in 2022 (And a Paid One) - For years, cPanel has been the best WHS on the web. However, There are other options. Here we will examine 5 best free cPanel alternatives
- Top 5 cPanel Alternative - eHostingServer - The control panel is a popular tool used to manage hosting server. Here is the list of top cPanel Alternatives which can be used to manage server.
- 7 Best cPanel Alternatives for Your WordPress Website - Qode Interactive - Looking for some cPanel alternatives to try out for website hosting control and management? There's quite a few of them - and we've chosen the best ones!
- 6 Great cPanel Alternatives - InMotion Hosting Blog - Learn which of these great cPanel alternatives best suits your needs on Cloud Server Hosting.
- 20 Best cPanel Alternative Control panel 2020 [Free/Paid] - 17 Best cPanel Alternative Management panel 2020. There isn't a doubt that cPanel is likely one of the most well-known website hosting management panel. It permits web site house owners to effectively handle the web site from a web-based interface in a single dashboard.
- 15 BEST cPanel Alternatives in 2020 [Free/Paid] - SaaSHub - A summary of recommendations.
- Top 7 Best cPanel Free Alternatives 2023 | cPanel Open Source Alternative - Web Blogging - In this, article, the Top 7 Best cPanel Free Alternatives, cPanel Open Source Alternative full reviews have been given to you.
- 5 Best Free cPanel Alternatives in 2022 (And a Paid One) - For years, cPanel has been the best WHS on the web. However, There are other options. Here we will examine 5 best free cPanel alternatives.
- 8 cPanel Open Source Alternatives | CloudPanel - Looking into the top cPanel open-source alternatives? We tested the leading solutions and shortlisted the best.
- cPanel vs. Plesk vs. Webmin vs. Other Web Panels (old)
- While each hosting control panel should offer the same fundamental features — management for domains, email, FTP, app installs, and so on — the actual feature sets, layout, and level of control offered can vary widely from panel to panel. Below, we discuss each of the top web hosting control panels independently.
- Shows some of the oldies and what they looked like.
- This article was definately not written in Nov 2023.
Comparison Sites (also gives lists)
- cPanel Alternatives: 25+ Server Management Tools and Web Hosting Services | AlternativeTo - The best cPanel alternatives are Vesta Control Panel, Webmin and ISPmanager. Our crowd-sourced lists contains more than 50 apps similar to cPanel for Linux.
- CentOS CWP alternatives and competitors 2023 | PeerSpot - Discover the top CentOS CWP alternatives and competitors. Read comparisons, reviews, and ratings from real users sharing their opinions.
- Top 15 Ajenti Alternatives & Similar Software - eBool - The Top Alternatives to Ajenti Includes cPanel, Vesta, Plesk, Webmin and 11 other products in Hosting Control Panel.
- Ajenti vs Webmin - compare differences and reviews? | LibHunt
- Compare: Cockpit Project vs cPanel (Which is better?) | Zeemly - This is a side by side comparison of Cockpit Project and cPanel. Two products that are similar in nature, yet provide unique feature-sets that are worth taking in to account before making a purchasing decision or start using the software. This page can help you broadly analyze the products and weigh pros and cons against one another. Allowing you scrutinize peoples opinions about Cockpit Project and cPanel, before making a decision if any of the products fit your use-case.
- cPanel VS Cockpit Project - compare differences & reviews? - Compare cPanel VS Cockpit Project and find out what's different, what people are saying, and what are their alternatives
- VestaCP Alternatives and Reviews (Jan 2023) - Which is the best alternative to VestaCP?
- CyberPanel Alternatives (12 Similar Tools as of April, 2023) | Zeemly - In total people have suggested 12 alternatives to CyberPanel that share similarities by use case and feature set.
Individual Reports
- Centos Web Panel Review - Slant - Top reasons why people like Centos Web Panel
- CyberPanel Overview (Details, Reviews, Pricing, & Features) - CyberPanel is a web hosting control panel that natively supports LiteSpeed Web Server, Email, DNS and FTP server and high performance, lightweight and a drop-in Apache replacement. The software free to use, but is also provided as CyberPanel Enterprise, with extended features for organizations with more requirements.
Misc
Web Servers
Just a quick list of the servers for my reference as they popped up during my research.
- Apache
- The Apache HTTP Server Project is an effort to develop and maintain an open-source HTTP server for modern operating systems including UNIX and Windows. The goal of this project is to provide a secure, efficient and extensible server that provides HTTP services in sync with the current HTTP standards.
- Nginx
- nginx [engine x] is an HTTP and reverse proxy server, a mail proxy server, and a generic TCP/UDP proxy server, originally written by Igor Sysoev.
- Nghttp2
- This is an implementation of the Hypertext Transfer Protocol version 2 in C.
- This can be used by apache instead of a module, to offer http/2 and via openssl1.1.1 TLS1.3 (i.e. CWP workaround)
- LiteSpeed
- LiteSpeed Web Server is an Apache alternative that conserves resources without sacrificing performance, security, or convenience. Double the capacity of your current Apache servers! Securely handle thousands of concurrent clients while consuming minimal memory and CPU. Compatible with your favorite control panel.
- MiniServ
- Caddy
- Sites
- General
- Caddy 2 is a powerful, enterprise-ready, open source web server with automatic HTTPS written in Go
- FreeBSD, OpenBSD, Windows, macOS, Linux
- HTTP2 http3 QUIC TLS1.3
- Yes, Caddy is free to use for personal and commercial purposes, both locally and in production, without limitations or warranty of any kind, subject to the terms in the standard Apache 2.0 open source license. Just like any other open source project.
- Fast and extensible multi-platform HTTP/1-2-3 web server with automatic HTTPS
- That means it’s totally free for you to use, including for live production servers, and in a commercial context. You may take this code, make any modifications you like, and use it for any purpose. You can even re-distribute it with your changes included and re-license those modifications (as long as you include the original license for the unmodified parts of the code and don’t include trademarked content).
- caddy/LICENSE at master · caddyserver/caddy | GitHub - Fast and extensible multi-platform HTTP/1-2-3 web server with automatic HTTPS - caddyserver/caddy
- Roll Your Own Static Site Host on VPS with Caddy Server - This blog post will teach you how to set up a static host on a virtual private server with Ubuntu, Caddy server, SSL, and SFTP access.
- How To Remotely Access GUI Applications Using Docker and Caddy | DigitalOcean - Even with the growing popularity of cloud services, the need for running native applications still exists. By using noVNC and TigerVNC, you can run native applications inside a Docker container and access them remotely using a web browser.
- Using Caddy as a reverse proxy in a home network - Wiki - Caddy Community - If you want to run a service inside a Local Area Network (LAN) such as your home or office – and especially if you want to be able to access it from outside that network – Caddy can help you accomplish this quite easily. This guide will show you how. It assumes you’ve never done this before, but that you have some technical proficiency and are somewhat knowledgable about your own network.
- What Is Caddy Web Server? - Are you unsure which web server to run WordPress on? Learn about Caddy Web Server to determine whether it's right for your specific needs!
- GUI
- Install
- Cloudflare Server
- This is Cloudflare's custom web server.
- Microsoft IIS
- Node.js
- A server side Javascript execution engine, and web server.
Which Base OS to use?
Hosting or you are not sure:
- Ubuntu Server LTS (Minimal) (Pro flavour is optional)
- AlmaLinux (Minimal)
Testing or local hobby sites:
- Ubuntu Desktop LTS (Minimal/Normal) (Pro flavour is optional)
General
AlmaLinux
- General
- This is the one cPanel are going to use as their base OS.
- It is support by Microsoft and is a valid OS to use in thw WSL emulation layer on your Windows computers.
- It is not dependant on RHEL so will not get pulled like CentOS has been.
- AlmaLinux seems to have more support that Rocky Linux.
- A lot of open source software is using AlmaLinux as a CentOS direct replacement.
- AlmaLinux OS - Forever-Free Enterprise-Grade Operating System - An Open Source, community owned and governed, forever-free enterprise Linux distribution.
- Test Driving AlmaLinux 9 Minimal: A Hands-On Review - Hands-on review of AlmaLinux 9 Minimal - exploring features, performance, stability, and compatibility. Find out how this community-driven distro stacks up in our comprehensive review.
- AlmaLinux 8 OpenSCAP Guide | AlmaLinux Wiki
- SCAP - The Security Content Automation Protocol - is an automated method that uses standards to enable vulnerability management, measurement, and policy compliance evaluation of systems. SCAP is a U.S. standard maintained by the National Institute of Standards and Technology.
- The AlmaLinux OpenSCAP Guide describes how to use OpenSCAP software to audit your AlmaLinux 8 system for security compliance.
- Install
- AlmaLinux Installation Guide | AlmaLinux Wiki
- AlmaLinux supports both firmware interfaces: BIOS and UEFI.
- AlmaLinux has 3 types of ISOs for each supported architecture:
- boot - a single network installation CD image that downloads packages over the Internet.
- minimal - a minimal self-containing DVD image that makes offline installation possible.
- dvd - a full installation DVD image that contains mostly all AlmaLinux packages.
- Almalinux large ISO has all the different version on it, including minimal.
- AlmaLinux Installation - Linux Tutorials - Learn Linux Configuration - In this tutorial, we show the step by step instructions to install AlmaLinux on a desktop or in a server environment.
- If you’re using the boot ISO, you’ll also need to configure an installation source (AlmaLinux’s repo), and your internet connection (just turning it on is usually enough). This is only necessary if you’re not using the DVD1 or minimal ISO media.
- Info about Base Environments and Software selection during install | Reddit
- You can find what each group means in the repodata on the iso - see comps.xml.gz
- These are the translation files.
- ISOs
- Update
Ubuntu
- General
- Explained: Which Ubuntu Version Should I Use? - Confused about Ubuntu vs Xubuntu vs Lubuntu vs Kubuntu? Want to know which Ubuntu flavor you should use? This beginner's guide helps you decide which Ubuntu should you choose.
- Why You Should Prefer Ubuntu LTS Over Normal Releases - Ubuntu introduces a new LTS release of the distro every two years. Here are three reasons to install Ubuntu LTS on your PC.
- Ubuntu or Fedora: Which One Should You Use and Why
- Brief: Ubuntu or Fedora? What’s the difference? Which is better? Which one should you use? Read this comparison of Ubuntu and Fedora.Ubuntu and Fedora are one of the most popular Linux distributions out there. Making a decision to choose between using Ubuntu and Fedora is not an easy.
- Choose Ubuntu
- Server vs Desktop
- The main difference between Ubuntu Desktop and Server is the desktop environment. While Ubuntu Desktop includes a graphical user interface (GUI), Ubuntu Server does not and so the Server version has a much lesser resource footprint.
- The Server and the Desktop now share the same kernel.
- Both have all of the packages available to them from the Ubuntu repositry.
- Both installations medias are different. The Server one has much less on it because it does not need any of the GUI stuff.
- Both have different default package lists to better reflect their purpose.
- You could say the server is a different package configuration.
- The installation process is different on both flavours.
- What's the difference between desktop and server? | Ubuntu - This official page is very clear about the differences.
- Ubuntu Desktop vs. Ubuntu Server: What’s the Difference?
- Unsure whether to choose Ubuntu Desktop or Ubuntu Server? Here's what you need to know.
- Great explanation
- Ubuntu Desktop vs. Server: How Do They Compare? - History-Computer - Which is the best version of Ubuntu for you: Ubuntu Desktop or Server? Find out with comparisons, features, and benefits in this guide.
- Difference between Ubuntu Desktop and Ubuntu Server - Ubuntu has introduced various flavors in the software industry, including Ubuntu Server, Ubuntu Desktop, Cloud, Kylie, etc. These Ubuntu variants ensure that Ubuntu maintains its position and attracts new clients. If you want a reliable server with a command-line interface, go for the "Ubuntu Server." On the other hand, if you want to avail a desktop environment that comprises a great GUI and preinstalled utilities, "Ubuntu Desktop" is an excellent choice for you! The difference between Ubuntu Desktop and Ubuntu Server is explained in this article.
- Ubuntu Server vs Desktop: What's the Difference? - When you click on the download button on the Ubuntu website, it gives you a few options. Two of them are Ubuntu Desktop and Ubuntu Server.This could confuse new users. Why are there two (actually 4 of them)? Which one should be downloaded? Ubuntu desktop or server?
- Ubuntu Server vs Desktop - javatpoint - Ubuntu Server vs Desktop with examples on files, directories, permission, backup, ls, man, pwd, cd, linux, linux introduction, chmod, man, shell, pipes, filters, regex, vi etc.
- Ubuntu Desktop vs Ubuntu Server: What's the Main Difference - Ubuntu is one of the most popular operating systems of Linux. In this article, you will learn the differences between Ubuntu Desktop and Ubuntu Server. Follow this guide to review Ubuntu Desktop vs Ubuntu Server.
- Ubuntu Desktop vs Server: Differences, Similarities & More - Explore all the differences and similarities between Ubuntu Desktop vs Server. Learn more about Ubuntu Desktop and Ubuntu Server.
- Ubuntu Server Vs Ubuntu Desktop: Everything You Need to Know & More! - Ubuntu server vs Ubuntu desktop is a moot point if your OS is exposed to destructive cyber threats. Experience 100% security with Cloudzy's mega-quality VPS solutions.
- Installing
- Ubuntu 18.04 LTS Minimal Install Guide - The default Ubuntu desktop is heavy on resources. It requires a lot of RAM, hard disk space, good GPU and CPU to work perfectly. Ubuntu 18.04 LTS desktop installation image does have a new functionality called Minimal installation. With Minimal installation you can install only the basic components required for the operating system to function, no extras.
- Ubuntu 18.04 LTS Minimal Installation Option Review - In this article we will take a closer look at what exactly you get when you use minimal installation option so that you stay prepared and can be ready if the option is for you when Ubuntu 18.04 is available. Will you get faster booting time? Will it reduce RAM consumption? Let’s review!
- INSTALL UBUNTU - Server 20.04 LTS - Code Intrinsic - Simple Guide how to setup USB Installation Disk, followed by installation instruction step by step.
- Ubuntu Pro
Debian
- This is where Ubuntu comes from and is usually 6 months ahead of Ubuntu when it comes to new major technologies.
- People say Debain is more secure becasue it has less unwanted packages.
General Panel Setup Guide
This is just a collection of notes but might get more refined as I go along.
- Before installation
- Login
- Enforce admin HTTPS only.
- Disable root from the admin panel (if exposed on the web).
- Restrict admin access by IP.
- Restrict access to apps such as phpMyadmin and Webmail.
- Files
- Disable non-TLS FTP
- Restrict files from users (CHROOT) etc
- Email
- Enable DKIM/SPF/DMARC
- Set email filtering patterns
- Security
- Database
- Make sure your phpMyAdmin and MySQL server use the DB collation utf8mb4_unicode_ci
- PHP
Setting up your Ubuntu Server (for a Panel)
This is an easy thing but I will just mention the key points.
Recommend Storage
- 50GB for Dev server.
- 100GB is a good size to start off with if you dont have many websites to host.
- 250GB will hold a lot of websites.
NB: You need to have enough space for making backups, especially if you do an all accounts backup which will require at least twice the currently used space on your server.
Install Base OS
- Download Ubuntu Server LTS
- Install Ubuntu with these options when requested:
- Use the 'Ubuntu Server (minimized)' option
- Do not use LVM for paritioning your disk.
- Don't use when creating Virtual machines.
- Snapshotting will be done above the VM if at all (i.e. TrueNAS), adding LVM adds an extra layer of complexity just for this reason alone.
- This is a dynamic disk that has to be online to be cloned.
- Install OpenSSH
- Enable the root account
sudo passwd root
Update OS
Get your server's IP address
- Get your server's IP address
ip addr

or

ip a
Enable SSH
- Add root to SSH
Instead of using `sudo` you could run this command to swap to the `root account`: sudo -s

sudo apt-get install nano (you might not need to install this if part of your Ubuntu flavour)
sudo nano /etc/ssh/sshd_config

Add the following permit rule in the correct section as shown below:

# Authentication:
PermitRootLogin yes
- Restart the SSH daemon
systemctl restart ssh

or

service ssh restart
You can now connect in with SSH using the root account and the server's IP and I can copy and paste instructions via SSH using PuTTY from my Windows PC.
Additional Packages
I would recommend adding the following packages:
- nano
- This is an easy to text editor and is invaluable if you get issues that need fixing from the command line.
- dnsutils
- This add the ability to ping remote servers, adds the DNS utilities ping, dig, traceroute and others.
- It is perfectly safe to install these dnsutils on your live server as they are standalone binaries.
- iputils-ping
- This simple command can be very helpful in diagnostics
- network-manager (optional)
- This installs for nmtui allowing for easy management of the network and NICs.
- This is very useful if your dev Virtualmin is being moved about (i.e. IP changes).
Setup your selected Panel using their instructions
Disable Root Account (optional)
Recommendations
- Don't disable the root account
- Use a sudo-capable account for administration
- Disable root logins in SSH
- Should I disabled the root account after I have installed Virtualmin - Help! (Home for newbies) - Virtualmin Community
- By default, after a fresh Ubuntu installation, I believe
root user will not have a password set. And, that’s been the case since around Xenial (16.06) or Trusty (14.04), maybe even earlier. Your first user will be configured with sudo ALL privileges. You can, of course, set a root password, and many hosting providers do that with their Ubuntu image.
- You do have to have a
root user (many processes start with UID 0), but you can disable direct logins as root in a variety of ways. Using the “lock” option in passwd, as you mentioned above, is one (this sets the hashed password to start with !, which will never match a hash and thus prevent all authentication as this user). Disabling root logins in ssh is another (console root login still works). I tend to prefer the latter, as I like knowing I can get in on the console in the event everything else fails. But a sudo-capable user works for that, too, and you probably always still have single user mode, if you can get to the console.
- Disable the root account
sudo passwd -l root
- Disabling root login over SSH - Webmin Administrator's Cookbook - Allowing the root user to log in over SSH is a potential security vulnerability. An attacker may try to break into your system by trying every password for the root user. It's recommended to disallow the root user's access over SSH and to log in as another user with the
sudo privileges to perform administrative tasks.
Setting up your Debian Server (for a Panel)
As with the Ubuntu server we will be doing a minimal installation, however Debian does not have a specific 'minimal' installation and there are a few other small differences in the setup.
Install Base OS
- Download Debian from here
- Install Debian with these options when requested:
- Do not use LVM for paritioning your disk.
- Don't use when creating Virtual machines.
- Snapshotting will be done above the VM if at all (i.e. TrueNAS), adding LVM adds an extra layer of complexity just for this reason alone.
- This is a dynamic disk that has to be online to be cloned.
- Configure a password for both the root and your user account. If you use simple passwords dont forget to change them later.
- Software Selection
- Only install 'SSH Server'

- Configure the package manager
- Make sure this is enabled and if you don't know what repository to select then juts use: deb.debian.org
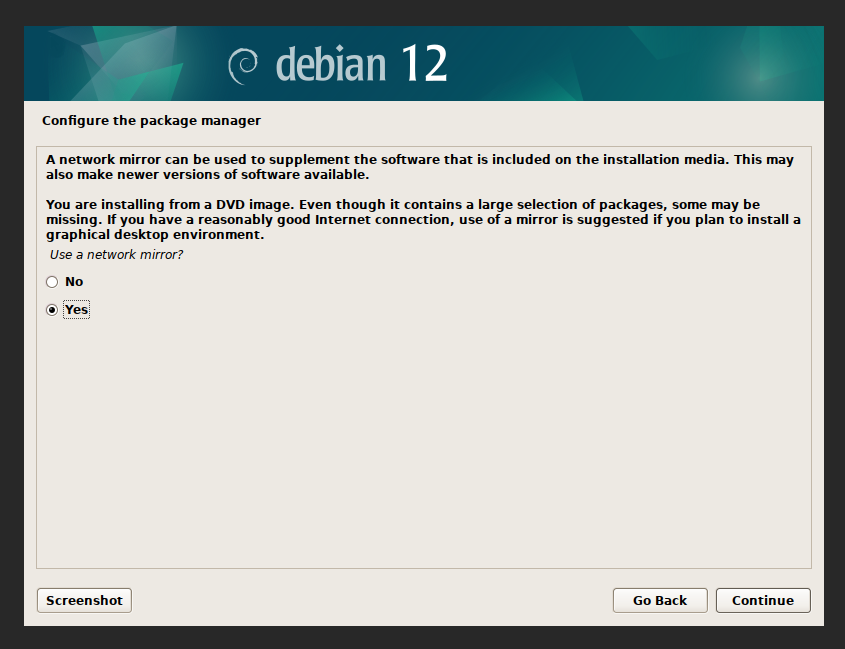
- Remove the CDROM Repository
- If you do not remove this, Debian will keep trying to get files from the DVD/ISO even if it is disconnected and will cause things to fail.
- Once Debian installation is completed, install wget
apt install wget
Follow the Ubuntu Instructions
Follow the Ubuntu instructions above, starting at "Update OS", as these are the same for Debian.
Links
Top 10 Things to Do After Installing Debian 12 (Bookworm) - In this guide, we will explain top 10 things to do after installing Debian 12 (Bookworm to make the most out of this powerful operating system.