Updated to [OpenWrt Wiki] OpenWrt 21.02.1 - Service Release - 25 October 2021
Overview / Purpose of this guide
These instructions are for aimed at users of Windows but a lot of the information will work for other OS users.
I wrote these instructions just to clear few things up so next time I flashed a BT Home Hub 5 Model A (HH5A) router, it would be easier. The instructions done by other people are not necessarily faulty but not as clear as I needed at points and this mini guide will address those. It must be said I am also a bit of a newbie at electronics so not everything is obvious.
These instructions are complementary to the guides and information that has already been done by the community and in particular thanks goes out to:
- Bill at ebilan for the excellent instructions for installing OpenWrt on a HH5A.
- OpenWrt groups for the hard work with the open source router software.
- mkresin - for the BT HH5A install image
- Anyone else I have not mentioned who helped with this setup.
My guide covers all aspects of this process:
- Opening the routers case
- Soldering the serial connection
- Flashing / Installing OpenWrt and backup of the original router firmware
- Configuring OpenWrt on the router
Things you need
- Documents
- OpenWrt HH5A Page - Original OpenWrt page for the HH5A and the main starting point
- 1-OpenWrt-LEDE Installation Guide for HH5A.pdf (ebilan)
- 2-BT HH5A openwrtLEDE Windows instructions.pdf (ebilan)
- Printout of the three wires on the board in colour (My version below) (optional) – makes it easier when you are soldering
- Printout of the fine pad locations in colour (optional) – makes it easier when you are soldering
- Equipment
- Spudgers and other tools to open the routers plastic case
- Soldering Equipment to solder wires to HH5A circuit board for serial console access.
- Various wires
- 5 Pin Header Block - you can cut these to size
- Soldering iron and solder etc..
- Kapton tape (optional) – for masking of the areas you are soldering to, to prevent damage.
- PL2303TA USB To TTL RS232 Converter Serial Adapter Cable – This is not the Chinese copy.
- Chinese copies based on the Prolific PL2303HX will require the vista driver from here and also see eliban instructions about using these devices.
- USB pen drive at least 512mb - FAT32 or exFAT
- Software
- Firmware / Install Files for the HH5A
- lede-lantiq-bthomehubv5a_ram-u-boot.asc – BT HH5A LEDE/OpentWRT custom U-boot (mkresin)
- lede-lantiq-xrx200-BTHOMEHUBV5A-installimage.bin –BT HH5A LEDE/OpenWrt install image (mkresin)
- BT HH5A sysupgrade file (OpenWrt)
- bt_homehub-v5a-squashfs-sysupgrade.bin (21.02.1)
- bt_homehub-v5a-squashfs-sysupgrade.bin (21.02.3) (Last non-DSA)
- bt_homehub-v5a-squashfs-sysupgrade.bin (21.03.0-rc4) (DSA)
Step 1 – Opening the routers case
If you do not open the case carefully you will break the 'fixing tabs' inside. I broke them on my first go and then repaired them with a soldering iron. Look at these instructions in order on how to open the case.
- BT HomeHub 5A Router UART Access Hack (ebilan) – This tutorial shows you how to open the case (in detial) and how to mount a permanent serial connection.
- BT home hub 5A case opening - YouTube - This hub has been open before, don’t just pull the hub apart and all of the clips need to be loosened.
Step 2 – Soldering the serial connection
Before you start soldering read this article:
Simple no soldering flashing jig made from a cat5e keystone jack - openwrt.ebilan.co.uk
It is perfect for those who cannot solder. You will need to buy a RJ45 Network Keystone from eBay.
You can use your own method for soldering the connections as long as you have access to the required connections on the circuit board and can attach them to a USB to TTL RS232 Converter.
People have done this many different ways but I am going to replicate the arrangement on the OpenWrt BT HomeHub 5.0 Type A as this is the page most people will land and the method is quite clean.
You do not have to use the ground points that I have used based on the OpenWrt BT HomeHub 5.0 Type A page.
This method described on this page mounts a 5 pin header block designed for reuse.
Connections of the 5 pin header
Before soldering, you need to know what you are soldering and why.
The images and instructions could be a little clearer about what is actually soldered to where, so I will just clear that up now.
I have taken the image off the OpenWrt HH5A page that shows the wires connected and then labelled the connections with an accompanying table below showing the connections. These are now labelled in a logical order and are easier to follow but do not have the same numbering as the OpenWrt HH5A page.

Image from the OpenWrt HH5A page
| Pin No. | USB Serial to TTL Adapter | Wire Colour | Home Hub Connection Point |
| 1 | n/a | Blue | boot_sel2 / R45 Pad |
| 2 | n/a | n/a | GND / Use the USB socket ground/case pin |
| 3 | TX | Blue | RX / R78 Pad |
| 4 | RX | Purple | TX / R77 Pad |
| 5 | GND | n/a | GND / Use the ground plane connection of the capacitor |
- As you can see there are 2 groups. One is for the ‘Boot Selection’ and the other is for the 'Data Connection'
- There are 2 grounds because each group needs its own ground.
- The ground on the left is a case pin of the USB socket and the one on the right is the ground plane of a capacitor. The 5 pin header is soldered directly to these points (pins 2 and 5) which gives it stability as well as a ground connection on each pin.
- If left as is, the case would need to have some holes drilled into it to allow the 5 Pin header to be exposed outside of the case for permanent access.
- After the process is complete the serial interface is not needed unless router becomes bricked.
- Some people say to remove the serial interface (wires etc.) as it can affect the wireless calibration. Eliban left his in
This is a close up of the pads

Image from the OpenWrt HH5A page
Fitting the 5 pin header and soldering the wires to the pads
These are my newbie notes
- Do not use to much heat because you will damage stuff. If it gets a bit warm wait a few minutes before doing the next pad or pin.
- if you are not a good solderer, get some practice (or someone to do it for you)
- Mask of the area around the pads with some kapton tape to prevent accidental damage to components
Soldering instructions
- Get some wires and make sure you get the approximate length to match how it looks in the picture
- Strip the ends of the wire, but not too much.
- Solder the wires to the required pins of the 5 pin header.
- Solder the 5 pin header on to the 2 grounding points.
- Make sure you have not melted the 5 Pin header and the pins are still tight so do not move.
- Lay the wires in place on the board so they run from the header to the pads
- Tape the down the wires with some Kapton tape. This makes it much easier to solder them to the pads and removes load of the solder pads when the wires are soldered to the pads
- Solder the wires to the pads carefully. The solder mask will be quite forgiving.
Example of neat soldering
Step 3 - Flashing / Installing OpenWrt and backup of the orginal router firmware
Follow the instructions from 1-OpenWrt-LEDE Installation Guide for HH5A.pdf (ebilan) and use this as a companion guide.
Download Firmware / Install Files for the HH5A
You should of downloaded these from the prerequisites section.
Install the required software
- PuTTY
- Notepad++
- TFTPD32 - Use the Standard edition installer
- WinSCP - This is only needed for messing with the router later. FlashFXP will also work.
Connect the adapter
- Connect the USB serial adapter to the 5 pin connector as the connection table above.
- pl2303ta Wires Legend - You can use the diagram to work out what each of the wires on the adapter do.
- Connect the USB serial adapter to windows.
- Get the COM number of the adapter by going to windows device manager and find the COM assignment of the new device.
Configure Putty
- As per the ebilan instructions page 3
Access the router firmware via the console
With putty running and the adapter connected:
- Short the boot_sel2 pin to Ground (GND) and power on the HH5A. Now immediately disconnect the boot_sel2 pin from Ground. The UART ‘CFG 04’ prompt will appear.
Do NOT leave it connected any longer than necessary because it may damage the hub, causing it to remain permanently stuck in ‘CFG 04’ mode! - CFG04 mode should now appear in the console. This means it is in a read/write mode.
- If you get CFG06 either you soldering is wrong for the boot select, you did not make a good short for long enough or you did not short the pins properly.
Transfer ‘HH5A LEDE/OpenWrt install image’ to the router
- Transfer the lede-lantiq-bthomehubv5a_ram-u-boot.asc (u-boot) to the router
- Open the .asc file with Notepad++, select all and copy
- Goto the Putty console window and right click (should still be open and connected to the router). The asc file will transfer and execute.
- I believe the .asc is file contains loads of pre-written scripts that get executed
- After about 90 seconds, the custom U-boot will start and the BTHOMEHUBV5A U-boot prompt will appear.
- On you windows PC set IP on the Ethernet to be 192.168.1.2/255.255.255.0
- Open TFTPD32
- Put lede-lantiq-xrx200-BTHOMEHUBV5A-installimage.bin into the TFTPD32 program directory. This prevents permission errors.
- Configure TFTPD32 as per eliban instructions, page 7
- Run the Put command
- Go back to putty
- Type the following command into the console
tftpboot 0x81000000 lede-lantiq-xrx200-BTHOMEHUBV5A-installimage.bin; bootm 0x81000000 - The file should automatically transfer via TFTP
- Type the following command into the console
- Wait 5+ mins for ‘br-lan’ to appear and then press enter
Now move on to the 1-OpenWrt-LEDE Installation Guide for HH5A.pdf (ebilan) as the rest of the instructions should be the same as the linux OS.
Backup BT Firmware (ebilan 3.0)
Before doing anything else you need to back your routers original firmware.
When you remove a pendrive from windows you should eject it properly so the volume is not marked as dirty
- Plug a pendrive into the USB socket (if a FSCK notice is shown, the volume was not unmounted properly, just a warning but it is better to use a clean pendrive). It will auto mount, usually as USB-A1
- Get the USB mount name by typing
ls /tmp/mounts
- Check the pendrive works by doing a directory listing
ls /tmp/mounts/USB-A1
- Run the backup command to send the nanddump to the pendrive took (12 minutes to complete on mine)
nanddump -f /tmp/mounts/USB-A1/hh5a.nanddump /dev/mtd4
- Unmount the pendrive and transfer the nandbackup backup to a PC. You can run the backup process again as above and then binary compare them if you want.
umount /tmp/mounts/USB-A1
- Whilst the USB is in the PC, put the file lede-17.01.4-lantiq-xrx200-BTHOMEHUBV5A-squashfs-sysupgrade.bin in the root of the USB
- Plug the USB back into the router
Replace the stock BT firmware (ebilan 4.0)
- Eun the prepare script by entering the command below. This will unlock the internal bootloader. Only ever run this once.
prepare
- Enter the confirmation
- The bootloader is now decrypted, unlocked and rewritten back to the firmware
- A LEDE/OpenWrt console will now appear root@lede:/#
- Enter the command
sysupgrade /tmp/mounts/USB-A1/lede-lantiq-xrx200-BTHOMEHUBV5A-squashfs-sysupgrade.bin
- This only takes a couple of minutes at most before the CFG04 message is on screen and this means the flash has finished successfully
- Powercycle the router
Backup settings - (ebilan 4.3)
Always backup your current OpenWrt configuration before making any significant changes.
- (System-->Backup / Flash Firmware-->Backup / Restore-->Download Backup)
- Get the backup of your configuration settings and store safely on another device.
- This seems to include all of the /etc/ folder and in particular the /etc/config/ folder
We have now installed OpenWrt successfully installed on our HH5A. You should now follow my instructions but I still use references to the 1-OpenWrt-LEDE Installation Guide for HH5A.pdf (ebilan) tutorial.
Step 4 - Configuring OpenWrt on the router
The following are my instructions on how to configure OpenWrt to give the same functionality (and more) of the orginal HH5A.
Router password
(System-->Administration-->Router Password)
Notes
- This must be done ASAP for security.
- When the password is not set you can just click on the message at the top for easy access
- I use the admin password off the router itself because it is easier to remember
Change hostname and local time
- Goto (System --> System --> General Settings)
- Hostname: primaryrouter
- You can pick a name of your choosing but it is easier to keep it like this for now while doing the tutorial.
- This prevents confusion if using other OpenWRT routers
- Timezone: Europe/London (this is correct for me)
- Hostname: primaryrouter
- Click 'Save & Apply'
SSH / SCP
This is optional and probably does not need changing for most peoples setup.
(System --> Administration --> SSH Access --> Dropbear Instance --> Interface)
- By default dropbear is set to listen to port 22 on all interfaces (unspecified), but the default firewall blocks it on the WAN zone.
- Perhaps set this to ‘LAN’ for better security?
Wireless
(Network --> Interfaces --> Wireless)
Only change things if they are noted below, else just leave as is. Some items are left in for reference if you are wondering.
Set the WiFi SSID and encryption with a suitable password
- 5GHz / wlan0
- Device Configuration --> General Setup
- Operating frequency: (AC / 36(5180 MHz) / 80 MHz) (default)
- Maximum transmit power: driver default (default)
- Device Configuration --> Advanced Settings
- You dont need to change anything here.
- Interface Configuration --> General Setup
- Mode: Access Point (default)
- ESSID (SSID): quantumwarp_5G
- Interface Configuration --> Wireless Security
- Encryption: WPA2-PSK/WPA3-SAE Mixed Mode (strong security)
- Cipher: auto (default)
- Key: {your password}
- Interface Configuration --> MAC-Filter
- You dont need to change anything here.
- Interface Configuration --> Advanced Settings
- Country Code: GB United Kingdom (or your country)
- Country Code: GB United Kingdom (or your country)
- Device Configuration --> General Setup
- 2.4GHz / wlan1
- Device Configuration --> General Setup
- Operating frequency: (N/ 11(2462 MHz) / 20 MHz) (default)
- Allow legacy 802.11b rates: unticked (default) - HH5A would have this enabled, but no-one uses this slow speed any more.
- Maximum transmit power: driver default (default)
- Device Configuration --> Advanced Settings
- You dont need to change anything here.
- Interface Configuration --> General Setup
- Mode: Access Point (default)
- ESSID (SSID): quantumwarp
- Interface Configuration --> Wireless Security
- Encryption: WPA2-PSK/WPA3-SAE Mixed Mode (strong security)
- Cipher: auto (default)
- Key: {your password}
- Interface Configuration --> MAC-Filter
- You dont need to change anything here.
- Interface Configuration --> Advanced Settings
- Country Code: GB United Kingdom (or your country)
- Device Configuration --> General Setup
Notes
- WiFi is off by default
- You can also use the same SSID for both networks if you want. This is the way BT Home Hub normally does it.
BT/Plusnet fibre using the DSL socket
- Read How do I connect the HH5A to my UK ISP ? (eliban 7.5) – this will give you the settings for your VDSL (fibre) or ADSL line but more importantly gove you the correction section to read next which depends on your required setup.
- Select the correct section to goto, In my case (eliban 9.1)
- Read Quick PPPoE setup using DSL port for VDSL Connection (eliban 9.1)
- Follow the instructions below to configure your BT/Plusnet fibre.
(Network-->Interfaces-->WAN-->Edit)
- Protocol =PPPoE
- PAP/CHAP username = your broadband username
- PAP/CHAP password = your password if you have one
- If you need to set a VLAN tag (i.e. for BT with VLAN tag of 101)
- (Network-->Interfaces-->WAN-->Edit-->Physical Settings-->Interface-->Custom Interface:) = dls0.101
- This setting will not stay on Custom Interface: but will create a new setting called Software VLAN: "dls0.101" (wan) which will be selected.
- Leave the rest
(Network-->Interfaces-->DSL)
- Settings for the UK
- Annex: B (all)
- Tone: A (A43c + J43 + A43)
- Encapsulation mode: PTM/EFM (Packet Transfer Mode) (default)
- DSL line mode: VDSL - slightly faster to connect on VDSL if you specify, however the HH5A would have this on auto.
- Ignore the rest
(Network-->Interfaces-->ATM Bridge)
- Delete the ATM Bridge
- This is only needed for ADSL
Now Reboot Router (System-->Reboot)
DNS
OpenDNS / Quad9 / Custom DNS servers
This still sends 192.168.1.1 to the clients but sets the DNS servers used by the router to OpenDNS
- (Network-->Interfaces-->WAN-->Advanced Settings-->Use DNS servers advertised by peer) = unticked
- (Network-->Interfaces-->WAN-->Advanced Settings-->Use custom DNS servers) = OpenDNS servers (208.67.222.222 / 208.67.220.220)
- Check out Quad9 and use their security based Public DNS servers (9.9.9.9 / 149.112.112.112) as an alternative.
Notes
- In (Networks-->Interfaces-->LAN-->Edit-->Advanced Settings-->Use custom DNS servers) you can set what DNS servers are issued to the LAN clients.
- This becomes available after you unticked/disable:
(networks-->Interfaces-->LAN-->Edit-->Advanced Settings-->Use DNS servers advertised by peer)
- This becomes available after you unticked/disable:
- In (Network-->DHCP and DNS-->General settings-->DNS forwardings) you can change where DNS queries are forwarded to.
- Edit the config file manually /etc/config/dhcp
- Configuring OpenWrt and OpenDNS to log all DNS lookups - might has some relevance.
- You can use the Dynamic DNS plugin to update the client IP at OpenDNS servers directly (or use DNS-O-Matic) so you can perform any required filtering you want such as a familiy filter etc...
DHCP
Notes
- DHCP settings are configured on the interface (i.e. network-->interfaces-->LAN-->DHCP Server)
- You can edit the DHCP settings manually by editing the Config file = /etc/config/dhcp
- (network-->DHCP and DNS-->) has the non-interface specific settings for DHCP and DNS.
Set Red WAN port as a LAN port (optional)
- 1-OpenWrt-LEDE Installation Guide for HH5A.pdf (ebilan) - part 9.7 (page 72)
- (network-->switch-->VLAN ID 1) set the WAN to be untagged
- (network-->switch-->VLAN ID 2) set the WAN to be off
- You need to do both settings above otherwise you get this error
“WAN is untagged in multiple VLANs!”
You could delete VLAN 2, but I don’t know what that does.
Notes
- By default: VLAN1 WAN = off, VLAN 2 WAN = untagged
Firewall
I currently do not have any specific configurations for the firewall because it has all been done.
Notes
- OpenWRT - Firewall - Port Forwarding and Traffic Rules - YouTube ( Van Tech Corner) In video video, we use OpenWRT Firewall to configure Port Forwarding and Traffic Rules. We will discuss the basic concept of Firerwall, such as zones, actions and network interfaces.
- Port Forwarding: Just that, it forwards ports based on patterns.
- Traffic Rules: Thi can perform none routing actions on packets based on patterns and the actions are:
- drop, accept
- reject
- don't track
- assign conntrack helper
- apply firewall mark
- XOR firewall mark
- DSCP classification
LED Lights
You are able to configure the router's 3 compound LEDs to provide feedback from the router's various functions with a selection of colours which can also be controlled independently.
There are some really nice features you can add such as the heartbeat effect where you can translate the CPU load in to a heartbeat pulse via the select LED. I use the WiFi LED configured as red.
Colours available
- Red
- Green
- Blue
- Orange - The router hardware is capable, but OpenWrt is not because of a limitation in the driver (See below)
Notes
- You can edit the LED rules very easily using LuCI
(System-->LED Configuration) - The LED configurations are stored in the file /etc/config/system
- You can edit the system file directly without needing to use LuCi.
- The order the rules appear in the system file is important because they are hierarchical like CSS so each rule will override the ones before it if they conflict. These will be in the same order as displayed in LuCi in which you can drag and drop the rules to change their order.
- The dimmed rule when enabled will dim all the LEDs.
- You can only program each LED with a single colour.
- This is a limitation od the GPIO Kerenl driver.
- Read this excellent explanation by a developer: FS#321 : BTHomeHub5 Type A dsl_notify.sh fails to set LED
- The hub has only three LEDs, but these LEDs are RGB LEDs, where each LED is controlled by three GPIOs. That is why you have red:broadband, green:broadband, blue:broadband.
- The GPIO LED driver does not have support for RGB LEDs and you can not use these colours intendant. Means, if you enable red + blue, the LED will be purple. With red + blue + green the LED will be white. If you use some kind of blinking pattern you get nice colour effects. What is missing in the kernel driver is the possibility to define an LED with multiple GPIOs and the value of each GPIO.
- So you cannot mix 2 colours such as red + green to give you orange.
- LED triggers prefixed with phy mean they are direct physical polls of the WiFi hardware. phy0 is the
- netdev trigger is a wrapper for polling various different software polls.
- The LED flashes on events triggered in physical interface, rather than in software network interface. Besides phy triggers have more events, it also provides possibility of static LED setup in case you want to monitor your 2.4 GHz radio (phy0 usually) and 5 GHz radio (phy1 usually) separately. netdev can’t guarantee this distinguishing since wlan0 may be referring to 2.4 GHz or 5 GHz radio based on current network setup.
- You cannot monitor both wifi networks as one.
- Linux LEDs GPIO, I am not sure it is the same things as OpenWrt's: linux/leds-gpio.c at master · torvalds/linux · GitHub
- Some Scripts for controling LEDs
- Device Tree (How LEDs are discovered)
- GPIO LED configuration - For Developers - OpenWrt Forum
- [OpenWrt Wiki] Device Tree Usage in OpenWrt (DTS)
- [OpenWrt Wiki] Adding a new device
- How to write a DTS file of a router for OpenWrt - For Developers - OpenWrt Forum
- Specifications - DeviceTree
- Linux commands to display your hardware information | Opensource.com
Links
- LED configuration /etc/config/system | OpenWrt - This is the official documentation which is geared towards developers.
- LEDE/OpenWrt — Disabling Your LEDs – LEDE/OpenWrt & IoT – Medium - Another way of disabling your LEDs using the command line.
LED Configurations
This section contains various configuration for your HH5A LEDs.
Default OpenWrt Configuration
This is the default configuration for the LEDs when you first install OpenWrt.
config led 'led_wifi'
	option name 'wifi'
	option sysfs 'blue:wireless'
	option trigger 'phy0tpt'

config led 'led_dsl'
	option name 'dsl'
	option sysfs 'blue:broadband'
	option trigger 'netdev'
	option mode 'link tx rx'
	option dev 'dsl0'

config led 'led_dimmed'
	option name 'dimmed'
	option sysfs 'dimmed'
	option default '0'
Configure LEDs to be like the HH5A
This is not exactly the same as the default BT HH5A LED configuration because the LED configuration in OpenWrt lacks the features I need to program this.
This configuration will do the following:
- The WIFI LED will be disabled.
- The Internet LED will light up blue when the DSL connection is up
- All LEDs will be dimmed.
- The load up procedure and it's LED configuration is untouched because it is controlled by the bootloader. This also means the Power LED will stay on coloured as blue.
- the rules are processed in order from the top down and can be re-ordered.
In LuCi
- Goto LED Configuration
- Edit wifi and set the following:
- Name: wifi
- LED Name: blue:wireless
- Trigger: Always off (kernel: none)
- Edit dsl and set the following:
- Name: dsl
- LED Name: blue:broadband
- Trigger: Network device activity (kernel: netdev)
- Device: dsl0
- Trigger Mode: Link On
- Edit dimmed and set the following:
- Name: dimmed
- LED Name: dimmed
- Trigger: Always On (kernel: default-on)
- Default state: ticked
This is the code the rules above create in the /etc/config/system file.
config led 'led_wifi'
	option name 'wifi'
	option sysfs 'blue:wireless'
	option trigger 'none'

config led 'led_dsl'
	option name 'dsl'
	option sysfs 'blue:broadband'
	option trigger 'netdev'
	option dev 'dsl0'
	list mode 'link'

config led 'led_dimmed'
	option name 'dimmed'
	option sysfs 'dimmed'
	option trigger 'default-on'
	option default '1'
Disable Power LED / Other LED
It is possible to disable the Power LED (or other LED) by adding a new rule via LuCI or directly in the /etc/config/system file. The Power LED is turned on by the bootloader and this is why you need to add an extra rule whereas other LEDs you could just delete the rule that turns them on.
In LuCi
- Goto LED Configration
- Click on the 'Add LED action' button
- Add a new LED action with the following:
- Name: power
- LED Name: blue:power
- Trigger: Always off (kernel: none)
Or you can add the following code directly into the /etc/config/system file.
config led
	option name 'power'
	option sysfs 'blue:power'
	option trigger 'none'
Unmodified HH5A LED behaviour
This is the default LED behaviour of an unmodified HH5A and I can use this to program up the LED behaviour in OpenWrt to match this default behaviour when the required functionality is added in a future version of OpenWrt.
Booting a configured router with DSL plugged in
Router bootloader
- (0:00) Start:
- Power: Green, Solid
- (0:25) Power: Green, Flashing
Router has booted
- (0:40) Power: Blue, Solid
- (1:00) Power: Orange, Flashing
- (1:50) Power: Orange, Solid
- (2:00) Internet: Orange, Solid
- (2:33) Internet: Orange, Off
- (2:35) Power: Blue, Solid
NB: occasionally at 1:15 the orange light goes solid while the internet led flashes about 4 times before resuming flashing orange.
Remove DSL wire from a connected and configured router
- (0:00) Start:
- Power: Blue, Solid
- (0:07) Power: Orange
- (0:07) Internet: Orange, Solid
- (0:13) Internet: Red, Flashing (0.5 second on/off)
Plug in DSL wire to a configured router
- (0:00) Start:
- Internet: Orange, Solid
- Internet: Red, Flashing (0.5 second on/off)
- (0:06) Power: Orange, Flashing (0.5 second on/off)
- (0:40) Power Orange, Solid
- (0:55) Internet: Orange, Solid
- (1:24) Internet: Red, Off
- (1:25) Power: Blue, Solid
Hold the WPS Button
- Wifi: Orange, Flashing (2 second on/1 second off)
Step 5 - Additional OpenWrt functionality with Add-ons (Packages)
(System-->Software)
Your Router must be on the internet to be able to install software
These extra features do not come pre-installed in OpenWrt so need to be installed. The GUI (web interface) is called LuCI and all of the GUI add-ons are prefixed with ‘luci’ so you can search for just GUI add-ons by using the search term 'luci-'. I have found that if I install a ‘LUCI’ add-on then the other dependencies such as the actual service it will controls gets installed as well. This is why using LuCI is much better for most people than using the command line.
The plugins I have listed below are the main ones to get your router doing the original HH5A features and the little extras to make life easier.
There is currently no place online you can browse the software repository. The best place for descriptions is to type something in to the search box on the software page of your router and look at the packages you want to install and you will see a brief description of them but only on the 'Available Packages' tab.
Please bear in mind this is my setup to get a good baseline as close to the HH5A as possible. All those add-ons that have (not used) means I have installed them to make sure they work but have uninstalled them because I did not want the features they offered. Some people might want those features so I have left the install notes here for reference.
The optional add-ons should only be installed if you want those features. All the rest of the add-ons should be installed unless you absolutely do not need those features.
OpenWrt will run with none of these add-ons installed.
Add-on Notes
- LEDE/OpenWrt — Managing Packages – LEDE/OpenWrt & IoT – Medium
- [OpenWrt Wiki] Package table - A full searchable list of packages (Add-ons) with descriptions. This table also lists all of the dependencies.
- [OpenWrt Wiki] packages:index:start - A quick overview to all available packages, sorted by type.
- [OpenWrt Wiki] Documentation - The documentation covers setting up many different services and features on you router such as DLNA and Ad-blocking so it is worth a look.
- [OpenWrt Wiki] Reasons to Use OpenWrt - This page has a small list of add-ons you might like to install.
Editing Files (SSH / SCP / SFTP)
You need to use this to edit config files with windows using WinSCP or FlashFXP which is easier than the command line but this requires a little configuration. You can use SSH and edit via the command line using the VI editor.
- Install openssh-sftp-server - OpenSSH SFTP server.
- Installs nothing else
Install Notes
- [OpenWrt Wiki] SSH access for newcomers
- this sub system is require because FlashFXP give the error {see sftp flashfxp error.txt}
- You can now edit files like you can in ftp
- this might already be installed. I did a reset and uploaded my old config and openssh-sftp-server was in the installed packages. This could be a bug or an incomplete reset.
- If you try and use SFTP over SSH without openssh-sftp-server installed you will get the following error
[15:11:23] [R] Connection failed (Unable to access SFTP sub-system, operation failed.)
[15:11:23] [R] Delaying for 10 seconds before reconnect attempt #1
FlashFXP/WinSCP
- Install WinSCP in windows. FlashFXP will do the same (SFTP over SSH)
- connect using the 'root' account and password
- once connected, click up folder once to see all of the folders
- Config settings are at /etc/config/
- Edit them like a normal text file
- Read WinSCP (ebilan 10.2)
Notes
- How to open a file in ssh - Linux - nixCraft Linux/Unix Forum - If you need to edit directly via the SSH command line then this article will tell you how.
- Linux And Unix Command To View File - nixCraft - How to view a file via SSH. You can then use Putty or Kitty to copy and paste the file in windows. Very useful for grabbing config files.
cat /etc/config/packages.list
UPnP (optional)
UPnP is not installed by default.
- Upnp available on LEDE? - Installing and Using OpenWrt - OpenWrt Forum
- install luci-app-upnp - Universal Plug & Play configuration module
- also installs
- libuuid
- miniupnpd
- creates a menu under services called ‘UPnP’
Once installed UPnP will need to be turned on.
WPS
WPS doesn't work out of the box on OpenWrt, you need to:
- remove wpad-mini
- This package contains a minimal IEEE 802.1x/WPA Authenticator and Supplicant (WPA-PSK only).
- install wpad
- This package contains a full featured IEEE 802.1x/WPA/EAP/RADIUS Authenticator and Supplicant
- does not install anything else
- install hostapd-utils
- This package contains a command line utility to control the IEEE 802.1x/WPA/EAP/RADIUS Authenticator.
- does not install anything else
- remove wpad-basic-wolfssl
- This package contains a basic IEEE 802.1x/WPA Authenticator and Supplicant with WPA-PSK, SAE (WPA3-Personal), 802.11r and 802.11w support.
- install wpad-wolfssl
- This package contains a full featured IEEE 802.1x/WPA/EAP/RADIUS Authenticator and Supplicant
- does not install anything else
- install hostapd-utils
- This package contains a command line utility to control the IEEE 802.1x/WPA/EAP/RADIUS Authenticator.
- does not install anything else
- Reboot
- Log back into LuCI
- You will now have the option to enable WPS in LuCI
- (Network-->Wireless-->(radio0/radio1) -->Edit-->Interface Configuration-->Wireless Security--> Enable WPS pushbutton, requires WPA(2)-PSK/WPA3-SAE
- I use radio1/wlan1/2.4GHz but you might be able to choose both.
- Tick the box
- Click 'Save & Apply'
- Done, WPS is enabled.
Notes
- WPS works my HH5A with LEDE 17.0.0.4, and just to confirm, yes the button does work with no extra configuration. But i have read that WPS working, can be hit or miss varying from router to router.
- [OpenWrt Wiki] Wi-Fi /etc/config/wireless - Contains information on configuring WPS, this is really for reference or advanced users.
WIFI On/Off Button (optional)
This is cannot be used use WPS as they use the same button, otherwise you can use this to configure the WPS button for something else such as turning the WIFI on or off.
- install wifitoggle
- Very versatile script to toggle Wi-Fi with a button. Allows to set timeouts, persist changes after boot, and set LEDs according to the state.
- I dont think this installs anything else as I have not tested it.
Notes
- [OpenWrt Wiki] Wi-Fi on/off buttons - instructions and developer reference.
uHTTPd GUI for the web server daemon (optional)
You only need this if you want to play around with the web server settings. Most people will not need this.
- Install luci-app-uhttpd
- uHTTPd Webserver Configuration
- This installs nothing else
- Creates a menu under services called ‘uHTTPd’ (you might need to refresh the page)
- Change the Server Hostname (Services-->uHTTPd-->uHTTPd Self-signed Certificate Parameters-->Server Hostname) to match your FQDN which will be Hostname + Local domain
- Hostname (System-->system-->General Settings--> Hostname) (primaryrouter)
- Local domain (Network-->DHCP and DNS-->Server Settings-->General Settings-->Local domain (quantumwarp.com)
- Server Name = primaryrouter.quantumwarp.com
- NB: I am not sure if this needs to be changed, it just seems the right thing to do.
- The other certificate settings at (Services-->uHTTPd-->uHTTPd Self-signed Certificate Parameters) will probably need to be changed if you were doing things right.
Notes
- SSL Certificate Country Codes - Create CSR | DigiCert.com - Get your country code here.
Force HTTPS
This is a must nowadays, and there are 2 ways of doing it.
- uHTTPd
- If you have installed uHTTPd above then goto
(Services-->uHTTPd-->General Settings-->Redirect all HTTP to HTTPS) - Tick the box and apply.
- NB: Make sure you are logged in via HTTPS otherwise it will fail when using LuCi.
- NB: if you are changing details then once you change and save the details you must click the Remove configuration for certificate and key button to update the certificate.
- If you have installed uHTTPd above then goto
- Command line
- Run the following commands
uci set uhttpd.main.redirect_https=1     # 1 to enable redirect, 0 to disable redirect
uci commit uhttpd
service uhttpd reload
- Run the following commands
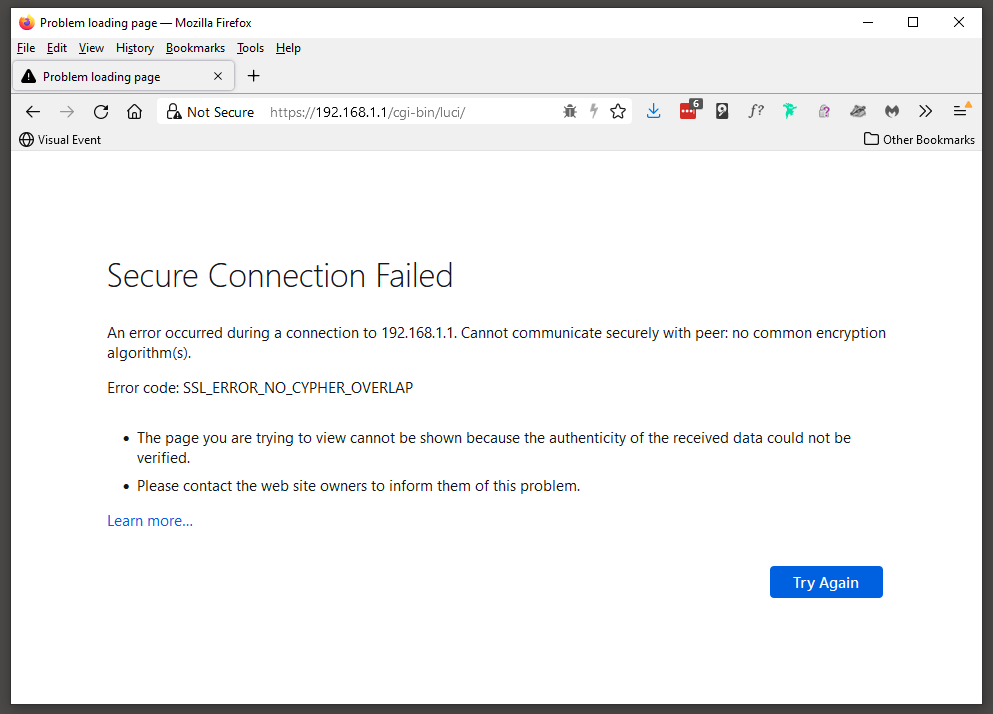
Secure Connection Failed
If you get the following message after you have forced HTTPS then is it most likely a certificate mismatch error and all you have to do is closes and restart your browser.
Notes
- [OpenWrt Wiki] How to get rid of LuCI HTTPS certificate warnings - Do you like the security of using LuCI-SSL (or Luci-SSL-OpenSSL), but sick of the security warnings your browser gives you because of an invalid certificate? With these instructions, you can generate your own self-signed certificate, which your browser will accept as valid.
- FireFox does not handle you messing with HTTPS/SSL in LuCi so you might find using chrome easier while setting everything up reguarding this.
- In FF, becasue the cert is unsafe, FF might not redirect to it. I cannot figure out the pattern, sometimes it works and sometimes it does not. (FF 94.0.2 64-bit).
HTTPS for LuCI (optional)
This is now enabled by default by default OpenWrt 21.02 I will leave this section here as a reference.
This installs https for LuCi, the required SSL libraries and disables http:// for LuCI,
- Install luci-ssl-openssl
- LuCI with OpenSSL as the SSL backend (libustream-openssl). OpenSSL cmd tools (openssl-util) are used by uhttpd for SSL key generation instead of the default px5g. (If px5g is installed, uhttpd will prefer that.)
- Also installs
- zlib
- libopenssl
- openssl-util
- libustream-openssl
Notes
SSL
SSL is not installed by default OpenWrt 21.02 so you do not need to install SSL or CA-Bundles. I will leave this section here as a reference.
There seems to be a few SSL packages but most people seem to use one which is the package that is used by LuCI for https/SSL (see below).
Basic Open SSL
This will install the minimum to use SSL
- Install libustream-openssl
- ustream SSL Library (openssl)
- Also installs
- Zlib
- libopenssl
CA Certificates (optional)
This installs all root certificates as one bundle file and seems to be updated on a regular basis to keep upto date with certificate authority changes. Root certificates are required to validate HTTPS certificates.
- Install ca-bundle
- System CA certificates as a bundle
- This installs nothing else
ca-bundle vs ca-certificates
I do not know why there is ca-bundle and ca-certificates but I believe that ca-bundle is all of the root certificates in one file where as ca-certificates the root certificates are all separate and that some programs require them to be separate. Which ones these are is beyond me and unless otherwise told I will use ca-bundle.
- [OpenWrt Wiki] package: ca-bundle - System CA certificates as a bundle
- [OpenWrt Wiki] package: ca-certificates - System CA certificates
- Things to do after installing Linux LEDE 17.01 | Tech Tutorials - Mentions "wget: SSL support not available, please install one of the libustream-ssl-* libraries as well as the ca-bundle and ca-certificates packages."
- ca-certificates: Add certificate bundle package (3015af96) · hayden / source · GitLab - Mentions "Some SSL applications requires a certificates bundle rather than a directory containing certificates. For those applications we build the ca-bundle package"
LetsEncrypt (not used)
Control the ACME LetsEncrypt certificate interface. For you that dont know, LetsEncrypt gives out free SSL/TLS certificates.
- Install luci-app-acme
- Control the ACME Letsencrypt certificate interface
- Also installs
- libmbedtls
- libcurl
- luci-app-uhttpd
- curl
- netcat
- ca-bundle
- acme
Notes
- Amongst other things, this installs a LuCI add-on for the uHTTPd webserver which is already installed and running for OpenWrt LuCi by default.
- [OpenWrt Wiki] package: acme
- How to run on OpenWrt · acmesh-official/acme.sh Wiki · GitHub
- the instructions from the developer.
- I dont think yu need to install luci-ssl-openssl anymore since OpenWrt 20.02
- The developer tells you to force LuCi to be HTTPS, this might be optional and/or you have already done this above.
Adblock
LuCI support for Adblock
- Install luci-app-adblock
- LuCI support for Adblock
- Also installs
- adblock
- Creates a menu under services called ‘Adblock’
Notes
- Blocks advertising at the router by intercepting DNS requests and checking them against a list.
- This adds a menu item under services called 'Adblock'.
- Adblock Documentation | GitHub
- Adblock support thread - Community Builds, Projects & Packages - OpenWrt Forum
- Adblock [Turris wiki] _ this is a comprehensive tutorial on Adblock.
- Adblock downloads the lists local and uses these for its lookups rather then doing an online lookup for each domain.
- the block lists are stored locally after downloading them
- Updating Block Lists
- The block lists are updated when the adblock process is started or stopped but you can configure a cron job to do this on a regular basis.
- To setup a cron job to update the lists
- Goto (System-->Scheduled Tasks)
- add the following line to the 'Scheduled Tasks' and click submit
This updates the block list every day @ 06:00# Adblock - Block list update 0 06 * * * /etc/init.d/adblock reload - Reboot the router. This might not be needed but it is easier just to do it.
- [OpenWrt Wiki] Scheduling tasks with cron
- Adblock - Weekdays only - Installing and Using OpenWrt - OpenWrt Forum - This is very useful.
- See the official documentation for more stuff you can do by the command line and CRON.
- OpenDNS might do a similar job, but Adblock will check against its own lists aswell before forwarding the DNS request to your chosesn DNS server.
- You can configure Adblock locally for your own whitelists and blacklists
- Test your browsers ads blocker - Load this page and see if AdBlocker is working.
- Adblock lists are all adblock formatted lists.
- The firewall rules get added to the bottom of your rules, you might need to move them up depending on your setup.
- DNS based adblock using OpenWRT, OpenDNS, and dnsmasq – Paul Bryan Vreeland - This is a alternative script that will do something similiar.
Dynamic DNS
LuCI Support for Dynamic DNS Client (ddns-scripts). The HH5A has this, but is optional to install.
- Install luci-app-ddns
- LuCI Support for Dynamic DNS Client (ddns-scripts)
- Also installs
- ddns-scripts
- This adds a menu item under services ‘Dynamic DNS’
Configuring no-ip.com as a custom DDNS provider
For some reason no-ip.com is not in the list of DDNS providers and by the looks of it people have been using a custom script for no-ip.com. I dont know wether that is still the prefered method by most people.
no-ip.com now offer the standard http/https API method of updating the DNS records with them, so that is my prefered method of updating no-ip.com DNS records.
In (Services-->Dynamic DNS-->myddns_ipv4) configure these settings
- Lookup Hostname: myexampledomain.ddns.net
- DDNS Service provider [IPv4]: -- custom --
- Custom update-URL: http://[USERNAME]:[PASSWORD]@dynupdate.no-ip.com/nic/update?hostname=[DOMAIN]&myip=[IP]
- Domain: myexampledomain.ddns.net
- Username: account@example.com
- Password: xxxxxxxxxx
These settings work fine and are using normal http.
You need to install SSL to use HTTPS
To use SSL you needs to install the basic SSL package or install https for LuCI will also install the basic SSL package and make the web interface use https at the same time.
If you try and use https for DDNS without installing a suitable SSL package you will get the following error and The DDNS service will also fail to start:
 223214  WARN : uclient-fetch: no HTTPS support! Additional install one of ustream-ssl packages - TERMINATE
 223214  WARN : PID '4597' exit WITH ERROR '1' at 2017-11-23 22:32
The resolution is simple, Install SSL functionality by following the instructions in the sections below.
Configure DDNS to use https
Making DDNS use https is really simple
- install a suitable SSL package
- in (Services-->Dynamic DNS-->myddns_ipv4)
- enable Use HTTP Secure
- a new box will apear called Path to CA-Certificate
- You now have to options to enter in
- type in IGNORE and SSL will work but will not verify the SSL certificate of the provider. this does add a slight security risk because you do not verify the certificates. It is still better than not using https.
- type in /etc/ssl/certs/ and install the ca-bundle package - This installs the root certificates (CA Bundles) OpenWrt can use to verify the SSL certificates that are issued by the DDNS prover. I have not verified this works.
Notes
- This script checks the IP against the domain and will only update the record at supplier if the IP has changed. Makes sense and reduces traffic.
- even when you are using https the url in Custom update-URL stays http://. I looked in the config file for this script and they were all http://.
- You could add the Custom update-URL into the config file manually and then select it as normal.
- packages/list at master · openwrt/packages · GitHub- Look at the DDNS providers list config file.
- Request Method - No-IP - No-IP API calls that i used to make the custom URL.
- [OpenWrt Wiki] SSH access for newcomers
- OpenDNS
- Using Dynamic DNS with OpenDNS – OpenDNS
- OpenDNS used the DynDNS API (with different domain of course).
- Managed DNS API | Dyn Help Center
- Dynamic IP: General Information for OpenDNS usage – OpenDNS
- Dynamic Update the IP / use of own URL – OpenDNS
- FAQ: OpenDNS Developer Resources – OpenDNS
- DNS-O-Matic
- DNS-O-Matic can update multiple services with 1 call, but this is not really needed with OpenWrt and this add-on.
- DNS-O-Matic Documentation: api
OpenVPN (not used)
This section is not complete. check out the links to get things working.
Ebilan now has a document on how to do this in his DropBox Repo
LuCI Support for OpenVPN
- install luci-app-openvpn
- LuCI Support for OpenVPN
- installs nothing else
- creates a menu item unders services called 'OpenVPN
- install openvpn-openssl
- Open source VPN solution using OpenSSL
- Also installs
- kmod-tun
- liblzo
- install openssl-util (optional?)
- The OpenSSL Project is a collaborative effort to develop a robust, commercial-grade, full-featured, and Open Source toolkit implementing the Secure Sockets Layer (SSL v2/v3) and Transport Layer Security (TLS v1) protocols as well as a full-strength general purpose cryptography library. This package contains the OpenSSL command-line utility.
- Also installs
- openvpn-easy-rsa
- install openvpn-easy-rsa – (optional?)
- Simple shell scripts to manage a Certificate Authority
- This might not be needed for some configurations.
- i do
- Creates a menu under service called ‘OpenVPN’
Notes
- This might need something else installing to get working
- OpenVPN on your OpenWrt router has 3 potential modes
- Force all local traffic through the VPN
- Configured as a VPN server so clients can connect to your network remotely.
- Bridge mode so 2 routers bridge their networks. (might be the same as 1 and 2)
Links
- Setting up OpenVPN client on BT Home Hub 5A using Windows - openwrt.ebilan.co.uk - A OpenVPN tutorial PDF by ebilan
- OpenWrt (LEDE) OpenVPN Setup : My Private Network - Recent tutorial
- How to setup ProtonVPN (OpenVPN) on a OpenWrt/LEDE router - Recent tutorial
- VPN(pptp) Router with OpenWrt/LEDE Tutorial (Super Easy) — Steemit - Recent tutorial
- Setup OpenVPN with OpenWrt/LEDE | LTE-Forum Österreich - Recent tutorial
- OpenVPN Setup Guide for Beginners [OpenWrt Wiki]
- OpenVPN Server HowTo (Streamlined) [OpenWrt Wiki]
- Setting an OpenWrt / LEDE Based Router as OpenVPN Client · GitHub - Some instructions
- Enterprise Servers and Networking: Step-by-Step: Base Install - VPN Client Router using LEDE (or OpenWrt)
- How to set up anonymous VPN OpenVPN use at OpenWrt router - YouTube
- Setting an OpenWrt / LEDE Based Router as OpenVPN Client · GitHub
- Setting an OpenWrt Based Router as OpenVPN Client · StreisandEffect/streisand Wiki · GitHub
ClamAV (not used)
ClamAV is an anti-virus package you can run on the router independant of the clients but it is CPU intensive. This is better suited for higher spec setups such as virtual machines.
- install luci-app-clamav
- This package will install ClamAV Web UI.
- This also installs
- libmbedtls
- libcurl
- uclibcxx
- clamav
- This creates a menu item under services called 'ClamAV'
- install freshclam (optional)
- Database updater for ClamAV
- this does not install anything else
Notes
- This will put a high cpu load on the router.
- freshclam is a service to keep the definition files upto date
Statistics
Out of the box, OpenWRT can show you real-time statistics, however it will not store the data for historical view. Install luci-app-statistics to have a nice historical data graphs for router, eg: ping, interfaces bandwidth utilization, cpu load, ram, disk, uptime, etc…
- Netdata
- This is very powerful but can be quite costly in resources.
- OpenWRT - Install Netdata - Real Time Monitoring Dashboard - YouTube
- To install, the package name is netdata
- [OpenWrt Wiki] package: netdata
- luci-app-statistics
- Linux command line instructions
- top - The most obvious
- Check Linux memory usage with 5 command line tools
- in LuCi
- Goto (System-->Processes)
Step 6 - Secure DNS (optional - but recommended)
This needs its own section because there are several ways of encrpting your DNS request and also there is DNSSEC.
See the different methods below and pick whichs ones are right for you, but my recommendation is:
- DNS Hijacking (via the Firewall)
- Requires dnsmasq-full to filter by IPSets.
- dnsmasq-full
- Supports DNSSEC
- Easy to use with Stubby for DoT
- Closet to dnsmasq in terms of config and current LuCi setup
- I dont need a full authoriative recursive DNS server (you need Unbound for this)
- You need dnsmasq-full to do DNSSEC validation locally and you only need to do this if your upstream DNS provider does not do it for you.
- DNS Hijacking needs dnsmasq-full to filter by IPSets.
- DoT (dnsmasq and Stubby)
- IT manages can still control traffic.
- Doesn't require a full HTTPS stack like DoH
- more compatible with devices
- DoT runs on a different port so is easier for traffic management
- Less resources needed
- Your local ca-bundles must be upto date (there might an override but this would defeat the object of DoT)
- dnsmasq supports IPv6
- Quad9
- It Supports DNSCrypt, DoH, DoT, DNSSEC
- I think it validates DNSSEC on it's own server so i dont need to install dnsmasq-full to do this locally.
- Its purpose is to send NXDOMAIN responses for domains that are flagged as malware/dirty.
- DNSSEC (dnsmasq)
- This validated cryptographocaly the domain you are talking it legitimate and not spoofed.
- The DNSSEC validation is done at Quad9 servers
- I dont believe I dnsmasq-full for this to work as I was getting verification just using dnsmasq
- With just dnsmasq I went to intentionally misconfigured domain and Quad9 blocked me as expected.
DNS Hijacking (via the Firewall)
This script allows OpenWrt to intercept all DNS traffic from your local network and send it to your preferred DNS provider. This is useful nowadays because of all of the encrypted DNS traffic from various apps and devices on your network.
Standard DNS and DoT are easy to identify becasue of the port they run on, however for DoH you need to match the domain the packet is being sent to from a known list DoH which is updated regulary via the hotplug.d, you can see in the code where the list is if you want to have a look.
To install DNS Hijacking run the following code blocks from the official documentation [OpenWrt Wiki] DNS hijacking via a SSH command line
- Upgrade dnsmasq to dnsmasq-full if you have not already done so
# Upgrade to dnsmasq full
opkg update
opkg remove dnsmasq
opkg install dnsmasq-full
- Command-line instructions - Configure firewall to intercept DNS traffic (The basic rule).
- Setup IP set extras
- Goto [OpenWrt Wiki] IP set extras
- Copy the code block under Instructions and paste this into your SSH window and execute.
- Setup Hotplug extras
- Goto [OpenWrt Wiki] Hotplug extras
- Copy the code block under Instructions and paste this into your SSH window and execute.
- NAT6 - Enable NAT6 to process IPv6 traffic when using dual-stack mode.
- DNS over HTTPS (DoH) - Filter DoH traffic with firewall and IP sets forcing LAN clients to switch to plain DNS. Set up IP set extras and Hotplug extras to automatically populate IP sets.
- The script has paced a file in /etc/hotplug.d/online/ so when the router comes on line this script will run.
- Setup .
- Now run the code block
- DNS over TLS (DoT) - Configure firewall to filter DoT traffic forcing LAN clients to switch to plain DNS.
- Reboot your router
Notes
- Script Notes
- DoT port is unique matching both IPv4 and IPv6 traffic, so filtering by port works well. DoH uses the same port as HTTPS, so we need to filter by the destination IP address.
- There are many public DoH servers, and filtering them all efficiently relies on IP sets. Each IP set contains only IPv4 or IPv6 entries, so a couple of sets/rules is necessary.
- IP set extras to resolve the DoH domains, and Hotplug extras to trigger IP set update at startup.
- The script downloads a domain list, converts it to ip addresses, create IPv4 and IPv6 block list and then the firewall uses this to block requests so the clients will downgrade to unsecure DNS requests on port 53 which can then be routed as required. But it does required IP set extras and Hotplug extras to be installed/run first.
- The block list will only update when the router comes on line so basically when you reboot the router. This could potential be altered if you change the location of the 60-ipset-doh script file to another hotplug folder.
- These scripts will need to be re-run after a firmware upgrade
- DNS Hijacking Doc - 2 rules for DNS over HTTPS - Talk about Documentation - OpenWrt Forum
- This script seems to need dnsmasq-full even thought it does not explicity mention it becasue all fo the examples of using those other scripts seem to say upgrade to dnsmasq-full
- IP set extras
- [OpenWrt Wiki] IP set extras
- This instruction extends the functionality of IP sets.
- Create and populate IP sets with domains, CIDRs and ASNs.
- Populate IP sets automatically at startup.
- The automatic script is the same as pasting in the code from the window
- Hotplug
- [OpenWrt Wiki] Hotplug
- This daemon will runs scripts based on events.
- Hotplug extras
- [OpenWrt Wiki] Hotplug extras
- This instruction extends the functionality of Hotplug.
- Run scripts at startup when the network is online.
- These are slightly different to the ones from Adblock but seem to be kept up to date.
Tutorials
- [OpenWrt Wiki] DNS hijacking Official Guide. This how-to describes the method for intercepting DNS traffic on OpenWrt.DNS Hijacking
DNS Hijacking (via Adblock)
Using this feature and OpenDNS (or other DNS provider) adds extra security to your network and prevents rogue uncontrolled DNS requests.
This option adds a rule into the OpenWrt firewall so all DNS requests are forced to the router and if you have set up OpenDNS as a custom DNS server then all DNS requests will be sent to OpenDNS via the router.
- Goto (Adblock-->Settings-->General Settings-->Force Local DNS)
- Enable Force Local DNS
- Forced Zones: lan
- Forced Ports: 83, 853, 5353
- Save & Apply
Firewall rules have now been added to accomplish this however the firewall rules are removed when the Adblock service is disabled or you uninstall the adblock package.
From looking at this, these rules will only work for DoT and not DoH traffic.
Keep firewall rules for DNS requests but disable the Adblock service
When you disble the adblock service under (Adblock-->Settings-->General Settings-->Enabled) the firewall which force DNS routing are removed. Sometimes you might not want the Adblock service but really want the DNS funnelling rules. So this is how to keep the rules and have the adblock service disabled. If you really want you can manually add these rules to the firewall but who wants to do that.
- Install Adblock (if not already)
- Enable Force Local DNS
- Goto (System-->Startup)
- Find the line with adblock
- Click Stop
- Click Disabled
Now the Firewall rules are still in place and the adblock service is not running. It will also not restart the service when you reboot your router.

config redirect 'adblock_lan53'
	option name 'Adblock DNS (lan, 53)'
	option src 'lan'
	option proto 'tcp udp'
	option src_dport '53'
	option dest_port '53'
	option target 'DNAT'

config redirect 'adblock_lan853'
	option name 'Adblock DNS (lan, 853)'
	option src 'lan'
	option proto 'tcp udp'
	option src_dport '853'
	option dest_port '853'
	option target 'DNAT'

config redirect 'adblock_lan5353'
	option name 'Adblock DNS (lan, 5353)'
	option src 'lan'
	option proto 'tcp udp'
	option src_dport '5353'
	option dest_port '5353'
	option target 'DNAT'
DNS over TLS (DoT) (dnsmasq and Stubby)
This is very easy to set up and the 2 options I recommend are (both have the same end result:
- Pick a method
- OpenWRT: Secure DNS over TLS with LuCI [No Command Line]
- This uses LuCi and is well written.
- [OpenWrt Wiki] DoT with Dnsmasq and Stubby
- This uses the command line and is very quick.
- Make a note of your current DNS entries as these will get wiped and if the dont, they should be.
- Open a SSH windows and run the commands in Command-line instructions
- OpenWRT: Secure DNS over TLS with LuCI [No Command Line]
- Set your own DoT DNS provider to use (eg: OpenDns/Quad9)
- edit the resolvers in /etc/config/stubby
- If your ISP does not provide IPv6 then you must comment out or remove the IPv6 resovlers otherwise this will just generate errors.
- I removed the CloudFlare resolvers as I only wanted to use Quad9.
- Further Stubby configuration (from README.md)
- Set dnsmasq to send DNS requests to stubby
- The sets up the proxy arrangement but is already done by the script we ran earlier.
- Disable sending DNS requests to ISP provided DNS servers
- This changes your WAN connections to route DNS locally.
-
If using a DoT/Stubby setup: When you do a router upgrade you will temporarily change your WAN/WAN6 DNS settings to 9.9.9.9/2620:fe::fe while you install the required packages because without this change your router will not be able to talk to the internet for this process.
- Enabling DNSSEC (Optional)
- This is a bit misleading.
- This should say enable local DNSSEC validation.
- Use DNSSEC by dnsmasq
- This is only required if your upstream resolver does not perfomr DNSSEC validation.
- Quad9 does DNSSEC validation upstream and if it faills will return a NXDOMAIN result, however if there is no DNSSEC crypto for that domain, DNS lookup will occur as normal.
- The setting (Network --> DHCP and DNS --> Advanced Settings -->DNSSEC) should be left unticked.
- The setting (Network --> DHCP and DNS --> Advanced Settings -->DNSSEC check unsigned) is a related setting and is on by default.
- Requires upstream supports DNSSEC; verify unsigned domain responses really come from unsigned domains
- See DNSSEC support in OpenWrt 15.05 Chaos Calmer | falstaff - yet another tech blog
There is one problem thought: If an attacker forges an answer and removes its DNSSEC records, dnsmasq silently accepts them. The dnsseccheckunsigned option avoids that by asking the upstream servers whether the domain in question really does not support DNSSEC. Hence this leads to additional DNS requests for all non DNSSEC domains… Well, security comes not for free - Should this be on or off?
- Set dnsmasq to send DNS requests to stubby
- Stubby Config File - Additional configurations you should set after going through the config file
- set option triggerdelay '5' to prevent some stubby errors in your syslog.
- If you dont have a delay on stubby getting triggered you get many of the following errrors
Sat Nov 27 17:24:00 2021 daemon.err stubby[3738]: Could not schedule query: None of the configured upstreams could be used to send queries on the specified transports
- This is caused purely becasue whent he WAN comes up it does not instantly have an internet connection availbe but stubby thinks it does and starts doing DNS requests. To stop this we just add a delay between WAN coming up and Stubby doing DNS requests.
- Depending on your router you might need to increase thjis a little but for mine this setting is good.
WAN Up --> Stubby Up --> No internet --> Errors
WAN Up --> Pause 4 seconds --> Stubby Up --> Internet --> No Errors
- If you dont have a delay on stubby getting triggered you get many of the following errrors
- set option triggerdelay '5' to prevent some stubby errors in your syslog.
- Complete the TLS1.3 setup
These options can be overriden on a per-resolver basis but I dont have a need for that.- Force the newer TLS1.3 cipher standards by uncommenting the following line. Please note
option tls_cipher_list 'EECDH+AESGCM:EECDH+CHACHA20'
option tls_ciphersuites 'TLS_AES_256_GCM_SHA384:TLS_CHACHA20_POLY1305_SHA256:TLS_AES_128_GCM_SHA256'
Please note that the following line is for TLS1.2 only and should be left commented out aws it is not needed.
# option tls_cipher_list 'EECDH+AESGCM:EECDH+CHACHA20'
- Set option tls_min_version '1.3'
- This ensures no downgrade to TLS1.2
- Force the newer TLS1.3 cipher standards by uncommenting the following line. Please note
- Remove CloudFlare Resolver sections
- You can have as many resolvers as you want but I only want to use Quad9
- Backup stubby YAML config files (optional)
- This does not seem to be required becasue Stubby is using the UCI system
- It says in the official doc to "You might want to add /etc/stubby/ to the list of config files that should be preserved on upgrade / backup! ", unless you use the .yaml files in that folder dont bother as all settings used are in /etc/config/stubby.
- This is done in (System --> Backup / Flash firmware --> Configuration)
- Reboot your router
- Test your new DNS system (see links below)
- Tutorials
- OpenWRT: Secure DNS over TLS with LuCI [No Command Line] - A really easy tutorial to follow using dnsmasq and stubby all done via the GUI.
- [OpenWrt Wiki] DoT with Dnsmasq and Stubby Official Guide.
- This how-to describes the method for setting up DNS over TLS on OpenWrt. It relies on Dnsmasq and Stubby for resource efficiency and performance.
- We'll basically be putting Stubby in between dnsmasq and the internet, leaving most things untouched so that dnsmasq will continue to work in OpenWrt. = easier
- The script on this page adds 2 listening addresses '127.0.0.1@5453' and '0::1@5453' (taken from the subby config file) but on the README.md it just tells you to use '127.0.0.1@5453'. Both configs work just dont know if one is better than the other.
- [Tutorial] [No CLI] Configuring DNS over TLS with LuCI using Stubby and Dnsmasq - Network and Wireless Configuration - OpenWrt Forum
- DNS Over TLS on OpenWrt 18.06, 19.07, and 21.01 – Craig Andrews
- GitHub - getdnsapi/stubby: Stubby is the name given to a mode of using getdns which enables it to act as a local DNS Privacy stub resolver (using DNS-over-TLS).
- DNS Over TLS on OpenWrt 18.06, 19.07, and 21.01 – Craig Andrews
- [OpenWrt Wiki] Stubby - Package homepage with OpenWrt Stubby install instructions.
- UPDATED GUIDE FOR Getdns 1.4.2-2 stubby 0.2.3-3 and unbound 1.8.1-2 - Member Tutorials - TorGuard Forums
- This tutorial tells you how to install and use Stubby on OpenWrt but it also give you information about setting TLS1.3 and the appropriate ciphers and how to test them with OpenSSL.
- The best ciphers for TLS1.3 are the ones in the Stubby config file that are commented out. These might be the same as the defaults, I am trying to find this out.
- DNS over TLS - Windows 10 (Stubby /w GUI) | Quad9
- Quad9 have told me nslookup -q=txt -class=chaos id.server does work when using the Windows client.
- Stubby documentation
- DNS Privacy Daemon - Stubby :: dnsprivacy.org - Official homepage.
- packages/README.md at master · openwrt/packages · GitHub - OpenWrt Stubby Package repo - All configs are described here, DNSSEC tests and good instructions to install on OpenWrt
- stubby/stubby.yml.example at develop · getdnsapi/stubby · GitHub - All configs are described here in this example YAML file. OpenWrt does nto use this file but the settings are the same.
- Enforce DNSSEC validation if your DNS provider does not support it, or you want to perform the validation yourself. Beware of fault tolerance and performance issues. See notes below for more information.
- Misc
- Stubby can receive IPv6 and IPv4 traffic.
- SPKI pins
- Dont use.
- Public Resolvers :: dnsprivacy.org - Quad9 do NOT publish or recommend use of SPKI pins with their servers.
- SPKI validation for public DOT systems · Issue #242 · getdnsapi/stubby · GitHub
- EDNS
- Stubby does not have its own log file. When enabled, it posts the messeages in to the System Log which can be viewed as ever (Statuis --> System Log)
DNS over TLS (DoT) (Unbound and odhcpd)
- Tutorials
- OpenWRT - Configure DNS-over-TLS with Cloudflare DNS - YouTube (Van Tech Corner) In this video, we will configure DNS over TLS on OpenWRT router with Cloudflare DNS, in order to secure the DNS requires. By default, OpenWRT was pre-installed Dnsmasq as an internal resolver and therefore doesn't support DNS-over-TLS. We will need to uninstall it and install unbound & odhcpd in order to enable DNS-over-TLS with Cloudflare DNS. In this video, I will also explain the basic concept of DNS and why do we need DNS-over-TLS
- [OpenWrt Wiki] DoT with Unbound - Official Guide.
- Privacy-Protecting Portable Router: Adding DNS-Over-TLS support to OpenWRT (LEDE) with Unbound Cloudflare
DNS over HTTPS (DoH) (dnsmasq and https-dns-proxy)
- Tutorials
- OpenWRT - Configure DNS-over-HTTPS (DoH) - YouTube (Van Tech Corner) In this video, we are going to configure DNS over HTTPS on OpenWRT LuCI to secure the DNS queries that come from LAN devices to the internet. This is a great video.
- [OpenWrt Wiki] DoH with Dnsmasq and https-dns-proxy (Official Guide) This how-to describes the method for setting up DNS over HTTPS on OpenWrt. It relies on Dnsmasq and https-dns-proxy for masking DNS traffic as HTTPS traffic.
DNSSEC (dnsmasq-full)
OpentWrt comes with the small version of dnsmasq which is fine for most basic operations but DNSSec requires the full package to be installed.
It should be possible to run DNSSec and DNSCrypt if the target DNS server supports both of these technologies.
- uninstall dnsmasq
- It is intended to provide coupled DNS and DHCP service to a LAN.
- install dnsmasq-full
- It is intended to provide coupled DNS and DHCP service to a LAN. This is a fully configurable variant with DHCPv6, DNSSEC, Authoritative DNS and IPset, Conntrack support & NO_ID enabled by default.
- Also installs
- kmod-nfnetlink
- libmnl
- libgmp
- libnettle
- libnfnetlink
- kmod-nf-conntrack-netlink
- libnetfilter-conntrack
- kmod-ipt-ipset
You probably will receive the follow error:
Collected errors:
 * resolve_conffiles: Existing conffile /etc/config/dhcp is different from the conffile in the new package. The new conffile will be placed at /etc/config/dhcp-opkg.
Compare the config files
You should note there might be more that one service using the dhcp config file.
- Text compare the 2 files for obvious settings that need to be copied. Always keep your orginal dhcp file and move what is missing from dhcp-opkg (optional)
- or you can freshly load the page (Network-->DHCP and DNS) after upgrading to dnsmasq-full and then 'save and apply' the settings thus creating any missing setting that needs to be added (i am guessing here).
- the dnsmasq-full dhcp config file is almost the same as dnsmasq dhcp config file. dnsmasq-full dhcp config file seems messy. and when you save 'DHCP and DNS' settings in LuCI with no changes it encapsulates all of the settings in apostrophes which mean the original dsnmasq dhcp file format is correct. This most likely means that you should use you orginal dsnmasq dhcp config file. When you enable additional settings then they will be recorded in the config file so any that were possibluy missing will appear as required, this is probably how things worked even before the upgrade.
- Delete the dhcp-opkg (or save it somewhere but do not leave it on the router)
Enable DNSSec
DNSSec is not enabled by default so will need to be turned on.
- (Network-->DHCP and DNS-->Server Settings-->Advanced Settings-->DNSSEC) = enabled
- (Network-->DHCP and DNS-->Server Settings-->Advanced Settings-->DNSSEC check unsigned) = enabled (optional)
- is slower but more secure, see notes.
- Requires upstream supports DNSSEC; verify unsigned domain responses really come from unsigned domains
DNSCrypt (Dnsmasq and dnscrypt-proxy) (not used)
dnscrypt-proxy is an application that acts as a local DNS stub resolver using DNSCrypt. It encrypts your DNS traffic improving security and privacy. dnscrypt-proxy is the client-side version of dnscrypt-wrapper. Follow DNSCrypt with Dnsmasq and dnscrypt-proxy to properly setup DNSCrypt via dnscrypt-proxy on your router.
- This is a new way to get your DNS quries. It is not a web standard yet nor is it DNSSEC
- Install luci-app-dnscrypt-proxy
- dnscrypt-proxy provides local service which can be used directly as your local resolver or as a DNS forwarder, encrypting and authenticating requests using the DNSCrypt protocol and passing them to an upstream server. The DNSCrypt protocol uses high-speed high-security elliptic-curve cryptography and is very similar to DNSCurve, but focuses on securing communications between a client and its first-level resolver.
- Also installs
- ibsodium
- dnscrypt-proxy-resolvers
- dnscrypt-proxy
- Tutorials
- [OpenWrt Wiki] DNSCrypt with Dnsmasq and dnscrypt-proxy2 (Official Guide) This how-to describes the method for setting up DNSCrypt on OpenWrt. It relies on Dnsmasq and dnscrypt-proxy for resource efficiency.
- [OpenWrt Wiki] DNSCrypt with Dnsmasq and dnscrypt-proxy (official Guide) (old Version)
- [OpenWrt Wiki] dnscrypt-proxy - The OpenWrt homepage for the DNSCrypt package.
Notes
- Quad9 is the best DNS Resolver
- Introduction to Quad9 DNS Service - YouTube - Our Executive Director, John Todd, gives an overview of the Quad9 DNS Service and explains the benefits of its security and privacy features. For more information, please visit quad9.net.
- DNS Malware Filtering Compared: Quad9 VS Cloudflare VS DNS Filter VS OpenDNS / Cisco Umbrella - YouTube - A video from Lawrence system showing you how well Quad9 behaves against malware and their domains.
- DNS Malware Filtering Followup: Comments, Concerns, Cisco Corrections and Conversation - YouTube - A followup video from Lawrence systems on the video above.
- DNS Ports
- 53 DNS
- 443 SSL/TLS Traffic and DNS over HTTPS (DoH)
- 853 DNS over TLS (DoT)
- 5353 Mulicast DNS (mDNS)
- 5453 Stubby
- DNS Hijacking
- DNS Hijacking is a method administrators use to route the DNS traffic to their router and then control the lookups and traffic etc.
- Do this first otherwise secure DNS will be pointless for unknown devices or those you do not control.
- DNS over TLS (DoT)
- DNS over HTTPS (DoH)
- An easy way to test without changing anything in your favorite DoH client is to just perform the following query right from your browser. The output is in JSON so can probably be used by programmers via cURL. Firefox does a nice formatted output by default/
https://dns.quad9.net:5053/dns-query?name=quad9.net
https://9.9.9.9:5053/dns-query?name=quad9.net
- An easy way to test without changing anything in your favorite DoH client is to just perform the following query right from your browser. The output is in JSON so can probably be used by programmers via cURL. Firefox does a nice formatted output by default/
- DoT Vs DoH
- DNSSEC vs DNSCrypt vs DoH vs DoT
- DNS-over-HTTPS Is The Wrong Partial Solution | Hackaday - This is a fantastic article, clear and answers a lot of questions about secure DNS.
- The idea of also encrypting DNS requests isn’t exactly new, with the first attempts starting in the early 2000s, in the form of DNSCrypt, DNS over TLS (DoT), and others. Mozilla, Google, and a few other large internet companies are pushing a new method to encrypt DNS requests: DNS over HTTPS (DoH).
- DoH not only encrypts the DNS request, but it also serves it to a “normal” web server rather than a DNS server, making the DNS request traffic essentially indistinguishable from normal HTTPS. This is a double-edged sword. While it protects the DNS request itself, just as DNSCrypt or DoT do, it also makes it impossible for the folks in charge of security at large firms to monitor DNS spoofing and it moves the responsibility for a critical networking function from the operating system into an application.
- It also doesn’t do anything to hide the IP address of the website that you just looked up — you still go to visit it, after all.
- Secure DNS with DNSCrypt & DNSSEC | What is DNSCrypt?
- It may seem like DNSCrypt and DNSSEC are competing solutions, but they are actually complementary and can be used together for comprehensive security. DNSSEC provides protection against DNS spoofing and other man-in-the-middle attacks, and DNSCrypt provides double-protection and prevents any eavesdropping on traffic, even by ISPs.
- DNS Security with DNSCrypt | OpenDNS
- In the same way the SSL turns HTTP web traffic into HTTPS encrypted Web traffic, DNSCrypt turns regular DNS traffic into encrypted DNS traffic that is secure from eavesdropping and man-in-the-middle attacks. It doesn’t require any changes to domain names or how they work, it simply provides a method for securely encrypting communication between our customers and our DNS servers in our data centers.
- DNScrypt vs DNScrypt v2 vs DoT vs DoH - Installing and Using OpenWrt - OpenWrt Forum
- Q&A - DoH, DoT, DNSCrypt or DoQ? | MalwareTips Community
- A poll on what people secure DNS protocol use.
- DNSCrypt or similar tools aren't necessary nowadays because of DoT, DoH and upcoming DoQ
- DNS-over-HTTPS Is The Wrong Partial Solution | Hackaday - This is a fantastic article, clear and answers a lot of questions about secure DNS.
- DNSSEC
- DNSSEC validation can be done upstream by your resolver and does not need you to perform this function locally which is what would happen if you get either dnsmasq or stubby to do DNSSEC validation. The reason for this option is that not all DNS resolvers provide this service. So if you are using a decent resolver like Quad9 then leave this option off.
- What is the actual purpose of the "Use DNSSEC" option? - General - Pi-hole Userspace
- Frequently Asked Questions | Quad9 - Quad9 does dns validation upstream so with this service you do not need to enable DNSSEC on either OpenWrt or Stubby. If a domain fails DNSSEC validation a NXDOMAIN response is sent, if the domain does not have DNSSEC configured then this additional test is skipped. So just let Quad9 do the ahrd work rather than using additional resources on your router.
- How Does DNS Works : Resolving DNS With DNSSEC - YouTube
- An easy to watch video explaining DNSSEC
- a validator is the software/service that checks the cryptographic keys and goes up the tree to validate the whole root. Quad9 is a Validator.
- DNSSec is an internet standard that is getting adopted across the internet. This technology prevents DNS cache poisoning by verifying that DNS lookups are valid by using a public key infrastructure similiar to that used for SSL certificates to authenticate them. A target website needs to also have DNSSec configured correctly for the system to fully work. I assume most large companies will have this configured by now. The end user will not notice any difference if a site does not have this configured as the DNS request will be correctly handled and sent to the requester. If the DNS lookup fails validation then the lookup will return a domain not found.
- Quad 9 | Internet Security and Privacy in a Few Easy Steps - Quad9 is a free public DNS service that provides security focussed DNS lookups. They actively prevent access to malicious sites by blocking the lookups. Quad9 also supports DNSSec.
- Main page of DNSMASQ
- "As a default, dnsmasq does not check that unsigned DNS replies are legitimate: they are assumed to be valid and passed on (without the "authentic data" bit set, of course). This does not protect against an attacker forging unsigned replies for signed DNS zones, but it is fast. If this flag is set, dnsmasq will check the zones of unsigned replies, to ensure that unsigned replies are allowed in those zones. The cost of this is more upstream queries and slower performance. See also the warning about upstream servers in the section on --dnssec"
- Create a DNSSEC record for your domain in cPanel - YouTube - If available.
- cPanel Zone Editor - cPanel Version 64 Documentation
- [OpenWrt Wiki] DNS configuration
- CZ.NIC - O DNSSEC - A central point on the internet for information and tools for DNSSec.
- DNSSEC – What Is It and Why Is It Important? - ICANN
- RFC 3655 - Redefinition of DNS Authenticated Data (AD) bit
- What is DNSSEC? | ResellerClub
- What is DNSSEC? (DNSSEC)
- DNSSec Explained - YouTube
- This fully explains how DNSSec works. I have added somes notes below I took from the video about DNSSec.
- 8:40 in video shoes how DNSSec works, the bit before just covered prerequsite technology with explanations.
- The 'root PubKSK' need to be already installed in OpenWrt DNS server from means other than the DNS protocol therefore dnsmasq-full must have this file(s) in it to allow DNSsec to work as expected. This is either added in to the repository or the package downloads the file(s) as required but seperate to the DNS protocol.
- For each lookup from (root zone-->TLD Zone-->Website Domain/Zone) in a fully DNSSec compliant router there is a chain of trust similiar to a CA certificate. Each signed with the parents public key and so on.
- A DNSSec server passes back additional information in its lookup response over and above normal DNS and the DNSsec service performs validation and decryption of various keys and signatures which requires the servers to be DNSSec capable.
- For a website to be using DNSSec there there needs to be keys and things installed on that domains DNS record. (not 100%)
- I think the keys are all stored as DNS records (not 100%)
- OpenWrt is not a full 'recursive DNS server'. dnsmasq will pass the DNS request to a 'full recursive DNS server', this server will do all of the hard work. When the response is sent back to OpenWrt this will be checked and then forwarded to the client as a normal DNS request reponse.
- 13:50 in the video setting up DNNSec on your domain
- Things have to be added to the domain. Just because you enable DNNSsec on the router does not mean that it will happen for the full tree. (root zone-->TLD Zone-->Website Domain/Zone) as the chain of trust needs to be maintained.
- Websites need to use DNSSEC to prevent them from being hijacked, it is not just about implementing this for the clients.
- Evaluating Local DNSSEC Validators – /techblog - In this article I will demonstrate how to install and configure six common local DNSSEC validators for Linux, and evaluate how well they perform. Very indepth article using Ubuntu/OpenWrt/Linux.
- DNSSEC validation can be done upstream by your resolver and does not need you to perform this function locally which is what would happen if you get either dnsmasq or stubby to do DNSSEC validation. The reason for this option is that not all DNS resolvers provide this service. So if you are using a decent resolver like Quad9 then leave this option off.
- DNSCrypt
- DNSCrypt is an open source technology developed by OpenDNS that allows the SSL/TLS encryption of DNS requests between the client and the DNS server/resolver. This is not an internet standard but it does have some adoption. DNSCrypt does not do any validation of the DNS request or response like DNSSec does but the two technologies could potentially be used in tandom although currently OpenDNS does not support DNSSec.
- DNS Security with DNSCrypt | OpenDNS - An overview of DNSCrypt.
- DNSCrypt version 2 - Official Project Home Page
- DNSCrypt - Official Project Home Page
- DNSCrypt is a protocol that authenticates communications between a DNS client and a DNS resolver. It prevents DNS spoofing. It uses cryptographic signatures to verify that responses originate from the chosen DNS resolver and haven't been tampered with.
- It is an open specification, with free and open source reference implementations, and it is not affiliated with any company nor organization.
- dnscrypt resolvers - A list of public DNS servers that support DNSCrypt
- dnsmasq
- OpenWrt base install uses Dnsmasq for DNS forwarding (and DHCP serving). This works well for many cases. Dependence on the upstream resolver can be cause for concern. It is often provided by the ISP, and some users have switched to public DNS providers. Either way can result in problems due to performance, hijacking, trustworthiness, or several other reasons. Running a recursive resolver is a solution.
- [OpenWrt Wiki] package: dnsmasq-full - It is intended to provide coupled DNS and DHCP service to a LAN. This is a fully configurable variant with DHCPv4, DHCPv6, DNSSEC, Authoritative DNS and IPset, Conntrack support & NO_ID enabled by default.
- unbound
- [OpenWrt Wiki] Unbound
- [OpenWrt Wiki] package: luci-app-unbound
- DNS Resolver — Roll Your Own Network - Detailed instructions on how to install and configure unbound on OpenWrt and remove dnsmasq.
- Bind vs dnsmasq vs Unbound
- Bind vs dnsmasq vs PowerDNS vs Unbound | ComputingForGeeks - Excellent descriptions of the different packages and their functionality.
- Unbound vs. Dnsmasq - Very specific about why you should use unbound.
- Multicast DNS (mDNS)
- mDNS cannot be routed, it is a zero config local protocol only.
- DNS vs mDNS | difference between DNS and mDNS
- Multicast DNS - Wikipedia
- mDNS operate at local network level unlike conventional DNS which operates at global level. It works in conjunction with DNS-SD (service discovery) protocol in zeroconf network. ... Multicast DNS works at link local level and hence every node can be reached without routing. mDNS packet will not be forwarded by any router.
- odhcpd
- [OpenWrt Wiki] odhcpd
- Disable Dnsmasq DNS role or remove it completely optionally replacing its DHCP role with odhcpd.
- Test DNS
- Test your DNS request (Via Webbrowser) is running DNSSEC
- DNSSEC? Or Not?
- DNS leak test - Check your DNS provider. Make sure there is no DNS leak. and tells you your IP address.
- DNSSEC Resolver Test - Test DNSSEC validation.
- Are You Protected By DNSSEC? A Quick Way To Check | Internet Society - Thumbs up or thumbs down.
- DNSSEC Algorithm test | Root Canary Project - This tells you the signing algorithm of your DNSSEC handshake.
- Cloudflare Browser Check | Cloudflare - When you browse websites, there are several points where your privacy could be compromised, such as by your ISP or the coffee shop owner providing your WiFi connection. This page automatically tests whether your DNS queries and answers are encrypted, whether your DNS resolver uses DNSSEC, which version of TLS is used to connect to the page, and whether your browser supports securing the Server Name Indication (SNI) using Encrypted Client Hello (ECH).
- Test Webserver has DNSSEC installed adn aworking correctly
- DNSViz | A DNS visualization tool - DNSViz is a tool for visualizing the status of a DNS zone. It was designed as a resource for understanding and troubleshooting deployment of the DNS Security Extensions (DNSSEC). It provides a visual analysis of the DNSSEC authentication chain for a domain name and its resolution path in the DNS namespace, and it lists configuration errors detected by the tool.
- DNSSEC Analyzer | Verisign
- Test if DNSSEC is enabled on your domain - Very easy answer, yes or no.
- Multiple DNSSEC Tests
- DNSSEC Tools | Internet Society - this has some domains with intentinally misconfigured DNSSEC for testting. This is the best way to amke sure DNSSEC is working on your setup. There are also some other tools, well worth a look.
- Test for modern Internet Standards like IPv6, DNSSEC, HTTPS, DMARC, STARTTLS and DANE. - Browser and website checks in a nice format.
- Test with DIG
- Dig for Windows – Dr John's Tech Talk
- How to Install dig on Windows 10 | configserverfirewall
- packages/README.md at master · openwrt/packages · GitHub - The following command can be used to test your DNSSEC validation using dig.
- 10 Most used DIG commands - ClouDNS Blog
- How to test and validate DNSSEC using dig command line - nixCraft
- DNSSEC Guide : How To Test Recursive Server (So You Think You Are Validating) | The DNS Institute
- How to Test and Validate DNSSEC using dig and Web Tools? - Techglimpse
- Testing DNSSEC validation - DNS server configuration notes
- Test with KDIG
- Misc Information
- DNSThought - DNSSEC resolver information, loads of graphs and things.
- Test local traffic with Wireshark
- OpenWRT - Configure DNS-over-TLS with Cloudflare DNS - YouTube (Van Tech Corner) @757s this shows you how to use Wireshark to track traffic on your OpenWrt router's WAN port. You need to:
- install tcpdump on you router
- install SSH on Windows 10 (if not already
- install Wireshark on Windows
- run this command
ssh root@192.168.1.1 tcpdump -i br-lan -U -s0 -w - 'not port 22' | "C:\Program Files\Wireshark\Wireshark.exe" -k -i -
- The extra '-' at the IS needed.
- 192.168.1.1: The traget that will supply the data and has tcpdump installed.
- -i br-lan: The interface to monitor.
- -U: As the description of the contents of each packet is printed, it will be written to the standard output, rather than, when not writing to a terminal, being written only when the output buffer fills.
- -s0: Capture the full data packet. The number following the 's' indicates the number of bits to capture of each packet. 0 indicates all.
- -w: Write the packet capture to a capture file that is readable in an application such as Wireshark.
- - 'not port 22': This is an expression that can be passed via the command line. The expression argument can be passed to tcpdump as either a single Shell argument, or as multiple Shell arguments, whichever is more convenient. Generally, if the expression contains Shell metacharacters, such as backslashes used to escape protocol names, it is easier to pass it as a single, quoted argument rather than to escape the Shell metacharacters. Multiple arguments are concatenated with spaces before being parsed.
- | "C:\Program Files\Wireshark\Wireshark.exe" -k -i -:
- This pipes the output from the devide with tcpdump to Wireshark on the PC you ran the command from with the switches -k -i
- The dash at the end terminates the output definition.
- -k: start capturing immediately (def: do nothing)
- -i: defines the interface, but this must just say there is no interface just use the stream i supply. This is probably a minimum requirement to start Wireshark.
- This pipes the output from the devide with tcpdump to Wireshark on the PC you ran the command from with the switches -k -i
- Enter your router's root password into the SSH window.
- Devices available to monitor (might not be all of them). Just swap out eth0 with the device you want to monitor.
You can find a full list of devics to monitor by going to (Network --> Interfaces --> Devices) or (Status --> Realtime Graphs --> Traffic)
- dsl0
- Shows/Pings: All external traffic.
- Does NOT Show/Ping:-
- NB: -
- dsl0.101
- NB: same as dsl but with a VLAN assigned. (i.e. BT lines in the UK)
- pppoe-wan
- NB: I think this is the same as dsl0
- wlan0
- Shows/Pings: 192.168.1.2 (WiFi client)
- Does NOT Show/Ping: 192.168.1.1 (Router), 192.168.1.219 (LAN client), DNS requests.
- NB: Only internal wireless traffic!
- wlan1
- Shows/Pings: 192.168.1.2 (WiFi client)
- Does NOT Show/Ping: 192.168.1.1 (Router), 192.168.1.219 (LAN client), DNS requests.
- NB: Only internal wireless traffic!
- eth0
- Shows/Pings: 192.168.1.219 (LAN client)
- Does NOT Show/Ping: 192.168.1.1(Router), 192.168.1.2 (WiFi client), DNS requests.
- NB: Only internal switch traffic!
- eth0.1
- NB: same as dsl but with a VLAN assigned.
- br-lan
- Shows/Pings: 192.168.1.1 (Router), 192.168.1.2 (WiFi client), 192.168.1.219 (LAN client), DNS requests.
- Does NOT Show/Ping: -
- NB: Shows all internal router traffic including cross border traffic. It does not show the traffic on the external side of the WAN.
- NB: This stands for Bridged LAN
- dsl0
- OpenWRT - Configure DNS-over-TLS with Cloudflare DNS - YouTube (Van Tech Corner) @757s this shows you how to use Wireshark to track traffic on your OpenWrt router's WAN port. You need to:
- Test external DNS traffic is now secure
- Run Wireshark with
ssh root@192.168.1.1 tcpdump -i dsl0.101 -U -s0 -w - 'not port 22' | "C:\Program Files\Wireshark\Wireshark.exe" -k -i -
- Filter in Wireshark with ip.src == 111.111.111.111 and dns (use your WAN IP)
- Monitor your network for a little while to make sure. and if your router is correctly handling all of the DNS request through DoT (or which ever DNS security method you chose)
- There should be no DNS protocol packets being shown.
- DNS should now as TLS packets going to your defined DNS provider and in my cas that is 9.9.9.9 (Quad9) and is using the TLSv1.3 protocol.
- If you have not configured DNS Hijacking then there will likely be some DNS protocol packets as well as your secured stuff.
- To generate DNS lookups for testing
- Use ping google.com -t , this sequence will start with a dns lookup followed by a load of pings which is easy to find.
- nslookup
- Dont use this for testing DNS lookups in Wireshark, I could never get it to show anything on any interface.
- networking - How does Windows decide which DNS Server to use when resolving names? - Server Fault
- Run Wireshark with
- Wireshark - SSH Piping
- How to Use SSH Pipes on Linux - Like most commands on Linux, SSH can be used with input/output redirection via | (Unix Pipe). SSH can be used with this pipeline too. The basic concept here is understanding how the Unix pipeline works.
- How to Use SSH Pipes on Linux - CVTF Studios.net
- powershell - Piping SSH to wireshark on windows - Server Fault
- Wireshark Switches
- 11.2. Start Wireshark from the command line - You can start Wireshark from the command line, but it can also be started from most Window managers as well. In this section we will look at starting it from the command line.
- Wireshark - Single Dash (at the end)
- linux - What's the magic of "-" (a dash) in command-line parameters? - Stack Overflow
- If you mean the naked - at the end of the tar command, that's common on many commands that want to use a file.
- It allows you to specify standard input or output rather than an actual file name.
- It's not magic. Some commands interpret - as the user wanting to read from stdin or write to stdout; there is nothing special about it to the shell.
- My interpretation is that this allows the data to be streamed and not written to a file
- shell - What does dash "-" at the end of a command mean? - Unix & Linux Stack Exchange
- In this case, it means ‘standard input’. It's used by some software (e.g. tar) when a file argument is required and you need to use stdin instead. It's not a shell construct and it depends on the program you're using.
- linux - What's the magic of "-" (a dash) in command-line parameters? - Stack Overflow
- Wireshark - SSH double dash explained
- ZG International Zentica - What Does –– (double dash) Mean In SSH Shell Command?
- A nice and easy article explaining double dashses.
- The double dash “--” means “end of command line flags” i.e. it tells ssh command not to try to parse what comes after command line options.
- shell - What does "--" (double-dash) mean? - Unix & Linux Stack Exchange
- More precisely, a double dash (--) is used in most Bash built-in commands and many other commands to signify the end of command options, after which only positional arguments are accepted.
- What Does ‐‐ (double dash) Mean In SSH Shell Command? - nixCraft - Easy to read article.
- ZG International Zentica - What Does –– (double dash) Mean In SSH Shell Command?
- Wireshark - To monitor IPv6
- Wireshark - Filters
- Top 10 Wireshark Filters // Filtering with Wireshark - YouTube - Has a list of simple filters in the description aswell.
- 6.4. Building Display Filter Expressions | Wireshark
- DisplayFilters · Wiki · Wireshark Foundation / wireshark · GitLab - Many filter examples here.
- How to Filter By IP in Wireshark - With pictures and many examples.
- The ones you might need straight away
- dns
- ip.addr == 192.168.1.226
- ip.addr == 192.168.1.226 and dns
- ip.src == 111.111.111.111
- ip.dst == 111.111.111.111
- ipv6.addr == ff02::1:2
- Wireshark - OpenWrt tcpdump packet capture (General)
- Wireshark - Notes
- Wireshark adds new entries at the bottom (i wish i could change this) and unless you are at the bottom you will not see updates and Wireshark will appear to be stuck.
- Wireshark Tutorial and Tactical Cheat Sheet | HackerTarget.com - A cheat sheet for Wireshark.
- IPv6 - The Wireshark Wiki - A quick overview of IPv6 and some example filters.
- Wireshark - Depending on what device you are connected to you might not see your computer becasue:
- you are monitoring the WAN where all traffic has been natted and the local IP address no longer exist.
- you are monitoring the ethernet and not the bridged ethernet with the wifi on.
- you are emonitoring the wifi but yur device is on the ethernet
- some traffic that is sent to the router i.e. 192.168.1.1 might just get eaten up by the router becasue effectively when it get the packet it does not route it (this is a guess)
- your device is communicating on IPv6 and you are only monitoring IPv4
- tcpdump
- Man page of TCPDUMP - All switches are listed here
- tcpdump Switches - The tcpdump command has several switches with different purposes. The following are some of the most commonly used.
- A tcpdump Tutorial with Examples — 50 Ways to Isolate Traffic - Daniel Miessler - This guide will show you how to isolate traffic in multiple ways—including by IP, port, protocol, or application to help you find what you’re looking for.
- Test SSL
- WolfSSL
- Release wolfssl 5.0.0 binaries for Windows 10/11 x64 · fochoao/wolfssl-windows · GitHub - WolfSSL Binaries
- wolfSSL User Manual | wolfSSL Embedded SSL/TLS Library Docs - Official documentation.
- Using wolfSSL with Visual Studio | wolfSSL Embedded SSL/TLS Library
- Which cipher is actually being used in connect process. (Page 1) — wolfSSL (formerly CyaSSL) — wolfSSL - Embedded SSL Library - A forum thread with a workthrough.
- OpenSSL
- Binaries - OpenSSLWiki - Old list
- Win32/Win64 OpenSSL Installer for Windows - Shining Light Productions - Uses and installer and there are many different flavours.
- OpenSSL Binary Distribution for Microsoft Windows | firedaemon - Requires some dependencies to be installed but is in a ZIP format.
- Xampp - Apache Webserver for Windows - This has the OpenSSL binaries within it, so if you have this software install you can just use that.
- Release OpenSSL binaries from OpenSSL1.1.1.d [Fixed] · serenial/openssl-windows-binaries · GitHub
- OpenSSL source files
- GitHub - openssl/openssl: TLS/SSL and crypto library
- Using OpenSSL s_client commands to test SSL connectivity | Ping Identity
- OpenSSL Cookbook: Chapter 2. Testing TLS with OpenSSL | feistyduck.com - This test SSL certificates and other test such as cipher. Very detailed.
- s_client | OpenSSL - The s_client command implements a generic SSL/TLS client which connects to a remote host using SSL/TLS. It is a very useful diagnostic tool for SSL servers.
- Wireshark
- Use Wireshark to check the Server Hello
- WolfSSL
- nslookup - this can be a useful tool for testing DNS
- 10 most used Nslookup commands - ClouDNS Blog
- command line - How can I direct a query to specific DNS server? - Super User
- Using Nslookup in Windows to List DNS Servers and Records – TheITBros
- nslookup force to use IPv4: nslookup -q=txt -class=google.com 192.168.1.1
- nslookup | Microsoft Docs
- networking - Windows Appending Domain Suffix To All Lookups - Server Fault
- to solve: add a . (period) on the end of the ip Address you are looking up.
- Test your DNS request (Via Webbrowser) is running DNSSEC
- Test you are using Quad9
- Are you using quad9 - Simple Yes/No Test | Quad9
- @Quad9DNS is there any way to test if the dns is correctly setup on the router? Any site on which I could check if it's blocked for ex? | Quad9 Twitter thread
- Try our test domain - http://isitblocked.org - should result in NXDOMAIN on our systems
- For specific DNS-over-TLS debugging and command-line testing, we’d suggest using ‘kdig’ - https://knot-dns.cz/docs/2.6/html/man_kdig.html
- To test what a blocked domain would look like, try resolving
‘http://blocked.test.on.quad9.net’ - that should result in an NXDOMAIN,
while ‘http://notblocked.test.on.quad9.net’ should resolve to 9.9.9.9.
- What does a block from Quad9 look like? | Quad9
- When Quad9 blocks a domain we send a response with the code NXDOMAIN in it. That code is also returned when a domain does not exist. To differentiate between domains that are nonexistent and blocked we set the authority bit differently. When you receive an NXDOMAIN with authority 0 that is a block from Quad9. When you receive an NXDOMAIN with authority 1 then that is a domain that does not exist.
- dig commands to test this are on the page
- How to Confirm You're Using Quad9 - Windows | Quad9
- How to Confirm You're Using Quad9 - Linux | Quad9
Step 7 - Final Configuration
In this section we just make changes that are appropriate here.
My ISP is not providing IPv6 and I am getting odhcp6c errors in the syslog
This error appears in your system error log. It will not cause any real issues but explanantions and solutions are below.
Mon Nov 29 15:56:12 2021 daemon.err odhcp6c[1363]: Failed to send SOLICIT message to ff02::1:2 (Permission denied)
Mon Nov 29 15:56:13 2021 daemon.err odhcp6c[1363]: Failed to send RS (Permission denied)
Cause
- odhcp6c is the DHCPv6 client daemon. It is likely trying to get dhcpv6 address for WAN from ISP dhcpv6 server. (for WAN interface, the outside network is the link-local context. And that fails as long as the WAN interface has no connectivity.
- ff02::1:2 is an IPv6 address that is used to send all messages to DHCP servers and relay agents on the local network segment (defined in RFC 3315). IPv6 DHCP works differently to IPv4.
- WAN6 has dhcpv6 as the address protocol, so that your WAN port can get an IPv6 address from the ISP's DHCPv6 server (if there is such).
- My provider does not offer IPv6 so this DHCPv6 request will always fail and potential keep retrying.
- Once the WAN6 interface is started when configured as a DHCPv6 client, even if you stop it, or it appears stopped, the odhcp6c daemon is still running.
Solutions
Pick one of the solutions below.
- Get an ISP that provides IPv6
- Prevent the WAN6 interface from ever starting. (Preferred)
- (Network --> Interfaces --> WAN6 --> Edit --> Bring up on boot) = unticked
- This method has the benefit of leaving the interface intact should you ever want to quickly enable IPv6.
- Delete the WAN6 interface (not tried this but a few people have said this works)
- Disable IPv6 on your whole router (not tried this but seems overkill)
Links
- Error message in log regularly - #4 by takimata - Installing and Using OpenWrt - OpenWrt Forum - This thread gave me the answers. It was hard to find becasue the title was nto the best.
- Failed to send DHCPV6 message to ff02::1:2 (Address not available) · Issue #55 · openwrt/odhcp6c · GitHub - Some diagnosis techniques here and worth a read if my solutions dont work. This issue kept on coming up in my Google searches.
- Daemon.err odhcp6c: Failed to send DHCPV6 message to ff02::1:2 (Permission denied) - #3 by gtdaniel - Network and Wireless Configuration - OpenWrt Forum - Some useful information here.
- Getting to the bottom of an OpenWRT IPv6 problem | Tom Thorogood - This is a real good article on how Tom diagnosed his IPv6 issue, although slightly different in the end the error messages were the same.
- Node Address - an overview | ScienceDirect Topics - The discovery process of the DHCP server consists of sending a message to the well-known link-local address (FF02::1:2) used to address all DHCP agents on the local link in contrast with DHCPv4 that uses broadcast addresses.
- [OpenWrt Wiki] odhcp6c - The OpenWrt embedded DHCPv6-client odhcp6c is a minimal DHCPv6 and RA-client for use in embedded Linux systems.
- odhcp6c/README at master · openwrt/odhcp6c · GitHub
- CLI Magic: ifup, ifdown, ifstatus - Linux.com - How to use ifstatus
- What are those? (Log provided) · Issue #37 · seud0nym/tch-gui-unhide · GitHub
- From the command line you can run ip -6 addr , the output of this will confirm if you have a valid link local addresses in use (show what IPv6 addresses used by the router). This is useful for diagnosis.
- This trace is often triggered when there's no valid link local address in use or when no layer3 connectity is supported on the device eg due to the device being a bridge member
- Hello IPv6: a minimal tutorial for IPv4 users - This is an great article on tIPv6 and how it differs from IPv4
- IPv6 Multicast Address Space Registry - A full list of IPv6 multicast addresses as defined in "IP Version 6 Addressing Architecture" [RFC4291].
- Debug IPv6 issues on OpenWrt | falstaff - yet another tech blog - A tutorial on debug IPv6 issues with Wireshark.
Configure 802.11r Fast Transition (Fast Roaming)
This is only useful if you have mulltiple routers running AP (Acccess Points) on the same SSID.
Notes
- The full version of wpad is installed. It should of been done earlier.
- All of your APs will need to use the same SSID, encryption, and passwords
- Repeat for each AP on this router (Openwrt / Openwrt_5g) you want to offer fast roam.
- Do the same for any other AP on your network where you want Fast Roaming.
Method 1 - Easy
- Goto (Network --> Wireless --> 'Your AP' (Openwrt/Openwrt_5g) --> Edit --> Interface Configuration)
- Click the check box for 802.11r Fast Transition
- Click 'Save'
- Click 'Save & Apply'
This is based on a post from @Mushoz on the OpenWrt forum here Fast Roaming 802.11r - Multiple SSIDs = different mobility domains? | OpenWrt Forum where he says the Mobility Domain is created automatically by hashing the SSID.
Method 2 - Manual (Van Tech Corner)
This is a very useful video from Van Tech Corner OpenWRT - Configure 802.11r Fast Transition - Fast Roaming Wifi - YouTube
- Goto (Network --> Wireless --> 'Your AP' (Openwrt/Openwrt_5g) --> Edit --> Interface Configuration)
- Click the check box for 802.11r Fast Transition ans some more options will appear
- NAS ID
- This needs to be unique for each Router/AP
- I just use the router's hostname (i.e. officerouter)
- Mobility Domain
- 4-character hexadecimal ID (0-9 and A-F)
- This will be the same for all of your APs that share the same SSID
- I will use this for both (Openwrt / Openwrt_5g) because they are on different frequencies. If the APs have the same SSID but are on diffferent frequencies this rule should also apply.
- Leave the other settings as they are.
- Click 'Save'
- Click 'Save & Apply'
Step 8 - Backup settings
After configuring the router you will want to backup your settings
- (System-->Backup / Flash Firmware-->Backup / Restore-->Download Backup)
- Get the backup of your configuration settings and store safely on another device.
- This seems to include all of the /etc/ folder and in particular the /etc/config/ folder
Notes
- When you make a backup it basically makes a copy of the /etc/ which includes all settings.
- A backup does not contain downloaded software packages
- When you restore a backup you overwrite everything in the /etc/ folder with that in the backup archive, but no files are deleted, just replaced.
Upgrading OpenWrt
Do not upgrade over WIFI and read How to update OpenWrt (ebilan 4.3)
It is ok just to use the basic LuCi upgrade procedure for minor versions, but you will probably find with major verion updates there are syntax differences within the config files and these need to be manually resolved. Always use the new config files as the base and move your settings into them.
When merging move the settings you understand and for those that you are not sure about go and find them in the LuCi GUI and see what they match up to.
- If using a DoT/Stubby setup: When you do a router upgrade you will temporarily change your WAN/WAN6 DNS settings to 9.9.9.9/2620:fe::fe while you install the required packages because without this change your router will not be able to talk to the internet for this process.
- Custom scripts might need to be re-installed eg: IP set extras and Hotplug extras required for DNS Hijacking (via the Firewall) (i am not 100% sure if this is the case for these scripts).
Basic
It should be noted that this method (on it's own) will require you to re-install all of the 3rd party packages manually for the new firware to be the same.
- Goto (System-->Backup / Flash Firmware-->Flash new firware image)
- Select a compatible firmware image
- bt_homehub-v5a-squashfs-sysupgrade.bin – BT HH5A sysupgrade file (OpenWrt 21.02.1)
- Keep settings: ticked (unless you want to start fresh)
- Click ‘Flash Image’
- Reinstall user-installed packages. (optional)
- After a successful upgrade, you will need to reinstall all previously installed packages according to your notes.
- Package configuration files should have been preserved due to steps above, but not the actual packages themselves. If you used the scripts provided in the forum, this step might not be necessary.
- The new package installations will have installed new, default versions of package configuration files.
sysupgrade (Manual) (Keeping 3rd Party Packages) (20.00+)
Manually removed/installed packages are not preserved by default so we must make note of them before upgrading.
Not Added To Archive
- Removed packages are not recognised in the installed_packages.txt currently and will still be present after restoration.
- Service startup status are not maintained either.
- An example is that this will affect people who disable the dsl_control service to prevent the restarting bug.
- Automatic statirng of a script is based on the presence of a symbolic link to it in the folder /etc/rc.d
- The startup scripts are stored in /etc/ini.d
- It would be nice if this was preserved in the backup archives.
- [OpenWrt Wiki] Init Scripts
These are based on official instructions [OpenWrt Wiki] Backup and restore - Preserving packages and the Luiz Angelo Daros de Luca method shown below.
installed_packages.txt issue in recent OpenWrt21.02.1 release
There has been a change and for some reason I cannot write to the /etc/backup/ folder, however the installed_packages.txt if enabled in the config backup will still be present in the backup. It might be this folder is now getting purged automatically. I have made some adjusments to the code below but have left the old stuff there just incase this is just a bug in 21.02.1 - It should be noted I can still place files in this folder with SFTP and that if i place installed_packages.txt this does not get overwritten but the backup folder in the archive now has 2 installed_packages.txt indicating the file is created elsewhere. This might be an issue with the /overlay and /rom partitions.OpenWrt Bug Report: FS#4048 : sysupgrade with "-k"
For the instructions to work below you must
- make sure the installed_packages.txt is included in the backup configuration.
- output the file to the config directory and dont delete it sysupgrade -k -u -b /etc/config/deleteme.tar.gz
- FTP or otherwise transfer the backup archive from your router
- The installed_packages.txt will be correctly present at /etc/backup/installed_packages.txt
- The normal backup archive will NOT have the installed_packages.txt present.
- SSH into your router and run the following commands. I have remmed out the delete file line for now as it is more useful to keep it.
sysupgrade -k -u -b /etc/backup/deleteme.tar.gz
# rm /etc/backup/deleteme.tar.gz
- These will create a file located at /etc/backup/installed_packages.txt
- This file will NOT be included by default in a config backup archive, but during a system upgrade it will be preserved.
- You can also use this command to get a copy of all of your installed packages. It create a single list but tags the packages as in the /rom(in the firmware) or /overlay(user installed).
- This is a bit of a hack to use this script as you have to create a backup to generate the installed_packages.txt file so we obviously need to delete the backuparchive when our file has been created.
- Lastly this will overwrite any installed_packages.txt present.
- I run this before creating a config backup archive.
- (Optional) Add installed_packages.txt into the config backup archive.
- Go to (Backup / Flash Firmware --> Configuration)
- In the list add this line at the end
/etc/backup/installed_packages.txt
- Click Save
- This is useful if you use the same config archive on multiple routers of the same model (MAC addresses might need changing)
- Now run the Basic instructions above to update your firmware.
- SSH into your router
- Rrun the following commands which will install only the packages from the overlay partition and ingnores the ones in the rom partition.
You can just open the installed_packages.txt and manually install the files you find in the list using the software manager.
opkg update
grep "\toverlay" /etc/backup/installed_packages.txt | cut -f1 | xargs -r opkg install
rm /etc/backup/installed_packages.txt
reboot
- There also might be conflicts with packages already installed.
Collected errors:
 * check_conflicts_for: The following packages conflict with wpad-wolfssl:
 * check_conflicts_for:         wpad-basic-wolfssl *
 * opkg_install_cmd: Cannot install package wpad-wolfssl.
xargs: opkg: exited with status 255; aborting
root@officerouter:~# rm /etc/backup/installed_packages.txt
root@officerouter:~#
- The opkg command will not remove them so you have to remove them manually. I would recommend using the LuCI (the GUI) for this.
- So in the example above, you need to remove wpad-basic-wolfssl and then install wpad-wolfssl
- Once done, re-run the opkg script above command above to finish any missed updates.
- Reboot the router
- If when a package is installed and the new config file does not match with the one in your config files, opkg will create a second config file eg:
adblock
adblock-opkg
These will need to be compared with a merging program and you will need to make manual changes where needed. Try and keep the layout of the new config file
- Rrun the following commands which will install only the packages from the overlay partition and ingnores the ones in the rom partition.
- Reboot your router
- Done !!!
opkg method (Manual) (Keeping 3rd Party Packages) (18.06+)
- SSH in to your router
- run the following command
opkg list-installed | cut -f 1 -d ' ' > /etc/config/packages.list
This will create a file called packages.list that will survive a flash when you keep the settings. - Backup your firmware config to your PC
- (System-->Backup-->Backup-->Generate archive)
- This will include the packages.list file in the archive.
- After upgrade to 20.00+ you should delete this file as it is no longer needed and you should use installed_packages.txt instead.
- Flash the new firmware using the Basic method.
- After reading any notes from OpenWrt (i.e. dont skip to many versions)
- Make sure you keep the settings
- SSH in to your router
- run the following command
cat /etc/config/packages.list | opkg install
This will now install the missing 3rd party packages.
- Package Configurations
- As your existing configuration files were already in place, opkg would have displayed a warning about this and saved the new configuration file versions under *-opkg filenames.
- The new package-provided configuration files should be compared with your older customized files to merge in any new options or changes of syntax in these files.
Notes
- I got these instructions from What happens to installed packages on a sysupgrade in OpenWrt? | Newbedev
- Assumptions (opkg and packages.list)
- if in the list it will install them
- if the package is already installed it will skip to the next one and not overwrite what is already present
- any dependencies that are needed for a package will be installed
- if not present does it remove them?
- You can make a list of just the packages you know you have installed (or want to install) and just use that by manually adding the file /etc/config/packages.list afterwards.
- Create a list of user installed packages only
- Currenltly the packages.list includes all installed, user ones (/overlay) and those already present in the firmware (/rom). To get a list of just user installed apcakges, do the following:
- Generate a packages.list on your current setup
- Factory reset the router.
- Generate a packages.list on this vigin router.
- compare the two package.list and remove all of the packages that are duplicated and this will give you a list of user installed packages.
Luiz Angelo Daros de Luca Method (20.00+)
This is a another method that I have come across and is developed by the person responsible for sysupgrade (I think)
sysupgrade -o -k -u openwrt-new-version.img
<auto reboot>
opkg update
grep "\toverlay" /etc/backup/installed_packages.txt | cut -f1 | xargs -r opkg install
rm /etc/backup/installed_packages.txt
reboot
Notes
- [OpenWrt-Devel] [PATCH v3 0/4] base-files: add new backup options - I got the information from here
Install Config archive on another OpenWrt router
When you have anoter router OpenWrt router on which you did not create the config backup on but want that same setup on there are a few things you need to do. I will use my setups as an example which might only need a few tweaks for yours, but you will get the idea.
- Upload and apply the config backup (from your first router)
- (Optional) Change root password to match the one on the new router's case (System-->Administration)
- (Optional) Change router Hostname (System-->System-->General Settings)
- (Network-->DHCP and DNS-->Server Settings)
- (Optional) Change the Local server (Default is /lan/)
- (Optional) Change the Local domain (Default is openwrt)
- (Network-->Inerfaces-->Devices)
- remove the overriden MAC addresses. They can easily be seen because they are in bold and when you hover over them OpenWrt tells you.
- Setup your internet connection, one of these methods will apply:
- Setup your DSL connection to get internet / Change the username and password on the interface.
- Change the wireless client network to match new parent SSID if required
- Check you have internet with diagnostics (Network-->Diagnostics)
- (System-->Software)
- Update the software lists
- Remove specific packages that will cause issues becasue sysupgrade does not currently remove packages for you and some packages need to be remove for others to be installed.
- primaryrouter: wpad-basic-wolfssl, dnsmasq
- officerouter: wpad-basic-wolfssl
- (Optional) Install openssh-sftp-server
- Check installed_packages.txt is in /etc/backup and if not put it there or in /etc/config
- Run the following command via SSH
grep "\toverlay" /etc/backup/installed_packages.txt | cut -f1 | xargs -r opkg install
- Remove and *-opkg config files in /etc/config because they are not needed.
- (Optional) Change Server Hostname (Services-->uHTTPd-->General Settings)
- Remove old certificate and key (Services-->uHTTPd-->General Settings)
- Regenerate Dropbear keys - Not sure how to do this.
- Remove any packages you do not want on this new router. My example is tcpdump becasue i want to monitor network traffic but my mate does not.
- Remove any additional Firewall rules you had that dont apply to the new router's role.
- Reboot
- Backup new config and put it on file
General Notes
- [OpenWrt Wiki] Sysupgrade – Technical Reference
- This has the switches listed
- To get the switches from the command line run
sysupgrade --help
- Files to be preserved depend on the following:
- /etc/sysupgrade.conf - customizable backup configuration.
- /lib/upgrade/keep.d/* - system configurations provided by specific packages preserved by default.
- opkg list-changed-conffiles - list of files derived by package manager.
- Standard upgrading tutorials
- [OpenWrt Wiki] Upgrading OpenWrt firmware using LuCI and CLI
- [OpenWrt Wiki] Upgrading OpenWrt firmware using LuCI
- [OpenWrt Wiki] Upgrading OpenWrt firmware using CLI
- [OpenWrt Wiki] Preserving OpenWrt settings during firmware upgrade
- The new package installations will have installed new, default versions of package configuration files. As your existing configuration files were already in place, opkg would have displayed a warning about this and saved the new configuration file versions under *-opkg filenames.
- The new package-provided configuration files should be compared with your older customized files to merge in any new options or changes of syntax in these files. The diff tool is helpful for this.
- Older Links
- Other Methods of upgrading (and keeping packages)
- HOW TO: Keep packages & settings AFTER upgrading - Installing and Using OpenWrt - OpenWrt Forum
- [OpenWrt Wiki] Upgrading OpenWrt firmware using LuCI and CLI (2021-09-21)
- This official document has many different methods on upgrading and preserving packages, including:
- Opkg Extras (This instruction extends Opkg functionality.)
- Opkgscript
- This is an alternative to opkgextras
- (2017-10-11)
- simliar to OpenWrt opkg command
- I do not know what is the preferred method of upgrade or if these are still valid with new versions.
- Generally speaking, the use of opkg upgrade is very highly discouraged. It should be avoided in almost all circumstances.
- This official document has many different methods on upgrading and preserving packages, including:
- patrakov script
- Automatically reinstall OpenWrt packages after firmware upgrades
- The script has been tested for upgrading from OpenWrt 18.06.1 to 18.06.2
- missing packages in back up (openwrt) - How someone uses sysupgade on Reddit
- upgrade - What happens to installed packages on a sysupgrade in OpenWrt? - Super User - cat command does nopt work.
- GitHub - richb-hanover/OpenWrtScripts: opkgscript.sh
- The opkgscript.sh script helps to restore the current set of packages after a sysupgrade or even a clean install of OpenWrt.
- This might no longer be needed because this functionality is built into OpenWrt's opkg script (I could be wrong)
- Sysupgrade instead of opkg upgrade - #11 by wbeine - Installing and Using OpenWrt - OpenWrt Forum - General Discussion
- OpenWrt Home Server - Backup and Restore - pedrohdz.com - an indepth tutorial going over some useful points.
- Automatic Updating (not recommended)
- Every 12 - 16 months, redo your config settings to prevent syntax errors.
- New Flash image options explained.
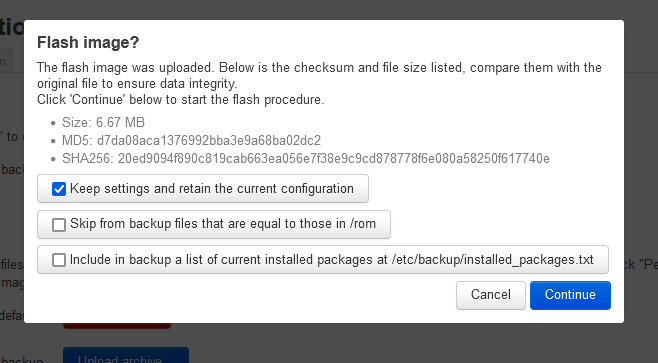
- Keep settings and retain the current configuration
- If ticked (sysupgrade default behaviour i.e. not defined by a switch), the following files will be preserved during an upgrade:
- Modified config files in /etc/config/
- System configurations supplied by individual packages defined in /lib/upgrade/keep.d
- User defined files stored in /etc/sysupgrade.conf
- If unticked then the following switch is used -n (do not save configuration over reflash)
- If ticked (sysupgrade default behaviour i.e. not defined by a switch), the following files will be preserved during an upgrade:
- Skip from backup files that are equal to those in /rom
- If ticked then the following switch is used -u (skip from backup files that are equal to those in /rom)
- base-files: add sysupgrade -u to skip unchanged files · openwrt/openwrt@20b2327 · GitHub
With '-u', for a file /aaa/bbb/ccc enlisted for backup,
it will only get into backup if /rom/aaa/bbb/ccc does not
exist or /aaa/bbb/ccc is different from /rom/aaa/bbb/ccc.

It also works with '-c', but only effective for files touched
but not modified.
- -u saves some space by not including unmodified configuration files in the backup. It also has the benefit of getting new default options if they changed with the new update, instead of getting stuck with legacy configuration files forever.
- If a file that flagged to be included in a backup archive is exactly the same as the one currently present in the /rom partition (virgin files in the firmware image), dont add it to the backup.
- Why is this useful?
- A good example is a config file, if the file is the same as the one in the /rom then it means this config file has all default values for the current version of package and can just be replaced with the default config file of the newer version of the package.
- Using the new default config file that belongs with the new version of the package prevent conflicts with incorrect syntax when you install the new firmware with a newer version a package.
- Not putting a unchanged config file in the backup saves space (not a lot) and allows OpenWrt just to place the new config file in the directory without creating a xxxx-opkg file which you then have to sort.
- Makes upgrades easier
- Include in backup a list of current installed packages at /etc/backup/installed_packages.txt
- If ticked then the following switch is used -k (include in backup a list of current installed packages at /etc/backup/installed_packages.txt)
- -k creates a file with all packages installed before the update which will be available in installed_packages.txt after the update. So no more "Oh, which package am I missing?" since yes, software update doesn't preserve installed packages.
- This will create a list of your user installed packages in /etc/backup/installed_packages.txt and this file will be present after the firmware upgrade.
- So why include this file when you dont have to. This seems to be a new feature in OpenWrt.
- So my thoughts are, tick all 3
- Keep settings and retain the current configuration
- Please add missing sysupgrade options · Issue #4160 · openwrt/luci · GitHub - New options explaind.
- Button in LuCi to install overlay packages defined in installed_packages.txt · Issue #5530 · openwrt/luci · GitHub - I have asked for a button to be added so an end user can easily re-install the missing packages.
- [OpenWrt Wiki] Backup and restore - Documentation on how to configure your backups for specific situations. This page also tells you how you can preserve your backups 'during' an upgrade and describes the default backup settings.
- Set up Hotplug extras to automatically restore Opkg profile after upgrade.I have not done this method.
- [OpenWrt Wiki] Preserving OpenWrt settings during firmware upgrade
- [OpenWrt Wiki] Sysupgrade – Technical Reference
- [OpenWrt Wiki] Failed to download, wget returned 4
- This is most likely your fault becasue the router is not online.
- I used my mates DSL username and password on my broadband line and the internet was on and off and caused this error.
Upgrade All Installed Packages
Upgrading all packages without updating the firmware of the router is something you possibly want, so here it is:
- How do I upgrade all of my installed packages in OpenWRT? - Unix & Linux Stack Exchange
opkg update
opkg list-upgradable | cut -f 1 -d ' ' | xargs -r opkg upgrade
- opkg update just makes sure the software lists from the remote repositories are upto date so a comparrision can be made.
- [OpenWrt Wiki] Opkg package manager
- [OpenWrt Wiki] Managing packages
- Package Update from Luci - #5 by wbeine - Installing and Using OpenWrt - OpenWrt Forum
- openwrt - How do I upgrade all of my installed packages in LEDE? - Unix & Linux Stack Exchange
- [OpenWrt Wiki] Opkg package manager - This is the command-line utility that will update packages aswell as other operations.
- some people recommend not to do this if your router firware is very old and out of date to prevent compatibility issues.
Other Configurations, Features and Things
Stuff that was not covered above will be here.
Resetting the Router
What Happens
- Resetting the router removes all of the user settings and downloaded packages by putting the router back to how it was when you first flashed it.
- It will keep all of the system information like mac addresses.
- It basically wipes the /etc/ folder
Notes
- You should do this over Ethernet because the reset process will disable the wifi
- The router will revert to 192.168.1.1 and http:// so this might also create an update in the router
- This seems to wipe the etc folder
- [OpenWrt Wiki] Failsafe Mode, Factory Reset, and Recovery Mode
Try a new Add-on
When you uninstall a piece of software, this will not remove the dependencies automatically (OpenWrt should add a dependencies register to fix this). If you want to try out a new add-on, do the following so if the add-on installs a load of stuff you do not want you can remove the dependencies and revert back to your old settings.
Installing
- make a backup of your settings configuration
- install the Add-on
- make a list of the dependencies installed from the log notifcations (at the top of the page) that appears after the add-on has been installed. Only dependencies that are not installed but required will be downloaded and installed. Add-ons can share packages
Removing
- uninstall the LuCI app (if you used one)
- remove the dependencies that were installed
- delete the relevant settings in /etc/config/ (optional). these can be left for re-installation.
Failsafe Mode
Failsafe mode is where you can access OpenWrt Console/Linux Kerel via SSH or a serial connection and is used for those times OpenWrt will not boot up.
To access the Failsafe mode by SSH
- when the router is booting up (Flashing Green LED), Press any button on the router to interrupt.
- The OpenWrt normal boot procedure is interupted and the cut down console over SSH will become available on 192.168.1.11
- You can now SSH into the router. Use the username 'root' and no password is required.
Notes
Config file conflicts
Config file conflicts can happen at various times but in this instance it was when I had done the following
- Factory reset my router
- Uploaded my config back
- installed a dynamic DNS script luci-app-ddns which also installs ddns-scripts
I then received the following error:
Collected errors:
* resolve_conffiles: Existing conffile /etc/config/ddns is different from the conffile in the new package. The new conffile will be placed at /etc/config/ddns-opkg.
What this error means is that when i downloaded luci-app-ddns, OpenWrt discovered I already had a config file called ddns so it just renamed the new/default config file that came with the package to ddns-opkg so my original config file that had been restored with my backup was unaffected and I still had the opportunity to examine the new config file to see if there were any changes.
You can delete the file ddns-opkg as it is not used. You might want to just look in it to see if there any changes you need to know about.
VLAN
Notes
- LEDE/OpenWrt — Configuring VLANs – LEDE/OpenWrt & IoT – Medium
- Configure WAN port on OpenWrt/LEDE · One Transistor
- Help with LUCI VLAN - Installing and Using OpenWrt - OpenWrt Forum
My Security Options Overview
I will briefly outline the security settings I have added to my OpenWrt HH5A setup. This might change over time.
- Strong password for root
- adblock - Advert blocking. List updated automatically
- DNS Hijacking
- DoT (via Stubby)
- Quad9 used for the DNS provider
- SSH console only allowed to be accessed from the LAN (WIFI and Ethernet)
Notes
- [OpenWrt Wiki] Accessing LuCI web interface securely
- [OpenWrt Wiki] How to get rid of LuCI HTTPS certificate warnings
Questions
I have not verified the answers to these so any feedback is welcome.
- Can I leave the wires in place to access the serial, or are they no longer required. = does not seem to make much difference.
- Is the config file specific to a router i.e. because of MAC addresses = I thinks so.
- Where does OpenWrt store MAC addresses = in /etc/config/network and then in the image which is used for a factory reset (squashfs only).
- What happens when I press the reset button on my HH5A OpenWrt router
- LEDE/OpenWrt — Factory Resetting – LEDE/OpenWrt & IoT – Medium
- It wipes the overlay partition and thus all of the unspoilt/unchanged files of the original firmware on the rom partition are used to load the OS.
General Notes
- LuCi is the GUI for OpenWrt
- LAN referrers to LAN and WIFI clients
Additional Settings
These settings here are useful ones I have come across but do not form part of the intial configuration of OpenWrt for the HH5A.
Wireless Isolation
This is not available for configuration in LuCI and the correct format seems to be option isolate '1'
- LEDE/OpenWrt — Setting Up Client Isolation – LEDE/OpenWrt & IoT – Medium
- Isolate wireless clients? - Installing and Using OpenWrt - OpenWrt Forum
Prevent Windows adding a new network every time the OpenWRT router is rebooted
- Add a fixed MAC to the LAN (and DSL) because otherwise everytime I reboot my router, Windows sees it as a new network
- Any way to prevent Windows from adding a new network each reboot - Installing and Using OpenWrt - OpenWrt Forum - So I've noticed that whenever I reboot the router Windows seems to think it has discovered a new network and appends an incremented number too the name. Currently I'm on ethernet suffix 14 and WiFi network 5. Any way to stop this?
Notes
General
- All device names can be found in (System-->Realtime Graphs-->Traffic)
- High Memory
- High used and cached memory - Installing and Using OpenWrt - OpenWrt Forum - explains hwo memory is used and a command line to expidite clearing RAM.
- How to Monitor System Processes Using htop Command | Cloudways Help Center - A script a bit better than top.
Flashing Guides / Tutorials
- BT HomeHub 5A Router UART Access Hack: 12 Steps - This guide shows you how to open the case and install a permanent serial connection and is very detailed (eliban).
- How to install OpenWrt/LEDE on HH5A using Windows - openwrt.ebilan.co.uk - The goto guide for windows users.
- 'LEDE Install Image' and 'Installation Guide for BT Home Hub 5A' - openwrt.ebilan.co.uk - This is the goto guide for installing OpenWrt on the HH5A.
- equk's blog - Unlocking BT HomeHub 5a - This is a cut down guide on how to where to solder the serial connection and how to flash the OpenWrt firmware.
- Running OpenWrt on the Plusnet Hub One (& BT Home Hub 5a) | Plusnet Community - This is a tutorial by a plusnet user and there is a lot of information in this thread.
- Installing OpenWrt on a BT HomeHub 5 (or Plusnet Hub One), Full Instructions
Documentation / Configuration
- [OpenWrt Wiki] Resetting the root password
- [OpenWrt Wiki] OpenWrt Starter FAQ
- DMZ in luci please? - Installing and Using OpenWrt - OpenWrt Forum
- Things to do after installing Linux LEDE 17.01 | Tech Tutorials - Some intersting things to try here.
Tech Specs
- BT HomeHub 5.0 Type A [OpenWrt Wiki]
- BT Home Hub 5A - WikiDevi
- BT Home Hub 5 ADSL Modem Router teardown - one way and a close look inside - YouTube– a general electronics look around
Websites of note
- OpenWrt - Official Website
- Releases · mkresin/BTHH5a-installimage · GitHub - This is where to get the custom u-boot files for the process
- LEDE/OpenWrt & IoT – Medium - some nice tutorials here.
- OpenWrt bugs:: OpenWrt/LEDE Project: Tasklist - OpenWrt Bug Tracker.
- Ebilan HH5A DropBox - all of the related files are here.
Forums
- Homehub 5 / Plusnet Hub One - openwrt.ebilan.co.uk - This is the best forum for HH5A users.
- Broadband Hardware | Kitz.co.uk - This is general broadband hardware forum but covers the BT HH5A, OpenWrt.
- Running OpenWrt on the Plusnet Hub One (& BT Home Hub 5a) | Plusnet Community - A very busy forum thread discussing the whole process starting with a tutorial from a plusnet member.
BT HomeHub stuck in CFG04 (UART) mode after installation
- Still in UART (CFG 04) boot after flash - openwrt.ebilan.co.uk
- BT HomeHub stuck in CFG04 mode after installation - #11 by slh - Installing and Using OpenWrt - OpenWrt Forum
Logging
- logread - This is a command for reading out the messages in the syslog much the same as in LuCi.
- Linux Logging Basics - The Ultimate Guide To Logging
- Linux Log Files Location & How To View Logs Files on Linux - nixCraft
- Where are the log files located
- The default method is using `/sbin/logread' and/or `/bin/dmesg'.
There is no log file, by default, but you can enable it in System-->Logging.
Alternatively you can setup "remote logging" to a syslog server on another host. - (System-->System-->System Properties-->Logging - You can use Luci to configure the logs as required.
- The default method is using `/sbin/logread' and/or `/bin/dmesg'.
- linux - logread in OPENWRT - Unix & Linux Stack Exchange
The UCI system
- [OpenWrt Wiki] The UCI system - The abbreviation UCI stands for Unified Configuration Interface, and is a system to centralize the configuration of OpenWrt services.
- UCI command usage - Teltonika Networks Wiki - Unified Configuration Interface (UCI) is a small utility written in C (a shell script-wrapper is available as well) and is intended to centralize the whole configuration of a device running on OpenWrt. This is a full list of information.
Questions
- When you save settings in LuCi, does this reformat the related config files so they are neater?