The best kit setup to have (in order)
- Commodore 1571 Disk Drive + ZoomFloppy
- Commodore 1541 Disk Drive (with parallel mod) + ZoomFloppy
- Any Commodore Disk Drive + Any X-Cable
Buy from
- ZoomFloppy – RETRO Innovations - The official website. You can buy the device from here.
- Commodore c64 128 user port parallel adapter + 1541 drive parallel port | eBay | cespok_64 - This seller does loads of cool stuff
These are my notes on how to transfer or image disks to and from a real Commodore Floppy disk.
Recommend Methods To Image Disks
- Copy Protected Disks (Disk to Image):
- PC (Windows) + 1571 + ZoomFloppy/XUM1541 + NIBTools + Images in G64 format
- PC (Windows) + 1541 (With Parallel Port Mod) + ZoomFloppy/XUM1541 (With Parallel Port Option) + NIBTools + Images in G64 format
- Copy Protected Disks (Disk to Emulated Disk):
- PC (Windows) + 1541/1571 + Pi1541 + Maverick (GCR Nibbler Copier) + Images in G64 format (will not do all copy protections)
- Normal Disks (Disk to Image):
- PC (Windows) + 1541/1571 + ZoomFloppy/XUM1541 + NIBTools + Images in D64 format
- Normal Disks (Disk to Emulated Disk):
- Commodore Computer + 1541/1571 + Pi1541 + DraCopy/Maverick (Fast Data Copier) + Images in D64 format
- Normal Disks (Files to Image):
- PC (Windows) + 1541/1571 + ZoomFloppy/XUM1541 + CBM-Transfer + Images in D64 format
Transfer Methods
There are some basic transfer methods I have discovered and they fall into the following groups below. Most of these methods require a real Commodore 1541 Disk Drive and they will not copy protected disks unless mentioned.
The instructions sets of the various methods for controlling the 1541 will vary, and so will the features they offer (i.e. Sector-to-Sector copying).
Directly connect a 1541 to a PC (Disk to Image)
- PC (Windows) + 1571 + ZoomFloppy + NIBTools (can do copy protected disks)
- PC (Windows) + 1541 (With Parallel Port Mod) + ZoomFloppy (With Parallel Port Option) + NIBTools (can do copy protected disks)
- PC (Windows) + 1571 + XUM1541 + NIBTools (can do copy protected disks)
- PC (?) + 1541 + KryoFlux + Their own software (can do copy protected disks)
- PC (?) + 1541 + SuperCard Pro + Their own software (can do copy protected disks)
Directly connect a 1541 to a PC (File Transfer)
If you select all files it can work as if the disk is real standard DOS floppy disk for storing files etc. Programs with custom loaders (most full-disk games and demos) should be copied as disk images because they do not store their data in standard files.
- PC (DOS) + 1541 + Parallel Port Adapter + Star Commander
- PC (Windows) + 1541 + Parallel Port Adapter + CBM-Transfer
- PC (Windows) + 1541 + Parallel Port Adapter + Vice Emulator + (File Transfer Software | BASIC)
- PC (Windows) + 1571 + ZoomFloppy + File Transfer Software
- PC (Windows) + 1541 (With Parallel Port Mod) + ZoomFloppy (With Parallel Port Option) + File Transfer Software
Real Commodore, Real 1541 and an Emulated 1541 (Disk to Emulated Disk)
In this method creating a disk images is done by the fact we are emulating a real 1541 drive which stores the disk as an image. These methods will probably work when you want to copy disks between 2 real 1541 drives attached to a Commodore computer and if you really need too for some reason, a virtual 1541 to another virtual 1541.
You can substitute the 1541 with a another Commodore drive model of your choosing.
- Commodore computer + 1541 + Pi1541 + Disk Copier Software (can do copy protected disks)
- Commodore computer + 1541 + SD2IEC + Disk Copier Software
- Commodore computer + 1541 + VC1541 (Parallel Port Adapter and PC) + Disk Copier Software (I am only guessing about this one but I don't think it will work)
- Commodore computer + 1541 + 64HDD (Parallel Port Adapter and PC) + Disk Copier Software (I am only guessing about this one but I don't think it will work)
Real Commodore with a twin disk drive attached (BASIC)
I only mention this for completeness as I came across the following BASIC command
Copy the whole disk in drive 1 to the disk in drive 0 (on a dual-drive floppy only):
COPY D1 TO D0
- COPY - C64-Wiki
- The BASIC COPY command with logical drives can be used to copy between units of a dual disk drive (drives that use a single device number and two logical drives in that). I'm not aware any of them that could be connected to the plus/4 easily.
- Examples of a suitable drive is probably the CBM PET 8050, 4040 etc..
Build your Commodore disk imaging setup in Windows
You must follow the 'Proper power-on sequence' as outlined here, also read these warnings
These instructions assume you have a Windows 10 PC, although not tested in Windows 11 and Windows 7 they might work. I will be installing all of the software you might use whether or not you use it to keep the instructions easy to follow.
- Turn on your Windows 10 PC
- Download
- OpenCBM
- Transfers files/images to/from a real CBM drive connected via an 'X-cable' on the parallel port or USB via ZoomFloppy/XUM1541.
- Win NT/2K/XP, and Linux/i386 kernel driver and development library to control serial CBM devices, such as the Commodore 1541 disk drive, connected to the PC's parallel port via a XM1541 or XA1541 cable. Fast disk copier included.
- Successor of cbm4li
- Contains offical firmware for ZoomFloppy.
- Releases are in a sub folder in the repo, not in the releases section.
- C1541 / VICE (SDL Version)
- A utility from the VICE emulator that works with CBM Image Files (ie: D64,D71,D81 files) NEW! CBM-Transfer 1.22 now supports latest releases..
- VICE is an emulator collection which emulates the C64, the C64-DTV, the C128, the VIC20, practically all PET models, the PLUS4 and the CBM-II (aka C610). It runs on Unix, MS-DOS, Win32, OS/2, Acorn RISC OS, BeOS, QNX 6.x, Amiga, GP2X or Mac OS X machines.
- Get the SDL version
- CBM Transfer (CBMXfer)
- An open-source GUI for OpenCBM, VICE, NIBTools and several other command-line utilities for transferring files and working with disk images.
- NIBTools
- Utilities to transfer images via parallel port. Supports protected disks.
- OpenCBM
- Create a folder C:\commodore
- Install OpenCBM
- Unzip OpenCBM to (This is a temporary folder)
C:\commodore\opencbm\
- Navigate to this folder
- Run the following command (doesn't have to be run from the command prompt). This will install the software to C:\Program Files\opencbm\
C:\commodore\opencbm\install.cmd
- When successful you will be prompted with some instructions
I could install the necessary USB drivers if you like
- Option 1 - You have a ZoomFloppy
- Insert the ZoomFloppy as instructed
- Wait a moment for Windows to recognise the device
- Press 'y' and then Enter
- Press any key to continue . . .
- (optionally) Update the ZoomFloppy firmware by running (doesn't have to be run from the command prompt)
C:\commodore\opencbm\firmware-update.bat
- Press any key to continue . . .
- Unplug your ZoomFloppy
- Option 2 - You don't have a ZoomFloppy
- Press 'n' and then Enter
- Press any key to continue . . .
- Option 1 - You have a ZoomFloppy
- Add the OpenCBM folder to the system PATH. If you need help follow the instructions here
C:\Program Files\opencbm\
- Create a folder to stored your imaged disks
C:\commodore\floppies\
- Unzip OpenCBM to (This is a temporary folder)
- Install VICE for the C1541 utillity
- Extract the VICE download to
C:\commodore\vice\
- Run one of the emulators such as x64sc.exe to make sure it works
- Extract the VICE download to
- Install NIBTools
- Extract the downloaded package to
c:\commodore\nibtools\
- (optional) Add this folder to the system PATH.
- If you need help follow the instructions here
- This is if you are going to use the Nibtools from the command line.
- Extract the downloaded package to
- Install CBM-Transfer
- Extract the downloaded package to the folder
C:\commodore\cbm-transfer\
- There is no a separate setup that needs to be run even though this is what some istructions say. It must be for an old version.
- Run
C:\commodore\cbm-transfer\CBMXfer.exe
- If you get an error as follows, you need to perform an additional step, if not, skip this step
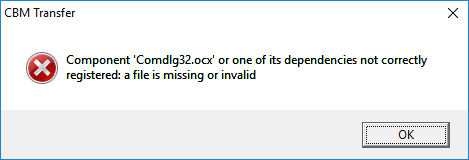
- How to Fix the 'comdlg32.ocx' missing Error on Windows? - Appuals.com
- The comdlg32.ocx file is a part of the Visual Basic Runtime suite and it’s not located on your computer by default.
- This guides you through fixing the issue
- I located the file on one of my other computers, but this one should be fine.
- The file should be located at one of these locations:
C:\Windows\System32\comdlg32.ocx (x32)
C:\Windows\SysWOW64\comdlg32.ocx (x64)
- Get a copy of the file from another one of your PCs or the Appauls article above and place it in the correct folder for your version of windows
- Open an command prompt in Administrator mode
- Navigate to the relevant folder from above.
- Run these 2 commands - They might generate an error but ignore it.
regsvr32 /u Comdlg32.ocx
regsvr32 /i Comdlg32.ocx
- How to Fix the 'comdlg32.ocx' missing Error on Windows? - Appuals.com
- Now run CBMXFer.exe
- Upon first running you will get a dialogue box which can be ignored because we are fixing it in the next step

- Under 'CBM-Transfer Options' (which should popped up automatically)
- Set the various 'Utility Paths' which we installed earlier as follows:
OpenCBM:     C:\Program Files\opencbm\
Vice, C1541: C:\commodore\vice\
NIBTools:    C:\commodore\nibtools\
- Set the default 'Left' directory in the menu item 'Local Paths'
C:\commodore\floppies\
- Set the various 'Utility Paths' which we installed earlier as follows:
- Extract the downloaded package to the folder
- (optionally) You can delete the folder below if you want, but I keep it because it has the documentation in it and a test script.
C:\commodore\opencbm\
- Done
Using your Windows setup to image Commodore disks
You must follow the 'Proper power-on sequence' as outlined here, also read these warnings
Now the software is setup, it is now time to use it to save those disk you have. I will mention all of the methods I know of and it is up to you to choose which is most appropriate with the disks and equipment you have.
Connect and Test the drive
- Connect your Commodore drive to your chosen adapter (we will use ZoomFloppy) to your PC as prescribed here
- You can use other adapters to connect your drive
- For connection issues relating to the X Series of cables, see my article Commodore Tape Transfers | QuantumWarp
- You can only use XM1541 or XA1541.
- XA1541 is better.
- Test your drive is on and working by trying these commands
    cbmctrl detect     - checks the drive is there (might be only ZoomFloppy)
    cbmctrl reset      - resets the drive
    cbmctrl status 8   - Will output some information about the drive
Making the Images
Now it is time to insert your disk that you want to image
- OpenCBM - d64copy.exe
- This will only work to copy 1541 formatted disks (D64)
- Navigate to
C:\commodore\floppies\
- Run the command
d64copy 8 test.d64
- OpenCBM - imgcopy.exe
- This is stilll under development and is not as stable as d64copy
- This can be used to create D64, D71, D81 etc..
- NIBTools - nibread.exe
- Requires a 1571, or 1541 with parallel port mod
- Will do copy protected disks
- If you have a parallel connection in your Commodore drive, or a 1571 you can enable the "Use NibTools" option and create additional image types NIB, NBZ or G64 in a similar fashion. NibTools has many options, so please refer to the Nibtools documentation for correct usage of the various switches.
- Navigate to
C:\commodore\floppies\
- Run one of these commands
nibread test.nib
nibread test.nbz   (same as above, but compressed)
- Convert NIB to G64 or D64 disk files
- These NIB/NZB can be converted to G64 or D64 as required. Unless needed you should always convert the disks to .G64 as this can handle protected disks and is a better format.
- You use nibconv.exe to change the format or removed the compression.
- How to use NIB Disk Image Files | Commodore 64 | YouTube | Basic Bites
- Using NIB files with your C64/1541 emulator: what they are, and how to easily convert them to G64/D64 floppy disk images.
- As always a very clear and concise video.
- nibread.exe can be tweaked with advanced options when edge-case disks are not working. 95% of disks should image with the default settings.
- CBM-Transfer
- This is a GUI for all of the above software and most functions can be done through this frontend.
- Are using a X-Cable?
- There are several different types of X-Cables. I recommend you use an "XM" or "XA" type for use with windows. Other types may not work.
- XA is better.
- I prefer to use this software.
- Easy Disk copy
- To make a D64 image from a disk (uses d64copy.exe)
- Make sure NO files are selected in the RIGHT pane,
- then click the "<-" button.
- You will be asked for a name to save the image (the Disk Title will be the default).
- If you have a 1571 dual-sided floppy, simply change the extension to D71.
Installing and Using links (sort)
- Installing a ZOOMFLOPPY in 2022 | YouTube | Basic Bites
- How to connect a Commodore Disk Drive to your Windows PC, and backup diskettes to D64 & NIB disk images using OpenCBM & NIBTOOLS.
- This video is so easy to follow and I have based some of my instructions on it. Please watch this as it will answer most questions.
- ZoomFloppy with NIBTOOLS | YouTube | Hey Birt!
- In the third part of this series on the ZoomFloppy we look at using NIBTOOLS to back up out copy protected disks.
- An in-depth description of issues that might occur between 1541 and other formats of disks when imaging.
- Install cbmxfer (CBM-Transfer) on top of OpenCBM 0.4.99.104 on Win7 (x64, 64 bit) | YouTube | Spiro Trikaliotis - A video showing what the author of CBM-Transfer does, but it is not very clear.
- OpenCBM, CBMXfer: how to install XUM1541 drivers on Windows 10
- In this video tutorial, we see how to connect the XUM 1541 adapter to the PC and how to install the XUM1541 drivers on Windows 10.
- Based on an old setup but mentions Comdlg32.ocx is missing
Software
- Fast Disk Copiers (Disk to Disk)
- DraCopy
- GitHub - doj/dracopy: DraCopy and DraBrowse - Both Plus4 and C64 versions are here.
- DraCopy (Plus 4) | plus4world
- DraCopy | csdb.dk (C64)
- Plus4
- Based on Fcopy
- Shows sector by sector copy
- Browser is D64 aware
- FCOPY
- C64
- Apparently got around some disk protections
- Many different version https://csdb.dk/search/?seinsel=all&search=fcopy&Go.x=0&Go.y=0
- Commodore Software - Fcopy v3.0
- The story of FCopy for the C-64 – pagetable.com
- DraCopy
- Nibblers (Low Level Disk Copiers) (native)
- Maverick
- C64
- Is by far the more advanced copy program. very handy program.
- [CSDb] - Maverick Copy by Angels (1999) - Commodore 64 Tool: Maverick Copy by Angels. Released on 1999
- Maverick - C64 Copy ProtectionC64 Copy Protection - Maverick is one of the best software copiers for the C64. Maverick V2.0 was originally called ‘Renegade’ but was forced to change their name for copyright reasons. The last legitimate version is v5.04
- Also has a Fast Disk Copier (sector by Sector)
- Has a GCR Nibble mode
- Fast Hack'em
- C64
- [CSDb] - Search for Fast Hack'em - CSDb
- Fast Hack'em Parameter List - C64 Copy ProtectionC64 Copy Protection - Fast Hack’em v6.04 Parameter List Here is the list of the parameters found in Fast Hack’em version 6.04, There are 189 parameters: Fast Hackem 6.04 Parameters List by Craig A. Ernster
- Fast Hack'em v9.5a - Commodore Software - Fast Hack'em v9.5a by Mike J. Henry and the Basement Boys is I believe the last version of the awesome Commodore 64 copying arsenal.
- Fast Hack'em - Wikipedia
- Fast Hack'em is a Commodore 64 fast disk/file copier, nibbler and disk editor written by Mike J. Henry and released in 1985.
- The most popular feature of Fast Hack'em was its ability to produce copies of copy-protected commercial software. When using the nibbler, disk copying is done on a very low level, bit-by-bit rather than using standard Commodore DOS commands. This effectively nullifies the efficacy of deliberate disk errors, non-standard track layouts, and related forms of copy prevention
- Ultrabyte Disk Nibbler
- Ultrabyte Disk Nibbler | C64 Copy Protection - Ultrabyte has quite a few version. From the ads 2.1, V4, V5 and V6. Early version where out in 1985 including routines to copy Electronic Arts titles. V4 included a powerful new GCR Nibbler and 105 parameters. V5 now copied Rapid Lock protection and had 205 parameters including VMAX protections. Finally V6 now has 305 parameters.
- Maverick
- Other Copiers
- Archiver-Copy - Software Details - Plus/4 World - AKA Archiver Copy. Copy between any combination of tape and disk.
- Commodore Software - Disk Copiers - A list of disk copiers.
- Utility/Copy - Software - Plus/4 World - A collection of copiers for the C16/+4
- Utility/Disk - Software - Plus/4 World - A collection of disk utilities for the C16/+4
- Commodore 64/128 - Model 1551/1541 Test/Demo-Diskette | Daniel's Legacy Computer Collections
- There are a few PRG on the utility disk supplied with your Commodore drive
- SD.BACKUP.PLUS4 / Single-Drive Backup for PLUS 4 systems
- These programs are designed to run on the indicated computers with a 1541 disk drive. They allow backup diskettes to be created on a system with only a single 1541 disk drive. They work by first reading from the source diskette and then writing to the destination diskette in a series of diskette `swaps`.
- GUI
- CBM-Transfer / CBMXFer
- GitHub - sjgray/cbm-transfer - GUI for OpenCBM and others to transfer and view Commodore disks and files.
- The CBM-Transfer Homepage
- An open-source front-end to several command-line utilities for transferring files and working with disk images.
- CBM-Transfer makes using those utilities easy by providing a familiar windows interface that removes the need to learn the commandline syntax of each program.
- CBM-Transfer also includes a multi-format file and picture viewer.
- Windows based
- Uses the OpenCBM driver for Windows 10, a utility from VICE and NIBTools and has some of its own binaries for copying
- Commodore 1541 Disk Drive connected via parallel port
- This is a front-end
- CBMX-Transfer is a front-end to several command-line utilities for transferring files and working with disk images. CBM-Transfer makes using those utilities easy by providing a familiar windows interface that removes the need to learn the commandline syntax of each program. CBM-Transfer also includes a multi-format file and picture viewer.
- A PC running Windows 95 or higher (see note below). Tested working on Windows 10.
- Written in Visual Basic
- CBM-Transfer (aka "CBMXfer") is based on GUI4CBM4WIN (G4C from now on) and is a lot more improved
- CBM-Transfer / CBMXFer
- File Transfer
- Star Commander
- The Star Commander homepage - The Star Commander is the ultimate DOS shell that can handle the image file formats of the C64 Software Emulator.
- DOS only
- Has a copy disk option, but this might just be sequential copying of all files present on the disk
- Not updated any more - 2010-01-11 v0.83
- Commodore 1541 Disk Drive connected via parallel port
- Commodore 1541 Project - Part 6 of 6 - Using Star Commander | YouTube
- This is a short - a VERY short - look at how to use the Star Commander software to transfer disk images between the PC and the 1541 Disk Drive. Just giving the basics of how to create an image that you can use in an emulator, and how to create a REAL disk from an image.
- really easy to watch and follow.
- Supports XE1541, XA1541 and others.
- How to get Star Commander working under Windows XP - Commodore 64 (C64) Forum - On one of my web pages, I have written a text in Swedish about how to get Star Commander working under Windows XP. Somebody asked me to translate it into English and so I just did.
- How to use the XA1541 and Star Commander | YouTube | 16mmDJ
- Star Commander Manual (eng).pdf - The manual in a PDF.
- Commodore Software - File Copiers - A collection of copiers for the C64
- Commodore 64 Drive on PC | YouTube | Tech Tangents - The XA1541 cable and Star Commander makes it super easy to work with C64 disks on PCs!
- Commodore 1541 Project - Part 6 of 6 - Using Star Commander | YouTube | boredwithusernames
- This is a short - a VERY short - look at how to use the Star Commander software to transfer disk images between the PC and the 1541 Disk Drive. Just giving the basics of how to create an image that you can use in an emulator, and how to create a REAL disk from an image.
- C64 Making Disk Images - Old Skool Style Longplay | YouTube | Greymousedoesstuff
- In this tutorial I show you how to work with disk images for my trusty Commodore 64, pin out for a simple X1541 cable, BIOS Parallel Port settings, finally transferring disks using DOS running Star Commander v0.82 and a 1541 II drive.
- Very long but seems to cover everything.
- Star Commander
- Imagers
- CBM-Transfer / CBMXFer
- See above
- OpenCBM
- see below
- NIBTools
- Low-level disk "nibbler" utilities using parallel port cables, or 1571 drive
- Commodore 64 (C64) Preservation Project - NIBTools Homepage
- Commodore 1541/1571 disk image nibbler
- A specialist setup of hardware and software which will recover protected disks
- GitHub - markusC64/nibtools - This old GitHub page has some basic commands and list the adapters it will support.
- NIBTools Downloads
- d2d64 – Preserving your C64 disks - World of Jani
- I needed a program to transfer C64 disks to .d64 images with a good overview of the process, but more importantly, it had to be fast and with minimial interaction to be used for reading disks in large batches. I ended up making a modified version of Nibread which i decided to call d2d64 so it would not be mixed up with the original Nibread. Nibread is part of the Nibtools utilities by Pete Rittwage at the C64 Preservation Project.
- D64it Plus4 - Software Details - Plus/4 World
- Plus4 / PRG
- Creates D64 images and transfer them into mass storage devices.
- CBM-Transfer / CBMXFer
- Drivers
- OpenCBM
- A package of core utilities as-well as drivers and firmware for the ZoomFloppy/XUM1541 and several other related devices.
- GitHub - OpenCBM/OpenCBM
- OpenCBM download | SourceForge.net - Download OpenCBM for free. Win NT/2K/XP, and Linux/i386 kernel driver and development library to control serial CBM devices, such as the Commodore 1541 disk drive, connected to the PC's parallel port via a XM1541 or XA1541 cable. Fast disk copier included.
- OpenCBM Changelog | Spiro
- Win 7/8/10, and Linux/i386/AMD64 kernel driver and development library to control serial CBM devices, such as the Commodore 1541 disk drive, connected to the PC's parallel port via a XM1541 or XA1541 cable. Fast disk copier included. Successor of cbm4linux. Also supports the XU1541 and the XUM1541 devices (a.k.a. "ZoomFloppy").
- Contains firmware for the ZoomFloppy
- Has copying programs in it.
- OpenCBM
- File Management
- 64Copy
- By Peter Schepers
- 64COPY is an all-purpose DOS and C64 emulator file manager, modelled after Norton Commander, and runs under the Windows DOS VDM (32-bit or lower), and in real DOS. The 64-bit editions of Windows have no DOS VDM, so you will need to install a DOS-like emulator like DOSBox. It specializes in converting and manipulating emulator files between various formats, as well as a very flexible 6502 disassembler. 64COPY does not do any communication to the 1541/71/81 floppy drives to read disks
- Latest v4.45 2014
- DirMaster: a d64 editor and more | Style64
- A Windows-based GUI application designed to help Commodore enthusiasts explore and manage their disk image collections.
- DirMaster supports common (and uncommon) emulator disk image formats (such as .d64, .d81, .d2m, etc), almost every native Commodore archival format (such as .arc, .sda, .lnx, etc), and many native graphic formats (such as koala, doodle, amica, etc).
- DirMaster was designed to give users a perfect blend of familiar appearance (e.g. natural looking disk image contents using the PETSCII character set) and modern GUI functionality (e.g. drag and drop, opening multiple disk images at once).
- Extact PRG from the D64 easily with this.
- DirMaster/Style Documentation (v3.0.0)
- 64Copy
- Commodore Emulators (Can connect directly to a real 1541)
- Vice Emulator
- Commodore 1541 Disk Drive connected via parallel port
- I am not sure how reliable this is reliable
- Vice Emulator
- 1541 Emulator
- VC1541 (Hardware Emulator software)
- 1541 Drive emulator you run on your PC (supports X1541 or XE1541)
- This works with any Commodore that has the serial port.
- Copy from the real disk to an Emulated disk
- Use native Commodore disk copying software or commands to copy from the real disk to an image on the emulated drive.
- 64HDD
- A serial bus and disk drive emulator
- Will run with either X1541 or XE1541 cables
- 64HDD in action | youtube | Psylicium - I found an old IBM Thinkpad laptop in the trash a couple of months ago, and decided to turn it into an emulated floppy drive for my Commodore 64, using 64HDD. This is a short video of what it does :)
- 64hdd for real dummies! - Commodore 64 (C64) Forum - I've no idea if this is going to be of any use to anyone, but I had a lot of trouble getting 64Hdd to work. I managed to figure out most of this either myself, or by googling.
- See this article for more information Commodore Tape Transfers | QuantumWarp
- VC1541 (Hardware Emulator software)
Hardware
- 1541 Emulator
- SD2IEC (Hardware Emulator device)
- This connects direct to a real Commodore computer
- Commodore 1541 Disk Drive connected to the commodore computer
- Use native Commodore disk copying software or commands to copy from the real disk to an image on the emulated drive.
- How to Copy C64 Disks between SD2IEC and Real Drives | YouTube | Jan Beta
- A little tutorial video about how to copy .D64 disk images from an SD2IEC (or equivalent device) to a real floppy disk using a 1541 disk drive (and also vice versa).
- Set SD2IC to Device 9 (non permanent)
- OPEN 15,8,15 - Opens channel 15 for device 8
- PRINT#15,"u0>CHR$(9) - this send the command to change the drives address to 9
- CLOSE 15 - Closes channel 15
- Use DraCopy on a real C64
- sd2iec (firmware) - C64-Wiki - This page describes the functionality of the sd2iec firmware including disk commands that can be issued from the Commodore.
- Does not support G64 images
- Pi1541
- Fully supports:
- Fast Loaders
- D64
- G64
- Pi1541 Official Homepage - Pi1541 is a real-time, cycle exact, Commodore 1541 disk drive emulator that can run on a Raspberry Pi 3B, 3B+ or 3A+.
- Pi1541 - C64-Wiki - A description of the Pi1541
- The Pi1541 Disk Drive – breadbox64.com - A great article on a beautiful looking device.
- Fully supports:
- Raspberry Pi
- RaspberryPI models comparison | Comparison tables - SocialCompare - Compare Raspberry Pi Zero 2 vs Raspberry Pi 400 vs Raspberry Pi 4 vs Raspberry Pi 3 A+ vs Raspberry Pi 3 B+ vs Raspberry Pi 3 vs Raspberry Pi 2 vs Raspberry Pi Zero vs Raspberry Pi
- Raspberry Pi 3 B+ Comparison with 3B and More! - Latest Open Tech From Seeed - Released in 2018, the raspberry pi 3B+ was the third ever seemingly capable upgrade to the raspberry pi 3B. With the 3B and Pi 3B+ having significant advantages over the Pi B+ and Pi 2, one would wonder what’s the difference between the 3B and 3B+?
- SD2IEC (Hardware Emulator device)
- PC 1541 Adapters
- ZoomFloppy Adapter
- Based on XUM1541 developed by Nate Lawson.
- ZoomFloppy brings Commodore disk archival into the 21st Century, bridging the gap between the both the IEEE-488 and IEC-based disk intelligent Commodore™ disk drive line and contemporary personal computers. Taking up the baton from the ever-popular X*-1541 line of parallel port interfaces, ZoomFloppy provides complete functionality for newer machines running multitasking and multi-user operating systems and those systems lacking the legacy parallel port upon which the X*-1541 interfaces depend.
- ZoomFloppy Set Up | YouTube | Hey Birt!
- Follow along as we wrap a case around a ZoomFloppy board, install the USB driver and OpenCBM software on the PC as well as learn how to back up a floppy disc to a .d64 file. There is a lot more you can do with a ZoomFloppy, if you have questions let me know in the comments below.
- In this video he uses GUI4CBM4WIN to transfer files.
- ZoomFloppy will always be compatible with the XUM1541 firmware
- ZoomFloppy – RETRO Innovations
- Excellent description of this product and it's features.
- How is the Zoom Floppy different then the XU1541?
- Performance
- 25-second backup without optimizing (parallel transfer, needs cable in drive).
- Still faster even for serial xfers.
- Functionality
- supports Burst Nibbler protocol via nibtools. Allows raw g64 backups (read and write). Works with vmax/epyx etc etc.
- Reliability
- interrupt xfers in the middle (^C), start another transfer, and everything gets reset and restarted properly
- Supports infinite holdoff
- IEEE-488 Support
- ZoomFloppy is one of a few solutions for USB access to the IEE-488 drives, and the only one that understands PET/CBM IEEE commands.
- Can talk directly to Commodore Disk drives such as the PET 4040 and PET 8050.
- Future Expansion
- All signals are available on the X5 Expansion Port.
- only 7 KB used out of 32 KB FLASH on microcontroller
- How does ZoomFloppy compare to a XUM1541 device?
- ZoomFloppy is an implementation of an XUM1541-compliant interface. XUM1541 specifies a protocol that is used to transfer data from the interface to the OpenCBM libraries. In many cases, the terms can be used interchangeably, though they do not mean exactly the same thing. Incidentally, ZoomFloppy is partially named after the “xum” in XUM1541, which many people pronounce as “zoom” .
- Performance
- How to use ZoomFloppy – The WP Guru - ZoomFloppy is an ingenious contraption by Nate Lawson which lets you connect real Commodore disk drives via USB to modern computers.
- ZoomFloppy adapter can access CBM Commodore PET Dual drives (i.e. 4040/8050)
- ZoomFloppy – RETRO Innovations - homepage
- ZoomFloppy review – Vintage is The New Old
- This seems to be a next generation adapter that works with everything including PET drives.
- I have not used this but included it because it keeps popping up
- Commodore Software - CBM Transfer v1.22a - CBM Transfer v1.22a by Steve J. Gray (Released Sept. 13th, 2021) - This is an excellent Windows based program for transfer files from a real Commodore 1541/71/81 to a PC using either the Zoom Floppy or USB based XUM cable.
- XUM1541 Setting up guide | load64.com
- ZoomFloppy from Box to using in 10 minutes. | YouTube | Steve's Real World - Unboxing and use of a ZommFloppy
- A ZoomFloppy, PixelBook Go, and Raspberry Pi - marcbilodeau.com - The ZoomFloppy is an essential tool for any serious Commodore 64 enthusiast. Learn about it and how to set one up with a Pixelbook Go and Raspberry Pi.
- Getting two ZoomFloppies to Work on the Same Windows 10 Box - Realm of Zoggins - You have probably made poor decisions in life when you come to the conclusion that you need so many Commodore drives hooked up to your PC that you need more than one ZoomFloppy, but here I am to tell my story.
- XUM1541-II
- Building and testing a XUM1541-II adapter for connecting a Commodore 1541 floppy drive to a PC | YouTube | Artic retro - In this video I build a XUM 1541-II adapter that is based on the ZoomFloppy adapter.
This makes it possible to connect a 1541 floppy disk drive to the USB-port of a modern PC, and copy floppy disks over to that PC, or do other disk-operations using OpenCBM commands. - KryoFlux (PC Adapter)
- KryoFlux Products & Services Ltd.
- KryoFlux is a USB-based device designed specifically for the reliability and precision needed to acquire reliable low-level reads suitable for software preservation.
- This is the official hardware developed by The Software Preservation Society, an authority in authentic floppy disk imaging and preservation.
- UK Company.
- KryoFlux Products & Services Ltd.
- SuperCard Pro (CMBSTUFF)
- CBMSTUFF SuperCard Pro - Homepage
- I have not used these and they are hard to get hold of.
- Burst Nibbler
- The package came with software to be run on the Commodore C64
- The connection cable is the same pinout of the ZoomFloppy (i am guessing)
- Commodore 1541 Parallel Cable with ZoomFloppy & Burst Nibbler Demo | YouTube | Steve's Retro Gaming - This video shows a mix of ZoomFloppy/Burst nibbler hardware and software and how they can be mixed and matched when using the parallel mod on a Commodore 1541.
- [CSDb] - Burst Nibbler V1.9 by Octagon (1988) - Commodore 64 Crack: Burst Nibbler V1.9 by Octagon. Released on 1988
- Burst Nibbler for Commodore 64/128 Datel Parallel Cable & Software Zoom floppy compatible - GameDude Computers
- Deep Scan Burst Nibbler! Zoom floppy compatible Powerful Software
- The notes below explain how the ZoomFloppy and this Burst Nibbler gets the un-modified data to make perfect backups.
- The Burst Nibbler system is probably the most powerful disk copier available for the Commodore computer.
- It gains its power by using parallel data transfer. With standard nibblers the data is read from the disk and decoded into a standard format before being transferred to the host computer by the serial bus. This is all well until it comes across some non-standard data on the disk. Because it can't recognize the code it is unable to decode into the form needed for serial transfer. With parallel transfer the data is read from the disk and transferred directly to the host computer without the need to decode it. This is achieved because the Burst Nibbler System is actually hardware and software package. The hardware consists of a parallel cable that plugs into the computers user port. The other end of the cable plugs into the Via chip socket inside your disk drive. The software is a powerful Nibbler control program with various parameter settings to maximize results.
- Transfers raw GCR Code via cable!
- Fitted in minutes usually no soldering!
- Only package to copy up to 41 tracks!
- Will copy a whole disk in under 2 mins!
- Full and half tracks copied - no problem!
- Make a perfect copy every time!
- Fitting involves lifting the 6522 Via chip inside the drive, inserting it into the socket on the cable and plugging the whole assembly back into the socket, the other end just plugs into the user port and has a through connector for your other hardware.
- Parallel Port Adapters (XE1541/XA1541/etc....)
- These have been covered extensively in this article Commodore Tape Transfers | QuantumWarp
- They are an old and slow way of connecting to Commodore drive
- XU1541
- The xu1541 | Spiro's home on the web - Homepage
- Originally developed by Till Harbaum
- This project is now dead and you should not use these adapters anymore unless you have one already.
- The xu1541 was the modern way to connect CBM IEC bus devices to todays USB equipped PCs (The more modern alternative is the XUM1541).
- It was meant to replace the printer port solutions based on the so-called original x1541 cable.
- It provides a means to send low level IEC commands forth and back via the USB. PC software developed to support this interface may then directly access the disk drive and the contents of a disk inserted. It should also be possible to access other IEC devices like printers. Currently e.g. the git version of the OpenCBM software supports this interface.
- XUM1541
- Developed by Nate Lawson
- The firware and schematics are released as Open Source
- ZoomFloppy is based on this.
- Introducing xum1541: the fast C64 floppy USB adapter | rdist
- I’ve been working on a project in my spare time that I’m now ready to announce. It is a USB interface for the C64 1541 floppy drive, which allows it to be connected to a modern PC.
- The xum1541 (pronounced “zoom”) is built from a modified version of the xu1541 firmware.
- It is a USB full speed device and supports high-speed parallel cables.
- The hardware USB support significantly speeds up transfers.
- It will support mnib (aka nibtools), which provides low-level imaging to backup copy protected disks. I’m most excited about this feature since it is critical to archiving original floppies for the C64 Preservation Project.
- XUM1541 Homepage | Nate Lawson - Nate's original prototype page.
- Nate recommends buying a ZoomFloppy prebuilt.
- A GitHub XEUM1541 project
- GitHub - tebl/C64-XUM1541: Simple PCB for building a XUM1541 - A device for copying data to and from Commodore 1541 disk drives using a modern computer.
- GitHub - tebl/C64-XUM1541-II: An updated version of my C64 XUM1541, - this supports the newer XUM1541 firmware and comes with a few extra goodies.
- OpenCBM/xum1541 at master · OpenCBM/OpenCBM · GitHub
- Official XUM1541 firmware
- Win 7/8/10, and Linux/i386/AMD64 kernel driver and development library to control serial CBM devices, such as the Commodore 1541 disk drive, connected to the PC's parallel port via a XM1541 or ...
- ZoomFloppy Adapter
- Commodore Drives
- 1541
- Commodore 1541 - Wikipedia
- Disks formatted on the 1541 are compatible with the 1551
- You can only change the devices ID number permanently with a hardware mod.
- the default device ID is 8, but this can be changed to 9 and possible 11.
- You can use software to change the device ID temporarily
- Both theses change methods are written in the user manual.
- Commodore Pet can read 1541/1551 formatted disks
- Readers' Feedback: Commodore 1541 Disk Drive Device Number Update
- Commodore Disk Drive Device Number Update (From Compute! Issue 50 / July 1984)
- Covers hardware mod and software method, both mentioned in the user manual (page 48)
- The 1541 demo disk that was included with your drive also contains a program to change device numbers. LOAD the program DISK ADDR CHANGE then RUN. The user prompts will tell you what to do.
- If you feel uncomfortable changing the device number using the hardware method, the same thing can be achieved with a software (program) modification. Here is the procedure:
- Turn off all disk drives
- Turn on the disk drive whose device number you want to change
- Type and enter the following commands:
CLOSE 15: OPEN 15, 8, 15
PRINT # 15, "M-W", CHR$(119) CHR$(0) CHR$(2) CHR$(n + 32) CHR$(n + 64)
CLOSE 15
- Change the n in the PRINT#15 command above to the device number you want to assign to the disk drive. It might be best to limit the device numbers to the range between 9 and 14.
- Note the syntax of the PRINT#15, "M-" … command. Contrary to the instructions in the 1541 user's manual, do not include the colon after the memory-write (M-W) command. If the colon is included, the device number change will not be successful.
- Now you can turn on the other drive(s), and start processing.
- The 1541 demo disk that was included with your drive also contains a program to change device numbers. LOAD the program DISK ADDR CHANGE then RUN. The user prompts will tell you what to do.
- Change Device Number - Software Method (From Manual / Pg48)
- The device number is selected by the drive by looking at a hardware jumper on the board and writing the number based on that jumper in a section of its RAM. Once operation is underway, it is easy to write over the previous device number with a new one.
- The Code
FORMAT FOR CHANGING DEVICE NUMBER:

    PRINT#file#,"M-W:" CHR$(119) CHR$(0) CHR$(2) CHR$(address+32)
    CHR$(address+64)

EXAMPLE OF CHANGING DEVICE NUMBER (FROM 8 TO 9):

 10 OPEN 15, 8, 15
 20 PRINT# 15, "M-W" CHR$(119) CHR$(0) CHR$(2) CHR$(9+32)
    CHR$(9+64)
- "HOW TO" change the 1541 drive assignment. | AmiBay
- Every now and then i see that people are wondering how to change the 1541's drive assignment from say,8 to 9. So here is a little write up on how to do it, with pictures and a little hand drawn diagram.
- This tutorial show you how to add your own DIP switches to your drive.
- The 1541 demo disk that was included with your drive also contains a program to change device numbers. LOAD the program DISK ADDR CHANGE then RUN. The user prompts will tell you what to do.
- Ruud's Commodore Site: 1541 - Ruud's Commodore site, information about Commodores and old PCs. This particular page is dedicated to the 1541 hardware and how it works.
- Commodore 1541 - Wikipedia
- 1541-II
- Commodore 1541-II DIP switches - The Silicon Underground
- Commodore's 1541-II disk drive has a pair of DIP switches in back. Here's how to set the Commodore 1541-II DIP switches so you can run more than one drive.
- It shouldn’t strictly matter how you connect the drives, but Commodore recommended plugging drive 8 straight into to the computer. Plug drive 9 into drive 8. If you need help connecting them, see my earlier post on connecting Commodore disk drives.
- For what it’s worth, the switch settings are the same on a 1571 or 1581 drive as well.
- Device 12 - Changing the Commodore 1541 Default Device Number To Anything! | The Commodore Room - In this video, we change the 1541-II device number to start at 12 rather than the default 8. This way, you can avoid the lengthy process of software device number changes and easily daisy chain a couple dozen 1541's together!
- Commodore 1541-II DIP switches - The Silicon Underground
- 1551
- Commodore 1551 - Wikipedia
- Disks formatted on the 1551 are compatible with the 1541
- You can only change the devices ID number permanently with a hardware mod.
- the default device ID is 8, but this can be changed to 9 and possible 11.
- You can use software to change the device ID temporarily
- Both theses change methods are written in the user manual (age 71).
- Commodore Pet can read 1541/1551 formatted disks
- Change Device Number - Software Method (From Manual / Pg71)
- The preferred way to temporarily change the device number of a disk drive is via a program. When power is first turned on. the drive reads an 110 location whose value is controlled by a jumper on its circuit board, and writes the device number it reads there into memory locations 119 and 120. Any time thereafter, you may write over that device number with a new one, which will be effective until it is changed again, or the 1551 is reset
- The Code
FORMAT FOR TEMPORARILY CHANGING THE DISK DEVICE NUMBER:

    PRINT#15,"%n"

    Where n = 8 or 9

EXAMPLE

    Here is a program that sets any device number:

10 INPUT "NEW DEVICE NUMBER"; DV$
20 IF NOT (DV$ = "8" or DV$ = "9") THEN 10
30 OPEN 15,8,15, "%R"+DV$: CLOSE 15

If you send only the % sign, the device number will toggle between 8 and 9.
- The 1551 demo disk that was included with your drive also contains a program to change device numbers. LOAD the program DISK ADDR CHANGE then RUN. The user prompts will tell you what to do.
- Commodore 1551 and Plus 4 Update | YouTube | OldSkoolCoder - A simple repair for a 1551 not reading disk because the head is jammed.
- Commodore 1551 Disk Drive - Peripheral - Computing History - Originally known as the SFS481, and designed specifically for the Commodore Plus 4, it is in appearance like a charcoal grey 1541. The drive plugs into the cartridge slot of the machine, using its own wired in interface.
- Commodore 1551 - C64-Wiki - A small article on this unique drive.
- Commodore 1551 - Hardware - Plus/4 World - The Commodore 1551 floppy drive is a rare beauty. Designed for the Commodore 264 series, it borrows the nice black look of the Commodore Plus/4. It connects through the parallel port, unlike the more common 1541 drive, which had a serial connection.
- Commodore 1551 Academic - The Commodore 1551 (originally introduced as the SFS 481) was a floppy disk drive for the Commodore Plus/4 home computer. It resembled a charcoal-colored Commodore 1541 and plugged into the cartridge port, providing faster access than the C64/1541 combination. Commodore reportedly planned an interface to allow use of the 1551 with the C64, but it was never released.
- Commodore 1551 - Wikipedia
- 1571
- The internal RAM of this drive is sufficient to load a complete track into memory which is require to beat some copy protections.
- A 1571 can backup protected disks natively becasue it can read the a whole Track into RAM including read errors.
- A parallel mod on a 1571 just speeds the drive up. I have not seen anyonbe who has done this mod so I could be wrong.
- Parallel Port mod
- This is mainly done on the 1541 thought it can be done on the rest of the drives with varing levels of difficultly.
- It allows greater speed for transfers but it main feature is it allows direct access to the GCR data so copy protectsion can be imaged as-well. See Burst Nibbler notes above for more information.
- Commodore c64 128 user port parallel adapter + 1541 drive parallel port | eBay
- I know you have to add the parallel mod onto a 1541 to allow nibbling and it gives it speed increase. But I see on the mod 1571, does this mean you can apply this parallel mod to a 1571 for increased speed?
- Yes, it can be used in a 1571 also, but in this case you can't use a header connector because the space inside is limited and you may need to raise the cover a little.
- The 1571 has also the "burst" mode that can be used to increase speed and burst nibbling without parallel connection, so the mod in the 1571 is not very useful.
- Floppy disk Recovery
- Rescuing Floppy Disks - Archiveteam - This page is meant to be a clearinghouse for various options that a person or group of reasonable technical ability could use to rescue data from floppy disks. If any of these options seem daunting, a number of people have offered to accept floppy disks and pull the data using these tools.
- Cleaning a drive
- DIY 5.25 inch cleaning diskRetro Commodor
- I’m dumping quite a lot of disks in different formats. For that I’m using the Kryoflux, but quite often are the disks dirty, and the dirt gets stuck to the read head of the drive.
- This article shows you how to make your own cleaning disk and then how to use it to clean your drives heads.
- DIY 5.25 inch cleaning diskRetro Commodor
- Disk Misc
- Converting a Commodore 1541 or 1570 Drive into a 1551 – pagetable.com - The 1551 is the weird outlier in the family of Commodore disk drives: It is the only drive using the “TCBM” bus instead of Serial or IEEE-488. And what’s even weirder? 1541 and 1570 drives converted into 1551s!
- 1541 vs 1551 vs 1571 etc..
- Commodore 5.25" Floppy Disk Drives - 1551/1541 | YouTube | Dan Wood - A look at my mid 80's Commodore floppy disk drives. The famous Commodore 1541 drive for the Commodore 64, and the rare Commodore 1551 parallel drive for the Commodore Plus/4.
- Commodore Disk Drive 1551 vs. 1541 Speed Comparison | YouTube | jimboblivesforever - Comparison of loading speeds of the Commodore VC 1541 Disk Drive and the very rare Commodore 1551 Drive for the 264 series computers like the C16, C116 and Plus 4.
- Inside Commodore DOS - OCR.pdf | devili.iki.fi - A technical dive into the 1541 Disk Drive and is aimed at programmers.
- 1541
Commodore BASIC/Disk Commands
- COPY - C64-Wiki
- Copy the whole disk in drive 1 to the disk in drive 0 (on a dual-drive floppy only)
COPY D1 TO D0

or possibly

COPY D8 TO D9
- The BASIC COPY command with logical drives can be used to copy between units of a dual disk drive (drives that use a single device number and two logical drives in that). I'm not aware any of them that could be connected to the plus/4 easily.
- Examples of a suitable drive is probably the CBM PET 8050
- Copy the whole disk in drive 1 to the disk in drive 0 (on a dual-drive floppy only)
- To load and show directory
LOAD"$",8
LIST
- To load a PRG and execute it
LOAD"TTAPSERV.PRG",8
RUN
- DIRECTORY - C64-Wiki
- BASIC 3.5+ (i.e. C16 and Plus4)
- DLOAD - C64-Wiki
- BASIC 3.5+ (i.e. C16 and Plus4)
Notes
- General
- Misc
- Transferring Commodore 64 Disks to Modern Formats | Diginoodles - This is a description of how I was able to convert over 200 Commodore 64 1541 floppy disks to a number of .D64 archive files, readable with any of the modern C64 emulators. I did this transfer of ancient data close to 20 years ago, but hopefully the information may stil be useful for anyone who may want to do this.
- Commodore History Part 7 - Disk Drives | YouTube | The 8-Bit Guy
- Copy Protection
- Telling the story of the Commodore 64, Copy Protection, and Disk Copiers | Commodore Copiers Copy Protection - Telling the story of the Commodore 64, Copy Protection, and Disk Copiers
- ZoomFloppy with NIBTOOLS | YouTube | Hey Birt!
- In the third part of this series on the ZoomFloppy we look at using NIBTOOLS to backup copy protected disks
- He is using a 1571 and it works with no modification because the drive has enough internal RAM to load a whole track at a time which is required to beat some copy protections.
- You can use a 1541 but it requires a hardware modification and ZoomFloppy with the Parallel Port option.
- Simple Commodore 64 Disk Protection: Copy that Floppy, Remove Anti-Piracy Measures | YouTube | 8-Bit Show And Tell
- The is a really easy video to watch and show you how to defeat some copy protections.
- This guy uses the software Maverick utilising both the 'Fast Data Copier' (Sector by Sector copier) and the 'GCR Nibbler Copier' for copying dodgy sectors.
- The "I Am The C-64" tutorial programs for the Commodore 64 have anti-piracy disk copy protection, despite being written in BASIC, and it's enough to thwart simple "fast" disk copiers. We go through the steps of making a copy of the disk on a real 1541 and KAO 5.25" floppy disk with the help of Maverick's disk nybbler, and then go a step further and "de-protect" the program so a nybbler is no longer necessary.
- commodore 64 - How can I view an Error Info Block in a D64 image? - Retrocomputing Stack Exchange
- How do I copy a real disk with an error as protection? - Commodore 64 (C64) Forum
- Some useful information and starting points here
- Mentions the following software
- [CSDb] - Disk Tool V5.0 by The Light Circle (1986) - Commodore 64 Crack: Disk Tool V5.0 by The Light Circle. Released on 1986
- [CSDb] - Disk Error Check Utility by Kracker Jax Protection Busters - Commodore 64 Tool: Disk Error Check Utility by Kracker Jax Protection Busters
- [CSDb] - Underground Network by Mike J. Henry (1984) - Commodore 64 Tool: Underground Network by Mike J. Henry. Released on 1984
- [CSDb] - 64Copy V4.46 Beta by Peter Schepers (2015) - Other Platform Commodore 64 Tool: 64Copy V4.46 Beta by Peter Schepers. Released on 21 October 2015
- Create a Blank Disk Image
- Pi1541 - Page 124 - Commodore 64 (C64) Forum - At the top of this page it gives the instructions on how to create a blank D64 and G64 image both from the Commodore and from the Pi1541.
- Create a blank .c64 disk image for the Pi1541 or SD2IEC | retroCombs - Create a blank .c64 disk image for the Pi1541 or SD2IEC
- Use VICE Emulator (This can create any type of blank image except TAP and T64 for obvious reasons)
- Run the emulator
- File --> Create and attach an empty disk image
- Set the following options
- Select a suitable location such as your desktop
- At the top, fill in the Name field with a suitable name such as 'blank_disk'
- No spaces are allowed in the filename.
- I dont know if all lowercase is better for filename.
- At the bottom, select the image type (ie D64/G64)
- Don't touch anything else unless you know what they are for (I don't)
- Click Save
- Close VICE
- Disk Images
- NIB is an archive of a floppy disk, it is not a virtual disk file. it contains the GCR data recorded of the disks surface.
- D64 is the standard and basic disk image.
- D64 reader/writer with support for extended tracks - Commodore 64 (C64) forums - A discussion on the D64 image format.
- Cannot be used to store copy protected disks.
- This format stores all the data from a disk in a structured manner but it is not a 1-1 representation of the disk. Only data from standard tracks in standard locations is kept.
- G64
- Is a format that that can handle copy protected disks.
- It is made from the raw GCR stream (GCR Pulses from the magnetic media).
- GCR-encoded disk image format
- Contains all the extra information such as errors on the disk and so is more full and accurate image of the disk.
- This format is needed for copy protected disks.
- The C64 file formats list | 64Copy Central - This is a page of all the various disk image formats and links to their specifications.
- Disk Image - C64-Wiki - This is a page of all the various disk image formats and links to their specifications.
- 17 The emulator file formats | VICE Manual - This chapter gives a technical description of the various files supported by the emulators.
- Commodore 64 file types - Commodore 64 (C64) Forum - Can someone please explain exactly what the following game files are - d64, .t64, .g64, .p00, .p01, .p02, .prg, .tap, .crt.
- Introduction to the various Emulator Formats | petlibrary.tripod.com
- This page and the pages it refers to can be found in the C64 download folder ( formats.zip ) . It is taken directly without any modifications from the 64copy package by Peter Schepers which can be found in the PC tools section of the fairlight site , in the PC section .
- Programming information | Fairlight
- Hardware information about the 1541 and the Commodore 64.
- This page has the formats.zip. Formats is Peter Scheper's (author of the excellent conversion program 64Copy) contribution to enlightening us about the structure of the different formats commonly used on the C64 and the emulators. The text has grown covering more and more, so the overview was slightly lost. To solve this, Peter split the file into one file for each format description. What you get here is a ZIP file containing them all.
- Ruud's Commodore Site: disk images
- Disk images are a copy of the data of a floppy on another carrier, like a hard disk or an USB stick. These images can be used by programs like Star Commander, VICE, X1541 and several C64-emulators
- A basic explanation of the different Commodore image types.