
These are my QEMU notes
- KVM gives access to the host hardware through the kernel.
- QEMU emulates the hardware.
How to QEMU install on Windows
Main Software
- Method 1 (Installer)
- Download the Windows binaries from here
- Download QEMU - QEMU (Windows Tab)
- Direct link: Stefan Weil provides the binaries and installers for 64-bit Windows
- Run the execuatable and complete the wizard
- No other binary is needed to run QEMU
- Download QEMU - QEMU (Windows Tab)
- Download the Windows binaries from here
- Method 2 (MSYS2)
- Goto Download QEMU - QEMU (Windows Tab)
- Follow the instructions under the MSYS2 section.
Frontend GUI for QEMU on Windows
QEMU is by it's nature only a command line application, however you can install QtEMU (Windows) or virt-manager (Linux).
- How to Install QEMU on Windows with Qtemu GUI | Complete Setup Tutorial - YouTube
- In this video, we’ll walk you through the complete installation of QEMU on Windows and configure it with the Qtemu GUI for easy use.
- You do not need to run the windows installer and then all of the MSYS2 stuff, it is one or the other.
Batch File
This is an example batch script to run QEMU directly from the command line.
This will run a virtio-blk, RAW image file, Logical and Physical sectors set to 4096 and boots with UEFI (GPT, with an EFI System Partition)?
if not exist "D:\VM Backups\Web_Server_OVMF_VARS.fd" copy "C:\Program Files\qemu\share\edk2-i386-vars.fd" "D:\VM Backups\Web_Server_OVMF_VARS.fd"

"C:\Program Files\qemu\qemu-system-x86_64.exe" ^
-L "C:\Program Files\qemu\share" ^
-drive if=pflash,format=raw,readonly=on,file="C:\Program Files\qemu\share\edk2-x86_64-code.fd" ^
-drive if=pflash,format=raw,file="D:\VM Backups\Web_Server_OVMF_VARS.fd" ^
-monitor tcp:127.0.0.1:36000,server,nowait ^
-cpu qemu64 ^
-k en-gb ^
-vga std ^
-machine pc ^
-accel whpx ^
-drive file="D:\VM Backups\Web_Server_disk_2026-09-09.raw",if=none,id=drive0,format=raw ^
-device virtio-blk-pci,drive=drive0,logical_block_size=4096,physical_block_size=4096 ^
-net nic,model=virtio-net-pci ^
-net user ^
-serial tcp:127.0.0.1:1370,server,nowait ^
-rtc base=localtime,clock=rt ^
-object rng-builtin,id=rng0 ^
-device virtio-rng-pci,rng=rng0 ^
-device virtio-balloon-pci ^
-device virtio-keyboard-pci ^
-device qemu-xhci,id=aqemu_usb_hub ^
-name test ^
-display sdl,show-cursor=on,gl=on
- Notes
edk2-x86_64-code.fd/edk2-i386-vars.fdare the filenames used by the official QEMU-for-Windows builds (weilnetz.de)- You can simply just change the
-driveline if you want to swap the image type.raw -drive file="D:\VM Backups\Web_Server_disk_2026-09-09.raw",if=none,id=drive0,format=raw ^ qcow -drive file="D:\VM Backups\Web_Server_disk_2026-09-09.qcow",if=none,id=drive0,format=qcow ^ qcow2 -drive file="D:\VM Backups\Web_Server_disk_2026-09-09.qcow2",if=none,id=drive0,format=qcow2 ^
- The
^is a batch file thing to say, this is not the end of the line, carry on. It allows you to split one long line for easier reading.`(backtick) is the PowerShell version.
- The
- This is for a
virtio-scsidisk-device virtio-scsi-pci,id=scsi0 \ -drive file=disk.qcow2,if=none,id=drive0,format=qcow2 \ -device scsi-hd,drive=drive0,bus=scsi0.0,physical_block_size=4096,logical_block_size=4096
- 512/4096/4Kn Sectors
- QEMU exposes
logical_block_sizeandphysical_block_sizeas device properties on the drive/device (not onqemu-img). You set them via-device(or-global), not as aqemu-imgswitch. - if you want to run 512 sectors, you can do one of the following:
- Remove the
physical_block_sizeand logical_block_sizevalues - Change them to 512.
physical_block_size=512and logical_block_size=512values
- Remove the
- You can apply these globally instead of per individual device
-global scsi-hd.physical_block_size=4k -global scsi-hd.logical_block_size=4k
- will set the physical and logical sector size for all virtual SCSI disks for your VM.
- QEMU exposes
Hardware Devices
Information relating to QEMU hardware devices
- BIOS
- QEMU doesn't ship its own UEFI firmware. OVMF/edk2 is a separate package on most distros, tracked outside qemu-stable releases.
- QEMU_Starter/Documents/README_5_UEFI-BIOS.md at main · TunaCici/QEMU_Starter · GitHub
- Pseudo-wiki; offering guides, tutorials, and examples for new QEMU users.
- Open Virtual Machine Firmware, OVMF, is an EDK II based project to enable UEFI support for Virtual Machines.
- OVMF contains sample UEFI firmware for QEMU and KVM. 5.
- GitHub - tianocore/edk2: EDK II · GitHub - A modern, feature-rich, cross-platform firmware development environment for the UEFI and PI specifications from www.uefi.org.
- Introduction - TianoCore EDK II Documentation
- AHCI
- An AHCI-attached drive in QEMU is locked to 512-byte logical sectors. This isn't an AHCI-specific limit, it's baked into the underlying IDE device model that AHCI ports use.
- QEMU's AHCI controller (hw/ide/ahci.c) doesn't implement its own disk device — each SATA port is just an IDEBus with an ide-hd/ide-cd device attached (-device ide-hd,drive=X,bus=ahci.0).
- That device realization code in hw/ide/ide-dev.c explicitly enforces: "logical_block_size must be 512 for IDE". See https://git.zx2c4.com/qemu/plain/hw/ide/ide-dev.c
physical_block_sizeis not restricted — onlylogical_block_sizeis pinned to 512. So you can do "512e" emulation (4Kn-style physical alignment reported to the guest, but still addressed in 512-byte logical sectors):
- Don't use this except where compatibility is required for the Guest OS.
- An AHCI-attached drive in QEMU is locked to 512-byte logical sectors. This isn't an AHCI-specific limit, it's baked into the underlying IDE device model that AHCI ports use.
Troubleshooting
QtEMU
- QtEMU will not start a virtual machine and you get these errors: `tcp whpx` and `Accelerators supported in QEMU binary:`
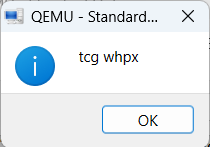
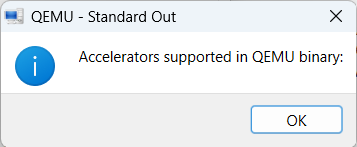
- Cause
- The "Windows Hypervisor Platform" is not enabled.
- Solution
- Enable the Windows Hypervisor Platform (WHPX)
- Enable the Accelerator in QtEMU
- QtEMU --> Machine Settings/Preferences --> Accelerator --> Windows Hypervisor Platform (WHPX)
- NB:
- Tiny Code Generator (TCG) - no idea what this is
- Hardware Accelerated Execution Manager (HAXM) - Is no longer supported
- Cause
Windows Hypervisor Platform (WHPX)
Might move to its own page
Enable
- Instructions
- Press Win + R, type OptionalFeatures.exe, and press Enter.
- In the Windows Features dialogue that appears, you need to turn these on (including their child options)
- Hyper-V
- Hyper-V Management Tools
- Hyper-V Platform
- Hyper-V
- Click OK and wait for the process to complete.
- Restart your PC to apply the changes.
- Links
- Windows Hypervisor Platform — QEMU documentation - Windows Hypervisor Platform is the Windows API for use of third-party virtual machine monitors with hardware acceleration on Hyper-V.
- How to Enable or Disable Windows Hypervisor Platform in Windows 11 | Geek Rewind - Enable Windows Hypervisor Platform on Windows 11 with 4 easy methods: Settings, Control Panel, Command Prompt, or PowerShell. Run virtual machines faster.
- How to enable Hyper-V on Windows 11 - Pureinfotech
- To enable Hyper-V on Windows 11, open System > Advanced > Virtual Workspaces, turn on the Hyper-V components.
- good setup instructions, not how to use it
- Install Hyper-V in Windows and Windows Server | Microsoft Learn
- Gives instructions for installing the Hyper-V role using Server Manager or Windows PowerShell.
- And gives instructions for enablings Hyper-V on Windows.
Enable-WindowsOptionalFeature -Online -FeatureName Microsoft-Hyper-V -All
Using
- Hyper-V Windows 11: The Complete Expert Guide for Virtualization - Virtualization has become one of the most essential technologies for developers, IT administrators, cybersecurity researchers, and advanced Windows users.
- How to configure Hyper-V on Windows 10 and 11 | IT Pro - From setup and configuration to the most useful features and settings, here is everything you need for Hyper-V on both Windows 10 and 11
- Complete Hyper-V Tutorial 2025: Setup Virtual Machines on Windows 11/10 (Step-by-Step Guide) - YouTube - Learn how to set up Microsoft Hyper-V and create virtual machines completely FREE! This comprehensive 2025 tutorial covers everything from checking system requirements to building your first virtual lab environment.
- Create a virtual machine in Hyper-V | Microsoft Learn - Learn how to create a virtual machine in Hyper-V using Hyper-V Manager or PowerShell. Follow step-by-step instructions to get started quickly.
Links
- Official Software
- QEMU - QEMU is a generic and open source machine & userspace emulator and
virtualizer. - QEMU / QEMU · GitLab - Project Repository
- QEMU Binaries for Windows and QEMU Documentation | Stefan Weil - QEMU Binaries for Windows
- MSYS2 - Software Distribution and Building Platform for Windows.
- QEMU - QEMU is a generic and open source machine & userspace emulator and
- Documentation
- Disk Images — QEMU documentation - QEMU supports many disk image formats, including growable disk images (their size increase as non empty sectors are written), compressed and encrypted disk images.
- QEMU block drivers reference — QEMU documentation
- QEMU supports many image file formats that can be used with VMs as well as with any of the tools (like qemu-img). This includes the preferred formats raw and qcow2 as well as formats that are supported for compatibility with older QEMU versions or other hypervisors.
- Depending on the image format, different options can be passed to
qemu-img createandqemu-img convertusing the-ooption. This section describes each format and the options that are supported for it.
- Tutorials
- Stop using Virtualbox, Here's how to use QEMU instead - YouTube - In the first 60 seconds of this video I benchmark Virtualbox vs QEMU. Then follow my quick guide to get QEMU working on YOUR system!
- QEMU KVM Tutorial for Beginners | Run Windows & Linux on Linux - YouTube
- Want to run Windows 11 inside Linux, test other Linux distributions, or safely experiment with software without touching your main operating system? In this beginner-friendly tutorial, I'll show you how to install and configure QEMU and KVM on Debian 13, one of the fastest and most powerful virtualization solutions available for Linux.
- Unlike VirtualBox or VMware, QEMU and KVM take advantage of hardware virtualization to deliver near-native performance, making them ideal for developers, home lab enthusiasts, system administrators, and anyone who needs reliable virtual machines.
- uses
virt-managerfor the frontend.
- QEMU QED
- The missing manual for QEMU for digital preservation
- QEMU is also a complex application with a vast range of configuration options. QEMU QED is intended to lower the barrier to first-time users by breaking down QEMU use into more digestible concepts and recipes.
- Frontend Software (Windows)
- QtEmu - QtEmu is a graphical user interface for QEMU.
- GitHub - uwolfer/qtemu: This project is UNMAINTAINED. QtEmu is a graphical user interface for QEMU written in Qt4. Active fork: https://gitlab.com/qtemu · GitHub
- QtEmu / gui · GitLab | Sergio Carlavilla - Front-end for qemu emulator
- GitHub - MateuszKrawczuk/QtEmu · GitHub
- GitHub - ChileCris2011/QEMUWin - A simple GUI for QEMU in Windows based in Python.
- GitHub - chronic8000/aqemu: AQEMU
- Qt frontend for QEMU. Maintained by Chronic Engineering (Windows & Linux). GPLv2. - chronic8000/aqemu
- AQEMU VM Manager - Download and install on Windows | Microsoft Store
- Compile it yourself or pay a modest fee for the software ready to go from Microsoft Store. The is actively developed.
- Default location for VM configs:
C:\Users\<username>\AppData\Local\aqemu\AQEMU\VMs
- Microsoft Store Version installs to:
C:\Program Files\WindowsApps\30932PhilipSempers.AQEMUVMManager_1.1.0.0_x64__ke0bq3v0p1hwa\qemu-system-x86_64.exe
- GitHub - benbaptist/qemuweb · GitHub - A modern web interface for managing QEMU virtual machines. This application provides a user-friendly way to create, manage, and interact with QEMU virtual machines through your web browser.
- QtEmu - QtEmu is a graphical user interface for QEMU.
- Frontend Software (Linux)
- Virtual Machine Manager
- The virt-manager application is a desktop user interface for managing virtual machines through libvirt.
- It primarily targets KVM VMs, but also manages Xen and LXC (linux containers).
- Virtual Machine Manager
- Installing QEMU on Windows
- QEMU on Windows 10 - Shells KB - Step-by-step guide to install QEMU on Windows 10. Complete tutorial with commands and configuration.
- How to Install QEMU on Windows: A Simple Guide for Virtualization Enthusiasts
- So, you want to install QEMU on Windows. Maybe you’ve heard about its reputation as a powerful virtualization tool, or maybe you just want to experience the thrill of running Linux, Windows, or other systems without sacrificing your main setup. Either way, QEMU (Quick Emulator) is a flexible open-source option that can emulate and run multiple operating systems on one machine.
- Here’s a step-by-step guide on how to install QEMU on Windows, from setup to configuration, with just the right dose of tech and simplicity.
- QEMU Command Line Generators (Some are better than others)
- Ultimate QEMU/KVM Cheatsheet Generator - ServerSpan
- Generate professional qemu-system commands with presets, advanced options, setup notes, and safety checks for QEMU/KVM.
- QEMU Virtual Machine Command Generator
- Generate QEMU virtual machine command with simple clicks!
- aClassicKoder / qemu-command-generator · GitLab
- GitHub - Checkm8ra1n/QEMU-Command-Generator
- Basic command generator for QEMU, an HTML, CSS and JavaScript based app, for Windows and UNIX (I mean macOS/Linux)
- An app for generate commands for QEMU, for boot from your CD and HDA and also for generate commands for create you virtual disks
- PreTest - QEMU Command-Line builder - Very basic.
- Ultimate QEMU/KVM Cheatsheet Generator - ServerSpan