Items filtered by date: December 2015
My RealFaviconGenerator Notes
These are the settings and notes I made whilst using the RealFaviconGenerator service to generate my Favicon pack. This is an excellent service and I would recommend making a donation, it is well worth it.
Why is the favicon.ico not enough
Because of the use of apps, the multitude of operating systems and how they handle websites, bookmarks and other features you need many different versions of your logo icon files along with the favicon.ico to allow for the smooth operation of bookmarking and other things. This also helps keep your branding consistent.
Some icons require being declared in the html, some have default locations and usually these default locations can be changed by using declared HTML.
This is where RealFaviconGenerator comes in handy the website will generate all of icons in the formats you need along with the relevant code whilst giving you the ability to configure the process with various options.
My Starting Point.
- I have used ‘Quantum Warp’ instead of ‘QuantumWarp’ for titles because the single word was to long to be on one line on my android phone causing the word to split into ‘QuantumWar’ on the first liine and 'p' was on a line on its own which did not look good.
- I used my Square Logo SVG file. SVG are scalable without loss and it is my source file.
SVG
- if you use a SVG and you have used any fonts, these will be be substituted, so either change them into proper objects or export you logo as a (512x512) PNG and use this as the source to prevent your logo deforming. The viewbox on my SVG was set to (512x512). This should not make any difference but it is a good starting point because my logo exports easily as (512x512).
Optimal Size
- (512x512) is a nice standard size icon size.
- The Google Play store requires you to supply them with a (512x512) icon file so they can downscale it as required.
- When using a SVG as a source the largest Android Chrome icon created is (512x512). If you use a (512x512) PNG then the same Android Chrome (512x512) icon will be created, but if the supplied PNG is smaller then the largest Android Chrome icon created will be the largest Android Chrome icon size that can fit into the PNG resolution.
What this means is that is is prefered that you supply either a SVG or a PNG (512x512) to get the best results.
Notes
- I recommend you read RealFaviconGenerator FAQ
- Issues can be reported at GitHub showing the project is still very much alive.
- The favicon.ico generated at RFG is in True Colour
- The favicon includes (16x16, 32x32, 48x48) this seems to be the industry standard
RFG Links
There is more than a favicon generator at this site.
- Favicon Generator for all platforms: iOS, Android, PC/Mac...
- Favicon checker
- Facebook Sharing Markup Generator
- Social checker
Settings I used - RealFaviconGenerator
After reading the FAQ I used these settings. Some of the options not used are there for exotic applications or scenarios which are not needed by me so unless you know about them don’t bother.
Favicon for iOS - Web Clip
Settings
- Add a solid, plain background to fill the transparent regions
- Background colour - #ffffff
- Margin size - Leave as is (4px)
Assets
Why is apple-touch-icon.png a 180x180 picture? (From FAQ)
apple-touch-icon.png is sometimes designed as a 57x57 picture (non-retina iPhone on iOS6). It is actually safer to design as a 180x180 picture (iPhone 6 Plus with iOS8) and let the platform resize it as needed. This is how Apple is doing it for his own web site (credits: Mathias Bynens). – this means only this 1 high qualiy icons is needed
Why do you generate a precomposed favicon for iOS? (From FAQ)
The precomposed icons (eg. apple-touch-icon-precomposed.png as opposed to apple-touch-icon.png) are deprecated since the release of iOS7 and older versions can perfectly cope with their absence. They just take the non-precomposed icon and apply the necessary effect(s). – this means the precomosed icons are only needed for old systems
- iOS 7 and Later
- Leave off
- iOS 6 and Prior
- Leave off
- Miscellaneous
- In the HTML, declare only the icon with the highest resolution – Leave on
- Generate the corresponding precomposed icons – leave off
Dedicated picture
- Leave as is
Favicon for Android Chrome
Main settings
- Add a solid, plain background to fill the transparent regions.
- Background Colour: #ffffff
- Margin size (for a 96x96 icon) = leave as is (8px)
- App name = Quantum Warp
- Theme color = #ffffff
Options
Standalone option loads your website, after displaying a splash screen but without the navigation bars. This gives the illusion of an application. This is run in android like a separate application and not through your browser. It is all controlled througha manifest.json file which has to be declared in your header. The splash screen shows your logo and site description.
- Standalone.
- Start URL = https://quantumwarp.com
- Orientation = Not specified.
Assets
- Modern versions
- Create only recommended, high resolution icons
- Legacy versions
- Declare the icon in the HTML code = Leave off
Dedicated picture
- Leave as is
Windows Metro
Settings
- Colour #00aba9 (Teal) / #4db2b3
- Use a white silhouette version of the favicon.
Assets
RFG used to generate 5 tile icons for Windows. Now there is only one. Why?
…..When they add your site to their homescreen, your visitors are presented all the available icons, letting them pick the one that fit their device best. Although this is a nice feature, the Metro interface is probably not widespread enough to justify the systematic creation of 4 icons. A single one is a good default. – what this means is that you only need the one icon ‘Medium, square icon’, the rest are nice but not used enough.
- Windows 8.0 / IE 10
- Medium, square icon, declared with two HTML markups – Leave off
- Windows 8.1 and 10 / IE 11 and Edge
- Small, square icon = off
- Medium, square icon = on
- Big, square icon = off
- Rectangular icon = off
Dedicated picture
- Leave as is
macOS Safari
settings
- Use a silhouette of the original image.
- Theme Colour: #4db2b3 (my normal green)
Dedicated picture
- Leave as is
Favicon Generator Options
Path
I don’t have that many assets to put in the root. If I generated all of them I might consider putting them in a folder on their own but there has been a reduction in assets required
- I will place favicon files (favicon.ico, apple-touch-icon.png, etc.) at the root of my web site. Recommended.
Version/Refresh
- This is a new web site, nobody visited it yet. So there is no "old" favicon and no caching issue.
Compression
- Very high quality, very low compression factor = about 64%
Scaling algorithm (not present on SVG, so for SVG assume Mitchell)
Mitchell and Lanczos are very similiar (not much in it). Lanczos seems to be the preferred scaler on the internet because it provides sharper images where as Mitchell blurs images to make them look better. If you are using pixelart then ‘nearest neighbour’ is better.
- Lanczos
App name
This despite its name controls the shortcut name. Either it is got from the page title (which in Android Chrome add you can edit before adding to your desktop) or you can manually set it.
- Specific app name, override the page title. = Quantum Warp
Additional files
- Generate README.md = on
- Generate html_code.html = on
Now Generate Your Icons
Click on the generate button icon and you will be taken to the download page where the following types of packages are available
- HTML5 (Default)
- XHTML
- Jade
- Grunt
- Gulp
- Node CLI
- RoR
- NET Core
- Google Web Starter Kit
- RFG API
I am not sure what the difference is, possibly the code snippets created or different files supplied with the icons.
Follow the onscreen instructions (Example shown below) and you should also make a copy of the generated HTML code because it is not within the package.
Bug Warning: Currently when you use an SVG for the source file all versions of the mstile icon are generated. You should delete all but mstile-150x150.png, unless you have selected to generate all of the mstiles.
Example HTML Code
- Download your package: (compression rate: 64%)
- Extract this package in the root of your web site. If your site is
http://www.example.com, you should be able to access a file namedhttp://www.example.com/favicon.ico. - Insert the following code in the
<head>section of your pages:<link rel="apple-touch-icon" sizes="180x180" href="/apple-touch-icon.png"> <link rel="icon" type="image/png" sizes="32x32" href="/favicon-32x32.png"> <link rel="icon" type="image/png" sizes="16x16" href="/favicon-16x16.png"> <link rel="manifest" href="/manifest.json"> <link rel="mask-icon" href="/safari-pinned-tab.svg" color="#4db2b3"> <meta name="apple-mobile-web-app-title" content="Quantum Warp"> <meta name="application-name" content="Quantum Warp"> <meta name="theme-color" content="#ffffff"> - Optional - Once your web site is deployed, check your favicon.
Done !!!
Rounded Corners for Android Chrome
Currently there is no rounded corners option for the Android Chrome icons in RFG but the developer is aware of it and here are some links to the reported issue:
- Android icons should be rounded · Issue #180 · RealFaviconGenerator/realfavicongenerator · GitHub
- Android preview is not accurate regarding rounded corners · Issue #237 · RealFaviconGenerator/realfavicongenerator · GitHub
- Create App Icons with Image Asset Studio | Android Studio - The square icons with rounded corners are the Google Play icons. The grey background might also be from Google Play but I am not sure and I do not know what hex code it is.
Windows, Firefox, Favicon, Internet Shortcuts and Caching
This article will cover some of the favicon cache issues you get when working with Windows 10 and Firefox 56.0.2 (64-bit), but the information will probably apply to other setups.
If your Favicon is cached and you cannot unchache the icon then this article will guide you through the process of fixing that and why.
Where does an Internet Shortcut icon come from?
Internet Shorcuts are handled by your default browser. There are 2 ways to create an Internet Shortcut.
The following article goes into some depths about this. How do I set a custom icon for a desktop URL shortcut? - Ask Leo!
- Most of the Windows system icons are stored in C:\Windows\System32\shell32.dll
- The World icon is stored in C:\Windows\System32\url.dll
Right Click
On the Windows desktop, right click and create a new shortcut but using a URL as the location. This will create a shorcut that uses the Firefox default icon but I have seen it use the favicon before now.
The icon created typically looks like:
![]()
With the code inside the shortcut:
[{000214B0-0000-0000-C000-000000000048}]
Prop3=19,11
[InternetShortcut]
IDList=
URL=https://quantumwarp.com/
Drag and Drop
In Firefox highlight the URL in the address bar and drag it to the Windows desktop.
This method always creates a shortcut using an icon created by using the Favicon (48px or highest quality layer in the icon) stored in Firefox and then super imposes this on a white background. This leads to a very small icon in the middle of a white square. a lot of people complained about this so it is possible to change this behavious to use the normal Firefox icon. If the icon does not exist in Firefox then the icon will be grabbed from the website via Firefox internally and the same process will occur. If no Favicon exists then you might see a World icon.
Some other browsers might support this feature but I have not tested them.
The icon created could looks like one of these:
![]()
As you can see it has used the URL title for the description, this can be changed by renaming the shortcut.
With the code inside the shortcut:
[InternetShortcut]
URL=https://quantumwarp.com/
IDList=
HotKey=0
IconFile=C:\Users\testuser\AppData\Local\Mozilla\Firefox\Profiles\727ui0od.default-1577462149946\shortcutCache\TiE1mKLHrw+Is5_yDymu0w==.ico
IconIndex=0
Favicons not showing correctly in File Explorer but do show correctly in Firefox
This is an easy one to explain (after a lot of research) but first you need to know the process Windows goes through to create the shortcut.
The Process
When creating an internet shortcut via drag and drop the following occurs:
- User drags the URL from Firefox
- Firefox checks to see if it has a Favicon is in its Favicon cache (favicons.sqlite) for the given URL:
- Icon present in cache - If there is a Favicon in the cache Firefox uses it.
- No icon in cache - Firefox will attempt to download the favicon.ico from the URL, if success it will add the favicon.ico to the cache and use this icon. If there is no favicon.ico found then Firefox will use one of the following icons default Firefox icon, the World icon or White Paper icon instead. Firefox now skips to Step 5.
- Firefox now check if it has an icon in its shortcutCache:
- Icon present in cache - Firefox will use this cached icon.
- No icon in cache - Firefox creates an icon of the URL and adds it to the cache by creating an icon (A white square with the favicon in the middle which looks really small) in the /shortcutCache/ folder. The favicon layer used to create a shortcut icon in QuantumnWarps case is (48x48) but Firefox might use the highest resolution layer available. There seems to be a bug, even if there is no icon in this cache but the icon has previously been cached in the windows IconCache then an icon location is still sent back to Windows.
- Firefox now gives Windows the location of the custom icon.
- Windows checks its own IconCache for the URL to see if there is already an icon:
- Icon present in cache - Windows will use this cached icon.
- No icon in cache -Windows adds the supplied icon to the IconCache, and will use this cached icon.
- Windows now builds the shortcut with the supplied icon.
Cause
As you can see there are 3 caches involved, this is where the issue creep in. The favicon might be correct in Firefox but because Windows has its own independent cache the old version can persist within the Windows cache.
Solution
The only way to get a Windows Internet Shorcut Icon to have an upto date icon is to:
- Wipe the Firefox Favicons Database
- Wipe the Firefox Shortcut Cache
- Refresh/Wipe the Windows Icon Cache
- and then re-create the icon. (Not always required, but can speed things up)
NB: Firefox Favicons stored in the database expire after 7 days but I do not know if that causes the Internet Shortcuts Icons in the shortcutCache to be automatically updated or if you need to visit the URL in question or they do not get updated at all. Depending on the answer you might only need to wipe/refresh the Windows Icon cache if the favicon that you need to update is older than 7 days. One further thing you could try is to set the expiry data in the Firefox database for all of the required Favicons to 0 or another time in the past.
Firefox Favicon Caching
I have changed my favicon on my site but my Firefox Bookmark icon has not changed. This is because the favicon is cached but not within the normal Firefox file cache.
You can possibly bypass this problem if you use versioning on your favicon by using the following code to declare your favicon.ico changing the variable when you make change.
<link rel="shortcut icon" href="/favicon.ico?v=QWr4XjEpXx">
Disable the use of Favicons for Internet Shortcuts
You can disable the use of Favicons for Internet Shorcuts by modifying some Firefox settings in about:config, this also assumes Firefox is the default browser of Windows.
In about:config set these options to false and restart the browser.
browser.chrome.favicons
browser.chrome.site_icons
The original article from HowToGeek - Quick Tip: Disable Favicons in Firefox | HowToGeek
Location of Favicon Cache
When you visit a site in Firefox it caches the favicon.ico, favicon-16x16.png, favicon-32x32.png (only 1 of the png is stored, 16x16 if both present).
It caches them in it's own database as BLOBs and the location varies from version to version. It only ever grabs the following layers 16/32/48.
FF <55 - %AppData%\Mozilla\Firefox\Profiles\.default\places.sqlite
FF 55+ - %AppData%\Mozilla\Firefox\Profiles\.default\favicons.sqlite
After research I can confirm the expiry date set on all favicon assets in the database is 7 days. I have not found anywhere that this can be changed. It should also be noted that changing caching options in your .htaccess seems to make no difference.
Firefox 55.0 got a new storage system for Favicon data.
Moved from the places.sqlite file into its own 'favicons.sqlite' file, along with adding two temporary storage files 'favicons.sqlite-wal' and 'favicons.sqlite-shm' which are used while Firefox is running. Then as Firefox is closed the temporary data is written to the main 'favcions.sqlite' file.
The goals for the new storage system include saving the new Favicon with the newly saved bookmark (vs being saved upon the first use of the new bookmark) and the ability for Favicons to be Sync'd (although I'm not sure if the Sync service has been updated just yet).
Favicons Disappear After 55+ Updates | Firefox Support Forum | Mozilla Support
Clear Firefox Favicon Cache
So for those of us who are developing our sites often we need a way to be able to empty the favicon cache. This is not always as easy as it seems so I will outline what works.
Option 1
- Download and install DB Browser for SQLite. (You could also try the addon SQLite Manager but I have not tried this.)
- Quit Firefox (close all open Firefox windows).
- Open the following database with DB Browser. Your profile name might be different, so change as required.
%AppData%\Mozilla\Firefox\Profiles\.default\favicons.sqlite
- Click on the 'Browse Data' tab. All you icons will now be listed.
- Select the favicons you want to delete.
- Click the 'Delete Record' at the top right.
- Write the changes.
- Done, you can now restart Firefox.
Option 2 (not tested)
- As above but instead of deleting the record you can set the expiry date to 0 (or other past date). the icon in this case will stay until it is refeshed by visiting the website.
Other Options
These are a collection of links with different ways of doing this. I have not test any of them but they are for reference.
- Refresh favicon in bookmarks (Firefox) - Stack Overflow - This gives you SQL commands that you can use in DB Browser
- Clearing A favicon.ico From FireFox’s Cache – marcusjenkins.com - older tutorial using a firefox addon called SQLite Manager
- FavIcon Reloader up to FF 48 only – Add-ons for Firefox - An addon dedicated to refreshing your Favicons. Not been updated in a while.
- Booked marked site favicon will not update | Firefox Support Forum | Mozilla Support - This gives you code you can put straight in the Web Developer Toolbar command line.
- Delete browsing, search and download history on Firefox | Firefox Help - this gives you information of what emptying your history does.
- How to Clear Favicon in Firefox's Cache | It Still Works | Giving Old Tech a New Life - This mentions emptying your 'Cached Web Content'
Location of the Firefox Internet Shortcut Icons
- Create a shortcut by the Drag and Drop method
- Edit the .url/shortcut file by using a text editor such as Notepad++
- You will see some code similiar to that below
[InternetShortcut]
URL=https://quantumwarp.com/
IDList=
HotKey=0
IconFile=C:\Users\testuser\AppData\Local\Mozilla\Firefox\Profiles\727ui0od.default-1577462149946\shortcutCache\TiE1mKLHrw+Is5_yDymu0w==.ico
IconIndex=0
- Open that folder named in IconFile and you will see all of the icons used for shortcuts. (Remember that windows has already cached these)
Clear Firefox Internet Shortcut Icon Cache
This is the easiest cache to clean.
- Delete all of the files in:
%LocalAppData%\Mozilla\Firefox\Profiles\.default\shortcutCache\
Notes
- The icons have filenames like TiE1mKLHrw+Is5_yDymu0w==.ico. These are not random. Firefox is aware if an icon has been already created for this domain and will use the same icon location even if you have deleted it or if an icon for that URL exists it will re-use it. This means that Firefox must keep a reference table for URL against icon name or it is some sort of hash. I have looked through the Firefox databases and search the Windows registry but have not found anything. I might of missed it.
- This random name also seems to be used by the Windows icon cache.
Windows Icon Cache
As of now I do not believe that there is any Windows event that expires the Icon Cache or that they have an expiry date.
How to wipe the Windows Icon Cache
Most of the delete icon cache out there refer to just deleting the IconCache.db and this is ok for Windows 7 but is not correct for windows 10. The file IconCache.db is still present in Windows 10 but is no longer used. The icons are now stored in the following folder within the files all starting with iconcache*.
%LocalAppData%\Microsoft\Windows\Explorer
Option 1 - Refresh the Cache
This is where you can refresh the icons without needing to reboot the PC.
After issuing this command, icons might not refresh but instead change into Blank Paper icons. This is probably because you have emptied the Firefox Internet Shorcut Cache and Windows cannot find the correct icon so it uses the first icon (Blank Paper) in the default icon library (C:\windows\system32\shell32.dll). You can fix this by recreating the shortcut for the URL using the Drag and Drop method, this will cause the favicon to be downloaded again consequently this Internet Shortcut icon will display correctly with the new version of the icon. You also find all other shortcuts that were using the same icon will now also be restored but using the newer icon. You do not need to recreate each one individually, it is only because the icon is missing from the shortcutCache folder that we do this.
Open a command prompt and enter the appropriate command:
For Windows 7 and 8 use
ie4uinit.exe -ClearIconCache
For Windows 10
ie4uinit.exe -show
Notes
- How to Refresh or Clear the Icon Cache Quickly Using IE4UINIT.exe | winhelponline
- Refresh Icon Cache Without Rebooting - Super User
Option 2 - Manually Delete Files
- Open command console with admin privileges
- taskkill /IM explorer.exe /F
- cd /d %LocalAppData%
- del IconCache.db /a
- cd /d %LocalAppData%\Microsoft\Windows\Explorer
- del iconcache*
- explorer
NB: If some of the iconcache* files do not delete, logout, log back in and repeat the process, this should be enough. Once the icons have refreshed it would not harm to reboot, this is optional.
Notes
- How to Rebuild a Broken Icon Cache in Windows 10 This is an indepth Tutorial on how to wipe the cache for both Windows 7 and Windows 10 (Recommended)
- How to Clear and Rebuild the Icon Cache in Windows | winhelponline - this also has a cleariconcache.vbs to do this automatically. I have not tested the VB Script.
- Icon Cache - Rebuild - Windows 7 Help Forums - although for Windows 7 there is a Rebuild_Icon_Cache.bat that can be easily altered for Windows 10.
- FavIcons not showing correctly in File Explorer but do show correctly - Microsoft Community - Gives the manual instructions on how to wipe the icon cache in Windows 7. This is the first article I found that was useful.
- Refresh Icon Cache Without Rebooting - Super User - Has information on the manual method despite the title.
Option 3 - Other Apps
- Icons Refresh | GitHubIcons Refresh is a program to refresh Desktop, Start Menu and Taskbar icons without restart Explorer. (Not tested)
- Winaero - This uses Winaero to reset the Windows Icon Cache. See also Change a pinned app’s shortcut icon on the taskbar in Windows 10 (Not tested)
Links
- jeffdav on code: why doesn't the favicon for my site appear in IE7? - some sensible questions and answers, although focussed on IE7 some of the answers apply to others browsers and situations.
- favicon-cheat-sheet | GitHub - Obsessive cheat sheet to favicon sizes/types. Please contribute! (Note: this may be in flux as I learn new things about favicon best practices.)
- 1293043 - The icons of the Internet links are too small since the last update - not to see - Technical discussion over at Mozilla about the small cion size in an internet shorcut. It also has a direct link to the appropriate code.
- URL File Extension - What is a .url file and how do I open it?
Inkscape - Export a transparent PNG from the QuantumWarp SVG
The following instructions are how to export a transparent PNG version of my QuantumWarp logo from a SVG using Inkscape.
Once exported to make the white version you can manually change the black to white by using paint.net
Square Logo (400 x 400 / QW)
- Configure the layers to the square version (i.e. all in viewport)
- File --> Export Bitmap
- Select 'Page'
- Select desktop for output
- Export
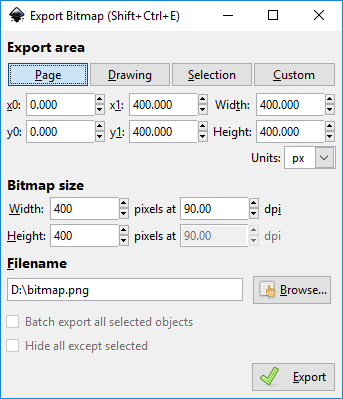
Wide Logo (400 x 1000 / QuantumWarp)
Option 1
- In Document Properties (under the 'File' menu),
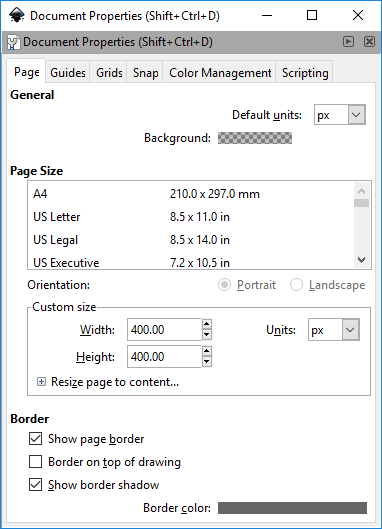
alter Custom size toWidth:1000.00 Height:400.00
- File --> Export Bitmap
- Select 'Page'
- Select folder for output
- Export
Option 2
- Configure the layers to the long version
- File --> Export Bitmap
- Select 'Drawing' (Custom might work the same.)
- You will get some settings like this below
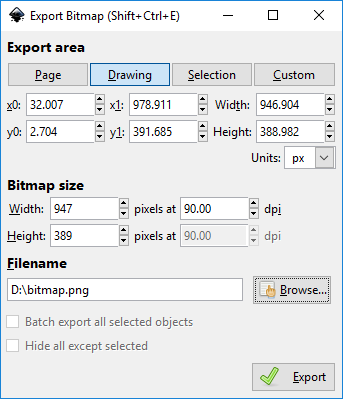
- Change the settings in this order
x0 = 0.000
y0 = 0.000
x1 = 1000.000
y1 = 400.000
- This should give
Width: 1000px at 90.00 dpi
Height: 400px at 90.00 dpi
- Select folder for output
- Export
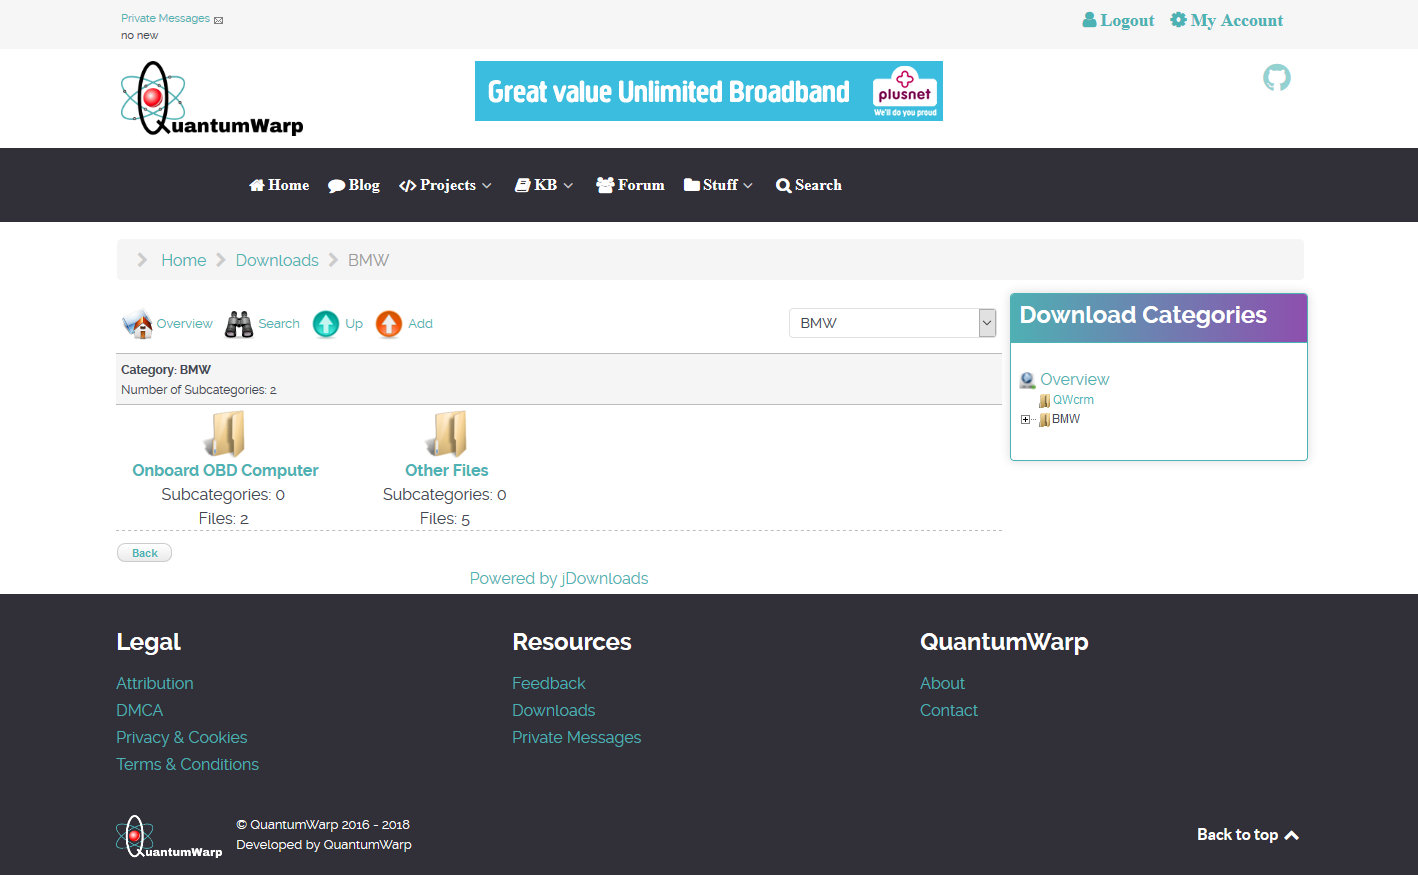
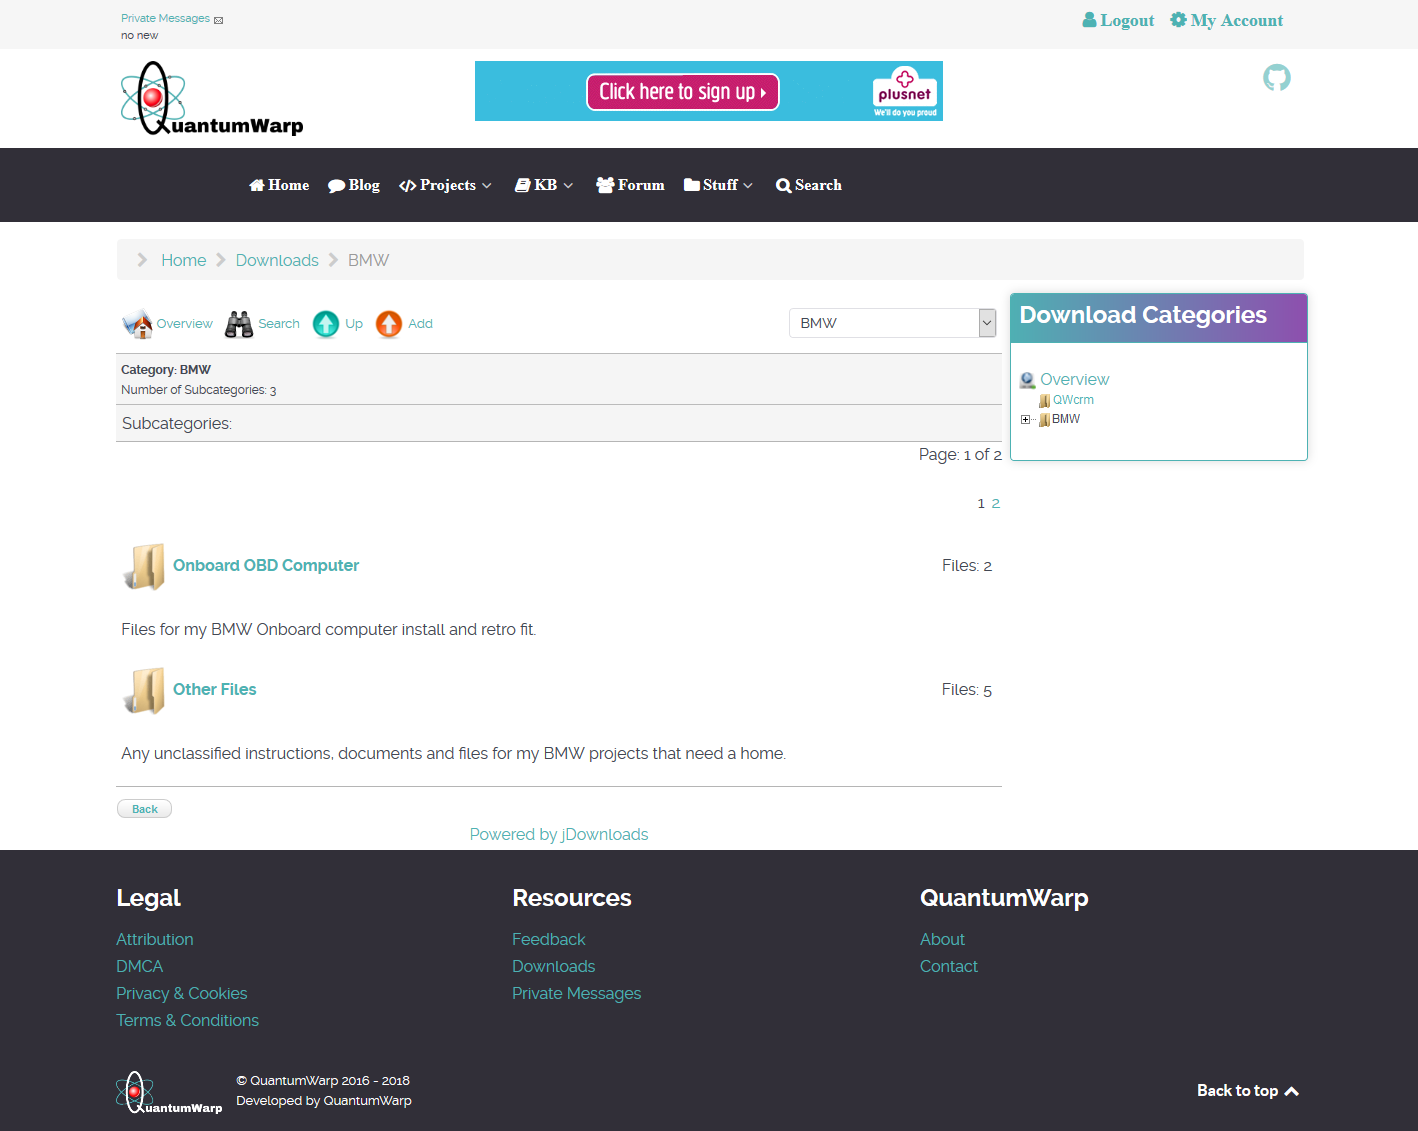
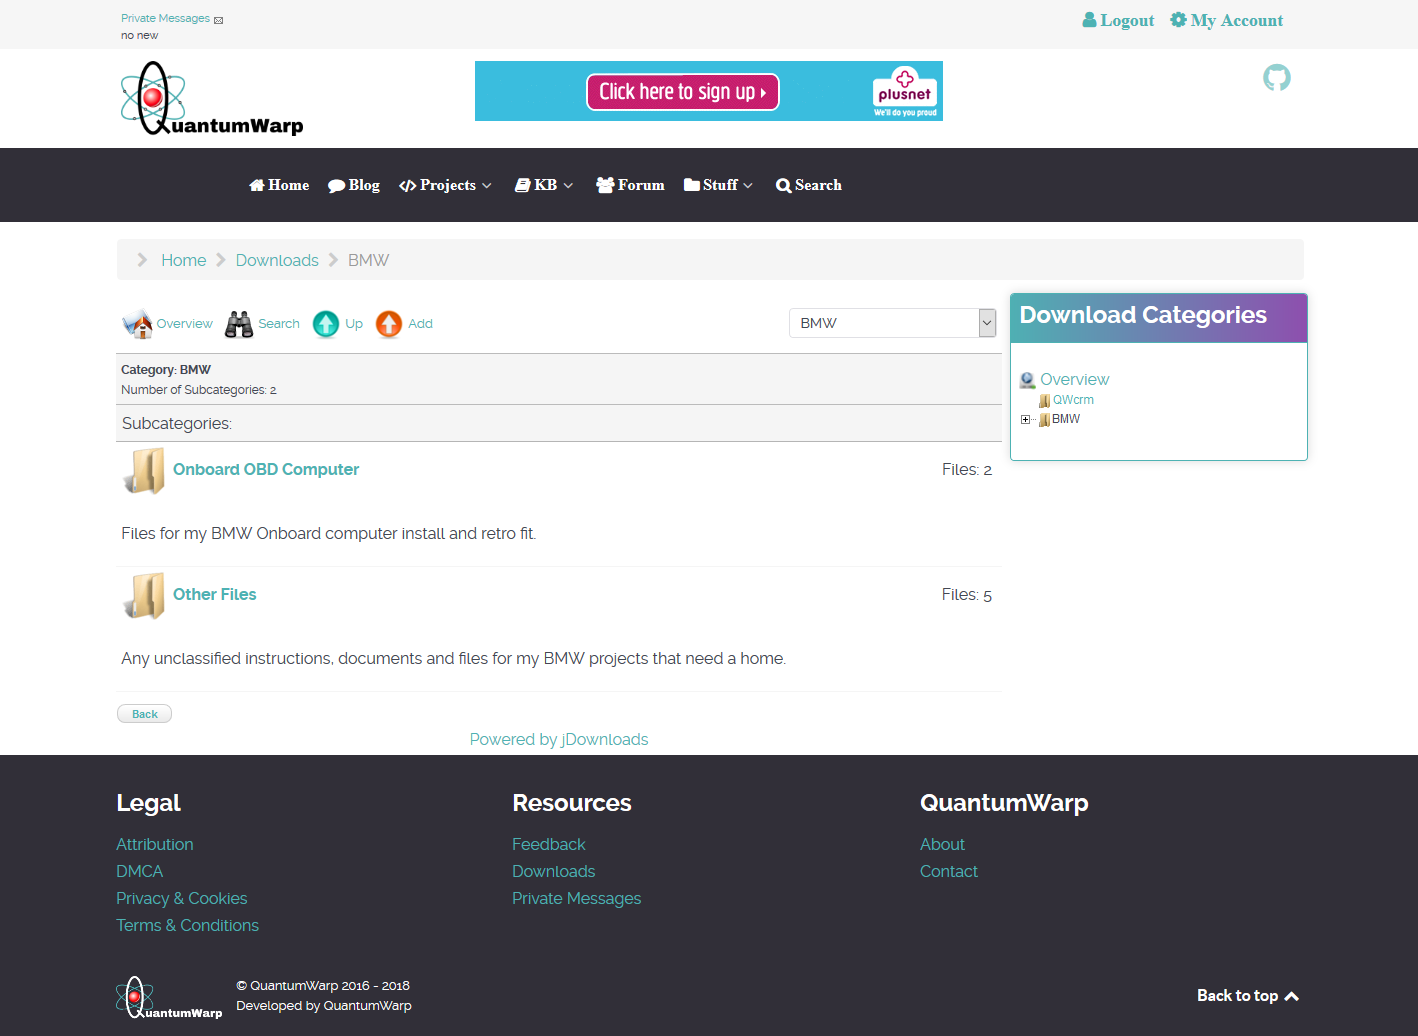
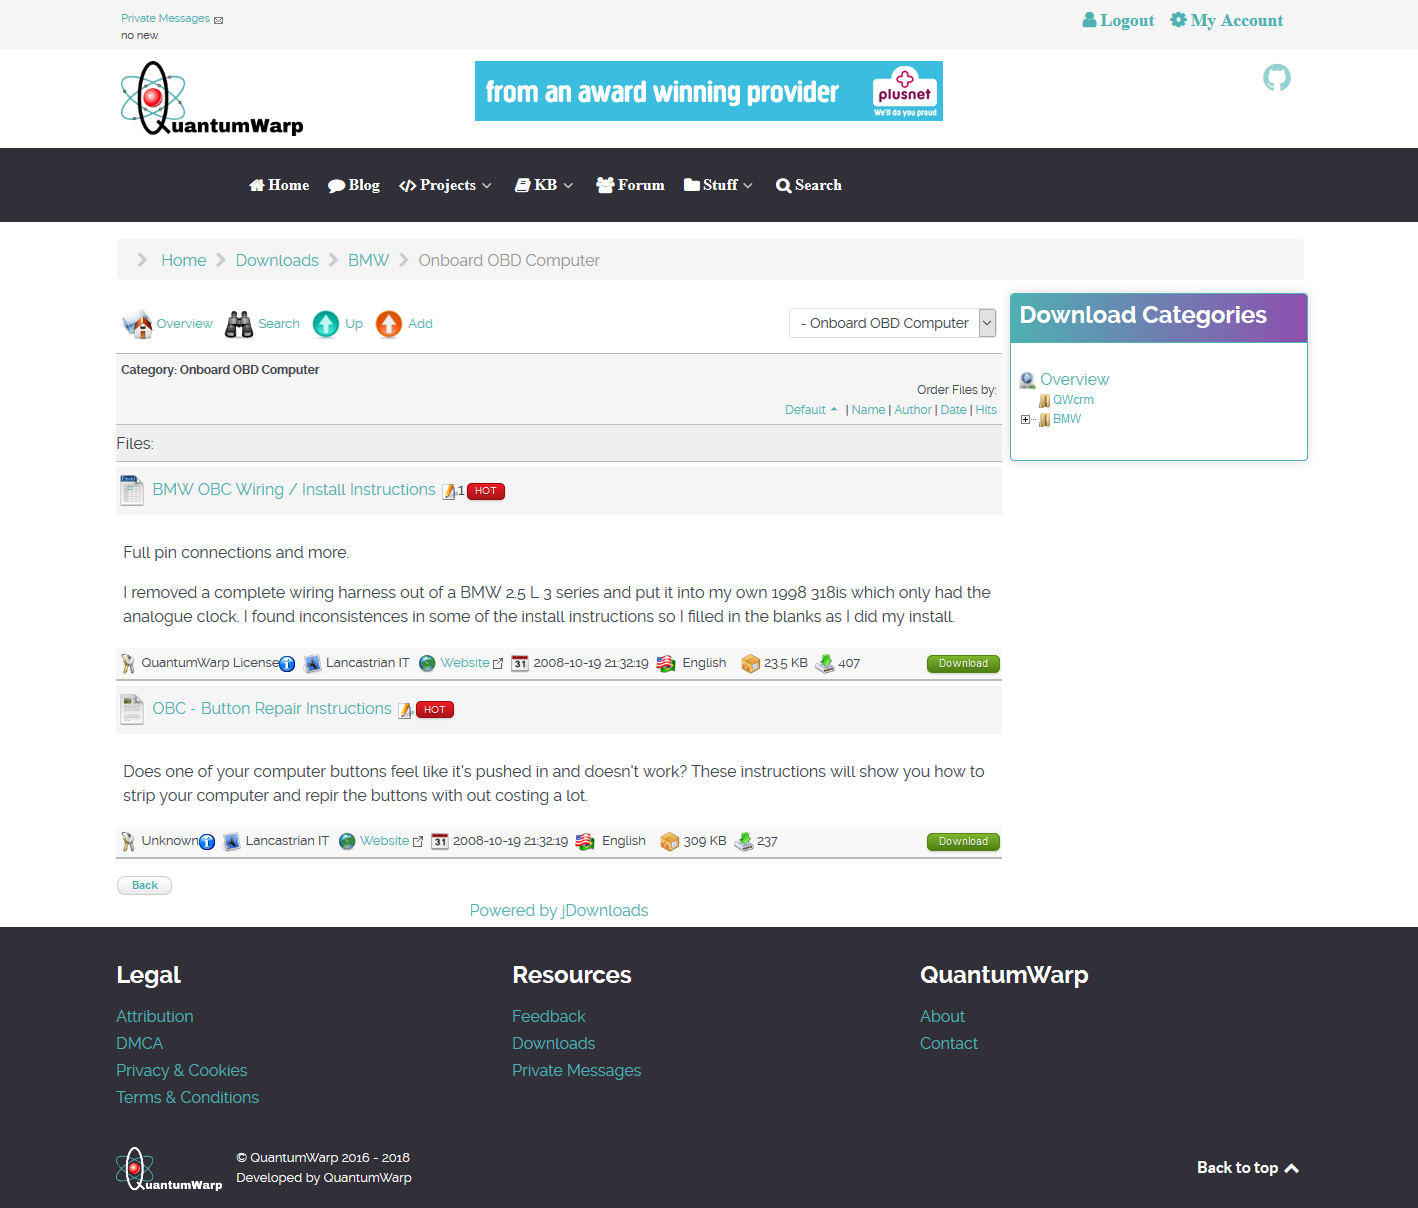
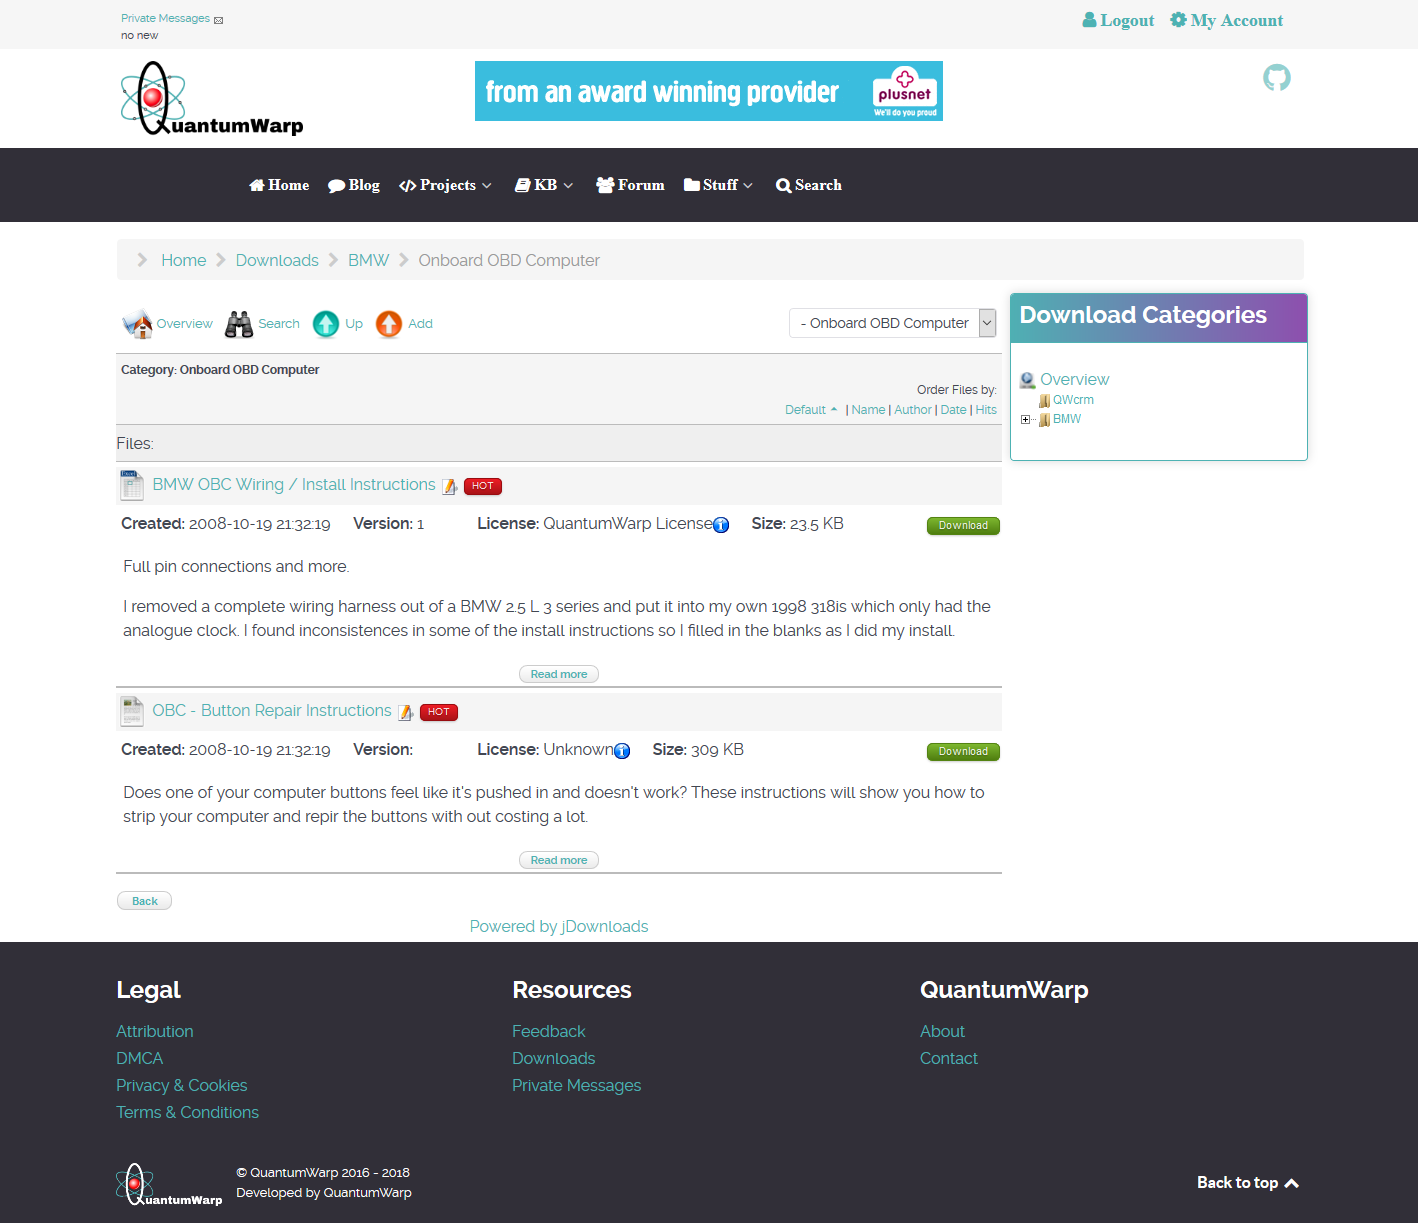
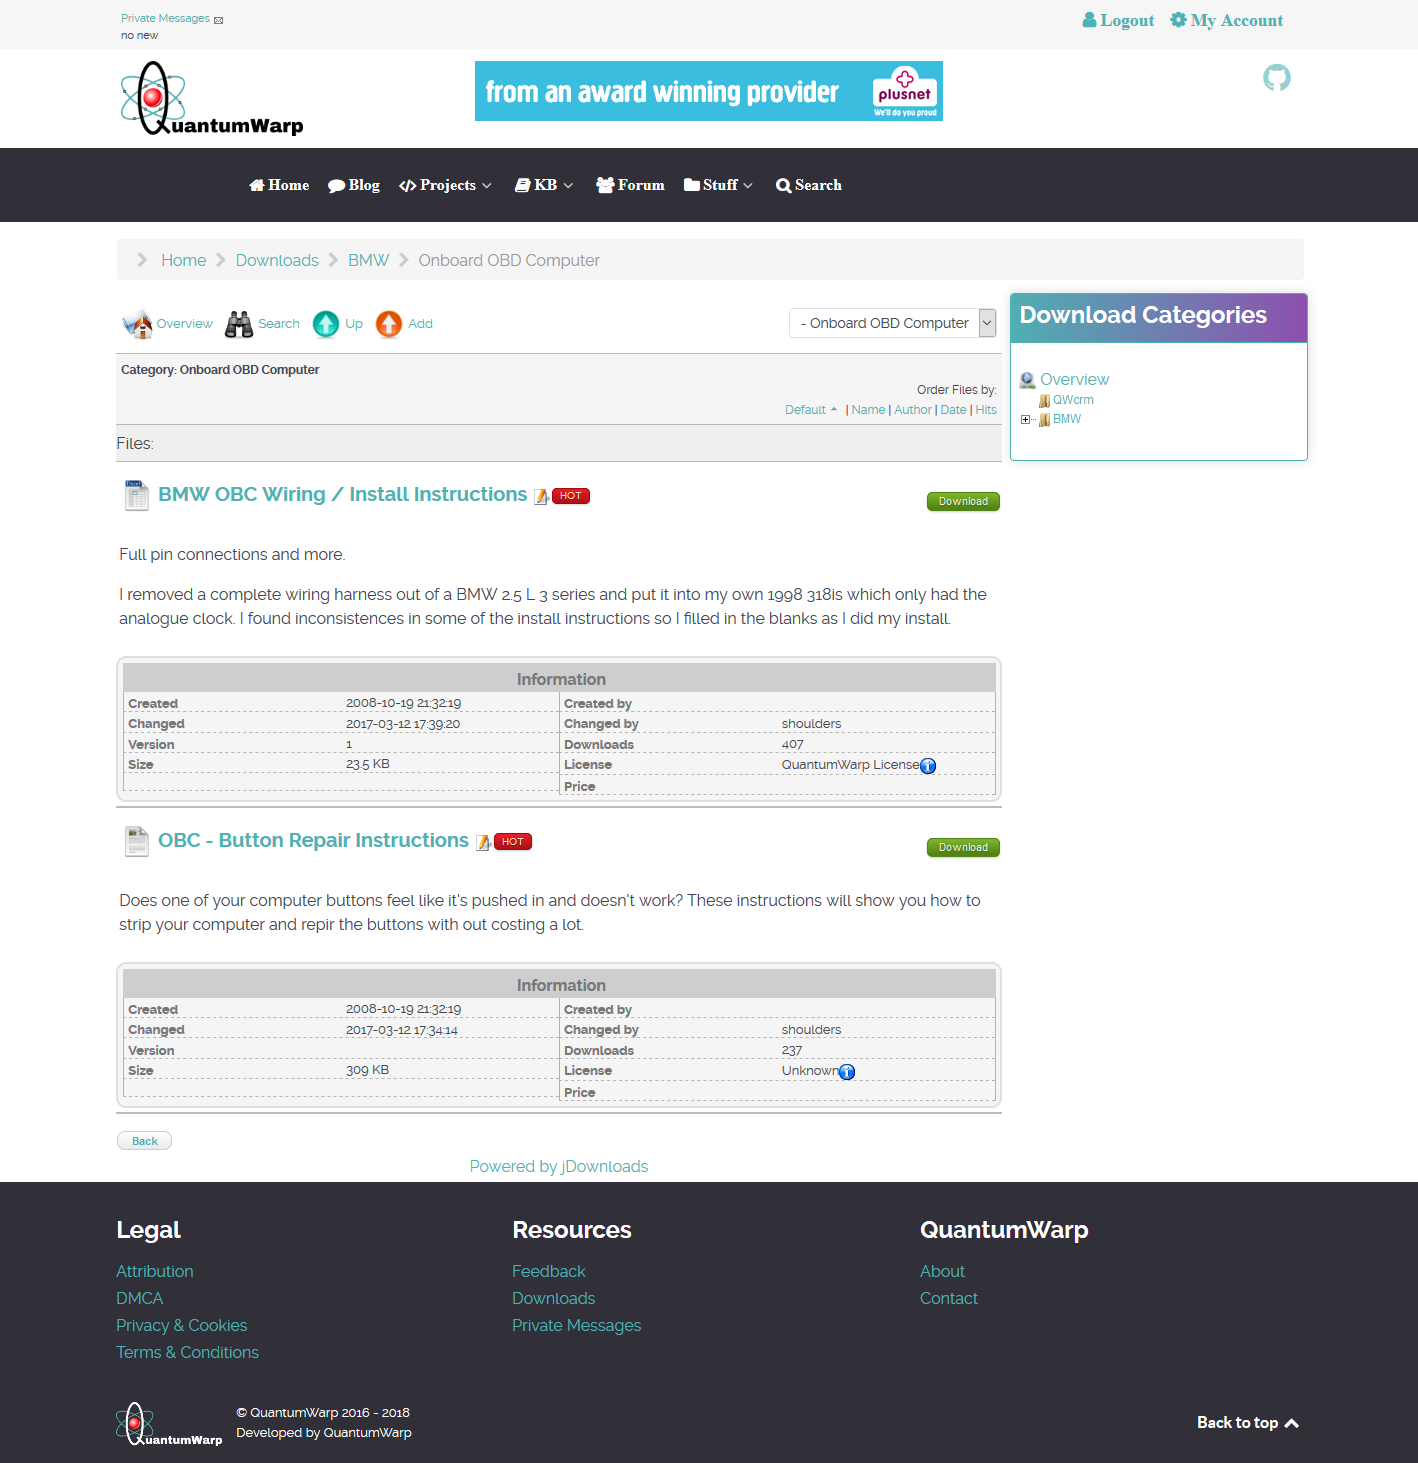
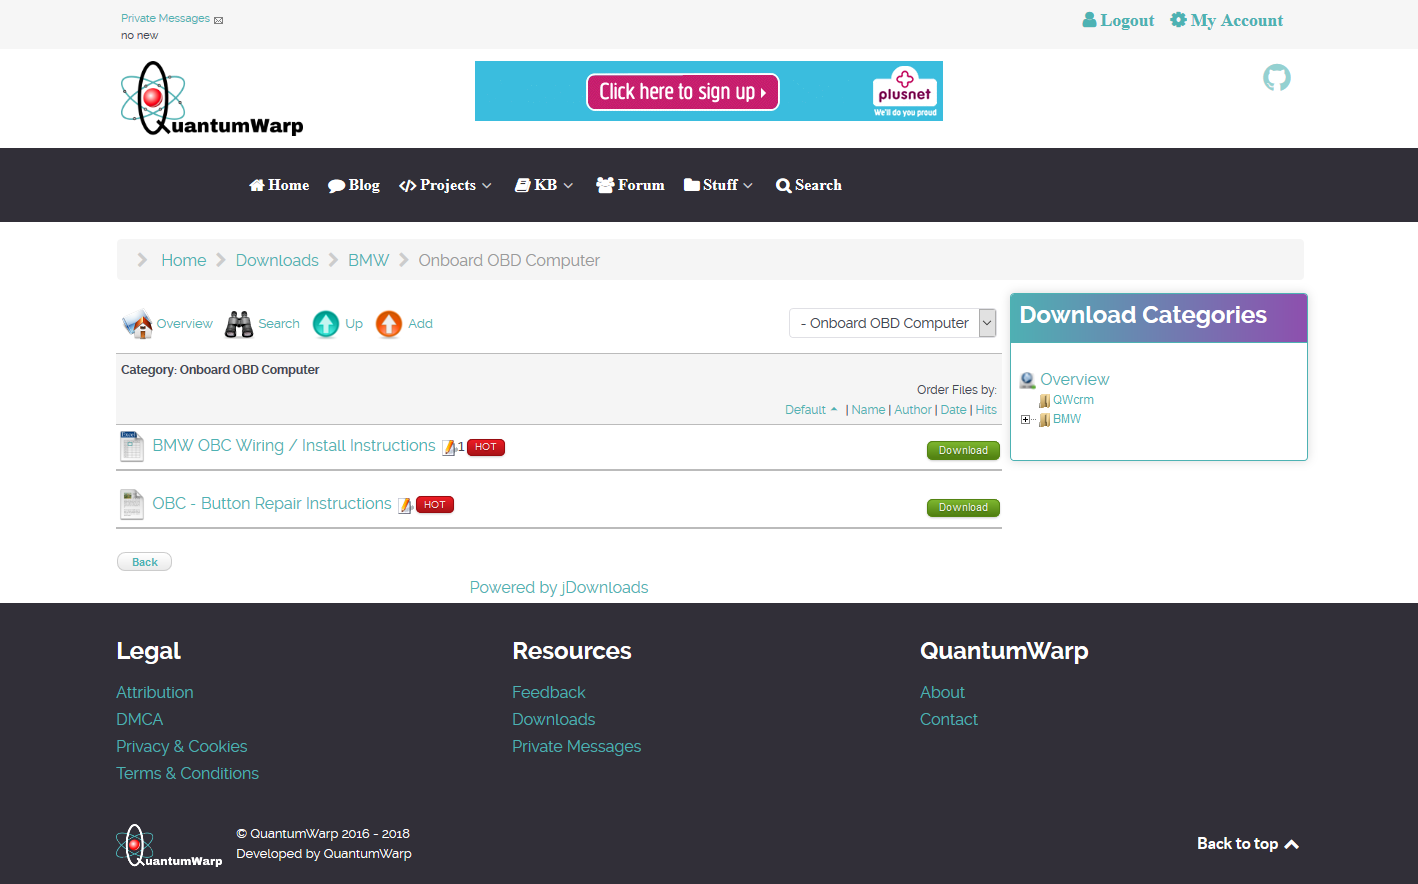
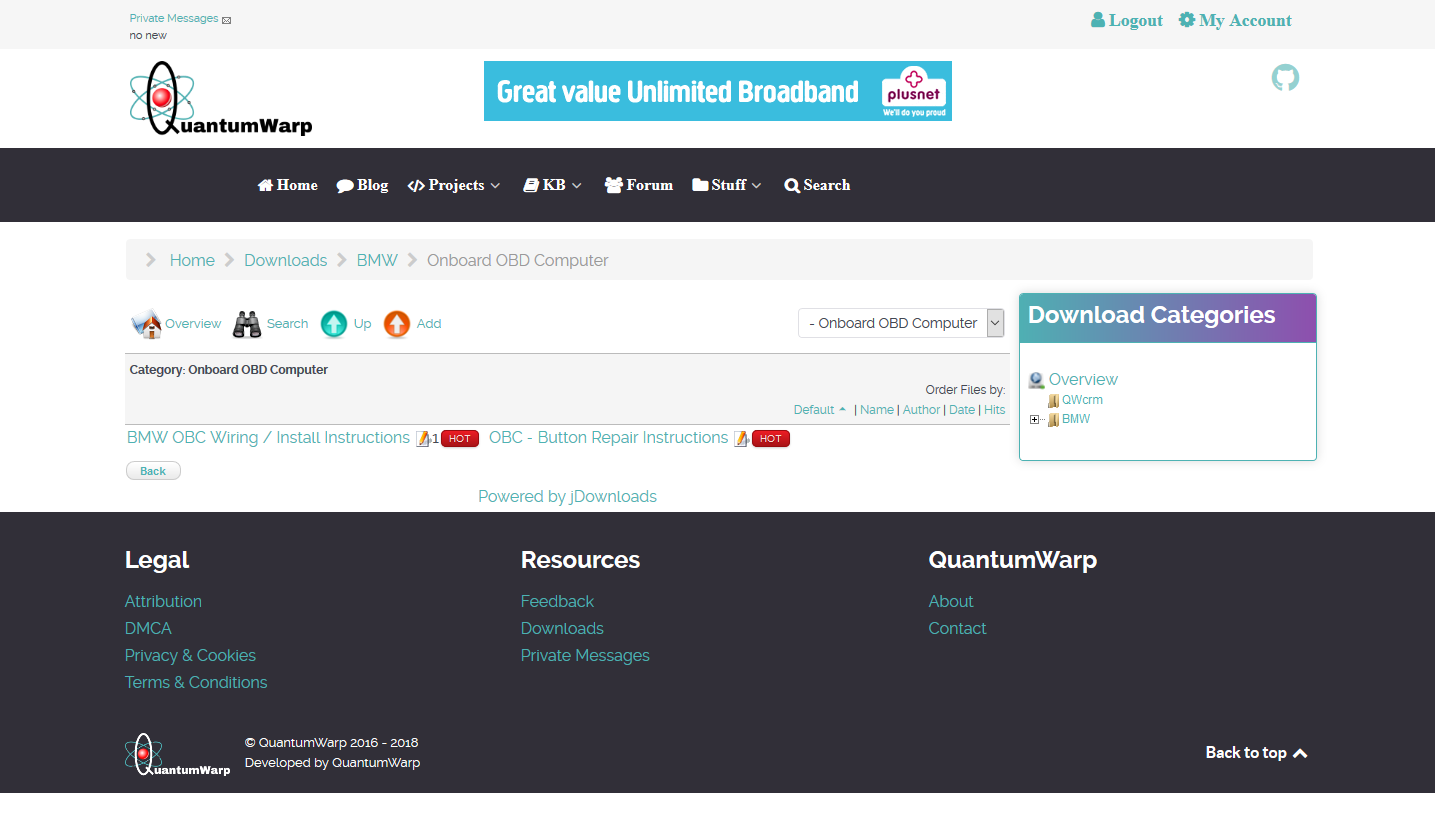
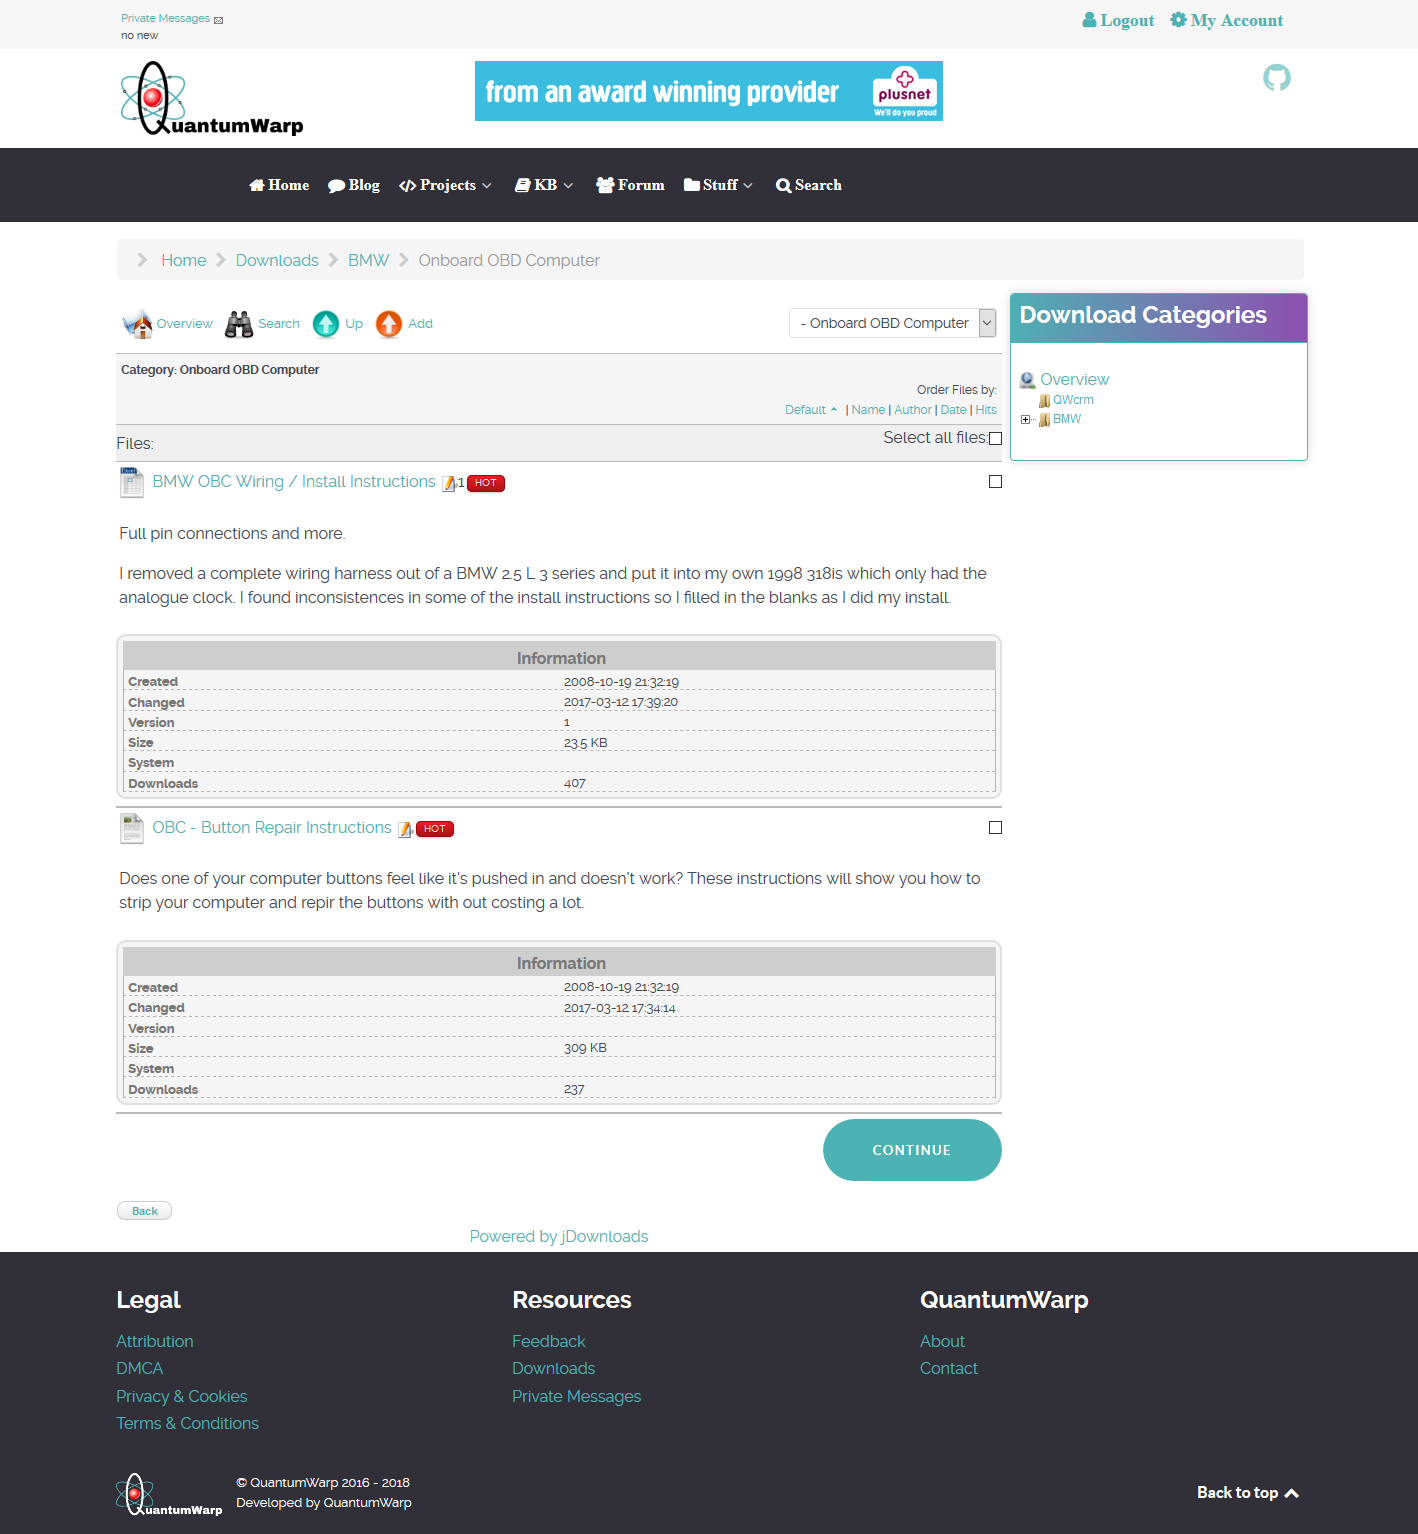
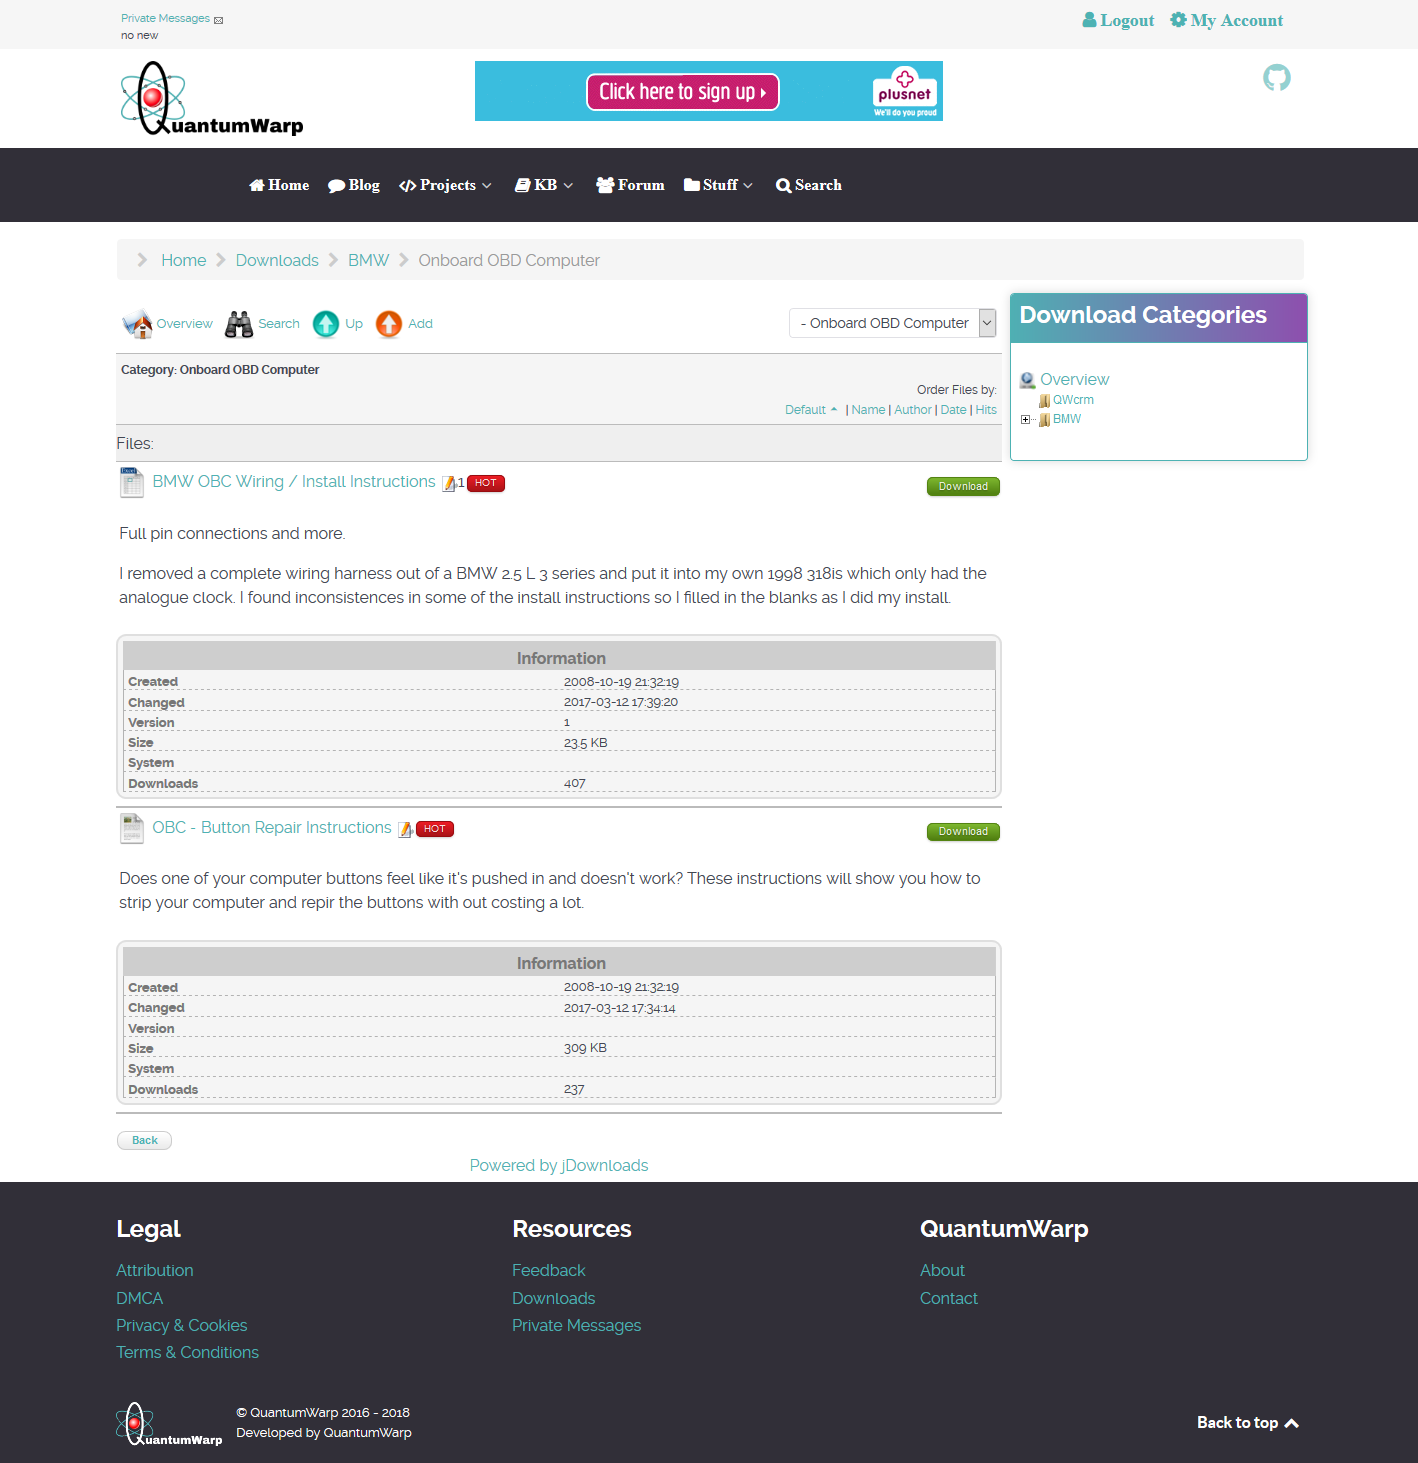
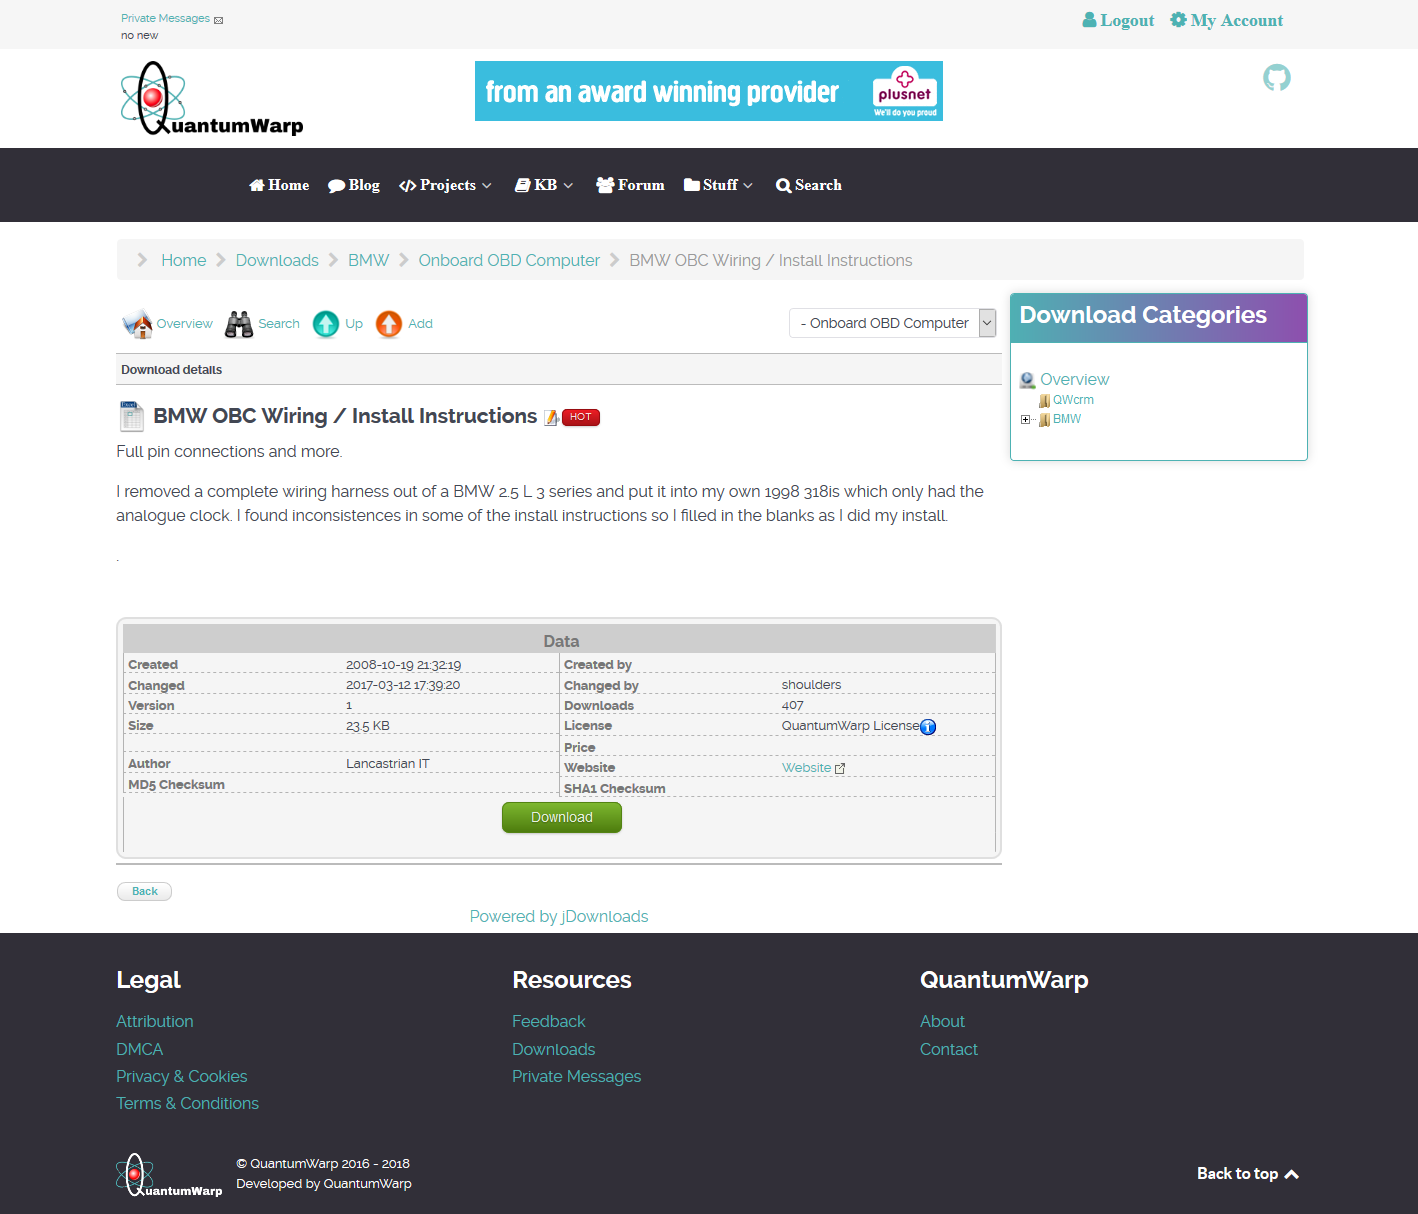
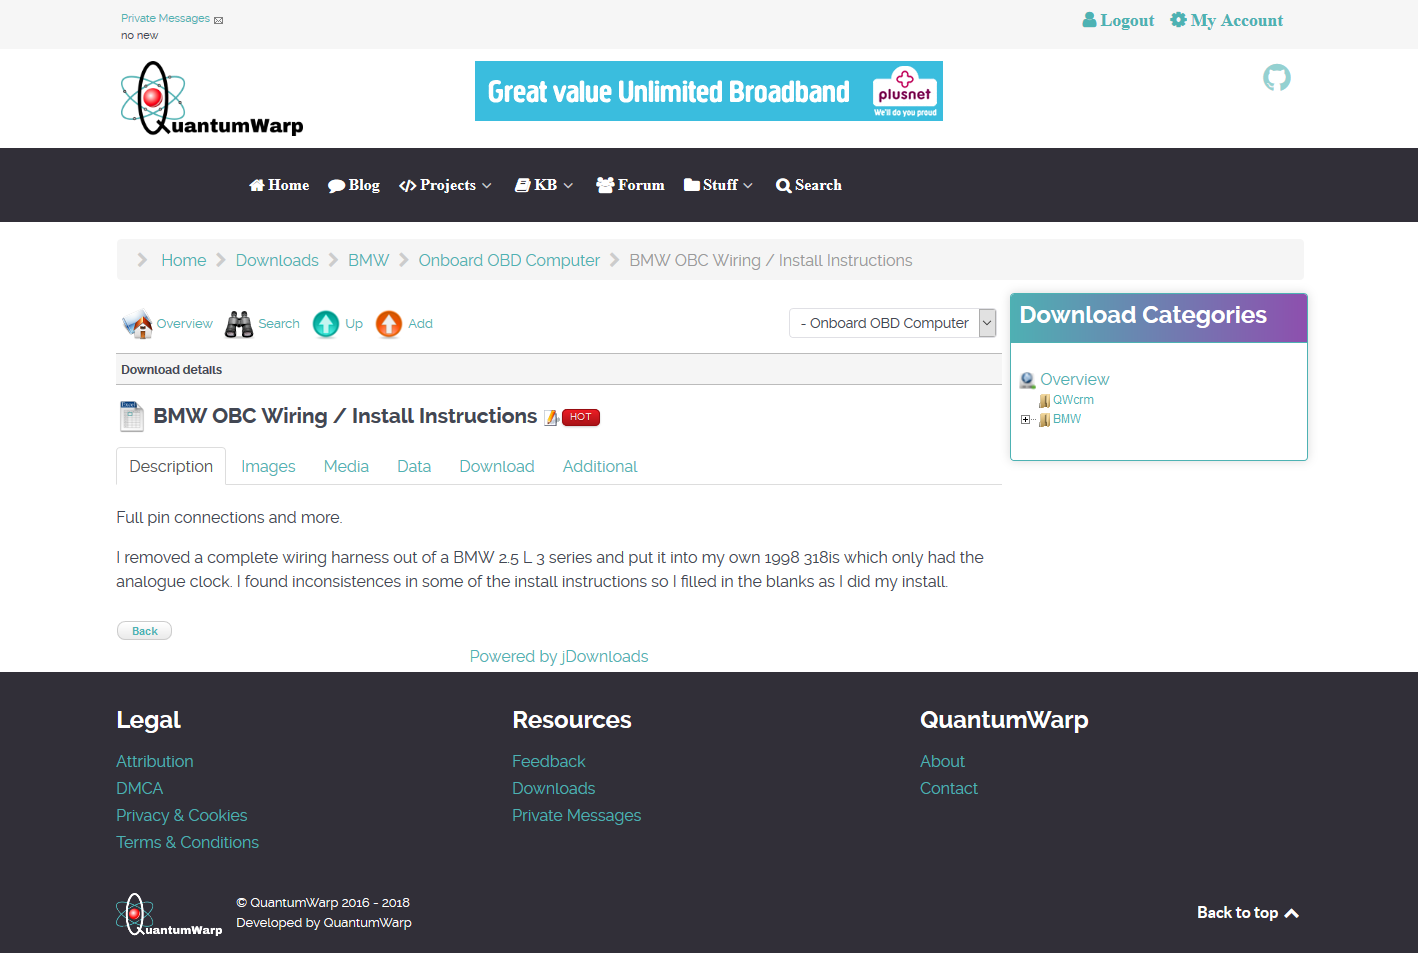
JDownloads - Layout Previews
This page shows you what the different standard layouts that come installed with JDownloads look like so you can easily choose what you want.
There are some more layouts available at JDownloads.com in the Layout Section and these already have images and descriptions.
Categories
Defines the layout of the categories as well as the download items for the use with CHECK boxes above and below the Download list.
Categories Example with 2 columns v3.2
Categories Example with 4 columns v3.2
Here is a sample layout with 4 columns. If you create your own layout with more then one column, you must observe the rules which may be found in the FAQ.
Standard Categories Layout for paginated Subcategories 3.2
This is a subcategory layout used in categories when subcategory pagination is enabled by the 'Show page navigation for subcategories?' option in the Frontend tab of the Configuration. This layout must not be activated because it is automatically used when the above option is selected. It is not intended as a standalone category layout.
Standard Categories Layout v3.2
Category
Defines the layout of the Download list when displaying as a single category view.
Standard Category Layout v3.2
Files
Defines the layout of the Download list displayed below the categories.
Alternate Files Layout v3.2
Files Layout Full Info v3.2
Files Layout Single Line v3.2
Files link only v3.2
Standard Files Layout v3.2

Standard Files Layout with Checkboxes v3.2
Standard Files Layout without Checkboxes v3.2
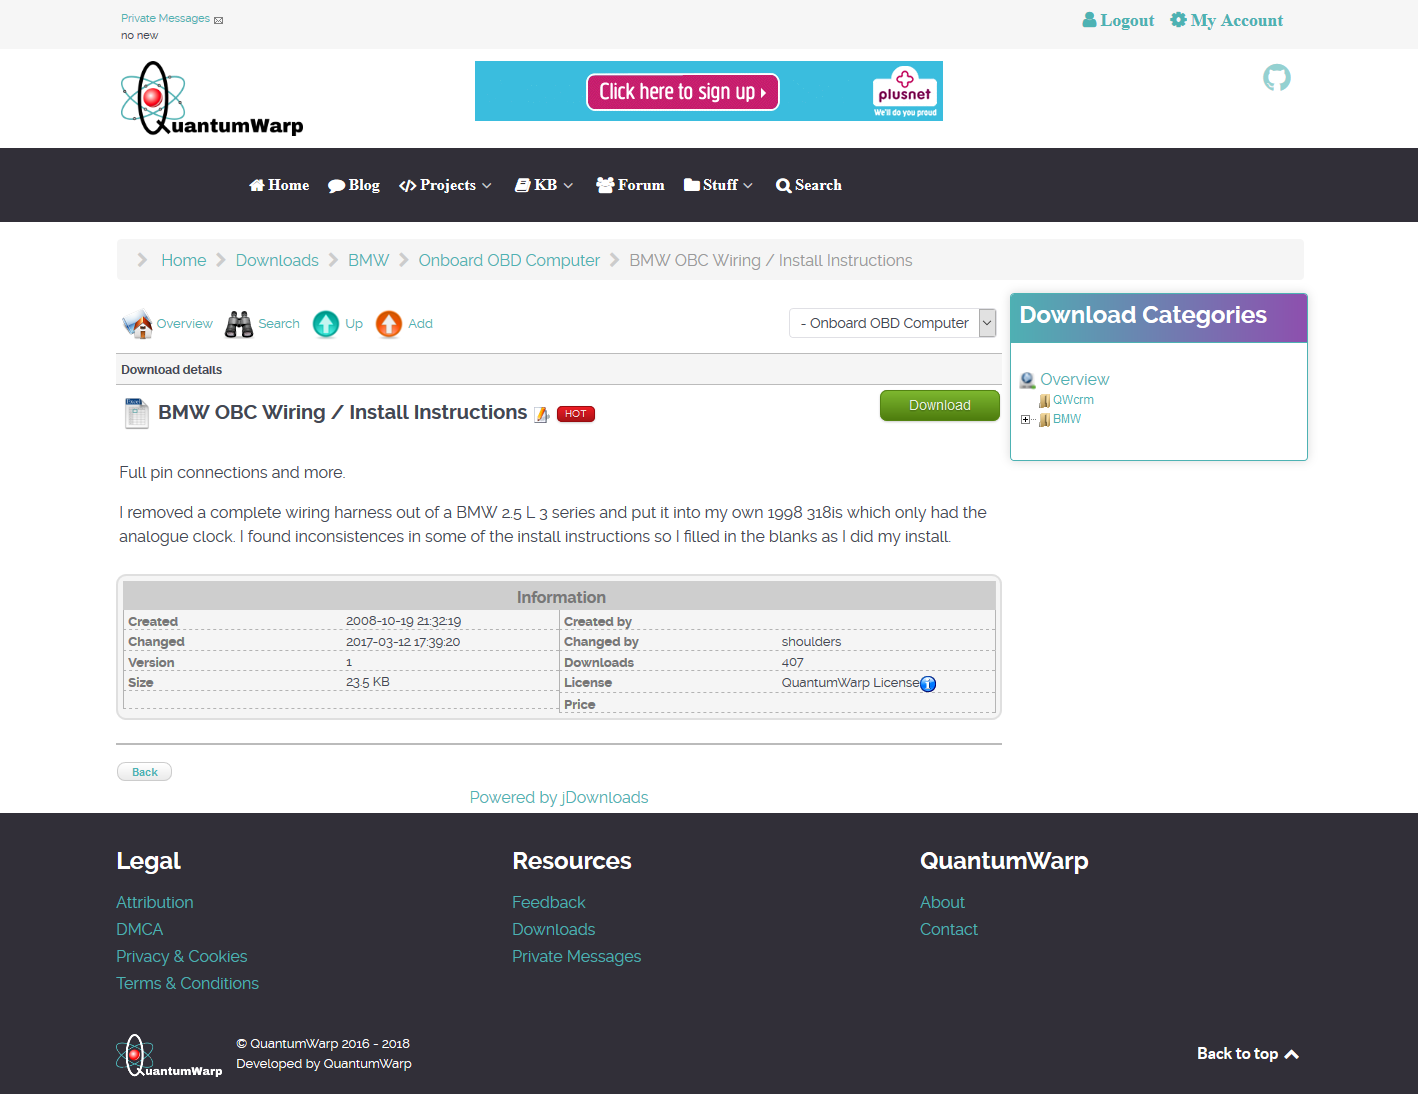
Download Details
Defines the layout of the Download detailed view.
Example Details Layout v3.2
Example Details Layout with Tabs v3.2
Standard Details Layout v3.2 - Full Info
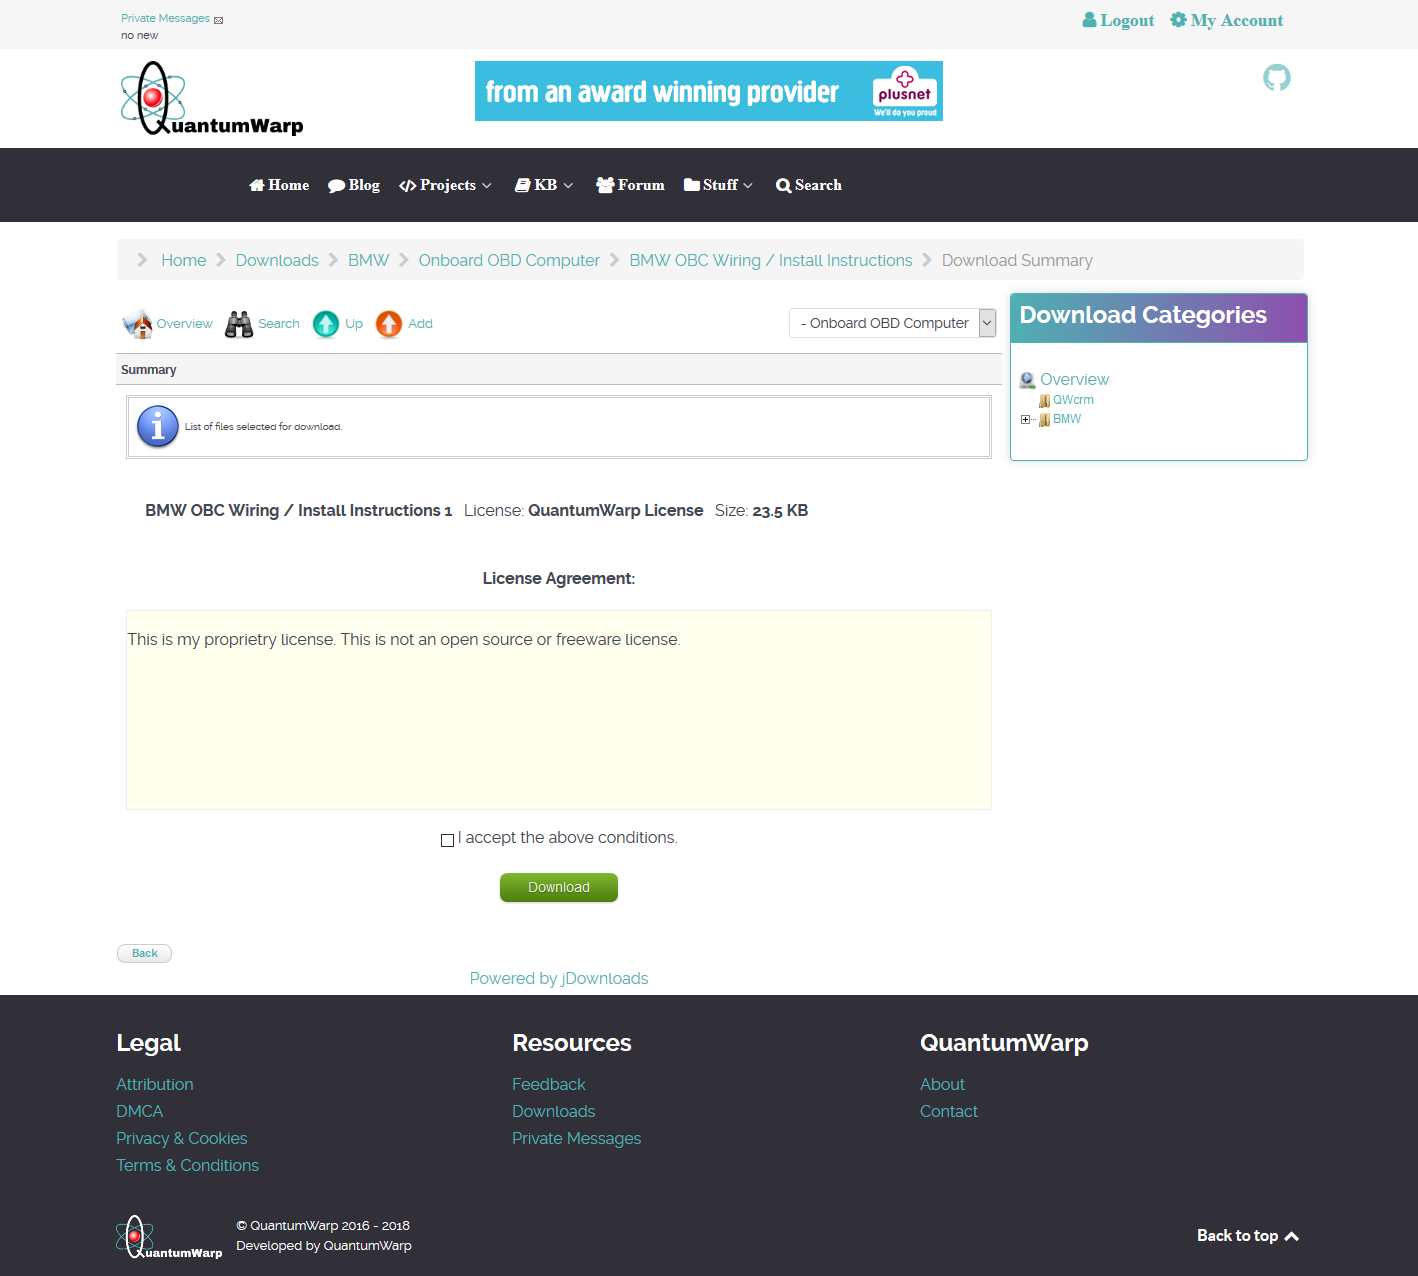
Summary
Defines the layout of the Download summary page with the list of those files selected for downloading. This is the page where actual dowloading is initiated.
Standard Summary Layout v3.2
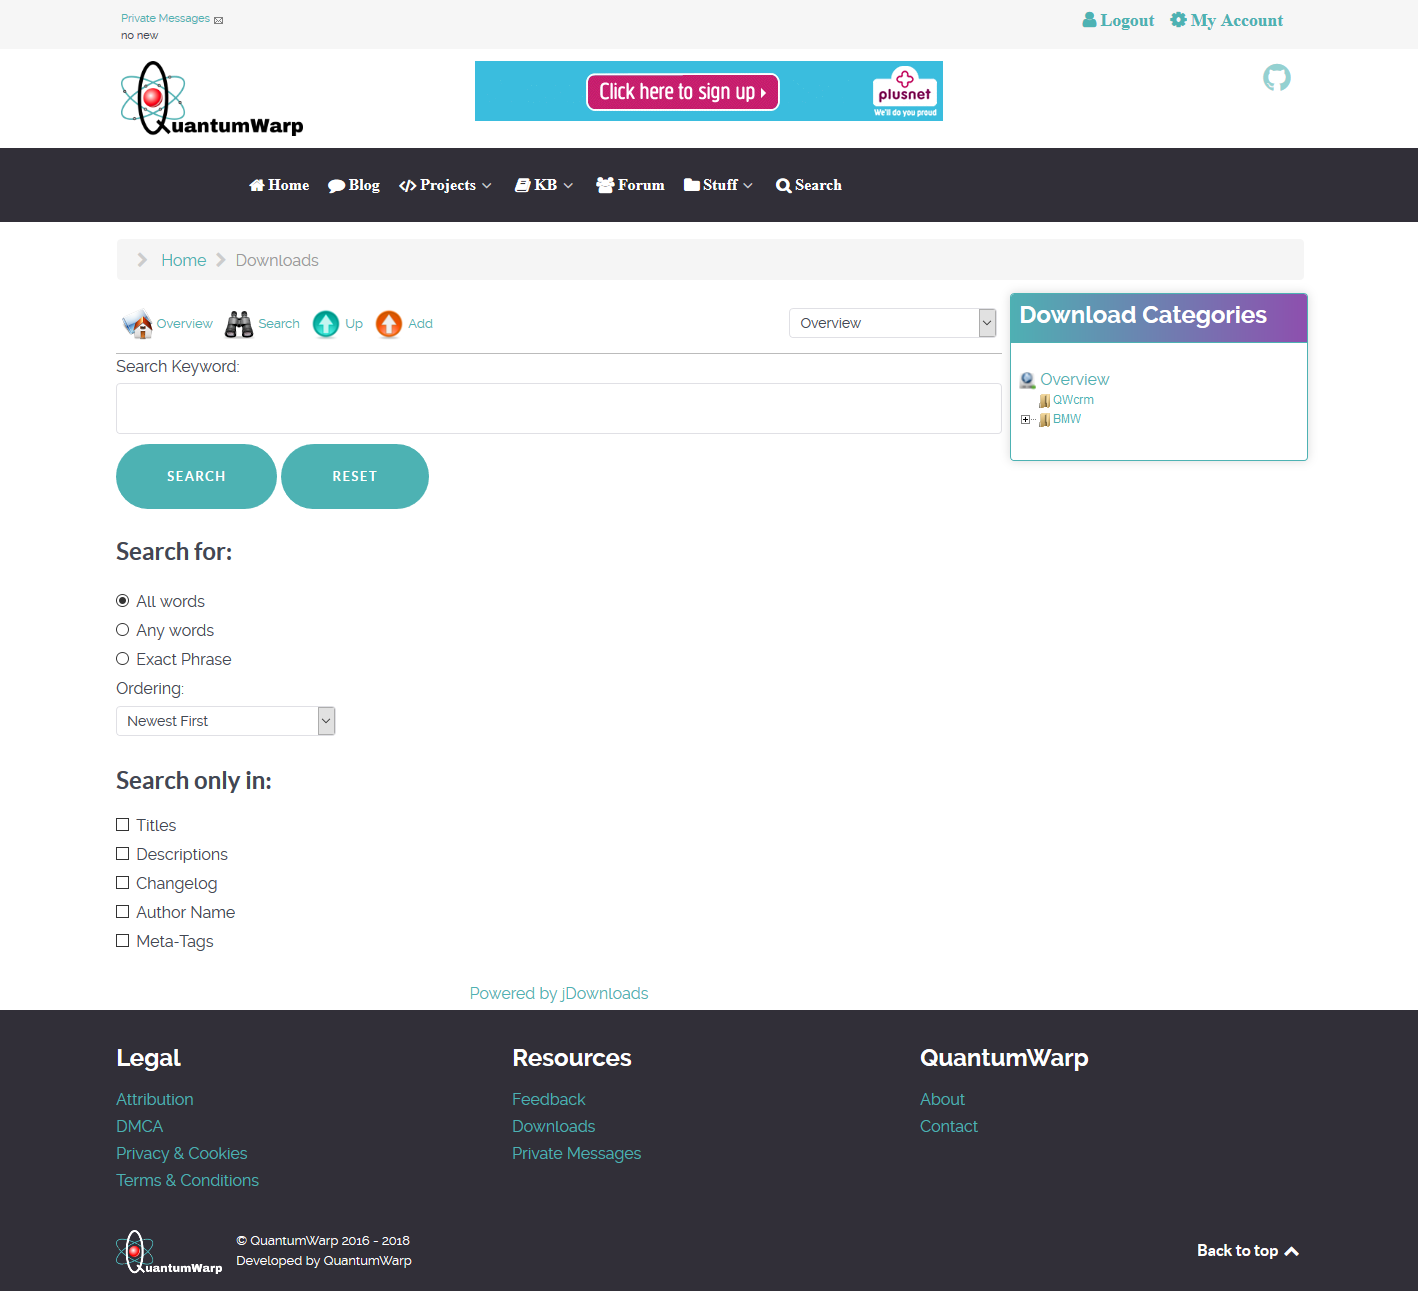
Search Form
Defines how the form and the results from the frontend search function are shown.
Search Form Horizontal Layout v3.2
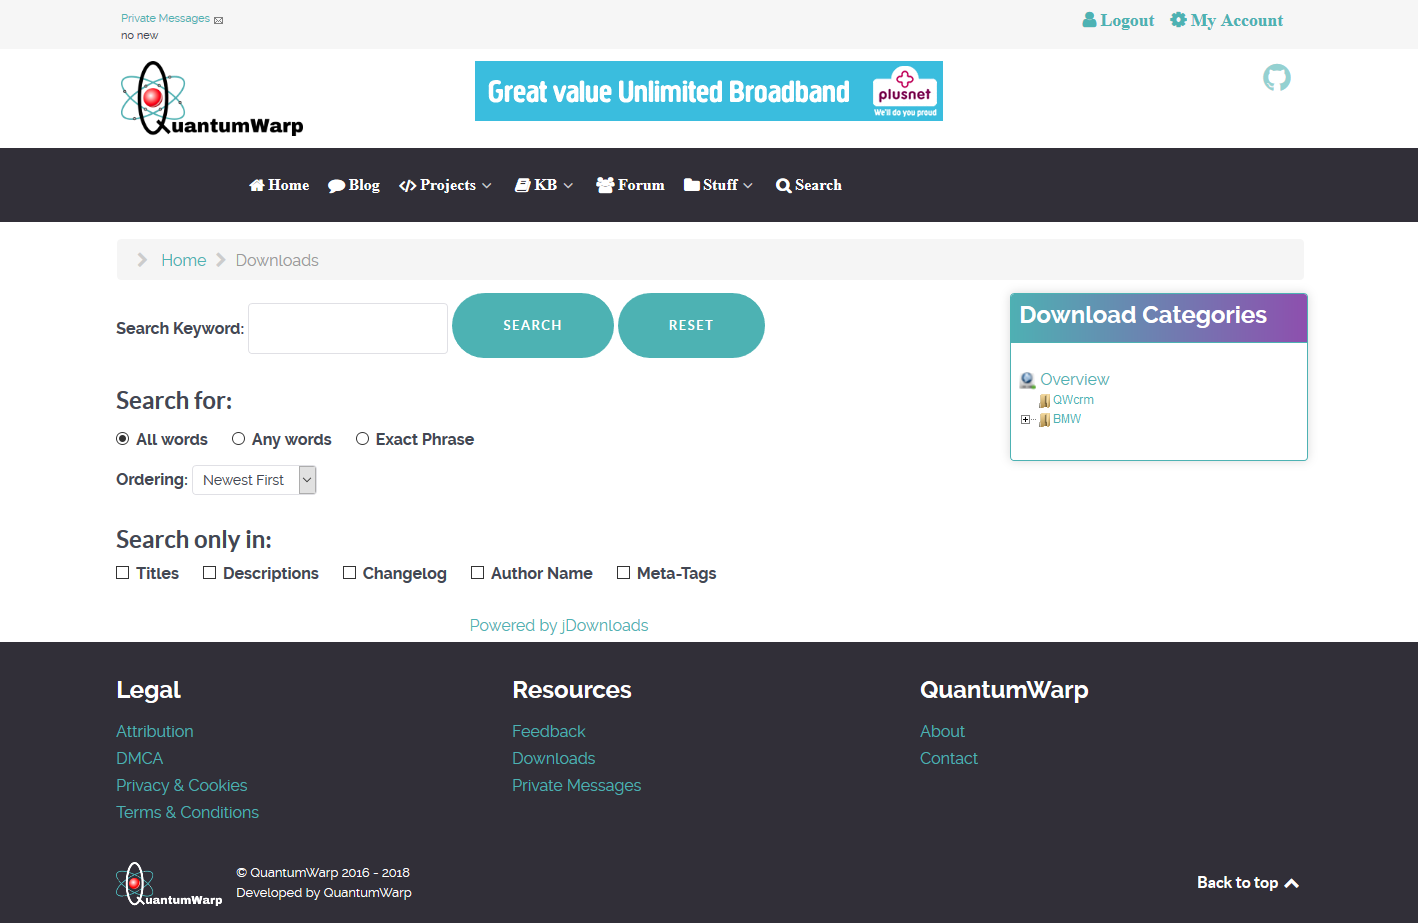
Search Form Vertical Layout v3.2 - Standard
Move a Windows User Profile
Back your system and files up before doing anything.
Currently if you have split profile locations you cannot upgrade Windows 10. This might be the case for other operating systems.
This article came about because I had already moved my documents, pictures and music to my D: drive by changing the location of those libraries. It is an easy thing to move your libraries but I kept on finding programs such as VirtualBox created their own library folder and this was back in my profile on the C: drive so I decided that I might aswell move my whole profile on to the D: drive. There were serveral methods I came across all with various pros and cons:
- Xcopy / RoboCopy - These softwares allow the moving of files and folders whilst keeping them permissions and other things and are what I have based this tutorial on.
- Profile Relocator - This does not move the profiles
- SysPrep - Using the Microsoft SysPrep you can repackage your windows installation and during this you can tell it to move your profiles. This is not an easy process.
- USMT - The Microsoft User State Migration Tool is very powerful and complicated to configure. This has the ability to transfer profiles.
- Copy To and Move To profile options - This has been removed in later version of Windows. I think it is present in Windows 7 and hidden in Windows 8.
- 3rd Party Transfer Software - This software tends to be designed to transfer a profile from one machine to another but potentially can be used to move a profile from one loaction to another on the same PC
- Symbolic Links (symlinks) - Using a symbolic link allows you to keep using the C:\Users location virtually while the real files are located elsewhere on you r PC. This has potential to be a really good solution if done right.
- Moving Libraries - This is where you only move all of your files (Documents, Pictures and Music etc..) but not the actual profiles. This is what I original did and although it is fully supported by windows it is not my preferred option.
- Windows Easy Transfer - This use to be the way to move profiles but it has been removed in Windows 10.
Moving your profile from one location to another on the same PC is not an easy thing to do, not any more, because you need to make sure that file permission are correct and that all references point to the new location properly. My process outlined below goes over all aspects of moving your profile correctly. This will should work on XP, Vista, Windows 7, Windows 8 and Windows 10.
One other thing to consider is are you just moving 1 User Profile or do you want to move all of your profiles in which case you will find is is also possibly to change the default location for new profiles easily.
Prerquisite Software
- RoboCopy - All modern versions of Windows have this built in to the command line (except XP). This seems to be a replacement for xcopy.
- ChoEazyCopy - Simple and powerful GUI to Microsoft RoboCopy tool (optional).
- Registry Editor (select one)
- RegCool - Free
- RegEditX Pro - Extend Windows Registry Editor (REGEDIT). There is a 30 day evaluation copy available.
- Profile Relocator - Profile Relocator is a step-based application that allows the re-locating of the Windows Users profile directory (optional).
1. Create a User Folder (optional)
I would recommend you create a user folder to hold your profiles (eg D:\Users) even if it is just for your one profile at the minute. This folder will have the exact same permissions as on the C: drive so you know the permissions are not going to cause any problems. It is possibly to put this folder anywhere but I prefer to use D:\Users\ as in this example.
Also read about changing the default profile locations before doing anything in this section as you might not want to do this step.
Method 1 - Manual
- Create the folder D:\Users\
- Manually duplicate the permissions from C:\Users\ to D:\Users\ folder by having both folder permissions windows open and then going through them one by one to make them the same.
Method 2 - RoboCopy / ChoEazyCopy
This method takes a little setting up and understanding but this method will do all of the heavy lifting for you whilst you know there wont be any mistakes. You can use either the RoboCopy command directly or you can use ChoEazyCopy whichs configures and uses RoboCopy via a GUI. Both methods do exactly the same thing.
RoboCopy Command
RoboCopy.exe "C:\" "D:\" *.* /E /LEV:2 /DCOPY:T /SEC /COPYALL /MT:8 /XF *.* /XD "C:\$RECYCLE.BIN" "C:\$SysReset" "C:\$Windows.~WS" "C:\Boot" "C:\Documents and Settings" "C:\MSOCache" "C:\PerfLogs" "C:\Program Files" "C:\Program files (x86)" "C:\ProgramData" "C:\Recovery" "C:\System Volume Information" "C:\VTRoot" "C:\Windows" "C:\Windows.old" /L
- Copy the rule above to a text editor and make sure you add any folder exclusions that you need to it. The folders that are configured cover most folders but do not forget to check hidden and system folders aswell.
- Remove the /L switch if you want to run this live (optional)
- Open a command prompt as Administrator
- Paste the modfied code in a command prompt and run
ChoEazyCopy Settings File
<ChoAppSettings>
  <MaxStatusMsgSize>1000</MaxStatusMsgSize>
  <SourceDirectory>C:\\</SourceDirectory>
  <DestDirectory>D:\\</DestDirectory>
  <RoboCopyFilePath>RoboCopy.exe</RoboCopyFilePath>
  <Files>*.*</Files>
  <CopyNoEmptySubDirectories>false</CopyNoEmptySubDirectories>
  <CopySubDirectories>true</CopySubDirectories>
  <OnlyCopyNLevels>2</OnlyCopyNLevels>
  <CopyFilesRestartableMode>false</CopyFilesRestartableMode>
  <CopyFilesBackupMode>false</CopyFilesBackupMode>
  <FallbackCopyFilesMode>false</FallbackCopyFilesMode>
  <UnbufferredIOCopy>false</UnbufferredIOCopy>
  <EncrptFileEFSRawMode>false</EncrptFileEFSRawMode>
  <CopyFlags />
  <CopyDirTimestamp>true</CopyDirTimestamp>
  <CopyFilesWithSecurity>true</CopyFilesWithSecurity>
  <CopyFilesWithFileInfo>true</CopyFilesWithFileInfo>
  <CopyFilesWithNoFileInfo>false</CopyFilesWithNoFileInfo>
  <FixFileSecurityOnFiles>false</FixFileSecurityOnFiles>
  <FixFileTimeOnFiles>false</FixFileTimeOnFiles>
  <DelDestFileDirIfNotExistsInSource>false</DelDestFileDirIfNotExistsInSource>
  <MirrorDirTree>false</MirrorDirTree>
  <MoveFiles>false</MoveFiles>
  <MoveFilesNDirs>false</MoveFilesNDirs>
  <AddFileAttributes />
  <RemoveFileAttributes />
  <CreateDirTree>false</CreateDirTree>
  <CreateFATFileNames>false</CreateFATFileNames>
  <TurnOffLongPath>false</TurnOffLongPath>
  <RunAgainWithNoChangesSeen>0</RunAgainWithNoChangesSeen>
  <RunAgainWithChangesSeenInMin>0</RunAgainWithChangesSeenInMin>
  <RunHourStartTimeTicks>0</RunHourStartTimeTicks>
  <RunHourEndTimeTicks>0</RunHourEndTimeTicks>
  <CheckRunHourPerFileBasis>false</CheckRunHourPerFileBasis>
  <InterPacketGapInMS>0</InterPacketGapInMS>
  <CopySymbolicLinks>false</CopySymbolicLinks>
  <MultithreadCopy>8</MultithreadCopy>
  <CopyNODirInfo>false</CopyNODirInfo>
  <CopyWithoutWindowsCopyOffload>false</CopyWithoutWindowsCopyOffload>
  <CopyOnlyFilesWithArchiveAttributes>false</CopyOnlyFilesWithArchiveAttributes>
  <CopyOnlyFilesWithArchiveAttributesAndReset>false</CopyOnlyFilesWithArchiveAttributesAndReset>
  <ExcludeFilesWithGivenNames>*.*</ExcludeFilesWithGivenNames>
  <ExcludeDirsWithGivenNames>"C:\$RECYCLE.BIN";"C:\$SysReset";"C:\$Windows.~WS";"C:\Boot";"C:\Documents and Settings";"C:\MSOCache";"C:\PerfLogs";"C:\Program Files";"C:\Program files (x86)";"C:\ProgramData";"C:\Recovery";"C:\System Volume Information";"C:\VTRoot";"C:\Windows";"C:\Windows.old";</ExcludeDirsWithGivenNames>
  <ExcludeChangedFiles>false</ExcludeChangedFiles>
  <ExcludeNewerFiles>false</ExcludeNewerFiles>
  <ExcludeOlderFiles>false</ExcludeOlderFiles>
  <ExcludeExtraFilesAndDirs>false</ExcludeExtraFilesAndDirs>
  <ExcludeLonelyFilesAndDirs>false</ExcludeLonelyFilesAndDirs>
  <IncludeSameFiles>false</IncludeSameFiles>
  <IncludeTweakedFiles>false</IncludeTweakedFiles>
  <ExcludeFilesBiggerThanNBytes>0</ExcludeFilesBiggerThanNBytes>
  <ExcludeFilesSmallerThanNBytes>0</ExcludeFilesSmallerThanNBytes>
  <ExcludeFilesOlderThanNDays>0</ExcludeFilesOlderThanNDays>
  <ExcludeFilesNewerThanNDays>0</ExcludeFilesNewerThanNDays>
  <ExcludeFilesUnusedSinceNDays>0</ExcludeFilesUnusedSinceNDays>
  <ExcludeFilesUsedSinceNDays>0</ExcludeFilesUsedSinceNDays>
  <ExcludeJunctionPoints>false</ExcludeJunctionPoints>
  <AssumeFATFileTimes>false</AssumeFATFileTimes>
  <CompensateOneHourDSTTimeDiff>false</CompensateOneHourDSTTimeDiff>
  <ExcludeJunctionPointsForDirs>false</ExcludeJunctionPointsForDirs>
  <ExcludeJunctionPointsForFiles>false</ExcludeJunctionPointsForFiles>
  <NoOfRetries>0</NoOfRetries>
  <WaitTimeBetweenRetries>0</WaitTimeBetweenRetries>
  <SaveRetrySettingsToRegistry>false</SaveRetrySettingsToRegistry>
  <WaitForSharenames>false</WaitForSharenames>
  <ListOnly>true</ListOnly>
  <ReportExtraFiles>false</ReportExtraFiles>
  <VerboseOutput>false</VerboseOutput>
  <IncludeSourceFileTimestamp>false</IncludeSourceFileTimestamp>
  <IncludeFullPathName>false</IncludeFullPathName>
  <PrintByteSizes>false</PrintByteSizes>
  <NoFileSizeLog>false</NoFileSizeLog>
  <NoFileClassLog>false</NoFileClassLog>
  <NoFileNameLog>false</NoFileNameLog>
  <NoDirListLog>false</NoDirListLog>
  <NoProgress>false</NoProgress>
  <ShowEstTimeOfArrival>false</ShowEstTimeOfArrival>
  <NoJobHeader>false</NoJobHeader>
  <NoJobSummary>false</NoJobSummary>
</ChoAppSettings>
NB: C:\\ (source) and D:\\ (target) it is intentional to have 2 trailing slashes and is a workaround for a bug when using root folders in ChoEazyCopy. This bug has been reported but only applies to ChoEazyCopy but not when using RoboCopy directly.
- Install ChoEazyCopy
- Create a new file called copy-user-folder.ezy
- Copy and paste the code above into it and save
- Run ChoEazyCopy as an administrator
- Open copy-user-folder.ezy with ChoEazyCopy
- Add any folder exclusions that you need to it. The ones that are present cover most folders but do not forget to check hidden and system folders aswell.
- Remove the /L (ListOnly) switch if you want to run this live (optional)
- Save any changes.
- Run the command by clicking the play arrow at the top.
Switches Explained
- "C:\" (Source) - Files/Folders Source
- "D:\" (Target) - Files/Folders Target
- *.* (Files) - Which files to select. We have to put something in here so i use *.*
- /DCOPY:T (CopyDirTimestamp) - Preserve folder timestamps
- /COPYALL (CopyFilesWithFileInfo) - Copy files with their attributes
- /SEC (CopyFilesWith Security) - Keeps file ACL permissions as they are in the source
- /E (CopySubDirectories) - Copy all sub directories including empty ones
- /MT:8 (MultithreadCopy) - Do multi-threaded copies with n threads. Makes copying quicker.
- /LEV:2 (OnlyCopyNLevels) - Only copy folders to 1 level below (i.e. C:\Users)
- /XD (ExcludeDirsWithGivenNames) - Exclude all folders except C:\Users. With RoboCopy you select all and then exclude what you dont want.
- /XF *.* (ExcludeFilesWithGivenName) - *.* excludes all files because we only want the C:\Users folder.
- /L (ListOnly) - This switch is a test switch which prevents copying, timestamp changes or deleting of any files and is present to prevent accedentally running this command with setting things up properly. Remove this when you want to perform this command for real.
2. Change Default location for User Profiles (optional)
This can easily be done with a piece of software called Profile Relocator. This is ideally used when you first setup a new PC before you create any profiles (except the one you were required to do to set windows up which you can delete later), however you can still use this on a live PC.
Profile relocator does not move exisiting profiles.
Instructions
- Login to an Administrator account
- Install Profile Relocator
- Run the software and follow the onscreen instructions.
This is what it does according to the readme:
- If the user has explicitly enabled the option, PR will copy the Public and Default folders from the old location - which varies depending on the version of the operating system - to the new location. The original folders aren't modified in any way.
- PR updates the following registry keys to reflect the new location the user chose:
HKLM\SOFTWARE\Microsoft\Windows NT\CurrentVersion\ProfileList\ProfilesDirectory
HKLM\SOFTWARE\Microsoft\Windows NT\CurrentVersion\ProfileList\Public
HKLM\SOFTWARE\Microsoft\Windows NT\CurrentVersion\ProfileList\Default
- To allow the process to be reverted back to its previous state, PR will then create - or update if it already exists - the following registry key with the location of the profiles directory it found when it PR was started:
HKLM\SOFTWARE\Microsoft\Windows NT\CurrentVersion\ProfileList\!ProfileRelocator-Original
Notes
- You can make these changes manually in the registry so do not need this software for that but it makes things easier.
- You get the option as to whether you want to copy the Public and Default folders and use them in the new location.
- I do not know how Profile Relocator copies the Public and Default folders and therefore how it maintains their permissions. I am guessing that it does.
- How To | How To Move A User Profile To Another Drive or Partition In Windows - YouTube - This is just showing the same thing that Profile Relocator does but also shows that when you change the Users folder location in the registry to D:\Users then Windows will automatically create the D:\Users folder when you create a new account along with the D:\Public profile.
3. Copy User Profile to new location
This process will copy the selected profile to the new location with all of the ACL permission intact. In this example I am moving a single profile from C:\Users to D:\Users. This process will copy all profiles that you do not specify in one action so you do not have to repeat this for every profile if doing more than one.
You can use either the RoboCopy command directly or you can use ChoEazyCopy whichs configures and uses RoboCopy via a GUI. Both methods do exactly the same thing.
Notes
- You cannot run these commands from within a profile that you are going to move. You must logout into another account that has administrator rights and that you are not going to move. You can create a temp administrator account for this.
- Do not login to these profiles untill these instructions tell you that it is ok.
- Disable your antivirus if you are moving folders with files in that might trigger it.
- After a migration always check your error log
- If find errors, you might find that running these in safemode gives a better result.
- You cannot just use copy and paste because the ACL permissions and other things are not preserved.
RoboCopy Command
RoboCopy.exe "C:\Users" "D:\Users" *.* /E /ZB /DCOPY:T /SEC /COPYALL /SL /MT:8 /XD "C:\Users\All Users" "C:\Users\Default" "C:\Users\Default User" "C:\Users\Default.migrated" "C:\Users\DefaultAppPool" "C:\Users\LogMeInRemoteUser" "C:\Users\Public" "C:\Users\UpdatusUser" /R:1 /W:1 /UNILOG:"C:\profile-copy.log" /L
- Copy the rule above to a text editor and make sure you add any User Profile folders to the folder exclusion list that you do not want to copy. The list that is in the example code above covers most default/system folders present but do not forget to check for other hidden and system folders aswell.
- Remove the /L switch if you want to run this live (optional)
- Open a command prompt as Administrator
- Paste the modfied code in a command prompt and run
ChoEazyCopy Settings File
<ChoAppSettings>
  <MaxStatusMsgSize>1000</MaxStatusMsgSize>
  <SourceDirectory>C:\Users</SourceDirectory>
  <DestDirectory>D:\Users</DestDirectory>
  <RoboCopyFilePath>RoboCopy.exe</RoboCopyFilePath>
  <Files>*.*</Files>
  <CopyNoEmptySubDirectories>false</CopyNoEmptySubDirectories>
  <CopySubDirectories>true</CopySubDirectories>
  <OnlyCopyNLevels>0</OnlyCopyNLevels>
  <CopyFilesRestartableMode>false</CopyFilesRestartableMode>
  <CopyFilesBackupMode>false</CopyFilesBackupMode>
  <FallbackCopyFilesMode>true</FallbackCopyFilesMode>
  <UnbufferredIOCopy>false</UnbufferredIOCopy>
  <EncrptFileEFSRawMode>false</EncrptFileEFSRawMode>
  <CopyFlags />
  <CopyDirTimestamp>true</CopyDirTimestamp>
  <CopyFilesWithSecurity>true</CopyFilesWithSecurity>
  <CopyFilesWithFileInfo>true</CopyFilesWithFileInfo>
  <CopyFilesWithNoFileInfo>false</CopyFilesWithNoFileInfo>
  <FixFileSecurityOnFiles>false</FixFileSecurityOnFiles>
  <FixFileTimeOnFiles>false</FixFileTimeOnFiles>
  <DelDestFileDirIfNotExistsInSource>false</DelDestFileDirIfNotExistsInSource>
  <MirrorDirTree>false</MirrorDirTree>
  <MoveFiles>false</MoveFiles>
  <MoveFilesNDirs>false</MoveFilesNDirs>
  <AddFileAttributes />
  <RemoveFileAttributes />
  <CreateDirTree>false</CreateDirTree>
  <CreateFATFileNames>false</CreateFATFileNames>
  <TurnOffLongPath>false</TurnOffLongPath>
  <RunAgainWithNoChangesSeen>0</RunAgainWithNoChangesSeen>
  <RunAgainWithChangesSeenInMin>0</RunAgainWithChangesSeenInMin>
  <RunHourStartTimeTicks>0</RunHourStartTimeTicks>
  <RunHourEndTimeTicks>0</RunHourEndTimeTicks>
  <CheckRunHourPerFileBasis>false</CheckRunHourPerFileBasis>
  <InterPacketGapInMS>0</InterPacketGapInMS>
  <CopySymbolicLinks>true</CopySymbolicLinks>
  <MultithreadCopy>8</MultithreadCopy>
  <CopyNODirInfo>false</CopyNODirInfo>
  <CopyWithoutWindowsCopyOffload>false</CopyWithoutWindowsCopyOffload>
  <CopyOnlyFilesWithArchiveAttributes>false</CopyOnlyFilesWithArchiveAttributes>
  <CopyOnlyFilesWithArchiveAttributesAndReset>false</CopyOnlyFilesWithArchiveAttributesAndReset>
  <ExcludeFilesWithGivenNames />
  <ExcludeDirsWithGivenNames>"C:\Users\All Users";"C:\Users\Default";"C:\Users\Default User";"C:\Users\Default.migrated";"C:\Users\DefaultAppPool";"C:\Users\LogMeInRemoteUser";"C:\Users\Public";"C:\Users\UpdatusUser";</ExcludeDirsWithGivenNames>
  <ExcludeChangedFiles>false</ExcludeChangedFiles>
  <ExcludeNewerFiles>false</ExcludeNewerFiles>
  <ExcludeOlderFiles>false</ExcludeOlderFiles>
  <ExcludeExtraFilesAndDirs>false</ExcludeExtraFilesAndDirs>
  <ExcludeLonelyFilesAndDirs>false</ExcludeLonelyFilesAndDirs>
  <IncludeSameFiles>false</IncludeSameFiles>
  <IncludeTweakedFiles>false</IncludeTweakedFiles>
  <ExcludeFilesBiggerThanNBytes>0</ExcludeFilesBiggerThanNBytes>
  <ExcludeFilesSmallerThanNBytes>0</ExcludeFilesSmallerThanNBytes>
  <ExcludeFilesOlderThanNDays>0</ExcludeFilesOlderThanNDays>
  <ExcludeFilesNewerThanNDays>0</ExcludeFilesNewerThanNDays>
  <ExcludeFilesUnusedSinceNDays>0</ExcludeFilesUnusedSinceNDays>
  <ExcludeFilesUsedSinceNDays>0</ExcludeFilesUsedSinceNDays>
  <ExcludeJunctionPoints>false</ExcludeJunctionPoints>
  <AssumeFATFileTimes>false</AssumeFATFileTimes>
  <CompensateOneHourDSTTimeDiff>false</CompensateOneHourDSTTimeDiff>
  <ExcludeJunctionPointsForDirs>false</ExcludeJunctionPointsForDirs>
  <ExcludeJunctionPointsForFiles>false</ExcludeJunctionPointsForFiles>
  <NoOfRetries>1</NoOfRetries>
  <WaitTimeBetweenRetries>1</WaitTimeBetweenRetries>
  <SaveRetrySettingsToRegistry>false</SaveRetrySettingsToRegistry>
  <WaitForSharenames>false</WaitForSharenames>
  <ListOnly>true</ListOnly>
  <ReportExtraFiles>false</ReportExtraFiles>
  <VerboseOutput>false</VerboseOutput>
  <IncludeSourceFileTimestamp>false</IncludeSourceFileTimestamp>
  <IncludeFullPathName>false</IncludeFullPathName>
  <PrintByteSizes>false</PrintByteSizes>
  <NoFileSizeLog>false</NoFileSizeLog>
  <NoFileClassLog>false</NoFileClassLog>
  <NoFileNameLog>false</NoFileNameLog>
  <NoDirListLog>false</NoDirListLog>
  <NoProgress>false</NoProgress>
  <ShowEstTimeOfArrival>false</ShowEstTimeOfArrival>
  <UnicodeOutputLogFilePath>C:\profile-copy.log</UnicodeOutputLogFilePath>
  <NoJobHeader>false</NoJobHeader>
  <NoJobSummary>false</NoJobSummary>
</ChoAppSettings>
- Install ChoEazyCopy
- Create a new file called copy-user-profile.ezy
- Copy and paste the code above into it and save
- Run ChoEazyCopy as an administrator
- Open copy-user-profile.ezy with ChoEazyCopy
- Add any User Profile folders to the folder exclusion list that you do not want to copy. The list that is in the example code above covers most default/system folders present but do not forget to check for other hidden and system folders aswell.
- Remove the /L (ListOnly) switch if you want to run this live (optional)
- Save any changes.
- Run the command by clicking the play arrow at the top.
Switches Explained
- "C:\Users" (Source) - Files/Folders Source
- "D:\Users" (Target) - Files/Folders Target
- *.* (Files) - Which files to select. Select all files
- /DCOPY:T (CopyDirTimestamp) - Preserve folder timestamps
- /COPYALL (CopyFilesWithFileInfo) - Copy files with their attributes
- /SEC (CopyFilesWith Security) - Keeps file ACL permissions as they are in the source
- /E (CopySubDirectories) - Copy all sub directories including empty ones
- /SL (CopySymbolicLinks) - Copy symbolicLinks versus the target. Not sure this does anything didnt harm my profile when I moved it.
- /ZB (FallbackCopyFilesMode) - I think this is volume shadow copy and is used when a file is locked and a 'Access is Denied' error is returned.
- /MT:8 (MultithreadCopy) - Do multi-threaded copies with n threads. Makes copying quicker.
- /LEV:2 (OnlyCopyNLevels) - Only copy folders to 1 level below (i.e. C:\Users)
- /XD (ExcludeDirsWithGivenNames) - Exclude all folders in C:\Users except the profile(s) that you want to move. With RoboCopy you select all and then exclude what you dont want.
- UNILOG:"C:\profile-copy.log" (UnicodeOutputLogFilePath) - If you dont use this Eazy Copy will crash.
- /R:1 (NoOfRetries) - As default the retry limit is 1 Million which is daft so this switch will limit it to 1. In Eazy Copy if you set this to zero the switch does not get added.
- /W:1 (WaitTimeBtweenRetries) - Default time is 30 seconds which is far to long so this sets it to 1 second. In Eazy Copy if you set this to zero the switch does not get added.
- /L (ListOnly) - This switch is a test switch which prevents copying, timestamp changes or deleting of any files and is present to prevent accedentally running this command with setting things up properly. Remove this when you want to perform this command for real.
4. Change the Registry to reflect the Profile's new location
Once the profile has been moved the registry needs some changes making to it so things work properly. This needs to be done for each profile moved.
Step 1 - Change Profile Image Path
- You should be logged in with the temporary Administrator account
- Create a System Restore Point (optional)
- Open Regedit as an Administrator
- Change the Profile Image Path from C:\Users\{username} to D:\Users\{username} in the registry key below. Each profile with have a slightly different parent folder in the registry for obvious reasons. It will not look exactly like it does below.
HKLM\SOFTWARE\Microsoft\Windows NT\CurrentVersion\ProfileList\S-1-5-xx-xxxxxxxxxx-xxxxxxxxxx-xxxx\ProfileImagePath
- Change the profile state from 0 to 1 in the registry key below. The base type should stay as Hexidecimal. I do not know why you need to do this but this YouTube video tells you to.
HKLM\SOFTWARE\Microsoft\Windows NT\CurrentVersion\ProfileList\S-1-5-xx-xxxxxxxxxx-xxxxxxxxxx-xxxx\State
- Rename the orginal profile folders i.e. C:\Users\{username} to C:\Users\{username}.bak. This prevents accidental use and that only the new profile will be used. You can delete it at a later date as it should no longer be needed or used.
Once you have done all of the above for each of the moved profiles, reboot the computer.
Step 2 - Change the static references in the registry
We need to change all references of C:\Users\{username} to D:\Users\{username} - this is also a good reason for keeping the same folder format but on the D: drive as it is slightly easier to change the locations in the registry.
For this we will use a Registry editor that will allow us to do a text search and replace within the registry. Install this via your temporary administrator account.
This procedure needs to be done for each profile.
- Log into the moved profile
- Create a System Restore Point (optional)
- Pick Your REG software
- RegCool
- Open RegCool as an Administrator
- Search the registry for C:\Users\{username} in Values, Data and all HKEY hives and I did NOT match case.
- In the results window at the bottom select all of the results
- right click on the highlighted results and click replace
- You should now replace C:\Users\{username} with D:\Users\{username}
- Make sure you double check the strings are correct as this cannot be undone
- Click start/replace
- When I did this I found some registry keys would cause the software to crash. In this case just start the software again, do the same search but instead of selecting the whole block of results, select half and keep going until the are all done.
- Some keys will not change or if they do they just change back again. they must be protected somehow. But it does not harm to leave them.
- These are the keys I had issue with:
- [HKEY_LOCAL_MACHINE\SOFTWARE\4Developers\RCrawler\History]
- [HKEY_LOCAL_MACHINE\SOFTWARE\Microsoft\Windows Defender\Exclusions\Paths]
- [HKEY_LOCAL_MACHINE\SYSTEM\CurrentControlSet\Control\Session Manager\AppCompatCache]
- RegEditX Pro
- Open RegEditX Pro as an Administrator
- In the menu at the top select (RegEditX-->RegEditX Crawler)
- Search the registry for C:\Users\{username} in Values, Data and all HKEY hives and I did NOT match case.
- Highlight all of the results
- On the right click Replace
- You should now replace C:\Users\{username} with D:\Users\{username}
- Make sure you double check the strings are correct as this cannot be undone
- Do NOT confirm every replacement
- Click Start
- The program will appear to crash or lockup. It is still working. I think this is bug.
- RegCool
- Logout
NB: Some entries in the registry have the format C:\Users\USERNAM~1\ (old file format) you might want to change these but I suspect that this is fromm old buggy software I no longer have
Once you have done the process above for each moved account then you should reboot the computer.
5. Housekeeping
Now you have moved your profile you might need to do some of the follwoing to keep you computer running correctly
- Update AV exclusions in both your choosen AV and Windows Defender
6. Thats it Folks
All the changes have been made and hopefully you now have moved your profiles.
Known Issues
After I have finished moving my profile I noticed a couple of issues which might not always occur. These are easy enough to fix.
- Library Folders dont work - This could just be my PC but to fix this you should delete all of the libraies (files will be untouchjed) and then click recreate default
- Quick Access links might be come faulty - Delete/Unpin them and then re-add as required.
- Outlook PST references become broken causing error 0x8004010F. See my solution.
- ClassicShell menu layout is lost - If you have customised your start menu using classicshell and have spent ages arranging your menu, the arrangement will probably be lost. There might be a way to preserve this before moving profiles.
- Moving profiles to a non standard location can cause upgrade issues? - This might not be the case anymore in Windows 10 and might only have been an issue on older versions of windows because the profiles were moved wrong. Anything using Windows 8 is flaky and I think this is where most of the issues were caused by this.
There could be some other minor issues that occur because of the change of folder and file locations but should just be a case of changing settings in the various softwares.
Links
General
- How To Move A Windows User Profile Folder - YouTube - This uses Xcopy to move the User Profiles. This is not as complete as my tutorial.
- Moving User Profiles and Data in Windows 10 - Webinar - YouTube - Shows you how to use PC Mover and goes over USMT (Win10, Laplink PCmover and USMT).
- How to Move Your Windows 10 User Profile - Gives an overview about some methods to mvoe your profile. (Profile Relocator, Transwiz, PCmover)
- How to Backup / Restore / Transfer User Profile in Windows - YouTube - As a computer tech you have to backup and restore window user profile data on a daily basis, whether you have a corrupt windows user profile or you can boot your computer to backup your user profile data, well this video is for you, (Fab's AutoBackup).
- Don't move your Windows user profiles folder to another drive | ZDNet - I dont think this is the case, certainly with Windows 10.
- Create mandatory user profiles (Windows 10) | Microsoft Docs - Shows Copy To button
Registry Software
- RegEditX Pro - Extend Windows Registry Editor (REGEDIT). There is a 30 day evaluation copy available.
- Registry Replacer | CNET Download.com - Registry Replacer is a search-and-replace utility for the Windows Registry. It lets you search the contents of keys and key names for strings and replace them.
Microsoft User State Migration Tool (USMT) Software
- USMT GUI - Gui for MS User State Migration - This looks like a very comprehensive GUI for USMT. i.e. "Its a simple three-step procedure to backup a user profile and to restore the data and settings to another user profile /other AD"
- Migrate-WindowsUserProfile - Migrate Windows user profile to a new machine using Microsoft USMT with a PowerShell GUI.
Microsoft User State Migration Tool (USMT)
- Migrating User Profiles with the User State Migration Tool - Microsoft 70-680: 1.7 - YouTube
- SOLVED: Step By Step USMT Script To Migrate as Single User On Windows 10 - Up & Running Technologies Calgary - If you are replacing your Windows 10 hardware or just moving a user from one PC to another you can use User State Migration Tool (USMT).
- User State Migration Tool (USMT) Overview (Windows 10) | Microsoft Docs - You can use User State Migration Tool (USMT) 10.0 to streamline and simplify user state migration during large deployments of Windows operating systems. USMT captures user accounts, user files, operating system settings, and application settings, and then migrates them to a new Windows installation. You can use USMT for both PC replacement and PC refresh migrations.
- Migrate User Accounts (Windows 10) | Microsoft Docs - By default, all users are migrated. The only way to specify which users to include and exclude is on the command line by using the User options. You cannot specify users in the migration XML files or by using the Config.xml file.
3rd Party Transfer Software
- ForensiT Transwiz - Transwiz makes it easy to transfer your personal data and settings to a new computer.
- Easy Solutions to Copy and Migrate User Profile in Windows 10 - EaseUS - Using Windows Backup and EaseUS
- Laplink PCmover
RoboCopy GUI Software
- ChoEazyCopy - Simple and powerful GUI to Microsoft RoboCopy tool.
- Cinchoo - EazyCopy, yet another RoboCopy GUI - CodeProject - this is another of its home pages. GitHub is the primary though.
- Command Line GUI download | SourceForge.net - I think this replaces 'Better Robocopy Gui'.
- Better Robocopy GUI
- Add a Graphical User Interface (GUI) to the Microsoft Robocopy Command Line Tool | HowToGeek - Covers a few GUIs including RoboMirror.
- RoboMirror download | SourceForge.net - Very easy to use
- Free Utility: RichCopy, an Advanced Alternative to RoboCopy - this is old now but is linked to a lot.
RoboCopy
- windows server 2008 r2 - Using robocopy and excluding multiple directories - Super User - Apparently, including trailing slashes keeps robocopy from parsing the list of directories correctly
- /L (ListOnly) is like a test run
- Microsoft DOS robocopy command | Computer Hope
- ROBOCOPY hides destination Directory - In my case it was caused by the folder being transfered being tagged as a system folder so when it was nested in it's new parent folder that folder then became hidden.
- [SOLVED] Move shared folders, retain file & share permissions using Robocopy on Windows Server
- Robocopy – Copying files with file permissions (ACLs) and Importing file permissions / security information | Information Systems Security - This is a very simple method but use with caution because you could delete files that you wanted to keep. I have included this for reference only.
- Windows: Ignore errors with Xcopy and RoboCopy | Randy's Blog - To copy entire directory structures as quickly as possible and ignore all disk errors (useful in data recovery) either of the following commands should work with robocopy being the quickest (if you’ve got Vista/7 or XP with the XP Resource Kit installed). Both commands use source -> destination path order.
Xcopy
- HOW TO: Copy a Folder to Another Folder and Retain its Permissions | Microsoft - This is information about using xcopy.
- How to use xcopy to select specific folders(Not Files) within another folder - Stack Overflow
- Xcopy command : syntax and examples
- Using xcopy to copy files and folders and keeping the ntfs permissions - Geeks Hangout
- cmd - Xcopy Command excluding files and folders - Stack Overflow
Symbolic Links
- windows 7 - Can I use a Symbolic Link to 'move' C:Users to another drive? - Super User
- Using Symbolic Links to Save Space on Your SSD - This tutorial uses a software called Directory Linker which copys files and creates a symbolic link automatically.
- Move the Users Directory in Windows 7 - A tutorial showing you how to use Symbolic Links to move the Users Folder
SysPrep
- Move Users Folder Location in Windows 10 Installation & Upgrade Tutorials - A very indepth tutorial with videos on how to use Sysprep to move User profiles. The method described in this tutorial allows relocating Windows 10 main profile folder Users including all present and future user profiles and folders while installing Windows, before any user accounts are created, as well as later on an already installed system.
Managing Libraries
- How to move default Windows account folders to a second hard drive - YouTube
- Moving User Profile Folders in Windows 10 - YouTube
- How To Move User Profile Folders To Another Partition Without Symbolic Link | Next of Windows
- How to Enable Libraries in Windows 10 File Explorer
- File Explorer Libraries resetting on Wondows 10 - Microsoft Community - tells you how to restore the library defaults easily.
Quick Links
- How to Clean Up and Tame Quick Access in Windows 10 - This is a great tutorial on Quick Links.
- How to reset Quick Access folders to default? - Windows Central Forums - Gives the following solutions:
- In File Explorer go to the View tab then click Options. In the Privacy section click Clear (Clear File Explorer history).
- Run command prompt as admin and type the following command:
del %appdata%\microsoft\windows\recent\automaticdestinations\*
- Restore file to Windows 10 Quick Access - Microsoft Community
- Finally uncovered a way to restore a file to QuickAccess that was acceptable to me. If you go to view/options and clear history, removed files will return to QuickAccess. The negative is you've removed everything except pinned items from QuickAccess until you open them again and you have restored everything you have removed from showing up in QuickAcces
- Running SFC is pointless
NTFS Cut and Copy Permissions behaviour
- Permissions lost when copying/moving files and folders
- How permissions are handled when you copy and move files and folders | Microsoft
- Cut/paste file between folders no longer keep the original folder permissions - Super User
NTFS Extended Attributes
My EasyBlog 5 Notes
These are for those fiddly settings you can never find.
Settings
cron jobs
You need to setup a cron job for both EasyBlog and Komento because
- Emails are sent out via 'Send E-mails During Page Load' mechanism. This is slow and can cause issues with high traffic sites.
- This will move the email handling away from the normal running of the website and will not suffer timeouts or other issues related to emails.
- EasyBlog has a feature where it can autopost emails as articles from a defined mailbox. This feature will not work without a cron setup.
- The crons can handle a lot more emails than the page load method.
- Stackideas - In short, sending e-mails is a long process and it requires your server to communicate with the recipient's e-mail server. Sending one e-mail is perfectly fine but imagine sending it to 500 recipients because you have 500 subscribers. Two main issues for not utilizing cronjobs:
- The only way to dispatch e-mails is when someone accesses the component area (either EasyBlog or Komento). Imagine having 5000 pending e-mails and you do not have the sufficient traffic to these pages. Those e-mails would stuck in the queue.
- Even if you have sufficient traffic, it would cause delays when anyone accesses these pages because your mail server would need to communicate to the recipient's mail server.
Send E-mails During Page Load Location
Use this information to turn the feature off, if not already. This also where you can setup other notification options.
- EasyBlog (Settings-->Notifications-->General-->General Settings-->Send E-mails During Page Load) = off
- Komento (Settings-->Notifications-->General-->General-->Send E-mails On Page Load) = off
Official Documentation
Notification of the requirement to use cron
Currently the only notification that you need a cron job is if you visit the following pages. they also have a link to the official documentation for setting up a cron job.
- EasyBlog (Mail Activities-->Mail Activities)
- Komento (E-mails-->Email Activities)
Shared Hosts
remember that on shared hosts you will have limits on your email send and receive volume and the frequency that your cron can run.
These are a typical example of limitations on a well run server.
- cron
- Any client who schedules cron jobs in such a manner that jobs take more then half the time to complete before the next scheduled iteration, and more frequently then 10 minutes is abusing the cron system.
- Any automated processes that excessively consume resources and impact server stability may be disabled at our discretion by our technicians.
- Maximum email rate
- The maximum allowed email send rate is 350 messages per hour per domain (cPanel is irrelevant). Please keep in mind that each recipient counts as a separate message as it is being sent to a separate address. This should be the only limitation in place as far as outgoing messages.
Setup your cron to run every 10 minutes with a 50 emails max send. You could push it to 100 emails max send.
Toolbar
Disable Blog Header Title and Header Description
The settings to disable these are at
- (Settings-->Layout-->Toolbar-->General)
- Enable Headers Above Toolbar – set to no - This disables the global title at the top of easyblog (optional)
- Enable Headers Description Above Toolbar – set to no – This disables the global description at the top of easy blog (optional)
- (Settings-->Layout-->Toolbar-->Toolbar)
- Display Tags Link = off
- Display Bloggers Link = off
- Display Teamblog Link = off
- Enable Archives Link = off
Enable Automatic Approval of Posts
- (ACL-->Author 'Group'-->Compose-->Compose-->Allowed To Publish Post) = Yes
- Also you must add content-editor into the Author group (publisher will not inherit author settings for EasyBlog)
In EasyBlog user author settings
NB: EasyBlog retrieves the info from Joomla, not a separate database
- (Authors-->{username}-->Details)
- (Authors-->{username}-->Blog Settings)
- Blog Permalink – set to this something sensible, not the account username
Change the a blog post to userX
Assuming EasyBlog Composer
- (Posts-->Posts)
- Edit the requires Blog Post
- Edit the Author on the top right
- Select the userX account
- Update the post
Storage Paths
(Settings-->Media-->General-->Storage Paths)
I need to test my folder selection to see if it all works as expected.
Default:
- Article Images images/easyblog_articles/
- User media images/easyblog_images/
- Shared media images/easyblog_shared/
- User avatars images/easyblog_avatar/
- Category avatars images/easyblog_cavatar/
- Team avatars images/easyblog_tavatar/
Mine:
- Article Images images/blog/article-images/
- User media images/blog/user-media/
- Shared media images/blog/shared-media/
- User avatars images/blog/user-avatars/
- Category avatars images/blog/category-avatars/
- Team avatars images/blog/team-avatars/
This is much neater as all of the blog media is within one folder. I have many application installed in my Joomla website.
Themes
If you are using EasyBlog and Komento it is important to match the themes.
I like the following EasyBlog themes:
- bubbles
- x origami
- plain
- timeless
- wireframe
Kometo also has these themes:
- bubbles
- Wireframe
Questions and Answers
If easy blog has its own built in commenting system why do i need Komento ?
EasyBlog had its own commenting system, integrating with komento gives you more features given in the default easyblog comment.
- Instantly activate user interaction and get feedback from visitors to your site.
- Professionally control all incoming comments or spam in one easy centralized system.
- Migrate comments from EasyBlog and other comment extensions and have them display in Komento.
- Komento handles comments in K2, EasySocial, JomSocial, FlexiContent, ZOO, EasyBlog 3.5, VirtueMart, redSHOP, and more.
- Control certain activity that a particular user or user group can do in the comments area.
You could read more about it here --> Komento, by stackideas - Joomla Extension Directory
Do i need to use the inbuilt media manager?
You do not need to use media manager to upload your pictures, using your editor would work.
What are the benefits of using the inbuilt media manager?
The build in manager makes it easy for you to upload picture, it also automatically create thumbnails and full view and will come in handy when using lightbox. It also has additional features like pictures that you could share with others using the shared folder.
Can you recommend which comment system to use? i do not know if disqus is better because it is cloud based ?
You might need to check your requirements and what you will need for your blogs.
Why does Easyblog not use the Joomla template?
EasyBlog had themes which you could choose to better suite your site. We also have partners with template developer that supports easyblog
Link --> http://stackideas.com/partners
Will ever use the joomla template?
As for the Joomla template, the default theme that is included in EasyBlog was created to inherit most of the styling of your Joomla template but some of the elements are designed internally. For instance, the toolbar in EasyBlog, we have to design this on our own because there's no other Joomla template that is designing the toolbar :)
You can read this documentation link and see is it helpful for you? -> Template Overriding - Customizations - EasyBlog Documentation
Does Easyblog allows the use of joomla plugins
EasyBlog does trigger content plugins but whether or not it works with EasyBlog is another matter because some of these content plugins are explicitly configured to work with Joomla articles. We can't really tell you which plugin works and which plugin doesn't but if I recall correctly, allvideos plugin does work but EasyBlog has a built in video embed tool so not too sure if Allvideos is really necessary?
Where does the number come from of the folder my uploaded images are put it?
The number comes from the User ID
When i upload an image using your image manager, the manager uploads the image and puts it in a folder of that user, ie /easyblog_images/623/ is there anyway of turning this off because running a blog i do not want images all over the place. i want them like /images/blog/2014/09 etc.. no user number
There is also a shared folder in EasyBlog where they are stored in a shared folder . The shared folder does not categorize images into user id folders. However do take note that storing them in a shared folder also means that all authors on your site will be able to access them.
When inserting an image using your manager it uses an absolute image link ie http://www.mywebsite.com/images/easyblog_images/mypicture.jpg this is really bad, lets say i was developing on my test server and then moved it, none of the image links would then work. please can you tell me if you can turn this off as i do not understand why anyone would have this option on anyway.
The URL that is inserted into the blog post is actually dependent on your editor's configuration. If the editor that you are currently using is configured to use relative URLs, the url of the image will be relative because these WYSIWYG editors would format the urls accordingly.
This is only seems to work with JCE Editor. Does not work with None/TinyMCE/JCK
Other Notes
- SH404SEF - Remove the word easyblog from the URL
- Easyblog uses profiles + shared media, might be good just to use 'user media' like they want you to, this allows the easy implementation of team bloggin later and keeps all files assigned to 'your account'. It is easy to use the 'user media' whilst maintaining my url and media rules
Proprietary Software Licenses and EULA
Proprietary software is computer software for which the software's publisher or another person retains intellectual property rights—usually copyright of the source code,[1] but sometimes patent rights.[2]. A Proprietry
A license for such software maintains the vendors rights tot hat software and affords the end user the use of the software under certain conditions and are usually aggreed to in a End User License Agreement (EULA).
For further information see these articles from Wikipedia
Examples of Proprietary Licenses
I have come across these examples of licenses.
- RocketTheme Licenses - The RocketTheme Proprietary Use License (v1.3) and others. You should also look at their copyright notice for the site (link in the footer).
- License & Terms of Service - JoomlaWorks
- JoomlaWorks includes the following copyright notice in their code which points to this page.
/**
 * @version     3.0.x
 * @package     Simple Image Gallery Pro
 * @author      JoomlaWorks - http://www.joomlaworks.net
 * @copyright   Copyright (c) 2006 - 2014 JoomlaWorks Ltd. All rights reserved.
 * @license     http://www.joomlaworks.net/license
 */
- JoomlaWorks includes the following copyright notice in their code which points to this page.
- License | Artetics - This has really simple and easy to understand Proprietry Use License. There is also a DMCA statement.
Examples of Eula
- RSComments - Terms and Conditions
By checking this, you agree with the following:

1. To accept full responsibility for the comment that you submit.
2. To use this function only for lawful purposes.
3. Not to post defamatory, abusive, offensive, racist, sexist, threatening, vulgar, obscene, hateful or otherwise inappropriate comments, or to post comments which will constitute a criminal offense or give rise to civil liability.
4. Not to post or make available any material which is protected by copyright, trade mark or other proprietary right without the express permission of the owner of the copyright, trade mark or any other proprietary right.
5. To evaluate for yourself the accuracy of any opinion, advice or other content.
Debugging with Netbeans, Xdebug and Xampp in Windows
Getting Xdebug, Xampp and Netbeans to work together in Windows can be a tricky thing and I want to address that here. These instructions will get debugging working all on the same PC and IP.
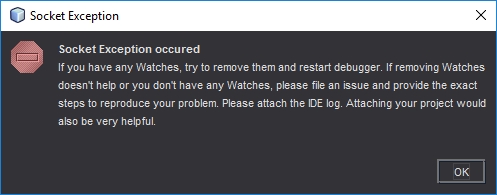
A symptom of a PC that is not setup correctly is this Netbeans Socket Exception error. You get this error when Netbeans cannot communicate with Xdebug and is usually because you are running them both on the same computer and therefore IP so the traffic routing is getting mixed up. It could also because something else is running on the debug port you have selected.
Tutorials
- How to Install NetBeans for Java Programming on Windows, macOS and Ubuntu - Basic @@@@@@ Tutorial for the beginners
Troubleshooting
- Truncated Values
- debugging - Shortened value in Netbeans PHP debugger - Stack Overflow
xdebug.var_display_max_data=16384

// Source - https://stackoverflow.com/a/40608738
// Posted by matt
// Retrieved 2026-05-06, License - CC BY-SA 3.0

netbeans_default_options="-J-client -J-Xss2m -J-Xms32m -J-Dapple.laf.useScreenMenuBar=true -J-Dapple.awt.graphics.UseQuartz=true -J-Dsun.java2d.noddraw=true -J-Dsun.java2d.dpiaware=true -J-Dsun.zip.disableMemoryMapping=true -J-Dnb.php.debugger.full.values=true"
- php - How to view value of long strings using NetBeans and x-debug? - Stack Overflow
- For this goto to
Options -> PHP -> Debuggingtab in netbeans and setMaximum Data Lengthto a large number like 100000 (I think -1 should also work here). - Setting
xdebug.var_display_max_data to -1seems to have fixed the problem. Hope this helps someone else.
- For this goto to
- debugging - Shortened value in Netbeans PHP debugger - Stack Overflow
These Settings Work
These settings are what I am using now and work well.
Windows
- You need to set a static IP on your ethernet adapter (or wifi)
php.ini
- Use your static IP to set xdebug.remote_host. Setting a static IP seems to fix most connecion issues. xdebug does not like 127.0.0.1 it works sometimes but can be problematic.
- Swapping xdebug.remote_port to 9001 helped when xdebug just stopped working. The default is 9000.
- Disable output_buffering in your php.ini by altering/uncommenting the following line
output_buffering = Off
- Add the following code to the end of your php.ini file.
[XDebug]

zend_extension="D:\websites\php\ext\php_xdebug.dll"
;zend_extension="D:\websites\php\ext\php_xdebug-2.5.4-5.6-vc11.dll"
xdebug.idekey = netbeans-xdebug
xdebug.profiler_append = 0
xdebug.profiler_enable = 0
xdebug.profiler_enable_trigger = 0
xdebug.profiler_output_dir = "d:\websites\tmp\xdebug"
xdebug.profiler_output_name = "cachegrind.out.%t-%s"
xdebug.remote_enable = 1
xdebug.remote_autostart = 0
xdebug.remote_connect_back = 0
xdebug.remote_host = "192.168.1.160"
xdebug.remote_port = 9001
xdebug.remote_handler = "dbgp"
xdebug.remote_mode = req
xdebug.remote_log = "d:\websites\tmp\xdebug\xdebug_remote.log"
xdebug.show_local_vars = 9
xdebug.trace_output_dir = "d:\websites\tmp"

;xdebug.show_exception_trace = 1
Minimum working settings
These are the minimum settings I have found to work but are here only for reference.
[XDebug]

;zend_extension="D:\websites\php\ext\php_xdebug.dll"
zend_extension="D:\websites\php\ext\php_xdebug-2.5.4-5.6-vc11.dll"
xdebug.remote_enable=1
xdebug.remote_handler=dbgp
xdebug.remote_mode=req
xdebug.remote_host=192.168.1.160
xdebug.remote_port=9001
xdebug.idekey=netbeans-xdebug
Netbeans
(Tools --> Options --> PHP --> Debugging)
- Debugger Port: 9001
- Session ID: netbeans-xdebug
- Maximum Data Length: 2048 - I think this is the default
- Stop at First Line: off
- Watches and Balloon Evaluation: All off
- Show Requested URLs: off
- Show Debugger Console: On
Browser
You need to send a trigger to Xdebug via your browser to trigger the debugger. You can send the trigger via GET/POST but you need a plugin for this.
- Firefox
- The easiest Xdebug – Add-ons for Firefox
- There are many others....
- Google
- Xdebug helper - Chrome Web Store
- There are many others....
Getting debugger to work
- Project Properties --> Run Configuration --> Advanced --> Do Not Open Web Browser (not needed to enable debugging but it prevent the browser opening everytime you start debug)
- Project Properties --> Run Configuration --> Advanced --> Path Mapping (not sure what this does, but if debugging does not work then this needs adding)
### Example
Server Path: D:\websites\htdocs\platforms\Joomla4
Project Path: D:\websites\htdocs\platforms\Joomla4
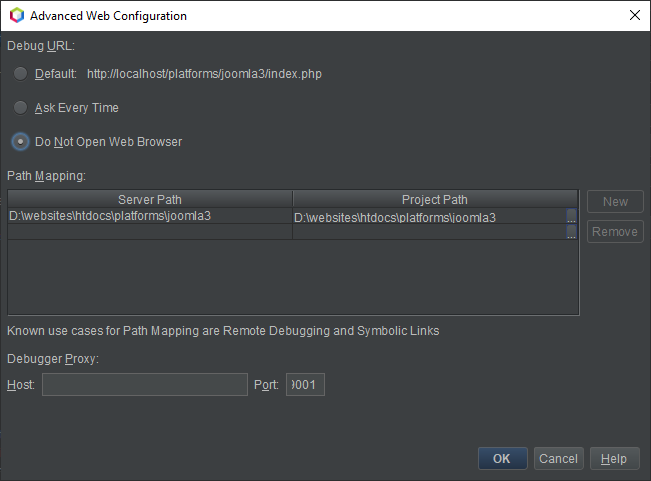
- use a browser extension to add the required POST variable. Adding GET variable is messy. (you can use special xdebug calls in your code, see xdebug website for details)
- the xdebug settings in the php.ini file
- use your real local IP i.e. 192.168.1.15 , NOT `localhost` or 127.0.0.1 - these do not always route correctly on my Windows 10 PC with Xampp
{add my example ini file}
Test Debugger is working
Now you have configured your system as above you need to test it before you can rely on it.
- Set a breakpoint in Netbeans on the index.php (or a PHP file that is parsed) in your software project, preferably one before the content is displayed. (or you can enable the ‘Stop at First Line’ option in the Netbeans config
- Start debugging in Netbeans
- Open your project in a chrome browser with the xdebug helper plugin enabled
- If the browser and Netbeans stop at the breakpoint, everything is working
Diagnostics / Troubleshooting
If xdebug will not stop at breakpoints, try
- try putting breakpoints on different items. Xdebug might not always be able to stop on certain items. Add them in your self if needed ie $chimp = 13;
- a different version of xdebug DLL, (ie different VC).
- debugging some other code. i.e. QWcrm works but Joomla did not. I then retried joomla and debugging joomla worked (however i did it after doing the item below)
- remove all other xdebug entry defintions in php.ini so you just have the one in that you think should work, save, restart and retry.
Things that Might help
If xdebug does not work straight away then trying these things might help.
- could disabling ipv6 in the network adapter help? because xampp has issues with ipv6
- xdebug might fail if you have multiple version of xampp running
- Localhost is mapping to ::1 and not 127.0.0.1
- Not all lines can act as breakpoints, these are displayed as cracked breakpoint markers in Netbeans. These breakpoints will not work because Netbeans does not like them. To fix this yoou should choose another breakpoint.
- Run the Xdebug on another server which has another IP
- Get the latest dll from xdebug site (i.e. php_xdebug-2.5.4-5.6-vc11.dll)
- Comment out any zend extensions
- Some people use port 9001 when they have issues with 9000.
Test the port is not already in use - dbgtest.php
This code is taken from 21.4.2 How to Set Up XDebug | Oracle
<?php
$address = '127.0.0.1';
$port = '9000';
$sock = socket_create(AF_INET, SOCK_STREAM, 0);
socket_bind($sock, $address, $port) or die();
socket_listen($sock);
$client = socket_accept($sock);
echo "Connection established: $client";
socket_close($client);
socket_close($sock);
?>
However I found this slightly better version from dbgtest.php · GitHub
<?php
// adapted from https://blogs.oracle.com/netbeansphp/entry/howto_check_xdebug_installation
$address = $argv[1] ?: '127.0.0.1';
$port = '9000';
$sock = socket_create(AF_INET, SOCK_STREAM, 0);
socket_bind($sock, $address, $port) or die();
echo "Listening to $address:$port\n";
socket_listen($sock);
$client = socket_accept($sock);
echo "Connection established: $client\n";
socket_close($client);
socket_close($sock);
- Create a php file with the code above called dbgtest.php and put it in the htdocs folder of your xampp server
- Change the port to 9001 if that is the port number you are using/diagnosing
- Enable sockets - extension=php_sockets.dll
- only be need for the test script
- You enable this by uncommenting the appropriate line in the php.ini
- if you do not enable this you will get this error
Call to undefined function socket_create()
- Close Netbeans if that is running.
- Restart Xampp
- Run the script
If there is something running on this socket you will get an error as shown below. This shows that some other process is using the port 9000.
Warning: socket_bind(): unable to bind address [10048]: Only one usage of each socket address (protocol/network address/port) is normally permitted. in D:\websites\htdocs\dbgtest.php on line 5
Workarounds
These are a few workarounds I tried and might work for you. These are not designed to be a permanent fix.
Method 1
- Make sure netbeans and xampp are not running
- Put the basic xdebug settings in php.ini
- Enable extension=php_sockets.dll in php.ini
- Run xampp
- Put a copy of the oracle script in your Webroot and run it. This causes xampp to open socket on 9000
- Now open and run NetBeans debugging
* I am not sure if you need to do the IP fix aswell for this to work. It is all caused by routing issues on the loopback system of the PC. Or sockets might be needed.
Method 2
- Turn of netbeans debugging (leave netbeans open)
- Run the dbgtest.php to allow xampp/xdebug to grab the port
- Now start netbeans debugging
Method 3 - (if working and then stops for no reason)
- Close Netbeans, Xampp and browsers
- Restart them all
Clickable Links for Xdebug Trace Errors
This is so when you get parsing errors and Xdebug shows those errors in the browser, you can click on the link to open up Netbeans at the appropriate file and line number.
Files
These files are required to make this function work.
netbeans.bat
:: Useful Sites
:: https://quantumwarp.com/kb/articles/72-xampp/928-debugging-with-netbeans-xdebug-and-xampp-in-windows
:: https://xdebug.org/docs/all_settings#file_link_format

:: Disable onscreen text
@echo off

:: This allows variable replacements
:: Cause each variable to be expanded at execution time rather than at parse time.
:: https://quantumwarp.com/kb/articles/10-windows-family/988-replace-a-text-string-in-a-windows-batch-file
:: https://learn.microsoft.com/en-us/windows-server/administration/windows-commands/setlocal
setlocal EnableExtensions EnableDelayedExpansion

:: Replace netbeans:// with the full program path
set NETBEANS=%1

:: This holds the open command defined in xdebug/xampp
set FILE=%~2

:: Convert '%5C' --> '\'
:: This requires EnableDelayedExpansion
:: We use the !! because of the % special character
:: Cycles once but does not parse variables and only removes one of the percent signs
:: You can use ENDLOCAL to stop this looping, but we dont need to
SET FILE=!FILE:%%5C=\!

:: the ~19 appends the page number on. This just assumes there are 18 or less other variables
%NETBEANS% --nosplash --console suppress --open "%FILE:~19%"

:: `nircmd` is a utility that does various computer related commands
:: nircmd win activate process netbeans.exe

:: Dont Close the Window after running - useful for debugging
:: cmd /k
- This batch file accepts the link from the stack traces and parses the variables.
netbeans_protocol.reg
Windows Registry Editor Version 5.00

[HKEY_CLASSES_ROOT\netbeans]
"URL Protocol"=""
@="URL:Netbeans Protocol"

[HKEY_CLASSES_ROOT\netbeans\DefaultIcon]
@="\"C:\\Program Files\\NetBeans-12.6\\netbeans\\bin\\netbeans64.exe,1\""

[HKEY_CLASSES_ROOT\netbeans\shell]

[HKEY_CLASSES_ROOT\netbeans\shell\open]

[HKEY_CLASSES_ROOT\netbeans\shell\open\command]
@="\"C:\\Windows\\netbeans.bat\" \"C:\\Program Files\\NetBeans-12.6\\netbeans\\bin\\netbeans64.exe\" \"%1\""
- This registry file causes
netbeans.batto open Netbeans. - It configures the shell command and path to be run when
netbeans.batis executed.
Instructions
- Place the
netbeans.batbatch file inC:\Windows- I put it here because I know this folder is in my
PATH.
- I put it here because I know this folder is in my
- Update the
netbeans_protocol.regto your current version of Netbeans and make sure you select the correct 32/64-bit executable.ie: "C:\Program Files\NetBeans-12.6\netbeans\bin\netbeans64.exe"
- Run
netbeans_protocol.regto apply to the registry - In
php.ini, configure or set the following:xdebug.file_link_format = "netbeans://open/?f=%f:%l"
when xdebug wiil not debug inside a large file
- Issue
- xdebug is working but when you get to a large class, Xdebug stops and this is caused by Netbeans not opening a large file
- Set a breakpoint just before it calls the class
- an you can manually advanced into the class and when you do you get a warning from Netbeans that opening the file is so large it will cause stability issues
- but you click yes and it is fine after clicking yes to open it.
- Diagnostics
- Once in the file, advance manually until you break it. This will help find what is causing the issue. You can also add breakpoints at various parts in the afflicted file to advnce quicker
- Solutions
- Reduce your class size
- Find the setting in Netbeans where you can allow files over a certain size to open, make this bigger
- If you couldn't reduce your class size try to add this in your
\NetBeans\harness\etc\app.confdefault_options="-J-Xms24m -J-Xmx1024m"
- I have increased the -J-Xmx memory parameter to 1G both in netbeans.config as well as in the project properties file.
- If you couldn't reduce your class size try to add this in your
- Pre open the file
- Start Netbeans with command line switches that allow larger files
Links
- java - NetBeans is Showing Error file could cause outofmemoryerror netbeans - Stack Overflow
opening this file could cause outofmemoryerror netbeans
default_options="-J-Xms24m -J-Xmx1024m"
- NetBeans Tuning JVM switches for performance - netbeans.org | WayBackMachine - JVMs offer a variety of standard and non-standard switches that tune memory allocation and garbage collection behavior. Some of these settings can benefit NetBeans' performance.
- Conf file locations
C:\Program Files\NetBeans-11.1\netbeans\etc\netbeans.conf
C:\Program Files\NetBeans-11.1\netbeans\harness\etc\app.conf
app.confandnetbeans.confseem to be the same. I would recommend editing the netbeans.conf as this is where there are some default options already set
- java - increasing heap size in netbeans.conf file - Stack Overflow
- JVM command line switvchs (those that start with J- are commandline switches for thdirectly to the JVM)
- FaqStartupParameters - NetBeans Wiki | WayBackMachine
-J-Xss2m
- making this larger seems to let netbeans open a lot quicker
- it makes no difference to the messaage prompt
- java | Oracle documentation - This document contains reference information for the tools that are installed with Java Development Kit (JDK).
- Configuring the Default JVM and Java Arguments - Oracle Fusion Middleware Installation Guide for Oracle Unified Directory - This guide describes the installation process for Oracle Unified Directory and the components that are required to manage it.
- JVM command-line options | setgetweb.com
- Use these options to configure your JVM. The options prefixed with -X are nonstandard.
-XssSet the maximum stack size for Java threads.
- Options --> Debugging --> maxium data length: 2048000 = about 2gb = changes nothing
File too big warning
- Background
- Bug 98701 - Allow to open very big files? | ASF Bugzilla
- 'The user can choose' to ignore the warning and open the document in Full editor mode at their own risk (Thankfully we can already achieve this by setting a system property '-J-Dorg.openide.text.big.file.size=25', Personally I currently use 25mb to reduce the occurrence of this issue).
- Bug 98701 - Allow to open very big files? | ASF Bugzilla
- Cause
- The 'big file size' is hardcoded in netbeans to 1MB.
- This is handled in the file D:\netbeans-master\platform\openide.loaders\src\org\openide\text\DataEditorSupport.java : Line 849 - 870
- Solution
- it is now possible to override this size with the option "org.openide.text.big.file.size". This is an integer and is MB.
'-J-Dorg.openide.text.big.file.size=5'--> will set the large file size to 5MB - This is a system property. should not matter beginning or end, but does work at end- add this to C:\Program Files\NetBeans-11.1\netbeans\etc\netbeans.conf (this will affect all projects)
- Additional
warnedFiles- Holds the files the user has already accepted, where is this list? add this to my article, someone might answer. i cant.- is it stored in the project but as a binary thing, maybw a hash
- 1,029KB is the size of the mpdf.php file
XDebug session stuck on curl_exec call
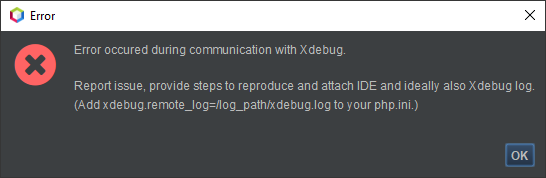
- Issue
- When debugging, your xdebug craps out when you hits curl_exec($ch)
- Cause
- You have
xdebug.remote_autostart = On
- You have
- Solution
- Set to
xdebug.remote_autostart = Off
- Set to
- Links
Links
array_walk() - Working with an anonymous function
This code is incredibly useful for going through an array and applying changes to the individual values without having to create a specific loop to perfom this action. In this example all apostrophes are escaped.
// Walk through the array and escape all apostophes (anonymous function)
array_walk($merged_config, function(&$value, &$key) {
    $value = str_replace("'", "\\'", $value);
});
this also works, without the &$key
// Walk through the array and escape all apostophes (anonymous function)
array_walk($merged_config, function(&$value) {
    $value = str_replace("'", "\\'", $value);
});
keep the '&' it is important. This creates a reference to the object in memory.
Change a browsers language, locale and HTTP_ACCEPT_LANGUAGE header
When testing the translation system on QWcrm I needed to try different locales (languages) to see if the software actually worked how it should. The following are ways to change the HTTP_ACCEPT_LANGUAGE header that the browser sends to the webhost with its request.
FireFox
This will also fix the issue where Firefox was sending en-US instead of en-GB
Option 1 - Change the browser system settings
- Goto (Tools menu --> Settings --> Content --> Languages)
- Add English/United Kingdom [en-gb]
- (optional) remove the other version of english. I do not know if this would cause issues so i have left them
Option 2 - re install
You can also just install Firefox with the correct locale.
Option 3 - Plugins
Using a plugin will allow you to easily change the settings on a temporary basis.
Chrome
Option 1 - Change the browser system settings
- In the address bar type chrome://settings/ or click the 3 balls button-->settings
- Open advanced section at the bottom
- Goto languages
- Install 'English (United Kingdom)' language
- with 'English (United Kingdom)':
- move to the top so it is first in the order of preference
- set 'Display Google Chrome in this language'
- set it as the language for spell checking
- (optional) remove the other version of english. I do not know if this would cause issues so i have left them