Items filtered by date: December 2015
My Wall Mounted Network Cabinet
There are 2 ways to mount this cabinet to a wall and then the fixing method depends on the type of substrate you are attaching too (BRick/Concrete/Drywall/Plasterboard)
Both methods require the use of some sort of Anchor Bolt........ get proper name
In the box 4 are included but it is unclear which method they are suitable for.
Method 1 - Mounting plate
Pros
- Easier to mount because you place and attach the mounting plate without the bulk of the cabinet
- Allows easy removal of the cabinet by just undoing to non-load bearing screws.
Cons
- I feel that over time if the cabinet is heavy, that this will eventually pull the mountings out or damage the drywall because the cabinet will always be pulling on an angle rather than straight down.
Method 2 - Large Bolt Holes
Pros
- Will hold heavy weight without fear of the bolts coming out over time for the Drywall failing
- Because you are using 4 holes the weight is more evenly spread and there is a modicum of cantilever effect happening, to a different extent depending on the substrate being attached too.
- The holes might be set at an industry spacing so could allow for easy replacement of the cabinet.
Cons
- Harder to install
My Citizen CLP-521 Thermal Printer Notes
These are a collection of notes to help me use my Citizen CLP-521 Thermal Printer
The first label printed after power on is always corrupt
This issue has been plaguing me for a while and is shown in the image below:

Whenever I turn the printer on, the first label I print is always corrupt and has cost me a fair few labels.
Cause
- Using Windows 10 and the USB connection on the printer
- It most likely is a speed issue of the USB driver.
- This printer might only like USB 1.1
- The reason the first label gets corrupted, is the data is sent to quick over USB 2.0, but the subsequent communications over USB are clocked down to USB 1.1
- It could be an issue with the Seagull driver itself, but this is a legacy printer so this issue is unlikely to get fixed in the driver.
Notes
- You could try a better USB cable
Solution
- Make sure your Windows OS is up to date.
- Download and install the latest drivers for your printer (completely uninstalling might be better)
- Optionally, factory reset your printer and recalibrate you label sensor
- Factory reset did not seem to make any difference for me, but will definitely get rid of bad settings.
- Connect you printer via one of the following methods
- Parallel Port network print server such as the HP JetDirect Ex Plus (J2591A) Print Server. Configuration instructions can be found here and I have used this particular print server with the CLP-521 so I know it works.
- A real Parallel port
- COM port - I have not tested this, but I would guess it will be very slow.
Bartender prints first label blank after power down on Citizen CLP521
These solutions have only be tested using standard labels with the transparency sensor
Solution 1 - Correctly position the label before the sensor
Before powering on the printer, load the labels as shown below. You are going to position the head of the first label just before the paper sensor, but not over the sensor. This allows the printer to find the front of the first label. If you have too much space on the roll before the first label, this method will not work and the first label will probably be discarded. If the label is actually over the sensor, this will cause the first label to be discarded.
![]()
![]()
![]()
Solution 2 - Run a dummy single label through first
This was my first solution I figured out but might have relevance for further fixes.
Keep a single label on its backing paper. This backing paper should be long enough to be loaded into the printer with the label being towards the end of the paper and can be positioned before the paper sensor.
- Load the single label into the printer before the sensor.
- Hit the feed button
- The label should be loaded into the correct position.
- Print your label and one of 2 things will now happen:
- The label will print
- A blank label will print
- The label was expelled out the front and the feed continued until the backing paper was out as-well
- A beep and print error was showing indicating paper out
- Put your single label paper to one side. You might need to use this in the future as printer power downs.
- Load your main roll of labels so the first label is behind the label sensor
- Press STOP to cancel beeping
- Press FEED to load the label or just hit print
- The will feed the label correctly and your labels will now print as normal.
Notes
- Bartender prints first label blank after power down on Citizen CLP521 – BarTender Support Portal
- Hello, on Citizen CLP521 Bartender prints first label blank after power down. As I understand the printer checks where the start of the label is, but can't this be turned off if I never remove / change paper ?
- I believe that will be the printer itself trying to find the correct start of print position. Not sure on the Citizen but on some devices you can disable this via a front panel option but then this can cause the first label to be printed incorrectly as it starts part way through the label and only looks for the gap/mark after it has printed the first label.
- I would suggest when you power up or reload the paper that you feed a label first to make sure the device is in the correct position to start printing.
- Dirty paper sensor - This might causes issues
- Do i need set on the printer the label size? Can this be causing an issue?
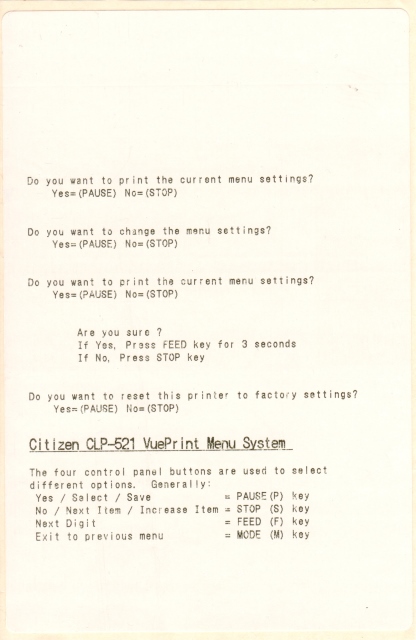
Reset Printer to factory defaults
When following these steps, messages will be printed so make sure you have paper in the printer.
- When turning the printer on press and hold the MODE/REPEAT button.
- Press PAUSE
- Press and hold the FEED button for 3 secs.
- Press STOP
- Press STOP
- Press STOP
This is an image of the printed messages you should expect:
You will now need to calibrate your label sensor.
Sensor Adjustment
This process allows you to swap between the reflective and transparency sensors. This process is covered in the manual (Page 34) for both types of mode but we will configure for standard sticky labels (i.e. transparency mode)
- Enter sensor adjustment mode 3 buttons
- Turn on the power while pushing the PAUSE key, FEED key and STOP key simultaneously.
- Set the sensor mode (Transparent <--> Reflective)
- For this we will enable the transparent sensor
- Transparent sensor is the default
- See page 34
- To switch from transparent to reflective sensor, ensure the CONDITION LED is lit then hold down the MODE/REPEAT key and then press the STOP key.
- Each time you press the STOP key, you switch back and forth between the two sensor types.
- If the transparent sensor is selected, the PRINT LED lights up and the buzzer sounds once. If the reflective sensor is selected, the PRINT LED flashes slowly and the buzzer sounds twice.
- Make sure top and bottom sensors align
- Install the label paper roll but with the with the labels removed at the beginning so the print sensor can see through the paper. It cannot see through labels.
- Hold down MODE/REPEAT and press PAUSE and release
- If successful, the PRINT LED and CONDITION LED return to their original status.
- Press STOP to exit out of this sensor adjustment mode.
LabelPrinterUtility
If I could get this utility to work with the CLP-521 then I could configure everything from a proper Windows computer instead of using printouts and wasting a lot of paper.
- This use to be called BarcodePrinterUtility.
- Also the last version of this named utility (barcodeprinterutility1202.exe) worked just the same, so this older version made no difference to compatibility.
- Use the Printer Model: CL-S5xx
- This does not fully work with my printer in Windows 10. It might work better in Windows 7.
- Only the Receive 'INFORMATION' option seems to work
- This is good for setting up the label sensor, has pictures as-well
Label Settings
These are some examples of the wheel settings for some label types
- Small White
- Thickness (Vertical Wheel): 1
- Width (Horizontal Wheel): 5
- Settings in Seagull Driver
- Name: Small Labels
- Type: Die-Cut Labels
- Label Size: Width:73.0mm, Height:51.0mm
- Exposed Liner Widths: Left:2.0mm, Right:2.0mm
- This label Manufacturer said they were 76mmx50mm Direct Thermal Labels and the same size as Datamax 420069. (2" x 3")
- This label is almost the same as the Datamax 420069, but the label is a bit smaller on the width. The label backing is 3" across.
- The Datamax Labels has been renamed to the Datamax-O'Neil Labels.
- This actual label is 2" x 2.87"
- 6x4
- Thickness (Vertical Wheel): 1
- Width (Horizontal Wheel): 9
- Media thickness from the manual (page 42)
Media Thickness
Dial Position          Suggested media type
0                      Direct thermal media (thin media)
1                      Standard Label media, Direct thermal media
3-5                    Thicker backing paper labels
6-9                    Cards, tags, thicker media stock.

* These values are guidelines. The exact media being used must be matched with the correct media thickness adjustment position.

- When shipped from the factory, it is set at dial 1.
- The offset adjustment varies according to the thickness and the hardness of the media.
NB: The closes the head is to the labels the more wear is likely and the life of the head is reduced.
Misc
- Downloads
- Downloads for the Citizen CLP-521 | CITIZEN SYSTEMS JAPAN CO.,LTD. - Here, you can download Official User's Manuals, Drivers, Utilities, SDKs and more. The driver here is an old Seagull one.
- Citizen CLP-521 Printer Drivers by Seagull Scientific
- Citizen CLP-521 Windows printer drivers by Seagull Scientific make it easy to print labels, cards and more from any Windows program, including our BarTender software.
- These will always be the latest drivers
- Download Utility | CITIZEN SYSTEMS JAPAN CO.,LTD. - Download LabelPrinterUtility and other utilities here. I have used a cached version so the downloads will appear.
- barcodeprinterutility1202.exe File Download & Fix For All Windows OS | pconlife.com - This is an old version of LabelPrinterUtility and is here for reference only.
- Citizen CLP-521 : Printer User Manual | Manual Shelf - Find and download user guides and product manuals
- Citizen CL-S521 User Manual | ManualsLib - Alternative download location for the manual.
- Settings
- Setting the following will make graphics better (Printing Preferences --> Graphics --> Dithering: Ordered)
- Replacement Guide
- CLP-521 --> CLS-521
- CL-S521 | Citizen Systems - The successor of the CLP-521
- Errors
- How To Diagnose Configuration Issues with Citizen label printers | citizensystems | YouTube
- Producing a diagnostic self-test from and configuration print from our label printers including CL-S521, 621, CL-S700, CL-E720, CL-S6621 and CL-S400.
- how to do a self test print.
- When trying to print, the CONDITION and ERROR lights keep coming on.
- When trying to print and condiition and error lights keep coming on | fixya
- When trying to print, CONDITION and ERROR lights keep coming on. also when pressing feed it feeds through more than one label and then shows the condition and error lights.
- Most common cause for this is sensors not positioned correctly. Make sure that the white arrow on the top sensor is aligned with the bottom sensor. See you user manual.
- Also check that the sensor used is the correct one for the media (i.e. black mark or transmissive).
- How To Diagnose Configuration Issues with Citizen label printers | citizensystems | YouTube
- Maintenance and usage
- How to change the media sensor for a Citizen CLP521 | BOXwise | YouTube - How do I adjust the Threshold Setting? By following the simple procedure outlined in this video.
- cls521 labels | Doug Morton | YouTube - Citizen cl-s521 label loading and sensor placement.
- Media Width and Thickness Adjustment for Citizen CL-S521/621 and CL-E720 Label Printers | citizensystems | YouTube
- Using the media adjustment dials or ‘wheels’ to set correct media width and media thickness on the CL-S521, CL-S621, CL-S631, CL-E720 and CL-E730 models as well as earlier CLP ranges
- Blue Wheels
- CL-S521-CBI printer Instructions | Alicia O'Neill | YouTube - Citizen CL-S521-CBI thermal printer - How to load label and armband media.
- Media Width and Thickness Adjustment for Citizen CL-S521/621 and CL-E720 Label Printers | citizensystems | YouTube - Using the media adjustment dials or ‘wheels’ to set correct media width and media thickness on the CL-S521, CL-S621, CL-S631, CL-E720 and CL-E730 models as well as earlier CLP ranges
- Most Common Thermal Printer Faults and How to Resolve Them | Latest News - Thermal printers are a popular choice for businesses who want to create high quality, durable labels while saving valuable time and money.
- When feeding labels, you must remember the label that is hanging out might have already past the print point so it is the label behind it will be the first to be printed on. Obviously this depends on label length.
this is not true
- PRN files
- These files are just copies of the information sent to the printer, not error logs.
- What's a PRN file, why do I need it and how do a make one? - NeuraLabel Blog - A PRN file is simply a printer file that is created for a specific printer in a language that the printer understands. Therefore PRN files are printer model specific and will not work with other types of printers.
Call waiting is not working on my Android phone
Have you had the following error when you try to swap calls or put a call on hold. This article will bring together all of the causes and solutions.
Error message
Can't switch calls.

Background
Before we get started I need to explain a few things
This is a message I got from my provider which helped me understand things:
4G calling uses your 4G data connection to carry your phone and video calls, rather than the 2G or 3G networks.
It also works alongside WiFi calling, so you'll automatically switch between them without your connection dropping.
If your device supports 4G calling, you've already got access to it, but you may need to switch it on your phone's settings, or you can check in our device guides - choose your device, then tap Specifications and scroll down to Communication > VoLTE – 4G calling. It will state here if your device is compatible or not.
The following points are important:
- 2G/3G use a different technology than 4G/LTE for handling voices calls and therefore also Call Waiting is handled by the corresponding technology/protocol.
- Networks can enable/disable Call Waiting for both of these technologies independently
Prerequsites
- Update all of your apps. This probably wont make any difference but it wont harm.
Causes
- Call Waiting is not enabled on your contract
- Call Waiting is not enabled on your phone
- Call forwarding is redirecting all calls before you get them
- Carrier does not support Call waiting on their 2G/3G networks, only 4G/LTE and upwards.
- Phone/ROM not support VoLTE
- Why is this specifically and issue. Most phones support Call waiting on 2G/3G networks but these networks are now being shutdown, but your phone is still working you ask! Carriers will start by shutting down all non-essentials services such as Call waiting on these old networks and hope that customers migrate naturally to newer phones that support 4G/LTE and of course VoLTE. so while the 2G/3G networks are still working these extra features are not. If you do not have VoLTE you cannot utilise Call waiting on the newer network.
- When the 2G/3G networks are shutdown, if your phone does not support VoLTE then you will not be able to makes voice calls.
- Modem is too old
- Technology that handles calls changes, but this technology is not supported in older modems
- Modern phones and carriers require VoLTE
- The Custom ROM such as LineageOS, does not always support VoLTE
- LineageOS that Support Volte? - F-Droid Forum - Is there any way to tell if a LineageOS phone supports Volte?
- Notably anything older than 2016, does not support VoLTE, devices then used non-standard IMS stacks.
- You can check the sources to see if it supports it, but even then your carrier may not allow it or it may lack the required configs for your carrier.
- What exactly should I be looking for when I look at the source code?
Check for an ims.apk in the proprietary.txt files for your device.
And because some devices use a common device tree, find the command device tree
name in the lineage.dependencies file and check the proprietary.txt files in
that repo too.
- Another way to see if you phone can use VoLTE is when you make a voice call, 4G/LTE changes to 2G/3G/H/H+
- This is caused by the phone have to downgrade the connection type to allow a voice call to be made
- VoLTE Questions And Where To Go From Here? : LineageOS
- Users With VoLTE Working : LineageOS
- Determining VoLTE support on a device : LineageOS
- Due to the closure of 2G and 3G networks drawing closer all over the world - the latest date I'm aware of is mid-late 2022, and there are networks that will shut down earlier - devices must support VoLTE to connect to the network.
- In order for VoLTE to work properly, carrier configuration and APN must be correc
- For example stock Samsung OS supports it but LineageOS for S5 klte + variants does not support VoLTE (Voice over LTE).
- You should be able to use the dialer code *#*#4636#*#* --> "Phone Information" to determine if VoLTE is working.
- Dialler storage and cache is corrupt
- Dialler does not have all required permissions
- Carrier configuration and APN are incorrect
- Because VoLTE uses data, it is important for this to be working.
Solutions
These solutions might not work and might not all be relevant to your phone.
- Enable Call Waiting on your contract
- Ring your provider and make sure this feature is enabled and available.
- Enable Call Waiting on your phone
- or *#43# to check (add these notes
- LineageOS 18.1: Dialler --> 3 Dots --> Settings --> Calls --> GSM call settings --> Additional settings --> Call waiting
- Disable Call forwarding
- So you can rules this out. It can be put back on later.
- LineageOS 18.1: Dialler --> 3 Dots --> Settings --> Calls --> GSM call settings --> Call forwarding
- Update Phone Modem (to give VoLTE support)
- Stock ROM: Updating your stock ROM will also update the modem
- LineageOS: You will need to update the modem manually by the relevant method (not covered here)
- Clear the Dialler storage and cache stores
- I have seen people mention this one, but I suspect this only fixes the issue if it was working one day and then not the nexxt rather than after a phone or network update
- Done through the 'App Manager'
- Open the Dialler App properties and make sure it has all permissions enabled
- Re-setup your APN
- Use WiFi calling
- I have not tried this, but if you can install the app, just try and see.
- Get a new modern phone
- This is a last case scenario
Other Notes
- The Android Dialler uses an API to communicate with the modem so it is unlikely to be the dialler causing any issue.
- What is VoLTE? - VoLTE stands for voice over LTE and it’s more or less exactly what it says on the tin. It's voice calls over a 4G LTE network, rather than the 2G or 3G connections.
- Call waiting commands (from Vodafone)
- To activate - enter *43# followed by SEND
- To accept the incoming call and end the original call - press 1 then SEND
- To hold the original call and accept the incoming call - press 2 then SEND
- To swap between calls - press 2 then SEND
- To end present call and return to holding call - press 1 then SEND
- To cancel - enter #43# then SEND
- Phone Information - *#*#4636#*#* then SEND
- Vodafone 845 - Turn call waiting on or off | Vodafone UK - When call waiting is turned on, you can hear and answer a new incoming call while you're on the phone. Follow these instructions to turn call waiting on or off.
- How To Fix Error Message Can't Switch Calls Problem Solved in Android - In this blog, I am going to tell you How To Fix Error Message Can't Switch Calls Problem Solved in Android.
- How to Set Up Call Waiting on Android: 3 Methods | JoyOfAndroid
eBay Android app will no longer install or upgrade on Lineageos
I am using the eBay app as an example here because it is an issue for my, but these instructions and notes should apply to most apps.
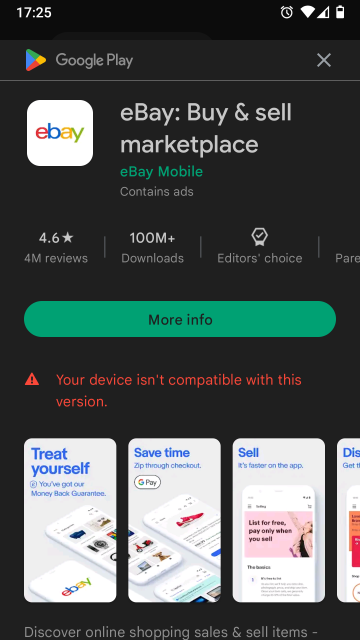
The eBay app will not longer update or when you search for it in Google Play on your phone it is not found in the search results
The Errors
You are going to see one of these when trying top install the eBay app when your device is no longer supported
On Google Play via your PC's browser
This app is not available for your device

Via the play store on your phone
This is not possible because Google actively hides the app from you here.
Via the browser on your phone
This work around requires us to search for the `eBay android app`on the Google search engine

Click on the install button and you will now see the following error message;
Your device isn't compatible with this
The Cause
eBay has flagged your device by:
- Device name / Model Number (i.e. SN-9005)
- Android version
- Both
This is why most apps still works but these bigger apps actively remove older device and OS from the compatibility lists.
Have a read of this articl as-well
- Why Can't I Download Certain Apps on the Google Play Store? - Seeing "this app is not available for your device" on Google Play? Learn why some apps aren't available to install from the Google Play Store.
The Solutions
- Upgrade Android OS
- Update your Android version to the latest. It must be a modern version that supports eBay.
- Patch releases are very unlikely to fix this issue.
- Make sure you have GAPPS installed and it is the latest
- A lot of apps depend on services this package installs.
- PICO/NANO/FULL I am not sure if this version makes a difference.
- Clean Caches
- Wipe Data + cache for Google Play
- Wipe Data + cache for Google Services
- This did not work for me
- FIX: “Your Device Isn’t Compatible with This Version” on Android - While downloading specific apps on your Android device, you might find that the Play Store displays a “Your device isn't compatible with this version” error, implying that your device isn’t compatible with the app.
- Change the phones model number - There are a couple of different methods to achieve this:
- Change Model number in the firmware before flashing
- This will cause issues with signatures unless you are the one signing it
- Change the model number on a live phone via ADB and Fastboot
- On a firmware upgrade these settings will be lost
- How to Change Android Device Model Number and Name - DroidViews - If you own a rooted Android device and want it to display a different model number than it really is, you can change it.
- Use Magisk to change the model number
- Magisk Official Sites
- [MODULE] MagiskHide Props Config - SafetyNet, prop edits, and more - v6.1.2 | XDA Forums - Official thread
- MagiskHide Props Config - Magisk - This module is a very complicated way of doing something very simple. Complicated for me, that is... The aim is to make it easy for you, the user. The module changes prop values using the Magisk resetprop tool, something that is very easy to do with a Magisk boot script and some simple commands.
- Magisk and MagiskHide Installation and Troubleshooting guide - I think this is the developers site
- Common
- The options set here should be kept after an in-place upgrade
- The options are loaded at boot and make no physical changes to the firmware
- Edit device fingerprint method (option 1)
- Select another phone that is not blocked by eBay from a list supplied by Magisk in the wizard and then apply it. This fools eBay and Google Play into think you have a different phone.
- This does not make any changes to your phone, it does all of this in RAM via a boot-time script.
- This method has a wizard and is very easy to do.
- [SOLVED]Android 10 build.prop how to change model?? | XDA Forums - [SOLUTION] Solution Find and select the fingerprint of the model you changed in Magisk Hide Props Config (option 1) and restart it.
- Add and submit your own fingerprints to Magisk
- Add/edit custom props (option 5)
- I have not tried this method
- You can edit the relevant config settings here but it is not as complete as the option above
- ro.product.model and ro.product.brand
- builds - Change device model on Android 10 - Android Enthusiasts Stack Exchange - Change phone model with "MagiskHide Props Config"
- Magisk - Device simulation - If you want to simulate a specific device (to get access to device specific apps in the Play store, as an example), you can activate this option. It will pull information from the currently used fingerprint (has to be set by the module) and use this to set a few certain props to these values.
- Change device model on Android 10 | AndroidHiro.com - Change device model on Android 10.I have Realme X2 (RMX1992) phone with Lineage OS 17.1 with root.
- Magisk Official Sites
- Change Model number in the firmware before flashing
Change the Phone Model Number - The Best Solution
This method makes no permanent changes to your phone and is very easy to do when you have instructions and we will be using:
- Magisk
- MagiskHide Props Config
- Terminal
Install instructions
- Install Magisk (I did this via TWRP Recovery)
- Reboot your phone
- Update Magisk to the latest version
- Download and copy MagiskHidePropsConf-v6.1.2.zip to your SD Card
- README.md - MagiskHidePropsConf · GitHub - MagiskHidePropsConf instructions.
- MagiskHide Props Config - Magisk - Download here - This module changes prop values using the Magisk resetprop tool, something that is very easy to do with a Magisk boot script and some simple commands.
- Open Magisk in android and update it if required
- Click on the `Modules` button at the bottom right
- Click on `Install from storage`
- Find the file MagiskHidePropsConf-v6.1.2.zip and double click it to install
- Reboot when prompted
- Now install a terminal so we can use MagiskHide Props Config
- Terminal Emulator for Android - Apps on Google Play - Access Android's built-in Linux command line shell. Unleash your inner geek!
- Just give this app temporary superuser access when prompted, this prevent issues or accidents.
- Run the terminal app and follow these instructions
- type: props
- select: Edit device fingerprint / 1
- Make a note of your current fingerprint, i use screenshot for this
- select: Pick a certified fingerprint / f
- select brand:
- My new phone brand: Samsung / 26
- select model:
- New model for my phone: Samsung Galaxy S8 SM-G950F (8.0.0) / 58
- select yes to confirm
- reboot phone when prompted
Notes
- This allowed me to download ebay from the play store.
- Lineagos still shows my phone as a SM-N9005
- eBay app would not let me log in / Invalid request
- I then tried the clear storage and cache which did not fix anything
- I rebooted my phone, i can now log into eBay.
- My phone still shows as a Samsung SM-N9005 on the Google Play store
Replace a text string in a Windows Batch file
This can be tricky if you do not know how to do this, it should also be noted depending on what text you are replacing your method you will use will change.
These methods can also be used to remove text from strings.
Standard Text String Replacement
This is straight forward and you should just use the example below. This will not allow the use of %
@echo off

set mystring=This is a water bottle.
echo %mystring%

set mystring=%mystring:water=glass%
echo %mystring%
Outputs as follows:
This is a water bottle.

-->

This is a glass bottle.
% Character and String Replacement
To replace % you need to do a few more steps because % is a special character. This method will also allow you to change normal strings aswell.
The following example will convert a URL that has had the slashes replaced with HTML entities and of course these include % which is a special character in batch files and cannot be escaped.
We use EnableDelayedExpansion to change when these variables are parsed allowing us to convert the %5C to \ so the URL can be used appropriately. We are just using echo here but the variable can be used like normal variable aswell.
The example will convert the following URL
D:%5Cwebsites%5Chtdocs%5Cprojects%5Cqwcrm%5Csrc%5Ccache%5Csmarty%5Ccompile%5Cd0d7cab3fc900.file.financial.tpl.php

-->

D:\websites\htdocs\projects\qwcrm\src\cache\smarty\compile\d0d7cab3fc900.file.financial.tpl.php
The Example
@echo off

:: Each variable is to be expanded at execution time rather than at parse time
setlocal EnableDelayedExpansion

:: Set the URL that has been passed to the batch file as a commandline parameter
set URL=%1

:: Convert '%5C' --> '\' - Notice the command is wrapped in !
set URL=!URL:%%5C=\!

:: Optional
endlocal

:: Output the URL
echo %URL%
Links
- General
- How a command line is interpreted | programming-books.io - How a command line is interpreted including quoting and escaping
- External commands | programming-books.io
- External commands available to Windows command interpreter are separate executable program files, supplied with the operating system by Microsoft, or bundled as standard with the third-party command interpreters. By replacing the program files, the meanings and functions of these commands can be changed.
- A list and description of all windows external commands that can be used in your batch file.
- Prevent cmd Window for Batch File from Closing
- Learn how to stop cmd (command prompt) window for batch files from closing. The .bat files automatically close window after execution.
- cmd /k
- Batch File Comment (Remark) - Windows - ShellHacks
- How to comment (leave remarks) in a batch file in Windows. How to comment out and uncomment a line or a block of code (multiple lines) in a batch file.
- :: = comment out and dont display
- REM/rem = comment out but still show
- Setlocal - Local variables - Windows CMD - SS64.com - setlocal, EnableExtentions, EnableDelayedExpansion and more explained here.
- Character Escaping
- Batch files - Escape Characters | Rob van der Woude's Scripting Pages - A list of special characters and how to escape them.
- Replace character of string in batch script - Stack Overflow
- Removing Characters from a string
- Batch Script - Replace a String | Tutorials Point - Batch Script - Replace a String, To replace a substring with another string use the string substitution feature.
- windows - Batch â Delete Characters in a String - Super User
- Batch Script - Replace a String - GeeksforGeeks - In this article, we are going to Replace a substring with any given string.
- Percent Symbol '%'
- How can I use the percent symbol (%) in a batch file? | ITPro Today
- Percent symbols - % - Windows CMD - SS64.com - A common question asked by new batch file programmers is "why do we need to double the percent symbols when writing a FOR command?". On the command line %A works fine, so why does a batch need %%A?
- How do you use % as a literal character in a batch file / on the command line?
- How to replace character "-" by "%_%" in a batch file? - Super User - This is the article I got my solution from for swapping out %5C
- escaping - Ignore percent sign in batch file - Stack Overflow
- windows - How to replace string inside a bat file with command line parameter string - Stack Overflow
- String replacement in Windows batch - Super User - This explains the process of how a batch file is processed and what the use of EnableDelayedExpansion is for
- Replace %%20 in string using windows batch script - Stack Overflow
Upgrade Xampp and keep your data
Xampp does not have an inbuilt upgrade mechanism and there does not appear to be any official instructions on how to upgrade your Xampp install in full or just certain aspects such as PHP.
My xampp location is always at:
D:\xampp
- I put it on the D: drive because the amount of files that are created and this made it easier to defrag and keeps it away from my neat C: drive.
Full Upgrade
These instructions will show you how to upgrade your Xampp installation in full and assumes you have used the portable version. I never use the installer.
- Backup the whole xampp folder
- Export the Databases - using one of the options below:
These processes will wipe any date in the target databases
- Copy and Paste
- This requires xampp to be shutdown cleanly.
- This will not work if the source is MySQL and the target is MariaDB etc... and perhaps if the version of the DB are too different.
- Nothing needs to be done at this point
- Command Line
- Dump all databases with the command line.
- This does not suffer from timeouts
- Run one of these commands:
From the xampp shell:
mysqldump -u root -p --all-databases > all-db-dump.sql

From the command line:
D:\xampp\mysql\bin\mysqldump -u root -p --all-databases > all-db-dump.sql

NB: These can be used for doing a backup of you databases
- phpMyAdmin
- This requires some modification to your PHP and phpMyAdmin settings to work
- See How to upgrade XAMPP in Windows? Complete Solution. | by Asif Rahaman | Medium
- Copy and Paste
- Uninstall xampp as a service (if enabled)
- Shutdown xampp
- Rename the xampp folder
From: D:\xampp\htdocs

To: D:\old-xampp\htdocs
- Download the new portable/zip/7z version of xampp
- from ApacheFriends (SourceForge)
- extract it to where your old installation was and renaming the folder as required.
D:\xampp
- Inside the D:\xampp\htdocs folder there are some xampp only files, just delete them or move them into their own folder just in-case you need them later (they are always in the downloaded file)
- Run the setup batch file
D:\websites\setup_xampp.bat
- Import the databases - use the method you did to export them
- Copy and Paste (this works)
- Make sure that xampp is not running
- Delete the new database files
D:\xampp\mysql\data
- Copy the old database files
From: D:\old-xampp\mysql\data

To: D:\xampp\mysql\data
- Start the Xampp control panel
- Start Apache and MySQL
- Run the 'Xampp Shell' (by clicking the button in the control panel)
- Run the command and wait. It might not be quick.
mysql_upgrade
- Command Line
- Import all databases with the command line.
- This does not suffer from timeouts
- Run one of these commands:
From the xampp shell:
mysql -u root -p < all-db-dump.sql

From the command line:
D:\xampp\mysql\bin\mysql -u root -p < D:\all-db-dump.sql

NB: These can be used for restoring a backup of you databases
- phpMyAdmin
- Copy and Paste (this works)
- Copy/move all of your website files from the old location to your new xampp folder
From: D:\old-xampp\htdocs

To: D:\xampp\htdocs
- Copy my libraries folder and update the libraries (this is only for me)
From D:\xampp\libraries

To: D:\xampp\libraries
- tsmarty2c.php GitHub - Gettext plugin enabling internationalization in Smarty Package files.
- gettext - GNU Project - Free Software Foundation - msgcat.exe and msgmerge.exe, (64-bit?? Static)
- These files are not used by xampp but for me and my software development.
- Exit Xampp and make sure it is not running
- Compare/merge your config files (as required)
D:\xampp\php\php.ini
D:\xampp\mysql\bin\my.ini
D:\xampp\phpMyAdmin\config.inc.php
D:\xampp\apache\conf\httpd.conf
D:\xampp\apache\conf\extra\httpd-ssl.conf
D:\xampp\apache\conf\extra\httpd-xampp.conf
D:\xampp\apache\conf\extrahttpd-vhosts.conf
D:\xampp\xampp-control.ini
- Additional PHP extensions - Updated versions will probably be required, they are located here:
D:\xampp\php\ext
- Ioncube
- Thread Safe and 64 Bit
- Loader Download | ionCube - Secure and license your PHP scripts with the ionCube PHP Encoder 11.0. Secure valuable code with bytecode compilation, encryption and licensing capabilities.
- Xdebug: Downloads - Xdebug: A powerful debugger for PHP
- Xampp 7.4 (64 bit)
- Xdebug v2.8.1 Thread Safe 64 Bit
- eg: php_xdebug-2.8.1-7.4-vc15-x86_64.dll
- The file has been renamed.
- There is a new 3.x series of xdebug that uses slightly different code in the php.ini but this can be found in the xdebug section of netbeans
- An example file name for the required version in this series is: php_xdebug-3.1.5-7.4-vc15-x86_64.dll
- I have not used v3.x yet but I am sure it will work fine with the right calling code.
- Naming Explained
- x86_64 = 64 Bit
- nts = Non thread Safe
- lack of nts = Thread Safe
- TS (on download button) = Thread safe
- Xampp 7.4 (64 bit)
- Ioncube
- Set Notepad++ as the default text editor
C:\Program Files\Notepad++\notepad++.exe
- Enable Autostart of the Apache and MySQL modules
- Set my folder icons so i can see things easily
D:\xampp
D:\xampp\htdocs
D:\xampp\libraries
- Put a text file called version.txt in the xampp root folder showing the version installed. This can be useful if things go wrong.
- If you have anything else like SSL certs installed you will need to figure that out yourself.
- Final Things
- make sure PHPMyadmin default collation has been set to your preferred option (mine is utf8mb4_unicode_ci)
- Apply the phpMyAdmin pmahomme template fix
- Restart Xampp
Keep your old xampp files for awhile to make sure you have not missed anything
Links
- Full Upgrade Tutorials
- How to upgrade XAMPP in Windows? Complete Solution. | by Asif Rahaman | Medium
- I had to write this article cause I couldn’t find any complete solution to help people out with updating XAMPP in Windows. Well, finally here is an easy to understand, step by step guide to upgrade XAMPP that actually works. Kudos!
- Covers both the command line and phpMyAdmin options.
- How to update XAMPP for Windows - Update your XAMPP (for Windows) to the latest version with just a few simple steps
- Upgrade XAMPP the Clean Way | Thorsten Frommen - So you want to upgrade XAMPP. Instead of installing the new version on top of the current one, though, here’s what to do to get a fresh and clean install.
- How to Update XAMPP in Windows - LibreTips - XAMPP is an easy to install Apache distribution containing MySQL, PHP and Perl. XAMPP is really very easy to install and to use - just download, extract and start. XAMPP is an acronym, which stand for: X (to be read as "cross", meaning cross-platform) Apache MySQL PHP Perl You can also install them separately and configure them. XAMPP puts all this and more together in a single package which makes it easier to deploy it. Now How to Update XAMPP in Windows without loosing your existing sites and databases.
- How to Update XAMPP to the latest version - Here is how to update XAMPP to the latest version using a basic phpMyAdmin method
- How to Update XAMPP for WordPress & Not Lose Anything - WPMU DEV - Since there's no official documentation to walk you through the process, we've taken it on ourselves to figure out how to do it.
- Upgrading XAMPP - MoodleDocs
- How to copy xampp my sql data from one pc to another pc? | YouTube - This is not a full tutorial and I did not just move individual files, I moved the whole /data/ folder and everything worked.
- How to upgrade XAMPP in Windows? Complete Solution. | by Asif Rahaman | Medium
- Update Individual Services
- MySQL
- How to upgrade MySQL to MariaDB in XAMPP in 5 minutes on Windows – Mike's Draft Article Bin - Here are the steps I used to to upgrad MySQL to MariaDB in XAMPP on Windows in about 5 minutes. After completing this process, MariaDB will look and work just like MySQL.
- Mini Guide: How to Import an SQL File in MySQL - So you already have your backup and decided to restore this on your MySQL database? In this article, we will tackle how to import SQL files in MySQL using a couple of methods.
- PHP
- Upgrading PHP in XAMPP for Windows? - Stack Overflow - How to update XAMPP to PHP 8 properly
- Update PHP in XAMPP and Composer in 1 minute (2022) - Coder Champ - A tutorial on how to update PHP in xampp and composer in less than 1 minute. A step-by-step guide with screenshots.
- How to upgrade Xampp from php 7 to 8 in windows 10 | wecode101 - How to upgrade Xampp from php 7 to php 8 in windows 10
- How To Update PHP Version In XAMPP On Windows | Tutorials24x7 - It provides all the steps required to update and upgrade the most recent release of PHP in XAMPP on Windows 10.
- How to Update PHP Version in XAMPP for Windows - Step-by-Step Guide - How to Update PHP Version in XAMPP for Windows - Step-by-Step Guide,How to Update PHP Version in XAMPP,for Windows
- phpMyAdmin
- How to upgrade phpMyAdmin in XAMPP to latest? - Stack Overflow - How to upgrade phpMyAdmin in XAMPP to latest, without affecting the database, settings, and files.
- How to Update phpMyAdmin - OSTraining - One of our members asked us how to update their phpMyAdmin version. They were running it under Windows/XAMPP.
- OpenSSL
- Heartbleed OpenSSL Bug - This shows you how to update OpenSSL.
- OpenSSL Downloads (Official)
- Binaries - OpenSSLWiki - Some people have offered to provide OpenSSL binary distributions for selected operating systems.
- OpenSSL Windows Binaries - Unnofficial repo of binaries.
- MySQL
- Misc
- mysql_upgrade - MariaDB Knowledge Base - This is a tool that checks and updates your tables to the latest version.
- TS = Thread Safe
- VC = Visual C++
- eg: MSVC15 (Visual C++ 2017)
My Commodore Notes
These are my Commodore notes that don't fit anywhere else.
Retro Sites
General
- 8-bit computers collection - MCbx
- Here you will find information about old computers, their parts and peripherals.
- The main objective of this site is to provide information not only about technical specifications of old computers, but also instructions to make an old computer running again as well as how to use the old computers (retrocomputing) and its basic software.
- retrocollector.org - A site for retro games collectors and traders.
- TOSECdev Home - TOSEC - The Old School Emulation Center
- DLH's Commodore Archive - Main Page - An archive of Commodore, Atari and other computer's software and documentation.
- The Centre for Computing History - Computer and Video Game Museum - Cambridge
- The Centre for Computing History is a computer and video game museum based in Cambridge, UK. With a collection of vintage computers and game consoles, many of the exhibits are hands on and interactive.
- The UK Computer and Videogame Museum
- All computers of All types including the Commodore range.
- Information is extensive.
- Vintage is The New Old – Vintage is the New Old, Retro Games News, Retro Gaming, Retro Computing - Vintage is the New Old, Retro Games News, Retro Gaming, Retro Computing
- Zophar's Domain - All latest emulators, emulation news, utilites, savestates, cheats, hacks and more
- Video Games Database. Credits, Trivia, Reviews, Box Covers, Screenshots - MobyGames - MobyGames is the oldest, largest and most accurate video game database for games of every platform spanning 1979-2022.
- Amedeo Valoroso
- Amedeo Valoroso, official website. Electronic projects, Computer programming, Software development. Business Administration and Strategic Management.
- Some cool articles and Commodore related stuff.
- Vintage Computer Federation – VCF — A user group for computer history hobbyists
- Our mission is to preserve computing history through education, outreach, conservation, and restoration. We strive to accomplish this through family friendly hands-on activities at our museum, at regional and global events, and by fostering and nurturing the expansion of our on-line and in-person communities.
- There is an active forum and community
- FREE ROMs Download for GameCube, GBA, WII, GBC, SNES, PS2, PSX, N64 - RomsPlanet - Download game ROMs absolutely FREE on Romsplanet. Play your favorite ROMs on Android, PC and other Devices
- The 8-Bit Guy - The 8-Bit Guy's Website - Home on the web of The 8-Bit Guy who is heavily in to Commodores.
- Internet Archive: Digital Library of Free & Borrowable Books, Movies, Music & Wayback Machine - Excellent source of software and information of Commodore and other old computers.
- TOSECdev Home
- TOSEC - The Old School Emulation Center
- I haven't found their downloads on this site but they are on archive.org
- Retro Commodore (EU) | Your place with high quality scans for preservation.
- This is the place for books, documents, manuals, magazines, technical documents and more for the Commodore line of computers in the best quality found on the internet.
- Excellent preservation information.
- Commodore Computers "Commie web page -- Better red than IBM" - No meta description
- Zimmers.Net by Bo Zimmerman - A nice commodore section.
- /pub/cbm index - Downloads
- OldGameMags - A forum with high quality magazine scans.
- The bitsavers main page - A large repository or retro stuff
- Index of /pdf/commodore - Some technical manuals
Commodore and Vintage Computing Shops
- Vesalia Online - The Amiga & Retrocomputing Store (Est. 1987) - Our shop offers a large range of hardware and software products for Amiga, Commodore and other retro systems.
- DataServe Retro
- The aim of our web site is to provide information on the range of 8 bit micro computers we restore and support - the Companies behind the featured machines, their development history, the different model releases and any other information we feel relevant that we have been able to dig up. This information can be found in categories specific to the particular manufacturer, click on an image to take you to the category you are interested in.
- Bought my "Commodore 1531 Datassette Drive & Tape Counter Belt Set C1531DDTCBS" from here, great guy.
- Commodore 16 and plus/4, Mutant Caterpillar Games Ltd Retro Store
- Retro Computers Commodore C16 from eBay Webstore - Purchase Retro Computers Commodore C16 from SellMyRetro.com webstores
- Sell My Retro
- Buy & Sell Retro Electronics Home Computers Arcade & Video Games Consoles
- Trading website dedicated to retro & vintage computers and electronics such as Sinclair, Commodore & Amstrad
- MiniPET 40/80D - Replacement PET Motherboard - MiniPET 40/80D - Replacement PET Motherboard
- Retro ShopBox | eBay Stores
- We are a small business that specialises in restoring vintage computers, electronics, audio HI-FI gear and other specialty items. We also fabricate custom components for old machines. Contact us to find out how we can help you.Like us on Facebook (fb.com/retroshopbox) and follow us on Instagram (@retro_shopbox) for upcoming sales & new products.
- Commodore - Shop - Retro Computing, mostly 8bit. Worlds best selling SD Card interfaces for Commodore C64 SD2IEC+, divMMC Future Sinclair ZXSpectrum, SD2PET CBM PET, Kung-Fu-Flash C64 and the Penultimate+ for the VIC20
- Cespok64 | eBay Stores
- Located in Spain
- Excellent quality of products.
- The owner is very knowledgeable about Commodore hardware.
- Software Archive Wiki - The software is professionally recovered. Usually from magnetic disks using Kryoflux or Nibtools. If available meta data such as pictures of the disks and box content are created.
- Manosoft Group | C=ommodore Passion - No meta description
- The Commodore 64: The Birth of a Cultural Icon - Book - Kickstarter - No meta description
Commodore Only Sites
A collection of forums, community and ROM sites
All Commodores
- Commodore - The Future We Were Promised™
- Currently only C64 but this is the official homepage of commodore
- Commodore has returned from a parallel timeline where tech stayed optimistic, inviting, and human. Where it served us, not enslaved us. We’re here to bring that feeling back - retro • futurism, transparent tech, digital minimalism, real innovation.
- Commodore Info Page - Start page [en] - This is the Commodore Info Page. On this web page you will find information about Commodore computers, disk drives, datassettes, monitors, joysticks, printers, cartridges, cassette and diskette software, calculators and books. There are also articles about hacking the C64 dtv, transfering data from cassette and diskette to your PC and Emulators like VICE or CCS64. You can look at my Commodore collection, museum or the Extreme Commodore Logo. Stay a while stay for ever...
- Commodore Software - New Files
- Commodore 64 & 128 applications, utilities, tools and more!
- Extensive collection covering C64, C128, VIC20, Plus4, C16, PET & Amiga
- Commodore Computers: C64 VIC20 PET C128 Plus4 – 8 Bit PC's – Commodore: Inventor of the Personal Computer
- This site provides history, manuals, ROM downloads, along with an active user forum for support of your 8 Bit Commodore computers.
- Massive software and documentation library
- A great historical library of all sorts of information.
- Active forum and community
- The Gremlin Graphics Archive
- An archive of exclusive photos, film, media and memorabilia of Gremlin Graphics Limited, a Sheffield based computer and videogame developer responsible for games such as Wanted: Monty Mole, Jack The Nipper, Lotus Esprit Turbo Challenge and the Actua Soccer series.
- GitHub - mist64/cbmsrc: - This repository collects the original source code of various Commodore Business Machines (CBM) computers converted to a modern encoding (ASCII, LF, indentation).
- Commodore Service Manuals (and more!) - Service Manuals (and more, like technical documentation and some magazine articles from the eighties) for 8-bit Commodore computers and peripherals.
- Psytronik Software - itch.io
- The software label devoted to releasing new games for classic computer systems! Established in 1990 we pride ourselves on publishing quality releases for retro computer systems presented in high quality packaging.
- Plus4/C16 and C64 titles.
C16 / Plus4
- Home - Plus/4 World
- Plus/4 World - Everything about the Commodore Plus/4 and 264 family of computers
- Massive software collection
- Active community and forum
- Commodore16.com – Commodore 16/Plus 4 website to provide support and gaming - This is a wayback machine grab because the site is currently offline.
C64 / C128
- Lemon64: Commodore 64 - C64 Games, Reviews & Music - The #1 source for ALL your Commodore 64 needs. Relive the classic C64 games along with user ratings, reviews, music and an active community.
- Commodore 64 Online User Manual | Lemon64 - The online edition of the Commodore 64 manual.
- C64 FTP Search @ pokefinder.org - Commodore FTP search engine.
- [CSDb] - The Commodore 64 Scene Database - CSDb
- A site dedicated to gathering as much information as possible about the productions, the groups, the sceners, the events and bbs's in the Commodore 64 scene.
- Massive ROM and software collection with an active forum.
- The hosting center of Commodore 64 maniacs - ROM sharing site amongst other things.
- C64-Wiki
- The C64-Wiki is a project to build a special C64 encyclopedia.
- An excellent source of information on the Commodore 64
- Lemon - Commodore 64, C64 Games, Reviews & Music!
- Lemon64 is your one stop site with anything about everything regarding the popular Commodore 64 computer.
- An active and large forum for the Commodore 64
- C64 Online - Play classic C64 games online! - c64online.com - Play classic C64 games online for free on C64online.com! Online emulation of retro games for Commodore 64 and more.
- Commodore 64 (C64) Preservation Project - The main goal of this project is to archive pristine versions of original Commodore 64 software, including copy protection. A secondary goal and benefit of this will be to catalog and document all the different copy protection methods used. This information will be used to improve emulation, as well as allow remastering of the software onto new disks for you to enjoy on the real thing.
- C64.COM - To Protect and Preserve - A C64 site dedicated to just about everything that is connected to the Commodore 64 (C64). Get your favourite games and demos here!
- C128.com | The quest to understand electrons (and ourselves). - C128.com is a owned and maintained by Bil Herd and hopefully one day will attract co-contributors in kind. C16 / Plus4 ?
- Style | we make demos, tools and toys for your Commodore Business Machine | (an NTSC/C64 demo group)
- Online home for the North American/NTSC demo group Style; their releases for the C64, DTV v1, DTV v2, and PC; and their projects including DirMaster and Turbo Macro Pro.
- Also C64 TrueType font can be found here
PET
- Commodore PET Tape WAV files - Retro computer verzamelaar -Massive list of PET programs in WAV, TAP and PRG format.
- Independent Commodore Library
- The Commodore software library library is amongst the oldest PD software libraries around , it's available free of charge to to all and will gladly help out any 4000 & 8000 series owners . The library originally started life as the ICPUG CBM/PET library . ICPUG was founded in 1978 along with the library and there is a very large range of materials available ( all contributions very welcome ! ).
- All sorts of programs , text files covering a wide range of subjects , extensions to BASIC ( BASIC-AID , PROCEP EDITOR , COMAL ) , utilities .
- Has some Commodore 64 stuff.
- 6502.org: The 6502 Microprocessor Resource - Information, links, and projects for enthusiasts of the 6502 microprocessor.
- Micro-PET
- This is a re-incarnation of the Commodore PET computer(s) from the later 1970s.
- A Commodore PET replica and more - with all new parts in 2022 - GitHub - fachat/MicroPET: A Commodore PET replica and more - with all new parts in 2022
- Micro-PET - Micro-PET Commodore PET extended clone
- GitHub - fachat/MicroPET: A Commodore PET replica and more - with all new parts in 2022
- André's 8-bit pages - Commodore 8-bit 6502 information
- Commodore PET load Matrix Screensaver from tape - Very Satisfying
- Tezza's Classic Computers Articles and Projects - Getting Programs for a Commodore PET
- A classic computer article by Terry Stewart (Tezza). Getting Programs for a Commodore PET
- How to get PET programs found on the internet to a tape that can be read by a Commodore PET
- TPUG Library CD Available – TPUG - As announced at World of Commodore 2009, TPUG has created a CD containing the entire TPUG Disk Library!
VIC20
- cbmvic.net - Home of the VIC 20 and VIC 1001 serial number registry
Programming
- GitHub - OldSkoolCoder/Tutorials: Source Code To Accompany the Videos
- Source Code To Accompany the Videos.
- Contribute to OldSkoolCoder/Tutorials development by creating an account on GitHub.
- start [Codebase 64 wiki] - This wiki is the number one source of articles on Commodore 64 programming. You will find source code, tutorials, manuals, notes on clever tricks and hardware quirks and more!
- Commodore development utilities for Windows - CBM prg Studio is a windows application which allows you to write BASIC and machine code programs and create a .prg file from it. The .prg file can then be ran on a real or emulated machine. It also includes a character editor, sprite editor, screen designer and many other useful tools.
- PLUS/4 User port - Commodore.ca: The PET, VIC, 128, 64 & More Forum - Does anyone have information on Commodore plus/4 user port programming maybe with a short example. I am familiar with the Vic 20 and 64 user port programming but the plus 4 has different address locations that I am unfamiliar with. Thanks in advance for any help.
- Commodore Plus/4 and Commodore 16 Memory Map
Music
- Remix64.com: C64 and Amiga Music Remix Community
- Commodore c64 and Amiga music, remade and remixed! Join our friendly community, and enter a world where the brilliant music from your games and demos is not forgotten.
- Active forum and community
- HVSC - Commodore 64 music for the masses! - High Voltage SID Collection is a Commodore 64 music collection. It is one of the largest and most accurate computer music collections known.
BASIC Commands
Tape
LOAD "<filename>" [, <device number>]   - LOAD command format for tape
LOAD                                    - Load the first program from tape
LOAD""                                  - Load the first program from tape
LOAD"PROGRAM.PRG"                       - Load `PROGRAM.PRG` from tape
LOAD"",1                                - Load the first program from tape
LOAD"*",1                               - Load the first program from tape
Disk
LOAD "<filename>", <device number>[, <secondary address>] - LOAD command format for disk
LOAD"*",8,1        - Load the first program from the disk, load to the address specified within the file itself (most common).
LOAD"*",8,0        - Load the first program from the disk, Load to the start of BASIC memory (less common).
LOAD"*",8          - Load the first program from the disk, Load to the start of BASIC memory (less common).
LOAD"RUN-ME",8     - Load the `RUN-ME` program from the disk

DIRECTORY          - List the disk directory
LOAD "$",8         - List the disk directory
LOAD`!*MENU`,8,1   - Which will load the menu, I am not sure if this is valid.
Common
RUN - Execute the program that has been loaded in to RAM
Links
- LOAD"*",8 vs. LOAD"*",8,1 on the Commodore 64 - YouTube | 8-Bit Show And Tell - What's the difference between LOAD"*",8,1 and LOAD"*",8 ? We take a look at several games which require these and other incantations to start, and explore the concept of the load address of Commodore PRG files.
- LOAD - C64-Wiki
- LOAD: Your Program Transporter | C64 Playground - Load programs or data from external storage devices (like cassette tapes or disk drives) into memory with the LOAD command in Commodore 64.
- New to the C64 how to load programs and games - Commodore 64 - Lemon64
- D64 directory listing to text? - Commodore 64 - Lemon64 - Commodore 64 - What's the easiest way to acquire a text listing of a D64 directory?
- Open the disk with DirMaster and then do a `Save As - Text`.
- Other methods are listed here.
Misc
General
- There is no 16k only support - Forum (#18770) - Plus/4 World
- WHY are there no C16k-friendly versions as PRG files of games? Only TAP-games work with that Yape setting directly, and -some- games, like Berks and Aardvark.
- This thread gives a technical reason why you can't take a C16/16K only game on a tape and turn it into a PRG.
Alternative Hardware
- My Retro Computer - A modern day Commodore 64x PC - Was it a Commodore 64, Vic 20 or an Amiga? Wouldn’t it be fantastic to have a modern day PC in a retro computer shell? Well here at My Retro Computer we have done just that. Order yours today.
- Commander X16
- The modern retro computer.
- The Commander X16 is David Murray aka The 8-Bit Guy’s dream computer, designed to evoke the same fondness and nostalgia many of us had for 8-Bit computers, whilst retaining closeness to the hardware from a programming perspective, unlike the Raspberry Pi and others.
- Plus/4 PSU Modern Black UK - Replacement Commodore Plus/4 Power Supply, UK Plug - Plus/4 PSU Modern Black UK - Replacement Commodore Plus/4 Power Supply, UK Plug
- Cortex Amiga Floppy Emulator - Transform the Gotek Floppy Emulator into an Amiga Floppy emulator
Buttons
- RUN/STOP - C64-Wiki - no description
- By pressing the key RUN/STOP + RESTORE simultaneously a program can also be broken, with this the power-up mode is almost restored again. This e.g. helps, when the Keyboard has been switched off or the key RUN/STOP has been deactivated. After that, the locks are removed. This is almost the same as a hardware reset switch.
History
- The Duffers’ Guide to 8-Bit Computing #1: Software on Tape – East of the M60
- The first of a new Duffers' Guide, celebrating the joys of 8-bit computing I have recently found a YouTube channel that celebrates the wonder of audio tape. It is headed by a fellow from Lancashire who knows his TDKs from his Maxells, and his chrome tapes from his ferric tapes. What has amazed me is how no two audio cassettes are the same in terms of quality.
- Commodore Plus/4, 16, 264, 364 “TED” Series – The Beginning of the End – Commodore Computers: C64 VIC20 PET C128 Plus4 – 8 Bit PC's
- Commodore Plus 4 and Commodore 16 | The Silicon Underground
- Dan Bowman kindly pointed me to former Commodore engineer Bil Herd’s discussion of the ill-fated Commodore TED machines on Hackaday. Here in the States, few remember the TED specifically, but some people may remember that oddball Commodore Plus 4 that closeout companies sold for $79 in 1985 and 1986. The Commodore Plus 4 was one of those TED machines. So was the Commodore 16.
- What went wrong with those machines? Commodore miscalculated what the home computer market was doing. The TED was a solution to too many problems, and ended up not solving any of them all that well. Arguably it’s more popular with vintage computer enthusiasts today than it was in the 1980s.
Other Software
- Gamebase
- GameBase is an emulator front-end and database utility. You can use it to catalogue, browse and play all of your favourite old games from the golden age of videogaming.
- GameBase - Universal Emulator frontend and Database Utility | bu22.com - bu22.com - the home of the GameBase frontend and databases.
- GB64.COM - C64 Games, Database, Music, Emulation, Frontends, Reviews and Articles - GB64.COM is the home of The Gamebase Collection of C64 games. Over 15000 games in the online database, Sid Music, Articles and reviews, Forum and extensive links section. GameBase is THE C64 emulator frontend!
- Gamebase C16/Plus 4 Installation Instructions - Plus/4 Encyclopedia - Plus/4 World - Instructions on how to use the Commodore16 Gamebase.
- Gamebase C16 (WIP) November 15, 2008 | commodore16.com - wayback machine link
Plus4 / C16 Emulators
Some useful notes for these emulators.
VICE
- Key Mappings (General)
- 2.8 The keyboard emulation | VICE Manual - There are two ways of emulating the keyboard in VICE and they are described here
- Change keyboard mappings
- VICE --> Preferences --> Input Devices --> Keyboard
- the files are located at:
- /VICE Folder/Your Commodore Device/gtk3_sym.vkm
- /VICE Folder/Your Commodore Device/gtk3_pos.vkm
- Soft reset: Alt + F9
- When you soft reset VICE it does NOT resets the Tape counter
- Hard reset: Alt + F12
- When you hard reset VICE it resets the Tape counter
- You can add a key for 'Press PLAY on datasette' which is NOT assigned by default
- Help --> Hotkeys
- Key Mappings (+4)
- Joystick Fire: Numpad 0
- Run/Stop: End
- Shift Lock: Caps Lock
- Take a Screenshot = Pause
- Files end up in the VICE /bin/ folder
- Esc:
- Commodore Key: Left Ctrl
- Key Mappings (C64)
- C64 VICE Front-End – Waiting for Friday
- This has a image of the key mappings for the C64 used in VICE.
- The aim of this project was to create a front-end for Commodore 64 emulation using VICE. One of the primary problems with emulators (especially for machines from the ’80s) is that there was no standard keyboard arrangement. In this project I took a broken Commodore 64 computer and replaced the motherboard with a PIC microcontroller based board which interfaces the keyboard and both joystick ports (including ADC for the paddles) to a modern full-speed USB 2.0 interface.
- RUN/STOP: Esc
- RESTORE: PgUp
- CONTROL: Tab
- Commodore Key: Left Ctrl
- With the default english keymap file, RUN/STOP is mapped to the CAPS LOCK key, and RESTORE is mapped to the PAGE UP key.
- C64 VICE Front-End – Waiting for Friday
- Monitor
- VICE Manual - 12 Monitor
- The VICE emulator has a complete built-in monitor, which can be used to examine, disassemble and assemble machine language programs, as well as debug them through breakpoints.
- It can be activated by using "Activate monitor" from the menu.
- The monitor will either run in a separate window, or in a terminal emulation program (such as rxvt or xterm) when "native monitor" has been enabled in the settings.
- No sound
- Problem with winVice+sound... - Commodore 64 (C64) Forum - A thread with a few suggestions.
- When you reset the emulator, the tape counter is reset, so to disable it:
- If using the older Win32 interface, it's in Settings -> Datasette settings -> uncheck 'Reset Datasette with CPU'
- If using the GTK interface, it's in Settings drop menu -> Settings -> I/O Extensions -> Tape port devices -> uncheck 'Reset datasette with CPU'
- SDL vs GTX
- Use SDL as it is better
- Which one is better: SDL or GTK? - info4geek
- For those who want to get started in application programming, I will recommend GTK.
- For those who want to get started in programming video games, I will recommend SDL.
- Vice SDL version - my thought (Windows OS) - Commodore 64 (C64) Forum
- SDL is preferred
- VICE - A ‘Beginners Guide’ to Compiling and using the commodore 64 - Raspberry Pi Forums
- SDL is newer
YAPE
- Key Mappings
- Quick Debugger: Shift + F9
- This will allow you to see tape counter.
- Once the game has loaded, the tape counter will read: A simple tape counter (simply the offset in the TAP or WAV file) TAPE
- 000000000 the underlined ones are equivalent to commodore tape counter (Tape Counter + one and lots of extra preciseness).
- Full Throttle =
- Tape
- Play: F5
- Stop: Shift + F5
- Resets
- Run/Stop + reset: TAB + F11
- Equivalent to the one on the real machine
- Jumps to the machine language monitor without losing memory contents and BASIC programs and variables.
- Soft reset: F11
- Equivalent to pushing the white RESET button of a 264 computer. You will not lose the memory contents only BASIC programs and variables.
- If a program masks the RST vector, you may not be able to restart the emulated machine this way.
- Hard reset: SHIFT + F11
- Equivalent to turning the power on and off in a real machine in that it clears all the RAM contents
- Forced reset: CTRL + F11
- Will always jump to the ROM reset vector, even when it's disabled.
- Great for debugging.
- Drive reset: no shortcut key
- Eventually drives may crash, too, so they can be reset here, all at once or individually.
- This is the equivalent of turning the drive off and then on.
- Run/Stop + reset: TAB + F11
- Escape: ` (tilde)
- Commodore Key: Left Ctrl
- Control: Right Ctrl or Insert (for laptops)
- Shift Lock: Caps Lock
- Run/Stop: Tab
- Home: Home
- Pound (£): Delete
- Pound Sign / Hash (#): Shift + 3
- Inst/Del: BackSpace
- Cursors Arrows: Cursor keys
- Quick Debugger: Shift + F9
- Joystick Mappings
- These are the key mappings when the josytick is emulated through the PC keyboard.
- Joystick Move: Cursor keys or Numpad 2, 4, 6, 8 (selectable via the Input dialog window)
- Joystick Fire: Numpad 0
- Issues with Joystick then try one of these settings:
- Settings --> Input setup --> Configure keyboard & Joystick --> Windows input Method = Message Queue - positional keymap
- Settings --> Input setup --> Configure keyboard & Joystick --> Emulation via keyboard --> port 1/2 = Cursor keys
ICPUG
Official Sites and Information
- INDEPENDENT Computer Products Users Group - This web site is dedicated to keeping alive the memory and aims of ICPUG. The National group was closed as a physical entity at the end of 1998. The only real world presence of ICPUG now resides at what was the Stevenage regional group.
- ICPUG Services - What services this club offered
- Independent Computer Products User Group (ICPUG) - Group Details - Plus/4 World
- Plus4 Worlds holding page for their collected assets.
- Long lasting UK based user group. Closed as a physical entity at the end of 1998, nowadays the only real world presence of ICPUG now at what was the Stevenage regional group. The ICPUG library consisted of 10 in the beginning of 1988.
- Independent Computer Products User Group (ICPUG) - Group Details - Plus/4 World - Long lasting UK based user group. Closed as a physical entity at the end of 1998, nowadays the only real world presence of ICPUG now at what was the Stevenage regional group. The ICPUG library consisted of 10 in the beginning of 1988.
Software Downloads
- ICPUG - Search - Plus/4 World - Software and Newsletters available here.
- commodore16.com Archive - Download some ICPUG disks here
- ICPUG USA Members Collection | commodore16.com WayBackMachine - The ICPUG USA disks for the Plus4/C-16
- Re: Any source to download ICPUG disk images? [cbm-hackers mailing list]
- Index of /ken.ross1/download | WayBackMachine - No meta description
- Are these PET ICPUG disks?
- Index of /ken.ross1/download | WayBackMachine - No meta description
Newsletters (places to download)
check all pages are present, icpug_v03_i05_sep_1981.pdf , starts at page 94, and only has 44 pages, this is from 6502.org not bombjack
- ICPUG - Search - Plus/4 World - Software and Newsletters avaiable here.
- Commodore - Newsletters - Independent Commodore Product users Group | bombjack - A very complete list
- Vintage IPCUG Journals 1986-1993, 24 issues. | Retro Antiques Curios
- IPCUG Journals 1986-1993, 24 issues. Independent Commodore Products Users Group, (ICPUG) job lot of 34 issues Journals 1986-1993. There are two issues missing, the first of both 1986 and 1989.All issues are in good-very good condition with only minor staining to the covers, mainly on the white issues, there are also a few random pen marks and writing.Also included are 5 company account reports 1986-1990.
- recheck with these for the company reports.
- scuzzblogdseptember20_0201 Commodore ICPUG - CBM Users. - Commodore ICPUG - CBM Users article and scans
- 6502.org: Documents Archive - ICPUG Newsletter - A collection of useful documents pertaining to the 6502 microprocessor.
- Periodical library | landley.net - Issues of the Independent Commodore Product Users Group newsletter (from the UK). I have the whole of 1986, covering the introduction of the Amiga and the commodore 128, the peak through middle age of the C64, and the decline of the Vic 20 and PET.
- Bob Mockford Online - Computer Magazines - Includes six issues of ICPUG (Independent Commodore Products Users Group) from January 1984 to November 1984.
- davidviner.com: Early UK Computer Magazines
- 1979 also saw the beginnings of IPUG, the Independent PET Users Group, created to provide PET users with a voice that was not affiliated with Commodore. Like the official CBM newsletter, the IPUG equivalent was initially a non-professional, photocopied affair that slowly grew to be more professional, though the frivolous newsletter cover was retained for many years - some of us were sorry to see it go and the later, sanitised version was far from inspirational. During 1982, after the advent of the VIC-20 and with other new CBM machines such as the C64 and 500 and 700 series looming, the name of the publication was changed to ICPUG dropping P for PET and replacing it with CP for Commodore Products. Many names 'famous' within the Commodore arena could be found in its pages including Mike Todd and the aforementioned Jim Butterfield. I even managed to get a few things published there, too. The newsletter flourished through the years that the original Commodore managed to keep its head above water but, a few years after its demise, the C in ICPUG stopped representing Commodore and stood for Computer. Today they still have a website but the newsletter is no longer published.
- icpug | Retro Commodore - Posts about icpug written by Martin Sørensen
- Just a PORTION of my Commodore collection. How many can you identify? | Reddit - A user on here has the full IPUG/ICPUG magazine set.
- imgur - Pictures of IPUG Magazines - This is a rare sight. From the reddit page above.
- Mike Naberezny – Commodore Items Wanted - This giy might have some newsletters.
- User Groups | Retro Commodore - Has several ICPUG newsletters.
- Box 455 - ICPUG / Computing News - Storage Box - Computing History - 7 Complete ICPUG (Independent Commodore Products User Group) Volumes: 5,6,7,8,9,10,11.
- Icpug Independent Commodore Product Users Group Magazine : Zzapmort : Free Download, Borrow, and Streaming : Internet Archive - Icpug Independent Commodore Product Users Group Magazine, Fanzine covering Commodore 8 and 16 bits from the 80s to mid nineties
Other Commodore Groups
- Commodore Users Group of Ireland
- CUGI - Commodore Users Group of Ireland - Home of the Amiga Ireland event for Commodore users. Check out the event, get involved.
- Commodore Users Group of Ireland (CUGI) Web Pages - Old site
- TPUG – Toronto Pet Users Group
- North Herts ICPUG Group
- A regional based Group within ICPUG's world-wide membership.
- Brian Grainger
Commodore Computer Repairs
These are my nots on trying to repair my Commodore computers and there various issues.
- https://plus4world.powweb.com/forum/25481
- MIK
- Q: Unlucky Nightmare! I've had it happen and I'm sure many people have. A second hand Plus/4 gives up the ghost after being powered on for a short while, from maybe not being used for many years! Something I can not explain but it's happened to me once before now with a second hand P4. Everything was running sweet and then BOOM, black screen. Never fixed it as I'm running out of dead machines to fix working ones.
- A: Sounds like the CPU.
- MIK
- If you can see anything on the screen right now such as messed up text and stuff then I would of gone for the TED also but a totally black screen is normally the CPU.
- SVS
- Unit 1551 #9 can work only if a unit 1551 #8 is connected and turned on. This means that a 1551 #9 cannot work even if a 1541 #8 is connected to Plus4;
- The drives (any type) have to be turned on and initialized *before* to turn on the Plus4;
- crock
- Right to the problem, the CPU is just as prone as the TED to a premature death, and a likely cause of your black screen but it is not the only thing. The kernel, PLA, *any* ram chip, any component in the reset circuit or the crystal will also cause the same effect, so don't lose hope yet.
- MIK
- Commodore Plus/4 Specifications
- Modulator - Analogue RF Channel 36
- Processor - MOS 7501/8501 @0,885/1.76 MHz
- Memory - 64 KB RAM (upgradeable) and 64 KB ROM
- OS - BASIC 3.5
- Dead/Non-Responsive Serial Port
- Scenario:
- I was using my commodore plus4 for a couple of days to capture tapes using TTAPSERV.PRG and an XE cable which worked well and then all of a sudden it stopped working.
- I can see communication using VC1541 and a XE cable, but it is inconsistent and cannot be used.
- The inconsistent transfer error is what I got when I used the wrong parallel port mode or a parallel port that was not compatible check the motherboard of the PC
- It is either the serial port has failed or the parallel port
- NB: If your adapter never worked from the beginning, the most likely cause is the printer port is not compatible with the X range of adapters.
- Checklist
- Check the parallel port with something to make sure it is not faulty
- Port Tester
- Parallel Printer
- Try all different port modes available in the BIOS
- XE Adapter
- check for dry joints
- could be the diodes on my XE adapter as they are
- Commodore Drive
- Check the serial port with a known good piece of commodore hardware (+4/C16/C64)
- could be the IC controlling the serial bus in the commodore drive
- could be the diodes near the serial port which apparently is common fault
- check the physical connection of the serial port as sometimes the pins become dry-jointed etc.
- Check the parallel port with something to make sure it is not faulty
- Scenario:
- Commodore 8 Bit Repair - VCF 2012 | YouTube | bilHerd - Part 1 of 2: From VCF East 2012 - Workshop on diagnosis and repair of vintage 8 bit computers; PET through C128. Presenters Rob Clarke and Bil Herd (both ex Commodore employees) demonstrate existing tools and methods for troubleshooting yesterdays computers.
- Diag264 - Diagnostic tool for Commodore 8-Bit Machines
- This document describes operation of the Diag264 diagnostic tool and harness. It can be used to assist in the identification of faults with RAM, ROM, I/O & CPU ports, and TED registers. It has been tested on a wide range of 264 series (aka TED) machines, including some non-standard configurations and PAL and NTSC machines. This includes the C116, Commodore 16, C232 and Plus/4, and even a V364!
- The design and operation of Diag264 is closely modelled on the operation of the cartridges available for the 64/128 and VIC-20. One of the aspects that I was most keen to copy was the functionality of the Dead Test Cartridge of the 64. The primary use of this cartridge was to find RAM issues in a machine that otherwise appeared dead.
- Classic computer Commodore plus 4 repair and testing | YouTube | Phil Kruman - Repairing a classic computer - The Commodore Plus/4 computer is more difficult than most of the 1980's micro's due to its short production run and Commodore only processors. As an alternative, I try an Italian made CPU daughterboard with surprising results for this ailing classic computer.
- Commodore Plus/4 repair and demonstration | YouTube | Artic retro - I finally got my hands on a couple of Commodore Plus/4 machines. One of them not working. In this video I do a repair job, some restoration and then a demonstration of the working plus/4 machine with a few games.
- Commodore 16 and 'Device Not present' error - Forum (#35118) - Plus/4 World
- I have picked a Commodore 16 a few days ago from a local sale. The machine looks OK and will boot up normally. Problem is when I want to use my SD2IEC connected to the serial port, I'll just get a 'Device Not Present' error message while trying to load the SD2IEC browser. I have tried also with a 1571 Disk Drive but same message . What this can be? Faulty chip?
- Diagnosis of this hardware issue
- Commodore Plus/4 Repair & Restoration – Adam's Vintage Computer Restorations
- A while back I got my hands on my first Commodore Plus/4, yet another 1980s 8-bit computer to add to my collection. The machine was in good condition and came with several accessories and its original box, however it was sold as "untested".
- After checking that the PSU was working OK, I did a quick power-on test – the computer seemed to output video, but only displayed a “garbage” screen with flashing blocks and lines, and various artefacts which changed on reset. The unit required repair.
- C64 "Searching for $" repair (serial bus issue) | YouTube | bwack
- Two days ago I picked up a breadbin style Commodore 64. It worked, but the disk drive loading was intermittent. Next day it was almost impossible to get directory listing and later it was impossible.
I swapped CIA chips, no change. I swapped C64's, bingo. Problem is within the new C64 and not the drives. - According to the service manual, the serial bus should be checked. On the serial bus, in both ends, there are 7604 buffers. They are like the amplifiers of the VIA (in the 1541 drive or VIC20) and CIA chips (C64). This had ofcourse failed and desperatly i borrowed one from another drive. I promise i promise i promise to replace with new one soona and clean up the rework. :)
- Two days ago I picked up a breadbin style Commodore 64. It worked, but the disk drive loading was intermittent. Next day it was almost impossible to get directory listing and later it was impossible.
- Commodore Plus/4 and temperatures - Davide Bucci
- Is temperature a big deal? Spoiler: Nope.
- An in-depth teardown to look at this issue.
- Repair of an Commodore Plus/4 (264) ! - Stone Oakvalley Studios - One Crazy Multi Talent - A loving restoration of an unwanted Plus4
- IC Chip Removal
- How to remove chips without damaging the circuit board | Yourube | Adrian's digital Basement
- It can be tough to remove through hole ICs from boards without causing any damage. I'm using a desoldering iron, so if you don't have one, you will need something to remove solder. (Braid, manual pump, etc.) These usually leave some solder behind on double sided boards making it very hard to get chips out without causing damage.
- I use a combination of removing as much solder as I can from the bottom and hot air on the top to get the chips out without causing any damage.
- Makes it look easy.
Commodore Disk Transfers
The best kit setup to have (in order)
- Commodore 1571 Disk Drive + ZoomFloppy
- Commodore 1541 Disk Drive (with parallel mod) + ZoomFloppy
- Any Commodore Disk Drive + Any X-Cable
Buy from
- ZoomFloppy – RETRO Innovations - The official website. You can buy the device from here.
- Commodore c64 128 user port parallel adapter + 1541 drive parallel port | eBay | cespok_64 - This seller does loads of cool stuff
These are my notes on how to transfer or image disks to and from a real Commodore Floppy disk.
Recommend Methods To Image Disks
- Copy Protected Disks (Disk to Image):
- PC (Windows) + 1571 + ZoomFloppy/XUM1541 + NIBTools + Images in G64 format
- PC (Windows) + 1541 (With Parallel Port Mod) + ZoomFloppy/XUM1541 (With Parallel Port Option) + NIBTools + Images in G64 format
- Copy Protected Disks (Disk to Emulated Disk):
- PC (Windows) + 1541/1571 + Pi1541 + Maverick (GCR Nibbler Copier) + Images in G64 format (will not do all copy protections)
- Normal Disks (Disk to Image):
- PC (Windows) + 1541/1571 + ZoomFloppy/XUM1541 + NIBTools + Images in D64 format
- Normal Disks (Disk to Emulated Disk):
- Commodore Computer + 1541/1571 + Pi1541 + DraCopy/Maverick (Fast Data Copier) + Images in D64 format
- Normal Disks (Files to Image):
- PC (Windows) + 1541/1571 + ZoomFloppy/XUM1541 + CBM-Transfer + Images in D64 format
Transfer Methods
There are some basic transfer methods I have discovered and they fall into the following groups below. Most of these methods require a real Commodore 1541 Disk Drive and they will not copy protected disks unless mentioned.
The instructions sets of the various methods for controlling the 1541 will vary, and so will the features they offer (i.e. Sector-to-Sector copying).
Directly connect a 1541 to a PC (Disk to Image)
- PC (Windows) + 1571 + ZoomFloppy + NIBTools (can do copy protected disks)
- PC (Windows) + 1541 (With Parallel Port Mod) + ZoomFloppy (With Parallel Port Option) + NIBTools (can do copy protected disks)
- PC (Windows) + 1571 + XUM1541 + NIBTools (can do copy protected disks)
- PC (?) + 1541 + KryoFlux + Their own software (can do copy protected disks)
- PC (?) + 1541 + SuperCard Pro + Their own software (can do copy protected disks)
Directly connect a 1541 to a PC (File Transfer)
If you select all files it can work as if the disk is real standard DOS floppy disk for storing files etc. Programs with custom loaders (most full-disk games and demos) should be copied as disk images because they do not store their data in standard files.
- PC (DOS) + 1541 + Parallel Port Adapter + Star Commander
- PC (Windows) + 1541 + Parallel Port Adapter + CBM-Transfer
- PC (Windows) + 1541 + Parallel Port Adapter + Vice Emulator + (File Transfer Software | BASIC)
- PC (Windows) + 1571 + ZoomFloppy + File Transfer Software
- PC (Windows) + 1541 (With Parallel Port Mod) + ZoomFloppy (With Parallel Port Option) + File Transfer Software
Real Commodore, Real 1541 and an Emulated 1541 (Disk to Emulated Disk)
In this method creating a disk images is done by the fact we are emulating a real 1541 drive which stores the disk as an image. These methods will probably work when you want to copy disks between 2 real 1541 drives attached to a Commodore computer and if you really need too for some reason, a virtual 1541 to another virtual 1541.
You can substitute the 1541 with a another Commodore drive model of your choosing.
- Commodore computer + 1541 + Pi1541 + Disk Copier Software (can do copy protected disks)
- Commodore computer + 1541 + SD2IEC + Disk Copier Software
- Commodore computer + 1541 + VC1541 (Parallel Port Adapter and PC) + Disk Copier Software (I am only guessing about this one but I don't think it will work)
- Commodore computer + 1541 + 64HDD (Parallel Port Adapter and PC) + Disk Copier Software (I am only guessing about this one but I don't think it will work)
Real Commodore with a twin disk drive attached (BASIC)
I only mention this for completeness as I came across the following BASIC command
Copy the whole disk in drive 1 to the disk in drive 0 (on a dual-drive floppy only):
COPY D1 TO D0
- COPY - C64-Wiki
- The BASIC COPY command with logical drives can be used to copy between units of a dual disk drive (drives that use a single device number and two logical drives in that). I'm not aware any of them that could be connected to the plus/4 easily.
- Examples of a suitable drive is probably the CBM PET 8050, 4040 etc..
Build your Commodore disk imaging setup in Windows
You must follow the 'Proper power-on sequence' as outlined here, also read these warnings
These instructions assume you have a Windows 10 PC, although not tested in Windows 11 and Windows 7 they might work. I will be installing all of the software you might use whether or not you use it to keep the instructions easy to follow.
- Turn on your Windows 10 PC
- Download
- OpenCBM
- Transfers files/images to/from a real CBM drive connected via an 'X-cable' on the parallel port or USB via ZoomFloppy/XUM1541.
- Win NT/2K/XP, and Linux/i386 kernel driver and development library to control serial CBM devices, such as the Commodore 1541 disk drive, connected to the PC's parallel port via a XM1541 or XA1541 cable. Fast disk copier included.
- Successor of cbm4li
- Contains offical firmware for ZoomFloppy.
- Releases are in a sub folder in the repo, not in the releases section.
- C1541 / VICE (SDL Version)
- A utility from the VICE emulator that works with CBM Image Files (ie: D64,D71,D81 files) NEW! CBM-Transfer 1.22 now supports latest releases..
- VICE is an emulator collection which emulates the C64, the C64-DTV, the C128, the VIC20, practically all PET models, the PLUS4 and the CBM-II (aka C610). It runs on Unix, MS-DOS, Win32, OS/2, Acorn RISC OS, BeOS, QNX 6.x, Amiga, GP2X or Mac OS X machines.
- Get the SDL version
- CBM Transfer (CBMXfer)
- An open-source GUI for OpenCBM, VICE, NIBTools and several other command-line utilities for transferring files and working with disk images.
- NIBTools
- Utilities to transfer images via parallel port. Supports protected disks.
- OpenCBM
- Create a folder C:\commodore
- Install OpenCBM
- Unzip OpenCBM to (This is a temporary folder)
C:\commodore\opencbm\
- Navigate to this folder
- Run the following command (doesn't have to be run from the command prompt). This will install the software to C:\Program Files\opencbm\
C:\commodore\opencbm\install.cmd
- When successful you will be prompted with some instructions
I could install the necessary USB drivers if you like
- Option 1 - You have a ZoomFloppy
- Insert the ZoomFloppy as instructed
- Wait a moment for Windows to recognise the device
- Press 'y' and then Enter
- Press any key to continue . . .
- (optionally) Update the ZoomFloppy firmware by running (doesn't have to be run from the command prompt)
C:\commodore\opencbm\firmware-update.bat
- Press any key to continue . . .
- Unplug your ZoomFloppy
- Option 2 - You don't have a ZoomFloppy
- Press 'n' and then Enter
- Press any key to continue . . .
- Option 1 - You have a ZoomFloppy
- Add the OpenCBM folder to the system PATH. If you need help follow the instructions here
C:\Program Files\opencbm\
- Create a folder to stored your imaged disks
C:\commodore\floppies\
- Unzip OpenCBM to (This is a temporary folder)
- Install VICE for the C1541 utillity
- Extract the VICE download to
C:\commodore\vice\
- Run one of the emulators such as x64sc.exe to make sure it works
- Extract the VICE download to
- Install NIBTools
- Extract the downloaded package to
c:\commodore\nibtools\
- (optional) Add this folder to the system PATH.
- If you need help follow the instructions here
- This is if you are going to use the Nibtools from the command line.
- Extract the downloaded package to
- Install CBM-Transfer
- Extract the downloaded package to the folder
C:\commodore\cbm-transfer\
- There is no a separate setup that needs to be run even though this is what some istructions say. It must be for an old version.
- Run
C:\commodore\cbm-transfer\CBMXfer.exe
- If you get an error as follows, you need to perform an additional step, if not, skip this step
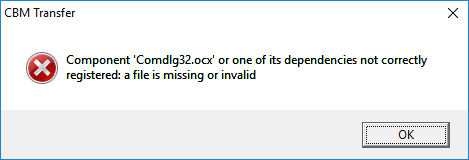
- How to Fix the 'comdlg32.ocx' missing Error on Windows? - Appuals.com
- The comdlg32.ocx file is a part of the Visual Basic Runtime suite and it’s not located on your computer by default.
- This guides you through fixing the issue
- I located the file on one of my other computers, but this one should be fine.
- The file should be located at one of these locations:
C:\Windows\System32\comdlg32.ocx (x32)
C:\Windows\SysWOW64\comdlg32.ocx (x64)
- Get a copy of the file from another one of your PCs or the Appauls article above and place it in the correct folder for your version of windows
- Open an command prompt in Administrator mode
- Navigate to the relevant folder from above.
- Run these 2 commands - They might generate an error but ignore it.
regsvr32 /u Comdlg32.ocx
regsvr32 /i Comdlg32.ocx
- How to Fix the 'comdlg32.ocx' missing Error on Windows? - Appuals.com
- Now run CBMXFer.exe
- Upon first running you will get a dialogue box which can be ignored because we are fixing it in the next step

- Under 'CBM-Transfer Options' (which should popped up automatically)
- Set the various 'Utility Paths' which we installed earlier as follows:
OpenCBM:     C:\Program Files\opencbm\
Vice, C1541: C:\commodore\vice\
NIBTools:    C:\commodore\nibtools\
- Set the default 'Left' directory in the menu item 'Local Paths'
C:\commodore\floppies\
- Set the various 'Utility Paths' which we installed earlier as follows:
- Extract the downloaded package to the folder
- (optionally) You can delete the folder below if you want, but I keep it because it has the documentation in it and a test script.
C:\commodore\opencbm\
- Done
Using your Windows setup to image Commodore disks
You must follow the 'Proper power-on sequence' as outlined here, also read these warnings
Now the software is setup, it is now time to use it to save those disk you have. I will mention all of the methods I know of and it is up to you to choose which is most appropriate with the disks and equipment you have.
Connect and Test the drive
- Connect your Commodore drive to your chosen adapter (we will use ZoomFloppy) to your PC as prescribed here
- You can use other adapters to connect your drive
- For connection issues relating to the X Series of cables, see my article Commodore Tape Transfers | QuantumWarp
- You can only use XM1541 or XA1541.
- XA1541 is better.
- Test your drive is on and working by trying these commands
    cbmctrl detect     - checks the drive is there (might be only ZoomFloppy)
    cbmctrl reset      - resets the drive
    cbmctrl status 8   - Will output some information about the drive
Making the Images
Now it is time to insert your disk that you want to image
- OpenCBM - d64copy.exe
- This will only work to copy 1541 formatted disks (D64)
- Navigate to
C:\commodore\floppies\
- Run the command
d64copy 8 test.d64
- OpenCBM - imgcopy.exe
- This is stilll under development and is not as stable as d64copy
- This can be used to create D64, D71, D81 etc..
- NIBTools - nibread.exe
- Requires a 1571, or 1541 with parallel port mod
- Will do copy protected disks
- If you have a parallel connection in your Commodore drive, or a 1571 you can enable the "Use NibTools" option and create additional image types NIB, NBZ or G64 in a similar fashion. NibTools has many options, so please refer to the Nibtools documentation for correct usage of the various switches.
- Navigate to
C:\commodore\floppies\
- Run one of these commands
nibread test.nib
nibread test.nbz   (same as above, but compressed)
- Convert NIB to G64 or D64 disk files
- These NIB/NZB can be converted to G64 or D64 as required. Unless needed you should always convert the disks to .G64 as this can handle protected disks and is a better format.
- You use nibconv.exe to change the format or removed the compression.
- How to use NIB Disk Image Files | Commodore 64 | YouTube | Basic Bites
- Using NIB files with your C64/1541 emulator: what they are, and how to easily convert them to G64/D64 floppy disk images.
- As always a very clear and concise video.
- nibread.exe can be tweaked with advanced options when edge-case disks are not working. 95% of disks should image with the default settings.
- CBM-Transfer
- This is a GUI for all of the above software and most functions can be done through this frontend.
- Are using a X-Cable?
- There are several different types of X-Cables. I recommend you use an "XM" or "XA" type for use with windows. Other types may not work.
- XA is better.
- I prefer to use this software.
- Easy Disk copy
- To make a D64 image from a disk (uses d64copy.exe)
- Make sure NO files are selected in the RIGHT pane,
- then click the "<-" button.
- You will be asked for a name to save the image (the Disk Title will be the default).
- If you have a 1571 dual-sided floppy, simply change the extension to D71.
Installing and Using links (sort)
- Installing a ZOOMFLOPPY in 2022 | YouTube | Basic Bites
- How to connect a Commodore Disk Drive to your Windows PC, and backup diskettes to D64 & NIB disk images using OpenCBM & NIBTOOLS.
- This video is so easy to follow and I have based some of my instructions on it. Please watch this as it will answer most questions.
- ZoomFloppy with NIBTOOLS | YouTube | Hey Birt!
- In the third part of this series on the ZoomFloppy we look at using NIBTOOLS to back up out copy protected disks.
- An in-depth description of issues that might occur between 1541 and other formats of disks when imaging.
- Install cbmxfer (CBM-Transfer) on top of OpenCBM 0.4.99.104 on Win7 (x64, 64 bit) | YouTube | Spiro Trikaliotis - A video showing what the author of CBM-Transfer does, but it is not very clear.
- OpenCBM, CBMXfer: how to install XUM1541 drivers on Windows 10
- In this video tutorial, we see how to connect the XUM 1541 adapter to the PC and how to install the XUM1541 drivers on Windows 10.
- Based on an old setup but mentions Comdlg32.ocx is missing
Software
- Fast Disk Copiers (Disk to Disk)
- DraCopy
- GitHub - doj/dracopy: DraCopy and DraBrowse - Both Plus4 and C64 versions are here.
- DraCopy (Plus 4) | plus4world
- DraCopy | csdb.dk (C64)
- Plus4
- Based on Fcopy
- Shows sector by sector copy
- Browser is D64 aware
- FCOPY
- C64
- Apparently got around some disk protections
- Many different version https://csdb.dk/search/?seinsel=all&search=fcopy&Go.x=0&Go.y=0
- Commodore Software - Fcopy v3.0
- The story of FCopy for the C-64 – pagetable.com
- DraCopy
- Nibblers (Low Level Disk Copiers) (native)
- Maverick
- C64
- Is by far the more advanced copy program. very handy program.
- [CSDb] - Maverick Copy by Angels (1999) - Commodore 64 Tool: Maverick Copy by Angels. Released on 1999
- Maverick - C64 Copy ProtectionC64 Copy Protection - Maverick is one of the best software copiers for the C64. Maverick V2.0 was originally called ‘Renegade’ but was forced to change their name for copyright reasons. The last legitimate version is v5.04
- Also has a Fast Disk Copier (sector by Sector)
- Has a GCR Nibble mode
- Fast Hack'em
- C64
- [CSDb] - Search for Fast Hack'em - CSDb
- Fast Hack'em Parameter List - C64 Copy ProtectionC64 Copy Protection - Fast Hack’em v6.04 Parameter List Here is the list of the parameters found in Fast Hack’em version 6.04, There are 189 parameters: Fast Hackem 6.04 Parameters List by Craig A. Ernster
- Fast Hack'em v9.5a - Commodore Software - Fast Hack'em v9.5a by Mike J. Henry and the Basement Boys is I believe the last version of the awesome Commodore 64 copying arsenal.
- Fast Hack'em - Wikipedia
- Fast Hack'em is a Commodore 64 fast disk/file copier, nibbler and disk editor written by Mike J. Henry and released in 1985.
- The most popular feature of Fast Hack'em was its ability to produce copies of copy-protected commercial software. When using the nibbler, disk copying is done on a very low level, bit-by-bit rather than using standard Commodore DOS commands. This effectively nullifies the efficacy of deliberate disk errors, non-standard track layouts, and related forms of copy prevention
- Ultrabyte Disk Nibbler
- Ultrabyte Disk Nibbler | C64 Copy Protection - Ultrabyte has quite a few version. From the ads 2.1, V4, V5 and V6. Early version where out in 1985 including routines to copy Electronic Arts titles. V4 included a powerful new GCR Nibbler and 105 parameters. V5 now copied Rapid Lock protection and had 205 parameters including VMAX protections. Finally V6 now has 305 parameters.
- Maverick
- Other Copiers
- Archiver-Copy - Software Details - Plus/4 World - AKA Archiver Copy. Copy between any combination of tape and disk.
- Commodore Software - Disk Copiers - A list of disk copiers.
- Utility/Copy - Software - Plus/4 World - A collection of copiers for the C16/+4
- Utility/Disk - Software - Plus/4 World - A collection of disk utilities for the C16/+4
- Commodore 64/128 - Model 1551/1541 Test/Demo-Diskette | Daniel's Legacy Computer Collections
- There are a few PRG on the utility disk supplied with your Commodore drive
- SD.BACKUP.PLUS4 / Single-Drive Backup for PLUS 4 systems
- These programs are designed to run on the indicated computers with a 1541 disk drive. They allow backup diskettes to be created on a system with only a single 1541 disk drive. They work by first reading from the source diskette and then writing to the destination diskette in a series of diskette `swaps`.
- GUI
- CBM-Transfer / CBMXFer
- GitHub - sjgray/cbm-transfer - GUI for OpenCBM and others to transfer and view Commodore disks and files.
- The CBM-Transfer Homepage
- An open-source front-end to several command-line utilities for transferring files and working with disk images.
- CBM-Transfer makes using those utilities easy by providing a familiar windows interface that removes the need to learn the commandline syntax of each program.
- CBM-Transfer also includes a multi-format file and picture viewer.
- Windows based
- Uses the OpenCBM driver for Windows 10, a utility from VICE and NIBTools and has some of its own binaries for copying
- Commodore 1541 Disk Drive connected via parallel port
- This is a front-end
- CBMX-Transfer is a front-end to several command-line utilities for transferring files and working with disk images. CBM-Transfer makes using those utilities easy by providing a familiar windows interface that removes the need to learn the commandline syntax of each program. CBM-Transfer also includes a multi-format file and picture viewer.
- A PC running Windows 95 or higher (see note below). Tested working on Windows 10.
- Written in Visual Basic
- CBM-Transfer (aka "CBMXfer") is based on GUI4CBM4WIN (G4C from now on) and is a lot more improved
- CBM-Transfer / CBMXFer
- File Transfer
- Star Commander
- The Star Commander homepage - The Star Commander is the ultimate DOS shell that can handle the image file formats of the C64 Software Emulator.
- DOS only
- Has a copy disk option, but this might just be sequential copying of all files present on the disk
- Not updated any more - 2010-01-11 v0.83
- Commodore 1541 Disk Drive connected via parallel port
- Commodore 1541 Project - Part 6 of 6 - Using Star Commander | YouTube
- This is a short - a VERY short - look at how to use the Star Commander software to transfer disk images between the PC and the 1541 Disk Drive. Just giving the basics of how to create an image that you can use in an emulator, and how to create a REAL disk from an image.
- really easy to watch and follow.
- Supports XE1541, XA1541 and others.
- How to get Star Commander working under Windows XP - Commodore 64 (C64) Forum - On one of my web pages, I have written a text in Swedish about how to get Star Commander working under Windows XP. Somebody asked me to translate it into English and so I just did.
- How to use the XA1541 and Star Commander | YouTube | 16mmDJ
- Star Commander Manual (eng).pdf - The manual in a PDF.
- Commodore Software - File Copiers - A collection of copiers for the C64
- Commodore 64 Drive on PC | YouTube | Tech Tangents - The XA1541 cable and Star Commander makes it super easy to work with C64 disks on PCs!
- Commodore 1541 Project - Part 6 of 6 - Using Star Commander | YouTube | boredwithusernames
- This is a short - a VERY short - look at how to use the Star Commander software to transfer disk images between the PC and the 1541 Disk Drive. Just giving the basics of how to create an image that you can use in an emulator, and how to create a REAL disk from an image.
- C64 Making Disk Images - Old Skool Style Longplay | YouTube | Greymousedoesstuff
- In this tutorial I show you how to work with disk images for my trusty Commodore 64, pin out for a simple X1541 cable, BIOS Parallel Port settings, finally transferring disks using DOS running Star Commander v0.82 and a 1541 II drive.
- Very long but seems to cover everything.
- Star Commander
- Imagers
- CBM-Transfer / CBMXFer
- See above
- OpenCBM
- see below
- NIBTools
- Low-level disk "nibbler" utilities using parallel port cables, or 1571 drive
- Commodore 64 (C64) Preservation Project - NIBTools Homepage
- Commodore 1541/1571 disk image nibbler
- A specialist setup of hardware and software which will recover protected disks
- GitHub - markusC64/nibtools - This old GitHub page has some basic commands and list the adapters it will support.
- NIBTools Downloads
- d2d64 – Preserving your C64 disks - World of Jani
- I needed a program to transfer C64 disks to .d64 images with a good overview of the process, but more importantly, it had to be fast and with minimial interaction to be used for reading disks in large batches. I ended up making a modified version of Nibread which i decided to call d2d64 so it would not be mixed up with the original Nibread. Nibread is part of the Nibtools utilities by Pete Rittwage at the C64 Preservation Project.
- D64it Plus4 - Software Details - Plus/4 World
- Plus4 / PRG
- Creates D64 images and transfer them into mass storage devices.
- CBM-Transfer / CBMXFer
- Drivers
- OpenCBM
- A package of core utilities as-well as drivers and firmware for the ZoomFloppy/XUM1541 and several other related devices.
- GitHub - OpenCBM/OpenCBM
- OpenCBM download | SourceForge.net - Download OpenCBM for free. Win NT/2K/XP, and Linux/i386 kernel driver and development library to control serial CBM devices, such as the Commodore 1541 disk drive, connected to the PC's parallel port via a XM1541 or XA1541 cable. Fast disk copier included.
- OpenCBM Changelog | Spiro
- Win 7/8/10, and Linux/i386/AMD64 kernel driver and development library to control serial CBM devices, such as the Commodore 1541 disk drive, connected to the PC's parallel port via a XM1541 or XA1541 cable. Fast disk copier included. Successor of cbm4linux. Also supports the XU1541 and the XUM1541 devices (a.k.a. "ZoomFloppy").
- Contains firmware for the ZoomFloppy
- Has copying programs in it.
- OpenCBM
- File Management
- 64Copy
- By Peter Schepers
- 64COPY is an all-purpose DOS and C64 emulator file manager, modelled after Norton Commander, and runs under the Windows DOS VDM (32-bit or lower), and in real DOS. The 64-bit editions of Windows have no DOS VDM, so you will need to install a DOS-like emulator like DOSBox. It specializes in converting and manipulating emulator files between various formats, as well as a very flexible 6502 disassembler. 64COPY does not do any communication to the 1541/71/81 floppy drives to read disks
- Latest v4.45 2014
- DirMaster: a d64 editor and more | Style64
- A Windows-based GUI application designed to help Commodore enthusiasts explore and manage their disk image collections.
- DirMaster supports common (and uncommon) emulator disk image formats (such as .d64, .d81, .d2m, etc), almost every native Commodore archival format (such as .arc, .sda, .lnx, etc), and many native graphic formats (such as koala, doodle, amica, etc).
- DirMaster was designed to give users a perfect blend of familiar appearance (e.g. natural looking disk image contents using the PETSCII character set) and modern GUI functionality (e.g. drag and drop, opening multiple disk images at once).
- Extact PRG from the D64 easily with this.
- DirMaster/Style Documentation (v3.0.0)
- 64Copy
- Commodore Emulators (Can connect directly to a real 1541)
- Vice Emulator
- Commodore 1541 Disk Drive connected via parallel port
- I am not sure how reliable this is reliable
- Vice Emulator
- 1541 Emulator
- VC1541 (Hardware Emulator software)
- 1541 Drive emulator you run on your PC (supports X1541 or XE1541)
- This works with any Commodore that has the serial port.
- Copy from the real disk to an Emulated disk
- Use native Commodore disk copying software or commands to copy from the real disk to an image on the emulated drive.
- 64HDD
- A serial bus and disk drive emulator
- Will run with either X1541 or XE1541 cables
- 64HDD in action | youtube | Psylicium - I found an old IBM Thinkpad laptop in the trash a couple of months ago, and decided to turn it into an emulated floppy drive for my Commodore 64, using 64HDD. This is a short video of what it does :)
- 64hdd for real dummies! - Commodore 64 (C64) Forum - I've no idea if this is going to be of any use to anyone, but I had a lot of trouble getting 64Hdd to work. I managed to figure out most of this either myself, or by googling.
- See this article for more information Commodore Tape Transfers | QuantumWarp
- VC1541 (Hardware Emulator software)
Hardware
- 1541 Emulator
- SD2IEC (Hardware Emulator device)
- This connects direct to a real Commodore computer
- Commodore 1541 Disk Drive connected to the commodore computer
- Use native Commodore disk copying software or commands to copy from the real disk to an image on the emulated drive.
- How to Copy C64 Disks between SD2IEC and Real Drives | YouTube | Jan Beta
- A little tutorial video about how to copy .D64 disk images from an SD2IEC (or equivalent device) to a real floppy disk using a 1541 disk drive (and also vice versa).
- Set SD2IC to Device 9 (non permanent)
- OPEN 15,8,15 - Opens channel 15 for device 8
- PRINT#15,"u0>CHR$(9) - this send the command to change the drives address to 9
- CLOSE 15 - Closes channel 15
- Use DraCopy on a real C64
- sd2iec (firmware) - C64-Wiki - This page describes the functionality of the sd2iec firmware including disk commands that can be issued from the Commodore.
- Does not support G64 images
- Pi1541
- Fully supports:
- Fast Loaders
- D64
- G64
- Pi1541 Official Homepage - Pi1541 is a real-time, cycle exact, Commodore 1541 disk drive emulator that can run on a Raspberry Pi 3B, 3B+ or 3A+.
- Pi1541 - C64-Wiki - A description of the Pi1541
- The Pi1541 Disk Drive – breadbox64.com - A great article on a beautiful looking device.
- Fully supports:
- Raspberry Pi
- RaspberryPI models comparison | Comparison tables - SocialCompare - Compare Raspberry Pi Zero 2 vs Raspberry Pi 400 vs Raspberry Pi 4 vs Raspberry Pi 3 A+ vs Raspberry Pi 3 B+ vs Raspberry Pi 3 vs Raspberry Pi 2 vs Raspberry Pi Zero vs Raspberry Pi
- Raspberry Pi 3 B+ Comparison with 3B and More! - Latest Open Tech From Seeed - Released in 2018, the raspberry pi 3B+ was the third ever seemingly capable upgrade to the raspberry pi 3B. With the 3B and Pi 3B+ having significant advantages over the Pi B+ and Pi 2, one would wonder what’s the difference between the 3B and 3B+?
- SD2IEC (Hardware Emulator device)
- PC 1541 Adapters
- ZoomFloppy Adapter
- Based on XUM1541 developed by Nate Lawson.
- ZoomFloppy brings Commodore disk archival into the 21st Century, bridging the gap between the both the IEEE-488 and IEC-based disk intelligent Commodore™ disk drive line and contemporary personal computers. Taking up the baton from the ever-popular X*-1541 line of parallel port interfaces, ZoomFloppy provides complete functionality for newer machines running multitasking and multi-user operating systems and those systems lacking the legacy parallel port upon which the X*-1541 interfaces depend.
- ZoomFloppy Set Up | YouTube | Hey Birt!
- Follow along as we wrap a case around a ZoomFloppy board, install the USB driver and OpenCBM software on the PC as well as learn how to back up a floppy disc to a .d64 file. There is a lot more you can do with a ZoomFloppy, if you have questions let me know in the comments below.
- In this video he uses GUI4CBM4WIN to transfer files.
- ZoomFloppy will always be compatible with the XUM1541 firmware
- ZoomFloppy – RETRO Innovations
- Excellent description of this product and it's features.
- How is the Zoom Floppy different then the XU1541?
- Performance
- 25-second backup without optimizing (parallel transfer, needs cable in drive).
- Still faster even for serial xfers.
- Functionality
- supports Burst Nibbler protocol via nibtools. Allows raw g64 backups (read and write). Works with vmax/epyx etc etc.
- Reliability
- interrupt xfers in the middle (^C), start another transfer, and everything gets reset and restarted properly
- Supports infinite holdoff
- IEEE-488 Support
- ZoomFloppy is one of a few solutions for USB access to the IEE-488 drives, and the only one that understands PET/CBM IEEE commands.
- Can talk directly to Commodore Disk drives such as the PET 4040 and PET 8050.
- Future Expansion
- All signals are available on the X5 Expansion Port.
- only 7 KB used out of 32 KB FLASH on microcontroller
- How does ZoomFloppy compare to a XUM1541 device?
- ZoomFloppy is an implementation of an XUM1541-compliant interface. XUM1541 specifies a protocol that is used to transfer data from the interface to the OpenCBM libraries. In many cases, the terms can be used interchangeably, though they do not mean exactly the same thing. Incidentally, ZoomFloppy is partially named after the “xum” in XUM1541, which many people pronounce as “zoom” .
- Performance
- How to use ZoomFloppy – The WP Guru - ZoomFloppy is an ingenious contraption by Nate Lawson which lets you connect real Commodore disk drives via USB to modern computers.
- ZoomFloppy adapter can access CBM Commodore PET Dual drives (i.e. 4040/8050)
- ZoomFloppy – RETRO Innovations - homepage
- ZoomFloppy review – Vintage is The New Old
- This seems to be a next generation adapter that works with everything including PET drives.
- I have not used this but included it because it keeps popping up
- Commodore Software - CBM Transfer v1.22a - CBM Transfer v1.22a by Steve J. Gray (Released Sept. 13th, 2021) - This is an excellent Windows based program for transfer files from a real Commodore 1541/71/81 to a PC using either the Zoom Floppy or USB based XUM cable.
- XUM1541 Setting up guide | load64.com
- ZoomFloppy from Box to using in 10 minutes. | YouTube | Steve's Real World - Unboxing and use of a ZommFloppy
- A ZoomFloppy, PixelBook Go, and Raspberry Pi - marcbilodeau.com - The ZoomFloppy is an essential tool for any serious Commodore 64 enthusiast. Learn about it and how to set one up with a Pixelbook Go and Raspberry Pi.
- Getting two ZoomFloppies to Work on the Same Windows 10 Box - Realm of Zoggins - You have probably made poor decisions in life when you come to the conclusion that you need so many Commodore drives hooked up to your PC that you need more than one ZoomFloppy, but here I am to tell my story.
- XUM1541-II
- Building and testing a XUM1541-II adapter for connecting a Commodore 1541 floppy drive to a PC | YouTube | Artic retro - In this video I build a XUM 1541-II adapter that is based on the ZoomFloppy adapter.
This makes it possible to connect a 1541 floppy disk drive to the USB-port of a modern PC, and copy floppy disks over to that PC, or do other disk-operations using OpenCBM commands. - KryoFlux (PC Adapter)
- KryoFlux Products & Services Ltd.
- KryoFlux is a USB-based device designed specifically for the reliability and precision needed to acquire reliable low-level reads suitable for software preservation.
- This is the official hardware developed by The Software Preservation Society, an authority in authentic floppy disk imaging and preservation.
- UK Company.
- KryoFlux Products & Services Ltd.
- SuperCard Pro (CMBSTUFF)
- CBMSTUFF SuperCard Pro - Homepage
- I have not used these and they are hard to get hold of.
- Burst Nibbler
- The package came with software to be run on the Commodore C64
- The connection cable is the same pinout of the ZoomFloppy (i am guessing)
- Commodore 1541 Parallel Cable with ZoomFloppy & Burst Nibbler Demo | YouTube | Steve's Retro Gaming - This video shows a mix of ZoomFloppy/Burst nibbler hardware and software and how they can be mixed and matched when using the parallel mod on a Commodore 1541.
- [CSDb] - Burst Nibbler V1.9 by Octagon (1988) - Commodore 64 Crack: Burst Nibbler V1.9 by Octagon. Released on 1988
- Burst Nibbler for Commodore 64/128 Datel Parallel Cable & Software Zoom floppy compatible - GameDude Computers
- Deep Scan Burst Nibbler! Zoom floppy compatible Powerful Software
- The notes below explain how the ZoomFloppy and this Burst Nibbler gets the un-modified data to make perfect backups.
- The Burst Nibbler system is probably the most powerful disk copier available for the Commodore computer.
- It gains its power by using parallel data transfer. With standard nibblers the data is read from the disk and decoded into a standard format before being transferred to the host computer by the serial bus. This is all well until it comes across some non-standard data on the disk. Because it can't recognize the code it is unable to decode into the form needed for serial transfer. With parallel transfer the data is read from the disk and transferred directly to the host computer without the need to decode it. This is achieved because the Burst Nibbler System is actually hardware and software package. The hardware consists of a parallel cable that plugs into the computers user port. The other end of the cable plugs into the Via chip socket inside your disk drive. The software is a powerful Nibbler control program with various parameter settings to maximize results.
- Transfers raw GCR Code via cable!
- Fitted in minutes usually no soldering!
- Only package to copy up to 41 tracks!
- Will copy a whole disk in under 2 mins!
- Full and half tracks copied - no problem!
- Make a perfect copy every time!
- Fitting involves lifting the 6522 Via chip inside the drive, inserting it into the socket on the cable and plugging the whole assembly back into the socket, the other end just plugs into the user port and has a through connector for your other hardware.
- Parallel Port Adapters (XE1541/XA1541/etc....)
- These have been covered extensively in this article Commodore Tape Transfers | QuantumWarp
- They are an old and slow way of connecting to Commodore drive
- XU1541
- The xu1541 | Spiro's home on the web - Homepage
- Originally developed by Till Harbaum
- This project is now dead and you should not use these adapters anymore unless you have one already.
- The xu1541 was the modern way to connect CBM IEC bus devices to todays USB equipped PCs (The more modern alternative is the XUM1541).
- It was meant to replace the printer port solutions based on the so-called original x1541 cable.
- It provides a means to send low level IEC commands forth and back via the USB. PC software developed to support this interface may then directly access the disk drive and the contents of a disk inserted. It should also be possible to access other IEC devices like printers. Currently e.g. the git version of the OpenCBM software supports this interface.
- XUM1541
- Developed by Nate Lawson
- The firware and schematics are released as Open Source
- ZoomFloppy is based on this.
- Introducing xum1541: the fast C64 floppy USB adapter | rdist
- I’ve been working on a project in my spare time that I’m now ready to announce. It is a USB interface for the C64 1541 floppy drive, which allows it to be connected to a modern PC.
- The xum1541 (pronounced “zoom”) is built from a modified version of the xu1541 firmware.
- It is a USB full speed device and supports high-speed parallel cables.
- The hardware USB support significantly speeds up transfers.
- It will support mnib (aka nibtools), which provides low-level imaging to backup copy protected disks. I’m most excited about this feature since it is critical to archiving original floppies for the C64 Preservation Project.
- XUM1541 Homepage | Nate Lawson - Nate's original prototype page.
- Nate recommends buying a ZoomFloppy prebuilt.
- A GitHub XEUM1541 project
- GitHub - tebl/C64-XUM1541: Simple PCB for building a XUM1541 - A device for copying data to and from Commodore 1541 disk drives using a modern computer.
- GitHub - tebl/C64-XUM1541-II: An updated version of my C64 XUM1541, - this supports the newer XUM1541 firmware and comes with a few extra goodies.
- OpenCBM/xum1541 at master · OpenCBM/OpenCBM · GitHub
- Official XUM1541 firmware
- Win 7/8/10, and Linux/i386/AMD64 kernel driver and development library to control serial CBM devices, such as the Commodore 1541 disk drive, connected to the PC's parallel port via a XM1541 or ...
- ZoomFloppy Adapter
- Commodore Drives
- 1541
- Commodore 1541 - Wikipedia
- Disks formatted on the 1541 are compatible with the 1551
- You can only change the devices ID number permanently with a hardware mod.
- the default device ID is 8, but this can be changed to 9 and possible 11.
- You can use software to change the device ID temporarily
- Both theses change methods are written in the user manual.
- Commodore Pet can read 1541/1551 formatted disks
- Readers' Feedback: Commodore 1541 Disk Drive Device Number Update
- Commodore Disk Drive Device Number Update (From Compute! Issue 50 / July 1984)
- Covers hardware mod and software method, both mentioned in the user manual (page 48)
- The 1541 demo disk that was included with your drive also contains a program to change device numbers. LOAD the program DISK ADDR CHANGE then RUN. The user prompts will tell you what to do.
- If you feel uncomfortable changing the device number using the hardware method, the same thing can be achieved with a software (program) modification. Here is the procedure:
- Turn off all disk drives
- Turn on the disk drive whose device number you want to change
- Type and enter the following commands:
CLOSE 15: OPEN 15, 8, 15
PRINT # 15, "M-W", CHR$(119) CHR$(0) CHR$(2) CHR$(n + 32) CHR$(n + 64)
CLOSE 15
- Change the n in the PRINT#15 command above to the device number you want to assign to the disk drive. It might be best to limit the device numbers to the range between 9 and 14.
- Note the syntax of the PRINT#15, "M-" … command. Contrary to the instructions in the 1541 user's manual, do not include the colon after the memory-write (M-W) command. If the colon is included, the device number change will not be successful.
- Now you can turn on the other drive(s), and start processing.
- The 1541 demo disk that was included with your drive also contains a program to change device numbers. LOAD the program DISK ADDR CHANGE then RUN. The user prompts will tell you what to do.
- Change Device Number - Software Method (From Manual / Pg48)
- The device number is selected by the drive by looking at a hardware jumper on the board and writing the number based on that jumper in a section of its RAM. Once operation is underway, it is easy to write over the previous device number with a new one.
- The Code
FORMAT FOR CHANGING DEVICE NUMBER:

    PRINT#file#,"M-W:" CHR$(119) CHR$(0) CHR$(2) CHR$(address+32)
    CHR$(address+64)

EXAMPLE OF CHANGING DEVICE NUMBER (FROM 8 TO 9):

 10 OPEN 15, 8, 15
 20 PRINT# 15, "M-W" CHR$(119) CHR$(0) CHR$(2) CHR$(9+32)
    CHR$(9+64)
- "HOW TO" change the 1541 drive assignment. | AmiBay
- Every now and then i see that people are wondering how to change the 1541's drive assignment from say,8 to 9. So here is a little write up on how to do it, with pictures and a little hand drawn diagram.
- This tutorial show you how to add your own DIP switches to your drive.
- The 1541 demo disk that was included with your drive also contains a program to change device numbers. LOAD the program DISK ADDR CHANGE then RUN. The user prompts will tell you what to do.
- Ruud's Commodore Site: 1541 - Ruud's Commodore site, information about Commodores and old PCs. This particular page is dedicated to the 1541 hardware and how it works.
- Commodore 1541 - Wikipedia
- 1541-II
- Commodore 1541-II DIP switches - The Silicon Underground
- Commodore's 1541-II disk drive has a pair of DIP switches in back. Here's how to set the Commodore 1541-II DIP switches so you can run more than one drive.
- It shouldn’t strictly matter how you connect the drives, but Commodore recommended plugging drive 8 straight into to the computer. Plug drive 9 into drive 8. If you need help connecting them, see my earlier post on connecting Commodore disk drives.
- For what it’s worth, the switch settings are the same on a 1571 or 1581 drive as well.
- Device 12 - Changing the Commodore 1541 Default Device Number To Anything! | The Commodore Room - In this video, we change the 1541-II device number to start at 12 rather than the default 8. This way, you can avoid the lengthy process of software device number changes and easily daisy chain a couple dozen 1541's together!
- Commodore 1541-II DIP switches - The Silicon Underground
- 1551
- Commodore 1551 - Wikipedia
- Disks formatted on the 1551 are compatible with the 1541
- You can only change the devices ID number permanently with a hardware mod.
- the default device ID is 8, but this can be changed to 9 and possible 11.
- You can use software to change the device ID temporarily
- Both theses change methods are written in the user manual (age 71).
- Commodore Pet can read 1541/1551 formatted disks
- Change Device Number - Software Method (From Manual / Pg71)
- The preferred way to temporarily change the device number of a disk drive is via a program. When power is first turned on. the drive reads an 110 location whose value is controlled by a jumper on its circuit board, and writes the device number it reads there into memory locations 119 and 120. Any time thereafter, you may write over that device number with a new one, which will be effective until it is changed again, or the 1551 is reset
- The Code
FORMAT FOR TEMPORARILY CHANGING THE DISK DEVICE NUMBER:

    PRINT#15,"%n"

    Where n = 8 or 9

EXAMPLE

    Here is a program that sets any device number:

10 INPUT "NEW DEVICE NUMBER"; DV$
20 IF NOT (DV$ = "8" or DV$ = "9") THEN 10
30 OPEN 15,8,15, "%R"+DV$: CLOSE 15

If you send only the % sign, the device number will toggle between 8 and 9.
- The 1551 demo disk that was included with your drive also contains a program to change device numbers. LOAD the program DISK ADDR CHANGE then RUN. The user prompts will tell you what to do.
- Commodore 1551 and Plus 4 Update | YouTube | OldSkoolCoder - A simple repair for a 1551 not reading disk because the head is jammed.
- Commodore 1551 Disk Drive - Peripheral - Computing History - Originally known as the SFS481, and designed specifically for the Commodore Plus 4, it is in appearance like a charcoal grey 1541. The drive plugs into the cartridge slot of the machine, using its own wired in interface.
- Commodore 1551 - C64-Wiki - A small article on this unique drive.
- Commodore 1551 - Hardware - Plus/4 World - The Commodore 1551 floppy drive is a rare beauty. Designed for the Commodore 264 series, it borrows the nice black look of the Commodore Plus/4. It connects through the parallel port, unlike the more common 1541 drive, which had a serial connection.
- Commodore 1551 Academic - The Commodore 1551 (originally introduced as the SFS 481) was a floppy disk drive for the Commodore Plus/4 home computer. It resembled a charcoal-colored Commodore 1541 and plugged into the cartridge port, providing faster access than the C64/1541 combination. Commodore reportedly planned an interface to allow use of the 1551 with the C64, but it was never released.
- Commodore 1551 - Wikipedia
- 1571
- The internal RAM of this drive is sufficient to load a complete track into memory which is require to beat some copy protections.
- A 1571 can backup protected disks natively becasue it can read the a whole Track into RAM including read errors.
- A parallel mod on a 1571 just speeds the drive up. I have not seen anyonbe who has done this mod so I could be wrong.
- Parallel Port mod
- This is mainly done on the 1541 thought it can be done on the rest of the drives with varing levels of difficultly.
- It allows greater speed for transfers but it main feature is it allows direct access to the GCR data so copy protectsion can be imaged as-well. See Burst Nibbler notes above for more information.
- Commodore c64 128 user port parallel adapter + 1541 drive parallel port | eBay
- I know you have to add the parallel mod onto a 1541 to allow nibbling and it gives it speed increase. But I see on the mod 1571, does this mean you can apply this parallel mod to a 1571 for increased speed?
- Yes, it can be used in a 1571 also, but in this case you can't use a header connector because the space inside is limited and you may need to raise the cover a little.
- The 1571 has also the "burst" mode that can be used to increase speed and burst nibbling without parallel connection, so the mod in the 1571 is not very useful.
- Floppy disk Recovery
- Rescuing Floppy Disks - Archiveteam - This page is meant to be a clearinghouse for various options that a person or group of reasonable technical ability could use to rescue data from floppy disks. If any of these options seem daunting, a number of people have offered to accept floppy disks and pull the data using these tools.
- Cleaning a drive
- DIY 5.25 inch cleaning diskRetro Commodor
- I’m dumping quite a lot of disks in different formats. For that I’m using the Kryoflux, but quite often are the disks dirty, and the dirt gets stuck to the read head of the drive.
- This article shows you how to make your own cleaning disk and then how to use it to clean your drives heads.
- DIY 5.25 inch cleaning diskRetro Commodor
- Disk Misc
- Converting a Commodore 1541 or 1570 Drive into a 1551 – pagetable.com - The 1551 is the weird outlier in the family of Commodore disk drives: It is the only drive using the “TCBM” bus instead of Serial or IEEE-488. And what’s even weirder? 1541 and 1570 drives converted into 1551s!
- 1541 vs 1551 vs 1571 etc..
- Commodore 5.25" Floppy Disk Drives - 1551/1541 | YouTube | Dan Wood - A look at my mid 80's Commodore floppy disk drives. The famous Commodore 1541 drive for the Commodore 64, and the rare Commodore 1551 parallel drive for the Commodore Plus/4.
- Commodore Disk Drive 1551 vs. 1541 Speed Comparison | YouTube | jimboblivesforever - Comparison of loading speeds of the Commodore VC 1541 Disk Drive and the very rare Commodore 1551 Drive for the 264 series computers like the C16, C116 and Plus 4.
- Inside Commodore DOS - OCR.pdf | devili.iki.fi - A technical dive into the 1541 Disk Drive and is aimed at programmers.
- 1541
Commodore BASIC/Disk Commands
- COPY - C64-Wiki
- Copy the whole disk in drive 1 to the disk in drive 0 (on a dual-drive floppy only)
COPY D1 TO D0

or possibly

COPY D8 TO D9
- The BASIC COPY command with logical drives can be used to copy between units of a dual disk drive (drives that use a single device number and two logical drives in that). I'm not aware any of them that could be connected to the plus/4 easily.
- Examples of a suitable drive is probably the CBM PET 8050
- Copy the whole disk in drive 1 to the disk in drive 0 (on a dual-drive floppy only)
- To load and show directory
LOAD"$",8
LIST
- To load a PRG and execute it
LOAD"TTAPSERV.PRG",8
RUN
- DIRECTORY - C64-Wiki
- BASIC 3.5+ (i.e. C16 and Plus4)
- DLOAD - C64-Wiki
- BASIC 3.5+ (i.e. C16 and Plus4)
Notes
- General
- Misc
- Transferring Commodore 64 Disks to Modern Formats | Diginoodles - This is a description of how I was able to convert over 200 Commodore 64 1541 floppy disks to a number of .D64 archive files, readable with any of the modern C64 emulators. I did this transfer of ancient data close to 20 years ago, but hopefully the information may stil be useful for anyone who may want to do this.
- Commodore History Part 7 - Disk Drives | YouTube | The 8-Bit Guy
- Copy Protection
- Telling the story of the Commodore 64, Copy Protection, and Disk Copiers | Commodore Copiers Copy Protection - Telling the story of the Commodore 64, Copy Protection, and Disk Copiers
- ZoomFloppy with NIBTOOLS | YouTube | Hey Birt!
- In the third part of this series on the ZoomFloppy we look at using NIBTOOLS to backup copy protected disks
- He is using a 1571 and it works with no modification because the drive has enough internal RAM to load a whole track at a time which is required to beat some copy protections.
- You can use a 1541 but it requires a hardware modification and ZoomFloppy with the Parallel Port option.
- Simple Commodore 64 Disk Protection: Copy that Floppy, Remove Anti-Piracy Measures | YouTube | 8-Bit Show And Tell
- The is a really easy video to watch and show you how to defeat some copy protections.
- This guy uses the software Maverick utilising both the 'Fast Data Copier' (Sector by Sector copier) and the 'GCR Nibbler Copier' for copying dodgy sectors.
- The "I Am The C-64" tutorial programs for the Commodore 64 have anti-piracy disk copy protection, despite being written in BASIC, and it's enough to thwart simple "fast" disk copiers. We go through the steps of making a copy of the disk on a real 1541 and KAO 5.25" floppy disk with the help of Maverick's disk nybbler, and then go a step further and "de-protect" the program so a nybbler is no longer necessary.
- commodore 64 - How can I view an Error Info Block in a D64 image? - Retrocomputing Stack Exchange
- How do I copy a real disk with an error as protection? - Commodore 64 (C64) Forum
- Some useful information and starting points here
- Mentions the following software
- [CSDb] - Disk Tool V5.0 by The Light Circle (1986) - Commodore 64 Crack: Disk Tool V5.0 by The Light Circle. Released on 1986
- [CSDb] - Disk Error Check Utility by Kracker Jax Protection Busters - Commodore 64 Tool: Disk Error Check Utility by Kracker Jax Protection Busters
- [CSDb] - Underground Network by Mike J. Henry (1984) - Commodore 64 Tool: Underground Network by Mike J. Henry. Released on 1984
- [CSDb] - 64Copy V4.46 Beta by Peter Schepers (2015) - Other Platform Commodore 64 Tool: 64Copy V4.46 Beta by Peter Schepers. Released on 21 October 2015
- Create a Blank Disk Image
- Pi1541 - Page 124 - Commodore 64 (C64) Forum - At the top of this page it gives the instructions on how to create a blank D64 and G64 image both from the Commodore and from the Pi1541.
- Create a blank .c64 disk image for the Pi1541 or SD2IEC | retroCombs - Create a blank .c64 disk image for the Pi1541 or SD2IEC
- Use VICE Emulator (This can create any type of blank image except TAP and T64 for obvious reasons)
- Run the emulator
- File --> Create and attach an empty disk image
- Set the following options
- Select a suitable location such as your desktop
- At the top, fill in the Name field with a suitable name such as 'blank_disk'
- No spaces are allowed in the filename.
- I dont know if all lowercase is better for filename.
- At the bottom, select the image type (ie D64/G64)
- Don't touch anything else unless you know what they are for (I don't)
- Click Save
- Close VICE
- Disk Images
- NIB is an archive of a floppy disk, it is not a virtual disk file. it contains the GCR data recorded of the disks surface.
- D64 is the standard and basic disk image.
- D64 reader/writer with support for extended tracks - Commodore 64 (C64) forums - A discussion on the D64 image format.
- Cannot be used to store copy protected disks.
- This format stores all the data from a disk in a structured manner but it is not a 1-1 representation of the disk. Only data from standard tracks in standard locations is kept.
- G64
- Is a format that that can handle copy protected disks.
- It is made from the raw GCR stream (GCR Pulses from the magnetic media).
- GCR-encoded disk image format
- Contains all the extra information such as errors on the disk and so is more full and accurate image of the disk.
- This format is needed for copy protected disks.
- The C64 file formats list | 64Copy Central - This is a page of all the various disk image formats and links to their specifications.
- Disk Image - C64-Wiki - This is a page of all the various disk image formats and links to their specifications.
- 17 The emulator file formats | VICE Manual - This chapter gives a technical description of the various files supported by the emulators.
- Commodore 64 file types - Commodore 64 (C64) Forum - Can someone please explain exactly what the following game files are - d64, .t64, .g64, .p00, .p01, .p02, .prg, .tap, .crt.
- Introduction to the various Emulator Formats | petlibrary.tripod.com
- This page and the pages it refers to can be found in the C64 download folder ( formats.zip ) . It is taken directly without any modifications from the 64copy package by Peter Schepers which can be found in the PC tools section of the fairlight site , in the PC section .
- Programming information | Fairlight
- Hardware information about the 1541 and the Commodore 64.
- This page has the formats.zip. Formats is Peter Scheper's (author of the excellent conversion program 64Copy) contribution to enlightening us about the structure of the different formats commonly used on the C64 and the emulators. The text has grown covering more and more, so the overview was slightly lost. To solve this, Peter split the file into one file for each format description. What you get here is a ZIP file containing them all.
- Ruud's Commodore Site: disk images
- Disk images are a copy of the data of a floppy on another carrier, like a hard disk or an USB stick. These images can be used by programs like Star Commander, VICE, X1541 and several C64-emulators
- A basic explanation of the different Commodore image types.
My Evolis New Pebble Card Printer Notes
I have an 'Evolis New Pebble' Card printer (a.k.a Pebble 2) and these are my notes (and solution) for getting this printer to work on a Windows 10 PC.
Running a Evolis New Pebble (a.k.a Pebble 2) on Windows 10
This is my easy solution
- Install and use Pebble 4 Windows 10 drivers (Pebble 2/3/4 share the same driver,)
- Connect the Pebble on to a HP JetDirect Ex Plus (J2591A) Print Server.
- Set the print server up on your network
- Install the printer in Windows 10 using a standard TCP/IP port with the IP of the print server and then select the Evolis Pebble driver.
My Research
- Driver
- Pebble 2/3/4 printers share the same driver.
- My Pebble 2 does not have a USB socket, but works with the Pebble 4 driver for windows 10
- According to the manual, to install printer on LPT
- Do not connect the printer
- Install drivers
- Manually add the printer using 'Add Printer'
- Pebble 4 default driver location
C:\Program Files\Evolis Card Printer\Drivers Pebble4
- Driver Error - accessio.sys
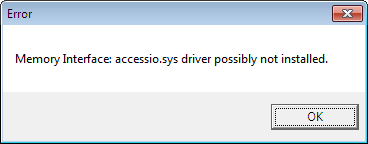
- This is caused by using the and old version of the driver.
- Install and use the Pebble 4 driver to fix this.
- Printer Port
- The Pebble 2 is very fussy about what printer port it likes. So if at first you cannot communicate with the printer it possible is the printer port.
- I have my printer connected to an old PC with the port set to ECP+EPP and I get communication.
- I am also running Windows 10 using the Pebble 4 driver.
- Consider getting an old print server (IEEE 1284 compatible) as this will resolve any printer port issues you have and will put the printer on the network.
- Old PCs tend to have more compatible parrallel ports such as my Foxconn Winfast MCP61SM2MA-ERS2H Socket AM2 Motherboard
- Use a Print Server
- This allows you to use a Pebble 2 as a network printer.
- This fixes any issues of printer port compatibility.
- Modern PC's printer ports seem to have issue with older kit. I think this is because they are not fully IEEE 1284 compatible.
- I use a HP JetDirect EX Plus (J2591A)
- How can I connect my printer to my corporate network? | Evolis - This suggests 2 printer servers.
- IEEE 1284 - Wikipedia - A parallel port that supports 1284 supports ll parallel port modes so is very compatible.
- SPP/EPP/ECP - How Parallel Ports Work | HowStuffWorks - Learn how parallel ports operate and how they came about.
- Parallel Port 'Plug and Play' is disabled by default in Windows 10
- I could not get this to work with the Pebble 2, I don't think the Pebble 2 is Plug and Play.
- Setting up a printer to use an LPT port in Windows 10 - How to enable Plug and Play
- Enable Plug and Play for parallel port devices - Windows Server | Microsoft Docs - Describes how to enable the Plug and Play feature on devices that use a parallel port device.
- When you set this option, it stays ticked, even after reboots.
- Ribbon
- What does YMCKO mean?
- YMCKO refers to a 5-panel ribbon. Each letter matches up to a panel color:
- Y Yellow
- M Magenta
- C Cyan
- K Black
- O Overlay
- YMCKO refers to a 5-panel ribbon. Each letter matches up to a panel color:
- Evolis Printer Ribbons - Pebble 2 3 4
- Fast delivery for all your Evolis Pebble 2 3 4 Printer Ribbons and Supplies.
- Ribbons for use with the Evolis Pebble 2, Pebble 3 and Pebble 4 ID card printers
- This means that the Pebble 2,3 and 4 all use the same Ribbons. I also think the Dualys also uses these ribbons.
- What does YMCKO mean?
- Maintenance
- General
- Evolis Pebble4 Troubleshooting Guide - BadgePros.com - Evolis Pebble4 Troubleshooting Guide - BadgePros.com
- Open Question My Evolis Pebble 4 isn't printing. | Fixya
- Cleaning
- Cleaning your Evolis Pebble 4 printer | Denver ID Card Printers | YouTube
- Reset the clean counter without a clean kit
- I did not have a cleaning card so i just used a normal card so I could clear the 'Clean Printer' error which is automatically triggered after 1200 prints but cleaning should be done every 1000 cards.
- This is not recommended to do, but if you want to get the printer working before spending any money on it, this is a valid thing to do.
- Change Ribbon
- Evolis Printers - How to Change A Print Ribbon | YouTube
- The supply spool is at the back (near card hopper) and the take-up spool is at the front (where cards come out)
- Evolis Printers - How to Change A Print Ribbon | YouTube
- Other Ribbon Issues
- Tutorial: How to Repair a Ripped Ribbon on an Evolis Printer | YouTube
- Evolis pebble 3 ribbon problem | Fixya - Hi i have just got a new black ribbon for me pebble 3 and a new coloured one, it will accept the coloured but not the new black one or the old one now, it just says error can you help me as i dont know what i have done?
- Feed Issues
- Evolis Pebble or Dualys - Printer Won't Feed A Card ~ TechTips@SafeCardID.com - If your Evolis Pebble or Evolis Dualys printer won't feed a card, check these 6 things to get your printer running smoothly again.
- Won’t Feed Cards – Evolis Pebble | TransTech Systems, Inc
- The printer will not display 'no cards'/'out of paper' on the printer unless the printer roll has been cycled or is in the correct position
- Permanent Feed error
- if you constantly get a feed roll error, check the drive belt which is attached to the front drive cog.
- The rear drive cog is passively driven by the ribbon which in turn is power by a motor at the front.
- The belt will wear out over time
- See making your own replacement belt below.
- Print Head
- How to Remove and Replace an Evolis Pebble Printhead ~ TechTips@SafeCardID.com
- One popular question about the Evolis brand printers is about the printhead removal and replacement.
- The following video was prepared to demonstrate how to remove a printhead from the Evolis Pebble printer and then replace it with a different printhead.
- How to Remove and Replace an Evolis Pebble Printhead ~ TechTips@SafeCardID.com
- Evolis Pebble 4 - How to print a test card | YouTube
- Calibration
- How to calibrate the ribbon sensors on an Evolis Pebble 4 printer from AlphaCard Technical Support AlphaCard Technical Support - A complete guide to calibrating the ribbon sensors on an Evolis Pebble 4 ID card printer.
- General
Make new Drive Belt (Poly Belt / PU Belt)
I could not find anywhere I could by a new drive belt but discovered you could make your own very cheaply
The belt is a Round PU Belt and we will replace it with a one having the following specs:
- 2mm Diameter
- 6 inches / 152mm
This is what my belt looked like when I took it out. It is no longer flexible and if you look you can see where the PU join is.

What you need

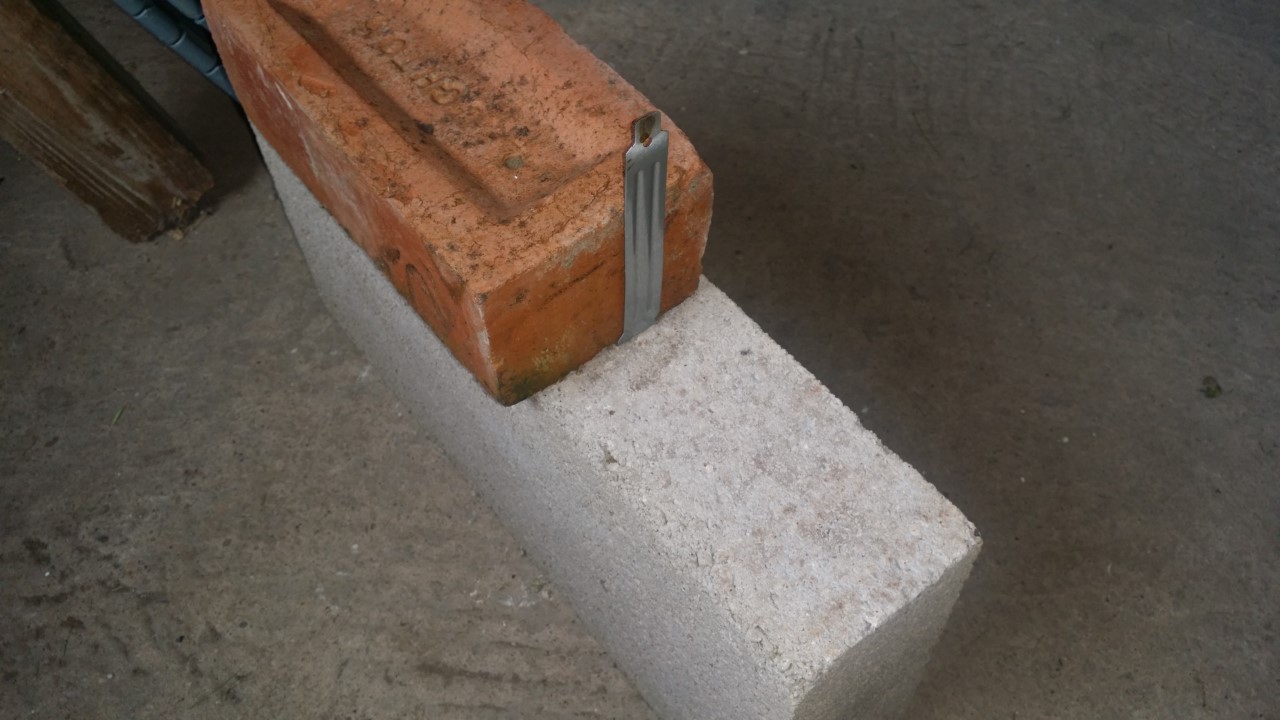
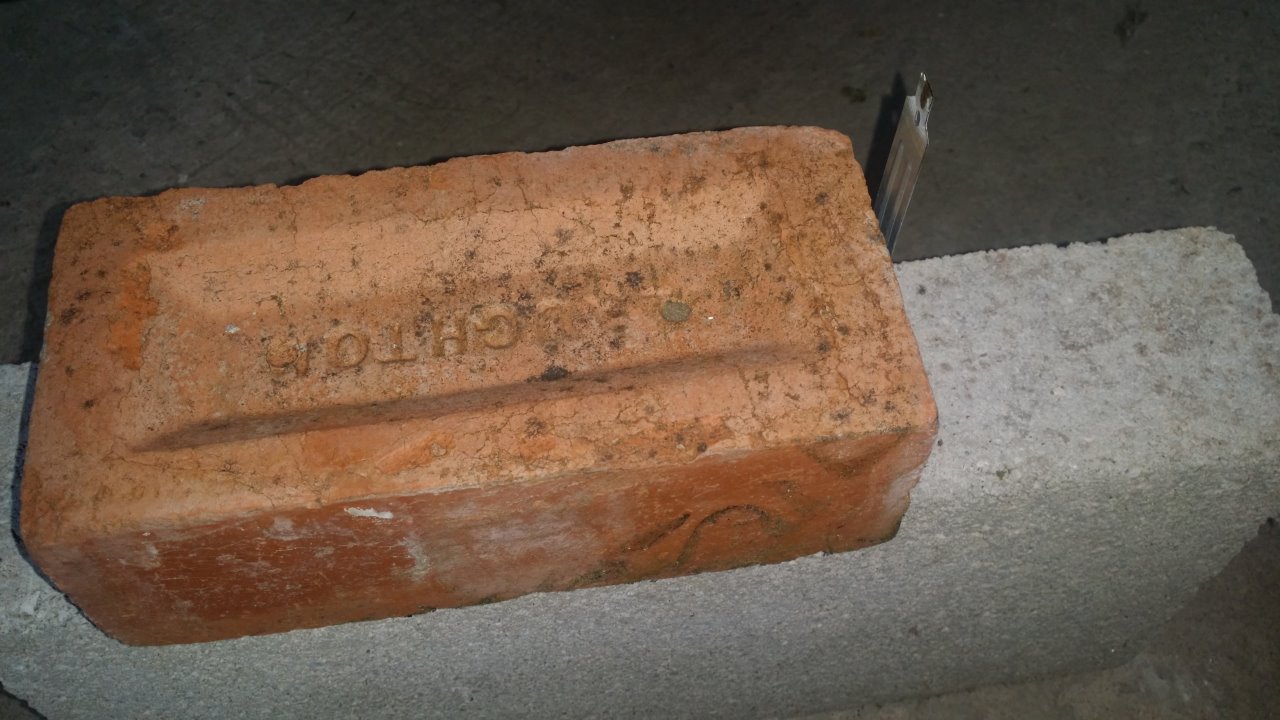
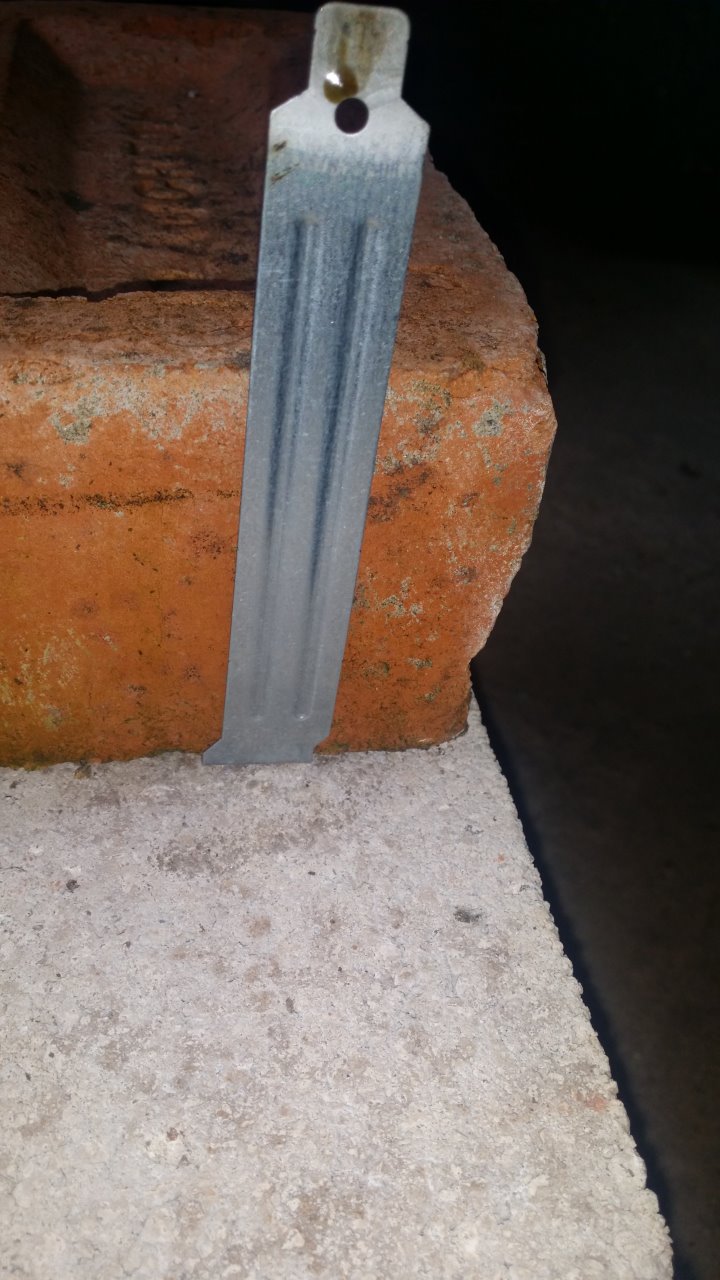
- A couple of bricks
- A PC Blanker plate with a flat head (where you screw it to a case) which allows it to be head in place by the brick
- A small blow torch
- A 6 inch length of your PU belt
What I did
- Heated up the top of the blanker plate with the blow torch until read hot.
- Touched the top of the blanker plate with each end of the PU belt.
- When they were melted (hot enough) I removed them from the blacker plate and pushed them together making sure they were even.
- I held the 2 ends together for about 2-3 mins
- Leave for a few minutes more.
- Test the new belt is strong by pulling it.
What other people have done
- Poly drive belt joining tutorial, the simple way. | The Stone Crafting Workshop | YouTube
- Easy to make Poly belt Jig. Make accurate replacement belts time after time. | The Stone Crafting Workshop | YouTube
- Joining Round Lathe Poly Belt | Mike Holmes | YouTube
Replace Pebble 2 Drive Belt
This is just an outline of what to do as stripping the printer is easy, just a bit fiddly at ppints.
- Drive belt location
- remove lid screw
- remove the card bucket screw
- remove screws on the side
- remove screws below
- waggle top cover off (carefully)
- unscrew control board and pull out
- remove the drive motor
- take the circlip of the drive cog
- replace drive belt (made earlier)
- re-assemble printer
HP JetDirect Ex Plus (J2591A) Print Server
This is an old piece of kit with no Web Admin so some notes are required.
HP Jetdirect EX Plus Print Server Manuals | HP® Customer Support - Manuals or user guides for your HP Jetdirect EX Plus Print Server
Reset Configuration
- Make sure the unit is off
- Connect the unit tot he network with an ethernet cable.
- Hold the 'Test' button down
- Power on the device
- keep holding the 'Test' button for 5-30 seconds and then release.
Get IP Address of Box
Pick the easiet option below to get the IP address of the box.
- Option 1 - Press the 'Test' button and a diagnostic sheet will printout with the IP.
- Option 2 - Check you DHCP server for a new entry.
- Option 3 - Scan your network with an IP scanner.
- Advanced IP Scanner
- Angry IP Scanner
- Slitheris Network Discovery
- Option 4 - Check to see if you can connect to the box's fallback IP of 192.0.0.192
- Option 5 - Possibly use Web JetAdmin?
See Current Configuration
Do this
- telnet 10.0.0.127
- Press Enter
- Press Enter
- Press / + Enter to show current configuration
- Press ? + Enter to show configurable options
Gives this
Please type [Return] two times, to initialize telnet configuration
For HELP type "?"
> >
   ===JetDirect Telnet Configuration===
        Present Config  : BOOTP
        MAC Address     : xx:xx:xx:xx:xx:xx
        Host Name       : 10.0.0.127

        IP Address      : 10.0.0.127
        Subnet Mask     : 255.255.255.0
        Default Gateway : 10.0.0.1
        Syslog Server   : 0.0.0.0
        Idle Timeout    : 90 Seconds
        Set Cmnty Name  : Not Specified

        DHCP Config     : Disabled
        Passwd          : Disabled
        Novell          : Enabled
        DLC/LLC         : Enabled
        Ethertalk       : Enabled
        Banner page     : Enabled
>
        To Change/Configure Parameters Enter:
        Parameter-name: value <Carriage Return>

        Parameter-name  Type of value
        ip:             IP-address in dotted notation
        subnet-mask:    address in dotted notation
        default-gw:     address in dotted notation
        syslog-svr:     address in dotted notation
        idle-timeout:   seconds in integers
        set-cmnty-name: alpha-numeric string (32 chars max)
        dhcp-config:    0 to disable, 1 to enable
        novell:         0 to disable, 1 to enable
        dlc-llc:        0 to disable, 1 to enable
        ethertalk:      0 to disable, 1 to enable
        banner:         0 to disable, 1 to enable

        Type passwd to change the password.

 Type "?" for HELP, "/" for current settings or "quit" to save-and-exit.
 Or type "exit" to exit without saving configuration parameter entries
>
Set Static IP
This sets static IP and disables some unused protocols. The settings above are only temporary so need to be set permanently.
NB: when you type these in, you will not see text appear in the console
- telnet 10.0.0.199
- Press Enter
- Press Enter
- host-name: JETDIRECT
- ip: 10.0.0.199 <Carriage Return>
- subnet-mask: 255.255.255.0 <Carriage Return>
- default-gw: 10.0.0.1 <Carriage Return>
- dhcp-config: 0 <Carriage Return>
- novell: 0 <Carriage Return>
- dlc-llc: 0 <Carriage Return>
- ethertalk: 0 <Carriage Return>
- banner: 0 <Carriage Return>
- quit
Notes for Options
- DLC/LLC
- HP's proprietary Logical Link Control/Data Link Control protocol.
- DLC/LLC protocols are provided for legacy systems that might require support
- Ethertalk
- Is for Apple Mac OSand devices.
- Banner
- Print a port-specific LPD banner page.
- From HP Jetdirect Print Servers Administrator's Guide.
JetDirect Notes
- General
- Use Windows 2000's TCP port monitor instead of HP's JetAdmin software | TechRepublic - With the addition of a standard TCP port monitor in Windows 2000, you no longer need HP's JetAdmin software to use a JetDirect printer. Find out how to configure the print driver to print directly to an HP JetDirect printer.
- HP JetDirect printserver J2382 setup | YouTube - A how-to guide on setting up an HP Jet-Direct Print server J2382 on a network. Includes configuring a BootP server to allocate an IP address to the Print server.
- Supports using a Syslog Server
- How to Determine, Reset, and Configure an IP Address on an HP Jetdirect Print Server | HP® Customer Support
- This might only be relevant for newer print servers.
- Defaults
- IP
- DHCP
- But if the Jetdirect box does not get an IP address within 2 minutes of it booting up, it assigns itself an IP address of 192.0.0.192, and you can connect to it over the network if you change your own network settings to 192.0.0. and a number from 1-254 (but not 192).
- Username: none
- Password: none
- IP
- Configuring with Telnet
- This is required because there is no Web Admin
- HP Jetdirect print servers with firmware x.07.03 or later have an embedded Web server that can be used to modify the TCP/IP parameters.
- How to configure hp jetdirect ex plus j2591a on win7 64 bit | fixya
-
telnet 192.168.x.x
- You can now change settings as required
-
- Configuring an HP Jetdirect Via Telnet - Network Admin Tools - If you ever need to reconfigure an HP Jetdirect, this can be done via telnet. We have a model 170x; however, this procedure will work with many Jetdirect boxes.
- Configuring HP JetDirect EX Plus J2591A | Inlet Technologies - A client wanted to solve a problem, that instead of having parallel printers connected to network PCs, have the printers connected to the network in their own right.
- SOLVED: How to setup JetDirect Plus (J2591A) - Fixya - How to setup JetDirect Plus (J2591A) Have a J2591A that was given to me. Trying to connect a HP LJ6p to my DSL - HP JetDirect EX Plus Print Server question
- Cracking Open the HP JetDirect EX Plus | TechRepublic - In this TechRepublic teardown gallery, Wally Bahny cracks open an HP JetDirect EX Plus Print Server.
- Hardware Reset
- While holding down the Test button on the print server, plug the power module into the print server and continue to hold down the Test button for five seconds. All previous configuration settings will be erased
- To cold reset an HP Jetdirect external print server, unplug the power cord from the HP Jetdirect print server, then hold down the TEST button (on top of or in back of the HP Jetdirect) for 5 to 30 seconds while plugging in the power cord.
- How To: Reset an HP Jetdirect External Print Server - Printers & Scanners - Spiceworks - This has worked, for me, on most JetDirect Print Servers like the 300x & 500x.
- Official Pages
- HP Jetdirect EX Plus series | HP® Customer Support - Find support and troubleshooting info including software, drivers, and manuals for your HP Jetdirect EX Plus series
- Download HP Web Jetadmin, HP Feature Packs, and HP Proxy Agents | HP
- HP Jetdirect Print Servers Administrator's Guide
- UNC Paths
- UNC path to Print Server | PC Review
- Can anyone advise me as to what my UNC path would be to our HP JetDirect200m print server and hence our HP D155xi OfficeJet Multifunction printer.On installing the HP software supplied, it simply sets up a local standardTCP/IP port and shares that.
- You would need to get a printer network card that supports UNC paths. I have seen ones from Intel and Epson but I'm pretty sure HP has never supported SMB protocol on their Printer NICs. They do have a print server appliance that supports UNC paths.
- UNC path to Print Server | PC Review
Downloads for Pebble Printers
- Pebble 2/3/4 share the same driver, so use the Pebble 4 driver for Windows 10
- Seagull do a generic driver which i have not tried.
Most downloads are not available on the evolis.com website for the older printers so I had to look on 'The Wayback Machine' for some.
- Pebble 2 / New Pebble
- 2009 - https://web.archive.org/web/20090307022755/http://www.evolis.com/eng/Drivers-Support/Product-support/New-Pebble-Pebble-2
- 2015 - https://web.archive.org/web/20150418231525/http://www.evolis.com/drivers-support/drivers-new-pebble-pebble-2-card-printer
- 2016 - https://web.archive.org/web/20160517021135/http://www.evolis.com:80/drivers-support/drivers-new-pebble-pebble-2-card-printer
- Pebble 3
- https://web.archive.org/web/20081014230502/http://www.evolis.com/eng/Drivers-Support/Product-support/Pebble-3
- https://web.archive.org/web/20140814120507/http://www.evolis.com/drivers-support/drivers-pebble-3-printer
- https://web.archive.org/web/20171014125216/http://www.evolis.com/drivers-support/drivers-pebble-3-card-printer
- https://web.archive.org/web/20210115184547/https://www.evolis.com/drivers-support/drivers-pebble-3-card-printer
- Pebble 4
- Pebble and Evolis Printer driver archive
- Evolis Pebble Series Printer Drivers by Seagull Scientific - Evolis Pebble Series Windows printer drivers by Seagull Scientific make it easy to print labels, cards and more from any Windows program, including our BarTender software.
NB: I have most of the drivers and some manuals stored locally.