Items filtered by date: December 2015
Add/Remove/Alter/Style Gantry Sections
Manipulating Sections in Gantry
Currently Sections in Gantry, adding, removing, moving and to some extent the styling has to be done manually. Some Preconfigured Sections can has some of their CSS styling set in the admin area under ‘Section Styles’ on the Styles page.
This process outlines how you can manipulate or style the Sections as you want.
Clone the Base Outline (common)
Create your own Outline that you can alter which will leave the core files alone and mean your changes will not get wiped out upon update. You need to do this no matter how you want to manipulate sections.
- Within Joomla, click on any joomla gantry template (ie. Helium - Default) in the 'Template: Styles' section of joomla, it does not matter which
- Click on Outlines (at the top)
- Clone the 'Base Outline'. Give it a suitable title and untick the inherit option (we do not want to inherit because we want to fully edit this template)
- The new outline/Template should be called something like 'Helium - Test'. It will be given an ID number. When saved this will create a new Joomla Template with this name in the 'Template: Styles' section of joomla with the same ID number. Make a note of this ID.
Change the Outline Preview Image
Changing the outline preview image is a useful thing to do by quickly showing the end user what the layout will be like.
- Gantry Docs – Preset Images
- The current Layout Preset images are stored at SITE_ROOT/administrator/components/com_gantry5/images/layouts/
- They are 200 x 250
- You can use the other ones that are already present in the template by just altering the link in the g5_helium/custom/config/{ID Number}/layout.yaml
Custom Image
- Place a preview image(200 x 250) g5_helium/custom/images/admin/layouts/example.png
- Edit the file g5_helium/custom/config/{ID Number}/layout.yaml
- Find image: 'gantry-admin://images/layouts/default.png' and change it to gantry-media://admin/layouts/example.png
Clone Notes
We now have a template file that we can alter as needed but you should just read these notes before continuing
- Edit the file g5_helium/custom/config/{ID Number}/layout.yaml to add/remove/move the sections as required. This has to be done via text editor currently.
- You can add modules, module positions, particles and lots of other things by editing the layout.yaml directly but I would only do this for sections as you can edit most other things through the Gantry admin visually and this is not only easier means there will be no errors in your text editing and as the scss pre-processor is very picky things could break.
- Edit the new Theme Outline 'Helium - Test' via the gantry admin to add sections and modules positions visually
- The ‘Base Outline’ (g5_helium/layouts/default.yaml) is already overridden by (g5_helium/custom/config/default/layout.yaml) so you can edit the Base Outline to your requirements without those changes getting wiped out upon upgrade.
- You cannot just edit g5_helium/custom/config/default/layout.yaml (Base Outline) to add/remove sections and see the changes immediately because although is editable, these sections will not be added to child outlines that have already been created. Child themes look at their sections and if set to inherit settings from the ‘base outline’ go and get those settings from the Base Outline. However adding/removing a section to the Base outline does not apply that operation to any Child Outline’s layout (any Outline inheriting from the Base Outline) which is a separate entity and is not updated by this process meaning the changes to sections you have just made will not be reflected.
- If you clone the ‘Base Outline’ after adding/removing sections then these changes would be reflected in the new child outline.
Add Sections
- Adding a Section to an Existing Layout Preset (Official Doc)
- Creating Layout Presets (Official Docs)
The process
Using the example we created above, look at the 2 files
- g5_helium/custom/config/{ID}/index.yaml (this file is updated when you save the layout in gantry admin with configuration settings and also stores the preview image location)
- g5_helium/custom/config/{ID}/layout.yaml (this is the text based layout file)
Looking at the layout.yaml there are 2 areas where sections are referenced, we only need to alter 1 as Gantry creates the other.
At the top there is the 'layout:' section and here you add a reference where you want to put your section, we will call our new section ‘testsection’. You need to put this reference where you want the section to appear. Refer to the Gantry documentation for further information.
The 'structure:' section at the bottom will be populated by gantry when you save the layout in the gantry admin. You can write this in manually but why bother if Gantry will do it. The 'structure:' is just styling information for the section
Don’t Use Tabs
Examples
## An empty testsection
layout:
/testsection/: { }

## testsection with a branding particle
layout:
/testsection/:
   -
     - branding-2200
Once you have made your changes, save the text file and browse to the layout page of the ‘Helium – Test’ outline and you should see your new section.
Styling using custom.scss
This is by far the easiest method of stying the section. The section id is always the same as the section name with ‘g-‘ prepended:
<section id="g-testsection">…</section>
So you would just use a the custom.scss for adding either CSS or SCSS styling the element as normal. This file should be placed at g5_helium/custom/scss/custom.scss and it will get parsed by gantry
.g-testsection{
   background-color: red;
}
If you style by this method you do not needs to style via the admin method shown below but you can mix and match however you want.
- create a file at THEME_DIR/custom/scss/custom.scss (use normal css or scss , less?)
- Adding a Custom Style Sheet (official doc)
Add Section to Gantry’s Section Styles (optional)
When designing a template for the end user you might like to configure the Gantry admin to allow the user to edit the new section’s settings just like the others in the backend rather than a text file. This takes a little more effort but is fairly easy to achieve.
1. Create a Admin Styles Config File for testsection . This contains the input types and their default values (when not inheriting).
- Copy the file g5_helium/blueprints/styles/above.yaml to g5_helium/custom/blueprints/styles/testsection.yaml
- You can just create this file from scratch if you know what you are doing but copying one that is already done is easier
- Edit g5_helium/custom/blueprints/styles/testsection.yaml and change the name to ‘Test Section’ or whatever you want and also change the description.
2. Create a SCSS file for the config options. This is the SCSS code that will use the values you set to make the final CSS
- Copy g5_helium/scss/helium/sections/_above.css to g5_helium/custom/scss/helium/sections/_testsection.scss
- You can just create this file from scratch if you know what you are doing but copying one that is already done is easier
- Change the CSS / SCSS identifiers so they match for testsection
- #g-above à #g-above
- $above-background à $testsection-background
- $above-text-color à $testsection-text-color
3. These _testsection.scss now needs to be picked up by Gantry. Override the helium.scss which controls scss file imports and add a reference to your section in it.
- Copy g5_helium/scss/ helium.scss to g5_helium/custom/scss/helium.scss
- edit g5_helium/custom/scss/helium.scss
- find the // SECTIONS STYLING and add the following at the end of that section.
 // Test Section
 @import "helium/sections/testsection";
- you will notice it does not point at the _testsection.scss override file we created earlier. It is not required to either create a file in the defined location shown above or point it directly to the override file (you can if you want) as Gantry will always look for overrides of these files first in the correct override locations, and in this case it finds one.
Preset Styles for Sections
Style settings that are configured in Gantry admin can also be subject to Preset Styles where you can quickly change colour schemes. These settings work as long as you have not configured any overrides in the style settings and you allow the presets to be inherited. Only the ones where you have set to specific values will not be affected.
The sections you have created will not have any settings configured in the when using the Preset Styles. This is not a problem as they still work as expected.
You cannot override the g5_helium/gantry/presets.yaml , you would need to edit it directly which is not advised.
https://github.com/gantry/gantry5/issues/306 - the issue is logged at GitHub
Remove Sections
When you have removed sections from the Helium template you will still have the section configs in the Gantry admin. This is how to remove them without altering core files of your Gantry template. These instructions use 1 example section but you need to do it for all sections you want to remove.
I will be using the Above Section as an example.
1. Remove the section from the layout / Outline File
- edit the file g5_helium/custom/config/{ID}/layout.yaml
- remove the following section code from ‘layout:’
/above/: { }

or it might look like

/above/:
   -
     - custom-4582
2. Remove ‘structure:’ code. You have 2 options.
- Manually remove by finding and removing the code shown below in ‘structure:’ section.
above: type: section attributes: boxed: '' - Or once you have removed the ‘layout:’ part of the code as shown above and saved it, you can go to the layout page in the Gantry admin and save the layout there and then Gantry will remove the corresponding ‘structure:’ code for you.
3. Remove the Gantry Admin Section Styles
- Create an empty file at g5_helium/custom/blueprints/styles/above.yaml
- This overrides basically overrides the above admin settings but with nothing
4. Remove the SCSS code (optional, just for completeness seeing as it is not used anymore)
- Copy g5_helium/scss/ helium.scss to g5_helium/custom/scss/helium.scss
(if not already done) - edit g5_helium/custom/scss/helium.scss
- find the // SECTIONS STYLING and comment out or remove the following section.
// Above
@import "helium/sections/above";
You can in theory override the section SCSS files with an empty file which should have the same effect but it is not a preferred option as you get loads of files you don’t want.
Nested Sections
These are not used all that often in basic sites but I will show you an example. Without a clear example this process can be tricky and the only file involved is listed below. I thinks a nested section's primary role is to allow you to specify section width such as a left and right column.
- g5_helium/custom/config/{ID}/layout.yaml (this is the text based layout file)
Nested Sections shown on the layout page
You can see that there is an area called 'Container' and this holds the nested sections (Content-left, Mainbar, Content-right).

Nested Sections Yaml
I have only included the section shown above. Dont forget the indentations are done by spaces and not tabs
  /content-top/:
    -
      - position-position-6933
  /container-main/:
    -
      -
        'content-left 25':
          -
            - position-position-4734
      -
        'mainbar 50':
          -
            - position-position-2880
          -
            - system-messages-7485
          -
            - system-content-1587
          -
            - position-position-8425
      -
        'content-right 25':
          -
            - position-position-3949
  /content-bottom/:
    -
      - position-position-8044
How To
Just use the format above. I am not sure how to describe the exact syntax but 2 spaces is the indentation size you can see in the example above, which works.
Override System Outlines
Gantry comes with outlines for some system pages
- Body Only
- Error
- Offline
You need to override these and configure them how you wish because they probably will not fit in with your new layout. Things will still work if you do not. Use the Gantry Admin to make these changes.
Sections are referenced
For some reason sections are referenced in the following files that are not directly part of the outline layout.
- g5_helium/gantry/presets.yaml – Preset Style values (which includes sections)
- g5_helium/gantry/theme.yaml – not sure why they are referenced here, maybe a legacy thing
I don’t think I need to alter any of these for my options above but just incase I have listed them here.
Replace the Default template with my new layout
Now I have created my new layout with my new admin configurations (optional) I want to make it the ‘Base Outline’. You do not have to do this but it probably is better if you are going to distribute the template.
NB I should just be able to copy my new theme over the top of the /default/ , but be aware that the other outlines might stop working properly?
- Then delete all other templates
- Clone the base outline and inherit
- You now have your new template with sections and you can alter the base outline and all changes will be reflected
TinyMCE - Installation instructions
This article was put together for a reference manual to all of the TinyMCE settings and what they mean in real life. I nver found one example with everything configured and labelled amking developing with TinyMCE difficult so I decide to make one. It is always easier to remove setting than add them. For those who will say there is a an online manual for TinyMCE, there is, but this is difficult as a newbie to use.
Once you have your editor up and running I agree the online manual is excellent as a reference guide, my article bridges the gap.
General Plugin notes
- Advanced Code Editor (advcode) cannot be used when using the standard code editor as they both use code in the toolbar. Advanced Code Editor is a premium plugin.
- Some plugins have associated buttons that need to be added to the 'Toolbar:' option in the 'Editor Appearance' section.
- Code Sample Plugin (codesample) - You need to add prism.js and prism.css to a page for syntax highlighting to work.
Excluded Plugins
These plugins have been excluded from my examples for the reasons listed.
- All Premium Plugins - Because they are paid for and I do not have a subscription.
- Full Page Plugin (fullpage) this has been removed because it adds <!DOCTYPE html> <html> <head> and <body> etc.. to the textarea. Toolbar item has also been removed.
- BBCode Plugin (bbcode) is removed because you sacrifice quite a lot of TinyMCE's functionality and since BBCode format doesn't support the whole HTML specification a lot of the HTML gets stripped.
- Legacy Output Plugin (legacyoutput) is not used because it changes the code to an old standard for unique uses.,
- Mentions Plugin (mentions) not added because of callback to lookup users and requires further configuration to a data source.
- 3.x Compatibility Plugin - Is added by another Javascript file and not required unless you need to add old plugins which I do.
'entity_encoding' setting notes
This option controls how entities/characters get processed by TinyMCE. This setting can be quite confusing and it controls what characters are escaped or converted by TinyMCE. This keeps documents looking correct and can prevent some hacking opportunities.
The official documentation is here: TinyMCE | Content Filtering | entity_encoding
This option controls how entities/characters get processed by TinyMCE. The value can be set as shown in Encoding Types below. You can also mix named and numeric by setting this to "named+numeric" this way it will produce entity names of the ones found in the configured entities and numeric entities for other entities.
The base entities < > & ' and " will always be entity encoded into their named equivalents. Though ' and " will only be encoded within attribute values and < > will only be encoded within text nodes. This is correct according too the HTML and XML specs.
There are a few settings
- named (default)
- Characters will be converted into named entities based on the entities option. For example, a non-breaking space could be encoded as . This value is default.
- It will convert characters to their named counterpart as denoted in entities and TinyMCE's internal list (i.e. &nsbp;).
- If you do not set a type via entity_encoding TinyMCE will use this setting by default. Character Encoding in TinyMCE – Support Center
- numeric
- Characters will be converted into numeric entities. For example, a non-breaking space would be encoded as  
- It will convert all characters into their numerics representations (i.e.  )
- named+numeric
- This will convert all characters named in the entities: '' to their named counterparts (i.e. &nsbp;). and the rest into their numerics representations (i.e.  ).
- raw - I think this is a less restrictive option than now having this option enabled. raw is UTF-8 with a few exceptions.
- All characters will be stored in non-entity form except these XML default entities: & < > "
- https://www.drupal.org/project/wysiwyg/issues/373542
- Good for multilingual sites or sites you need to use unicode characters (I think)
- It does not encode spaces to &nsbp;
- if your document is unicode you should use raw - Which characters need to be escaped on HTML? - Stack Overflow
- Joomla TinyMCE is set to raw
'valid_elements' / 'extended_valid_elements' setting notes
- TinyMCE | Content Filtering | valid_elements - This will give you the syntax for construction both valid_elements and extended_valid_elements.
- You can use these settings to enable padding of empty elements i.e. extended_valid_elements: '#p', will pad all empty <p> tags.
- extended_valid_elements is used to add more rules without wiping out the inbuilt rules of TinyMCE.
- A lot more than padding can be done with these settings/rules.
Custom Packages
You can build your own custom package with only the plugins you want built into a single file. This reduces file requests and can speed load times up.
By trial and error I discovered I did not save much file space by only including the plugins I wanted so i just made a custom build with all plugins inlcuded and 'combine all js files' enabled (just leave everything selected). This also has the added beneifit of making it much easier to turn plugins on or off just by using the config file.
Create a customized build with only the features you need.Make TinyMCE even smaller and tailored on your project. - TinyMCE | Build Customizer
- The builder does not always have the latest version of TinyMCE, but it is not that far behind.
Visual Warning for Empty Submission
This is an excellent way of preventing empty forms being entered with a visual warning just by adding a CSS class to the relevant <textarea>.
The following code adds a red border to a TinyMCE editor window if it is empty when the form is submitted and also prevents the form from being submitted (POST'ed)..
You need to add this code in to your tinymce.init statement as in the examples on this page and add the class wysiwyg-checkforcontent to the relevant <textarea>.
Some configurations of TinyMCE add in <p> </p> when the editor has no content. This is compensated for and is therefore still classed as empty by the code below.
editor.on('submit', function(e) {
var placeholderElement = editor.getElement();
var testClass = "mceCheckForContent";
if(
placeholderElement.classList.contains(testClass) &&
(editor.getContent() === '' ||
// This section might not be required on newer versions on TinyMCE and only when padding empty tags is enabled for <p> and <div>
editor.getContent() === '<p><\/p>' || editor.getContent() === '<p> <\/p>' ||
editor.getContent() === '<div><\/div>' || editor.getContent() === '<div> <\/div>')
) {
editor.getContainer().style.border = '3px solid red';
return false;
}
});
TinyMCE Library
You need to include this javascript file on every page you want to use the editor.
<script src="/js/tinymce/tinymce.min.js"></script>
Configurations
The following example configurations will enable TinyMCE with most of it's functions enabled. The Basic config will use all default settings whereas the Full config has all of the main options pre-configured play about with. The QWcrm config is a real life example of a config file that I use in my software QWcrm.
- When editing these config files make sure each statement has a comma at the end of it except the last statement, this is how Javascript separates the variables.
- Delete or comment out the options you do not want. You can delete all of the extended comments if needed which will make the code neater but harder to follow.
Basic
This is the least amount of code required to get TinyMCE to work with most of its Free Plugins, Toolbar Buttons and Context Menu Items enabled. All settings are default.
tinymce.init({

    selector: 'textarea',

    toolbar: [
        'newdocument undo redo | bold italic underline | alignleft aligncenter alignright alignjustify | outdent indent | bullist numlist blockquote hr charmap insertdatetime | help',
        'styleselect formatselect fontselect fontsizeselect | searchreplace spellchecker visualblocks visualchars | removeformat',
        'subscript superscript strikethrough | forecolor backcolor | ltr rtl | link unlink anchor | table image media | nonbreaking pagebreak toc codesample template emoticons',
        'cut copy paste | save restoredraft print | preview code fullscreen'
    ],
    contextmenu: 'cut copy paste | image | inserttable | cell row column deletetable | link',
    plugins: [
        'advlist anchor autolink autoresize autosave charmap code codesample colorpicker',
        'contextmenu directionality emoticons fullscreen help hr image imagetools importcss insertdatetime',
        'link lists media nonbreaking noneditable pagebreak paste preview print save searchreplace',
        'spellchecker tabfocus table template textcolor textpattern toc visualblocks visualchars wordcount'
    ]

});
Full
This is a config file with most of its FreePlugins, Toolbar Buttons and Context Menu Items enabled. Most settings are configured, the rest are default.
If you do not need anything or do not know what it is you can just remove it or coment the code out.
/**
* @package QWcrm
* @author Jon Brown https://quantumwarp.com/
* @copyright Copyright (C) 2016 - 2017 Jon Brown, All rights reserved.
* @license GNU/GPLv3 or later; https://www.gnu.org/licenses/gpl.html
*/
tinymce.init({
// https://www.tinymce.com/docs/ - TinyMCE Documentation
// NB: There are many more options not covered here, these are just the main ones.
// NB: Based on TinyMCE 4.7.12, apart from the mobile section should work on old versions as-well
//// Integration and Setup ////
// This option allows you to specify a CSS selector for the areas that TinyMCE should make editable.
//selector: 'textarea', // Select all textarea
//selector: 'textarea.editme', // Select all textarea with the class editme
selector : 'textarea:not(.mceNoEditor)', // Select all textarea excluding the mceNoEditor class
// This option allows you to specify a URL based location of plugins outside of the normal TinyMCE plugins directory. TinyMCE will attempt to load these as per regular plugins when starting up.
external_plugins: {
'testing': 'http://www.testing.com/plugin.min.js',
'maths': 'http://www.maths.com/plugin.min.js'
},
// On Submit if TinyMCE Editor is empty and has the class "wysiwyg-checkforcontent" on its placeholder, dont submit the form and put a red border around it
setup: function(editor) {
editor.on('submit', function(e) {
var placeholderElement = editor.getElement();
var testClass = "mceCheckForContent";
if(
placeholderElement.classList.contains(testClass) &&
(editor.getContent() === '' ||
// This section might not be required on newer versions on TinyMCE and only when padding empty tags is enabled for <p> and <div>
editor.getContent() === '<p><\/p>' || editor.getContent() === '<p> <\/p>' ||
editor.getContent() === '<div><\/div>' || editor.getContent() === '<div> <\/div>')
) {
editor.getContainer().style.border = '3px solid red';
return false;
}
});
},
//// Editor Appearance ////
theme: 'modern', // This option allows you to specify the theme that TinyMCE should use. The default theme included with TinyMCE is named "modern".
skin: 'lightgray', // This option allows you to specify the skin that TinyMCE should use. The default skin included with TinyMCE is named "lightgray"
content_css: '/css/editor.css', // This option enables you to specify a custom CSS file that extends the theme content CSS. This CSS file is the one used within the editor (the editable area).
min_height: 500, // This option allows you to set the minimum height that a user can stretch the entire TinyMCE interface (by grabbing the dragable area in the bottom right of the editor interface) when using the modern theme.
min_width: 500, // This option allows you to set the minimum width that a user can stretch the entire TinyMCE interface (by grabbing the dragable area in the bottom right of the editor interface) when using the modern theme.
height: 300, // Set the height of the editable area in pixels. Note that this sets the height of the editable area only. It does not include the space required for the menubar, toolbars or status bar.
width: 300, // Set the width of the editor in pixels.
max_height: 500, // This option allows you to set the maximum height that a user can stretch the entire TinyMCE interface (by grabbing the dragable area in the bottom right of the editor interface) when using the modern theme.
max_width: 500, // This option allows you to set the maximum width that a user can stretch the entire TinyMCE interface (by grabbing the dragable area in the bottom right of the editor interface) when using the modern theme.
resize: false, // This option gives you the ability to disable the resize handle or set it to resize both horizontal and vertically.
statusbar: false, // This option allows you to specify whether or not TinyMCE should display the status bar at the bottom of the editor.
elementpath: false, // This option allows you to disable the element path within the status bar at the bottom of the editor.
branding: false, // This option allows you to disable the "Powered by TinyMCE" branding.
menubar: 'file edit insert view format table tools', // This option allows you to specify which menus should appear and the order that they appear in the menu bar at the top of TinyMCE. (true/false/'list').
removed_menuitems: 'newdocument', // This option allows you to remove items from TinyMCE's drop down menus.
// Toolbar Buttons - This option allows you to specify the buttons and the order that they will appear on TinyMCE's toolbar.
toolbar: [
'newdocument undo redo | bold italic underline | alignleft aligncenter alignright alignjustify | outdent indent | bullist numlist blockquote hr charmap insertdatetime | help',
'styleselect formatselect fontselect fontsizeselect | searchreplace spellchecker visualblocks visualchars | removeformat',
'subscript superscript strikethrough | forecolor backcolor | ltr rtl | link unlink anchor | table image media | nonbreaking pagebreak toc codesample template emoticons',
'cut copy paste | save restoredraft print | preview code fullscreen'
],
//// Content Filtering ////
schema: 'html5-strict', // The schema option enables you to switch between the HTML4 and HTML5 schema. This controls the valid elements and attributes that can be placed in the HTML.(html5, html4, html5-strict)
entities: '160,nbsp,173,shy', // This option contains a comma separated list of entity names that is used instead of characters. Odd items are the character code and even items are the name of the character code.
entity_encoding: 'raw', // This option controls how entities/characters get processed by TinyMCE. (raw(UTF-8)/named/numeric)
forced_root_block: 'p', // This option enables you to make sure that any non block elements or text nodes are wrapped in block elements.
valid_elements: '', // The valid_elements option defines which elements will remain in the edited text when the editor saves. You can use this to limit the returned HTML to a subset.
extended_valid_elements: '#p|hr[id|title|alt|class|width|size|noshade]', // This option is very similar to valid_elements. The only difference between this option and valid_elements is that this one gets added to the existing rule set. #p will pad empty <p> tags with This can help keep HTML structure.
//This option instructs the editor to remove specific elements when TinyMCE executes a cleanup.
invalid_elements: 'iframe,script,style,applet,body,bgsound,base,basefont,frame,frameset,head,html,id,ilayer,layer,link,meta,name,title,xml',
//// Content Formatting ////
fontsize_formats: '8pt 10pt 12pt 14pt 18pt 24pt 36pt', // This option allows you to override the font sizes displayed in the font size select box using a space or comma separated list of font sizes
//// Spelling ////
browser_spellcheck: true, // This option configures TinyMCE to use the browsers native spell checker.
//// Localization ////
directionality: 'ltr', // This option allows you to set the base direction of directionally neutral text (i.e., text that doesnt have inherent directionality as defined in Unicode) within the editor.
language: 'en_US', // This option allows you to specify the language that TinyMCEs user interface will appear in. That is, the toolbar buttons and menu items.
//// URL Handling ////
document_base_url: '/quantumwarp/', // This option specifies the base URL for all relative URLs in the document. The default value is the directory of the current document.
relative_urls: true, // If this option is set to true, all URLs returned from the MCFileManager will be relative from the specified document_base_url.
remove_script_host: false, // If this option is enabled the protocol and host part of the URLs returned from the MCFileManager will be removed. This option is only used if the relative_urls option is set to false.
//// Plugin Settings ////
// Autosave Plugin
autosave_restore_when_empty: false, // This option enables you to specify if TinyMCE should automatically restore the content stored in local storage when the editor is empty on initialization.
// Code Plugin
code_dialog_height: 200, // This configuration option sets the internal, editable area height of the code dialog box.
code_dialog_width: 200, // This configuration option sets the internal, editable area width of the code dialog box.
// Context Menu Plugin
contextmenu: 'cut copy paste | image | inserttable | cell row column deletetable | link', // This plugin adds a configurable context menu that appears when a user right clicks in the editable area.
contextmenu_never_use_native: true, // This option allows you to disable the browsers native context menu from appearing within the editor.
// Import CSS Plugin
importcss_append: true, // If set to true this option will append the imported styles to the end of the Format menu and will replace the default formats.
// Insert Date/Time Plugin - https://www.tinymce.com/docs/plugins/insertdatetime/
insertdatetime_dateformat: '%Y-%m-%d', // This option allows you to override the default formatting rule for date formats inserted by the mceInsertDate command. - Default: %Y-%m-%d
insertdatetime_formats: ['%H:%M:%S', '%Y-%m-%d', '%I:%M:%S %p', '%D'], // Allows you to specify a list of date/time formats to be used in the date menu or date select box. - Default: ['%H:%M:%S', '%Y-%m-%d', '%I:%M:%S %p', '%D']
insertdatetime_timeformat: '%H:%M:%S', // This option allows you to override the default formatting rule for times inserted by the mceInsertTime command. - Default: %H:%M:%S
insertdatetime_element: true, // When this option is enabled HTML5 time elements gets generated when you insert dates/times.
// Preview Plugin
plugin_preview_height: 500, // This option allows you to set the height of the preview window that appears when using the preview plugin.
plugin_preview_width: 500, // This option allows you to set the width of the preview window that appears when using the preview plugin.
// Paste Plugin
paste_as_text: true, // This option enables you to set the default state of the Paste as text menu item, which is added by the paste plugin under the Edit menu dropdown. Its disabled by default.
paste_data_images: true, // This option specifies whether data:url images (inline images) should be removed or not from the pasted contents.
// Table of Contents Plugin - https://www.tinymce.com/docs/plugins/toc/
toc_depth: 3, // By default headers in the content will be inspected only three levels deep, so - H1 through H3. But it is possible to change this behaviour by setting toc_depth to any number in 1-9 range (H1 - H9).
toc_header: 'div', // Table of contents has a header and by default it will be marked up with H2 tag. With toc_header option you can change it to some other tag.
toc_class: 'our-toc', // With toc_class you can change the class name that gets assigned to the wrapper div. Please note that you will have to alter Boilerplate Content CSS accordingly. - default = 'mce-toc'
// Table Plugin
// This option allows you to specify the buttons and the order that they will appear on within TinyMCEs inline contextual toolbar for tables.
table_toolbar: 'tableprops tabledelete | tableinsertrowbefore tableinsertrowafter tabledeleterow | tableinsertcolbefore tableinsertcolafter tabledeletecol',
//// Intialise Plugins ////
// Enabled these Plugins
plugins: [
'advlist anchor autolink autoresize autosave charmap code codesample colorpicker',
'contextmenu directionality emoticons fullscreen help hr image imagetools importcss insertdatetime',
'link lists media nonbreaking noneditable pagebreak paste preview print save searchreplace',
'spellchecker tabfocus table template textcolor textpattern toc visualblocks visualchars wordcount'
]
//// Mobile ////
// https://www.tinymce.com/docs/mobile/
// TinyMCE mobile supports a small subset of the toolbar items supported by the main mode. The toolbar is specified in the mobile section also.
mobile: {
theme: 'mobile',
plugins: [ 'autosave', 'lists', 'autolink' ],
toolbar: [ 'undo', 'bold', 'italic', 'styleselect' ]
}
});
QWcrm
This is the config file from my software QWcrm which is a nice simple setup for entering text. Only some of it'sFree Plugins, Toolbar Buttons and Context Menu Items enabled. Some settings are configured, the rest are default.
/**
* @package QWcrm
* @author Jon Brown https://quantumwarp.com/
* @copyright Copyright (C) 2016 - 2017 Jon Brown, All rights reserved.
* @license GNU/GPLv3 or later; https://www.gnu.org/licenses/gpl.html
*/
tinymce.init( {
selector : 'textarea:not(.mceNoEditor)',
// On Submit if TinyMCE Editor is empty and has the class "wysiwyg-checkforcontent" on its placeholder, dont submit the form and put a red border around it
setup: function(editor) {
editor.on('submit', function(e) {
var placeholderElement = editor.getElement();
var testClass = "mceCheckForContent";
if(
placeholderElement.classList.contains(testClass) &&
(editor.getContent() === '' ||
// This section might not be required on newer versions on TinyMCE and only when padding empty tags is enabled for <p> and <div>
editor.getContent() === '<p><\/p>' || editor.getContent() === '<p> <\/p>' ||
editor.getContent() === '<div><\/div>' || editor.getContent() === '<div> <\/div>')
) {
editor.getContainer().style.border = '3px solid red';
return false;
}
});
},
elementpath: false,
branding: false,
menubar: false,
toolbar: [
'undo redo | bold italic underline strikethrough | alignleft aligncenter alignright alignjustify | outdent indent | blockquote hr charmap insertdatetime | help',
'bullist numlist | table | link unlink | cut copy paste | removeformat | preview code fullscreen '
],
schema: 'html5-strict',
invalid_elements: 'iframe,script,style,applet,body,bgsound,base,basefont,frame,frameset,head,html,id,ilayer,layer,link,meta,name,title,xml',
browser_spellcheck: true,
contextmenu: 'cut copy paste | link',
insertdatetime_formats: ['{$date_format}', '%H:%M:%S', '%I:%M:%S %p'],
plugins: [
'advlist autolink charmap code contextmenu fullscreen help hr insertdatetime link lists paste preview table textcolor visualchars'
]
} );
The curly braces are surrounded by whitespace so the Smarty Tempalte Engine does not try and parse it.
Which Open Source License Should I choose?
Firstly, IANAL (I am not a lawyer)
If at the end of this you are still not sure what license you want or should use, do not publish your code publically and keep it closed source.
I have loads of software I want to release but I am still struggling to choose which open source license to use or how they work. There are so many licenses out there and everyone has their own opinion.
I’m writing this article to help me get some plain English explanations of which license to choose, when I should choose a particular license.
I will be referencing a lot of other web pages in this article because there is no point in re-inventing the wheel; all that is needed is some guidance and the holes in information filling in. I find when researching this sort of topic that sometimes you cannot find the answers to key questions because everyone assumes that you should know them. I encourage you to read the information on the other sites as this is how I learnt as well. Because I have done the research you don’t have to spend days on the internet finding all the links.
What are Open Source Licenses?
These articles will give you a broad view of open source licenses.
- Open Source Licenses Demystified | Toptal – Read this article by David Marin first. It is right on the money and clearly covers everything. It is an incredibly well written article. It covers the 3 main permissive licenses (MIT, BSD, Apache) and the GPL family of licenses.
- UpStart Workshop - Episode 23 - What is Open Source Software? - YouTube - By Todd Harris, an excellent video and easy to understand.
- UpStart Workshop - Episode 25 - What are the risks and benefits of using open source software? - YouTube - By Todd Harris, an excellent video and easy to understand.
- Open-source license - Wikipedia, the free encyclopedia - An open-source license is a type of license for computer software and other products that allows the source code, blueprint or design to be used, modified and/or shared under defined terms and conditions
- Producing Open Source Software - How to Run a Successful Free Software Project online book. This is quite in-depth on all issues under this scope.
- Open-Source Licensing For Dummies – Binpress – A real basic article
- The benefits and risks of open source licensing | ZDNet - In the rush to bring a product to market, hurried software developers can run afoul of important open source software licensing rules.
- Coming to Terms with the Troubling Side of Open Source’s Success
- Open source software - The advantages & disadvantages.
- An Introduction to Free and Open Source Software Licensing and Busine… - A slideshare about the subject
- Understanding Open Source and Free Software Licensing (Free Book from O'Reilly)
Why do I need a license?
Permission
You need a license so people who want to use your software know what they can or can’t do and their responsibilities with it. If you do not include a license, people other than you have no right to use it and there seems to be a thing that you might be held liable.
Liability
All open source licenses have a common aspect that they protect you from liability, by clauses in the licenses, whichever you choose. Likewise if you use someone else’s software licensed via an open source license you cannot hold them liable.
If you do not use an open source license your software, if solely made by you, it is fully protected by copyright and no-one can come along and steal it or pass it of as theirs.
In regards to liability when software does not have a license (it must be a lawyer thing), if someone uses your code without permission, how is this your fault? I suspect that it is related to distribution of your code with permission and that you should have a good disclaimer and license before doing so.
Keeping Software Free
Using an open source license you ensure that you are not held liable and that your software will still be free. Not all open source licenses keep software free forever, but you can choose to what extent by choosing an appropriate license.
Don’t use Creative Commons for software licensing
The creative commons licenses are really made for creative works rather than code. I have seen that people have used the creative commons licenses to release software (not many) but I would not recommend it.
You can possibly use these licenses to for the accompanying assets such as images or videos within your software package.
- The Creative Commons licenses have no concept of "source code.
- Creative Commons is not typically applied to software, rather other forms of creative expression such as blog posts, articles, photos, course ware, etc.
Common Terms
There can be some terms that come up and seem very particular to the GPL license.
This is a glossary of terms that might pop up. The articles I have come across don’t always tell you all the terms, they just assume you know. Knowing these before you look at the licenses will help.
Dual License
A ‘Dual License’ is not a ‘Split License’
This is where the copyright holder (in this case, the original developer) can release the code under let’s say, the GPL license and the MIT license at the same time. You would do this I think by releasing 2 packages with the different license attached in them and they would be classed as separate entities. I am not sure if you can dual license in the same package.
- UpStart Workshop - Episode 29 - What is a dual licensing model? - YouTube - By Todd Harris, an excellent video and easy to understand.
- Open Source Licensing - Miscellanious - Forum - Static Void Games – This discusses Dual License
- Dual-licensing as a business model | OSSWATCH
Viral License
Viral license = any program/code that uses GPL code then has to be licensed under the same GPL otherwise you will be in violations of the license agreement for that additional GPL code. This license is non-revocable but only comes into play when you distribute the new package.
GPL is a viral license. When you make any derivative works that work must also be distributed under the GPL license. So the license spreads like a virus.
There are however some downsides to the GPL licenses. They are a viral license, so whenever you modify this code the new code is also licensed under the GPL. I you add some GPL code in to another software package, then that software must also be licensed under the GPL.
When combing a GPL package and a non-GPL package you must make sure that the non-GPL package’s license is compatible with the GPL license of the first software package. There is compatibility charts that can help you decide. For instance if you want to add MIT licensed code into your GPL package this is fine as the new work can be licensed under the GPL as no rights have been lost. However you cannot add a GPL work into a MIT licensed work and maintain the MIT license, it must be re-licensed under the GPL as this is the terms of the GPL (viral licence)
Links
- UpStart Workshop - Episode 24 - What does it mean for open source software to be viral? - YouTube - By Todd Harris, an excellent video and easy to understand.
- A Practical Guide to GPL Compliance - Software Freedom Law Center - SFLC's guide to better compliance with the GPL and related FOSS Licenses
- License - blender.org - Home of the Blender project - Free and Open 3D Creation Software – A clear example of the viral nature of the GPL and how it should be applied.
Split License
A ‘Split License’ is not a ‘Dual License’
This is particular to the GPL family because of its viral nature (LGPL excluded of course).
This seems particular to the GPL licenses because of the issues using that license causes but I am not sure how you would apply this under other licenses but I assume it would be a similar method.
This is where you can keep your software GPL complaint for certain projects but keep the JS, CSS, images and other design media such as videos outside the scope of the GPL license.
Even though the design media is inside the same distribution media (I.e. .zip) this does not cause it to be covered under the GPL license. See notes from RocketTheme and their license terms. You can then add another license to cover those assets.
I do not know how to specify both license within the same package but I am assuming it must be done to prevent confusion.
Some people say this does not exist but there are many companies doing this and ecosystems allowing this, so as far as they are concerned this does exist.
- Sobitemplates– this has additional terms in the GPLv3, section 7 and references the trademark issue.
- Joomla – See section 9
- Open Source Does Matter | Joomla.org – This outlines in English how Joomla handles GPL and the split license model.
- Drupal
- RocketTheme
- Envato/ThemeForest
- Template Monster
- Joomlashine
- Joomlashine and the GPL license | Joomlashine – This explains their position and clarifies the Split license model for GPL
- YOOtheme
- Vtiger CRM – This has the ULTIMATE split license. If in doubt have a look at all the different software packages that are used here.
Aggregation
This could potential be a very important part of the GPL when making ‘Split License’ products and also when you want to include many different libraries.
Split License Links and Notes
This is a mixture of links and notes because some of the notes point to specific sections on the related pages as opposed to the whole article. The rest are full articles on this subject.
- Use a GPL-licensed image - Stack Overflow - Can I use a GPL-licensed image on my website without making the code to the site GPL?
- licensing - GNU/GPL license and images - Stack Overflow - I want to use some icons and images that are distributed under GNU/GPL license. I won't modify them, just make them a part of my program. Can I do that? (of course I put an information about the author)
- The difference between using free images vs GPL images - M.Online - In a nutshell, if you want to use the images only without any accreditation legally.
- Images in GPL software | Ubuntu Forums - I know what releasing software under the GPL license means for the source code of the program, but what if anything does it mean for the images and pictures that are used in the software. Am I allowed to take images from a program that is released under GPL and use them in my own programs.
- The trouble with artwork and free software licenses | Linux.com - Are you a crafter of icons, sounds, backgrounds and splash screens, or even window manager themes? Selecting the right license for your artwork to coexist with free software is no trivial task. Creative Commons (CC) and Free Software Foundation (FSF) licenses each have their advantages, but they are mutually incompatible. The two groups are beginning to move toward simplifying the situation, but in the meantime there are several things you can do to make license compatibility easier.
- Licensing | Template Monster – The page makes note that the templates under GPLv3 can be re-distributed with no limitations but the images in the template are not covered by the license and are for demo purposes only.
- Can CSS files be licensed under the GPL? - Quora - Code licenses cover source code. But it seems to me that the specification of margins, colours, and fonts is more of a visual design than an original work of code. Can you actually copyright the visual treatment that a CSS file specifies? If not, then it seems that you cannot license it under GPL (which relies upon Copyright law to be enforceable). Sure, code can be licensed, but can CSS files? What about XHTML?
- What is Split Licensing and the GPL? | envato - On some of the Envato Markets (particularly ThemeForest and CodeCanyon) authors sell a range of items including themes and plugins for open source platforms. These platforms include WordPress, Drupal, Joomla, and a number of others, most of which are licensed under the General Public License (GPL).
Themes and plugins sold on Envato Market are sold under a default split license. This means authors can protect their rights and freedoms to respect (and comply with) the GPL as well as to control their own work. - GPL Clarification - Joomla! – A forum thread on this real life issue
- When GPL Becomes Almost-GPL — the CSS, Images and JavaScript Loophole - Slashdot – A forum thread discussion on the topic
- What about GPL and Split License? - Visual Composer - WPBakery Knowledge Base – This is a brief paragraph describing the Split License.
- Drupal and GPL (as I understand it) | Drupal.org – This seems to be a go to article on slit licensing and how Drupal handles it.
- you CAN control, via licenses or agreements or what not, stuff that isn't covered by GPL. (Images, CSS layouts, media, and 'helper' programs like TinyMCE that don't directly connect to Drupal). This distinction is important.
- In all of the discussions I've had with those knowledgeable about GPL and Drupal, I've been told that if your write a Drupal module, you're not writing something 'completely separate from Drupal.' The GPL classifies this as derivative or linked software. Thus the use of TinyMCE as an example -- the TinyMCE Drupal module is GPL-licensed, but the TinyMCE editor that it interfaces with is NOT.
- see - Actually, you can. It's called dual-licensing, and allows your theme (released under GPL) to ALSO be released under a license that is GPL compatible but makes allowances for third-party libraries. (The LGPL is one example)…….
- Explaining and Understanding the GNU General Public License (GPL) | @thetorquemag
- This is a great and easy to read article and makes special attention to the other assets, JS, CSS and media.
- Software Freedom Law Center confirms this
However, the design elements—CSS, HTML, JavaScript, images and other media files—do not directly interact directly with WordPress. So unless the CSS, HTML, JS or other media elements in your theme are based on GPL’d media elements, they need not be licensed under the terms of the GPL. - It seems that design materials are not by default covered by the GPL.
- The WordPress Foundation, and any sane advocate of open source, clearly feels that in the true spirit of freedom, the entire theme should be released under the GPL. However, even if you decide to follow a split model (release the code under GPL, excluding the design elements), you will still be on the safer side with the law.
- CSS, HTML, JavaScript, images and other media files—do not directly interact directly with WordPress. So unless the CSS, HTML, JS or other media elements in your theme are based on GPL’d media elements, they need not be licensed under the terms of the GPL
- I am writing software licensed under MIT and including GPL software. Should I include the whole GPL license text? - Quora - If your software includes GPL software, there is a strong likelihood that you are obligated by the terms of the GPL to license your code under the same GPL license. This is not always the case, but often is. So whereas you are asking how to deal with the license text -- you will also need to deal with the license terms.
- If I modify code that is dual licensed under the GPL and an MIT license, are there are any issues releasing my modified code under an Apache 2.0 license? - Quora – This article has incorrectly used the term ‘Dual License’.
- Licensing | Drupal.org
it is possible to distribute a module that integrates with a 3rd party PHP or JavaScript library, as long as the library is under either a GPL or GPL-compatible license. Examples of compatible licenses include BSD/MIT-style "permissive" licenses or the Lesser General Public License (LGPL). The Free Software Foundation maintains a list of popular GPL-compatible licenses.
This basically confirms (and its next paragraph) that you cannot distribute libraries that are proprietary or not compatible with the GPL license (whatever version) - GNU General Public License v2.0 - GPL License FAQ
2.) If you didn't made a derivate in the sense of copyright? This is the other case. The license differs for non-derivate works, which are basically works on their own: "If identifiable sections of that work are not derived from the Program, and can be reasonably considered independent and separate works in themselves, then this License, and its terms, does not apply to those sections when you distribute them as separate works." (In §2).
this sort of handles shipping images and things that have copyright, " If identifiable sections of that work are not derived from the Program, and can be reasonably considered independent and separate works in themselves, then this License, and its terms, do not apply to those sections when you distribute them as" - Use a GPL-licensed image - Stack Overflow - A GPL licensed Image? I would be really surprised to see such a thing, as the GPL was built to target program code specifically. Can you show a real-world example?
- GNU GPL v2.0 License - FAQ
I would like to bundle GPL’d software with some sort of installation software. Does that installer need to have a GPL-compatible license?
No. The installer and the files it installs are separate works. As a result, the terms of the GPL do not apply to the installation software. - I would like to release a program I wrote under the GNU GPL, but I would like to use the same code in non-free programs.
To release a non-free program is always ethically tainted, but legally there is no obstacle to your doing this. If you are the copyright holder for the code, you can release it under various different non-exclusive licenses at various times. - Once released under GPL license, the GPL license cannot be-revoked. However if you are the original creator, you can dual release the code.
- The code that was distributed via the GPL route must and will remain as GPL.
- If you are the copyright holder you can distribute the code under different licenses, literal 1 zip package has the MIT license and the other has the GPL license are you are allowed to do this. Each package would go on its journey and be covered by the license you gave it without interfering with the other.
- If someone contributes to your software and that code was under a GPL license your software would become licensed under GPL once distributed and this cannot be revoked. You could ask the supplier of the code to supply the code under another license that would not force the GPL license upon your software (if he has the right to do so) and in which case your software would not become licensed under the GPL. This is the nature of a viral license.
- If you include image in your package you need to make sure that a license file notes that these are not GPL
- Commercial WordPress Theme Directory Launches
I think this is great news because it encourages commercial theme developers to adopt a “100% GPL compatible” license. Even though PHP in WordPress themes must be GPL, and artwork and CSS don’t, a pure PHP theme (without graphics or styling) would be pretty much useless to most end users. - Can CSS files be licensed under the GPL? - Quora
- licensing - Can I provide a GPL app, with different licenced logo? - Programmers Stack Exchange – an in-depth thread on the subject.
- Maintaining Permissive-Licensed Files in a GPL-Licensed Project: Guidelines for Developers - Software Freedom Law Center – This tells you how to handle copyright notices for code that is already licensed under GPL and you want to add permissive licensed files to your software. This article also alludes to the fact you can have permissive licensed files within your software without them becoming under the remit of the GPL license because they are separate works.
- I am writing a website maintenance system (called a “content management system” by some), or some other application which generates web pages from templates. What license should I use for those templates? | GNU – This section shows the explicit exemption of Javascripts from the viral nature of the GPL when using within a template. A direct exception to JavaScript code, I think images and CSS are not mentions because they are creative works rather than code. This is backed up by the WordPress document. The GPL is code focussed and it is debatable if CSS is classed as code
GPL and WordPress – Split License - Case Example
These following links will described how GPL works with WordPress and covers the issue of ‘Split Licensing’.
WordPress founder Matt Mullenweg decided to get legal clarification on how the GPL should be applied when it came to templates, were they derivative works or separate works. The article Themes are GPL, too | WordPress.org goes into detail about how WordPress themes can be licensed under a ‘Split License’ and still honour the GPL license.
WordPress now enforces a 100% GPL infrastructure/community, this means the PHP code, JavaScript, CSS, images and other media that are in a WordPress package/extension must all be licensed under the GPL with no exception to allow them to be added to the wordpress.com repository.
WordPress have gone above what is legally required by the GPL because normally the CSS, images and other media would not be automatically covered by the GPL as they are classed as separate works, not a derivative work of WordPress. JavaScript’s have a special exemption in the GPL (see here).
- The WordPress License
- License « WordPress Codex - Like most software, WordPress is distributed under a license, which means there are certain things that you are legally permitted (and not permitted) to do with WordPress software and source code. WordPress is distributed under a license called the GNU General Public License, a very popular license in the open source industry. If that doesn't ring a bell, read on.
- Themes are GPL, too | WordPress - Matt Mullenweg
- There have been some questions in the community about whether the GPL applies to themes like we’ve always assumed. To help clarify this point, I reached out to the Software Freedom Law Center, the world’s preeminent experts on the GPL, which spent time with WordPress’s code, community, and provided us with an official legal opinion. One sentence summary: PHP in WordPress themes must be GPL, artwork and CSS may be but are not required. This seems to be the go to document on the web in regards to split license and the handling of images, JS and CSS.
- Matt summarised the SFLC opinion in one sentence: “PHP in WordPress themes must be GPL, artwork and CSS may be but are not required.” This I believe also includes JS
- – This article re-affirms the split license and the status of using JS, CSS, images and other media. “ThemeForest licenses all code for WordPress themes and plugins under the GPL automatically, but does not follow the interpretation that images, CSS files and other creative assets must also be licensed under the GPL. Let me be clear: this is a generally accepted interpretation that is considered legal under the GPL.”
- There is No Such Thing as a Split License | Matt Mullenweg - In the past people weren’t sure if themes for WordPress were derivative works and needed to be GPL. In 2009 we got an outside legal opinion that cleared up the matter saying that the PHP in themes definitely had to be GPL, and for CSS and images it was optional. Basically everyone in the WP community went fully GPL, sometimes called 100% GPL, for all the files required to run their theme (PHP, JS, CSS, artwork).
- WordPress themes, the GPL and the conundrum of derivative works – WP AND LEGAL STUFF -
- Now, I know what some readers may be thinking – ‘not another post on the GPL/theme debate’ – but I could hardly write a blog on WP and legal stuff without considering the issue and I hope there’s a point or two in here that at least some people won’t have read before. And no, I don’t try to assert that there’s a single definitive answer.
- in conclusion, the WordPress themes supplied contains elements that are derivative of WordPress’s copyrighted code. These themes, being collections of distinct works (images, CSS files, PHP files), need not be GPL-licensed as a whole. Rather, the PHP files are subject to the requirements of the GPL while the images and CSS are not. Third-party developers of such themes may apply restrictive copyrights to these elements if they wish.”
- So, if one accepts the SFLC opinion, there are two GPL-compliant licensing models for distributed WordPress themes:
- licensing a theme in its entirety under the GPL; or
- applying a “split licence” to the theme (under this licence, the PHP code and integrated HTML are covered by the GPL with the rest of the author-created components (such as the CSS and images) being covered by alternative and usually proprietary terms).
- (The split licensing model is the approach that has been adopted for the vast majority of WordPress themes on ThemeForest (which, for most practical purposes, usually limits use of the theme to one site), despite the fact that it’s now possible for a ThemeForest theme author to apply the GPL to a theme in its entirety. It has also been adopted by a number of other commercial theme providers.)
- The view of the Software Freedom Law Center is that at least the PHP and any intermingled HTML needs to be released under the GPL. CSS and images, by contrast, can be but do not need to be. If those latter components are not also released under the GPL, two different sets of licensing rights apply to different components of a theme. This is essentially a strategy to constrain people’s uses of the theme to what is allowed by the non-GPL licensing rights. Not that many theme shops do this. Envato/ThemeForest does but it gives authors/developers the choice to opt for 100% GPL.
- A House Divided: WordPress.org, Envato, and GPL Battle | @thetorquemag - There has been little secret about the issues between WordPress.org proper and Envato and the various and different interpretations to GPL, licensing, and distribution/ownership rights.
- WordPress Licensing & the GPL | Theme Developer Handbook | WordPress Developer Resources - To develop WordPress themes for the public—either free or paid— you need to get acquainted with the GNU General Public License (GPL) that WordPress uses.
- A Newbie's Guide to the GPL and WordPress Licensing - Confused about the GPL and WordPress licensing? We demystify the GPL and discuss what it means to the WordPress community and you.
- Understanding the GPL licensing of WordPress – WP AND LEGAL STUFF - As I’ve noted previously, WordPress is licensed under the GNU General Public License (GPL), version 2. An excellent overview of the GPLv2
- How WordPress is Licensed - Copyright, GPL & WordPress - In this post, Pragmatic have teamed up with Aurelia Butler-Ball from Verisona Law who specialises in rights management for the creative industries to explain how WordPress is licensed and what that means for people and businesses that use it.
- licensing - What does exactly GPL license mean for my WordPress theme? - WordPress Development Stack Exchange – A thread around this issue
- WordPress Theme Thesis Maker Backs Down, Adopts GPL - Chalk this one up as a victory for the free software movement: Thesis, the wildly popular proprietary WordPress theme from developer/designer Chris Pearson, is now available under a split GPL, the license that makes it possible to alter and redistribute this software as you see fit.
The split GPL will allow the parts of Thesis that use WordPress code to be freely shared. All the PHP code is GPL, while CSS and JavaScript code sections remain proprietary. It's not a complete win for FOSS, but at least it's fair, compliant and fork-able. - A question on GPL licensing and the current WordPress debacle - faq - Discourse Meta - Unfortunately, WordPress (and Drupal) believe that all plugins and themes, including images and CSS10 fall under the GPL as well, since they use the WordPress API.
- Would WordPress Sue The Maker Of Thesis, A Leading WordPress Theme? - with Chris Pearson and Matt Mullenweg - Mixergy - There was an argument brewing on Twitter today, so I invited the two guys at the centre of it to talk openly here. Chris Pearson, as you might have heard in his recent Mixergy interview, is racking up sales of Thesis, the popular premium theme he created for WordPress. Matt Mullenweg, the man behind WordPress says he’s happy that Chris is earning money, but insists that Thesis adopt the same license as WordPress, GPL, the most widely used free software license.
- WordPress GPL | Codeable – This article describes the GPL and then describes how this fits in with the WordPress model.
- Envato’s License Changes For The Worse – ThemeShaper - There’s been a lot of talk lately about ThemeForest, Envato, WordCamps, and the GPL. I’ve been paying close attention because, you know, themes. I love them. I think they’re a huge part of the WordPress mission to democratize publishing and I think the good ones are making the world a more beautiful and better place.
- licensing - What does exactly GPL license mean for my WordPress theme? - WordPress Development Stack Exchange – An in-depth discussion using a case example.
Case Example - RocketTheme
The questions and responses here are not and should not be classed as legally binding as they are advisory or opinion and might not reflect the law exactly.
I asked the question about the split license to RocketTheme and that went as follows:
QuantumWarp
Hi,
I am looking at your products but I would just like you to clear up some license issue I do not understand. I am a Joomla user.
The RocketTheme Joomla Extension License says that all the PHP code is GPLv2 but the JavaScript, CSS and images are not covered by the GPL license which leads me to 2 questions.
1) If these assets are included in the template/extension package with GPLv2 code are they not automatically covered by the GPLv2 license? If not, which you say, can you point me to the clause in the GPLv2 license which explains this so I can better understand this.
2) On the page https://www.rockettheme.com/legal/93-rockettheme-licenses you reference "The RocketTheme Proprietary Use License (v1.3)", is this the full license? (the one paragraph)
Thanks for your time
QW
RocketTheme
1) What specifically are you looking to do with our templates? We simply don't allow for reselling or bundling of our templates, where clients download our template packages from you. If you use our themes as part of a service, which involves substantive, individual customization to each client, then that is fine.
2) Yes, this is the entire license.
Kind regards,
QuantumWarp
I am trying to find out how the JavaScript, CSS and images files are outside the scope of the GPL license when I thought if you distributed a package with GPL that all inside that package was covered by the GPL. It is just a clarification of the license and how this has come to be. No hidden motive other than that.
RocketTheme
I think it falls under this statement:
In addition, mere aggregation of another work not based on the Program with the Program (or with a work based on the Program) on a volume of a storage or distribution medium does not bring the other work under the scope of this License.
https://www.gnu.org/licenses/old-licenses/gpl-2.0.en.html
Kind regards,
Handling GPL Images
How do you attribute copyright or give attribution.
- GPL compatibility use cases - Creative Commons – An article from Creative Commons on the compatibility of CC licenses and GPL
- Why Should We Have Only GPL-Compatible Images In WordPress Themes? | WPThemeMakeover – This discuss the uses of CC) and if they are compatible with GPL.
- GPL-Compatible Images – Theme Review Team — WordPress – This thread from WordPress discusses GPL compatible images and CC0
Compatible Licenses
This is a common issue with GPL because it is viral, it is required to change the licensing agreement of any code it comes into contact to that of the GPL, so you need to make sure the licensing agreement of the code you are adding gives you the right to transform that licensed code into GPL licensed code. If it does not, then you cannot merge the 2 code blocks together to distribute it as one. You can however use it for your own private use with no issue as you are not distributing the code.
There are other circumstances using other licenses where you need to check their compatibility, but they are a lot easier to deal with and probably do not require compatibility charts.
Some other open source licenses are compatible with GPL because they allow the GPL to take over or they extend the rights of their license. You cannot remove rights generally, but you can add them.
The LGPL license does not really have this problem because it allows itself to be treated as a library and does not require code that uses it to become covered under the LGPL/GPL license. The LGPL code and any modifications to it are still treated as per the normal GPL terms but the GPL is not pass to the larger code package (Weak Copyleft)
Links
- What is license compatibility? | ifrOSS
- License compatibility - Wikipedia - License compatibility is an issue that arises when licenses are applied to copyrighted works, particularly licenses of software packages (including software source code and binary representation). Licenses can contain contradictory requirements, rendering it impossible to combine source code or content from such works in order to create new ones.
- The Free-Libre / Open Source Software (FLOSS) License Slide - There are a large number of Free-Libre / Open Source Software (FLOSS) licenses, but only a few are widely used. The widely-used licenses tend to be compatible, i.e., the software can be combined to produce a larger work. The following “license slide” figure makes it easy to see when common licenses can be combined:
- GPL-Compatible Free Software Licenses - GNU Project - Free Software Foundation - The following licenses qualify as free software licenses, and are compatible with the GNU GPL.
- What is compatible? | GNU GPL Licenses FAQ
- What does compatible mean? | GNU GPL Licenses FAQ
- Compatibility Chart | GNU GPL Licenses FAQ – Compatibility chart
Copyleft
You chose to include specific licensing conditions on reuse. Sometimes these are called 'Copyleft'.
When people refer to Copyleft licenses they usually mean the GPL family.
When you create a derivative work you must make sure that you keep the original copyright notices in place and also include a copy of the GPL license. I have also read that you should make a note of when any of the files have been modified, I have not actually seen how you do this or if by the fact you can download the history on GitHub perhaps is enough.
- Copyleft - Wikipedia
- What is Copyleft? - GNU Project - Free Software Foundation
- Copyleft.org – A website dedicated to this legal vehicle.
- UpStart Workshop - Episode 26 - What is copyleft? - YouTube - A great video on the subject.
Copyleft comes in two basic varieties:
Strong Copyleft: When a software project contains some of your GPL code, the project as a whole must be distributed under the GPL licence, if it is distributed. The effect of this will be that the source code and any additions will made available to the public.
Weak Copyleft: When a software project contains your LGPL code, the LGPL parts of the project and its changes must be distributed under your LGPL licence, if it is distributed. The other parts may be distributed under their own licences (Split License), even though they both form part of a larger work (aggregation) including LGPL. The effect of this will be that the source code and changes to the LGPL will be available to the public the rest of the code can stay proprietary and not be available.
- Weak Copyleft - Wikipedia (LGPL)
Permissive License
Permissive software licenses are easy to use and have few restrictions on their use.
Tivoization
This is where hardware will stop open source software being run if it has been altered. This was pioneered by TiVo as they used open source GPL software but used hardware to stop modified copies being run on their box.
Derivative Work
This is where you have used someone else’s code to base your new program or code.
Software Patents / Patent License Clause / Patent retaliation clause
Software cannot be patented; you can patent a method, process, etc., as long it is novel and non-obvious. This is the first thing you should know so you can understand this murky issue. Until I knew this I could not understand what everyone was on about.
Patent License
- Patent Licensing | General Patent Corporation - Patent licensing may come about in different ways, and patent licenses can be classified as exclusive or non-exclusive.
- Licensing intellectual property - GOV.UK - A licence is an agreement between you as the IP right owner and another party. It grants them permission to do something that would be an infringement of the rights without the licence.
- Licensing – Exclusive / Non-Exclusive / Sole | TaylorWessing - When granting or receiving a licence under intellectual property rights, the parties need to consider at the earliest stage the degree of exclusivity that will be granted.
Prior Art – an American thing
Links and Notes
- Unmanaged Open Source & Your Patent Portfolio: What's at Risk? | Palamida - Video – this video is amazing
- The accompanying pdf of the slide show | Hall Law - Palamida
- Overview of open source licenses
- How patents work in open source
- Retaliation patent claims and how they work
- Once in public you have a year to file a patent otherwise it becomes public domain (according to US law)
- Software Patents | OSSWATCH – This article goes into details about what a software patent is
- Free and open source software and your patents | OSSWATCH –
- The question of how free and open source software licensing interacts with the ownership of software patents often arises among professionals charged with maximising value and return from software property. This document explains some of the most common issues that surround this topic.
- “Thus the permission to redistribute the software granted by all free and open source licences - it can be argued - implies the granting of the right to make use of any of the licensor’s patents which would be infringed by the distribution of the code.”
- If you have patented code, why give it away in open source software.
- Patent License = The ability to apply for a patent
- I think that these patent clauses which grant the use of a patent, which by proxy could allow someone to take your code a, modify it and then claim a patent on that, prevents this ‘patent aggression’ by immediately revoking the rights you granted to the guy suing you so he can no longer use your code. I don’t understand why that person would sue you, perhaps to take the competition out?
- Can I patent/copyright a software if it is built using an open source code? - Quora
- You can patent a method, process, etc., as long it is novel and non-obvious.
- You cannot patent software, you can patent a method, a thing the software does.
- Free and open source software and your patents | OSSWATCH – The issues that can be raised.
- Software patents and free software - Wikipedia
- Patent Pledges and Open Source Software Development - ConsortiumInfo.org
- Software Patents | OSSWATCH – What is a software patent and a short history.
- Patent clauses in software licences - software patents wiki (en.swpat.org)
- Patents | Producing Open Source Software – A chapter in this online book that deals with software patents.
- licensing - Can someone else patent my open-sourced algorithm? - Programmers Stack Exchange
- What happens if open source software infringes existing patent? - Law Stack Exchange
- 4 ways open source protects you against software patents | InfoWorld - Upon 8th anniversary of Open Invention Network, let's count the ways open source defends against patent aggression
- Can I patent an invention, and then release it to open source? - Quora
- Why would anyone patent open source software? | Jerry Stanton | LinkedIn
- Can I patent/copyright a software if it is built using an open source code.? - Quora
- Dealing with Patents in Software Licenses | Rosenlaw & Einschlag
- patentability - Can one patent software if that software uses a library that is Apache License, BSD, or MIT? - Ask Patents
- Beware Open Source Strings Attached if You Want a Patent | IPWatchdog
- Patents, Copyrights, and Your Software Innovation | CoMotion - As soon as you create a work in a tangible medium, such as a computer file, you have copyright in that work. Copyright protection gives the owner or licensee the right to control how other entities display, perform, distribute, copy, or create derivatives of the work.
- The Basics Of Open Patent Licensing | TechCrunch
- Patent risks of open source software (in Programs > Open source software @ iusmentis.com) - Patent and open source software are fundamentally incompatible. The basis of the open source software development model is the sharing of source code and the right to use other people's code in one's own work. If that code infringes on a patent, distribution and use is not allowed without permission from the patent holder.
- Software Patents - e s o m a
- What's the difference between a patented software and a license of proprietary software? - Quora
- Licensing Your Open Source Insurance Software Project - SchemeServe Insurance Software Blog - There are some good reasons for both insurers and insurance brokers to develop their own software and then release it as open source.
- Patents in Open Source licenses and the Facebook patent clause - Software Patents and Open Source are like oil and water. They just don't mix easily. One of the recent cases where the pair has been discussed is the BSD + Patent Clause licensing that Facebook uses for React.js and other Open Source software it has released.
- law - Interference of Software Patents with Free & Open Source Software - Open Source Stack Exchange
- An Introduction to Modern Open Source Licence Patent Clauses | Hacking for Christ - This post explains why all modern open source licences have patent clauses, what they do (and don’t do), and why you should use and recommend licences which contain them. This question is relevant to discussions of licence choice.
Patent Software / Tools
- What are the best open source patent analytics software available? - Quora
- Ask Patents | StackExchange – A website from StackExchange just for patents
- IP Nexus - The Global Marketplace For Intellectual Property - Do you have a legal or other question relating to your invention, innovation or business? Post a question to the experts on IP Nexus. This also has free tools; in particular you can search for prior patents.
Other Common Terms
- OSS = Open Source Software
- FOSS = Free Open Source Software
- FLOSS = Free Libre Open Source Software
License Type Overview
OSS licenses (that I will deal with) fall in to 2 basic groups:
- Permissive
- You can do what you want with it
- But must keep the copyright notices
- Copyleft / GPL Family
- A Copyleft license that requires anyone who distributes your code or a derivative work to make the source available under the same terms,
- A viral license
- Used by WordPress/Drupal/Joomla
Mixing Licenses
These licenses give you your rights to use the software and outline your responsibilities to re-distribute them or derivatives of them. Generally speaking unless you re-distribute the code you can mix and match licenses with no issue, but things would get messy when you try and distribute them at a later date if the licenses are not compatible, so just bear this in mind.
Copyright
Generally speaking you should leave the license file in place; it does not need to be displayed within the program but a link from within in it on where to find the license. In particular a command line program when executed according to the GNU GPL license should display the fact that it is a GNU GPL program, see the Linux kernel.
You should as a general rule leave all the copyright notices in the source code files as well. I will cover this more on this issue later on.
Overview Links
License Libraries / Databases
These are sites have complete listings of the OSS licenses with their terms and conditions. Ideal to see what rights they give you or that you have to extend.
- TLDRLegal - Software Licenses Explained in Plain English – really easy to use website. Each license has the Can, Cannot, Must conditions set out with short annotations and a quick summary
- Licenses & Standards | Open Source Initiative - Open source licenses are licenses that comply with the Open Source Definition — in brief, they allow software to be freely used, modified, and shared. To be approved by the Open Source Initiative (also known as the OSI), a license must go through the Open Source Initiative's license review process.
- CIPPIC Licensing Information Project – Each license has a well laid out page with information normal people can read to make a decision about licensing.
- Licenses - CodeProject - This is a very easy to read list of the different licenses and their different features.
- Licenses - Choose a License - Open source licenses grant permission to everyone to use, modify, and share licensed software for any purpose, subject to conditions preserving the provenance and openness of the software. The following licenses are arranged from one with the strongest of these conditions (GNU AGPLv3) to one with no conditions (Unlicensed). Notice that the popular licenses featured on the home page (GNU GPLv3, Apache License 2.0, and MIT License) fall within this spectrum.
General Licensing Links
- What are GNU GPL , GNU LGPL and MsPL - YouTube – This is a PowerPoint set to some annoying music but the information shown is very useful. You can always turn the music off or hit pause.
- Various Licenses and Comments about Them - GNU Project - Free Software Foundation
- Software license - Wikipedia – An overview of different license types, Proprietary, Open Source etc..
- Open source license usage on GitHub.com · GitHub – GitHub researched all of the public repositories on GitHub to see what licenses they were using. These are the results.
- Understanding Copyright And Licenses – Smashing Magazine - In this article, we’ll cover the basic principles that govern copyright and licenses. We’ll then explore common licenses in our industry, with examples.
- European Union Public Licence | Joinup – This is an excellent site for open source licenses from the European union (EU)
- Licensing and You | YouTube- No matter how much work developers do in the open source world, they are confronted by a myriad of different licenses for things they want to use. GPL, MIT, BSD, Apache… these are just a few of the different licenses PHP Devs deal with. What is the difference, and if you release your own code, which should you use? In 10 minutes we’ll give a high level overview of licensing, how it works, what to watch for, and the proper ways to use other people’s code.
- Making your code available under an open source licence | OSSWATCH
- Free Software vs Open Source - Taylor McGann - I’ve been doing a fair amount of research on software licenses, particularly free software and open source licenses, which I’ve learned are not the same and not to be confused.
- The fall of GPL and the rise of permissive open-source licenses | ZDNet - The GPL is still the world's most popular open-source license but it's declining in use, while permissive licenses are gaining more fans, and some developers are choosing to release code without any license at all.
- Licensing in Open Source (GPL, MIT, Apache, etc) - Linux Bash - The article explores the GPL, MIT, and Apache licenses in open-source software. GPL ensures software freedom by mandating the same license for derivatives. MIT offers extensive freedom, including commercial use, without requiring openness in derivatives. Apache is permissive like MIT but adds protection for patent rights. Understanding these licenses aids developers in selecting one aligned with their goals, such as control, freedom, or legal safety.
Permissive Licenses
These licenses are very relaxed and allow you to distribute your code without liability and that your copyright information to remain in place but places no further restrictions upon the code or it’s re-use.
In general:
- You can do whatever you want with them
- Use them in commercial, personal, network or public works
- You can use the code in proprietary or closed source projects
- You cannot be held liable
- You must leave the copyright in place
- You do not have to distribute the source code or source code from derived works
- Licenses like the MIT, Apache, and BSD come without a Copyleft requirement.
The Family
MIT
The MIT license currently is the most popular permissive license being used on GitHub. It is very easy to use, you can just copy the license into your software package, update the copyright info and add copyright notices to your source code files and you are done. The MIT license does not directly cover patents although some lawyers say it does by cause of the explicit terms of how the software can be distributed. According to GitHub and choosealicense.com this is the license they recommend if you want a simple and permissive license.
- What is the MIT License? | Quora - Can someone shed some light on what is the MIT License?
- MIT License - Comparison to other licenses | Wikipedia - Like the BSD license the MIT license does not include an express patent license. Both the BSD and the MIT licenses were drafted before the patentability of software was generally recognized under US law.[14] A similarly permissive license, which includes an explicit contributor's patent license, is the Apache license version 2.0+.
- The MIT license has also been called the X11
- There is another variation of the license called Expat
- What is MIT License (X11 license or MIT X license)? - Definition from WhatIs.com
- Why I Use the MIT License | ttmm - WordPress was my first exposure to open source software. At the time, the idea of giving your work away for free was so foreign to me that I rejected it almost outright. This is how he made his decision to use the MIT.
BSD
This license has had several variations but is regarded as being the first OSS license. This license as the MIT license has no specific patent clauses.
There are at least 3 variants of the BSD license:
- The 2-clause BSD License (or Simplified BSD License) is totally equivalent of the MIT License
- The 3-clause BSD License (or New BSD License) adds one clause, specifying that neither the name of the copyright holder nor the names of its contributors may be used to endorse or promote products derived from the software without specific prior written permission. This version is compatible with the GPL allowing you to mix 3-clause-BSD licensed code into GPL software.
- The 4-clause BSD License (or Original BSD License) adds another clause, specifying that all advertising materials mentioning features or use of the software must display an acknowledgement saying that the product includes software developed by the copyright holder. This 4-clause BSD License is not compatible with the GPL. Code with this license cannot be relicensed according to the GPL terms, as the fourth clause adds a requirement that is not required in the GPL.
Links
- UpStart Workshop - Episode 32 - What is the BSD license? - YouTube – By Todd Harris, an excellent video and easy to understand.
- The BSD might have different versions, i.e. Some clauses have been added or removed
- I don’t know which licenses everyone prefers to use, but I know they do not use the original on
- BSD License Problem - GNU Project - Free Software Foundation – This deals with a particular clause that has been removed from the revised BSD license which covered advertising.
- BSD licenses - Wikipedia - BSD licenses are a family of permissive free software licenses, imposing minimal restrictions on the redistribution of covered software.
- What is the BSD License? | BSD Newsletter - This page shares some examples of a BSD licenses, some details about the BSD license philosophy, and a few links to more information about the BSD license.
- The Modified BSD License - An Overview | OSSWATCH
- Top 10 BSD Licenses’ Questions Answered - After covering your top 10 questions about the GPL, the Apache 2.0 License, the Ms-PL, and the CDDL, today we’re answering your top questions about BSD Licenses.
- Why you should use a BSD style license for your Open Source Project - This document makes a case for using a BSD style license for software and data; specifically it recommends using a BSD style license in place of the GPL. It can also be read as a BSD versus GPL Open Source License introduction and summary.
- BSD license definition | linfo.org
- The 4.4BSD Copyright | FreeBSD
- The FreeBSD Copyright | FreeBSD
Apache 2.0
The apache license is a permissive license that has specific patent clauses in it. So if you are worried about patents but need a permissive license then you should use Apache 2.0, GitHub also recommends using this license if you are concerned about patents. Twitter Bootstrap uses this license and seem quite popular.
If you think you will have issues with patents I recommend looking at this license and using all of the resources in the Patents section in this article so you fully understand the rules to the patents game.
Links
- Apache License and Distribution FAQ
- The Apache License (v2) - An Overview | OSSWATCH
- Top 10 Apache License Questions Answered | whitesourcesoftware - Here’s the second post in our Open Source Software License FAQ series. We’ve compiled a list of your top 10 questions about the GPL license in the last post; following-up, here are your top 10 Apache License questions answered.
- How to Use Apache 2.0 License in Commercial Products, Explained in Simple Terms | inteist - If you were wondering whether you can use apache licensed code in your commercial applications and what do you need to do in order to comply with the license here's the unofficial simple and short answer.
- What if the work is not very long? | GNU GPL FAQ- The GNU GPL people recommend the Apache license when the code is 300 lines or less unless the code is very special.
- Software and different licenses | GNU GPL FAQ – This refers to the “bait and switch” issue relating to patents and how apaches prevents this. The GNU GPL folks recommend the apache license over all the other lax (permissive) licenses.
- Licensing Note: Apache and GPL – Theme Review Team — WordPress - The Apache 2.0 license is GPL-compatible, but only with version 3.0 of the GPL.
Other
- WTFPL – Do What the F**k You Want to Public License - The WTFPL is a very permissive license for software and other scientific or artistic works that offers a great degree of freedom. In fact, it is probably the best license out there. This site provides information on how to make the most of the WTFPL.
General Permissive Links
These are topical links about permissive licenses and are not specific to one of the 3 I have outlined.
- Do *not* use MIT (or BSD). MIT has a killer failing: it was developed prior to ... | Hacker News – a useful thread to read, this also touches on the Patent clauses of apache.
- What's the different between Apache v2.0 and MIT license? - Quora – clean explanation
- Why most JavaScript libraries are licensed under MIT license instead of Apache license? - I see that especially many JavaScript libraries are distributed under MIT license, but other language libraries (for Python, Java, Ruby, ObjectiveC) are not in MIT license, why?
- Why do companies such as Google and Facebook mostly release their open source code under the Apache license? Aren't BSD or MIT better alternatives? – Quora - Big companies particularly, Google and Facebook seem to release open sourced code from their projects under the Apache license. Examples include Facebook's recently released Folly and a major portion of source code in Google's Android.
Copyleft / GNU GPL Family
All the GNU GPL Licenses are Viral Copyleft licenses and are similar in what they try to achieve, but the variants have different roles. The GPL licenses are very harsh but do protect software freedom. There primary goal is to keep software free and open and to that end they are very good. The GPL only gets applies when you distribute the software and after that is non-revocable.
Technically, if I buy a theme or plugin and it’s released under the GPL, I have the right to share it with friends, make copies, and even improve it. Of course, if I improve or extend it and release it to the community, it has to also be distributed under the same license. There are certain circumstances when you can change the license but the new license must be compatible with the license that you received the code with.
- GPL license only comes into play when you distribute your code.
- You can use any GPL code in any of your own programs without having to license it under the GPL. If you only use it privately and do not distribute it. Distribution is the act of selling or supplying the code to a client, putting it on GitHub, sharing it on Facebook or any other fashion where you effectively lose control of it.
- Under the GPL if you have compiled version of the software which is made from GPL licensed software then you must make the source code available (distribute it) with the compiled version.
- GPL forces your software and future versions of it to stay in the public domain
- In the GPL, trademarks are excluded and are not covered by the license
- When a GPL command line binary is executed it should display the that it is GPL licensed (i.e. Linux kernel)
- GPLv2 is used by Joomla, Drupal, WordPress
The Family and their roles
Now you must understand there are different versions of most of the GPL license and that each different type has a slightly different use, so what I have mentioned above is a generalised outline.
GPL(v1)
This is the original version of the GNU GPL licenses and is no longer used
GPL v2
This is the most used of the GPL licenses, especially with the “or later” clause. This will be covered later.
- GNU General Public License v2.0 (GPL-2.0) Explained in Plain English - TLDRLegal - The GNU General Public License v2.0 (GPL-2.0) summarized/explained in plain English.
- GNU General Public License v2.0 - GNU Project - Free Software Foundation – old?
- GNU General Public License v2.0 - GNU Project - Free Software Foundation
- The GNU General Public License v2 - An Overview
GPL v3
This is the latest iteration of the GPL license. This is essential the same as the GPLv2 but with better wording for international law and several new clauses have been added to cover new threats to software freedom, in particular:
- Tivoization
- Patent Protection
Links
- A Quick Guide to GPLv3 - GNU Project - Free Software Foundation
- GNU General Public License v3 (GPL-3) Explained in Plain English - TLDRLegal - The GNU General Public License v3 (GPL-3) summarized/explained in plain English.
- GPLv3 Launch at MIT - YouTube - January 16, 2006 - Cambridge, MA - The launch event for the first draft of the GNU General Public License version 3 is held at MIT in Cambridge, MA. Richard Stallman provides opening remarks and Eben Moglen talks about the GNU General Public License version 3.
- What is the difference between GPLv2 and GPLv3? | ifrOSS – an authoritative read
- Linus Torvalds says GPL v3 violates everything that GPLv2 stood for - YouTube
LGPL / Lesser GPL
This was previously known as the ‘Library GPL’. Its purpose is to keep the GPL license intact for your code but allow you to use your code as a library within another software package without requiring that package to then be licensed under the GPL license. You do however still have to release that portion of your code that is covered under the LGPL under the normal terms of the GPL.
LGPL allows the software/code to be used in a project without forcing the whole package that it is added to become GPL licensed. The normal terms of the GPL apply to this section of code only. I.e. PHPMmailer. This is ideal for libraries. I also do not think that it forces you to distribute your code, I need to check this. This is more compatible with other licenses
- UpStart Workshop - Episode 31 - What are the GPL and LGPL and how do they differ? - YouTube - By Todd Harris, an excellent video and easy to understand.
- Obligations of the LGPL | Qt - Legal – This video is absolutely clear on what your obligations are and how the LGPL license works.
- 5:50 says if you use 10 lines or less, you do not have to re-license your code. There is a specific exception for this in the license. This deals with header files or definitions.
- 10:40 Software Patent Clause, excellent explanation.
- Joomla! Framework changes to LGPL - The board of Open Source Matters (OSM) has voted to approve the request submitted by the Joomla! Production Leadership Team (PLT) to change the license of the Joomla Framework from GPL v2+ to LGPL v2.1+.
- Looking at the LGPL license | The Bit Depth Blog - The Lesser General Public License (LGPL) is a software license that is based on the GPL, but is more permissive.
- Can I link a GPL program with a proprietary system library? | GNU GPL Licenses FAQ
AGPL / Affero General Public License
This GPL licenses allows the use of GPL code when it is runs as SaaS or server based where it is not possible to show the code or license, so in the spirit of software freedom the AGPL license was developed.
The GNU Affero General Public License is a modified version of the ordinary GNU GPL version 3 and is more aggressive.
It has one added requirement: if you run a modified program on a server and let other users communicate with it there, your must also allow the users to download the source code corresponding to the GPL software running there.
The purpose of the GNU Affero GPL is to prevent a problem that affects developers of free programs that are often used on servers.
Links
- Why the GNU Affero GPL - GNU Project - Free Software Foundation
- Why did you decide to write the GNU Affero GPLv3 as a separate license? | GNU GPL Licenses FAQ
- Under AGPLv3, when I modify the Program under section 13, what Corresponding Source does it have to offer? | GNU GPL Licenses FAQ
- In AGPLv3, what counts as “interacting with [the software] remotely through a computer network?” | GNU GPL Licenses FAQ
- If some network client software is released under AGPLv3, does it have to be able to provide source to the servers it interacts with? | GNU GPL Licenses FAQ
GPL (or later) Clause
The Clause
"this program is free software; you can redistribute it and/or modify it under the terms of the GNU General Public License as published by the Free Software Foundation; either version 2 of the License, or (at your option) any later version.”
What is it?
This is a very powerful clause. If you release software under the GPLv2, then that is the one and only license, derivatives or further distributions can be released under (obviously the copyright holder can re-release under another license).
How to use it
So if you add this clause in to the license you are free to upgrade the software license to a later version of the GPL. This has the advantage that you can either use the current version of the GPL to increase compatibility with other open source software or select a later version which has more protections and more rights. These later versions could also have better compatibilities with other open source licenses.
Example
It not be possible to combine GPLv2 and GPLv3 software together as the licenses are not compatible, but if the GPLv2 has the “or later” clause then you can effectively re-licensed the software to GPLv3 which therefore makes the licenses compatible which then then allows them to be merged both under the GPLv3 license and you can then distribute the new package legally.
Notes
- This statement allows, without re-contacting the author the ability to use later versions of the GPL
- You can make the GPL license just refer to that version or not put this clause in, and if so the version can never be altered (Linux kernel)
- Once you re-license under GPLv3 from GPLv2 you cannot go back (assuming you have distributed it). You could re-release another copy under GPLv2 but that would be classed as a separate entity.
- Linus Torvalds specifically leaves out the “or later” clause as he does not like GPLv3 and because this clause is left out you can only use the GPLv2 for the Linux kernel.
Links
- When is GPLv2 used, and when is GPLv3 used? | ifrOSS – this fully explains the “or later clause”
- Why should programs say “Version 2 of the GPL or any later version”? - Free Software Foundation – this deals with the “or later clause”
- Why should programs say “Version 3 of the GPL or any later version”? - GPL License FAQ
GPL Question and Answers
- If an image is released in the public domain it cannot be copyrights, therefore you cannot apply the GPL to it. Can you still distribute it on sites that require GPL compliance? According to WordPress CC0 is compatible with GPL.
- If an image is GPL and you supply it with code to make software, does this by implication require the whole package code + image to be released under the GPL license. No because they are classed as separate works unless specified.
- Is it possible to distribute a copyrighted image with a GPL program and still have the image retain its copyright and not be subjected to the GPL? Yes, this falls under the Split License; however you need to make sure you have the rights to distribute the image.
- can you do this with icons and smaller images? These would be classed as separate works no would not be virally infected with GPL.
- same questions for videos and other media? These would be classed as separate works no would not be virally infected with GPL.
- As a follow-up, can you add 3rd party JavaScripts which have copyright in to your GPL program and still distribute it as GPL without the 3rd party libraries being covered? The package as a whole could not be distributed as a GPL software, you would need to have a ‘Split License’ model. Javascripts have special exemptions in the GPL license. The GPL code would still be GPL and could be distributed under that license. When distributing the package with the copyrighted JavaScript you need to make sure you have the permission from the copyright holder to distribute it.
- Does the use of remote GPL software (i.e. CMS) mean that your software would have to be covered under the GPL license? The viral nature of the GPL requires derivative works to be license under the GPL. This means that plugin and theme PHP code that interacts or uses the CMS system must be GPL. With media or creative assets such as images, icons, JavaScript and CSS that come with these extensions these do not have to be. For WordPress extensions the WordPress community made it a requirement for the extensions to be 100% GPL including assets, but this is not a legal requirement of the GPL license.
- If someone forms my software, do they have to rename it (assuming no trademarks)? This is a tricky one, I don’t think they are obliged unless the software makes out or purports to be something git is not. For instance someone cannot make a copy of your software, make it really bad and distribute it and make out that this is your copy. I would need some clarification on whether it is mandatory to change the name.
- If there are trademarks in the software, do these need to be removed as they would imply that that new person was authorized by the trademark. From my understanding the GPL protects and respects trademarks, this means that if the software name is a trademark then the software must be renamed, you would not get automatic rights to use artworks or logos if they are trademark specific and these would need to be removed and replaced as needed.
- You cannot copyright software if it is in the public domain as it cannot have any copyright. This is correct, if the item has been released into the public domain (this could be very specific to US law) then it cannot have copyright assigned to it, so technically you cannot apply the GPL license to them but it is compatible.
GPL General Links
- Top 10 GPL License Questions Answered | whitesourcesoftware - GPL is the acronym for GNU’s General Public License, and it’s one of the most popular open source licenses. Richard Stallman created the GPL to protect the GNU software from being made proprietary. It is a specific implementation of his "Copyleft" concept.
- The GPL License Doesn’t Provide The Freedom To Infringe Registered Trademarks – WordPress Tavern - While the GPLv2 is an open source license that offers many freedoms to do with the code as you please, those freedoms are not carried over to trademarks.
- GNU General Public License - Wikipedia
- GNU General Public License (GPL) | ifrOSS – Covers GPL Version 2 and GPL Version 3
- GNU Free Documentation License - Wikipedia
- Richard M. Stallman GPL V3 release speech - 1/2 - YouTube
- Richard M. Stallman GPL V3 release speech - 2/2 - YouTube
- Richard M. Stallman GPL V3 release speech (1 Vid, lower quality) - YouTube
- UpStart Workshop - Episode 31 - What are the GPL and LGPL and how do they differ? - YouTube - By Todd Harris, an excellent video and easy to understand.
- Licensing | Drupal.org - These are answers to frequently asked questions about licensing of the Drupal project. Drupal uses GPL.
- Benefits of Using Pirated Joomla Extensions – An interesting look at the other side of open licenses.
- Passport Without A Visa: Open Source Software Licensing and Trademarks | Anderson | International Free and Open Source Software Law Review - The following article, by Mozilla's Harvey Anderson and Tiki Dare, Sun's trade mark counsel, is a clear and accessible overview of the position of trade marks in FOSS. It was written from a US perspective, but the principles set out in the article apply equally in Europe, and the general legal position is similar.
- Is it enough just to put a copy of the GNU GPL in my repository? | GNU GPL FAQ – This says that just putting the license file in the root of your software does not make it GPL licensed.
- Why should I put a license notice in each source file? | GNU GPL FAQ – This says, You should put a notice at the start of each source file. This does not say it is mandatory though.
- What if the work is not very long? | GNU GPL FAQ- The GNU GPL people recommend the Apache license when the code is 300 lines or less unless the code is very special.
- Software and different licenses | GNU GPL FAQ – the GPL folks recommend using different licenses, including non-GPL ones for different situations and softwares. This section covers that.
License Comparison
These are links to comparisons of the various licenses
Comparison Charts
- Appendix - Choose a License - For reference, all licenses described in the choosealicense.com repository, in a table. Very clean and easy to read. The legend is also quite good at explaining some terms.
- Comparison of free and open-source software licenses - Wikipedia – no list would be complete without a great article and chart from Wikipedia.
- Comparison of free and open-source software licenses - Wikipedia – Might be the same as above
- OSSCC License list – This is simpler list but can be helpful. The styling is pre-CSS. This page also has descriptions of some of the features of the license, such as patent rights.
- licensing - Is there a chart for helping me decide between open-source licenses? - Programmers Stack Exchange
Other links
- BSD v. GPL, Jason Dixon, NYCBSDCon 2008 - YouTube - BSD vs GPL is a sweeping epic, focused on the dichotomy between good and evil. It peers inside the hearts and minds of the creators of these movements and dissects their battle for world domination. No common documentary will dare to follow the path that BSD vs GPL blazes. This presentation was given by Jason Dixon at the NYC BSD Conference at Columbia University on October 11, 2008
- licensing - How does Apache 2.0 license differ from GPL? - Stack Overflow - I don't know much about the full GPL license other than that it's very restrictive to anyone wanting to use GPL anywhere near closed-source code. How does Apache 2.0 license compare with GPL and other license like LGPL, MIT, etc.?
- licensing - MIT vs GPL license - Stack Overflow - The MIT license is GPL-compatible. Is the GPL license MIT-compatible? i.e. I can include MIT-licensed code in a GPL-licensed product, but can I include GPL-licensed code in a MIT-licensed product?
- GPL vs Apache/MIT licenses - The ethical dilemma in Open source : opensource – A forum thread on this matter
- Software Licensing: What are the pros and cons of using a GPL-like licence compared to an Apache-like one? - Quora
- Labyrinth of Software Freedom (BSD vs GPL and social aspects of free licensing debate) | Nikolai Bezroukov – This is a personal essay on the subject.
- Chapter 3. licensing (Part I. introduction to Linux) - This chapter briefly explains the different licenses used for distributing operating systems software.
- Advantages and Disadvantage of Early Release, Open Source and Free Software Licenses - A simple PDF
License Choosing Tools
These are some interactive tools to help you select the appropriate license. It is most likely going to be one outlined on this page unless you have specific needs.
- Choose an open source license - Choose a License - Non-judgmental guidance on choosing a license for your open source project. Simple to use and lists the features of each license clearly
- OSS Watch Licence Differentiator – This is a great tool it asks you seven questions and filters the available licenses as you go.
- John Cowan's Free/Libre/Open Source license selection wizard – This is a text/html based selection wizard. The only copy seems to be on the WayBackMachine. Worth a look.
- Compatibility Tool - CLIPol – This tool allows you to work out which licenses are compatible with your chosen license.
- European Union Licence wizard | Joinup - The licence wizard is a guide to help you to find the most appropriate licence to distribute your software. It covers some of the most common situations, without providing the guarantees of a specific legal consultancy.
Other Tools
- Add a License (GitHub) – Once you have picked a license this tool will add a license file to all of your public GitHub repositories in the correct fashion.
- Open source licensing - User Documentation - GitHub provides an option to include a software license in your project when you create a new repository. These are instructions on how to add a license.
- List of Licensing Tools - Open Source Initiative - This page is a list of open source tools that can be used for creating, manipulating, and evaluating licensing information. The list has been created by OSI community members, but OSI does not endorse any particular tool on the list.
- Text Compare Tool - CLIPol – This is a tool that allows you to compare the texts of 2 licenses
- Easy Attribution Document Generator | tldrlegal - Many OSS licenses require you to credit the author or link back to the open source code/component you used.
- This tool is a quick way to generate an HTML "attribution" document to plop into your application.
Choosing your license
So now you know about the licenses on the ‘market’ so what now?
Decide what you want to do with your software, how do you want to distribute it? But in the end apart from some subtleties it comes down to:
- Permissive License (MIT, BSD, Apache)
- Copyleft Viral License (GPL) (With or without the “or Later” clause)
And of course you have to consider any license that already exists on the code if you have made, if a derivative work.
New Code / Your Code
If you want your code to be used by the wider world and you are not bothered where or by whom then use one of the permissive licenses. This allows companies to use your software in proprietary software and they do not have to share the changes to your code.
If you want your software to be used but always available and those derivatives of that work must always be available then choose the GPL license. This limits who can use the software, but keeps it in the free software world forever, once it is release, it and old of its children will be free forever.
Derivative Work / Pre-existing Code
If the code is already licensed under GPL you are stuck with it unless it says “or later” and in which case you case use a later version of the license.
If the code has another license such as MIT, you can carry on using that license or you can add that code to GPL licensed software.
Generally speaking, if the software already has a license you should use that unless you need to change it for specific reasons, and if you by the license are allowed to.
Still not sure!
- Don’t rush; go through all of the ‘Choosing Tools’.
- See what some of the larger opens source projects are using.
- Don’t release your software until you are sure.
- Look through the research in this article
- Ask on forums for some advice and point them to this article so they know what you know.
Choosing Links
- Open Source Licenses Demystified | Toptal – Read this article by David Marin first. It is right on the money and clearly covers everything. It is an incredibly well written article.
- Pick a License, Any License | Coding Horror - I hate software licenses. When I read a software license, what I see is a bunch of officious, mind-numbing lawyerly doublespeak. Blah, blah, blah... kill me now. This has a great list and a simple explanation of each of them. This is a great article to start with.
- Make Your Open Source Software GPL-Compatible. Or Else. - This essay argues that developers of Free-libre / open source software (FLOSS, aka OSS/FS) should use an existing widely-used license compatible with the General Public License (GPL), particularly the GPL, LGPL, MIT/X, or BSD-new licenses. It also argues against FLOSS license proliferation; where possible, you should only select FLOSS licenses from that list (with the possible addition of Apache 2.0). This article was previously printed, with a number of changes, as an article at OsOpinion. This is a very in-depth essay.
- What kind of licence should I choose? | OSSWATCH
- A guide to choosing an open source license for your work or project | Opensource.com - I’ve recently been involved in several discussions that are variations on, "Which open source or free software license should I choose for my project?" Here is my way of looking at the large and growing collection of licenses in the wild
- A Short Guide To Open-Source And Similar Licenses – Smashing Magazine - Many developers and designers want to release their work into the world as open-source projects. They want others to be able to build on and share their code. The open-source community is vibrant because of this. Open-source software is available for virtually any application you could think of. Most designers use open-source software or code on a regular basis (WordPress, Drupal and many other CMS’ are open source).
- Choosing a License | Civic Commons - Although there are many open source licenses [1], the important ones can be divided into two categories, and within each category only a few licenses are in widespread use. Note that open source licenses include strong disclaimers of liability – this is something virtually all of them have in common, so you don’t have to look for it specially. This covers the different License types, Copyleft and Dual Licensing.
- Choosing a License and Applying It |producingoss - This section is intended to be a very quick, very rough guide to choosing a license. Read Chapter 9, Legal Matters: Licenses, Copyrights, Trademarks and Patents to understand the detailed legal implications of the different licenses, and how the license you choose can affect people's ability to mix your software with other software.
- Choosing an Open Source License · GitHub – A blog article on ChooseALicense.com and how you can add a license to your GitHub repository with their tool.
- Choosing an open source software license for your development project - TechRepublic - If you are considering a development project that uses an open source software license, this guide will introduce you to the basic types available.
- Choosing an open-source licence | Software Sustainability Institute - You've written some software as part of your research, and you would like others to be able to use it. You've made sure your code is ready for release so there's only one thing left to do: choose a licence.
- How to choose a license for your own work - GNU Project - Free Software Foundation - People often ask us what license we recommend they use for their project. We've written about this publicly before, but the information has been scattered around between different essays, FAQ entries, and license commentaries. This article collects all that information into a single source, to make it easier for people to follow and refer back to.
- How to Choose the Best License for Your Open Source Software Project | CIO - Getting the right license for your open source project can mean the difference between success and failure for your software.
- Making your code available under an open source licence | OSSWATCH - Making your code available as open source involves much more than just indicating on the project web page that the code is licensed under a particular open source licence. Not only do you need to provide a way for people to download and/or contribute to the project, but you also need to choose the most appropriate licence and address other legal requirements.
- Selecting the Right License Strategy for Your Software – Gurock Quality Hub - Choosing an appropriate licensing scheme is crucial for the success of a software product.
- Why you should use a BSD style license for your Open Source Project - This document makes a case for using a BSD style license for software and data; specifically it recommends using a BSD style license in place of the GPL. It can also be read as a BSD versus GPL Open Source License introduction and summary.
- Why we chose the Apache License - Chef Blog
- Why I Use the MIT License | Things That Matter Most - I don't like the GPL, so I license my code under the GPL-compatible MIT license instead. Want to know why?
- Open Source Licenses Overview: GPL, LGPL, Apache, BSD,… | CNXSoft - I’ll give an overview of open source licenses in this blog post, as well as recommendation on how to keep your proprietary code closed.
- A Very Fast Tutorial on Open Source Licenses · Contact and Coil - I’ve written a bit of open source software lately, and I did a lot of learning about open source licenses. Unfortunately, after you learn a lot about a topic, you tend to subconsciously assume everyone knows what you do. In the interest of catching you all up, here’s a cheat sheet with some practical tips. Good Article.
- Choosing a License — The Hitchhiker's Guide to Python - Your source publication needs a license. In the US, if no license is specified, users have no legal right to download, modify, or distribute. Furthermore, people can’t contribute to your code unless you tell them what rules to play by. Choosing a license is complicated, so here are some pointers:
- Which License Should I Use? MIT vs. Apache vs. GPL | Exygy - This is a guest post from Exygy’s long-time counsel Joseph Morris. Among other things, we’re often asking Joe about software licensing issues. We recently had a discussion about whether to recommend MIT, Apache, or GPL to one of our non-profit client’s for their open source project. Joe’s response was so darn interesting we decided to turn it into a blog post!
- The differences between the GPL, LGPL and the BSD | FOSSwire - There are a lot of different open source licences out there, and it can sometimes be a bit confusing if you're not intimate with the details of each one. So here's a quick roundup of three of the most popular licenses and the difference between them.
- What types of licenses are there for Open Source software, and how do they differ? | ifrOSS
- Various Licenses and Comments about Them - GNU Project - Free Software Foundation
- Why Apache defeated the GPL license: developer freedom vs. user freedom - Interesting thesis from Matt Asay in the excellent last issue of TIM Review which is devoted to Open Source Sustainability:
- The businessmen's guide to open source licenses :: Software architect Kristof Kovacs – A simple easy to read article on open source licenses.
- A Short Guide To Open-Source And Similar Licenses – Smashing Magazine – This is a short article covering a few of the major licenses
- Choosing a License — The Hitchhiker's Guide to Python – short and sweet
- You’ve Been Haacked
- Open Source Licenses Overview: GPL, LGPL, Apache, BSD,… - The great thing about open source code is the large amount of high quality code that is available and many embedded projects use FOSS code as it really speeds up development time. What often are not taken into account are the licenses for the code.
- Which Open Source Licenses Should you be Using? - BlogGeek.me - I’ve written last week about the acquisition of Jitsi by Atlassian. It has spurred some comments around open source licensing, so I decided to write this post. This way, there’s more room for more licensing related comments.
Changing License
- licensing - Can you change a license once you pick one? - Programmers Stack Exchange - I am working on a product that I don't feel is completely ready but I have a set of users that are very interested in using it now as "alpha" testers. I would like to give them the product now for free as "alpha" testers, but I would like to later license the software.
- licensing - Taking an open source project to closed source - Programmers Stack Exchange - How is it legally possible to take a project initially released as open source back to closed source? Especially one licensed with the GPL any version.
- Open source library, can the project owner change the license to be more restrictive? - Programmers Stack Exchange - A company releases a library with an open source MIT license. If they wanted to, could they change the license to be very restrictive so competitors cannot use it?
- If my code uses some code licensed under LGPL, can I release the whole software under MIT? - Quora - I'd like to use Qt libraries, and they are licensed under LGPL and I'd like to release my entire software under MIT license, may I do that? Or I should (better to) purchase a Qt commercial license?
Now I have chosen my license how to I handle the copyright and any attributions
- Proper Copyright/License Attribution for Themes – Theme Review Team — WordPress - There seems to be a great deal of confusion/misunderstanding regarding what constitutes proper copyright/license attribution for Themes, and several Themes are being approved without proper copyright/license attribution. This gives a solid example on how things work.
- GPL license. Code reuse - Stack Overflow – This gives a really simple idea of how to add copyright by adding the date and your copyright below it
- licensing - GPL copyright notice when contributing new files - Stack Overflow – This has excellent suggestions and rules to follow
- phpsysinfo | GitHub - A customizable PHP script that displays information about your system nicely. This has a good usage of the GPL license
Copyright Notices – examples and where to put them
- How so with split licenses
- See the envato license example
- Look at Joomla
- I need to look how to show the changes?
Where do I put my copyright code, should I put it in every file, where does the license go etc...? Questions all to be answered here!
Remember license and copyright are different, so I would recommend putting the copyright notice at the top of every significant piece of code, or all files covered.
30/300 lines thing – i.e. significant code otherwise it is a bit pointless, not significant enough.
Most of these licenses say you need to leave the copyright in place. The copyright notices should be put at the top of all of your files. Check Joomla, WordPress, Joomla and Prestashop examples to see how they look. Don’t forget this is not the license file which usually should be included.
In the licenses where they say you must add a notice as to when it was changed, or even when you make loads of changes is how to apply the copyright, who owns it?
I do not think it is mandatory to add a copyright notice to the top of each code file but it asserts your rights and is particularly useful if that 1 file is taken out of context.
You should not remove copyright notices that are already there. But how would thins work if you completely re-write the file or there is not much left of the original file, surely you would own the copy right?
GPL says
- If you have copied code from other programs covered by the same license, copy their copyright notices too.
- Put all the copyright notices together, right near the top of each file.
- From reading if the program is interactive you must display the fact that the software is GNU GPL licensed, specifically the Linux kernel when it is run displays GBU GPL licensed,
Links
- Copyright notices/disclaimers in source files - Programmers Stack Exchange – discussion thread with examples
- Managing Copyright Information within a Free Software Project - Software Freedom Law Center – an in-depth legal look, perhaps it has suggestions in there.
- How to properly credit an original code's developer for her open source contribution - Quora – This thread has some examples, and looks at a few different scenarios.
- Copyright notices for open source projects - Ben Balter – This is a nicely written article and is worth a look
- Choosing a License and Applying It |producingoss - This also has a GPL copyright header example.
- Licenses - CodeProject - There are some GPL copyright examples.
- How to propertly comment a PHP file based on GNU/GPL source - Stack Overflow - My question is pretty simple. I have an application based on another application delivered with GNU/GPL 2.0 license (in short: changed code that I will deliver on same license and new name). How my PHP files header should look like to make everything fine (don't break GNU/GPL 2.0 license). Example would be great.
- How to use GNU licenses for your own software - GNU Project - Free Software Foundation – This includes copyright examples and where to put them. This is an in-depth manual on how to use the GPL.
- How to license your program under version 3 of the GPL | Free Software Foundation - This page discusses in practical terms how the GPLv3 would be applied in particular scenarios. Includes copyright examples.
- GPL file header in PHP files - Joomla! – A user copyright examples.
- Include license information at the top of each source file (Amy) · Issue #266 · ThinkUpLLC/ThinkUp · GitHub – Gives a great copyright example and a discussion around it.
- License file from ThinkUp – A small license file around the GPL.
- GNU General Public License v2.0 - GNU Project - Free Software Foundation - If you develop a new program, and you want it to be of the greatest possible use to the public, the best way to achieve this is to make it free software which everyone can redistribute and change under these terms. To do so, attach the following notices to the program. It is safest to attach them to the start of each source file to most effectively convey the exclusion of warranty; and each file should have at least the "copyright" line and a pointer to where the full notice is found.
- Maintaining Permissive-Licensed Files in a GPL-Licensed Project: Guidelines for Developers - Software Freedom Law Center – This tells you how to handle copyright notices for code that is already licensed under GPL and you want to add permissive licensed files to your software. This article also alludes to the fact you can have permissive licensed files within your software without them becoming under the remit of the GPL license because they are separate works.
- licensing - How to manage a copyright notice in an open source project? - Programmers Stack Exchange – This uses the MIT copyright as an example and goes through it.
- Topic: Copyright and license for a plugin i made (1/1) - Community Forum - JoomlaWorks - a question about re-using some code in a new plugin for Joomla.
License Examples
You can download these examples and examine the licenses to see what they look like in the real world
- WordPress Themes
- Vtiger CRM – This has the ULTIMATE split license. If in doubt have a look at all the different software packages that are used here.
- SobiPro (Joomla Extension) – this also prompts you with the license before you download it in a modal box.
GitHub and Licensing
This is not as simple as you think as not everything that is publically viewable on GitHub is open source.
- GitHub: You can manually add a license using the browser. For example, when you are on a repository home page, you can click on the + icon. To make the process easier, if you name the newly created file LICENSE.md, the license picker automatically appears.
- It came to my attention that software does not have to be open source on GitHub and the only conditions that apply is that your code is publically viewable and that others users have the right to mark a fork of your software. This is where the right you have extended end and the murky area where GitHub is failing. Read the following conversion regarding a repository that has no license (i.e. you have proprietary copy right) is then forked, the forker will not have the right to use that code as open source but he will think he has.
- GitHub has clarified the Licensing situation in clear terms on this page - Licensing a repository - User Documentation
GitHub Links
- Adding a license to a repository - User Documentation - This article tells you how to add a license to your GitHub Repo
- licensing - Can I use the code in a GitHub project which does not have a license specified? - Stack Overflow - Say that a public GitHub project does not have a license specified. Can I use that code in my own code? If I can, under what licenses can I distribute my code? Can I use any open source license?
- Is all code in GitHub under a GPL license? - Quora - You can license it however you want. GitHub seems to slightly encourage MIT, Apache, and GPL licenses, but choose whatever you want.
- copyright - How does GitHub "forking right" cope with an "All rights reserved" project? - Open Source Stack Exchange
- Does the owner of the GitHub repository own the copyright to the code? - Open Source Stack Exchange
- Git - Can my public GitHub project not be open source? - Stack Overflow
- GitHub needs to take open source seriously | InfoWorld - The legal details of copyright licensing are complex and off-putting -- but that doesn't mean they should be ignored
- If you fork a project in GitHub, do you become the copyright holder of the source code? - Quora
- Half of GitHub Code Unsafe To Use (If You Want Open Source) - Slashdot – A forum thread on this issue
- licensing - Reusing open-source code that doesn't specify a license - Programmers Stack Exchange
GitHub License issue / Email Conversation / Forker Issue
The questions and responses here are not and should not be classed as legally binding as they are advisory or opinion and might not reflect the law exactly.
QuantumWarp
Hello
Can you clarify the following point:
As far as I know that to use GitHub free, your software/code must be open source. However if you do not define any license in your code, then that code is still fully copyrighted to the author, All Rights Reserved?.
Under “F. Copyright and Content Ownership” of your terms of service:
We claim no intellectual property rights over the material you provide to the Service. Your profile and materials uploaded remain yours. However, by setting your pages to be viewed publicly, you agree to allow others to view your Content. By setting your repositories to be viewed publicly, you agree to allow others to view and fork your repositories.
So please can you tell me what happens to a repository of mine that has no defined license that is forked, what rights does the new recipient of the fork receive?
This issue is not covered in your terms of service. You even note that most of your projects are not licensed in this article.
Thanks
GitHub
Hi Jon,
As far as I know that to use GitHub free, your software/code must be open
source. [...]
So please can you tell me what happens to a repository of mine that has no
defined license that is forked, what rights does the new recipient of the
fork receive?
Great questions! It's not a requirement that projects in public repositories have any particular license or define themselves as "open source" or "open content". The Terms of Service only require that you grant others the right to view and fork the content, but you retain all other rights to your content by default.
That said, many people choose to apply an explicit license or copyright statement in order to make sure that it's clear to other users which specific rights they do or do not wish to grant. In that case, I'd strongly recommend getting in touch with a legal professional for advice about which option is most appropriate for your project.
Hope that clears things up!
Cheers,
Jack
QuantumWarp
Hi,
I would then ask that GitHub make an announcement (modal box) when anyone forks a repository that they might not be able to use it as they please, but only view it for education. You could also disable forking for repositories that do not have a license specified.
If a correct license is configured for the repo then an announcement of that license could be made upon forking of the repository of the basic terms of the license.
Currently it is possibly that I could fork a repository and illegally use the content. End users need to be made aware of this.
Most people are under the impression that all publically viewable code on GitHub is open source software that can be used as open source software things, however after the email from you below I now know that this is not the case. GitHub really needs to clear this up because it is just a matter of time before someone (not me) might take legal action for misleading people.
The forking procedure implies that you can now do what you want with the code if there is no defined license, I would re-iterate during the forking process that GitHub advise the forker that they might not have the right to distribute or use this code but only “fork it to view”, they cannot alter it (which makes forking pointless) unless a license is present, in which case GitHub can advise this during the forking process (with a modal box).
I would also go as far as to send out and email perhaps outlining this and mention this issue in your terms and conditions. Perhaps update your terms and send out the email advising people of this.
Your feedback is welcome
GitHub
Hi Jon,
Thanks for all the feedback and feature suggestions! Our team is taking these ideas into consideration (but I of course can't make any promises about if or when any particular suggestion you've made might be implemented).
In the meantime, if you do find that another user has used your code or project in a way that you did not allow, a great first step is to try contacting the user directly; in many cases, this type of thing turns out to be a misunderstanding that can be resolved by reaching out to them. If that's not possible, we follow the DMCA Takedown Policy:
https://help.github.com/articles/dmca-takedown-policy
Best,
Jack
QuantumWarp
Hi Jack,
As a follow up on forks, can you clarify the following from the page:
https://help.github.com/articles/dmca-takedown-policy/
B. What About Forks? (or What's a Fork?)
One of the best features of Git is the ability for users to "fork" one another's repositories. What does that mean? In essence, it means that users can make a copy of a project and then make changes to that copy to either push back to the main project or just keep as their own variation of a project. We call each of these copies a "fork" of the original repository, which in turn may also be called the "parent" of the fork.
GitHub will not automatically disable forks when disabling a parent repository. This is because forks belong to different users, may have been altered in significant ways, and may be licensed or used in a different way that is protected by the fair-use doctrine. GitHub does not conduct any independent investigation into forks. We expect copyright owners to conduct that investigation and, if they believe that the forks are also infringing, expressly include forks in their takedown notice. “”
Questions
If I have not specified a license, I own the copyright but by the terms and conditions of GitHub I allow users to see my code and make forks of it (public repositories). The following points are in contravention of this statement.
- This says that the user who has forked the project is allowed to keep as their own variation of the code
- This is because forks belong to different users,
- …may have been altered in significant ways, and may be licensed or used in a different way that is protected by the fair-use doctrine.
Could you just further explain these because it says that the forker owns the code and this conflicts with the notation that not all code on GitHub is opensource. Unless a license is specified the forker has no right to use the code for himself. However GitHub can say that the forker can keep and use the code for the sole purpose of reviing the code and then pushing it back to the parent repository.
I would also like the fair-use clause explained as GitHub does noto clarify this at all. Can fair-use allow people to steal my code?
Thanks
QW
GitHub
Hi Jon,
Thanks for your reply. The complex nature of your questions regarding fair use, the DMCA, and the impact they could have on your code would be best addressed by a legal professional. Unfortunately, GitHub is not in a position to offer legal advice; we can only recommend including a license in any code you make public to prevent licensing ambiguities.
Best,
Elizabeth
QuantumWarp
Hi,
With all dues respects, this is an issue GitHub has created and needs to be looked at by GitHub, not by me or my lawyer.
The answer you have given me not really good enough as I don’t think you have read my issue properly.
The things I have mentioned are created by your terms and conditions but the consequences are not covered by the said terms and conditions.
Could I ask you guys to re-look at this.
Thanks for your help
QW
GitHub
Hi Jon —
I'm on the GitHub Legal team. Elizabeth passed along your concerns to us. Thanks for the feedback.
As Elizabeth noted, GitHub cannot give you any legal advice about the consequences of your licensing choices. This is an ethical issue that unfortunately I cannot bend — as a lawyer, I represent GitHub, not you.
Reading over your message, however, I think it may suffice to say that when our DMCA policy states that "forks belong to different users" we did not intend to imply that, from a copyright or intellectual property standpoint, any rights are transferred. Rather, we intended to convey the idea that that different the fork creator has administrative control over the fork that the parent creator does not. I hope that clears up any confusion.
Cheers,
Jesse
QuantumWarp
Hi Jesse
Many thanks for this reply. I do feel that it answers the question.
My own license choice was never really the issue, but the creation of forks without a license (as a test case for raising the point).
Might I suggest that this (your response or something similar) is added to you terms of use as there seems to be some ambiguity of this issue on the internet, I have not been the only one to notice this "Grey area" and I am sure that this would clear that up for content creators and forkers who might not understand the intricacies of copyright.
I must also stress that I appreciate what GitHub does for the open source community and this feedback is only to bring to light this issue for positive gain.
Thanks
Jon
GitHub
HI Jon —
We will definitely take theses issues into consideration, both from a legal/Terms perspective as well as with respect to potential product improvements. Thanks again.
-Jesse=
Envato Tools and Documents
Envato seems to be the leading force behind the ‘Split License’ model and as such they have documentation on how to make Templates in the correct format which I am sure they have run past their lawyers.
- What is Split Licensing and the GPL? – Help Center | envato – This is the go to document to explain the ‘Split License’ model. Themes and plugins sold on Envato Market are sold under a default split license. This means authors can protect their rights and freedoms to respect (and comply with) the GPL as well as to control their own work.
- ThemeForest General File Preparation Guidelines – Help Center | envato - This article contains instructions on preparing your file for submission to ThemeForest. For help with our upload process —including how to format your submission title, tags and description— view our item upload guide. This gives you the license files and where you should put them.
- What Assets Can I Use In My Items? – Help Center | envato – This will give you an idea of what you can or cannot include in your software package. These rules are specific to Envato but should be ok for most open source licenses. Just read them and see if they help.
- Theme & Plugin Licensing Options – Help Center | envato – This article helps you decide what type of licensing model you should choose, either ‘Split License’ or 100% GPL.
Conclusion
I am just going to go over the main points I have learned
General
If you own the copyright you can distribute that code under more than 1 license. Currently I do not know of the exact mechanism for this but you could create 2 zip files, each one having a different license.
Permissive Licenses
These are far simpler to understand and are probably why they are getting a higher adoption that the GPL licenses. You do not need to be a lawyer to understand them. However the trade of is that they can be used by commercial and proprietary systems that are not public. These licenses do not ensure that you code of future iterations of the code will remain in the public sphere, this in its self has pros and cons.
The BSD license comes in several variants;
- The 2-clause BSD License (or Simplified BSD License) is totally equivalent of the MIT License.
- The 3-clause BSD License (or New BSD License) adds one clause, specifying that neither the name of the copyright holder nor the names of its contributors may be used to endorse or promote products derived from the software without specific prior written permission.
- The 4-clause BSD License (or Original BSD License) is no longer used.
Over time clauses were removed from the BSD license until it was the same as the MIT license and this is one of the reasons everyone uses the MIT license as it is easy to understand and there is only 1 version to choose.
Most people use the MIT license for simple code and a permissive license but where patents are an issue then they use Apache 2.0, this is the choice that seems to be the most recommend on the internet including from GitHub and Choosealicense.com
GPL Licenses
- There are different version of most of the GPL licenses effectively v2 and v3. The v2 license with the “or later” clause is the most popular.
- The GPLv2 and GPLv3 are different and the main differences are the inclusion of 2 clauses covering, Tivoization and patents.
- The GPL licenses are a viral license. The means that when you use someone else’s code in your GPL software it becomes licensed under the GPL license. This is also conversely true, if you use someone else’s GPL code in your code, then your code becomes licensed under the GPL license. This is the natural of a Viral Copyleft license. The LGPL license does not follow this rule.
- The LGPL is called a weak Copyleft license as it allows itself to be including in other people’s software without that software being required to become licensed under the GPL. The LGPL licensed code that is added does still need to be distributed under the LGPL terms but these are not force to the rest of the software. The GNU GPL people don’t promote this license, but they have made it none the less. However
- The AGPL license covers running GPL software from a server where the end user is never likely to see the source code but establishes that the source code must be made available.
- Output content from such things as Joomla or WordPress are not covered by the GPL, it does not extend to the content.
- You can sell and distribute GPL code freely even if you did not make it or own the copy right. This is a legal thing.
- The GPL license cannot be applied to ‘Public Domain’ stuff because by its nature the assets do not, and cannot have copyright assigned to them.
- Just putting the license within the root of the software does not make it licensed under the GPL. You need to add copyright notices along with the fact that it is licenses under the GPL in all source files. You do not have to adds it to every file but is better because if any of your code is used those copyrights and license need to stay in place.
GPL and WordPress
This debate which is now over really made clear some things about the GPL license.
It was put that the themes of WordPress were not derivative works but separate works and should not be covered under the GPL. Mark Wallenburg the founder of WordPress decided to get the software foundation to examine the case and give a legal answer.
The answer that came back is, In a WordPress theme:
- The PHP code is a derivative work of WordPress and as such WordPress’ GPL license now covers the theme’s PHP code
- The CSS and images are class a separate works and therefore are not covered by the GPL, even though they are in the same zip file. I also assume this covers other media such as videos.
- Javascripts have a specific exemption within the GPL that is, if they are only referenced/loaded by the browser and they take no part in the server side processing then they are not covered by the GPL and are classed as separate works.
- You can cover the assets (CSS, JS, Images and other media) with a proprietary license should you wish.
This gave rise to the split license. So now it has been proved that split licenses are legal and compatible with the GPL it does not fit in with Marks ethos for WordPress, so he made as a condition to upload extensions and themes to worpress.com then those extensions and templates must be 100% GPL compatible. This includes all the assets within such as CSS, JavaScript, images and more. I do not know how this would affect extensions that use other software, libraries etc... This is not a requirement of the GPL what mark has done but a WordPress thing. Drupal and Joomla openly accept extensions and templates with a split license. Evanto WordPress themes can either be 100% GPL or a ‘Split License’, the author gets to choose.
So this case study clearly deals with separate assets within a zip file or template and says that they do not automatically get covered by the GPL but can be if you choose and assuming you has the right to do this.
This ‘Split License’ is a way that some software houses can control their software distribution but comply with the open source nature of WordPress, Joomla, Drupal and more that use the open source model or specifically the GPL license.
Patents
Software cannot be patented; you can patent a method, process, etc., as long it is novel and non-obvious.
If you are worried about patents, don’t put your code into the public domain and if you decide you really need to then either use the Apache Permissive license or the GPL family of licenses (GPLv3 or equivalent) which have specific patent clauses in them.
Finally
If you are still not sure what license you want or should use, do not publish your code publically and keep it closed source. Also seek a lawyer’s advice on what to do next. Until you publish nothing has been written in stone and can be fixed.
The article should at the very least of informed you of what questions you need to ask.
My Choice for open source software:
- MIT = I want it simple and permissive
- Apache = I want it simple and permissive but I am concerned about patents
- GPLv2 (with or later clause) = Free Forever, High GPL compatibility, benefits the community, can select newer version of GPL if needed. My code cannot be used in closed software.
- GPLv3 (with or later clause) = Free Forever, benefits the community, has Patent clause to protect me, can select newer version of GPL if needed. My code cannot be used in closed software.
Select and export individual objects or layers from Adobe Photoshop
When you are given a complex Adobe Photoshop PSD with many layers, especially one without a proper naming convention, you will have issues identifying individual layers or objects so you can export them as PNG images for re-use in other projects.
These instructions will show you how to identify specific objects or layer, slect them and then export them as a PNG image file.
Single Object
This is the simplest method and is useful if you are struggling to identify the object to export.
- Click on the ‘Selection Tool’
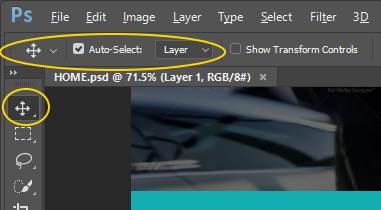
- In the ‘Selection Tool’ toolbar at the top directly underneath the menu you will see the contextual options for the ‘Selection Tool’
- Tick Auto-Select
- Select Layer
- Click on the object in the content/artboard that you want to export.
- The layer containing the object will become highlighted in the layers section.
- Sometimes selection does not work, in which case just try clicking around on different parts of the object until the layer gets selected
- Right click on the highlighted layer in the Layers list and select ‘Quick Export as PNG’
- Pick a location and save the image.
- Transparency will also be preserved.
Muiltple Objects (Export as one)
Use this method when you need to export a logo or image as 1 file, when it has been built up using several objects in Photoshop and they are still separate objects.
- Click on the ‘Selection Tool’
- In the ‘Selection Tool’ toolbar at the top directly underneath the menu you will see the contextual options for the ‘Selection Tool’
- Tick Auto-Select
- Select Layer
- Right Click on the first object in the content/artboard that you want to export and select ‘Isolate Layers’.
- The layer containing the object will become the only layer listed layers section.
- Sometimes selection does not work, in which case just try clicking around on different parts of the object until the layer gets selected
- Click on every other object you want adding to the exported image.
- These objects will maintain their relationship to each other as they appear on the screen
- Select all of the layers in the layers list
- Right click on any of the selected layers in the Layers list and select ‘Convert to Smart Object’
- Right click on the new ‘Smart Object’ and select ‘Quick Export as PNG’
- Pick a location and save the image. Transparency will also be preserved.
Notes
- Objects live on layers and usually there is one object per layer.
- These objects are also recognised as objects during export and not the whole layer with blank space.
- These instructions talk about objects but will probably work for layers as well.
Links
- Photoshop Quick Tip: Finding Layers Quickly - Go Media™ · Creativity at work! - This article was instrumental for me to figure out how to export objects from photoshop
Configure an Outlook.com account to use a 3rd party email address
There are different ways you can set this up and I will show you the best way of setting this combination up whilst still being able to use your 3rd party email address from your Outlook.com account.
I will cover using webmail, Outlook.com, Webmail and mobile phones and the different setups there.
The setup I am going to outline will remove the need to ever access your email via your 3rd party server, but obviously does require it to keep running.
The reason you would want to set this up is:
- Exchange functionality (for free)
- Out of office replies
- Email rules
- Calendar
- Etc.....
- 50GB mailbox
- Limited mailbox size at your 3rd party supplier
Instructions
Obviously for this to work you will need a Outlook.com email address that has been upgraded to the new version of Outlook.com account which supports Exchange (live and Hotmail email accounts will be ok) and Outlook 2013+ if you want to setup email in Outlook the software client.
Configuration Options
You need to configure each item in the list below for your selected configuration. The instructions for the different options are after this section. You basically just mix and match as per the menu below to get your preferred option. I have done this way because I am not 100% which way I am going to set things up yet but at least you can figure out the best configuration for you.
- Webmail Only – suitable for most clients
- Outlook Webmail
- Send and receive 3rd party email from Outlook Webmail
- Set 3rd party email address to be default from Outlook Webmail
- No Outlook client software
- Outlook Webmail
- Minimal – This setup is for people who want to use Outlook client software
- Outlook Webmail
- Send and receive 3rd party email from Outlook Webmail
- Set 3rd party email address to be default from Outlook Webmail
- Outlook Software Client Exchange setup
- 3rd Party emails are received via Outlook.com to your Exchange account
- Local 3rd party email send only (SMTP)
- Set 3rd party email address to be default from Outlook client Software
- Outlook Webmail
- Full – This setup is for people who want to use Outlook client software and get there emails as quick as possible.
- Outlook Webmail
- Send and receive 3rd party email from Outlook Webmail
- Set 3rd party email address to be default from Outlook Webmail
- Outlook Software Client Exchange setup
- 3rd Party emails are received via Outlook.com to your exchange account
- Local 3rd party email send and receive (SMTP and POP3)
(would this cause issues with outlook.com and outlook software sending and receiving) – definitely quicker for receiving emails - Set 3rd party email address to be default from Outlook client Software
- Outlook Webmail
- Outlook Software Client Only – This setup is for people who want to use Outlook client software and getting their emails as quick as possible but only have the 3rd party emails sent and received from their Outlook client software. This could be useful if you have lots of email accounts or specific needs. You will still be able to read all of your emails via Outlook.com but not send from those 3rd Party email addresses. You would also probably need to leave your PC on to get the benefit of this setup.
- Outlook Webmail
- Outlook software Client Exchange setup
- Local 3rd party email send and receive (SMTP and POP3)
- 3rd Party emails are uploaded to Outlook.com via your Exchange account
- Set 3rd party email address to be default from Outlook client Software
Configuration Items
Outlook Webmail
Obviously for this to work you will need an Outlook.com email address that has been upgraded to the new version of Outlook.com account which supports Exchange (live and Hotmail email accounts will be ok).
This item just requires you to create an Outlook.com account with an Outlook.com email address unless you already have one.
Send and receive 3rd party email from Outlook Webmail
Outlook.com uses your own server for sending email rather than sending from Microsoft servers so there will be no issue of address spoofing or your emails going into SPAM folders. To this end we need to give the email account details to Outlook.com.
- Login to outlook.com

- Click on the settings cog (top right)
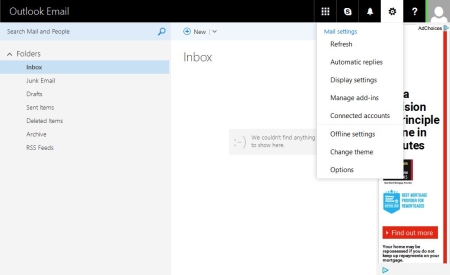
- Connected Accounts
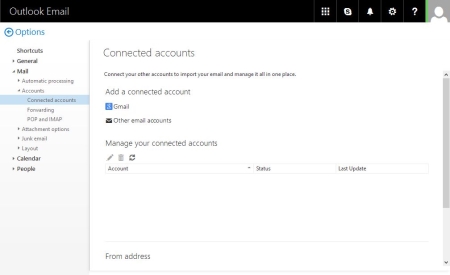
- Add a connected account Selecting ‘Other email accounts’
- Follow the setup procedure for the account
- Connect your email account – importing into existing folders is my preferred option because I can setup email rules later
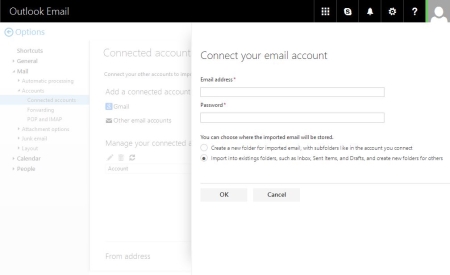
- Choose your connection type – Outlook.com will try and connect your account automatically but will almost certainly fail and then will prompt you to select your account type, select POP.
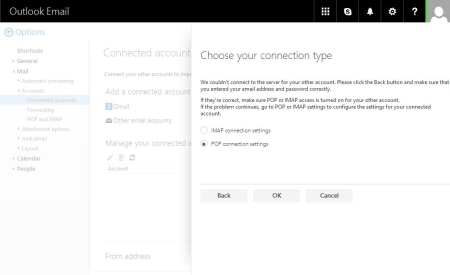
- New POP account connection – Fill in your details here. Select to import into existing folders but untick ‘Leave a copy of messages on the server’, this will make sure the 3rd party mailbox is always kept empty to prevent mixed up emails. SSL settings are more secure.
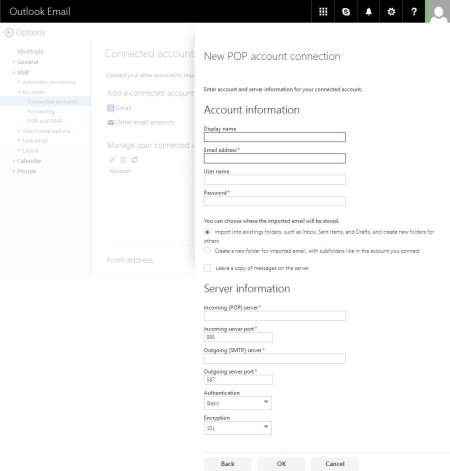
- Your account test123@quantumwarp.com is now connected
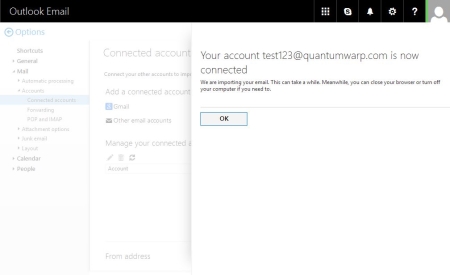
- Connected Accounts now showing your newly connected account
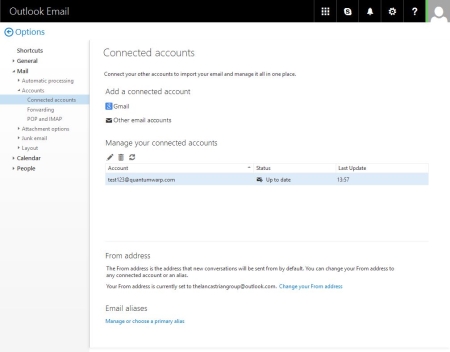
- Click back and return to your inbox
- Depending on whether you selected to import into current folders or create news ones, your inbox will look slightly different.
Merge / Import into current folders then there will be no change for either IMAP or POP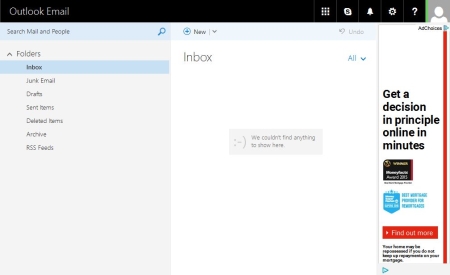
If you selected new folders (POP3) you will get this layout.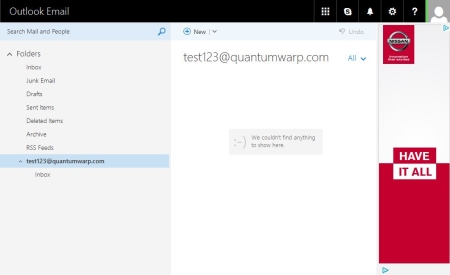
Just for completeness, IMAP with seperate folders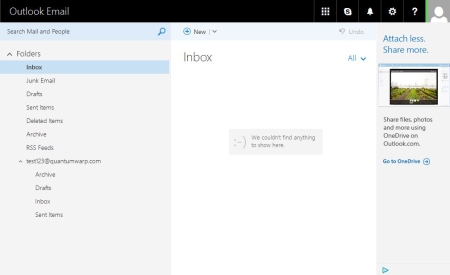
- You have now configured Outlook.com to grab your emails.
Your emails will only be fetched every 10 – 15mins from 3rd Party servers, this cannot be changed. If you use IMAP the emails are not received instantly either.
Set 3rd party email address to be default from Outlook Webmail
- Click on the settings cog (top right)
- Select Connected accounts
- If you scroll to the bottom of the screen you will see the From Address option
- Click on “Change your From Address” and select your 3rd party email address. This will now become the default email address in your Outlook.com Account.
Outlook Software Client Exchange setup
Recently Microsoft upgraded all Live/Hotmail/Outlook.com to support full Exchange features with a 50GB mailbox which allows Outlook client software to take full advantage of this such as the calendar which will sync to your calendar on Outlook.com, emails rules and out of office replies
Configuring Outlook Software Client
You need to have Office 2013 or later to be able to recognise Outlook.com as an Exchange server.
For these instructions I am using Outlook 2016
To Add the Exchange Account
- Go to File --> Account Settings --> Account Settings and click on new
There are different ways to get to the next step to add new email accounts and these methods are ok as well.
- The auto Account Setup dialog box will now appear.
- Fill in your details and click next
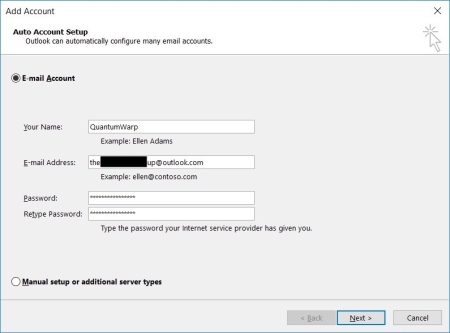
- Outlook will now auto-discover all of the required settings Outlook.com and configure your exchange account.
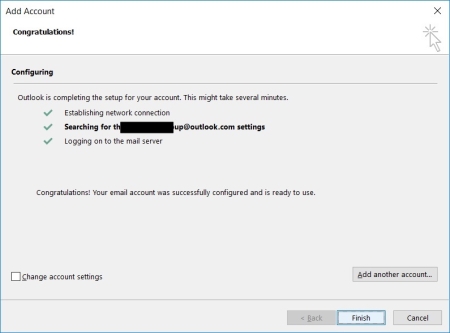
- Click Finish and restart Outlook if prompted
Local 3rd party email send and receive (SMTP and POP3)
Now we need to add your 3rd party email account into exchange. The difference is that we will have the delivery location be the Exchange .OST file. When emails are delivered to the .OST via Outlook client software it is synced up to Outlook.com and therefore all of your other devices. Emails will be sent from your 3rd party email account as normal via the Outlook client software.
- Select ‘Manual setup or additional server types’ Click next (Auto setup does not always work but you can try it if you want)
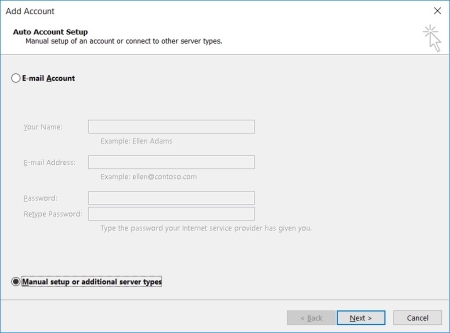
- Select POP or IMAP
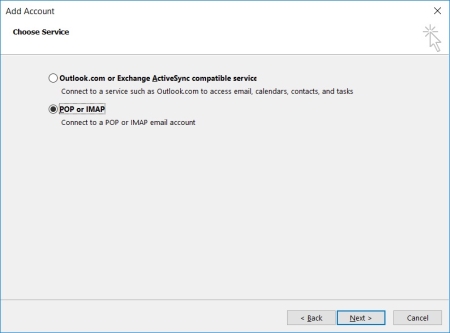
- The POP and IMAP Account Settings dialogue will appear
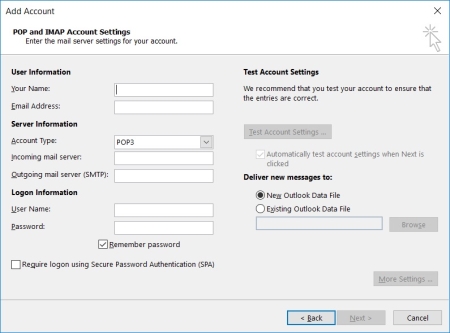
- Fill in User Information/Server Information/Logon Information
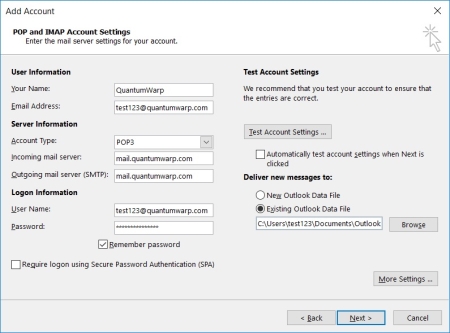
- Untick ‘Automatically test account settings when Next is clicked’
- We now need to set the delivery location of the 3rd party email to your Exchange account/.OST file
- Under Deliver new message to: select ‘Existing Outlook Data File’
- Select your Exchange .OST file.
If you are using default locations, the Exchange .OST should be listed in the browse windows as soon as it opens. If it does not you need to browse to where you Exchange .OST file sis and select it. The default location in Outlook 2016 is
"C:\Users\{windows account}\AppData\Local\Microsoft\Outlook\"
- Click on more settings
- General Tab
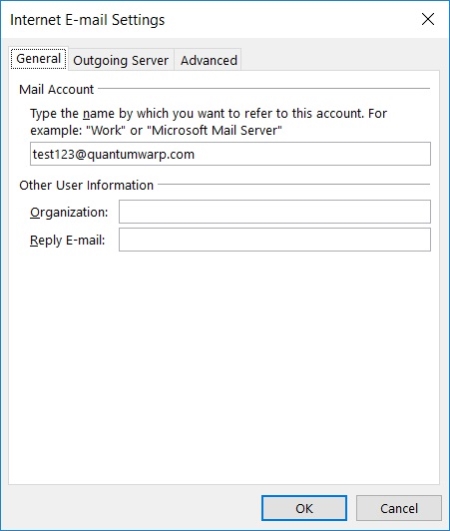
- Configure as required
- Outgoing Server Tab
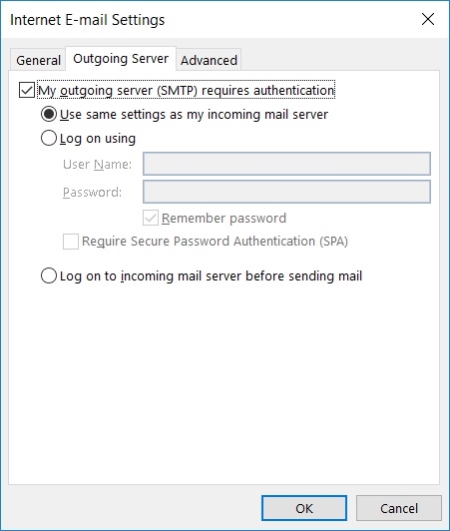
- Configure your Outgoing Server as required. In my case I just have to turn on ‘My outgoing server (SMTP) requires authentication’
- Advanced Tab
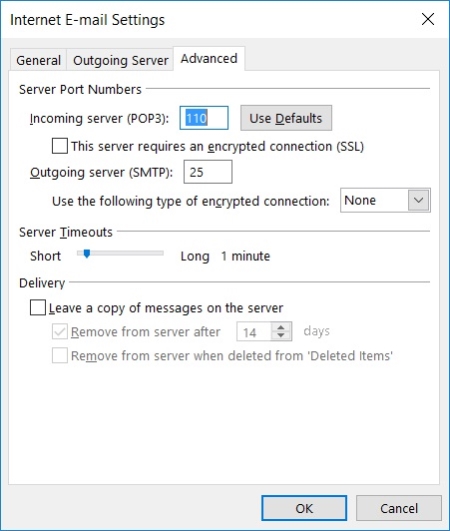
- Configure the ‘Server Port Numbers’ as required, SSL and TLS is preferable.
- Delivery – In this configuration you do not want to leave any emails on your 3rd party server because your Outlook.com Account will be your primary account. This will also prevent emails getting doubled up when Outlook.com interrogates your email server.
- Click OK to return to the POP and IMAP Account Settings
- Click Next
- You are all set now will appear, click finish
- You are returned to the E-mail Accounts page where you can see both accounts
- Check the 3rd party email delivery location ion the E-Mail tab. If you have accidentally created a new .PST file you need to change the delivery location and remove the unneeded .PST file.
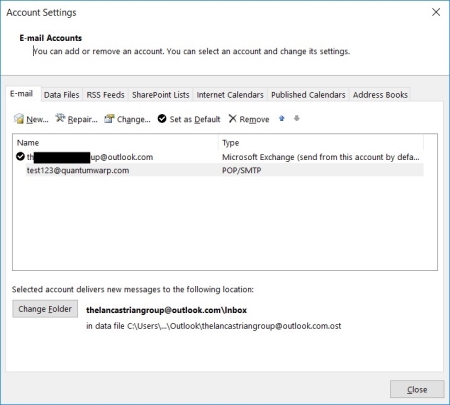
- Click on the 3rd party email address
- At the bottom a Change Folder button will appear, click this
- Select the inbox folder of the Exchange Account in the tree and click Ok
- Now delete the unwanted .PST file form the Data Files tab. If this fails, restart the Outlook client software and then retry the .PST deletion process.
- Click close
- Click Close
You can now send and receive emails from your 3rd party email account and those emails, both sent and receive will be saved in to your Outlook.com Exchange account and synced to all of your devices. The 3rd Party email address has been set as the default email address so you might not even notice you are using an Outlook.com Exchange Account.
Local 3rd party email send only (SMTP)
This option would be suitable if you just want Outlook.com to manage your email grabbing or if issues arising from both Outlook.com and Outlook client software polling your email server.
We are basically going to remove the 3rd party email account from the send/receive group preventing POP3 integration.
Do the same as above section ”Local 3rd party email send and receive (SMTP and POP3)” but make sure the internet is turned off first and then do the following.
- Go to the Send / Receive Tab
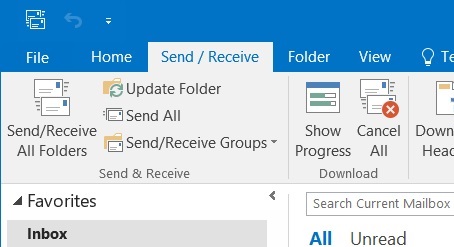
- Click on “Send/Receive Groups” drop down menu
- Select “Define Send/Receive Groups”
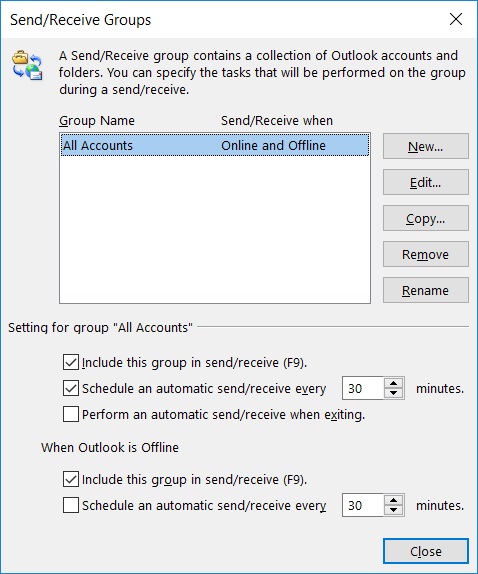
- Edit “All Accounts”
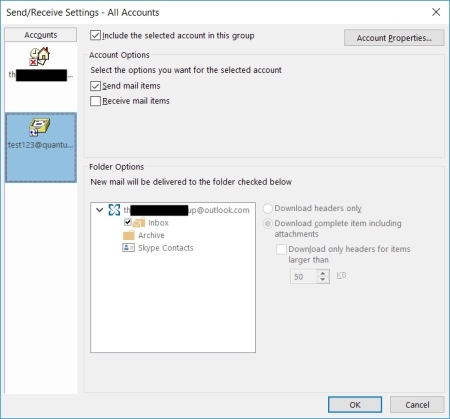
- Select the 3rd party email account on the left
- Untick “Receive mail items”
- Click OK
- Click Close
- Re-Enable the internet
You have now disables your 3rd party email account from receiving email so the POP3 server will never be polled by you Outlook client software but you can still send emails
Set 3rd party email address to be default from Outlook client software
The Exchange account should still be the default account. Simply set the 3rd party email account as the default.
- Open up the E-Mail Accounts page
- Highlight your 3rd party email account
- Click “Set as Default”
- Done
Mobile phone / outlook.com app
This section needs updating when there is a method to use an alias in the Microsoft Outlook App.
- You cannot send emails via and alias in the Ooutlokk App but you can see all emails that have been received in the main account.
- You can only add 3rd part IMAP accounts. This probably would allow you to send emails but things would get messy
Notes
Outlook.com Webmail
- The emails will not show up immediately in your inbox
- Frequency of email collection is every 10 – 15 mins and cannot be changed
- Logging in and out of your outlook account does not trigger your emails to be polled from your connected account
- The emails will appear automatically in your outlook.com inbox and you do not need to refresh your webpage
- Outlook.com might not immediately start downloading your emails when you add the connector. You have to wait for the cron job as it were
- When I added the connector back on to use separate folders using the same email address (i.e. folders already there) I had to wait for emails to be brought in.
- When I then added the same email address again but to use the primary folder structure they were downloaded immediately.
- You can set outlook.com to remove the messages or leave them on the remote server
- You can set the new account to be merged with the primary account folder structure or use its own.
- Outlook uses your own server to send emails when using connected so you should set any SPF or DKIM settings on your own server as normal.
- You can set your 3rd party email to be the default email account in Outlook Webmail
- can connect to the outlook.com via POP or IMAP (if you enable it)
- Rules created on outlook.com are translated down to outlook(software) and I guess vice versa
- If you have already created the connected account with separate details (i.e. under a folder with the email name) when you recreated the connector account to use separate folders it just re-uses the same folder and does not recreate another folder set. (pop3 checked)
- The pop3 method with When I added the connector back on to use separate folders using the same email address (i.e. folders already there) I had to wait for emails to be brought in.
- The connection in pop3 seems to be duplicate content aware after I did some experimentation but only to the prescribed delivery location i.e. main inbox or separate folder structure. It seems to check the configured delivery location for duplicate emails., not both
- When you send items from outlook.com or outlook when using pop3 the emails go in the sent folder
- If you struggle to delete a previous IMAP/POP3 folder group from prior connected accounts then use outlook client software once connected via exchange and delete the folders from and empty the recycle bin and the folder will be gone for good.
- Office 2013+ is required to use outlook.com email accounts for full exchange support.
- If you recieve the following error "This message can't be sent right now. Please try again later" it is most likely because you are trying to send with your 3rd party email address and the SMTP settings are wrong.

IMAP
- when you connect an IMAP account and ask for separate folders you get the following layout
- test123@quantumwarp.com
- Sent
- Archive
- Drafts
- INBOX
- The email delivery is not instant either, seems to be 10 -15mins
- Does not give you the option of removing the emails from the remote source when using IMAP.
- When you delete in outlook.com it does not delete in the remote IMAP so is a bit pointless. It literally works like pop but without being able to remove the email
- test123@quantumwarp.com
Set a background image or texture behind module positions and content
This code allows you to set a background image or texture behind the content areas of a Joomlashine template. This will not work for all templates and might need some further work but it is a great starting point.
/*-- Set a background image or texture behind module positions and content --*/

/* Set Background Image - add to wiki */
#jsn-page {
	background: url("../custom/images/background.jpg") repeat scroll 0 0;
}

/* Make backgrounds transparent */
#jsn-topheader,
#jsn-header,
#jsn-body {
	background-color: transparent;
}

/* Remove large padding in reta content block */
#jsn-content {
	padding: 0;
}

/* Restore white to certain regions */
#jsn-topheader-inner,
#jsn-header-inner,
#jsn-content_inner {
	background-color: white;
}
Dark Footer Background Image
There are 2 ways of making a Dark Footer Background Image:
- Manipulate the image directly, then add as a background
- Use a combination of a dark background and a semi-transparent image allowing the darkness to show through
Suggested footer image sizes
- 1900 x 856
- 192 x 600
Method 1: Manipulate the image directly, then add as a background
This is by far the easiest way of making a footer background image.
- Open the image in your favourite image editor (mine is Paint.NET)
- Edit Hue/Saturation/Lightness and Brightness/Contrast as needed
- Save the image
- Upload the image to the appropriate folder
- Alter the background image using the code below
Basic
This is the absolute code required to change the footer background.
CSS
#jsn-footer::before {
	background: url("../custom/images/footer-background.jpg");
}

#jsn-footer {
	background: url("../custom/images/footer-background.jpg");
}
Reference Code
Joomlashine has also used the following code for setting a footer background.
CSS
/* Required for the positioning of the background */
#jsn-footer {
	position: relative;
	font-size: 13px;
	line-height: 22px;
	color: #acacac;
	padding: 55px 0;
	/* margin-top: 30px; */
}

/* This displays the background image in relation to its parent #jsn-footer */
#jsn-footer::before {
	content: '';
	position: absolute;
	top: 0;
	left: 0;
	width: 100%;
	height: 100%;
	background: url("../images/backgrounds/ft1.jpg");
	background-position: 50% 0;
	background-repeat: repeat;
	background-size: cover !important;
}
HTML
<div class="jsn-footer">
	<!-- Footer Content Here -->
</div>
Method 2: Semi-Transparent Image on Dark background
The #jsn-footer <div> background is black so when the image is semi-transparent the black comes through making the image darker and give a sort of watermark effect.
Not all the code is required but I have put it here for reference. Different Joomlashine Templates might have slightly different versions of this code but the the rules shoud be very similiar.
CSS
/* Required for the positioning of the background and sets it to be dark */
#jsn-footer {
	position: relative;
	font-size: 12px;
	line-height: 20px;
	color: #fff;
	padding: 35px 0px 0;
	background: #171c26;
}

/* This displays the background image in relation to its parent #jsn-footer and makes the background image semi-transparent */
#jsn-footer .img-ft-bg {
	position: absolute;
	top: 0;
	left: 0;
	width: 100%;
	height: 100%;
	background: url("../images/backgrounds/footer.jpg");
	-ms-filter: "progid:DXImageTransform.Microsoft.Alpha(Opacity="15")";
	filter: alpha(opacity= 15);
	-moz-opacity: 0.015;
	-khtml-opacity: 0.015;
	opacity: 0.015;
	background-position: 50% 0;
	background-attachment: fixed !important;
	background-repeat: repeat;
	background-size: cover !important;
}
HTML
<div class="jsn-footer">
	<div class="img-ft-bg></div>
</div>
Notes
- Demo here - It is a little hidden, possible they have made it to dark. it is on the politics page
- This code keeps the backgound image fixed in place.
- If you think the background has a layer it is fixed to the bottom of the page.
- So when you scroll it appears as if the footer is a window and is moving over the background image.
- This is created by absoulte positiong of the .img-ft-bg within the relative positioned footer DIV
- changing the following helps with positioning the picture in the background
- background-position: 50% 0;
- background-attachment: fixed !important; --> background-attachment: local !important;
Reduce Image File Size but keep the same resolution
When making footer images they have to be quite wide and have resolutions such as 1920 x 1080 but this causes the images to be of a large file size. The solution is simple though.
This technique massively reduces its file size and allows you to use large resolution images with small footprints.
- Save the image as a JPG @ 60% quality
When you save this lower quality image, you will find it normal to the human eye and as such it looks fine, but the image file size is massively reduced.
Add a 'Link Title Attribute' to a Joomla Menu 'Text Seperator'
In Joomla occasionally you might want to a SubText Message underneath the menu item (Link Title Attribute), but Joomla does not support this feature currently (Joomla 3.51).
Solution
To add a 'Link Title Attribute' to a 'Text Seperator' you need to edit the database directly, preferably using PHPMyAdmin.
Get a working copy of a menu item with a 'Link Title Attribute' to look at
- Configure a menu with a 'Link Title Attribute'
- Goto the Joomla Database via phpmyadmin
- Goto #___menu table
- Find the menu item you are looking for, here it is 'Home'
- Edit params
This is a normal menu item configured with a sub text and css styling
{"show_title":"","link_titles":"","show_intro":"","info_block_position":"","show_category":"","link_category":"","show_parent_category":"","link_parent_category":"","show_author":"","link_author":"","show_create_date":"","show_modify_date":"","show_publish_date":"","show_item_navigation":"","show_vote":"","show_icons":"","show_print_icon":"","show_email_icon":"","show_hits":"","show_tags":"","show_noauth":"","urls_position":"","menu-anchor_title":"Life Coaching","menu-anchor_css":"teststyle","menu_image":"","menu_text":1,"menu_show":1,"page_title":"","show_page_heading":"","page_heading":"Stuart Downing : Professional Life Coach","pageclass_sfx":"","menu-meta_description":"","menu-meta_keywords":"","robots":"","secure":0}
Edit your 'Text Separator' and add a 'Link Title Attribute'
NB: if you have just created your menu item, it will be at the end of the table.
- Goto the Joomla Databse via phpmyadmin
- Goto #___menu table
- Find the menu item you are looking for
- In the item's parameters you will see
{"menu-anchor_css":"","menu_image":"","menu_text":1,"menu_show":1} - Add/Edit the menu item with the following parameters. You only need to add what you want. if the tag is already there just edit it
,"menu-anchor_title":"Life Coaching","menu-anchor_css":"teststyle",
Alternative Solution not using a 'Text Sperator'
Although this is not exactly what the article is about, this solution will give you the same effect.
- use External URL instead of a 'Text Seperator'
- Edit the 'Link Title Attribute' in the menu item as normal and as required.
- Use # as the link/Target URL
Links
- Text Separator Menu Item add CSS class - Joomla!
- Text Separator Menu Item add Link CSS Style – Customer Feedback for Joomla! - Add your vote to Joomla Ideas to get this feature added.
Where have the VirtualBox Drivers gone?
When you first setup a VirtualBox PC you might find the drivers are missing. These are not easy to find unless you know where they are.
Where are the drivers?
- The windows Files are on a iso file which might not be present until you install "Guest Additions"
- C:\Program files\Oracle\VirtualBox\VBoxGuestAdditions.iso
- So you mount this image which has the drivers.
- see https://www.virtualbox.org/manual/ch04.html
- I have also found that the drivers that are supplied do not cover all operating systems.
** Notes of the CD **
Oracle VM VirtualBox Guest Additions
- Where have the Windows drivers gone?
The Windows Guest Additions drivers were removed from this directory to save space on your hard drive. To get the files you have to extract them from the Windows Guest Additions installers: - To extract the 32-bit drivers to "C:\Drivers", do the following:
VBoxWindowsAdditions-x86 /extract /D=C:\Drivers - For the 64-bit drivers:
VBoxWindowsAdditions-amd64 /extract /D=C:\Drivers - Note: The extraction routine will create an additional sub directory with the selected architecture (x86 or amd64) to prevent mixing up the drivers.
- To get further help with the command line parameters of the installer,
type: VBoxWindowsAdditions-<arch> /?
Notes
- The video drivers are present but the network card is not. The link below suggest changing the network card hardware type until you find one that works.
- http://ubuntuforums.org/showthread.php?t=1106684
- "In the Virtualbox Control Panel thing (where you can specify your machines hardware configuration), you click on the network adapter category and then change the interface type. There are four to select from. Simply try a different interface type until one works. I didn't need to give windows any drivers for the PCnet-PCI II device (the screenshot shows the PCnew-FAST III device, and that's what I use on my home computer... this other persons computer...well, it probably would have worked too, but the I picked the PCI device out of the list of four available and it work with no issues or prompts to install any drivers). "
- Try "PCnet-PCI II device"
- Intel Pro/1000 MT (82540EM)
Remove the Yellow Triangle on the Samsung S2
This article is not complete yet.
There are 2 basic ways to remove the counter:
- Use the USB Jig - A little piece of hardware that would reset the counter and get rid of the yellow traingle when plugged into the USB socket.
- Software - I am not 100% sure how this works, needless to say it is software that alters the counter but this has a small chance of bricking your phone.
Links