
Items filtered by date: December 2015
USB to ISO, ISO to USB, Bootable ISO
This will cover a lot of topics to do with ISO and burning.
Software
Burners / Authoring
- ImgBurn
- ImgBurn is a lightweight CD / DVD / HD DVD / Blu-ray burning application that everyone should have in their toolkit... and it's free!
- AnyBurn
- A light weight but professional disc burning, imaging, and bootable USB drive creation software
- ShapeISO
- A free and excellent ISO editor software that helps you burn, extract and create ISO image files on Windows computers.
- PowerISO
- Create, Burn, Mount, Edit, Compress, Encrypt, Split, Extract ISO file, ISO/BIN converter, Virtual Drive.
- PowerISO is a disk image utility that can open, burn, create, edit, compress, encrypt, mount and extract ISO files.
- PowerISO comes with some unwanted programs (PUP) but you can simply turn off the internet in your PC (switch off WiFi or Ethernet) before installing PowerISO and it will skip the installation of the PUP.
- Menu: Tools --> Create ISO from USB
USB <--> Image
- Rufus
- Create bootable USB drives the easy way
- Rufus can format a USB drive in the following partition schemes/formats
- MBR
- GPR
- Super Floppy Disk
- How to create bootable USB drive for Windows 11 with Rufus (2025) - Pureinfotech
- Rufus lets you create a bootable Windows 11 USB for supported and unsupported hardware. Also, it offers the option to download the ISO file.
- Create a bootable Windows USB drive with modifications.
- How to Use Rufus: A Complete Guide | UUByte
- Rufus is a popular free software for creating bootable USB. Do you know how to use it? This is a complete guide for using Rufus.
- Rufus is best known for its ability to create bootable USB drive by burning ISO image to USB. However, it's more than that. In fact, you can use Rufus to create a non-bootable BIOS or UEFI device with GPT or Super Floppy Disk partition scheme. Also, you can format USB device as NTFS, FAT32, or UDF, adjust the volume label, and set your own cluster size.
- Do you plan to add USB → ISO creation support? - FAQ · pbatard/rufus Wiki · GitHub
- i.e. Do you plan to allow a feature that can reverse what Rufus does when converting a bootable ISO to bootale USB, so that a bootable ISO can be created back again?
- This was added in Rufus 4.10. If you show the advanced drive properties, and you have a compatible USB or VHD drive selected, then you can click the "save" icon next to it to save the drive content to an ISO.
- Also note that you can already use Rufus to create a VHD/VHDX image anyway (see the relevant entry in this FAQ), which, in most cases, is probably what you are really after. Rufus will happily open and write
.vhd/.vhdximages just like it can open.isoimages.
- ISO to USB
- ISO to USB is a free and small software that can burn the ISO image file directly to the USB drives, these USB drives include USB flash drives, memory sticks and other USB storage devices, it also supports to create a bootable USB disk with Windows operating systems.
- The ISO image file is a popular image of the CD/DVD discs, an ISO file can include all the content on the disc, this software can easily burn these ISO files to a USB flash disk, makes it easy to carry and use.
- This software currently only support Windows bootable disk, can work with both BOOTMGR and NTLDR boot mode, can create USB disk with FAT, FAT32, exFAT or NTFS file system. (When you are making a bootable USB disk, suggest you choose the FAT32 file system.)
- balenaEtcher - Flash OS images to SD cards & USB drives
- A cross-platform tool to flash OS images onto SD cards and USB drives safely and easily. Free and open source for makers around the world.
- EaseUS Todo Backup
- This software can create a bootable USB drive and put ISO on USB drives. It also helps in creating an image of a USB drive and putting ISO on USB drives.
- An easy-to-use free data backup software for Windows 11/10 users to back up photos, music, videos, documents, system, etc. for PC users.
Builders
- Windows Media Creator
- How to Create Bootable USB Flash Drive to Install Windows 10 | Windows 10 Forums - This tutorial will show you how to create a bootable USB flash drive that can be used to install Windows 10 with UEFI or Legacy BIOS.
- Create Windows 11 Bootable USB Installation Media | Windows 11 Forum
- This tutorial will show you how to create a bootable USB flash drive used to install Windows 11 with UEFI support.
- You can use a Windows 11 installation USB flash drive to clean install, upgrade, reset, or repair Windows 11.
- The installation USB can also be used as a recovery drive to boot to boot to WinRE (aka: advanced startup).
Converters
- IMG to ISO
- IMG to ISO is a free small software utility, as its name suggests, it can convert the IMG image files into the ISO image files.
- The IMG is an disk image file format, it be used by some virtual drive software, Its file extension is generally .img or .ima. The ISO format seems to be more popular than IMG format now, So, if you want to convert your IMG files into ISO files, this little software just helps you.
- The ISO format file that is created by this program can conform to the standard ISO-9660 format. You can also use this software to open *.ima files
Tutorials
Extracting Boot Sector from ISOs
- Extracting boot sectors from Windows ISOs | BetaArchive
- Bootsector is not stored in the files, but in the image itself...
- How to manually extyract the boot sector:
- Download and install 7-ZIP 9.20 from: http://www.7-zip.org/
- Open a bootable Windows 2000/XP ISO file with 7-ZIP.
- There is a folder named [BOOT].
- Go in into [BOOT].
- The boot sector file is named
"Bootable_NoEmulation.img". - Extract this bootsector.
- Rename
Bootable_NoEmulation.imgtoBOOTSECT.BIN - Copy your Windows Whistler PE CD to your hard disk e.g.
"C:\WINPE" - Place
BOOTSECT.BINin the folder"C:\WINPE\I386". - Then use a application that will create your bootable ISO file.
- Extracting floppy boot image from ISO with dd? | GRC Public Forums
- I know there are utilities that can extract the boot image from a CD ISO which can then be used to create a boot floppy or another bootable CD ISO. Anyone know if the differences in the boot header for a bootable FreeDOS floppy image, CD ISO or USB ISO is the sector number where the boot code is located?
- That being said, on Windows I have used 7-zip to extract the boot file. 7-zip shows it in a special folder called "[BOOT]".
If you install 7-zip on Linux (p7zip-full) you can use the 7z command to extract the file:7z e isofile.iso '[BOOT]'
- Mentions balenaEtcher for making USB drives.
- How to Extract Boot Sector Information from a Bootable DVD | Tom's Hardware Forum
- Use UltraISO with these instructions to extract the .BIF file.
- The bootable disc has a .BIF file i.e. boot information file which is responsible for booting the disc from a removable storage. Every bootable disk, thus, has a .BIF file that makes it bootable. The difference between a normal installation disk and a boot time installation disk lies mainly in the boot information sector.
- Boot Image Extractor - How to extract boot image from CD/DVD? | WinISO - WinISO is a powerful ISO Extractor, which can extract not only ISO image file but extract the boot image file if you desired.
Create a Bootable USB
- How to Create a Bootable USB Drive Without Using Any Software : 3 Steps - Instructables
- To create a bootable USB drive manually, we will use the command prompt (diskpart) as a Windows default program.
- Here are step by step to create a bootable USB drive as the Windows installation media.
- How To Create Bootable Windows 10 ISO From Files/Folders
- Use this guide if you have Windows 10/8.1/7 installation files and want to create a bootable ISO image file using those files.
- Shows how to use ImgBurn to make a bootable disks, also shows emulation types: None, Floppy disk, Hard Disk.
- ImgBurn
Bootable USB to ISO
- How to Convert Bootable USB to an ISO Image (Tutorial) - YouTube
- In this tutorial video, I'll show you How to Convert Bootable USB to an ISO image. So, if you've been wondering how to create an ISO image file from files and folders, this video is for you as I'll take you through the entire process step-by-step.
- AnyBurn, ImgBurn
- 2 Timeless Ways to Convert Bootable USB Drive to ISO
- Due to some reason, you need to convert bootable USB to ISO. Then you can refer to the methods offered in this post to complete the operation.
- ImgBurn, AnyBurn
- How to Convert Bootable USB to ISO (windows 10/11)
- You created a bootable USB of Windows 11, 10, or even 8.1 after downloading it. Then you deleted the ISO file to make space on the partition since we have the bootable. Now you want to create another bootable but the original ISO is missing. No worries as you can convert bootable USB to ISO.
- ImgBurn
- 2 Free Ways to Convert Bootable USB to ISO on Windows 10
- How to convert bootable USB to ISO in Windows 10? Here you can know how to easily create ISO file from a bootable USB for free.
- Sometimes you may need to create an ISO file from bootable USB for some purpose. Here this article will show you how to easily convert bootable USB to ISO on Windows 10 with 2 ways for free.
- ShapeISO, AnyBurn
- How to Convert Bootable USB to ISO
- Converting your bootable USB to an ISO can save you from these headaches. If you delete the original ISO after making the bootable USB, you will have to redownload it later. It’s easy to convert a bootable USB to ISO on Windows; here are the two best ways to do it.
- AnyBurn, ImgBurn
- How to Create ISO Image from USB with USB to ISO
- What is an ISO file? Are you looking for a way to create ISO image from USB? This article will tell how to create an ISO from USB drives on Windows 11/10/8/7.
- EaseUS Todo Backup, Rufus, DISM
- Make Bootable ISO Image from a Bootable USB Drive
- Learn how you can create a bootable ISO image using a bootable USB drive (with Windows installation files on it) very easily.
- Extract the
.BIFfrom an existing Bootable ISO and use that. - PowerISO
DiskGenius focused
- Create an .iso out of a bootable USB stick? | Ventoy Forum
- e.g. the software DiskGenius (https://www.diskgenius.com) can only create a bootable USB stick (UEFI and BIOS), but not an
.isothat I could use with Ventoy directly. - Just copy the
boot.wimfile to the Ventoy USB disk and boot to theboot.wimdirectly from Ventoy - no need to make an ISO. You will need to add Wimboot Plugin too. - Plugin.wimboot . Ventoy - Ventoy use this plugin to boot WIM files (Legacy BIOS + UEFI).
- e.g. the software DiskGenius (https://www.diskgenius.com) can only create a bootable USB stick (UEFI and BIOS), but not an
- Recommendations for bootable ISOs to add to Ventoy | Windows 11 Forum
- Q: I have not yet discovered an easy way to convert a bootable USB drive to a bootable ISO. Many utilities that claim to do this are getting long in the tooth - i.e 2012 or 2016 and I'd like to use more recent apps.
- A: There are a few methods and techniques on this thread so I will just summarise them.
- oscdimg (Page 1)
oscdimg.exe -m -o -u2 -udfver102 -bootdata:2#p0,e,bd:\iso_files\boot\etfsboot.com#pEF,e,bd:\iso_files\efi\microsoft\boot\efisys.bin d:\iso_files d:\14986PROx64.iso

becomes

oscdimg.exe -m -o -u2 -udfver102 -bootdata:2#p0,e,bE:\boot\etfsboot.com#pEF,e,bE:\efi\microsoft\boot\efisys.bin E:\ C:\users\myname\myiso.iso

You can create a one line batch file to do above.
- You could use cdimage, oscdimg or mkisofs which are command line tools, Or you can use, Lancer, which has a GUI (Page 1)
- Copy the DiskGenius WIM to the Ventoy disk and boot from that. (Page 1)
- Windows-isomaker_x64_x86_sha256.zip (Page 1)
- isomaker.zip (Page 1)
- mkisofs Linux (Page 1)
sudo mkisofs -o /path/to/image. iso /dev/sdb
- replacing /path/to/image. iso with the desired location and name of your ISO file and /dev/sdb with the device name of your USB drive.
- isomaker-DISKGENIUS.zip (Page 2)
- Lancer _x64 wont work for the unusual construction of diskgenius boot media.
- I have done a special one for diskgenius.
- Instructions
- Copy and paste the diskgenius usb stick to a hard drive.
- Rt click the usb stick and select copy. Rt click on a hard drive partition and select paste.
- So you have a folder e.g. C:\DISKGENIUS ( it will have the same name as the usb stick)
- then run the .cmd file and browse to C:\DISKGENIUS
- Do not browse to a sub folder inside C:\DISKGENIUS
- I made a diskgenius usb stick and tested the above .
- Boot from the WIM (Page 2)
- You really only need to copy the file
Boot.wimfrom the folderDiskGenius - Boot(and optionally rename the file to something like, e.g.,DiskGenius 5.5.1.1508 x64.wimto make it easier for you to see what exactly this one is) to the root of the VENTOY partition that's on your USB flash drive. Aside from this, you also need to make sure that you have installed the Wimboot plugin for Ventoy before you boot from the USB flash drive. (For this, you need to create a new folder namedventoyin the root of the VENTOY partition, and then copy the fileventoy_wimboot.imginto this folder like has been explained here.)
- You really only need to copy the file
- Use an existing Bootable ISO (Page 3)
- Using something like the free anyburn, edit a known working iso file (e.g. your macrium iso file ).
- Replace the \sources\boot.wim in the known working iso with the boot.wim from your diskgenius usb stick.
- Then save the iso as a new name, e.g. diskgenius.iso
- NB: I have not tried this.
- oscdimg (Page 1)
Disk Image Handling
Glossary
- P2V
- (Physical-to-Virtual) conversion
- P2V converts a physical server's operating system, applications, and data into a virtual machine format (like VMDK).
- V2V
- (Virtual-to-Virtual) conversion
- the process of migrating a virtual machine (VM) from one virtualization platform to another.
- Fixed Disk / "Thick" Provisions
- These disk images are a set size and are never changed. They are roughly the size of the disk defined in the image.
- Dynamic Disk / Growable / "Thin" Provisioned / "Sparse" Provisioned
- The disk image file size can change and is not directly related to the size of the defined virtual disk it holds.
- OVA/OVF
- These are not disk images, but a standard to allow moving of virtual machines between platforms.
- Deploy and Export OVF and OVA Templates
- You can export virtual machines, virtual appliances, and vApps in Open Virtual Format (OVF) and Open Virtual Appliance (OVA). You can then deploy the OVF or OVA template in the same environment or in a different environment.
- How To Convert Virtual Machines Between VirtualBox and VMware
- Migrating to another virtual machine program can be intimidating.
- If you use an ova extension, then all of the files will be combined into one Open Virtualization Format Archive.
- If you use an ovf extensions, several files will be written separately.
- Super Floppy
- This is the term given to a type of USB formating where it has the following features:
- No MBR
- No Partition Table
- 1 Partition that takes the whole of the drive
- The term "super floppy" can be a bit ambiguous, but generally, when people refer to a "super floppy" in the context of USB drives, they often mean a removable drive (like a USB flash drive) that does not have partitions, behaving more like a traditional floppy disk. Some older disk management utilities, like Acronis Disk Director, might label such drives as "Super Floppy."
- This is the term given to a type of USB formating where it has the following features:
- Boot Sector
- This can contain MBR or GPT code.
- Boot sector - Wikipedia
- A boot sector is the sector of a persistent data storage device (e.g., hard disk, floppy disk, optical disc, etc.) which contains machine code to be loaded into random-access memory (RAM) and then executed by a computer system's built-in firmware (e.g., the BIOS).
- Master Boot Record (MBR)
- The MBR is physically the first sector of a data medium (e.g. hard drive or USB stick), which is used by computers for the booting, or start-up process. The computer must be equipped with a BIOS and a x86 operating system.
- The searches for the active partition and then load the VBR
- The MBR code is OS specific.
- This is placed in the boot sector of a drive
- Volume boot record - Wikipedia
- A master boot record (MBR) is a type of boot sector in the first block of partitioned computer mass storage devices like fixed disks or removable drives intended for use with IBM PC-compatible systems and beyond. The concept of MBRs was publicly introduced in 1983 with PC DOS 2.0.
- The MBR holds the information on how the disc's sectors (A.K.A. "blocks") are divided into partitions, each partition notionally containing a file system.
- The MBR also contains executable code to function as a loader for the installed operating system—usually by passing control over to the loader's second stage, or in conjunction with each partition's volume boot record (VBR). This MBR code is usually referred to as a boot loader.
- MBR (Master Boot Record) explained - IONOS UK - The master boot record is a vital piece of code for many PCs to start up. But how does it work, how is it structured and how can it be repaired if necessary?
- What’s in the MBR?
- First 446 bytes: Bootloader code
- Next 64 bytes: Partition table
- Last 2 bytes: Boot signature (should be
0x55AA) - NB: this is first 512 bytes on a physical drive.
- Volume Boot Record (VBR)
- This is where Windows/OS start to load.
- The VBR is a file with a specific file name in a specific location.
- The VBR code is OS specific.
- The VBR for Windows is a file in the root called:
BOOTMGR - Volume boot record - Wikipedia
- A volume boot record (VBR) (also known as a volume boot sector, a partition boot record or a partition boot sector) is a type of boot sector introduced by the IBM Personal Computer.
- The code in volume boot records is invoked either directly by the machine's firmware or indirectly by code in the master boot record or a boot manager. Code in the MBR and VBR is in essence loaded the same way.
- Windows Boot Manager
- Windows Boot Manager - Wikipedia
- The Windows Boot Manager (
BOOTMGR) is the bootloader provided by Microsoft for Windows NT versions starting with Windows Vista and Windows Server 2008. It is the first program launched by the BIOS or UEFI of the computer and is responsible for loading the rest of Windows. It replaced the NTLDR present in older versions of Windows. - The boot sector or UEFI loads the Windows Boot Manager (a file named
BOOTMGRon either the system or the boot partition), accesses the Boot Configuration Data store and uses the information to load the operating system throughwinload.exeorwinresume.exeon BIOS systems, andwinload.efiandwinresume.efion UEFI systems. - On system with BIOS firmware, the BIOS invokes MBR boot code from a hard disk drive at startup. The MBR boot code and the VBR boot code are OS-specific. In Microsoft Windows, the MBR boot code tries to find an active partition (the MBR is only 512 bytes), then executes the VBR boot code of an active partition. The VBR boot code tries to find and execute the bootmgr file from an active partition.[3]
- On systems with UEFI firmware, UEFI invokes
bootmgfw.efifrom an EFI system partition at startup, starting the Windows Boot Manager.
- The Windows Boot Manager (
- Windows Boot Manager - Wikipedia
- Operating System Boot Loader.
UEFI / MBR Boot Procedure
- Windows MBR Boot Procedure
- MBR is loaded into RAM by the firmware.
- MBR searches for an active partition
- MBR loads the Windows Boot Manager (
BOOTMGR/ VBR) from the active paritition. - Windows Boot Manager now loads the Windows Boot loader from one of these locations:
\windows\system32\winload.exe
\windows\system32\boot\winload.exe
- Windows now loads
- Windows EFI Boot Procedure
- UEFI invokes the Windows Boot Manager from an EFI system partition (ESP) at startup,
\EFI\Microsoft\Boot\bootmgfw.efi
- A user can make an OS selection now, or the default OS is loaded. These settings are defined in the BCD.
- Windows Boot Manager now loads the Windows Boot loader from one of these locations.
\windows\system32\winload.efi
\windows\system32\boot\winload.efi
- Windows now loads
- UEFI invokes the Windows Boot Manager from an EFI system partition (ESP) at startup,
Links
- UEFI boot: how does that actually work, then? | AdamW on Linux and more - This blog post is aimed at regular everyday folks; it's intended to dispel a few common myths and help regular people understand UEFI a bit better. It is not a low-level fully detailed and 100% technically accurate explanation, and I'm not a professional firmware engineer or anything like that.
- Difference between bootmgr.efi and bootmgfw.efi? - Super User
- Could someone explain the EFI partition file structure please? | Reddit - I'm trying to boot back into PopOS after something went wrong during an update. I need to recreate an EFI boot entry in NVRAM, and am looking for the correct .efi file to point to on the EFI partition.
- 1. Introduction — UEFI Specification 2.10 documentation | UEFI Specification - This Unified Extensible Firmware Interface (UEFI) Specification describes an interface between the operating system (OS) and the platform firmware. UEFI was preceded by the Extensible Firmware Interface Specification 1.10 (EFI). As a result, some code and certain protocol names retain the EFI designation. Unless otherwise noted, EFI designations in this specification may be assumed to be part of UEFI.
- edk2/MdePkg/Include/Uefi/UefiSpec.h at master · tianocore/edk2 · GitHub - A boot loader code example.
- UEFI vs BIOS: What is the difference between BIOS and UEFI? | TheWindowsClub - A imple and concise answer to this questions.
USB Drives
USB drives:
- behave similiar to Hard Drives (HDD/SSD/NVMe).
- can be partitioned.
- can be made bootable
- access sectors/data via standard LBA methods.
- do not have the HDD demulation that a CD-ROM/ISO as it is not required.
- can use a SuperFloppy format that it allows it to be loaded as a large floppy disk (this is just a specialised partition layout).
- have their Removable Media bit (RMB) set, which is a hardware flag showing the device is removable device. This is used so the OS knows how to correctly handle the drive.
Some BIOSes have a feature where a USB drive can be:
- mounted and then presented as a HDD to older OS.
- mounted as a floppy disk.
Image Formats
- VHD (deprecated)
- (Microsoft Virtual PC Virtual Hard Disk)
- Azure (requires fixed size), Virtual PC,
- Developed by Microsoft
- Does Azure use VHD or VHDX? - Darwin's Data - Azure supports both VHD and VHDX disk formats for virtual machine disks. The choice between VHD and VHDX depends on the specific scenario and requirements.
- VHD should not be used for new systems.
- What is a VHD File? (Unpacking Virtual Hard Disk Mysteries) - Discover how Virtual Hard Disk (VHD) files revolutionize computing by simplifying management of multiple operating systems and enhancing efficiency.
- VHDX
- (Microsoft Hyper-V Virtual Hard Disk)
- Microsoft Hyper-V
- [MS-VHDX]: Virtual Hard Disk v2 (VHDX) File Format | Microsoft Learn - Specifies the Virtual Hard Disk v2 (VHDX) File Format Protocol, the virtual hard disk format that provides a disk-in-a-file abstraction.
- Hyper-V technology overview | Microsoft Learn - Describes what Hyper-V is, how to get it, key features, and common uses. This article includes an overview for Hyper-V in Windows and Windows Server.
- Hyper-V Manager: Is It the Right Tool for Hyper-V Configuration? - Hyper-V Manager is used for creating, configuring and deleting Hyper-V hosts and VMs. Read this blog post to learn more about Hyper-V Manager capabilities.
- Hyper-V Disk Types Explained - BDRSuite
- Hyper-V Disks : Fixed Size, Dynamically Expanding, and Differencing Disks
- In today’s blog post, we’ll discuss what virtual file formats are supported by Hyper-V and their types. We’ll cover in detail, the different types of VHD/VHDX, and how to choose the right one for your business requirements.
- VMDK
- (VMware Virtual Disk File)
- VMware and ESXi
- VDI
- (VirtualBox Virtual Disk File)
- VirtualBox
- QCOW (deprecated)
- KVM type Virtual Machines (old format, deprecated)
- QCOW2
- KVM type Virtual Machines
- HDD,HDS
- (Parallels Desktop Virtual Disk File)
- Parallels
- DD
- These are created by the Linux command
dd. - This is a binary blog, made by copying the RAW bits, and therefore is file system agnostic.
- These are created by the Linux command
- IMG
- (Disk or Partition Image File)
- This binary blog, made by copying the RAW bits, and therefore is file system agnostic.
- IMG (file format) - Wikipedia
- The .img file extension was originally used for floppy disk raw disk images only. A similar file extension,
.ima, is also used to refer to floppy disk image files by some programs. A variant of raw image, calledIMZ, consists of a gzipped version of a raw floppy disk image. These files use the.imzfile extension, and are commonly found in compressed images of floppy disks created by WinImage. - QEMU uses the
.imgfile extension for a raw image of a hard disk drive and calls the format "raw".
- The .img file extension was originally used for floppy disk raw disk images only. A similar file extension,
- An .img file is just a raw disk image, a sector-by-sector copy of a storage device (like a hard drive, SSD, USB stick, etc.). It doesn’t have a special format; it’s literally just the binary contents of a disk.
- .img was not a format invented by dd, it’s just a raw image file — a byte-for-byte copy of a disk.
- IMA
- (Virtual Floppy Disk Drive)
- This is a binary blog, made by copying the RAW bits, and therefore is file system agnostic.
- IMZ
- GZipped (Virtual Floppy Disk Drive)
- RAW
- This is a binary blog, made by copying the RAW bits, and therefore is file system agnostic.
- BIN
- This is a binary blog, made by copying the RAW bits, and therefore is file system agnostic.
- WIM
- Microsoft Windows Image File
- This is used to hold a Windows operating system and various other task.
- This is not strictly a Disk Image file but can behave like one.
- PHVD
- Paragon
- PMFX
- DiskGenius
- E01
- EnCase
- AFF
- (Advance Forensics Format)
- EWF
- (Expert Witness Compression Format)
- FFU
- (Windows Full Flash Update)
- GitHub - rbalsleyMSFT/FFU
- Using Full Flash Update files to speed up Windows Deployment
- Has full YouTube video with timestamps.
- Richard Balsley from Microsoft
- Capture and apply Windows Full Flash Update (FFU) images | Microsoft Learn - Deploy Windows faster on the factory floor by using the Full Flash Update (FFU) image format.
Software
There will be cross over between software functionality and their category.
Conversion (V2V and P2V)
- StarWind V2V Converter
- StarWind V2V / P2V Converter converts (sic!) virtual machines from one format to another, and turns physical machines into VMs as well. It simplifies transition between virtual environments, both public clouds and on-premises, making migration quick and frictionless. With on-the-fly, snapshot-based “direct” VM conversion between hypervisors, StarWind eliminates downtime and the burden of allocating intermediate space, saving valuable time and resources.
- Supports all the major image formats as source and destination.
- StarWind V2V Converter generally does not directly support converting or accessing USB drives as part of its core functionality. While it can convert virtual machine images and physical disks, USB drives are typically handled differently within virtualized environments.
- StarWind V2V Converter Help : Command Line Interface | Starwind - There are two ways for working with StarWind V2V Converter without GUI which is covered here.
- StarWind V2V Converter Overview (Part 5): Converting VMs to QCOW2v3 | Starwind - The StarWind V2V Converter series wraps up with an exciting new feature – QCOW2v3 support! From larger disks to better encryption, see how this format can transform your VM migration workflow Introduction Welcome to the fifth and final article in our StarWind V2V Converter series. In the previous articles, we covered converting virtual machines (VMs) to and from Oracle VirtualBox, oVirt, Proxmox, and explored hot migration from Microsoft Hyper-V to VMware ESXi. Now, we'll delve into an exciting new feature of StarWind V2V Converter: the ability to convert your disk images into the QCOW2v3 format. QCOW2v3 is the latest iteration of the widely used QEMU Copy-On-Write format, offering better performance, improved snapshot capabilities, and more efficient use of storage space. This makes it ideal for virtualization professionals who need a reliable, flexible, and powerful conversion tool for optimized VM migrations. For those who haven't yet tried StarWind V2V Converter, you can download.
- VMware vCenter Converter Standalone
- VMware vCenter Converter is an essential tool for users of VMware Workstation, enabling seamless physical-to-virtual machine conversions. While bundled with VMWare Workstation, it installs independently and supports individual version upgrades, offering flexibility and efficiency for virtualization tasks.
- Is able to reach into an offline virtual machine image and change the drivers in the Windows installation to the ones the VMWare environments need/offer.
- Convert Windows and Linux physical machines or third-party VMs into VMware virtual machines.
- Resize partitions and control disk formats during migration.
- Extremely painful sign up and download procedure, the website is terrible, but at least the software is free.
- Introduction to VMware vCenter Converter Standalone - VMware vCenter Converter Standalone provides an easy-to-use solution that automates the process of creating VMware virtual machines from physical machines (running Windows and Linux) and from other virtual machine formats.
- VMware vCenter Converter Download | filehorse
- VMware vCenter Converter transforms your Windows and Linux-based physical machines and third-party image formats to VMware virtual machines.
- It supports many source physical machines, including Windows and Linux desktop and server editions. It also supports the conversion of third-party virtual machines like Hyper-V and KVM.
- P2V and V2V Conversion: The software allows you to perform both Physical-to-Virtual (P2V) and Virtual-to-Virtual (V2V) conversions, giving you the flexibility to migrate from physical servers to virtual ones or move virtual machines between different hypervisors.
- This page has a good write-up of features.
- This is an alternative download source.
- Migrate machines to VMWare vCenter VMs using standalone converter - Notes_Wiki - VMWare standalone converter can be used for converting physical or virtual machines from different types of physical hardware or hypervisors to VMWare vCenter based VMs. For the conversion use following steps:
- VBoxManage
- This is part of the VirtualBox hypervisor package.
- VBoxManage is the command-line interface to Oracle VM VirtualBox. With it, you can completely control Oracle VM VirtualBox from the command line of your host operating system.
- It also has the ability to convert and manipulate disk images.
- How to Convert Between Fixed and Dynamic Disks in VirtualBox | How-to-Geek - VirtualBox allows you to choose either a dynamically allocated or fixed size disk when creating a new virtual hard disk file.
- Convert a VirtualBox Fixed Disk to a Dynamic or vice versa | TheWindowsClub - When creating a virtual machine, you are asked to select a disk type, you can either go for Fixed Disk or Dynamic Disk. What if you went for a Fixed Disk and later on realized that you need a dynamic one, or vice-versa? Well! You can convert one into another. In this post, we will see how you can convert a VirtualBox Fixed Disk to a Dynamic one or vice-versa.
- Use VBoxManage for Raw to VDI
VBoxManage convertfromraw source.img output.vdi --format VDI
- QEMU disk image utility (qemu-img)
- This is part of the QEMU hypervisor package.
- qemu-img allows you to create, convert and modify images offline. It can handle all image formats supported by QEMU.
- There are many options and are all run from the command line.
- Use qemu-img for Raw to VHDX
qemu-img convert -f raw -O vhdx source.img output.vhdx
- Disk2vhd - Sysinternals | Microsoft Learn
- Disk2vhd simplifies the migration of physical systems into virtual machines.
- Disk2vhd is a utility that creates VHD (Virtual Hard Disk - Microsoft's Virtual Machine disk format) versions of physical disks for use in Microsoft Virtual PC or Microsoft Hyper-V virtual machines (VMs).
- The difference between Disk2vhd and other physical-to-virtual tools is that you can run Disk2vhd on a system that’s online.
- Disk2vhd uses Windows' Volume Snapshot capability, introduced in Windows XP, to create consistent point-in-time snapshots of the volumes you want to include in a conversion.
- You can even have Disk2vhd create the VHDs on local volumes, even ones being converted (though performance is better when the VHD is on a disk different than ones being converted).
- Disk2vhd: Best Guide to Convert Physical to Virtual Machine - EaseUS - Disk2vhd is a utility that converts logical disks into virtual disks in VHD format. In this article, I will explain in detail what is disk2vhd and how it can be used to help us meet our virtualization needs.
- vhdtool.exe / vhdxtool.exe (Microsoft)
- These are old sofwares made by Microsoft and should not be used.
- VhdTool Is Dead, Long Live VhdxTool! | Systola
- KB200004
- This article covers this new tool and explains a few things.
- VhdxTool | Systola
- KB100005
- VhxdTool is a command line utility for Windows for quick creation and resizing of virtual hard disk files (VHDX).
- Convert-VHD (PowerShell) (Hyper-V Management Tools)
- How to Convert from Dynamic VHD/VHDX Disk Format to / from Fixed in Hyper-V | BC Blog
Convert-VHD –Path c:\VM\my-vhdx.vhdx –DestinationPath c:\New-VM\new-vhdx.vhdx –VHDType Dynamic
- Converting Fixed Size VHDs to Dynamic Sized VHDs – The World According to Mitch - You can use the Hyper-V menu or powershell.
- Convert VHD to VHDX | Virtualization file conversions - How to convert VHD to VHDX for better performance and larger disk support using Hyper-V Manager or PowerShell.
- How to convert VHD to VHDX using Hyper-V Manager | TheWindowsClub - If you have a VHD file and want to convert it to VHDX format, you can use Hyper-V Manager. This tutorial will show you how to convert VHD to VHDX using Hyper-V Manager in Windows 11/10.
- CITRIXEN: Convert, Resize, and Optimize VHD and VHDX files with PowerShell
- Convert, Resize, and Optimize VHD and VHDX files with PowerShell.
- This small article covers a lot.
- How to Convert from Dynamic VHD/VHDX Disk Format to / from Fixed in Hyper-V | BC Blog
- Powershell
- Fixed to Dynamic, Dynamic to Fixed
## Fixed --> Dynamic
Convert-VHD -Path "D:\Path\To\Fixed-Disk.vhd" -DestinationPath "D:\Path\To\Dynamic-Disk.vhd" -VHDType Dynamic

## Dynamic --> Fixed (For Reference Only)
Convert-VHD -Path "D:\Path\To\Disk-dynamic.vhd" -DestinationPath "D:\Path\To\Disk-trimmed-fixed.vhd" -VHDType Fixed
- Fixed to Dynamic, Dynamic to Fixed
- Multiple
- How to Convert VMDK to VHDX (VMWare to Hyper-V)? | TheITBros
- In an environment where different versions of the hypervisor are used, it is often necessary to convert virtual machine files from one format to another. In this article, we will look at how to convert a VMware virtual machine’s VMDK file to Hyper-V (VHDX) format.
- The article covers both PowerShell, Starwind V2V converter and QEMU-img.
- Convert VHD from Dynamic to Fixed | Easy Guide to Convert Dynamic VHD to Fixed | DiskInternals - Easily convert dynamic VHD to fixed or fixed VHD to dynamic with this step-by-step guide ?️. Learn the best tools and methods for hassle-free VHD conversions!
- Ultimate Guide to Converting Virtual Disks with VBoxManage and Other Tools - Learn how to convert VDI, VMDK, VHD, and more with VBoxManage, qemu-img, and other system virtualization tools.
- How to Convert VMDK to VHDX (VMWare to Hyper-V)? | TheITBros
Resizing
- VhdResizer | Softpedia
- A small and straightforward Windows utility designed to help users to shrink or expand the volumes of VHD files. Made in 2007.
- How to Resize a Microsoft Virtual Hard Drive (VHD) File - When you create a Microsoft Virtual Hard Drive either through Virtual PC or Virtual Server, you have to specify the maximum size of the file up front.
- VhdxTool
- VhxdTool is a command line utility for Windows for quick creation and resizing of virtual hard disk files (VHDX).
- This offers similar functionality to a former program vhdtool for Windows Server 2008/R2, but while vhdtool worked with older (VHD) format, vhdxtool works with the new (VHDX) format.
Compacting
- vboxmanage
- wslcompact
- Compacts the size of the ever-growing WSL vhdx images.
- Compacting the size of the ever-growing WSL images · microsoft/WSL · Discussion #9566 · GitHub
- Give the usage commands of the tool.
- Using virtual drives is a great idea. But, ext4 filesystem optimization inside VHDX images is not so well supported by the optimization tools. NTFS partitions are well optimized, but ext4 partitions are not so well optimized, and WSL suffers from this problem.
- Since WSL doesn't provide a good solution for this, I have coded a small utility wslcompact that compacts the WSL partitions.
- Any thoughts on improving the tool would be welcome. However, it would be better if the WSL team releases something similar. A good improvement would be an improvement in the export function, not only making a copy of the VHD file but dumping the contents in a newly created VHD, which would considerably reduce the size of the backup.
- Optimize-VHD (Hyper-V Management Tools)
- Needs Hyper-V to be installed.
Optimize-VHD -Path "Path\To\Your\VHDfile.vhdx" -Mode Full
- Needs Hyper-V to be installed.
- DISKPART
- Always present in Windows.
- Optimize-Vhd doesn't require diskpart, of course, both processes can do more or less the same regarding drive compaction. Diskpart is somehow more convenient as it is readily available in all systems without the need for installing any extra package.
- diskpart | Microsoft Learn - Reference article for the diskpart command interpreter, which helps you manage your computer's drives.
- Compact a VHD file created by Disk Management? - Super User
- You can then complete the compacting using diskpart from a Command Prompt
- Run
diskpart - Select the disk via its path: s
elect vdisk file="<path>" - Attach it as read-only:
attach vdisk readonly - Compact it:
compact vdisk - Upon completion of the compact, detach it again:
detach vdisk
- Run
- You can then complete the compacting using diskpart from a Command Prompt
Image Creation (Disk)
- DiskGenius: Data Recovery, Partition Manager, Backup & Disk Utilities
- This software handles a variety of formats (.vmdk, .vhd, .vhdx, .vdi, .hdd, .img) but is read only in the free version, this means you cannot backup a drive to one of these formats with the free version. There is a proprietary DiskGenius disk image format (.pmfx) you can use for normal disk operations.
- The paid version will also allow you to convert between the various Disk Image formats
- You can also browse the files on disk images.
- DiskImager
- A simple but powerful tool for saving and writing disk images.
- Save raw binary images of any disk as regular files.
- Write disk images to physical disks.
- When writing an image to a disk, supports industry-standard disk image formats (in addition to raw images), including VDI (VirtualBox), VMDK (VMware), E01 (EnCase), and VHDX/VHD (Virtual hard disk).
- MultiDrive
- 100% free disk management software for Windows. Clone, backup, restore, and erase drives with ease.
- Allows you to create IMG of drives and I think also USB Drives.
- dd (Linux)
- This is a low-level command-line utility that copies data from one location to another, byte by byte. It's commonly used to:
- Clone disks or partitions
- Create disk images
- Write ISO or IMG files to USB drives
- How to Make Disk Images in Linux with the DD Command: An Essential Guide for Sysadmins – TheLinuxCode
- Hey there! Do you manage Linux systems and need to make backups or clone disks? If so, the dd command should be part of your essential sysadmin toolkit. In this guide, I‘ll show you how to use dd to create complete disk images in Linux.
- This is very comprehensive.
- How to make disk image with dd on Linux or Unix | nixCraft - Explains how to use the dd command on Linux, macOS (OS X), FreeBSD, and Unix like system to clone hard disk or partitions from the CLI.
- This is a low-level command-line utility that copies data from one location to another, byte by byte. It's commonly used to:
- OSFClone
- OSFClone is a free, open-source utility designed for use with OSForensics. OSFClone is a self-booting solution which lets you create or clone exact, forensic-grade raw disk images.
- OSFClone is a free, self-booting solution which enables you to create or clone exact raw disk images quickly and independent of the installed operating system. In addition to raw disk images, OSFClone also supports imaging drives to the open Advance Forensics Format (AFF), AFF is an open and extensible format to store disk images and associated metadata, and Expert Witness Compression Format (EWF). An open standard enables investigators to quickly and efficiently use their preferred tools for drive analysis.
Image Creation (USB)
Rufus
- Rufus - The Official Website
- Rufus is a small application that creates bootable USB drives, which can then be used to install or run Microsoft Windows, Linux or DOS.
- This app also allows you to create disk image files (VHD/VHDX) of any USB pendrives plugged in.
- Rufus uses DD (or windows equivalent) to image the drive to a VHD/VHDX.
- This creates a "RAW" image as all bits are read `As-Is` and then recorded into the image irrelevant of whether they are files, empty space or random bits.
- Being raw, they are fully equivalent to a block-for-block disk image.
- Rufus produces Fixed (Pre-Allocated) VHD images.
- The image is the same size as the USB drive.
- The file size cannot be reduced because it's size is fixed.
- Reclaiming free space will not reduce the image size.
- Rufus produces Dynamic (Growable) VHDX images
- Because it is made from a raw DD copy, all sectors are used.
- The image is the same size as the USB drive.
- To reclaim free space you need to
- Internally recover the free space from the virtualised drive
- Zero out sectors or
- Mount the image and have a live OS TRIM the drive
- Compacted the disk image.
- Have an external program (file aware) compress the image file by removing all of the references to free thus reducing the VHDX image file size.
- Zero fill the USB drive before use
- This will reduce the noise on the drive and allow for compression, but this is obviously no good for drive that already have data on them.
- Internally recover the free space from the virtualised drive
- Rufus uses DD (or windows equivalent) to image the drive to a VHD/VHDX.
- Commands
- Power keys/Cheat modes - FAQ · pbatard/rufus Wiki · GitHub
Ctrl+L= Show the logCtrl+Z- Zero fill the selected USB drive.
- It writes zeroes into every single sector of the drive.
- This leaves the drive completely blank and unpartitioned.
- Misc
- How do I create a VHD drive to use with Rufus? - FAQ · pbatard/rufus Wiki · GitHub - Here is how you can create a VHD/VHDX to use with Rufus.
- Help, I don't see the ISO download button! - FAQ · pbatard/rufus Wiki · GitHub
- For the ISO download feature to be avaiable, you also need to have 'Check for updates' enabled in the Rufus settings.
- Also, if there was an issue with your network while Rufus launching or if you are running Rufus in an unconnected environment, the ISO download button will not appear.
- Disk Format information
- When you create a VHD(X) with Rufus, it effectively changes media state from removable (USB) to non-removable (HDD) as this is what is defined in the header that Rufus attached to the binary image it has just created.
- This is an AI analysis of the rufus disk mounting process
- Virtual Disk Handling | pbatard/rufus | DeepWiki
- The Virtual Disk Handling system in Rufus provides capabilities for working with virtual disk files and disk images.
- This includes mounting and analyzing VHD/VHDX files, handling Windows Imaging Format (WIM) files, and supporting various compressed disk image formats.
- Virtual disk handling enables Rufus to extract content from these files, analyze their bootability, and use them as sources for creating bootable USB drives.
- Virtual Disk Handling | pbatard/rufus | DeepWiki
- Why does Rufus call a .vhd file a DD Image? - Super User
- Rufus developer here. This is because the save option is only for uncompressed VHD images, and uncompressed VHD images are just the same as DD images with an extra 512 byte footer added.
- So, for all purposes, you can use DD to write the VHD image created by Rufus, and it will work just fine (with either the extra 512 byte footer being ignored as random data, if you use a larger sized disk, or being dropped, if using same exact same size disk).
- Ergo, what Rufus creates when you click the save button is essentially a DD image since it can very much be used as such.
- PS: For those who wonder why Rufus doesn't compress the VHD images it saves this is primarily due to the compression algorithm being used by Microsoft being very poor (IMO) and therefore not worth spending time implementing support for. This is also part of the reason why save as DD image is only available when clicking the advanced options.
- Getting Rufus to output to a disk image file - Super User
- Akeo
- Rufus can create an uncompressed VHD image from whichever drive you have currently selected, which, for all intent and purposes can be used as a regular DD image (because the only difference with a regular DD image is an extra 512-byte footer, which, no matter how much you may think otherwise, will NEVER EVER come in the way of using the
.vhdas a.img). - UPDATE: And recent versions can also create compressed VHDX images, that take less space, and that can work the same way.
- Rufus can create an uncompressed VHD image from whichever drive you have currently selected, which, for all intent and purposes can be used as a regular DD image (because the only difference with a regular DD image is an extra 512-byte footer, which, no matter how much you may think otherwise, will NEVER EVER come in the way of using the
- gronostaj
- Solution 1: Read the image from a prepared flash drive. Win32DiskImager can be used to do this.
- Solution 2: Prepare your own hybrid ISO. Most of modern Linux distros use so called hybrid ISOs. They are valid ISOs that can be burned to a CD/DVD, but at the same time they are valid disk images that can be written to a flash drive. For example you could feed an Ubuntu ISO to Win32DiskImager and have it write it to disk (Rufus may offer this feature for some ISOs, it calls it "dd mode"). Community documentation on ISO customization is ten to thirteen years old, but may still be useful and you'll find many useful guides all over the Internet.
- Akeo
- Make image from disc · Issue #1274 · pbatard/rufus · GitHub
- Aha, then this is my cue to enlighten you:
- An uncompressed is just a DD image with a 512 byte footer added.
- Therefore, because writing that footer (or not) is inconsequential, you can absolutely use the
.vhdthat was created by Rufus as a DD image. - Now, in case you have doubts about those extra 512 bytes potentially causing an issue let me explain that:
- If you are restoring the image to a drive of the exact same size as the one you used to create the VHD, then these 512 bytes will happily be dropped by
dd(At least the Linux version ofdddoesn't care much if you try to write more data that the drive can hold - it'll report it, but it will not have any kind of impact on the data written), leaving you with a 1:1 copy of the original drive. - If you are using a drive that is larger than the one you used to create the VHD, then, even if you are unfortunate enough to have the 512-byte VHD footer fall at the precise location where the GPT backup is located (a few sectors before the end of the drive), then because this is a backup, any modern OS will detect that the backup is corrupted and fix it by duplicating the master, which is located at the beginning of the disk. Oh, and, even when you restore a pure GPT based DD image onto a larger drive, this kind of GPT backup fix needs to happen anyway, since, obviously, the backup GPT from the original image is at the wrong location, and a new backup GPT needs to be created at the right one. In other words, the writing of that 512-byte VHD footer is no different than the case of expecting whatever garbled data one might find at the expected location for the backup GPT when writing a "regular" DD image. And really, even as this is a complete non-issue, the possibility that the VHD footer will fall at the precise location where the backup GPT should go is exceedingly small. Oh, and if your image is using a MBR partition table, then it's even less of an issue, because none of the data up to (size of VHD - 512 bytes) will EVER be seen as accessible from the original image.
- If you are restoring the image to a drive of the exact same size as the one you used to create the VHD, then these 512 bytes will happily be dropped by
- In summary, and I really have to stress this out, for all purposes, an uncompressed VHD image is exactly the same as a DD image. Therefore you can use the Rufus created
.vhdexactly as you would use a standard DD image. There REALLY is no "What if...?" or "But surely..." associated to using an uncompressed.vhdas you would a DD image.
- VHDX Disk image created by Rufus is shown as a Dynamic (Growable) image and not as a fixed (pre-allocated) disk image
- This is correct and is expected behaviour. A VHD image file will always be a fixed sizxe.
- StarWind V2V Converter shows the VHDX image as a Growable Image · Issue #2831 · pbatard/rufus · GitHub
- Hence VHDX is a compressed image format.
- Now, of course, if you have random data all over the disk, the fact that VHDX can compress data does not mean that its size will always be smaller than VHD. But in you have long sections of zeroed data, VHDX will work wonders as a compressed disk image format, hence why Rufus labels it as such.
- Well, using "growable" would imply that Rufus can somehow grow that drive, which it can't, so you have to be very careful about what the terminology you use implies your application might do (yes, even if you are going to reply "Well, it can be grown externally, so it still applies!"). And fixed/dynamic is already used for disks in a completely different context (fixed as opposed to removable, and dynamic disk is used in Windows disk manager and other places) so it would be exceedingly confusing there too.
- Instead, uncompressed and compressed (or "compressable", but we don't want to go into semantics here) does describe pretty exactly the difference between VHD and VHDX as far as Rufus' usage is concerned, so I am not planning to change the terminology because one person thinks some alternative would work better for their specific workflow.
- Why This Happens
- Rufus does not create truly dynamic (growable) disks. Instead, it writes raw, fully allocated (fixed-size) disk images, even when saving to
.vhdxformat. But:- Rufus doesn't explicitly write the full VHDX metadata headers the same way Hyper-V or Windows Disk Management does.
- This can cause third-party tools like StarWind to misinterpret the image format or default to "growable" in their interface or assumptions.
- Rufus does not create truly dynamic (growable) disks. Instead, it writes raw, fully allocated (fixed-size) disk images, even when saving to
- Evidence & Explanation
- StarWind is designed to work with officially structured VHDX files (including all metadata).
- Rufus writes uncompressed, flat VHDX files but doesn’t necessarily populate all optional VHDX metadata fields.
- StarWind may detect the structure or size mismatch and label it as "growable" (which usually means "dynamic")—even if it's not actually dynamic.
- How to Check What It Really Is
- You can confirm the truth using:
- PowerShell
Get-VHD -Path "C:\path\to\your.vhdx"
- Look for VHDType: Fixed or Dynamic
- vhdxinfo (from libvhdi)
vhdxinfo mydisk.vhdx
- It will show you
type: fixedortype: dynamicexplicitly.
- It will show you
- Workaround or Fix
- If you want the VHDX to be 100% standards-compliant and recognized as "fixed" by all tools (including StarWind), do this:
- Mount the Rufus-generated VHDX in Windows.
- Create a new fixed-size VHDX using:
New-VHD -Path "C:\fixed-compliant.vhdx" -SizeBytes 10GB -Fixed
- Use
ddorxcopyto clone contents to the new disk.
- This gives you a 100% spec-compliant VHDX that should show as "fixed" in all tools.
- If you want the VHDX to be 100% standards-compliant and recognized as "fixed" by all tools (including StarWind), do this:
Others
- ImageUSB (PassMark)
- ImageUSB is an effective tool for writing an image to multiple USB Flash Drives for mass duplication and creating images of thoese drives.
- ImageUSB is a free utility which lets you write an image concurrently to multiple USB Flash Drives. Capable of creating exact bit-level copies of USB Flash Drive (UFDs), ImageUSB is an extremely effective tool for the mass duplication of UFDs.ImageUSB also supports writing of an ISO file byte by byte directly to an USB drive (*). ImageUSB can also be used to install OSFClone to a USB Drive for use with PassMark OSForensics™.
- Unlike other USB duplication tools, ImageUSB can preserve all unused and slack space during the cloning process, including the Master Boot Record (MBR). ImageUSB can perform flawless mass duplications of all UFD images, including bootable UFDs.
- ImageUSB includes functionality to Zero a USB Flash Drive. This will replace the contents of the entire drive with 0s. Or alternatively to just Zero the MBR and/or GPT entries that exists on the drive. In addition, imageUSB has the ability to reformat even hard to format drives and reclaim any disk space that may be lost previously.
- (*) CD ISO images use a different file systems compared to USB drives. So the direct imaging of ISO9660, Joliet or UDF file system, from a CD, to a USB drive, might not allow the USB drive to function in all operating systems. A reformat can recover the drive however. As of V1.5, imageUSB now supports extraction of ISO contents onto USB Drive.
- Warning: Due to the forensic nature of image duplication by ImageUSB, please ensure that you select UFDs with a storage size similar to the image you wish to duplicate. For example, if a 2GB image is copied to an 8GB USB Flash Drive, the drive will only be able to use two out of the eight gigabytes of storage space. In this scenario, users will need to reformat the UFD in order to access the rest of the storage space.
- How to Create an Image of Your USB Drive | How-To Geek - You can backup your USB drive by creating a saved image. You can even take that image and clone multiple USB sticks. This guide shows you how to create an image of your USB drive.
- USB Image Tool – alex's coding playground
- USB Image Tool can create images of USB flash drives, SD cards and any other devices that are mounted as USB storage drives.
- It can create an exact byte copy of these devices in raw and compressed image formats and also restores or write images on the device.
- USB Image Tool works with any device, that implements the USB Mass Storage protocol. This includes flash drives, card readers/SD cards and a lot of other devices like digicams, cell phones and mobile music players.
- USBImager
- A really simple GUI application that writes compressed disk images to USB drives
and creates backups. Available platforms: Windows, MacOSX and Linux. Its interface is as simple as it gets, totally bloat-free.
- A really simple GUI application that writes compressed disk images to USB drives
- UltraISO
- This can write images to USB so I am guessing it can make them aswell.
Disk Image Repair software
- VMFS Recovery™ - repair VMDK, VMDK recovery tool. ESX/ESXi recovery | DiskInternals - VMFS Recovery™ repairs VMDK files stored in Virtual Machine images and compatible with WMware® VMFS, vSphere, ESX, ESXi Server, VirtualPC, VirtualBox and other. VMFS Recovery™ recovers data from corrupt or deleted VM images.
- VDI Repair Tool for Virtual Disk Image Recovery - SysInfo - To repair corrupt VDI file, VDI Repair tool is the best solution one can have. Get free VDI recovery tool to restore Virtual disk image data from corrupt VDI files.
- VHD Recovery Tool to Recover Deleted, Corrupted VHD File Free - VHD Recovery Tool is a best Virtual File Recovery software to recover damaged VHD file. It repairs corrupt VHD file and recover VHD data in their original form.
- Smart Virtual Disk recovery solution- restore corrupt & formatted VHD files. - Virtual disk recovery '' VHD recovery tool ''is made to restore corrupt VHD files. Get the best VHD recovery tool online to recover your corrupt and formatted VHD files.
- Virtual Disk Recovery Tool to Recover Data from Corrupt Disk Image File - Aryson Virtual Disk Recovery Software permits you to repair and restore all types of corrupted Virtual Machine VMware Files including all databases.
Other Software
- sDelete (Secure Delete)
- SDelete - Sysinternals | Microsoft Learn - Securely overwrite your sensitive files and cleanse your free space of previously deleted files using this DoD-compliant secure delete program.
- How to use the command 'sdelete' (with examples) - Secure deletion is an essential part of data management and protection, particularly when it involves sensitive information. The command-line tool ‘sdelete’ offers a robust solution by permanently erasing files, directories, or entire volumes, thus ensuring that data cannot be recovered. Developed by Sysinternals, ‘sdelete’ employs advanced algorithms to overwrite data, mitigating the risk of unauthorized data access. Below we explore various use cases, each tailored to different secure deletion needs.
- Meet Sdelete, the obscure Microsoft tool that wipes data for good | PCWorld - Sdelete, short for Secure Delete, is a powerful but little-known tool from Microsoft's Sysinternals suite that permanently wipes files and folders by overwriting data.
- How to use SDelete to ensure deleted data is gone for good | TechTarget - Standard delete functions aren't good enough to guarantee data is gone for good. Learn how to use SDelete to ensure your information is removed permanently.
Mounting and Managing Images (in Windows)
- Windows
- It can mount WIM, VHD and VHDX natively.
- You can use 7zip to open WIM files.
- Mount-WindowsImage (Dism) | Microsoft Learn - Mounts a Windows image in a WIM or VHD file to a directory on the local computer.
- How To Mount and Update Windows Image Files (WIM) | KC's Blog
- Using Microsoft’s own Windows Image Files (WIM) format, it’s also easy to mount to not only read but update files in the image file
- Example
## Mount WIM
DISM /Mount-Wim /WimFile:"d:\boot.wim" /index:1 /MountDir:"d:\chicken"

## Make changes

# Unmount WIM (Discarding Changes):
DISM /unmount-wim /MountDir:"d:\chicken" /discard

# Unmount WIM (Keeping Changes):
DISM /unmount-wim /MountDir:"d:\chicken" /commit
- Arsenal Image Mounter
- Arsenal Image Mounter mounts the contents of disk images as complete disks in Windows.
- FTK Imager - Forensic Data Imaging and Preview Solution | Exterro
- A free data preview and imaging tool used to acquire electronic evidence in a forensically sound manner by creating copies of computer data without making changes to the original evidence.
- With FTK Imager, you can create forensic images of local hard drives, CDs and DVDs, thumb drives or other USB devices.
- Mount an image for a read-only view that leverages Windows® File Explorer to see the content of the image exactly as the user saw it on the original drive.
- OSFMount - Mount Disk Images & Create RAM Drives
- The free OSFMount tool mounts raw disk image files in mulitple formats. You can also create RAM drives. Formats supported include img, dd, E01, VHD, ISO & bin
- Instructions
- Step 1 of 4: Just select your disk image, do not mount as ram disk
- Step 2 of 4: Mount entire image as virtual disk
- Step 3 of 4: Skipped by the software, must be something to do with partition detection.
- Step 4 of 4:
- Read-only drive: Optional, but readonly keeps the original image clean
- Write mode: Write cache
- Drive emulation: Physical Disk Emulation = we need this for the boot sector
- Drive type: HDD
- NB:
- In Starwind, your virtual disk will be listed as real disk called
osfdisk - If you mount as FDD (possible a super floppy mode) Starwind will not see the drive.
- In Starwind, your virtual disk will be listed as real disk called
- OSFMount - What is the difference between logical and physical drive emulation modes:
- In OSFMount, the difference between logical and physical drive emulation lies in how the mounted image is presented to the operating system:
- Logical Drive Emulation
- What it is: Mounts a partition within a disk image as a drive.
- Use case: When you're only interested in accessing a specific partition (e.g., a file system like NTFS or FAT32).
- Example: Mounting just the C: partition from a full disk image.
- Visible as: A standard drive letter in Windows (e.g., D:, E:).
- No boot sector or MBR is emulated—just the file system content.
- Faster and simpler for common use cases like extracting files.
- Physical Drive Emulation
- What it is: Mounts the entire image as if it were a real physical disk, including the MBR, partition table, and all partitions.
- Use case: When you need to work with the full disk structure (e.g., for forensic analysis or imaging software that requires MBR access).
- Visible as: A physical disk (not a drive letter), usually accessed via disk management tools or forensic software.
- Can emulate multiple partitions, raw sectors, boot records, etc.
- Slower and more resource-intensive, but gives low-level access.
- Logical Drive Emulation
- Forum
- OSFMount decides automatically whether to use physical or logical emulation based on the presence of a partition table in the image.
- OSFMount shall automatically mount using Physical Drive or Logical emulation based on whether the image file contains a partition table or not
- Another forum post clarifies the difference in practical terms:
- Logical emulation: mounts only the file system as a volume — you get a drive letter but no low-level disk access..
- Physical emulation: mounts the entire disk, including all sectors and partitions — useful for low-level forensic or VM boot tasks
- In OSFMount, the difference between logical and physical drive emulation lies in how the mounted image is presented to the operating system:
- VMware Workstation / Player
- This has inbuilt functionality to mount
.vmdkimage files - How to Open VMware VMDK Files in Windows 10/11 and 8.1/7 - Sysprobs
- Do you want to know how to open VMware VMDK files in Windows 10/11 or 8.1/7? Here is the simple guide without any 3rd party tools.
- This has inbuilt functionality to mount
- VMware/VMDK Additional
- 4 Ways to Mount a VMDK Image File in Windows | KC's Blog - If you have a VMDK file that hosts one or more VM partitions, here are 4 ways to get it mounted in Windows as a disk drive.
VMware Workstation
vmware-mount.exe X: “C:\Temp\TestVM.vmdk”
- Exact Steps to Map VMware Disk to Windows Disk
- For some reason, you may want to mount VMware disk to Windows disk. If so, take a look at this post where 3 available methods are offered.
- Mount VMware Disk to Windows Disk via VMware Workstation
- Mount VMware Disk to Windows Disk via Disk Mount Utility
- Mount VMware Disk to Windows Disk via vSphere Disk Development Kit
- For some reason, you may want to mount VMware disk to Windows disk. If so, take a look at this post where 3 available methods are offered.
- How to Open VMDK File in Windows 11
- This guide shows you how to open a VMDK (Virtual Machine Disk) file in Windows 11 and access the contents in it using VMware Workstation or 7-Zip file archiver.
- 4 Ways to Mount a VMDK Image File in Windows | KC's Blog - If you have a VMDK file that hosts one or more VM partitions, here are 4 ways to get it mounted in Windows as a disk drive.
- Image Mounter | Paragon Software Group
- Image Mounter helps IT pros and forensic experts mounting raw images as well as virtual drives.
- Mount RAW images and a plethora of virtual disk images
- Mount disks on the physical level with all partitions
- Auto-mount partitions in familiar OS formats
- Leverage cross-platform compatibility delivered by the Paragon technology.
- The preview version of Image Mounter by Paragon Software is available free of charge!
- VMFS Recovery | DiskInternals
- This is primarily a image recovery utility but can mount VMDK image files.
- WinMount - Compress & Mount RAR ZIP CD DVD HDD images (this is very old)
- Winmount is a powerful windows utility which is dedicated to managing files and disks impressively and conveniently.
- It's a compression tool, also a virtual disk tool ( Mount RAR ZIP MOU and CD DVD HDD images as virtual disk/folder ).
- Supported formats:MOU, RAR, ZIP, 7Z, CAB, ARJ, ISO, GZ, BZ2, TAR, WIM, ISO, BIN, BWT, MDS/MDF, NRG, IMG, ISZ, CUE, CCD, APE, FLAC, WV, VHD, VDI, VMDK.
- DAEMON Tools Lite: The most personal application for disc imaging yet - DAEMON-Tools.cc
- A well-known solution that allows you to mount, copy and create an image. It works with the most popular types of virtual discs.
- DAEMON Tools Lite allows you to mount all known types of disc image files and emulates up to 4 DT + SCSI + HDD devices.
- It enables you to create images of your optical discs and access them via well-organized catalogue.
- Simple VHD Manager v1.5
- A portable freeware which helps VHD users simplify some of these operations:
- You can attach and detach VHD/VHDX/ISO files via drag and drop
- You can permanently attach a virtual hard disk in Windows 11 – 10 – 8,1 – 8 and Windows 7
- You can easily add and/or remove VHD/VHDX/ISO files to the boot menu
- A portable freeware which helps VHD users simplify some of these operations:
- Mount and Unmount a VHD File in Windows Explorer via a Right-Click
- Virtualization has become an incredibly powerful and flexible way to deploy environments. So much in fact that Microsoft has integrated the ability to attach virtual hard drive (VHD) files as physical disks in the Windows Disk Management tool.
- This process is easy enough to do manually but if you attach VHD files often then we have a solution which enables you to mount and unmount VHD files with a single click.
- This article has batch scripts you can attach to the context menu to allow easy use of the right click feature.
Best Practices
- Fixed vs Dynamic disks - Microsoft Q&A - Hi Can anyone point me to a link that shows the correct official guidance from Microsoft as to if fixed or dynamic VHD's or VHDX's should be used in a production enviroment? Thanks
Tutorials
- Create from Scratch
- Windows Disk Management
- How do I create a VHD drive from scratch to use with Rufus? - FAQ · pbatard/rufus Wiki · GitHub - Create a VHD/VHDX imageusing windows in-built Disk Management.
- Control Panel --> Administrative Tools --> Computer management --> Storage --> Disk Management (or however you get there)
- On newer versions of Windows you cannot click on the drives as shwon here. Look under the Actions menu and you will find:
- Create VHD
- Attach VHD
- How to create virtual drive (VHD, VHDX, Dev Drive) on Windows 11 - Pureinfotech - The Settings app on Windows 11 now allows you to create and attach virtual drives, and in this guide, you will learn how.
- Free and Powerful VHD Resizer Download - AOMEI Partition Assistant - This article focuses on VHD Resizer. First you’ll be told what VHD is and its features, and then an amazing VHD resizer will be recommended.
- How to create and set up new VHD or VHDX File in Windows 11/10 | TheWindowsClub - Today, we will see how to create and set up (initialized and formatted) a new VHD and VHDX virtual hard disk file in Windows 11/10 using Disk Management. But before we begin, we will see what is a VHD and VHDX.
- How do I create a VHD drive from scratch to use with Rufus? - FAQ · pbatard/rufus Wiki · GitHub - Create a VHD/VHDX imageusing windows in-built Disk Management.
- Windows Disk Management
- Export/Import Virtual Machines
- How To Convert Virtual Machines Between VirtualBox and VMware - Migrating to another virtual machine program can be intimidating. if you already have your virtual machines set up they way you like them, you don’t necessarily have to install them from scratch – you can migrate your existing virtual machines.
- Migrate Proxmox VMs to VMware with StarWind V2V Converter • Nolabnoparty - StarWind V2V Converter is a free tool used to convert VMs from one format to another bidirectionally and physical machines to VMs.
- Shrinking and Compacting
- How to Shrink and Compact VHDX Files in Hyper-V? | Vinchin Backup
- This article serves as a comprehensive tutorial on managing VHDX disk space in Microsoft Hyper-V environments.
- It differentiates between shrinking and compacting VHDX files, outlines the advantages of the VHDX format over the older VHD, and provides detailed steps to perform both shrink and compact operations using both Hyper-V Manager and PowerShell commands.
- How to Shrink and Compact Virtual Hard Disks in Hyper-V | TheWindowsClub - In this post, we will see how to shrink and compact hard disks in Hyper-V. This allows you to make room for the hard disks if they are too big for your physical computer. Since Hyper-V hard disks are usually dynamic in nature, it is crucial to shrink and compact virtual hard disks in Hyper-V.
- How to Shrink the Virtual Disk of a Linux Distro in WSL | by bonguides.com | Medium - When you delete files or free up space in your WSL distribution, the virtual disk doesn’t automatically shrink. To reclaim this unused space, you need to compact the virtual disk (VHDX) file.
- Diskpart
- Open PowerShell (Terminal) as administrator then type diskpart and press Enter
- Use the following command, replacing the path with the actual location of your VHDX file to select the VHDX file.
select vdisk file=""
- Once the disk is selected, run the below command within the DiskPart prompt to shirk the disk. This will reclaim the unused space in your VHD file. You should see a message indicating that the disk has been successfully compacted
compact vdisk
- After the process is complete, you can check the size of the VHD file to confirm that it has been reduced.
- Hyper-V
- Open PowerShell as administrator, then navigate to the location of the VHD file
- Run the following command to compact the VHD file:
Optimize-VHD -Path .ext4.vhdx full
- You can monitor the processing status on the screen. After completion, verify the virtual disk size to confirm functionality.
- WSLCOMPACT
- Install it using the below PowerShell commands:
Set-ExecutionPolicy RemoteSigned -Scope CurrentUser
iwr -useb https://raw.githubusercontent.com/okibcn/wslcompact/main/setup | iex
- Run the wslcompact command to see the current size and estimated size of all WSL instances.
- Run the below command to compact the disk and apply the change to the VHD file.
wslcompact -c ubuntu
- If the tool is no longer needed, to remove the utility, close all your PowerShell instances, open a fresh one, and type:
Remove-Item "$($env:PSModulePath.split(';')[0])/WslCompact" -Recurse -Force
- Install it using the below PowerShell commands:
- Diskpart
- Shrink and Compact Virtual Hard Disks In Hyper-V (Guide) - If your Hyper-V environment starts running low on disk space, find out how to shrink and compact virtual hard disks in this step-by-step guide.
- How to Shrink and Compact Virtual Hard Disks in Hyper-V - TechDirectArchive
- Master the process of shrinking and compacting your Hyper-V virtual hard disks to save space and enhance virtual machine efficiency.
- Different method iusing: Hyper-V Manager, PowerShell, Resize-VHD
- WSL2 on Windows 11 - Virtual Disk vhdx is 200GB now | Reddit
- Release VHDX unused space:
Open Powershell and run the following:

wsl --shutdown

diskpart

select vdisk file="path-to-your-virtual-disk\ext4.vhdx"

attach vdisk readonly

compact vdisk

detach vdisk

exit
- Release VHDX unused space:
- How to Compact/Shrink a WSL2 Virtual Disk – Stephen Rees-Carter
- You can use the diskpart tool to compact a VHDX. This allows you to shrink a WSL2 virtual disk file, reclaiming disk space. I went from 100GB to 15GB.
- How to Compact a WSL2 VHDX Virtual Disk | mycodde.blogspot.com - I was struggling to compact my WSL VHDX disk, it has hardly 10 GB data but it was showing 72 GB in size.
- How to Shrink and Compact VHDX Files in Hyper-V? | Vinchin Backup
- Resizing
- How to Resize a VHD File or VHDX | DiskInternals - Learn how to resize VHD or VHDX files easily in Hyper-V or without it! Follow step-by-step methods using Hyper-V Manager, PowerShell, or Diskpart.
- Resize-VHD (Hyper-V) | Microsoft Learn - Use this topic (Resizes a virtual hard disk) to help manage Windows and Windows Server technologies with Windows PowerShell.
- Starwind V2V Converter
- Starwind V2V Converter - Ultimate Free P2V & V2V Conversion tool - This article explains the detailed feaures about Starwind V2V Converter and how to perform V2V & P2V conversion using Starwind V2V Converter
- VMware vCenter Converter Standalone
- Convert Physical Linux Server to VMware - P2V Vmware - In this topic, we will see how to convert a physical Linux server to a VMware VM. To make this conversion, I used VMware vCenter Converter Standalone.
- QEMU
- QEMU also supports various other image file formats for compatibility with older QEMU versions or other hypervisors, including VMDK, VDI, VHD (vpc), VHDX, qcow1 and QED. For a full list of supported formats see qemu-img --help. For a more detailed description of these formats, see the QEMU block drivers reference documentation.
- Converting images with qemu-img convert · GitHub - Converting images with qemu-img convert.
- How to use the command qemu-img (with examples)
- qemu-img is a versatile command-line utility designed to create and manipulate virtual HDD images for Quick Emulator (QEMU).
- This tool is particularly useful for handling tasks such as creating new disk images, converting between different virtual disk formats, resizing existing disk images, and more.
- Use Qemu-img to Manage and Convert Different Virtual Disks | Vinchin Backup - This post describes what is qemu-img and how to use this qemu disk image utility to create, resize, and convert virtual disk for VM management and migration.
- Converting a Physical disk to a Virtual disk with Qemu’s qemu-img on Windows | Virtually Fun - Give you the commands to convert a physical drive into a virtual disk and also gives the full list of support image files in QEMU.
- VBoxManage
- Converting disks (vboxmanage clonemedium)
- Convert VMDK to VirtualBox VDI and compact disk - How to convert the vmdk to a VDI file and then compact it.
## Convert
VBoxManage clonemedium disk --format VDI [drive]:[\path_to_file\sourceFile.vmdk] [drive]:[\path-to\destinationFile.vdi]

## Compact
VBoxManage modifyhd --compact "[drive]:\[path_to_image_file]\[name_of_image_file].vdi"
- Convert VMDK to VirtualBox VDI and compact disk - How to convert the vmdk to a VDI file and then compact it.
- resize VDI image size
VBoxManage modifyhd "[drive]:\[path_to_image_file]\[name_of_image_file].vdi" --resize 81920
- RAW Disk handling
- vboxManage internalcommands createrawvmdk - Bing Search
- The
VBoxManage internalcommands createrawvmdkcommand in VirtualBox allows you to create a virtual disk that maps to a physical disk or partition. This is useful for accessing a physical disk directly from a virtual machine. - Example
- To create a virtual disk that maps to an entire physical disk on a Windows host, use the following command:
VBoxManage internalcommands createrawvmdk -filename "C:\path\to\file.vmdk" -rawdisk \\.\PhysicalDrive0
- This command creates a
.vmdkfile that represents the physical diskPhysicalDrive0
- To create a virtual disk that maps to an entire physical disk on a Windows host, use the following command:
- Accessing Specific Partitions
- You can also map specific partitions of a physical disk. For example, to map partitions 1 and 5 of
/dev/sdaon a Linux host:VBoxManage internalcommands createrawvmdk -filename /path/to/file.vmdk -rawdisk /dev/sda -partitions 1,5
- This creates a
.vmdkfile that provides access to partitions 1 and 5 of/dev/sda
- You can also map specific partitions of a physical disk. For example, to map partitions 1 and 5 of
- Important Considerations
- Permissions: Ensure you have the necessary read/write permissions for the physical disk.
- Data Safety: Incorrect use can lead to data loss. Avoid accessing the same partition from both the host and guest simultaneously.
- Platform Differences: The device specification varies by platform (e.g.,
\\.\PhysicalDrive0for Windows,/dev/sdafor Linux).
- Using
VBoxManage internalcommands createrawvmdk, you can effectively utilize physical disks within your VirtualBox VMs, providing flexibility and direct access to hardware resources. - Learn more
- The
- Example Commands
vboxManage internalcommands createrawvmdk -filename "C:\Users\Public\Documents\VirtualBox\Raw Disk Images\spinrite.vmdk" -rawdisk "\\.\PhysicalDrive2"

vboxManage internalcommands createrawvmdk -filename "C:\rawdisks\spinrite.vmdk" -rawdisk "\\.\PhysicalDrive2"
- Use physical harddisk in Virtual Box - Straight forward instructions - Super User - Today, I managed to boot from physical drives. This achievement required....
- vboxManage internalcommands createrawvmdk - Bing Search
- Converting disks (vboxmanage clonemedium)
- How to Read VHDX Metadata (e.g., virtual size, block size)
- PowerShell
- Run:
Get-VHD -Path "C:\path\to\your.vhdx"- This returns
- VHD type (Fixed/Dynamic)
- Size
- Logical sector size
- Physical sector size
- This returns
- Note: Only works on Windows with Hyper-V features installed.
- Run:
- Use vhdxinfo from libvhdi (Linux/macOS/Windows)
- Install libvhdi tools:
- On Linux:
sudo apt install libvhdi-utils - On macOS (via brew):
brew install libvhdi - On Windows: Download libvhdi
- On Linux:
- Run:
vhdxinfo yourfile.vhdx- This will show:
- Header info
- Log GUIDs
- Virtual disk size
- Block size
- Parent locator (if differencing disk)
- This will show:
- Install libvhdi tools:
- Parse the VHDX File Manually (Hex or Script)
- You can parse the structure using a hex editor or script:
- Look for the magic header at offset 0:
00000000 76 68 64 78 66 69 6c 65 # "vhdxfile"
- Read region table at
0x20000, which lists metadata regions. - Use the region table to find:
- Virtual disk size
- Block size
- Logical/physical sector size
- GUIDs, versioning
- Look for the magic header at offset 0:
- You'd need to follow the Microsoft VHDX Specification to decode it fully.
- You can parse the structure using a hex editor or script:
- PowerShell
- TRIM'ing VHD(X) files
- Optimize-VHD (Hyper-V) | Microsoft Learn
- Optimizes the allocation of space used by virtual hard disk files, except for fixed virtual hard disks.
- Optimize-Volume (Storage) | Microsoft Learn
- Optimizes a volume.
- The Optimize-Volume cmdlet optimizes a volume, performing defragmentation, trim, slab consolidation, and storage tier processing. If no parameter is specified, then the default operation will be performed per the drive type as follows:
- HDD, Fixed VHD, Storage Space. -Analyze -Defrag.
- Tiered Storage Space. -TierOptimize.
- SSD with TRIM support. -Retrim.
- Storage Space (Thinly provisioned), SAN Virtual Disk (Thinly provisioned), Dynamic VHD, Differencing VHD. -Analyze -SlabConsolidate -Retrim.
- SSD without TRIM support, Removable FAT, Unknown. No operation.
- Multiple VHD/VHDx Optimization using PowerShell Workflows
- Optimize multiple VHD/VHDx files using PowerShell Workflows.
- After about 5 minutes of investigation I came up with this simple PowerShell command:
Get-VM | Where { $\_.State -eq 'Off' } | Get-VMHardDiskDrive | Optimize-VHD -Mode Full - It basically performs a full optimization on all VHD/VHDx files attached to all Virtual Machines that are in the Off state on the host the command is run on. This does the job quite well but has a few annoyances:
- The optimization is performed in series.
- Running guests won’t be optimized.
- The command only works on VMs on the host the command is run on.
- Optimize-VHD (Hyper-V) | Microsoft Learn
Reducing a VHDX Disk Image Size (Pre-created)
- I have not have much success with it.
- VHD images cannot be compressed or have their size reduced.
- Mount your drive image
- Windows Native (GUI)
- Right click on the drive image and select mount.
- or through `Disk Management`: Action --> Attach VHD
- Windows Native (diskpart)
- Select the disk via its path:
select vdisk file="<PathToYourDesktop>\DiskGenius v6.0.1.1645.vhdx"
- Select the disk via its path:
- OSFMount
- Windows Native (GUI)
- Clear free space
- Run
sdeleteto zero out unused space on the image's volume - This might not be required if Starwind only sees files and not RAW data.
- Run
- Convert the image with StarWind V2V / P2V Converter
- Select the location of the image to convert: P2V
- Select physical data to convert: Physical Disk
- Select physical disk to convert: Virtual Disk
- Select the location of the destination image: Local file
- Select the destination image format: VHD/VHDX
- Select option for VHD/VHDX image format: VHDX growable image
- Ignore `Activate windows Repair Mode`
- Set destination filename:
<PathToYourDesktop>\DiskGenius v6.0.1.1645.vhdx - Click `Convert`
- Compact the Dynamic disk image to reduce space
- This might be required to recover the free space.
- Unmount your drive image
- Window Native (GUI)
- You can unmount by right clicking on the drive and selecting Eject.
- or through `Disk Management`: Right click on the drive you want to unmount and select, Detach VHD.
- Windows Native (diskpart)
- run the command: detach vdisk
- Window Native (GUI)
Convert and Compact an Offline VHD/VHDX Fixed Disk Image to a Dynamic Disk Image
- TRIM is the process of the OS telling a SSD/NVMe drive to release the sector as it is no longer used, these drives do not actually zero fill the sectors to prevent uneeded writes, but in the future when the sector is read, the drive will supply back all Zeros.
- In a Fixed Disk Image, an unused sector is denoted by being all Zeros.
- In a Dynamic Disk Image, an empty unused sector is either all Zeros or is juts not referenced at all, in either case, all Zeros will be returned.
- If the Disk Image files is part of an online system, the OS it is running can perform TRIM on the drives and volumes to "Zero out" unused sectors.
Instructions
VHD and VHDX are interchangeable for these commands.
- Mount the Disk image
Mount-VHD -Path "D:\Path\To\Fixed-Disk.vhdx" -ReadOnly

Or

Mount through the GUI (Disk Management, Right Click)
-ReadOnly: This should protect the volume being written to by the OS, but not this command. I am not 100% on this.
- Zero out free space (inside the VHDX) (TRIM)
- You need to fill the free space with zeros so the compacting process knows it’s unused.
- Use sdelete from Sysinternals:
sdelete64.exe -z X:
- Replace
X:with the drive letter assigned to the mounted VHD. - -
z: This flag instructs ‘sdelete’ to write zeros over the available free space, a less intensive option than multiple passes and suitable for non-critical data. - This is needed because when a full RAW image of a drive is done, all bits are stored into the image, irrespective of whether that sector is holding any data.
- Unmount the VHDX
-
Dismount-VHD -Path "D:\Path\To\Fixed-Disk.vhdx"

Or

Unmount through the GUI (Disk Management, Right Click)
-
- Convert the Fixed VHDX to Dynamic.
- Powershell
Convert-VHD -Path "D:\Path\To\Fixed-Disk.vhd" -DestinationPath "D:\Path\To\Dynamic-Disk.vhd" -VHDType Dynamic
- Use StarWind V2V / P2V Converter to convert the Fixed disk to a Dynamic disk
- This process actually generates a copy of the disk image.
- Powershell
- Compact the Dynamic VHDX.
- Using Powershell
Optimize-VHD -Path "D:\Path\To\Dynamic-Disk.vhdx" -Mode Full
- Using Diskpart
diskpart
select vdisk file="D:\Path\To\Dynamic-Disk.vhdx"
attach vdisk readonly
compact vdisk
detach vdisk
exit
readonly: This should protect the volume being written to by the OS, but not this command. I am not 100% on this.
- Using Powershell
- Done
Running Trim in a live OS
- Virtual Drive TRIM - VergeOS Docs - How to regain space on a virtual SSD
- After importing a virtual machine from another hypervisor, sometimes the free space available inside the virtual machine does not match the free space reported to the VergeOS platform.
- This discrepancy is often due to the virtual disk being thick-provisioned from the VM source, making VergeOS unaware of the unused disk space.
- To resolve this, a TRIM/UNMAP operation needs to be performed on the virtual disk from within the virtual machine.
- Trimming a Windows Drive
Optimize-Volume -DriveLetter YourDriveLetter -ReTrim -Verbose

Optimize-Volume -DriveLetter E -ReTrim -Verbose
- Trimming a Linux Drive
## Check TRIM Timer/Schedule Status:
sudo systemctl status fstrim.timer

## Check TRIM Service Status:
sudo systemctl status fstrim

If TRIM is enabled, an operation will run at the next scheduled time. If TRIM is not enabled, you can

## Run a manual TRIM using:
sudo fstrim -av

## Info
It is recommended to enable automatic TRIM to ensure that data usage is reflected accurately between VergeOS and the guest OS.

## To enable automatic TRIM, run:
sudo systemctl enable fstrim.timer
Repairing Disk Images
- How to Repair Corrupted VHD File in Windows - Virtualization - Spiceworks Community - We all know that data is vulnerable in every form. This also allows to VHD(Virtual Hard Disk). When it comes to data loss, it becomes a critical situation for the users like us and it creates chaos inside us”. So in this handout, I’ll cover the VHD(Virtual Hard Disk) File, reasons for VHD Corruption and the way to repair or recover corrupt VHD.
- Corrupt VDI File: How to Fix and Recover Virtual Disk Data Effectively | DiskInternals - Troubleshoot a corrupt VDI file ? and recover lost data with expert methods. Use DiskInternals VDI Recovery™ for fast and reliable results. Safeguard your virtual machines today!
- Repair VHDX and Recover Corrupted/Unreadable VHD or VHDX Files in Windows 10 – EaseUS - This page provides the best VHD file recovery software and methods to help you effectively repair corrupted or unreadable VHD/VHDX and restore lost files in Windows 10 with simple clicks. Follow to see how to fix and repair your corrupted VHD disk partition without losing any data.
- 6 Methods to Fix VHD/VHDX file is Corrupted and Unreadable Error - VHD/VHDX file format which is similar to a hard drive is also prone to get corrupted and sometimes unreadable. The difference between VHDX and the physical hard drive is that VHDX is a virtual machine environment. The VHD/VHDX files getting corrupted or unreadable is a common problem and not easy to fix.
- Repair-VHD PowerShell: Step-by-Step Guide (3 Essential Steps to Fix VHD) | DiskInternals - Learn to repair VHD files using PowerShell ?️ with our comprehensive guide. Follow these steps to restore your virtual disks effectively!
- How to Repair VHD File: A Complete Guide to Recover Corrupted Virtual Disk Files - Virtual Disk Recovery Blogs - VHD Files are often prone to corruption which led to serious damage of your files and folders. So here read about how to repair vhd file manually.
- Free Methods to Repair Corrupted and Unreadable VHD Files (Aryson) - Free methods to repair corrupted and unreadable VHD files. Restore your virtual machines and recover data with our easy-to-follow guide.
Partition Types
- Partition type - Wikipedia
- Partition types: List of partition identifiers for PCs - Below a list of the known partition IDs (system indicators) of the various operating systems, file systems, boot managers, etc.
Makes your USB drive appear as a Hard drive and not removable Media
Is htis best ehre or antoher article
TL;DR = Might not be possible any more, and if it is, it is not worth the hassle.
- Flip the Removable Media bit (RMB) on the drive itself
- The Lexar BootIt utility was designed to "flip the removable media bit" on certain USB flash drives, making them appear as fixed (hard) disks to Windows. This was a niche utility and often highly specific to particular flash drive controllers. It's largely outdated and generally not recommended due to potential instability and the possibility of bricking your USB drive.
The "removable media bit" is often a hardware-level setting within the USB drive's controller firmware. So, if a utility like Lexar BootIt doesn't work for your specific drive, there's often no generic software alternative that can reliably change this "bit." - Flip Your Bit USB Utility To Make Local Drive | getusb.info
- BootIt is a Lexar based utility to flip the Removable Media Bit setting of a USB drive. What this means, is you can take a Lexar drive (and many other brands) and make it appear as a Local Drive on your PC rather than Removable Storage.
- Removable USB Flash Drive as Local HDD in Windows | Windows OS Hub
- In this article we’ll show you how to make a USB flash drive or an SD card to be identified in the Windows as a common local hard disk.
- Probably, you may ask why it’s necessary? The matter is that by default Windows identifies all the USB flash drives and SD cards as removable drives that can’t be split into several partitions with the built-in Windows tools.
- And even if you partition the USB flash drive into two or more volumes using third-party utilities (say, in Linux), only the first partition will be available in Windows. Windows supports multiple partitions only for hard disk drives identified as local (i.e. non-removable).
- Windows recognizes USB flash drives as removable devices due to the presence of a special descriptor bit RMB (removable media bit) on each of the devices. If the system determines that RMB=1 when polling the connected device using StorageDeviceProperty function, it concludes that this device is a removable drive. Thus, in order to convert the USB-flash to the hard disk it is enough to modify this descriptor.
- Software covered
- Lexar BootIt
- Hitachi filter driver
- How to make a disk drive "removable" - Windows 10 Forums
- Make USB Removable -> Fixed Disk / Applications & Desktop Environments / Arch Linux Forums - TL;DR : How do you "flip the bit" of a USB Drive to make it be seen by Windows as a "Removable" or "Fixed Disk" under Arch, or really any Linux distro? I can't seem to find any Unix instructions, only Windows apps.
- Removable USB Flash Drive as Local HDD in Windows | Windows OS Hub - In this article we’ll show you how to make a USB flash drive or an SD card to be identified in the Windows as a common local hard disk.
- The Lexar BootIt utility was designed to "flip the removable media bit" on certain USB flash drives, making them appear as fixed (hard) disks to Windows. This was a niche utility and often highly specific to particular flash drive controllers. It's largely outdated and generally not recommended due to potential instability and the possibility of bricking your USB drive.
- Windows Registry
- The mode cannot be changed in the Windows registry.
My DiskGenius Notes
My DiskGenius Notes
General
- Docs
- How to Use DiskGenius – Online User Guide
- This is detailed user guide for DiskGenius. Follow these tutorials and you'll know how to recover lost data, resize partition, backup data, wipe hard drive, etc.
- There is a large PDF manual you can download.
- Useful and Free Manuals of PartitionGuru – (DiskGenius has replaced this) - Free tutorial of PartitionGuru on how to recover lost data and partition, resize partition, clone hard drive, permanent file deletion, convert GPT to MBR, etc.
- How to Use DiskGenius – Online User Guide
- Misc
- When you mount a drive in Windows either using the GUI or diskpart, the image will be mounted as a physical drive.
- Windows and OSFMouint will mount an image whether is is a normal HDD style or a "Super Floppy" (FDD) style image.
- Windows will not fall back to a logical volume emulation if a VHD (Virtual Hard Disk) image file is corrupted—even slightly.
- can 7zip open VHD files?
- The partition table is not inherently protected—it's just stored in a specific location on the USB drive. While it can’t be easily changed by average users without intent or privilege, it can be accessed, overwritten, or corrupted by software that has sufficient access.
- All VHDs (and other image formats) created with DiskGenius, are fixed-size containers from the outset, made via sector-level cloning.
- The `Convert Boot Mode` options have moved here:
- Disk --> Convert Boot Mode -->
- Convert To USB-ZIP Bootable Mode
- Convert To USB-FDD Bootable Mode
- Convert To HDD mode
- Disk --> Convert Boot Mode -->
- If a Volume's `File System` type is display in Red

- This means it is set as the drive's active partition.
- It should also be accompanied by an `Attribute` of
A.
- When you format a USB disk, windows formats it in "Super "loppy format. These can can be booted by a legacy BIOS, but these are not a bootable hard drive.
- Making a USB drive "bootable" adds in an MBR which includes a partition table.
- Windows when loading a USB checks for both a partition table and then if this is not present searches for a partition (Super Floppy) allowing for both types of USB to load in Windows.
- License
- Q: The lifetime license, is this forever or is it linked to a major release of your software? Once licensed will the software work forever or is it time limited?
- A: After the license is activated, it is bound to the computer and hardware and is permanently activated.
- View SSD-nVME transfer mode
- Disk --> View S.M.A.R.T. Information --> Transfer Mode: PCIe 3.0 x4 | PCIe 4.0 x4
Make the DiskGenius Bootable WinPE USB
DiskGenius supports to making a bootable USB version based on Windows PE so that you can recover lost data, manage disk or backup data when system cannot boot.
- When you create your USB drive I think the build process uses your PC for the drivers and the WinPE files, so the resulting data size on the USB drive will change depending on your system (Win10 = 1GB, Win11 = 2GB)
- I don't know if the DiskGenius USB drives are tied to the PC they were created on.
Format the USB drive
Although DiskGenius can use a USB drive in either the "Supper Floppy" (FDD) or Hard drive mode (HDD) it is easier to work with a HDD version where it has an MBR and Partition table like a traditional hard drive.
When you format a USB drive in Windows the "Super Floppy" format is used by default. I am not sure what happens when you use Windows to format a USB drive taht has a partition table, perhaps ot leaves it alone.
- Format your USB in Rufus in MBR format
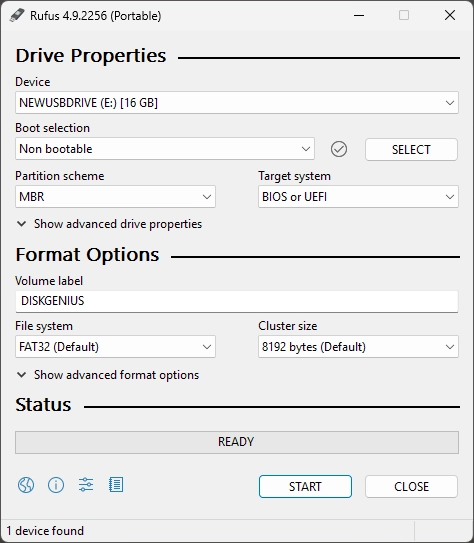
- Boot selection:
Non bootable - Partition scheme:
MBR - Target system:
BIOS or UEFI - Volume label:
DISKGENIUS(or whatever you want) - File system:
FAT32 - Cluster size:
Default(this might vary depending on the size of the USB drive)
- Boot selection:
- Set the partition active
- This is not required because DiskGenius does this when it makes the USB a WinPE drive.
Write the WinPE USB
This is non-destructive process, so if there were files on the USB before, they should still be there after the creation of the WinPE environment.
- Create WinPE Bootable USB Drive - DiskGenius
- Open DiskGenius
- Tools --> Create WinPE Bootable USB Drive of DiskGenius.
- Insert the USB you just formatted above if not still pugged in.
- Make sure the right USB drive is selected
- It is easier just to have one USB drive connected to prevent mistakes.
- Click OK button from the pop-up window.
- If you get a message about the drive is mounted, just let DiskGenius unmount the drive
- Wait for a couple of seconds and the bootable disk will be created.
- Click OK button after the bootable disk is created successfully.
- NB: The WinPE files and folders are hidden
Booting DiskGenius from Ventoy
- To boot DiskGenius from Ventoy, we need to generate the DiskGenius WinPE Bootable USB Drive and image it.
- Ventoy allows the use of several different image formats, all with their own strengths.
VHD/VHDX (Recommended)
Method 1 - Disk Image of the USB (Recommended)
- I would recommend getting a 2GB USB drive to keep the image size down and reduce the number of steps required.
- (Win10 WinPE = 550mb)
- (Win11 WinPe = 1GB+)
- The size difference between the images created by these formats is minimal.
- Only use VHDX
- Zero fill the USB drive (optional)
- Use
Alt-Zin Rufus to zero a physical drive.
- NB:
- If you have random data all over the disk, the fact that VHDX can compress data does not mean that its size will always be smaller than VHD.
- If you have long sections of zeroed data, VHDX will work wonders as a compressed disk image format, hence why Rufus labels it as such.
- Do not assume a brand new USB drive is empty for the purposes of imaging.
- After each use, you need to zero fill the drive again to return it to an optimal condition for the purposes of compression.
- If you do not zero fill the drive then the size of the image can be any size up to the capacity of the USB drive.
- Use
- Aquire the Image
- Connect the DiskGenius USB drive
- Image with Rufus to get an Fixed Disk Image (VHDX) of the USB drive
- Create a VHDX image, save it to your desktop and call it:
DiskGenius v6.0.1.1645.vhdx
- Create a VHDX image, save it to your desktop and call it:
- Disconnect the DiskGenius USB drive (optional)
- Prepare the Image
- Nothing to do
- Configure Ventoy
- Connect the Ventoy USB drive
- Copy
DiskGenius v6.0.1.1645.vhdxto your ventoy images partition. - Install the Ventoy Windows VHD Boot Plugin
- Plugin.WinVhdBoot . Ventoy
- Ventoy uses this plugin to boot VHD(x) files with Windows 7+ in it.
- Both Legacy BIOS and UEFI are supported. Both fixed and dynamic VHD(x) are supported.
- In UEFI mode, only 64 bit Windows is supported, 32 bit is NOT supported.
- Plugin.WinVhdBoot . Ventoy
- Done
- Boot from your Ventoy USB and check it loads.
Method 2 - Manually Create VHDX
- Create the VHDX (there are probably other ways)
- Open up `Disk Management`
- Run:
diskmgmt.msc
- Run:
- Action --> Create VHD
- Use these settings:
- Location:
C:\Users\quantunwarp\Desktop\DiskGenius v6.0.1.1645.vhdx - Virtual hard disk size:
2GB - Virtual hard disk format:
VHDX - Virtual hard disk type:
Dynamically expanding (Recommended)
- Location:
- Use these settings:
- Once created, the drive is automatically mounted but needs to be initialised like any new disk.
- In `Disk Mangement` Right click on the new drive and select
Initialise Disk - Use the
MBRpartition style
- In `Disk Mangement` Right click on the new drive and select
- Create a FAT32 partition
- Right click on the drive and select New Simple Volume and follow the wizard.
- Use these settings:
- File System:
FAT32 - Allocation unit size:
Default - Volume Label:
Disk Genius - Perform a quick format.
- File System:
- Set the partition active
- Use DiskGenius to set the partition active
- Open up `Disk Management`
- Prepare the Image
- Mount the VHDX disk image.
- Connect the DiskGenius USB drive.
- Show hidden files
- Copy all files on the USB drive to the VHDX volume.
- Hide all files again
- Unmount/Detach the Disk Image.
- Configure Ventoy
- Connect the Ventoy USB drive
- Copy
DiskGenius v6.0.1.1645.vhdxto your ventoy images partition. - Install the Ventoy Windows VHD Boot Plugin
- Plugin.WinVhdBoot . Ventoy
- Ventoy uses this plugin to boot VHD(x) files with Windows 7+ in it.
- Both Legacy BIOS and UEFI are supported. Both fixed and dynamic VHD(x) are supported.
- In UEFI mode, only 64 bit Windows is supported, 32 bit is NOT supported.
- Plugin.WinVhdBoot . Ventoy
- Done
- Boot from your Ventoy USB and check it loads.
WIM
- This only works when using EFI/UEFI boot environments.
- If you try and boot the WIM when using MBR/CSM/Legacy, it will start to load and then a black screen will overlay the Ventoy loader and it will crash.
- Aquire the Image
- Connect the DiskGenius USB drive.
- Show hidden files.
- Copy the following file to your desktop:
...\DiskGenius - Boot\boot.wim - Disconnect the DiskGenius USB drive (optional)
- Prepare the Image
- Rename
boot.wimto something human readable likeDiskGenius v6.0.1.1645.wim
- Rename
- Configure Ventoy
- Connect the Ventoy USB drive
- Copy
DiskGenius v6.0.1.1645.vhdxto your ventoy images partition. - Install the Ventoy Wimboot Plugin
- Plugin.wimboot . Ventoy
- Use this plugin to boot WIM files (Legacy BIOS + UEFI)
- Use Windows native bootloader (Legacy + UEFI): etfsboot.com + bootx64.efi directly extracted from Windows ISO file
- For Reference (not used)
- WIMBOOT Mode | Ventoy
- WIMBOOT mode is an alternative for booting official Windows ISO.
- Do I need to install the plugin? Is WIM support now native?
- WIMBOOT Mode | Ventoy
- Plugin.wimboot . Ventoy
- Done
- Boot from your Ventoy USB and check it loads.
ISO
- This is a very trick and time consuming option and is not really needed
- Try and find and ISO already done, and then use this.
method 1 get a windows disk and swap out the contents, keeping the boot sector
- Aquire the Image
- Connect the DiskGenius USB drive
- ..............
- Prepare the Image
- ...........
- Configure Ventoy
- Connect the Ventoy USB drive
- Copy
DiskGenius v6.0.1.1645.isoto your ventoy images partition.
- Done
- Boot from your Ventoy USB and check it loads.
Troubleshooting
How to check if your USB is configured as "Super Floppy" or a traditional Hard drive (HDD)
There are a couple of methods outlined below.
- diskpart
- Run the following commands (swap # for the number assigned to your USB disk):
diskpart
list disk
select disk #
detail disk
- This should give an output as follows:
Microsoft DiskPart version 10.0.26100.1150

Copyright (C) Microsoft Corporation.
On computer: WIN11PC

DISKPART> list disk

  Disk ###  Status         Size     Free     Dyn  Gpt
  --------  -------------  -------  -------  ---  ---
  Disk 0    Online         1863 GB  4096 KB        *
  Disk 1    Online         7651 MB      0 B

DISKPART> select disk 1

Disk 1 is now the selected disk.

DISKPART> detail disk

General USB Flash Disk USB Device
Disk ID: 6F20736B
Type   : USB
Status : Online
Path   : 0
Target : 0
LUN ID : 0
Location Path : UNAVAILABLE
Current Read-only State : No
Read-only  : No
Boot Disk  : No
Pagefile Disk  : No
Hibernation File Disk  : No
Crashdump Disk  : No
Clustered Disk  : No

  Volume ###  Ltr  Label        Fs     Type        Size     Status     Info
  ----------  ---  -----------  -----  ----------  -------  ---------  --------
  Volume 5     E   PICTURES     FAT32  Removable   7651 MB  Healthy

DISKPART> list partition

  Partition ###  Type              Size     Offset
  -------------  ----------------  -------  -------
* Partition 1    Primary             14 GB      0 B

DISKPART> select partition 1

There is no partition selected.

DISKPART>
- As you can see, Disk 1 (the USB):
- It is not a GPT based disk.
- Has no free space, meaning that all the space has been assigned to partitions.
- It is not a "Boot Disk".
- Has only 1 Volume/Partition, which is not bootable.
- When you try and select the partition, diskpart returns the error,
There is no partition selected., indicating it has an error accessing the partition table, which do not exist on "Super Floppy" USB drives.
- This is a "Super Floppy" USB drive, or the partition table is corrupted.
- Run the following commands (swap # for the number assigned to your USB disk):
- DiskGenius
- This images shows you a 16GB "Super Floppy" USB drive
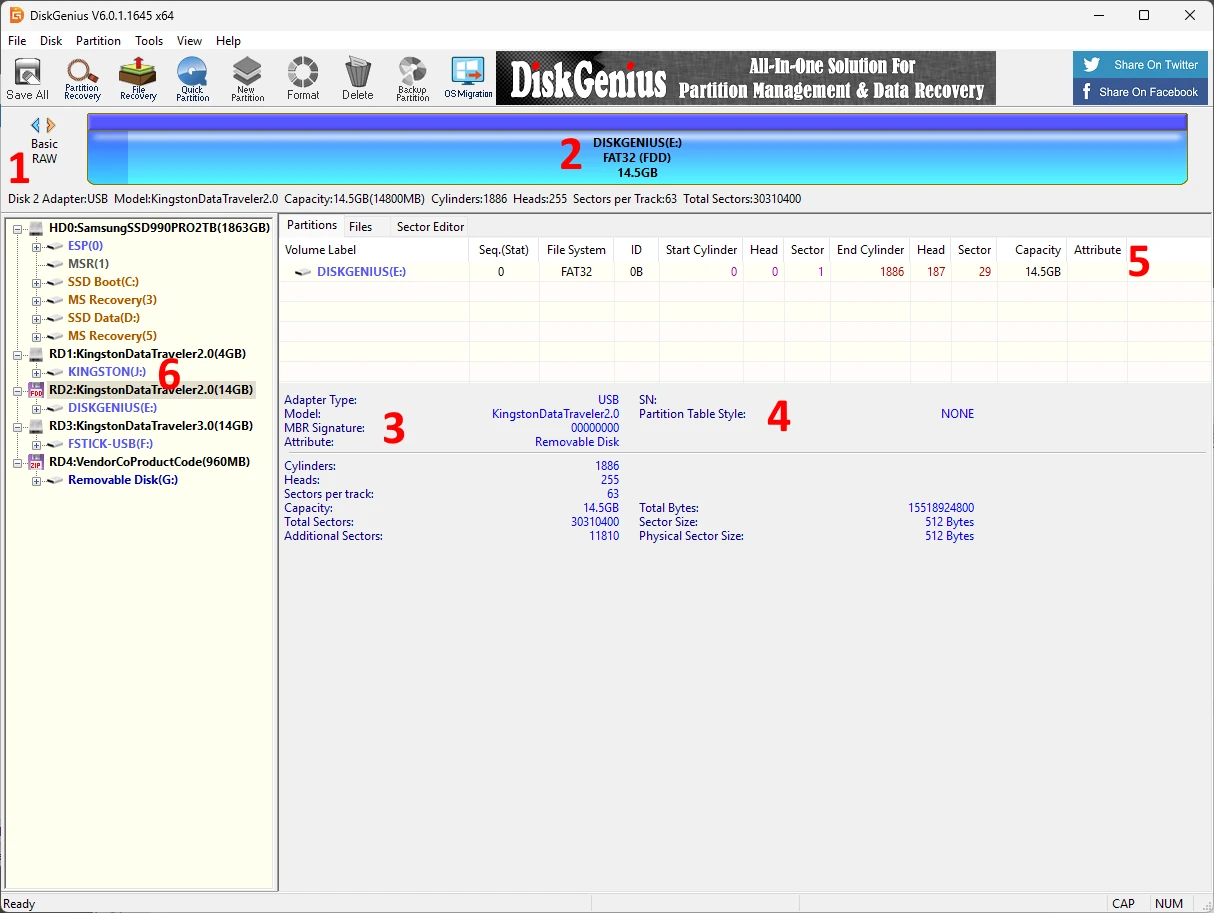
- Basic/RAW = This means there is no MBR or Partition Table.
- FAT32 (FDD) = This is a FAT32 partition, but has not been defined in a partition table.
- MBR Signature: 00000000 = No MBR is defined.
- Partition Table Style: NONE = No partition table.
- Volume/Partition is not marked as active.
- In the drive tree, there is a floppy icon instead of a HDD.
- This images shows you a 16GB "Super Floppy" USB drive
- OSFMount
- Does not show partitions in "Step 2 of 4" as shown below, and "Mount partitions as virtual disks" is greyed out.
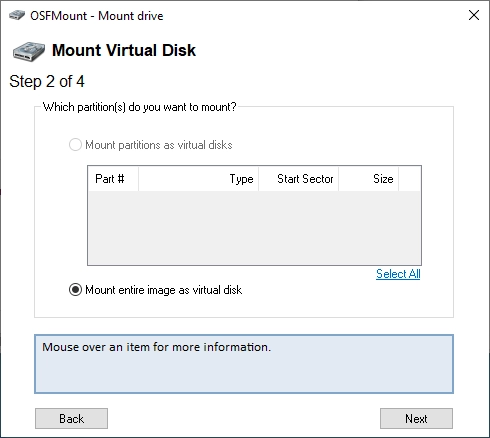
- This indicates a "Super Floppy" or corrupt disk image.
- There is no valid partition table for OSFMount to read.
- If the Volume gets mounted in windows then the Image is not corrupt and the drive image is that of a "Super Floppy".
- I have an image that when i mount as a physical disk shows not partitions in OSFMount but windows mounts a volume form this drive?
- This behavior can be confusing, but it usually comes down to how Windows interprets disk images versus how OSFMount handles physical vs logical mounting.
- Your Situation:
- You mount an image in OSFMount as a physical disk.
- OSFMount shows no partitions in its interface.
- Windows still assigns a drive letter and allows you to access a volume from that disk.
- Likely Explanation:
- Even though OSFMount is mounting the image as a physical drive, it may not parse or display the partitions correctly, especially if:
- The partition table is non-standard or corrupt.
- The image is just a raw partition, not a full disk with MBR/GPT.
- OSFMount has trouble recognizing certain filesystems or partition layouts.
- The image has a "superfloppy" format — a single partition image without an MBR (common in some forensic images or disk clones).
- Yet Windows is often more lenient:
- It scans all volumes and can mount a recognizable file system (e.g., NTFS or FAT32), even if the partition table is missing or broken.
- Windows may treat the image like a full partition, even though OSFMount expects a structured physical disk.
- Even though OSFMount is mounting the image as a physical drive, it may not parse or display the partitions correctly, especially if:
- What You Can Do:
- Try mounting the image as a logical drive instead of physical:
- In OSFMount, choose: Mount as drive letter (logical drive)
- Select the image file and choose offset 0 (or auto-detect).
- This usually works well if the image is a raw partition.
- Use disk utilities to inspect the structure:
- Tools like FTK Imager, WinHex, or HxD can help determine if the image has an MBR, GPT, or just a raw file system.
- You can also check in Disk Management (diskmgmt.msc) how Windows sees the mounted image (does it show a healthy volume or an unallocated disk?).
- Check the image format:
- If it’s from forensic software (like EnCase or dd), it might be a raw partition or use non-standard formatting.
- Try mounting the image as a logical drive instead of physical:
- Quick Test
- If you suspect it's a partition image (not a full disk), here’s a trick:
- Open it in OSFMount.
- Mount it as a logical drive with Offset = 0 and file system type = "Auto-detect".
- If it mounts and shows files, it’s just a partition, not a full disk with an MBR.
- If you suspect it's a partition image (not a full disk), here’s a trick:
- Does not show partitions in "Step 2 of 4" as shown below, and "Mount partitions as virtual disks" is greyed out.
When you Mount a DiskGenius USB Disk Image as a hard drive in Windows you get this error
- TL;DR this error is caused by the source USB formatted as a "Super Floppy"
- Starwind P2V does not support "Super Floppy" for live copying as it expects a partition table.
- A USB drive can be formatted as a traditional hard drive (HDD) or in a "Super Floppy" format akin to a traditional floppy disk (FDD).
- "Super Floppy" does not have a MBR or a Partition Table which is what Starwind is looking for when copying from the mounted Disk image.
- Starwind wiil not present/see Removable Media disks or their Volumes, only hard disks. This is intentianal by the software developers.
Scenario
- You used a large USB drive for your DiskGenius WinPE and as a consequence the image is very large even though most of the space is empty.
- You mounted the drive image using either Windows Native or OSFMount. (in this example we has used OSFMount)
- The drive has successfully mounted
- You open Starwind V2V to convert your large USB Fixed size disk image to a growable VHDX image which will create a much smaller image file
- After going through the wizard, you click on convert and almost immediately you get the following error.
Error
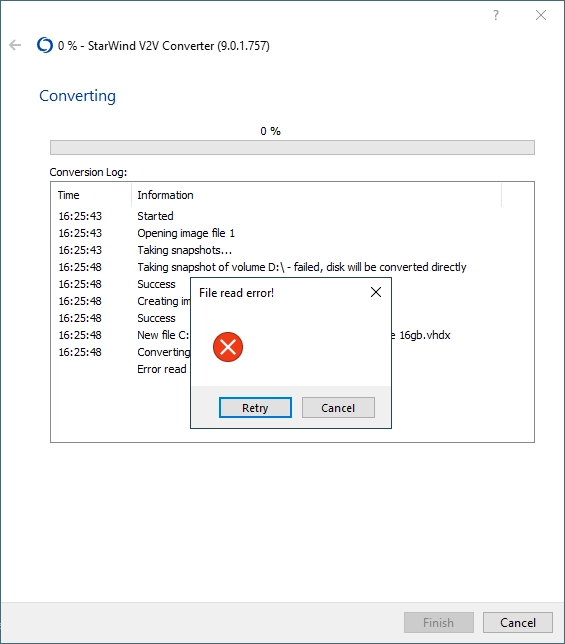
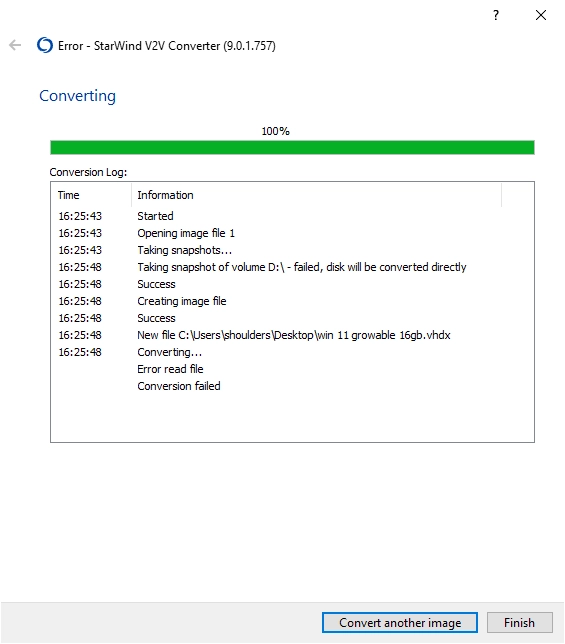
Log File
7/21 16:24:49.493 2b68 Facility ???INFO: CV2V_ConverterApp::InitInstance: SetDllDirectory: C:\Program Files\StarWind V2V Converter\lib
7/21 16:24:49.493 2b68 Facility ???INFO: CV2V_ConverterApp::InitInstance: File Version: 9.0.1.757
7/21 16:24:49.508 2b68 Facility ???INFO: CV2V_ConverterApp::InitInstance: Load language IDR_XML_ENGLISH
7/21 16:24:49.508 2b68 Facility ???INFO: CV2V_ConverterApp::InitInstance: Set current language English
7/21 16:24:49.508 2b68 Facility ???INFO: CPS_V2V_Converter::CPS_V2V_Converter: Version MajorVersion 10, MinorVersion 0, BuildNumber 19045
7/21 16:24:49.508 2b68 Facility ???INFO: WrapperHyperV::WrapperHyperV: LoadLibrary C:\Windows\system32\wbem\wmiutils.dll - 94cb0000
7/21 16:24:49.508 2b68 Facility ???INFO: WrapperHyperV::WrapperHyperV: LoadLibrary C:\Windows\system32\wbem\wmiutils.dll - 94cb0000
7/21 16:24:53.723 2b68 Facility ???INFO: ICPPage::OnWizardNext: SetActivePage - eSynchronization
7/21 16:24:57.926 2b68 Facility ???INFO: ICPPage::OnWizardNext: SetActivePage - eAzureConnectionTo
7/21 16:25:06.162 2b68 Facility ???INFO: ICPPage::OnWizardNext: SetActivePage - eLocationTo
7/21 16:25:09.053 2b68 Facility ???INFO: ICPPage::OnWizardNext: SetActivePage - eFormat
7/21 16:25:12.381 2b68 Facility ???INFO: ICPPage::OnWizardNext: SetActivePage - eOptionsHyperV
7/21 16:25:17.914 2b68 Facility ???INFO: ICPPage::OnWizardNext: SetActivePage - eConverting
7/21 16:25:43.043 2b68 Facility ???INFO: CPPOutputFile::onNext: Out path: C:\Users\quantumwarp\Desktop\DiskGenius-Dynamic.vhdx, Out format 11
7/21 16:25:43.043 2b68 Facility ???INFO: ICPPage::OnWizardNext: SetActivePage - eHYPERVConnectionTo
7/21 16:25:43.043 1788 Facility ???INFO: CPPConverting::Convert: InConvertType: 2, OutConvertType: 4
7/21 16:25:43.043 1788 Facility ???INFO: CPPConverting::ConvertDisks: pathInput: 1, pathOutput: C:\Users\quantumwarp\Desktop\DiskGenius-Dynamic.vhdx
7/21 16:25:43.043 1788 Facility ???INFO: P2V::CreateInputImage: path 1
7/21 16:25:43.043 1788 Facility ???INFO: P2V::CreateInputImage: Size 1 - 15518924800, BytesPerSector - 512
7/21 16:25:48.090 1788 Facility ???INFO: CPPConverting::ConvertDisks: CreateInputImage: 0
7/21 16:25:48.090 1788 Facility ???INFO: CPPConverting::ConvertDisks: CreateOutputImage: 0
7/21 16:25:48.090 1788 Facility ???ERROR: CPPConverting::ConvertImage: Read 3
7/21 16:32:00.054 1788 Facility ???ERROR: CPPConverting::ConvertDisks: ConvertImage - 2
7/21 16:32:00.054 1788 Facility ???ERROR: CPPConverting::Convert: FAILED
Log Explained
Here's what the log tells us:
- StarWind V2V Converter Version:
9.0.1.757- This is a relatively recent version, so it's unlikely to be a bug in an old release. - Conversion Type:
InConvertType: 2- This indicates a Physical Disk source.OutConvertType: 4- This indicates a Hyper-V (VHDX) destination.- This confirms that StarWind V2V Converter sees the OSFMounted IMG as a physical disk, which is good.
- Source Disk Identification:
pathInput: 1andSize 1 - 15518924800, BytesPerSector - 512pathInput: 1likely refers to the "Disk 1" as seen by Windows Disk Management. This corresponds to the virtual disk presented by OSFMount.- The size
15,518,924,800 bytes(approx 14.45 GB) andBytesPerSector - 512are correctly identified by the converter from the virtual disk.
- Failure Point:
CPPConverting::ConvertDisks: CreateInputImage: 0- This line means StarWind successfully initialized the connection to the source disk.CPPConverting::ConvertDisks: CreateOutputImage: 0- This line means StarWind successfully initialized the connection to the destination VHDX file.CPPConverting::ConvertImage: Read 3- This is the critical error. It happens immediately after the input and output images are created, right at the point where StarWind tries to read the actual data from the source disk. This confirms a low-level read error from the OSFMounted virtual disk.- The subsequent errors (
ConvertImage - 2, FAILED) are a direct consequence of this initial read failure.
- Conclusion from the log
- The log strongly indicates that the issue is not with StarWind V2V Converter itself, nor with the destination drive or VHDX creation. The problem lies squarely with StarWind's ability to read data from the virtual disk presented by OSFMount, which is derived from your disk image file created from your DiskGenius USB drive.
- Rufus can write raw ISO or DD images that may not have a typical partition table or disk signature that StarWind expects. This can cause problems when it tries to interpret sectors and fails.
- Additional
- This following error (not in the example above) shows an issue with the drive (VHD or physical) not being able to read sectors. If it is a physical drive then this indicates the drive is failing.
10/21 12:55:57.929 2764 Facility ???WARNING: P2V::getBuffer: ReadFile - 23. Data error (cyclic redundancy check).
10/21 12:55:57.929 2764 Facility ???ERROR: CPPConverting::ConvertImage: Read 3
10/21 13:03:16.650 2764 Facility ???ERROR: CPPConverting::Convert: FAILED
- This following error (not in the example above) shows an issue with the drive (VHD or physical) not being able to read sectors. If it is a physical drive then this indicates the drive is failing.
Cause
After in-depth research I can clarify the error is not cause by:
- Rufus or DiskImager: these apps just create a binary image of the disk and change nothing. Any errors or issues of the drive are blindly transferred to the disk image.
- Windows 10 or Windows 11: Apart from the size of the
boot.wimthere is no difference (Win10 = 550mb)(Win11 = 1GB). - Windows Native and OSFormat disk image mounting: These were mounting the disk image correctly and giving a 1:1 representation of the imaged USB drive.
- The disk image being mounted as "Read-Only": This does not interfer with the conversion as it is used as a source only.
- The size/capacity of the USB drive: None of the software has any size limits, certainly none that have been reached.
- Cluster Size / Allocation Unit Size: I tried both 4096 and 8192 and those made no difference. 8192 seems to be the default allocation size for 16GB USB drives.
- Trying different locations for the source and destination files made no difference.
- VHD, VHDX and IMG disk image formats all worked as expected.
- I got no Windows Defender errors, so in this case it was not the AV causing issues.
- Encryption on the drive can cause issues but these drive had none so can be ruled out.
What I have tried
- Zero filling the USB before reformatting = When I formatted with Windows, it just created a "Super Floppy" USB drive because this is how Windows formats them.
- I check the USB drive for errors by doing a full surface scan, it found no errors.
- I checked the FAT32 file system with chkdsk which found no errors.
Solutions
- Always use Dynamic/Growable disk image files where possible to keep space used down.
- Always use MBR/HDD style formatting on your USB drives where possible.
- Use a HDD/MBR Style USB drive to begin with or make one:
- Using Rufus, convert the USB drive into bootable USB, with a single FAT32 partition (HDD format), and of course the partiontion will be marked as `Active`.
- Then use DiskGenius to make it a WinPE.
- This way ensures the USB drive and any images created from it will work in Starwind P2V as there is a partition table present.
- This USB drive will is NOT a "Super Floppy".
- Use the original disk image as is.
- You can keep the image size down by using a smaller USB drive (Win10 = 1GB, Win11 = 2GB).
- Use DiskGenius Pro to make a direct VHD/VHDX image from the USB drive
- This is the same as using Rufus to create the disk image.
- All disk images created by DiskGenius are of the Fixed size type.
- Build your own VDH/VDHX image
- Manually create a VHD/VHDX image on your PC (MBR, Single 2GB FAT32 partition)
- Mount the VHD/VHDX drive image
- Set the partition as `Active`.
- Then manually copy all of the files from the USB drive into the new partition ion the drive image.
WinPE - Low Resolution
- TL;DR = UEFI GOP (Graphics Output Protocol) sets the screen resolution before WinPE when using EFI on my lenovo (resolution seems to be set at 800x600 and cannot be changed)
- Solution = Boot in legacy mode and then change the resolution in DiskGenius if needed: View --> Set screen resolution (Options: 1920x1080, 1024x768). This was on my Lenovo laptop.
- Notes
- Using a different boot loader like Grub which can be used to see what resolutions the GOP provides.
- My Lenovo on EFI returns a resolution of 800x600 but when I use CSM/Legacy I get 1024x768 and 1920x1080 which I can then swap between with the DiskGenius menu in the WinPE environment.
- For most users on modern UEFI systems — the hard limit is 1024x768.
- Some people say showing the boot logo helps increase screen resolution (not tested).
- DiskGenius resolution in the BCD is 1024x768
- Resolutions available will vary from PC to PC, Laptop to Laptop, and can also vary depending on the the boot method (Legacy BIOS / UEFI) used.
In DiskGenius
In the WinPE environment created by DiskGenius, you can change the screen resolution according to the following, if your hardware supports it.
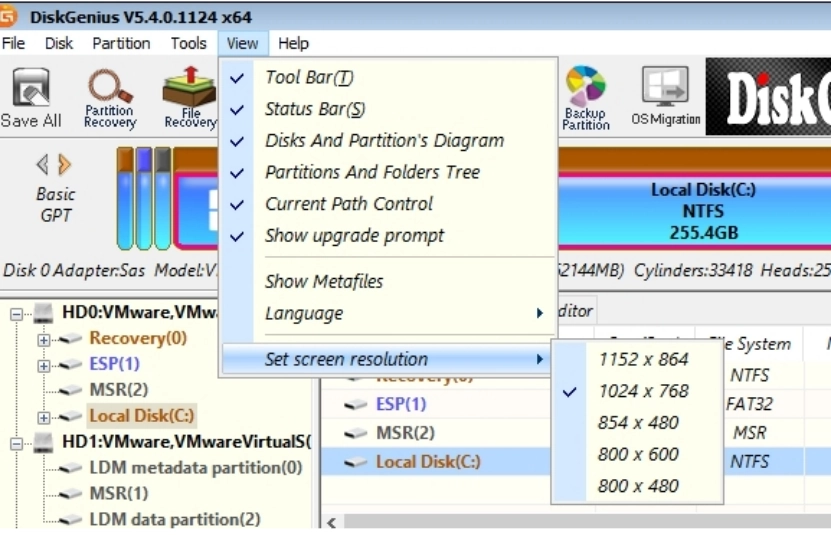
Notes
When trying to change the resolution of my screen when using DiskGenius on my Lenonvo laptop.
- Various Options summary
- Legacy Boot = allows me to change res in WinPE
- setres = no
- qres = 2005, didnt work
- powershell = no powershell to use
- unattended.xml = doesn't work
- Modify the WinPE Image Before Boot (Recommended):
- This is the most reliable method for setting the desired resolution. You do this by customizing the boot.wim file that makes up your WinPE environment.
- You can create an unattend.xml file with display settings and place it in the root of your WinPE ISO or USB. This file will be processed during the WinPE startup phase.
- Here's an example of the unattend.xml snippet for setting resolution:
<?xml version="1.0" encoding="utf-8"?>
<unattend xmlns="urn:schemas-microsoft-com:unattend">
    <settings pass="windowsPE">
        <component name="Microsoft-Windows-Setup" processorArchitecture="amd64" publicKeyToken="31bf3856ad364e35" language="neutral" versionScope="nonSxS" xmlns:wcm="http://schemas.microsoft.com/WMIConfig/2002/State" xmlns:xsi="http://www.w3.org/2001/XMLSchema-instance">
            <Display>
                <ColorDepth>32</ColorDepth>
                <HorizontalResolution>1920</HorizontalResolution>
                <RefreshRate>60</RefreshRate>
                <VerticalResolution>1080</VerticalResolution>
            </Display>
        </component>
    </settings>
</unattend>
- Modify the WinPE Image Before Boot (Recommended):
- bcdedit / graphicsresolution
- I made sure I was working on the WinPE drive: X: eg:
X:\bcdedit /store D:\boot\BCD /set {globalsettings} graphicsresolution 1280x1024 - Works
bcdedit /store "d:\boot\BCD" /set {bootmgr} graphicsresolution "800x600" bcdedit /store "d:\boot\BCD" /set {bootmgr} graphicsresolution "1024x768" - Not Working
bcdedit /store "d:\boot\BCD" /set {bootmgr} graphicsresolution "1280x768" bcdedit /store "d:\boot\BCD" /set {bootmgr} graphicsresolution "1280x1024" - Reason
- Most UEFI firmware initializes the screen at 1024x768 or lower.
graphicsresolutionis backed by the boot graphics adapter using VESA BIOS Extensions (VBE) or UEFI GOP (Graphics Output Protocol).- Changing that during early boot (before Windows loads its display drivers) is not officially supported past that limit.
- For most users on modern UEFI systems — the hard limit is 1024x768.
- I made sure I was working on the WinPE drive: X: eg:
- Standards
- GOP - OSDev Wiki
- This is the new standard for UEFI that superseded VESA (BIOS) and UGA (EFI 1.0).
- It has basically the same functions as VESA, you can query the modes, set the modes.
- It also provides an efficient BitBlitter function, which you can't use from your OS unfortunately.
- GOP is an EFI Boot Time Service, meaning you can't access it after you call ExitBootServices(). However, the framebuffer provided by GOP persists, so you can continue to use it for graphics output in your OS.
- GOP - OSDev Wiki
- BCD
- BCDEdit Command-Line Options | Microsoft Learn - BCDEdit is a command-line tool for managing Boot Configuration Data (BCD).
- Other Testing
- WinPE Screen Resolution and DPI scaling on UEFI firmware | mistyprojects.co.uk
- This article is based on observations on screen resolution and DPI scaling in WinPE.
- Screen resolution can be changed from a running WinPE booted on BIOS firmware.
- Changing the screen resolution on UEFI firmware is not so simple. Settings in unnatend.xml appear to be ignored and the screen resolution is fixed. Based on available information screen resolution appears to be set based on Graphics Output Protocal (GOP) mode. Once WinPE is booted, the resolution cannot be changed.
- Setting the resolution in the BCD
bcdedit.exe /set {globalsettings} graphicsresolution 800x600 bcdedit.exe /set {globalsettings} graphicsresolution 1024x600 bcdedit.exe /set {globalsettings} graphicsresolution 1024x768 - Attempting to use an unsupported resolution (unsupported by bcdedit.exe - not the hardware) resulted in the following output:
C:\windows\system32>bcdedit.exe /set {globalsettings} graphicsresolution 1920x1080 The integer data is not valid as specified. Run "bcdedit /?" for command line assistance. The parameter is incorrect. - The highestmode option is also supported in bcdedit.exe. This option will enable boot applications to use the highest graphical mode detected by the firmware
bcdedit.exe /set {globalsettings} highestmode on - To find supported resolutions, use the
graphicsmode --infocommand on the GRUB4UEFI commandline.
- WinPE Screen Resolution and DPI scaling on UEFI firmware | mistyprojects.co.uk
- unattend.xml
- How to Change Screen Resolution in Windows PE 4 and 5 | Password Recovery
- To set screen resolution in WinPE, simply put an answer file named unattend.xml file in the root of the WinPE ISO image with the following content.
- This articel has an example file.
- How to Change Screen Resolution in Windows PE 4 and 5 | Password Recovery
- Ventoy
- [issue]: Low resolution gfx mode booting various ISOs · Issue #3019 · ventoy/Ventoy · GitHub
- Could be an issue with Secure Boot and Lenovos
- Check what resolutions are avaiable in UEFI and Legacy: F5 --> Resolution Configuration
- Rebuild your venoty USB from scratch can help get rid of this resolution issue.
- Can i set the GOP resolution with Ventoy?
- Yes, Ventoy offers options to influence the display resolution, including in UEFI mode, but it's important to understand the nuances, especially regarding GOP.
- Ventoy's approach to resolution:
- Ventoy Menu Resolution: Ventoy itself, at its boot menu, tries to set a resolution. You can typically access this by pressing F5 (Tools) --> Resolution Configuration from the Ventoy main menu. This allows you to choose from resolutions detected by your system's firmware.
- In UEFI mode, these options are often limited to the resolutions exposed by the GOP (Graphics Output Protocol) of your motherboard/graphics card. Common options might include 1024x768, 1280x1024, 1920x1080, and sometimes others, but it depends on your hardware's firmware.
- While Ventoy can request a specific resolution from the firmware, the ultimate support depends on what your system's GOP actually offers.
- ISO Boot Resolution (Post-Ventoy): This is where it gets tricky, especially with WinPE.
- Ventoy's role ends once it hands off control to the ISO: So, while Ventoy might display its menu at a certain resolution, the operating system (like WinPE or a Linux distro) inside the ISO will then take over display control.
- WinPE and UEFI GOP: As discussed before, WinPE in UEFI mode often defaults to a generic resolution (e.g., 800x600) because it relies on the basic GOP. It doesn't load full display drivers by default.
- Ventoy's "Secure Boot Support" and Resolution Issues: There have been reports (as seen in search results) that enabling "Secure Boot Support" in Ventoy, especially with certain Lenovo UEFI firmware, can lead to WinPE ISOs being stuck at a low 800x600 resolution in UEFI mode. Some users found success by disabling secure boot support in Ventoy's installation options, even if Secure Boot is still enabled in the BIOS itself. This suggests a potential conflict or a more restrictive GOP mode being enforced when Ventoy's secure boot components are active.
- Ventoy Menu Resolution: Ventoy itself, at its boot menu, tries to set a resolution. You can typically access this by pressing F5 (Tools) --> Resolution Configuration from the Ventoy main menu. This allows you to choose from resolutions detected by your system's firmware.
- How to try and set resolution with Ventoy in UEFI:
- During Ventoy Installation/Update:
- When you run Ventoy2Disk.exe (on Windows) to install or update Ventoy on your USB drive, go to Option and consider unchecking "Secure Boot Support." This has reportedly helped some users with low resolution issues for WinPE in UEFI.
- Backup your ISOs first, as clearing or reinstalling Ventoy will wipe the USB drive.
- From the Ventoy Boot Menu (before booting the ISO):
- Boot your Ventoy USB drive.
- When the Ventoy main menu appears, press F5 (Tools).
- Select Resolution Configuration.
- Choose the desired resolution from the list of available modes. Ventoy will attempt to set this resolution for its menu.
- Then, proceed to boot your DiskGenius WinPE ISO.
- During Ventoy Installation/Update:
- Important points to remember:
- This won't guarantee WinPE will stay at that resolution. Even if Ventoy's menu appears in a higher resolution, WinPE might revert to a lower one once it boots if it doesn't have the necessary display drivers loaded internally.
- Integrating drivers into WinPE is still the most robust solution for UEFI. While Ventoy can set the initial GOP mode, for WinPE to utilize higher resolutions and display options, it truly needs the proper display drivers embedded within its
boot.wimfile. - Check Ventoy's Official Documentation: Always refer to the official Ventoy documentation (ventoy.net) for the most up-to-date information and advanced configuration options (e.g.,
ventoy.jsonfor persistent settings).
- [issue]: Low resolution gfx mode booting various ISOs · Issue #3019 · ventoy/Ventoy · GitHub
- Software to change Resolution
- Articles
- Software
- Powershell
- QRes @ Sourceforge - QuickRes allows you to change color depth and screen resolution without restarting the machine.
QRes.exe /x:800 /y:600
- NirCmd - Windows command line tool - NirCmd is a small utility that allows you to do many useful tasks from command-line, including changing the dsplay resolution.
- NirCmd Command Reference - setdisplay - No meta description
nircmd.exe setdisplay 1024 768 24
- NirCmd Command Reference - setdisplay - No meta description
- SetRes - MajorGeeks - With SetRes you can set the screen resolution, colour depth and refresh rate from the command line or a shortcut.
- ChangeScreenResolution - Change your screen resolution from the command line in Windows
- Misc
- Problem with resolution of Windows Boot Manager - Microsoft Q&A - Is there anyone know that how to take the default resolution back to Windows Boot Manager?
- Low Resolution Boot Screen Issue & Suggested Fix | Windows 11 Forum
- This is simply an aesthetic bother but I can't stand when my 4K PC monitor boot screen looks like it's 480p
- Someone understood and offered this fix
- Yes you can:
bcdedit /deletevalue "{globalsettings}" highestmode reboot - That picture you posted has zero to do with Windows and everything to do with the BIOS/UEFI loading screen.
- If it was as simple as running the above command from within Windows to edit the BIOS loading screen (or any bios settings for that matter, then we would all be in a world of trouble and at the mercy of any and all nasties that managed infect Windows.
- When i boot of diskgenius WinPE bootable USB, the screen resolution is too low. The option to change screen resolution is missing
- When booting a DiskGenius WinPE bootable USB, experiencing low screen resolution and missing resolution options is a common issue. This often stems from WinPE's minimalistic nature, as it typically uses generic display drivers that might not fully support your display's native resolution or advanced graphics settings.
- Here's what you should consider:
- WinPE and Display Drivers: WinPE images generally do not include a full set of display drivers. They rely on basic drivers for compatibility across a wide range of hardware. This means advanced display features, including the ability to change resolution, might be limited or unavailable.
- UEFI vs. Legacy Boot: The behavior of WinPE regarding screen resolution can differ between UEFI and Legacy BIOS boot modes. In some UEFI environments, the screen resolution is determined by the Graphics Output Protocol (GOP) and might be fixed once WinPE boots.
- Integrating Drivers: For specific hardware, it might be possible to integrate display drivers into the WinPE image itself. This is an advanced process and typically involves using tools from the Windows Assessment and Deployment Kit (ADK) to customize the boot.wim file. However, even with integrated drivers, some users report issues.
- GOP
- Changing the Graphics Output Protocol (GOP) resolution directly in UEFI is a complex topic, and it's not something you typically "change" in the same way you would adjust display settings in a running operating system. Here's a breakdown of what GOP is and why it's so difficult to modify:
- What is GOP?
- The Graphics Output Protocol (GOP) is a core part of UEFI firmware. It's designed to replace the older Video BIOS (VBIOS) found in legacy BIOS systems. Essentially, GOP provides a standardized way for the UEFI firmware and early boot processes to display graphics on your screen before the operating system's full graphics drivers load.
- Key characteristics of GOP:
- Pre-OS Display: It's responsible for displaying the manufacturer's logo, BIOS/UEFI setup screens, and early boot messages.
- Driver Replacement: It replaces the need for a separate VBIOS by providing a protocol that UEFI applications can use to draw directly to a hardware frame buffer.
- Integrated into VBIOS/Firmware: The GOP driver itself is usually embedded within the graphics card's VBIOS (Video BIOS) or the motherboard's UEFI firmware.
- Why is it difficult to change GOP resolution?
- Firmware-Dependent: The available GOP resolutions are determined by your motherboard's UEFI firmware and your graphics card's VBIOS. These are often hardcoded and limited to a few standard resolutions (e.g., 800x600, 1024x768).
- Generic Drivers: WinPE, being a minimal environment, relies on these generic GOP modes. It doesn't load a full suite of display drivers that would allow for dynamic resolution changes.
- No User Interface: There's typically no user-friendly interface within the UEFI firmware itself to change the active GOP resolution directly. You might find a setting to switch between "UEFI" and "CSM" (Compatibility Support Module, which enables legacy BIOS features), but not to pick a specific GOP resolution.
- Security and Stability: Modifying the underlying firmware (VBIOS or motherboard UEFI) to force a different GOP resolution carries significant risks, including potentially bricking your hardware if done incorrectly.
My Crashed MariaDB Server Notes
This is just a temporary article for these notes, I might move them.
Extract all failed tables from the error log with Notepad++
- Get Setup
- Download the error log from:
/var/lib/mysql/server.quantumwarp.com.err
- Open the log file in Notepad++
- Download the error log from:
- Remove all lines without Table errors
- Open the Replace dialogue (Ctrl + H)
- Configure as follows:
- Find what:
^(?!.*\[ERROR\] mariadbd: Table).*\r?\n
- Replace with: nothing
- Search Mode:
- Regular expression
- without `. matches newline`
- Click Replace All
- Find what:
- Make the lines Uniform
- Start of the line
- Open the Replace dialogue (Ctrl + H)
- Configure as follows:
- Find what:
.*\[ERROR\] mariadbd: Table '\.
- Replace with: nothing
- Search Mode:
- Regular expression
- without `. matches newline`
- Find what:
- Click Replace All
- End of the line (optional)
- Open the Replace dialogue (Ctrl + H)
- Configure as follows:
- Find what:
' is marked as crashed and should be repaired$
- Replace with: nothing
- Search Mode:
- Regular expression
- without `. matches newline`
- Find what:
- Click Replace All
- Start of the line
- Sort the lines
- Edit --> Line Operations --> Remove Duplicate Lines
- Edit --> Line Operations --> Sort Lines Lexicographically Ascending
My Notepad++ Notes
Throughout these examples I have used the regex
YourCodeHereto and you should change this to match your needs
Line Operations
Using a capture Group
Find:   ^.*YourCodeHere(.*)
Replace:  YourCodeHere\1
Add to the end of a line
- Open the Replace dialogue (Ctrl + H)
- Configure as follows:
- Find what:
$ - Replace with:
your content - Search Mode:
- Regular expression
- without `. matches newline`
- Find what:
- Click Replace All
Notes
Multiline Search and Replace
- Notepad++ replace two lines with other (10) lines in open documents - Stack Overflow
- NppToolBucket | phdesign - A .NET plugin for Notepad++
- NppToolBucket contains the following features:
- Multi-line search and replace dialog.
- Change indentation dialog.
- Generate GUID
- Generate Lorem Ipsum
- Compute MD5 Hash
- Compute SHA1 Hash
- Base 64 encode
- Base 64 decode
- NppToolBucket contains the following features:
Delete Specific lines
A couple of methods to identify lines and delete them.
Regex
- Open the Replace dialogue (Ctrl + H)
- Configure as follows:
- Find what:
.*YourCodeHere.*\n
.*YourCodeHere.*\r?\n
- Replace with: nothing
- Search Mode:
- Regular expression
- without `. matches newline`
- Find what:
- Click Replace All
Notes
- The end of line character should be
\nif straight from your Linux box, but you might just want to check this as it could be\r\n YourCodeHereshould be swapped for something on each of the lines you want to delete.- Notepad++ Delete Lines with Find & Replace - Super User
- some useful end of line regex that might still be valid.
Bookmark Line Method
Delete all lines that don't contain ....
A couple of methods to identify lines and delete all the others.
Inverse Regex Replace
- Open the Replace dialogue (Ctrl + H)
- Configure as follows:
- Find what:
^(?!.*YourCodeHere).*\r?\n
^(?!.*YourCodeHere).*\R

# When this is used, blank lines are left
^((?!YourCodeHere).)*$
- Replace with: nothing
- Search Mode:
- Regular expression
- without `. matches newline`
- Find what:
- Click Replace All
Bookmark Line Method
- Select the Mark tab from the replace dialogue (Ctrl + H)
- Enter your Regex to match code on the lines you want to keep.
YourCodeHere

# This will allow marking of all lines not containing [ERROR]
^((?!YourCodeHere).)*$
- Your Regex does not need to match all of the content on the line, just something unique to allow identification.
- Check Bookmark line.
- Search Mode:
- Regular expression
- without `. matches newline`
- Click Mark All.
- Menu --> Search --> Bookmark --> Remove Non-Bookmarked Lines
- In the replace dialogue, Mark tab, click Clear all marks.
Remove Duplicate Lines
- Method 1
- Edit --> Line Operations --> Remove Duplicate Lines
- Edit --> Line Operations --> Sort Lines Lexicographically Ascending (this is optional but makes them easier to read.)
- Method 2
- Edit --> Line Operations --> Sort Lines Lexicographically Ascending
- Edit --> Line Operations --> Remove Consecutive Duplicate Lines
Delete the first part of a line
Find:   ^.*YourCodeHere
Replace:  YourCodeHere

or

Find:   ^.*?YourCodeHere
Replace:  YourCodeHere
Line Endings (EOL / CR / LF)
A collection of hints and tips of this topic.
- The default Notepad++ font `Courier New` does not support a lot of Unicode characters such as the CRLF character.
- Notepad++ End of Line: How to Change It and Why - Notepad++ end of line settings: Learn how to change the end of line character in Notepad++. This article includes step-by-step instructions and screenshots.
To View Line Endings in Notepad++:
- Go to View > Show Symbol > Show End of Line
- CR LF for Windows line endings
- LF for Unix-style
- CR for old Mac-style
- This will display actual newline characters:
- These aren’t shown as ↵, but they indicate the same thing.
If you want ↵ to Show where Newlines Occur:
Notepad++ supports showing newlines as CR/LF/CRLF but does not support showing newlines as ↵, however you can simulate it:
- Use Find and Replace (Ctrl+H)
- Set Search Mode to Extended
- Find: \r\n or \n
- Replace with: ↵\r\n (this will visually insert ↵ at line breaks)
- Be careful—this alters the file.
Regex
- Non-Greedy
- Notepad++ supports non-greedy regular expressions, which are useful for matching the shortest possible string that satisfies the pattern. This can be achieved using the
?operator after a quantifier. See the example below:<h1 style="color: red">Hello</h1> <h1.*?> - This will match <h1 style="color: red"> <h1.*> - This will match <h1 style="color: red">Hello</h1>
- Notepad++ non-greedy regular expressions - Stack Overflow
- you can specify what you don't want:
a[^c]+c
- Which specifies: match
a, followed by one or more character that isn'tc, followed byc. This will matchabcandadc.
- Which specifies: match
- you can specify what you don't want:
- Notepad++ Find and Replace Expert Suggestion - Super User
- Notepad++ supports non-greedy regular expressions, which are useful for matching the shortest possible string that satisfies the pattern. This can be achieved using the
- Line Endings (EOL)
- \R (capital R) will grab any end of line characters in Notepad++.
- ^ for start of line.
- $ for end of line, but does not identify the EOL.
- Inverse Regex Selection/Match
- see my Inverse Regex Replace under the deleting lines section.
- How can I invert my Regex matching results? - Super User
- notepad++ Inverse Regex replace (all but string) - Stack Overflow
Themes
- Notepad++ • Dracula Theme - The most famous dark theme for Notepad++ and an ever-growing selection of apps!
Misc
How to add a TPL file to Notepad++ as a PHP file
- Click Settings / Style Configurator
- Select PHP in the left list box
- At the bottom of the list boxes, you'll see User Ext:. Enter tpl into that box
- Click Save & Close
Now Notepad++ will recognise .tpl files as PHP files. When you open the next one, it will contain syntax highlighting.
A question mark or a box is shown instead of the EOL character?
- I am using the Fira Code here for this example but this will apply to all fonts where this occurs
- The EOL character is shown when using the DejaVu Mono font.
- The question mark character is shown is when the required glyph does not exist in the current font.
- When copying text, the glyph references are copied not the characters, so if a character does not show correctly in one application this does not mean this will be the same in another.
The issue you're encountering is due to the Fira Code font not supporting the ↵ character (Unicode U+21B5: "DOWNWARDS ARROW WITH CORNER LEFTWARDS").
Here's a breakdown of what's going on:
- ✅ DejaVu Mono
- DejaVu Mono is a very complete font that includes a wide range of Unicode symbols, including many technical and typographic ones.
- It supports the ↵ character, so it displays correctly.
- ❌ Fira Code
- Fira Code is a monospaced programming font known for its ligatures (like turning
!=into a neat symbol), but it has a more limited set of Unicode glyphs compared to DejaVu Mono. - It does not include a glyph for
↵, so Notepad++ shows a replacement character (typically a question mark or a box), indicating a missing glyph.
- Fira Code is a monospaced programming font known for its ligatures (like turning
Solutions or Workarounds
- Use a different symbol:
- You can try using a visually similar symbol that Fira Code does support (e.g.,
↩,↓, or⏎), though it’s not the same.
- You can try using a visually similar symbol that Fira Code does support (e.g.,
- Use a different font:
- If Unicode coverage is important and you're dealing with many special characters, consider using a font like:
- JetBrains Mono
- Cascadia Code
- DejaVu Mono
- DejaVu Sans
- Segoe UI Symbol
- Arial Unicode MS
- Use a custom build of Fira Code with extended Unicode coverage (more advanced).
- If Unicode coverage is important and you're dealing with many special characters, consider using a font like:
- Use a different editor:
- Switch to a different editor that supports font fallback (like VS Code, Sublime Text, etc.).
To Verify a Character is supported in a font
You can test if Fira Code supports a character by:
- Checking it in a font viewer (like BabelMap or FontDrop).
- Viewing it in a browser with Fira Code explicitly set as the font.
- Set your editor to use the required font, then copy and paste in the character from somewhere it is shown correctly.
Why ↵ works in VS Code but Not in Notepad++
VS Code and Notepad++ handle fonts very differently, particularly when it comes to missing glyphs:
- ✅ VS Code: Font Fallback Support
- VS Code uses Electron/Chromium, which supports font fallback.
- When Fira Code doesn't include a glyph (like ↵), VS Code will automatically fall back to another installed font that does support it (e.g., DejaVu Sans Mono or Segoe UI Symbol).
- So even though Fira Code doesn’t include ↵, VS Code silently substitutes it from another font.
- ❌ Notepad++: No Font Fallback
- Notepad++ uses the Windows GDI or Scintilla rendering engine, which lacks proper font fallback.
- If the selected font (Fira Code) doesn’t include a glyph, Notepad++ simply shows a replacement character (usually a box or question mark), because it won’t switch to another font.
✅ Summary
| App | Font Used | ↵ Glyph Supported by Font? | Font Fallback? | Result |
|---|---|---|---|---|
| VS Code | Fira Code | ❌ | ✅ Yes | ✔️ Displays ↵ |
| Notepad++ | Fira Code | ❌ | ❌ No | ❌ Question mark |
Additional Fonts
- Notepad Plus Plus instructions · tonsky/FiraCode Wiki · GitHub - A Free monospaced font with programming ligatures.
- How to install this font into Notepad++
- Ligatures are not on by default, the DirectWrite option needs to be enabled.
ChatGPT Code Clean up
Using the regex below and Notepad++ remove the tag data and then remove unwanted paragraphs in list items allowing for correctly formatted information in my articles.
TL;DR
All the methods work but if in doubt use these:
- Remove <article> & </article> tags
- Remove unwanted tag data: Method 2
- Remove Nested <p>...</p>: Method 1
Remove all of the unwanted tag data
These regex simply removed unwanted style and data-start="" and data-end="" meta values from all html elements (eg: <ul data-start="1463" data-end="1764"> --> <ul>)
Method 1
- This will require a WYSIWYG to remove the unneeded white space.
- TinyMCE will remove the white space by pasting the into the code window and then returning to the normal edit window. Once this is done you can recopy the code from TinyMCE.
- this needs to be done before running any more Regex on the code.
- The regex code only needs to be run once.
- Regular expression, no `. matches newline`
Find what: ( data-start="[0-9]+"| data-end="[0-9]+")

Replace with:
Method 2
- This will handle self closed tags
- The regex code only needs to be run once.
- This will always find matches even if all the elements/tags are empty and nothing needs to be removed.
- Regular expression, no `. matches newline`
Find what: <([a-z0-9]+).*?( ?/)?>

Replace with: <\1\2>
Method 3
- This will handle self closed tags
- The regex code only needs to be run once.
- This will always find matches even if all the elements/tags are empty and nothing needs to be removed.
- The downside of this is that you need to add every element.
- Regular expression, no `. matches newline`
Find what: <(h1|h2|h3|h4|h5|h6|pr?e?|br|hr|ul|ol|li|strong|code|em){1}.*?( ?/)?>

Replace with: <\1\2>
Remove Nested <p>...</p> Tags from <li>...</li> but keep all Content
- To remove all p tags nested within <li></li> tags with a single replace operation in Notepad++, use a regex that captures all the content between a <li> and </li> tag and then replaces the nested <p> and </p> tags.
- These finds all <li><p>...</p> and removes the <p></p>
- These will find and remove the <p> tags while preserving their content, but only when they are within <li> tags.
- This regex needs to be run until all matches are found and replaced as it might not be able to do all changes on the first run. Multiple <p></p> in a <li></li> will require additional runs.
- Regular expression, no `. matches newline`
Method 1
- Regular expression, no `. matches newline`
Find what: (<li>[\s\S]*?)<p>([\s\S]*?)</p>([\s\S]*?</li>)

Replace with: \1\2\3
Explanation of the Regex
- (: Starts a capturing group.
- <li>: Matches the literal opening <li> tag.
- [\s\S]*?: Matches any character (\s for whitespace, \S for non-whitespace) zero or more times, non-greedily. This captures everything between the <li> and the <p> tag.
- )</p>: This ends the first capturing group and literally matches the opening <p> and closing </p> tags.
- ([\s\S]*?): This is the second capturing group, which matches the content inside the <p> tags.
- ([\s\S]*?</li>): This is the third capturing group, which matches everything from the closing </p> tag up to the closing </li> tag.
- \1\2\3: In the "Replace with" field, these refer to the content of the three capturing groups. This tells Notepad++ to reconstruct the text using the parts it captured, effectively removing the <p> tags.
Make sure you have Regular expression selected in the "Search Mode" area of the Find and Replace dialog.
Method 2
- Regular expression, no `. matches newline`
Find What: (<li>[\s\S]*?)<p>(.*?)<\/p>(?=[\s\S]*?<\/li>)

Replace with: $1$2
Explanation of the Regex
This regex uses a combination of capturing groups and a positive lookahead to find and replace all instances within a single pass.
- ( and ): These create a capturing group. ( starts the group, and ) ends it.
- <li>: Matches the literal opening <li> tag.
- [\s\S]*?: This non-greedy pattern matches any character (including newlines) zero or more times, capturing everything after the <li> tag.
- )*?): The first capturing group ends here. This group captures the content from the opening <li> tag up to the first <p> tag.
- <p>: Matches the literal opening <p> tag.
- (.*?): This is the second capturing group. It non-greedily matches all content within the <p> tags.
- <\/p>: Matches the literal closing </p> tag.
- (?=[\s\S]*?<\/li>): This is a positive lookahead. It asserts that the matched pattern is followed by a closing </li> tag. The [\s\S]*? matches any character zero or more times until it finds a </li> tag.
When you use $1$2 in the "Replace with" field, Notepad++ will replace the entire matched string with the content of the first and second capturing groups, effectively removing the <p> tags while preserving their content and the surrounding li structure.
Important: Make sure Regular expression is selected in the Search Mode section of the Find and Replace dialog. You may also need to check the . matches newline box.
Method 3 + 4
- These all assume that there is only one <p>...</p> in each <li>...</li> and are here for reference only.
- Regular expression, no `. matches newline`
## Remove the first nested <p>
Find what   : <li>[\r?\n?]+<p>
Replace With: <li>

## Remove the last nested</p>
Find what   : </p>[\r?\n?]+</li>
Replace With: </li>

## Remove the first pair of nested <p>...</p>
Find what   : <li>\s*(?:<p>(.*?)</p>\s*)+</li>
Replace With: <li>\1</li>
Remove <article> &</article> tags
- These 2 commands will remove all of the <article> tags, but not their content.
- Regular expression, no `. matches newline`
## Remove all <article>
Find what   : <article.*>
Replace With:

## Remove all </article>
Find what   : </article>
Replace With:
Enable long file paths in Windows
Window should just enable this by default but it doesn't even in windows 11.
TL;DR
Methods
The tutorials in the links below will give you a clearer understanding of how and why to perform this upgrade but this is an overview of the methods I found
- Registry
HKEY_LOCAL_MACHINE\SYSTEM\CurrentControlSet\Control\FileSystem
- PowerShell (to change the registry)
Set-ItemProperty -Path 'HKLM:\SYSTEM\CurrentControlSet\Control\FileSystem' -Name LongPathsEnabled -Type DWord -Value 1
- Group Policy Manager (Windows Pro only)
Computer Configuration > Administrative Templates > System > Filesystem > Enable Win32 long paths
Notes
- Some legacy apps, in particular Win32 will have issues with long file paths.
- Feature was brought in with Windows 1607
- Not on by default, including in Windows 11
- File explorer in Windows 11 will read long paths correctly but if you are over the 260 character limit it will not allow you to edit or create them (as of Windows 11 24H2)
- Apps have to support long file paths, just enabling the setting is not enough.
- Using a 3rd party file manager will get around the file explorer limit as long as
LongPathsEnabledis enabled
Links
- Background
- Why isn't long paths enabled by default in windows 11. - Microsoft Community - Why isn't long paths enabled by default in windows 11? The 260 character limit has been crippling to the user over the years. It only takes someone to change (lengthen) a folder name further up the path to make access to some file impossible. I know the restriction was removed in Win 10, but only by Registry and Group Policy Mods - This is beyond the average user - so why isn't it enabled by default). Thanks.
- Why does the 260 character path length limit exist in Windows? - stack Overflow
- You can enable long path names using PowerShell:
Set-ItemProperty -Path 'HKLM:\SYSTEM\CurrentControlSet\Control\FileSystem' -Name LongPathsEnabled -Type DWord -Value 1
- You can enable long path names using Group Policy:
Computer Configuration > Administrative Templates > System > Filesystem > Enable win32 long paths
- You can enable long path names using PowerShell:
- Why did Windows pick 260 characters as the maximum path length? - Retrocomputing Stack Exchange - Why did Microsoft decided to limit paths to 3 characters for drive + 256 characters + 1 character for the terminator?
- Tutorials
- Maximum Path Length Limitation - Win32 apps | Microsoft Learn - Starting in Windows 10, version 1607, MAX_PATH limitations have been removed from many common Win32 file and directory functions. However, your app must opt-in to support the new behavior.
- How to Make Windows 10 Accept File Paths Over 260 Characters | How-To Geek - Want a small novel for a file path? We've got you covered.
- Before Windows 95, file names could only be 8 characters long, but now Windows has a 260 character limit for the full path of a file.
- The Windows 10 Anniversary Update allowed users to abandon the 260 character limit, but some older 32-bit applications may not support longer paths.
- Home users can remove the path limit by editing the registry, while Pro and Enterprise users can use the Local Group Policy Editor to disable the limit.
- The maximum path limit may not be something you've ever run into, but for some people, it can certainly be the occasional frustration. Windows 10 has finally added the ability to remove that limit. You just have to make a quick change to the Registry or Group Policy to make it happen.
- Download the registry files.
- Windows 10 Allows File Paths Longer Than 260 Characters (With a Registry Hack) | Lifehacker - Ever since Windows 95, Microsoft has only allowed file paths up to 260 characters (which, to be fair, was much nicer than the 8 character limit previously). Now, with a registry tweak, you can exceed that amount in Windows 10.
- Maximum Path Length Limitation - Block repositories | Veeam Backup & Replication Best Practice Guide
- Best practice from the field for Veeam Backup & Replication
- Regardless of NTFS or ReFS, Windows operating systems used to have a limit of 260 characters as the maximum length of a file’s path name. Although this limitation has been removed in newer versions starting with Windows 10 version 1607, this feature is still disabled by default within the Windows API (see Maximum Path Length Limitation).
- Veeam is capable of handling long path names, but it needs to be enabled in the OS first. It is recommended to enable the
LongPathsEnabledsetting on all Windows servers hosting Veeam roles. - Refer to the Microsoft documentation for more details on how to change this value via the registry, PowerShell or Group Policy.
- Windows Explorer "does not support long file paaths
- Use a 3rd party app to overcome this. Obviously this needs to support long file paths
- STILL no file paths longer than 260 characters in Win Explorer, in 2023? - Super User
- Your only option would be to use an alternative File Explorer that supports Long Paths. Examples are OneCommander, Total Commander, and 7-Zip. (A nicer option that seems to support it, and can act as a Windows Explorer replacement with a similar layout, but isn't free, is the Files App.)
dddd
Line endings when working with Git for Windows and Visual Studio Code
So you are installing `Git for Windows` and you are asked how to handle line endings, what option should I pick and why? I will answer that question here so you know what to choose, and why rather than just following a YouTube video than never explains anything except just click next because this is what I use we will explore every avenue.
The information here applies to handling EOL in Git and probably applies to people whose OS is not Windows such as MacOS and Linux.
TL;DR
- EOL = End of Line
- EOL Types
CRLF= \r\n = WindowsCR=\n= Old computers and old MacOSLF=\n= Linux- Modern editors support
CRLF,LFand probablyCR.- Selecting your EOL
LFis the universal EOL and should be used unless it is a Windows project, in which case the EOL will beCRLF.- Only old and specialist systems use
CR.- Some projects can have a mix of files with different EOL.
- Rarely, some single files can have mixed EOL but VSCode does not currently support this.
- How to handle EOL
- Set EOL on a per project basis.
- Use EditorConfig to set your EOL, if this is not supported, set them with your editor.
- Do NOT use Git to convert EOL on submission for any reason.
- Set your editor's default EOL for new files to
LF. This is not mandatory but makes life easier when working cross platform.- Using your editor for EOL handling
- prevents binary files from being damaged.
- Allows the use of files which use different EOL.
- Allows the use of single files with mixed EOL.
Summaries
Where I can change line endings when using Git for Windows and VSCode? (each overrides the last)
Settings precedence - User and workspace settings | Visual Studio Code
- VSCode (User settings) (
%APPDATA%\Code\User\settings.json)
- Action: Set EOL for new files.
- Scope: All Workspaces.
- Additional:
- Command Palette ( F1 | Ctrl+Shift+P) --> Preferences: Open User Settings --> `Files: Eol`: LF
- Settings --> Text Editor --> Files --> Eol: LF
- Profiles replace the `User settings`, if loaded.
- These settings are only per user which means they are local and are not shared.
- VSCode (Workspace settings) (
.vscode/settings.json)
- Action: Set EOL for new files.
- Scope: Workspace.
- Additional:
- These settings can be commited to a repo and thus can be shared between colleagues and the wider world.
- VSCode (Multi-Root Workspace / Workspace Folder setting) (
.vscode/.code-workspace)
- Action: Set EOL for new files.
- Scope: Specified Workspace Folders.
- Additional:
- Settings for a particular folder can be saved in the
.code-workspace.- These settings can be commited to a repo and thus can be shared.
- VSCode (Multi-Root Workspace) (
[Workspace Folder]/.vscode/settings.json)
- Action: Set EOL for new files.
- Scope: Workspace Folder
- Additional:
- These settings can be commited to a repo and thus can be shared.
- Git (Repository) (
.editorconfig)
- Action: Set EOL for new files.
- Scope: Git repository.
- Additional:
- Visual Studio = Full native support, VS will check your code on every code change.
- VSCode = Partial support is added by extensions.
- VSCode (Extensions) - Examples below:
- Auto Convert End Of Line - Visual Studio Marketplace
- Action: Change the EOL for all
textfiles, on save- Scope: Workspace
- Prettier - Code formatter - Visual Studio Marketplace
- Action: Change the EOL for all files, as specified (see below) on save
- Scope: Workspace
- Additional:
- You can use VS Code settings to configure prettier. Settings will be read from (listed by priority):
.prettierrc(Prettier configuration file).editorconfig- Visual Studio Code Settings (Ignored if any other configuration is present)
- NOTE: If any local configuration file is present (i.e.
.prettierrc) the VS Code settings will NOT be used.- The VS Code settings are meant to be used as a fallback and are generally intended only for use on non-project files.
- It is recommended that you always include a prettier configuration file in your project specifying all settings for your project.
- If
options.editorconfigistrueand an.editorconfigfile is in your project, Prettier will parse it and convert its properties to the corresponding Prettier configuration. This configuration will be overridden by.prettierrc, etc. Currently, the following EditorConfig properties are supported:
end_of_lineindent_styleindent_sizetab_widthmax_line_length- End of Line - Options · Prettier - Prettier ships with a handful of format options.
- Unlocking Prettier: Mastering End of Line Configuration | runebook.dev
- Inconsistent EOL characters can lead to unnecessary Git conflicts, making it harder to track changes and collaborate effectively.
- Prettier aims to enforce consistent code style across a project or team. This includes standardizing how line endings are represented.
- This article covers
.prettierrcand.gtiattributes- ESLint - Linter - Visual Studio Marketplace
Action: Change the EOL for all files, as specified (see below) on saveScope: Workspace- EditorConfig for VS Code - Visual Studio Marketplace
- Action: Change the EOL for all files, as specified in
.editorconfig, on save- Scope: Workspace
- Additional:
- Supported Properties
indent_styleindent_sizetab_widthend_of_line(on save)insert_final_newline(on save)trim_trailing_whitespace(on save)- Git (Repository) (
.gitattributes)
- Action: Change the EOL for all files
- Scope: Git repository, but only on files as specified in the
.gitattributes- Additional:
- Applied when files are checked-in (submitted) to this Git repo.
- Git (Global Config / Git for Windows) (
.gitconfig)
- Action: Change the EOL for all files
- Scope: All local Git repositories.
- Additional:
- Occurs when files are submitted or retrieved from any Git repo.
- Only
core.autocrf=trueperforms a conversion on EOLs during on Check-in and Checkout, all other settings are Checkin-in only.
How to enforce LF EOL (Windows --> VSCode --> Git)
Making the following changes to your Editor and Repo will ensure the best outcome
- VSCode (User settings) (
%APPDATA%\Code\User\settings.json)
- Scope:
- Set EOL LF for new files, for the User.
- Actions:
- Enable
LFas the defaultEOLfor the current VSCode User
- Command Palette --> Preferences: Open User Settings --> `file end of line` --> `Files: Eol`: \n
- It will indicate LF at the bottom of the dropdown, which is fine as this is is just a note.
- VSCode (Workspace settings) (
.vscode/settings.json)
- Scope:
- Set EOL LF for new files, for the Workspace.
- Actions:
- Enable
LFas the defaultEOLfor the VSCode Workspace
.vscode/settings.json{ "files.eol": "\n" }Command Palette --> Preferences: Open Workspace Settings --> `file end of line` --> `Files: Eol`: \n
- Git (Repository) (
.editorconfig)
- Scope:
- Set EOL LF for new files, for the Git Repository.
- Some VSCode extensions will use the EOL and apply upon save.
- Actions:
- Enable
.editorconfigsupport (Visual Studio does not need this)
- Install EditorConfig for VS Code
- Not required if you use Prettier as this has supports, but you will need to make sure it is configured to respect
.editorconfighowever.prettierrcsettings will always override.editorconfigvalues..editorconfigsets the EOL for new files but these VSCode extensions set the EOL on save.- Create
.editorconfig# EditorConfig is awesome: https://EditorConfig.org # top-most EditorConfig file root = true # Default Behaviour [*] end_of_line = lf- VScode (Extensions) (
.prettierrc) (Prettier)
- Scope:
- Can use .editorconfig or it's own settings, Set EOL LF for new files, for the Git Repository.
- Some VSCode extensions will use the EOL and apply upon save.
- Actions:
- Create
.prettierrc(only needed if using Prettier){ "endOfLine": "lf" }- VScode (Extensions) (
eslint.config.js) (ESLint)
- SCope
- Can use .editorconfig or it's own settings, Set EOL LF for new files, for the Git Repository.
- Some VSCode extensions will use the EOL and apply upon save.
- Actions:
- Create
eslint.config.js(only needed if using ESLint)import { defineConfig } from "eslint/config"; export default defineConfig([ // Default Line Ending { files: ['**/*.*'], rules: { 'linebreak-style': ['error', 'unix'], }, }, // Force batch scripts to always use CRLF line endings { files: ['**/*.[bB][aA][tT]', '**/*.[cC][mM][dD]'], rules: { 'linebreak-style': ['error', 'windows'], }, }, // Force bash scripts to always use LF line endings { files: ['**/*.sh'], rules: { 'linebreak-style': ['error', 'unix'], }, }, ]);- Git (Repository) (
.gitattributes)
- Scope
- Enforce conversion of EOL to LF.
- Actions:
- Create
.gitattributes(optional)
# Default Line Ending
* text=auto eol=lf
- This will change all text file's EOL to LF when checking them into the repository, but not when you check them out in to your working tree (i.e. real files).
- This is a fallback to enforce EOL before committing and should not be needed if everything in your repo is setup correctly.
- Using this setting (* text=auto eol=lf) on it's own can cause corruption in some case, so a more granular .gitattributes configuration should be usedas Git can make mistakes with line endings, e.g. mixed EOL files and those with binary blobs
- Use and this is a base reference and also consult further notes on this page.
* text=auto eol=lfis the same as* text=auto- This rule is doing the same for this repository as
core.autocrf=inputwould do for the whole local Git instance.
EOL Handling Summary
- General
- DO NOT use
core.autocrlfto normalise your line endings
- This can lead to file corruption (i.e. embedded binary blobs in a text file)
- You cannot assume everyone has set their Git development environment the same.
- These settings would be global and thus a local repository would not have control and nor could you mandate changes with your editor.
- While it was useful in the past for source control tools to handle line endings, it really is an editor problem and it was solved with EditorConfig.
- Use
.gitattributesand.editorconfigto configure line normalisation
- These work on a Per-Repository basis.
- This will allow you granular control of EOL.
- Supports files with different EOL.
- Support an individual file with mixed EOL.
- The repository can define the EOL handling rather than individual user environments.
- This is the professional way to setup a repository.
- .git
- Repo (check-in) = Commit = Submitted to Git
- Working Tree (checkout) = The real files on your PC
- .gitconfig
core.autocrlf=true
- Converts text file's EOL to
LFon check-in to the repo from the working tree.- Converts text file's EOL to
CRLFon checkout from the repo to the working tree.- Tends to be recommended setting for Windows developers since it guarantees
LFin the remote copy of your code while allowing you to useCRLFin your working tree for full compatibility with Windows editors and file formats.- This setting only needs be used in a Window environment
, but can work in other OS.core.autocrlf=input
- Converts text file's EOL to
LFon check-in to the repo from the working tree.- Leaves the working tree untouched.
- This would be the same as:
* text=auto eol=lfand* text=auto, but applied globally.- .gitattributes
- Controls how EOL are handled when checking-in files to the Git repository.
- Local files (Working Tree) and their EOL are unaltered by these settings.
- Conflicts might occur when checking out files, but these can be resolved locally without poisoning the repo.
* text=auto eol=lf,* text=autoandcore.autocrlf=inputall do the same thing exceptcore.autocrlf=inputworks at the Git server level and not on a per repository basis.- (untested) This file will override the
core.autocrlfsettings for specified files in this repository if an appropriate rule exists.- Using this file ensures a consistent behavior for all users, regardless of their Git settings and environment.
- .editorconfig
- An open, editor agnostic schema.
- Defines the EOL for all new files.
- Some VSCode extensions use these settings on save, so these settings can work on new and created files.
- VSCode (User Settings)
- Configuring EOL here will only apply to new files.
- You should change the default EOL to LF as a fallback precaution (unless you are working on Windows only environment).
- These settings are only per user which means they are local and are not shared.
- VSCode (Workspace settings)
- Configuring EOL here will only apply to new files.
- You should change the default EOL to LF as a fallback precaution (unless you are working on Windows only environment).
- These settings can be commited to a repo and thus can be shared.
Git for Windows - Installer Questions
Checkout as-is, commit as-is (Git for Windows) (core.autocrlf = false)
Why should I choose this option, here is a simple Pros vs Cons:
- Pro
- All modern editors can handle all EOL types and does not need Git to do any conversions.
- Your code will be exactly the same in the local Git as well as the remote repository.
- Your code will not get corrupted because of the EOL conversions
- You can use a mix of files with different EOL.
- You can submit single files with mixed EOL (currently VSCode does not support mixed EOL).
- You can submit files with any EOL (CRLF / CR / LF).
- Can granular control which files have their EOL translated by Git at the repository level using
.gitattributes. - EOL specified by
.editorconfigwill be honoured and kept when the files are submitted to the repository.
- Con
- Requires the editor and repository to be setup correctly to prevent EOL inconsistencies amongst programmers.
Checkout Windows-style, commit Unix-style line endings (Git for Windows) (core.autocrlf = true)
Why should I choose this option, here is a simple Pros vs Cons:
- Pro
- If your files in a project have different EOL, this could ensure compatibility with minimal input from the user.
- = You should set your development environment up better.
- Good for people who work across different OS and platforms to ensure the repository always has the correct line endings.
- = You should set your development environment up better.
- If your files in a project have different EOL, this could ensure compatibility with minimal input from the user.
- Con
- Can cause corruption in your code e.g. binary blob.
- All EOL will be changed, meaning that if there are mixed EOL, then this difference will be lost whether that be in a single file or files with different EOL.
Bulk Changing EOL
So you already have a load of files with CRLF and now you need them all to be LF before committing them to Git.
- VSCode
- Change All End Of Line Sequence
- Runs the built-in 'Change End Of Line Sequence' on all files of a specified type, leaving them open and unsaved.
- Auto Convert End Of Line
- Automatically convert files with configured end-of-line sequence when they are opened.
- Every time a text files is opened, it converts all the EOL sequences into the specific one from the files.eol configuration, and displays an auto-dismissed notification. If no conversion is needed, or if files.eol is configured to be "auto", this extension does nothing.
- Change All End Of Line Sequence
- Windows
- How do I convert all files in a folder to a different line ending? (on Windows) - Super User
- Installed Cygwin and Dos2unix in Cygwin (You can also use Dos2unix with Powershell if you have it.)
find . -type f -exec dos2unix {} \;
- Installed Cygwin and Dos2unix in Cygwin (You can also use Dos2unix with Powershell if you have it.)
- GitHub - taskscape/LineEndings
- This Windows utility is designed to convert line endings in text files between Windows-style (CRLF) and Unix-style (LF).
- It converts line endings on multiple files in a specified directory.
- EOL Converter | Gogago
- EOL Converter is a Windows app for converting text file line endings between CRLF, LF, and LF formats.
- It has a nice GUI.
- Extensive command-line interface.
- It is a paid app.
- Windows command to convert Unix line endings? - Stack Overflow - This has many different options
- more command
TYPE input_filename | MORE /P > output_filename
- dos2unix / unix2dos
- NodeJS example
- VBScript examples
- Powershell examples
- Python examples
- Command Prompt examples
- Bash examples
- more command
- dos2unix / unix2dos - Text file format converters | waterlan - Windows binaries
- Just a moment... - No meta description
- dos2unix in WSL or in your Shell terminal using the `find` command.
- dos2unix from PowerShell
- How do I convert all files in a folder to a different line ending? (on Windows) - Super User
- Linux
- Converting between Windows and Linux line breaks | Commandline Wizardry
sed -i 's/$/\r/' fileLinux.txt find -type f -exec sed -i 's/$/\r/' '{}' \; tr -d '\r' < fileWindows.txt > fileLinux.txt sed -i 's/\r//' fileWindows.txt - Dos2unix Command on Linux with Examples - idroot - Learn how to effectively use the 'dos2unix' command on Linux to ensure seamless file compatibility.
- Dos2unix: The Linux File Conversion Command Explained
- Ever found yourself grappling with line ending issues when transferring text files between Windows and Unix/Linux systems? You're not alone. You’re not alone. Many developers find themselves in this predicament, but there’s a tool that can help you navigate these choppy waters.
- In this guide, we’ll walk you through the process of using the dos2unix command in Linux, from the basics to more advanced techniques. We’ll cover everything from simple file conversions to handling multiple files, as well as alternative approaches and troubleshooting common issues.
- The dos2unix command is a straightforward yet powerful tool in the Linux arsenal. Its primary role is to convert text files from DOS/MAC to Unix format, which is vital when transferring files between different operating systems.
- Find Out Text File Line Endings - LF or CLRF - ShellHacks
- How to find out the line endings in a text file and how to convert the Unix/Linux newline characters ("n" or "LF") to DOS/Windows ("rn" or "CRLF").
- Change Newline Characters
## To convert the newline characters from DOS/Windows to Unix/Linux:
$ dos2unix <filename>

## To convert the newline characters from Unix/Linux to DOS/Windows:
$ unix2dos <filename>
- Conversion between newline formats - Newline | Wikipedia - Many Linux examples here.
- Converting between Windows and Linux line breaks | Commandline Wizardry
- Python
- GitHub - t-regx/crlf - Command-line tool to recursively convert line endings - t-regx/crlf
- NodeJS
- GitHub - jurosh/nodejs-eol-converter-cli - Newline (EOL) coverter CLI for NodeJs. CRLF -> LF or backwards conversion.
npm i -g eol-converter-cli
eolConverter crlf "**/*.{txt,js,java,etc}"
- GitHub - jurosh/nodejs-eol-converter-cli - Newline (EOL) coverter CLI for NodeJs. CRLF -> LF or backwards conversion.
Links / Research
History of CRLF and LF
- Newline - Wikipedia
- End of Line (EOL): CRLF | linux-cookbook - Lists the ASCII characters and other references.
Handling Line Conversions articles
- Configuring Git to handle line endings - GitHub Docs
- To avoid problems in your diffs, you can configure Git to properly handle line endings.
- This covers:
- .gitattributes Example
# Set the default behavior, in case people don't have core.autocrlf set.
* text=auto

# Explicitly declare text files you want to always be normalized and converted
# to native line endings on checkout.
*.c text
*.h text

# Declare files that will always have CRLF line endings on checkout.
*.sln text eol=crlf

# Denote all files that are truly binary and should not be modified.
*.png binary
*.jpg binary
- This explains the various options
- Harmonizing Line Endings Across Windows and WSL | xakpc.info - When using a Git repository across Windows and Windows Subsystem for Linux (WSL), you may encounter unexpected issues with line endings. This article explains why these issues occur and how to resolve them effectively.
- Guide to line ending handling in Git · GitHub - This guide serves to clear up how Git handles line endings, how to avoid problems with them, how to fix problems if they come up, and some great tools for dealing with line endings in general.
- Git LF to CRLF: Mastering Line Endings Simply - Discover why git lf will be replaced by crlf and how to adapt your workflow. This concise guide simplifies the transition for smooth version control.
- Consistent Configuration: Ensure that every team member has set their `core.autocrlf` appropriately for their operating system.
- Use of .gitattributes: Proper configuration of the `.gitattributes` file can minimize discrepancies; this ensures everyone follows the same rules for line endings.
- Resolving Git Line Ending Issues Once and For All | TheLinuxCode - In this comprehensive 2500+ word guide, you‘ll gain a deeper understanding of controlling Git line endings plus actionable solutions to banish newline woes.
- git - How to change line-ending settings - Stack Overflow
- Global Configuration
- In Linux/OSX
git config --global core.autocrlf input
This will fix anyCRLFtoLFwhen you commit. - In Windows
git config --global core.autocrlf true
This will make sure that, when you checkout in windows, allLFwill be converted toCRLF.
- In Linux/OSX
- .gitattributes File
- It is a good idea to keep a
.gitattributesfile as we don't want to expect everyone in our team to set their own config. This file should be placed in the repository root and, if it exists, git will respect it.
- It is a good idea to keep a
- Global Configuration
- * text=auto in .gitattributes file - DEV Community - In this article, we analyse the .gitattributes from the react/.gitattributes. When you are part of a team, you and your colleagues often work on projects across different operating systems and development environments. As a result, file formatting issues, especially related to line endings, can arise.
- LF vs CRLF - Configure Git and VS Code on Windows to use Unix line endings Background | by Dev To
- This article covers unifying the EOL using
.gitattributesandtext=auto eol=lf - Since teams members may use different operating systems and since open source projects can accept contributions from developers using a variety of operating systems, it is best practice to ensure that all text files (including code files) in a Git repo use Unix line endings (i.e. LF, and not CRLF).
- Therefore, Git on Windows also needs to be configured to use LF as the EOL character instead of CRLF.
- This article covers unifying the EOL using
- Git for Windows: Line Endings | Edward Thomson
- Why not core.autocrlf?
- Phantom Changes
- What About Binaries?
- Line Ending in Git - KK's Blog (fromkk) - When working on a project with multiple developers, the line ending can be troublesome. This article will explain how to configure line ending in Git.
- Guide to line ending handling in Git · GitHub | sheeeng
- This guide serves to clear up how Git handles line endings, how to avoid problems with them, how to fix problems if they come up, and some great tools for dealing with line endings in general.
- NB: not my preferred method but gives information on how the process works.
Checkout as-is, Commit as-is - Reasons for using this method
- (.gitattributes)
- How to configure Git line endings correctly | LabEx (Read this)
- Master Git line ending configurations for seamless cross-platform development, prevent file conflicts, and ensure consistent code formatting across different operating systems.
- This is a detail article with relevant diagrams and explores all aspects of this topic.
- Using .gitattributes for explicit control and set EOL in VSCode to be \n
- .gitattributes Example
## Specify precise line ending behaviors
* text=auto
*.sh text eol=lf
*.bat text eol=crlf
*.txt text eol=lf
- How To: Handle Line Endings with Git | Shane Bart
- Learn how to handle line endings when using git across various operating system platforms
- Option 1: ‘core.autocrlf’ git config (legacy approach)
- Whilst this solution will work well in a single developer environment. It is not recommended in a multi-developer environment, as it relies on all developers in the team to explicitly configure their git configuration, which may not always happen.
- Option 2: Using .gitattributes (Recommended)
- This enables you to capture all required configuration in source control, rather than needing to rely on developers within your team to explicitly configure git.
- Also, try to stay away from using both these approaches together as it is more than likely to create confusion and lead to issues.
- .gitattributes Best Practices - Muhammad Rehan Saeed (Read this)
- Git can actually be configured to automatically handle line endings using a setting called autocrlf. This automatically changes the line endings in files depending on the operating system. However, you shouldn't rely on people having correctly configured Git installations.
- Covers many aspects of this file and how useful it is.
- A complete
.gitattributesfile - Only the first line is strictly necessary. It hard codes the line endings for Windows cmd and batch scripts to CRLF and bash scripts to be LF, so that they can be executed via a file share. It's a practice I picked up from the corefx repository.
- From comments
- Most of the programming editors these days support working with either line ending, regardless of the platform they run on, and most other tools (compilers etc..) are line-ending-agnostic.
- I've found I've had more problems caused by git trying to be helpful and converting my line endings for me, than the other way around. So I'd say best practice is to use
* -textin the.gitattributesand add.editorconfigthat enforces the projects preferred line endings. An added benefit is that you can also specify file encodings in your.editorconfigfile.
- .gitattributes Example
###############################
# Git Line Endings            #
###############################

# Set default behaviour to automatically normalize line endings.
* text=auto

# Force batch scripts to always use CRLF line endings so that if a repo is accessed
# in Windows via a file share from Linux, the scripts will work.
*.{cmd,[cC][mM][dD]} text eol=crlf
*.{bat,[bB][aA][tT]} text eol=crlf

# Force bash scripts to always use LF line endings so that if a repo is accessed
# in Unix via a file share from Windows, the scripts will work.
*.sh text eol=lf

###############################
# Git Large File System (LFS) #
###############################

# Archives
*.7z filter=lfs diff=lfs merge=lfs -text
*.br filter=lfs diff=lfs merge=lfs -text
*.gz filter=lfs diff=lfs merge=lfs -text
*.tar filter=lfs diff=lfs merge=lfs -text
*.zip filter=lfs diff=lfs merge=lfs -text

# Documents
*.pdf filter=lfs diff=lfs merge=lfs -text

# Images
*.gif filter=lfs diff=lfs merge=lfs -text
*.ico filter=lfs diff=lfs merge=lfs -text
*.jpg filter=lfs diff=lfs merge=lfs -text
*.pdf filter=lfs diff=lfs merge=lfs -text
*.png filter=lfs diff=lfs merge=lfs -text
*.psd filter=lfs diff=lfs merge=lfs -text
*.webp filter=lfs diff=lfs merge=lfs -text

# Fonts
*.woff2 filter=lfs diff=lfs merge=lfs -text

# Other
*.exe filter=lfs diff=lfs merge=lfs -text
- Git for Windows: Line Endings | Edward Thomson
- The key to dealing with line endings is to make sure your configuration is committed to the repository, using
.gitattributes. - Checkout Windows-style, commit Unix-style line endings: This is why one of the most common symptoms of a line ending configuration problem is seeing “phantom changes”: running
git statustells you that you’ve changed a file, but runninggit diffdoesn’t show you any changes.
- The key to dealing with line endings is to make sure your configuration is committed to the repository, using
- Git Handling Line Endings (CRLF) | git-cookbook
- This covers both .gitconfig and .gitattributes with good examples
- CRLF conversion bears a slight chance of corrupting data. When
core.autocrlfis enabled, Git will convert CRLF to LF during commit and LF to CRLF during checkout. A file that contains a mixture of LF and CRLF before the commit cannot be recreated by Git. For text files this is the right thing to do: it corrects line endings such that we have only LF line endings in the repository. But for binary files that are accidentally classified as text the conversion can corrupt data. - Unfortunately, the desired effect of cleaning up text files with mixed line endings and the undesired effect of corrupting binary files cannot be distinguished. In both cases CRLFs are removed in an irreversible way. For text files this is the right thing to do because CRLFs are line endings, while for binary files converting CRLFs corrupts data.
core.safecrlfis basically just a way to make sure you don’t irreversably perform CRLF conversion on a binary file.- Optionally, you can configure a
.gitattributesfile to manage how Git reads line endings in a specific repository. When you commit this file to a repository, it overrides thecore.autocrlfsetting for all repository contributors. This ensures consistent behavior for all users, regardless of their Git settings and environment. - Some good examples.
- core.eol - Sets the line ending type to use in the working directory for files that are marked as text. Alternatives are
lf,crlfandnative, which uses the platform’s native line ending. The default value isnative.git config core.eol lf # LF git config core.eol crlf # CRLF git config core.eol native # platform (default)
- .gitattibutes example
# Set the default behavior, in case people don't have core.autocrlf set.
* text=auto

# Explicitly declare text files you want to always be normalized and converted
# to native line endings on checkout.
*.c text
*.h text

# Declare files that will always have CRLF line endings on checkout.
*.sln text eol=crlf

# Denote all files that are truly binary and should not be modified.
*.png binary
*.jpg binary
- How to configure Git line endings correctly | LabEx (Read this)
- (.gitattributes) (.editorconfig)
- CRLF vs. LF: Normalizing Line Endings in Git | Aleksandr Hovhannisyan (Read this)
- Line endings can differ from one OS to another. Learn the history behind CRLF and LF line endings and how to enforce line endings in Git.
- The typical advice is to configure your local Git to handle line ending conversions for you. For the sake of comprehensiveness, we’ll look at how that can be done in this article, but it isn’t ideal if you’re on a large team of developers.
- The
core.autocrlfsetting isn’t the ideal approach for configuring line endings in a project.
- The
- A better solution is to add a
.gitattributesfile to your repo so you can enforce line endings consistently in your codebase regardless of what operating systems your developers are using. - A
.gitattributesfile is technically all that you need to enforce the line endings in the remote copy of your code. However, as we just saw, you may still seeCRLFline endings on Windows locally because.gitattributesdoesn’t tell Git to change the working copies of your files. Fortunately, we can take things a step further with an.editorconfigfile; this is an editor-agnostic project that aims to create a standardized format for customizing the behavior of any given text editor. Lots of text editors (including VS Code) support and automatically read this file if it’s present. - Gives the history of these control characters and the specific differences.
- Configuring Line Endings in Git with core.autocrlf
- By default,
core.autocrlfis set tofalseon a fresh install of Git, meaning Git won’t perform any line ending normalization. Instead, Git will defer to thecore.eolsetting to decide what line endings should be used;core.eoldefaults tonative, which means it depends on the OS you’re using. That’s not ideal because it means thatCRLFmay make its way into your code base from Windows devs. - Both of these options enable automatic line ending normalization for text files, with one minor difference:
core.autocrlf=trueconverts files toCRLFon checkout from the repo to the working tree, whilecore.autocrlf=inputleaves the working tree untouched. - For this reason,
core.autocrlf=truetends to be recommended setting for Windows developers since it guaranteesLFin the remote copy of your code while allowing you to useCRLFin your working tree for full compatibility with Windows editors and file formats.
- By default,
- A Simple .gitattributes Config
- The following
.gitattributesconfig normalizes line endings toLFfor all text files checked into your repo while leaving local line endings untouched in the working tree: - More specifically, the
text=autooption tells Git to only normalize line endings toLFfor text files while leaving binary files (images, fonts, etc.) untouched. This distinction is important—we don’t want to corrupt binary files by modifying their line endings. - After committing the
.gitattributesfile, your changes won’t take effect immediately for files checked into Git prior to the addition of.gitattributes. To force an update, you can use the following command since Git 2.16:
- The following
- Many Git commands are shown and explained.
- Summary
- That was a lot to take in, but hopefully you now have a better understanding of the whole CRLF vs. LF debate and why this causes so many problems for teams that use a mixture of Windows and other operating systems. Whereas Windows follows the original convention of a carriage return plus a line feed (
CRLF) for line endings, operating systems like Linux and Mac use only the line feed (LF) character. - The history of these two control characters dates back to the era of the typewriter. While this tends to cause problems with software like Git, you can specify settings at the repo level with a
.gitattributesfile to normalize your line endings regardless of what operating systems your developers are using. - You can also optionally add an
.editorconfigfile to ensure that new files are always created withLFline endings, even on Windows.
- That was a lot to take in, but hopefully you now have a better understanding of the whole CRLF vs. LF debate and why this causes so many problems for teams that use a mixture of Windows and other operating systems. Whereas Windows follows the original convention of a carriage return plus a line feed (
- Comments
- Using a
.gitattributesfile is indeed the best practice, but if you are working on a personal repository, it shouldn’t matter. In fact,autocrlf=truewouldn’t cause any problems even if you were working with other Linux/Mac developers since the remote code would always haveLFline endings anyway. The main reason whyautocrlfis not useful is because you have to keep setting it up every time you get a new Windows machine (since line ending normalization is turned off by default in Git). If you forget to set it up, you’ll re-introduceCRLFinto the remote code. From my article:
- Using a
- The typical advice is to configure your local Git to handle line ending conversions for you. For the sake of comprehensiveness, we’ll look at how that can be done in this article, but it isn’t ideal if you’re on a large team of developers.
- Line endings can differ from one OS to another. Learn the history behind CRLF and LF line endings and how to enforce line endings in Git.
- Normalizing Line Endings in Git: CRLF vs. LF - MyBlueLinux.com
- If you’ve ever worked on a project where developers use different operating systems, you know that line endings can be a peculiar source of frustration.
- The typical advice is to configure your local Git to handle line ending conversions for you. For the sake of comprehensiveness, we’ll look at how that can be done in this article, but it isn’t ideal if you’re on a large team of developers.
- A better solution is to add a .gitattributes file to your repo so you can enforce line endings consistently in your codebase regardless of what operating systems your developers are using.
- We’ll briefly review the history behind line endings on Windows and Unix so we can understand why this issue exists in the first place.
- By default, core.autocrlf is set to false on a fresh install of Git, meaning Git won’t perform any line ending normalization. Instead, Git will defer to the core.eol setting to decide what line endings should be used; core.eol defaults to native, which means it depends on the OS you’re using. That’s not ideal because it means that CRLF may make its way into your code base from Windows devs.
- That leaves us with two options if we decide to configure Git locally: core.autocrlf=true and core.autocrlf=input. The line endings for these options are summarized below.
- core.autocrlf=true / LF / CRLF
- core.autocrlf=input / LF / original (usually LF, or CRLF if you're viewing a file you created on Windows)
- Both of these options enable automatic line ending normalization for text files, with one minor difference: core.autocrlf=true converts files to CRLF on checkout from the repo to the working tree, while core.autocrlf=input leaves the working tree untouched.
- core.autocrlf=true / * text=auto eol=crlf / LF / CRLF
- core.autocrlf=input / * text=auto / LF / original (LF or CRLF)
- CRLF vs. LF: Normalizing Line Endings in Git | Aleksandr Hovhannisyan (Read this)
- (.editorconfig)
- Using the .editorconfig in VS2019 and VSCode | ASP.NET Hacker
- In the backend developer team of the YOO we are currently discussing coding style guidelines and ways to enforce them. Since we are developer with different mindsets and backgrounds, we need to find a way to enforce the rules in a way that works in different editors too.
- The
.editorconfigis a text file that overrides the settings of the editor of your choice. - Almost every code editor has settings to style the code in a way you like, or the way your team likes. If this editor supports the
.editorconfigyou are able to override this settings with a simple text file that usually is checked in with your source code and available for all developers who work on those sources. - If VS2019 finds an
.editorconfigit will use it immediately and it will check your code on every code change.
- Windows Git Users: Don't Convert Line Endings - With conversion enabled, the checked-out files are in a different state than their source repository. This can lead to strange errors where build artifacts or files transferred to other systems are subtly different than those generated from the unmodified source.
- Using the .editorconfig in VS2019 and VSCode | ASP.NET Hacker
Git and Repository EOL Configuration
- .gitconfig (Global settings)
- git-config | Documentation | git-scm.com
- How to use the git .gitconfig file for a more efficient workflow | TechRepublic - Jack Wallen shows how to use the .gitconfig file for global git configurations and a more efficient developer setup.
- Where is the global Git configuration data stored? - Stack Overflow - Give the various locations of the relevant files.
- .gitattributes
- Configuring Git to handle line endings - GitHub Docs - To avoid problems in your diffs, you can configure Git to properly handle line endings.
- gitattributes | Documentation | git-scm.com - List the relevant switches and values.
- text - gitattributes | Documentation | git-scm.co
- This attribute marks the path as a text file, which enables end-of-line conversion: When a matching file is added to the index, the file’s line endings are normalized to LF in the index. Conversely, when the file is copied from the index to the working directory, its line endings may be converted from LF to CRLF depending on the
eolattribute, the Git config, and the platform (see explanation ofeolbelow).
- This attribute marks the path as a text file, which enables end-of-line conversion: When a matching file is added to the index, the file’s line endings are normalized to LF in the index. Conversely, when the file is copied from the index to the working directory, its line endings may be converted from LF to CRLF depending on the
- 8.2 Customizing Git - Git Attributes | Documentation | git-scm.com
- Using attributes, you can do things like specify separate merge strategies for individual files or directories in your project, tell Git how to diff non-text files, or have Git filter content before you check it into or out of Git.
- In this section, you’ll learn about some of the attributes you can set on your paths in your Git project and see a few examples of using this feature in practice.
- Git .gitattributes | W3 Schools
- The
.gitattributesfile is a special file that tells Git how to handle specific files in your repository. - It controls things like line endings, file types, merge behavior, custom diff tools, and more.
- Everyone on your team gets the same settings because this file is versioned with your project.
- Put
.gitattributesin subfolders for rules that only apply there.
- The
- gittattributes force all text files to lf - Bing Search
- To ensure all text files in your Git repository use LF (Line Feed) as the line-ending format, you can configure a
.gitattributesfile. Here's how you can do it: - Steps:
- Create or edit a .gitattributes file in the root of your repository.
- Add the following line to enforce LF for all text files:
* text=auto eol=lf
- Explanation:
*: Matches all files in the repository.text=auto: Tells Git to automatically detect text files.eol=lf: Ensures that line endings are normalized to LF when files are checked out.
- Additional Notes:
- If you already have files with CRLF endings in your repository, you may need to normalize them. Run the following commands after setting up
.gitattributes:git add --renormalize . git commit -m "Normalize line endings to LF"
- This ensures consistency across different operating systems and prevents issues caused by mismatched line endings.
- If you already have files with CRLF endings in your repository, you may need to normalize them. Run the following commands after setting up
- To ensure all text files in your Git repository use LF (Line Feed) as the line-ending format, you can configure a
- Why does .gitattributes not override core.autocrlf configuration on Linux? - Stack Overflow
- So if you want to use attributes to control the line ending you get in the work tree, you need to set the eol attribute (not merely the text attributes).
- So, to answer your question: no, what you've described is not a bug.
- .editorconfig
- The .editorconfig is a text file that overrides the settings of your editor of your choice.
- The benefit is that irrelevant of what editor or OS your colleague has, their editor will apply the settings as defined in this file (if the editor support .editorconfig).
- The .editorconfig file is used to maintain consistent coding styles across different editors and IDEs, including Visual Studio Code (VSCode). It allows you to define settings such as indentation style, tab width, and line endings, ensuring that all contributors to a codebase adhere to the same formatting rules.
- Visual studio VS2019+ (i.e. full) supports .editorconfig out of the box
- Visual Studio code needs a plugin to enable .editorconfig support (Which is only partial)
- EditorConfig - EditorConfig is a file format and collection of text editor plugins for maintaining consistent coding styles between different editors and IDEs.
- .editorconfig Examples
- joomla-cms/.editorconfig at 5.3-dev · joomla/joomla-cms · GitHub - An etremely good example to look at, not too complicated but does the job.
- EditorConfig doesn't work well in VSCode (in specific files) · Issue #360 · editorconfig/editorconfig-vscode · GitHub
- vscode/.editorconfig at main · microsoft/vscode · GitHub - Visual Studio Code.
VSCode EOL Configuration
- How to change EOL
- Windows and Linux EoL Sequence - Configure VS Code and Git | by Chandrashekar Munukutla | Medium - If you have modified and uploaded any code to Git on both Linux and Windows systems, and have encountered issues with line endings, then this article is for you.
- VSCode does not support mixed line endings
- Provide option to opt out of line ending normalisation for files · Issue #127 · microsoft/vscode · GitHub
- This would be important when editing files with a binary payload. Think shellscripts with a built-in binary blob, or data files with a plaintext header part.
- The current file model normalizes the line endings as soon as the file is read (i.e. each line does not keep track of its EOL), the model only keeps track of one EOL for the entire file (which is computed on file open as the predominantely used EOL character).
- Provide option to opt out of line ending normalisation for files · Issue #127 · microsoft/vscode · GitHub
- VSCode does not support CR line endings
- Can we support CR line endings as well as LF and CRLF? · Issue #35797 · microsoft/vscode · GitHub
- VSCode supports LF line endings, and CRLF line endings, but it doesn't support CR line endings.
- There are some exotic platforms which still require them, such as e.g. pre OSX MacOS, and the amount of work involved ought to be trivial. This is ff=mac mode in vim.
- Lots of industrial machinery still use CR.
- Add support for CR line endings! · Issue #211461 · microsoft/vscode · GitHub
- Here is a non-inclusive list of older systems which use CR on EOL. (From Wikipedia except for list line which is my use case)
- Commodore 8-bit machines C64, C128
- Acorn BBC
- ZX Spectrum
- TRS-80
- Apple II
- Oberon
- Classic Mac OS
- HP Series 80
- MIT Lisp Machine OS-9
- Sharp Pocket computers, i.e. PC-1500 (my use case)
- Here is a non-inclusive list of older systems which use CR on EOL. (From Wikipedia except for list line which is my use case)
- Can we support CR line endings as well as LF and CRLF? #35797 · Issue #212770 · microsoft/vscode · GitHub
- HL7 messaging standard is the workhorse of electronic data exchange in the clinical domain and arguably the most widely implemented standard for healthcare in the world.
- HL7 message require CR or \r EOL sequence. It's very annoying that this feature is unavailable in VS code when saving the message.
- When exactly did Mac OS switch character for new line from '\r' to '\n' ? - Apple Community
- Classic macOS used a carriage return and OS X/macOS has always used a newline because of its BSD UNIX heritage. Even NeXTStep/OpenStep used newlines because it was based on 4.2 BSD and the Mach kernel.
- Any text file coming from MS Windows has a carriage-return/linefeed pair for line endings and that is incompatible with macOS until these documents are stripped of that carriage-return.
- Was the switch between OS 9 and OS X (MacOS)? If so, they coexisted for a while i think.
- Can we support CR line endings as well as LF and CRLF? · Issue #35797 · microsoft/vscode · GitHub
- Show Line Endings
- How to Show and Set Line endings in Visual Studio Code | bobbyhadz - A step-by-step illustrated guide on how to show and set line endings in Visual Studio Code.
- Files EOL (Modified elsewhere)
- EOL says elsewhere modified but no modication was ever done · Issue #167934 · microsoft/vscode · GitHub
- Hover over the (Modified elsewhere) for more information.
- This could be caused by an extension e.g. Prettier?
- A way to reset the setting in the UI still is to click on the gear icon and press the "Reset Setting" option while in the shellscript language scope.
- EOL says elsewhere modified but no modication was ever done · Issue #167934 · microsoft/vscode · GitHub
My Passkeys Notes
to be continued
- About passkeys - GitHub Docs
- Passkeys allow you to sign in safely and easily, without requiring a password and two-factor authentication.
- Passkeys are webauthn credentials that validate your identity using touch, facial recognition, a device password, or a PIN. They can be used as a password replacement or as a 2FA method. Passkeys can be used for sign-in as a simple and secure alternative to your password and two-factor credentials.
- look at
- https://forums.grc.com/threads/passkeys-mess.1949/
- https://forums.grc.com/threads/sn965-and-sn966-passkeys-vs-passwords.1546/ - a good thread
- https://www.grc.com/sn/sn-965.pdf - Passkeys vs 2FA - Steve Gibson
- https://www.grc.com/sn/sn-874.pdf - Passkeys, Take 2 - Steve Gibson
- get notes from github article, passkeys setion
My Netbeans Notes
Add a custom file extension to Netbeans
I am trying to figure out how to add a custom file type to be recognised by Netbeans.
I am editing .tpl files and I would like them to be recognised as PHP/HTML files.
Solution
- Open preferences.
- Select Miscellaneous tab.
- Select Files sub-tab thing.
- Click on New file extension and enter tpl.
- Select the mime type.
- Click ok. Done!
Coloured background in tpl cannot be turned off
- go to Tools -> Options -> Fonts&Colors
- choose language 'Smarty Templates'
- choose Category 'Background'
- you can change colour to your one or choose 'Inherited'
This option will use default editor colour, so no colouring any more.
Cannot find java.exe in specified jdkhome
If you upgrade your Java SDK, the NetBeans IDE may give you the following error message (Invalid jdkhome specified) at startup:
Cannot find java.exe in specified jdkhome.
Neither C:\Program Files\Java\jdk1.6.0_10\jre\bin\java.exe
    nor C:\Program Files\Java\jdk1.6.0_10\bin\java.exe exists.
Do you want to try to use default version?
This can be corrected by manually editing the netbeans.conf file found under:
%PROGRAMFILES%\NetBeans 6.5\etc
Replace the line netbeans_jdkhome with the correct path information. Alternatively, you can comment out the line entirely with # and NetBeans will use your default JDK, through JAVA_HOME.
Netbeans - doesn't match expected UUID
In Netbeans using SVN Subversion you get the following error when you try and sync/checkout files.
svn: Repository UUID '1a063a9b-81f0-0310-xxxxx etc' doesn't match expected UUID '7be80a69-xxxxxx etc'
(I've xxxxx'd out some of the UUID numbers in case they were sensitive in nature)
Notes
- You can't switch from one repository to another. You will have to check out WordPress 3.0 and overwrite your SVN.
- that you have to backup the custom directories (themes, plugins etc) and then do a new install. So deleting all the existing files/directories and doing a new CO with the WP 3.0 code.
- The --relocate flag is used to relocate a SVN to a new URL, but it must be the same SVN repo. A SVN has a GUID and the GUID has to be the same at the new location as the GUID at the old location.
- Files in a local repository have a reference stored in their .svn file, the GUID. These GUID must match those stored in the remote repository. Sometimes they can become mismatched causing this error.
Solution
- Backup files in your local repository
- delete all the files including hidden ones from your local repository
- checkout files again using SVN Subversion.
- swapped any files that had not been updated and they will then be reflected in the remote repository and a checkout is run again.
My Preferred Netbeans Settings
This will be a collection of preferred settings for netbeans. This will prevent me hunting to change that one setting for that annoying feature.
Disable mysql auto closing
When you press return/enter to split SQL statements, Netbeans automaticlly closes the statement and then re-opens it. This makes the code evern messier.
options --> editor --> code completion --> PHP language --> disable 'Use String Auto-Concatenation after Typed Break'
Netbeans Search
Search is not working
- make sure there is nothing in the 'File Name Patterns' box
- mark text can cauyse some issues so go to options->editor->marked occurances, then off/on
- reboot netbeans
- make sure you have the correct scope selected
Regex search
These are some examples of searches in netbeans using a Regex pattern
So i want to change some <input> tags.
<input .....>
to
<input ..... />
The following will search for all <input strings that do not terminate in />
Search String:
<input(.*)([^\/])>

Replacement String:
<input$1$2 />
However this does not take into account of whether there is a space at the end so I need to do another search for:
<input(.*)({space}){2}\/> - needs finishing
Notes
- ^ is a 'not' character when within []
[^\/]
Netbeans, Subversion and Windows 7 64-bit…
A minor issue is that the built in Netbeans Subversion integration doesn’t work in a 64-bit install. It helpfully provides a link to the Subversion client software at CollaNet, however the most recent version for Windows is v1.5.5 which isn’t a lot of help if you are using Subversion 1.6.x.

GitHub
Here I will give the basic instructions on how to use GitHub with Netbeans. I can be confusing at the beginning but does get easier.
- If you checkout a project first in Netbeans it will ask you if you want to create a project
- If you split metadata and files it keeps prompting/prefilling with meta location
- If I use meta data in same folder, what happens 1 folder I can exclude (Netbeans automatically excludes the Netbeans meta folder via the gitexclude.git file)
- Once a project is checked out the extra functions are available (via menu) for uploading changed etc..
- If you leave metadata in the same folder as your project it adds a [.gitignore] file and a nbproject folder which I think gets ignored.
- Keeping the meta data in the project folder is better for allowing you to move and managed projects easier.
Clone rep
- Clone the repository to the required location
- (Team/Clone) i.e. to your local webserver root directory
- Git repository URL is from github and easy to find
- Select MASTER only
- Clone
- You have the option of netbeans checking to see if there is a project for this repository and if not gives you the option to create one.
Create project
Keep files in the project folder
Other
- A Netbeans tab adds 4x spaces into the code, not a tab character, but interprets 4 spaces as a tab (this is the professional way to do it and maintains code layout between software)
- In MyITCRM, the smarty stuff is tabbed in using the tab character causing it to look funny
- Notepad++ can swap tab button behaviour to spaces in preferences/tab settings = Replace by space, leave as 4
- Professionals say use spaces and not tab character because of formatting issues
My GitHub Notes
This will be a collection of GitHub specific, Git and how to layout your project's Repository.
TL;DR
I have put my real quick overview of accounts plans and who should use what here.
- Public repositories
- Host open source projects in public GitHub repositories, accessible via web or command line.
- Public repositories are accessible to anyone at GitHub.com.
- Collaborators and members for public repositories are always unlimited irrespective of your personal plan (e.g. free, Pro) or your organization's plan (e.g. Free, teams, Enterprise)
- Private repositories
- Host code in private GitHub repositories, accessible via appliance, web, and command line.
- Private repositories are only accessible to you and people you share them with.
- Collaborators and members for private repositories:
- On a GitHub personal account (Free, Pro), collaborators and members are unlimited.
- On a GitHub Free Organization, collaborators and members are unlimited.
- Although collaborators and organization members serve different purposes within GitHub, for organizations subscribed to GitHub Team collaborators must occupy a paid seat in order to access private repositories. Organization members always require a paid seat.
- If you decide to upgrade your organization from GitHub Free to GitHub Team, you must add a paid seat for each organization member as well as each collaborator for them to keep access.
- No data will be lost, just access for those who do not have a seat.
- You only need to buy seats for those users that you want to have access to the organizations repositories going forward, not for everybody who has every made a change or contribution to any of the organization's repositories.
- Upgrading your account's plan - GitHub Docs - If you'd like additional users to have access to your GitHub Team organization's private repositories, you can purchase more seats anytime.
- Pricing Plans
- All pricing @ GitHub is done on a per-user basis.
- Personal accounts and organization seats are classed as separate Billing entities.
- If you upgrade your personal account from GitHub Free to the GitHub Pro plan then you can:
- get additional features for your personal Private repositories such as Pages and Wikis
- you will also get more Git features and various Code workflow enhancements for both your Public and Private repositories.
- If you use GitHub Team for your organization you will also get enhancements for your Public and Private repositories as-well as improved organization management better granular user role control.
- User Accounts
- A user account is for one person and some times is referred to as a `Personal Account`.
A person only needs one user account.You only need one Facebook account right!- This account can be used to host all of a user's project and also be used to login in to organizations.
- There are currently 2 pricing plans for an `personal` account, Free and Pro.
- If you are an individual developers with no commercial angle, then you should just use a personal/single account for all of your repositories.
- If you need more actions, features and that other stuff then you can upgrade your account to Pro.
- I would use my personal account where I need to fork a repo to push some fixes to someone else's code.
- A user can own more than one organization.
- Organizations
- Organizations are shared accounts where businesses and open-source projects can collaborate across many projects at once, with sophisticated security and administrative features.
- GitHub Free allows you to add as many members and collaborators to your organization as you’d like at no charge.
- There are currently 3 pricing plans for an account, Free, Team and Enterprise.
- Having an organization for your company ensures that the assets are not controlled by single member of staff under their personal account.
You should use an organization for your code if:
- If you are a company and you are making software.
- If you are a individual developer or a company that is going to sell software.
- You will need to collaborate with team members or other entities.
- Your software project(s) will be large.
- Features:
- Allow for collaboration between team members and other entities.
- Allows more granular permissions for repositories that belong to the organization.
- An organisation can have public and private members. Public members do not count towards your organizations seats.
- Allow for for organising repositories by groups such as; Company, Code Language, Software Type, etc.....
- You can convert your personal account into an organization (but this is not best practice).
- You can identify an organization easily because thy have a people tab.
- Organizations can have more than one organization owner to avoid lapses in ownership.
- Teams
- The concept of Teams in GitHub allows for greater flexibility for collaboration and integration, as well as separation of repositories and permissions.
- Enterprise accounts
- Are for very large companies, or those teams that need to manage multiple organisations but all under the same company banner.
- Pricing is done per member, each member requires a seat/license, I am assuming there will always be at leats one member.
- Discounts
- Discounted plans for GitHub accounts - GitHub Docs - GitHub provides discounts to students, educators, educational institutions, nonprofits, and libraries.
GitHub Official Sites
- GitHub - Join the world's most widely adopted, AI-powered developer platform where millions of developers, businesses, and the largest open source community build software that advances humanity.
- Marketplace · Tools to improve your workflow | GitHub - Find the tools that help your team build better, together.
- GitHub Skills | GitHub - Learn how to use GitHub with interactive courses designed for beginners and experts.
- GitHub Resources | GitHub - From setup to optimization, learn how to use GitHub to get the job done.
- Choose a License - Non-judgmental guidance on choosing a license for your open source project
- GitHub - YouTube - Official YouTube channel
- GitHub Sponsors · GitHub - Invest in the open source projects you depend on with GitHub Sponsors.
- Software Support and Product Help - GitHub Support - Access your support options and sign in to your account for GitHub software support and product assistance. Get the help you need from our dedicated support team.
- The GitHub Blog - Updates, ideas, and inspiration from GitHub to help developers build and design software.
- GitHub Gists | GitHub - Instantly share code, notes, and snippets.
- GitHub Classroom | GitHub - GitHub Classroom automates repository creation and access control, making it easy for teachers to distribute starter code and collect assignments on GitHub.
- GitHub - github/dev | GitHub
- Press the . key on any repo. Contribute to github/dev development by creating an account on GitHub.
- The github.dev web-based editor is a lightweight editing experience that runs entirely in your browser. You can navigate files and source code repositories from GitHub, and make and commit code changes.
- Press the . key on any repository or pull request.
- Swap
.comwith.devin the URL. For example, this repo https://github.com/github/dev becomes http://github.dev/github/dev - It’s a quick way to edit and navigate code. It's especially useful if you want to edit multiple files at a time or take advantage of all the powerful code editing features of Visual Studio Code when making a quick change. For more information, see our documentation.
- GitHub Docs - Get started, troubleshoot, and make the most of GitHub. Documentation for new users, developers, administrators, and all of GitHub's products.
- GitHub Skills · GitHub - Learn how to use GitHub with interactive courses designed for beginners and experts. - GitHub Skills
- GitHub - skills/introduction-to-github - Get started using GitHub in less than an hour.
- GitHub Community · GitHub - Ask questions, get answers, share expertise.
- GitHub Training Kit - GitHub Cheatsheets - Github Git Cheat Sheets Training Kit
- Expert Services | GitHub · GitHub - From idea to implementation, our experts are ready to help your team get wherever you want to go. Start a conversation with us about how we can bring your goals to life.
- GitHub School · GitHub - A repo used for training.
- Schools - GitHub Education · GitHub - Teach with industry-standard tools. Get free access with training for students and faculty.
- GitHub Classroom - GitHub Classroom automates repository creation and access control, making it easy for teachers to distribute starter code and collect assignments on GitHub.
- GitHub Status - Welcome to GitHub's home for real-time and historical data on system performance.
- GitHub Status - Incident History - GitHub's Incident and Scheduled Maintenance History.
- Contact - Software Support and Product Help - GitHub Support - Access your support options and sign in to your account for GitHub software support and product assistance. Get the help you need from our dedicated support team
- The GitHub Training Team · GitHub - Teaching the world how to effectively use the GitHub collaboration platform - The GitHub Training Team
- GitHub Training Manual - The Official GitHub Training Manual
- GitHub Next - GitHub Next investigates the future of software development
- GitHub Support
- GitHub software support and product assistance. Get the help you need from our dedicated support team.
- A lot of topics are available to personal accounts, some might redirect to the `Virtual Assistant` or GitHub Community discussions.
- Contacting GitHub Support - GitHub Docs - You can use the GitHub Support portal to contact GitHub Support for help troubleshooting issues you encounter while using GitHub.
- Creating a support ticket - GitHub Docs
- If your account uses a paid GitHub plan, Copilot Business, or Copilot Enterprise, you can directly contact GitHub Support.
- If your account uses GitHub Free, you can speak to GitHub users and staff on the GitHub Community discussions for most issues, and you can contact GitHub Support to report account, security, and abuse issues.
Markdown Cheatsheets
- Basic writing and formatting syntax - GitHub Docs - Create sophisticated formatting for your prose and code on GitHub with simple syntax.
- Markdown_Cheatsheet - arcanecode/VSCode_User_Snippets · GitHub - This document is a Markdown quick reference. It is by no means a comprehensive tutorial on Markdown, but rather just some of the most common Markdown tags to serve as a reminder.
Misc Sites
- gitmoji | An emoji guide for your commit messages - An emoji guide for your commit messages.
Software for GitHub
- GitHub - refined-github/refined-github
- Browser extension that simplifies the GitHub interface and adds useful features.
- Avaiable for Firefox, Chromium browsers and Safari.
- GitHub - refined-github/github-url-detection
- Which GitHub page are you on? Is it an issue? Is it a list? Perfect for your WebExtension or userscript.
- I think it is TypeScript.
Using GitHub
- Tutorials
- Filtering and searching issues and pull requests - GitHub Docs - To find detailed information about a repository on GitHub, you can filter, sort, and search issues and pull requests that are relevant to the repository.
- Searching issues and pull requests - GitHub Docs - You can search for issues and pull requests on GitHub and narrow the results using these search qualifiers in any combination.
- How to maintain two repositories internal/private and one open-source · GitHub | igorcosta - Managing multiple repositories that serve distinct but interconnected purposes can be a challenging task. This scenario is common when an organization wishes to contribute to an open-source project while also maintaining an internal space for private collaboration.
- Showing an overview of your activity on your profile - GitHub Docs - You can enable the activity overview section on your profile to give viewers more context about the types of contributions you make.
- Viewing contributions on your profile - GitHub Docs - Your profile shows off your pinned repositories, Achievements, and a graph of your repository contributions over the past year.
- View Forks
Repository --> Insights --> Forks
- Filters:
- By default the list will only show forks with activity within the last 2 years, so make sure you set the filters accordingly.
- There are many filters.
- The filter
Repository Type = Network (Forks of other forks)can be quite useful.
- Switch to tree view: This is useful as it lets you see more repositories on the page at the same time. I think this is how it use to look on GitHub.
- Filters:
- Compare different Branches / Versions
https://github.com/Open-Shell/Open-Shell-Menu/compare/v4.4.190...v4.4.191
- View everyone who has starred a specific repository
- add
/stargazersto the end of the repositories URL. - For example, to view stargazers for the github/docs repository, visit https://github.com/github/docs/stargazers or https://github.com/shoulders/qwcrm/stargazers
- How can I list people who have starred my GitHub repository? - Web Applications Stack Exchange
- I'm curious as to who has starred a GitHub repo of mine, so I'd like a list of users who have starred it. Is this possible to get?
- Same URL answer as above but also adds a Python script that you can use which leverages the GitHub API.
- add
GitHub Structure
Account Plans / Pricing
- Pricing
- Pricing · Plans for every developer · GitHub - Whether you're starting an open source project or choosing new tools for your team, we’ve got you covered.
- GitHub’s plans - GitHub Docs - An overview of GitHub's pricing plans.
- GitHub offers free and paid plans for storing and collaborating on code. Some plans are available only to personal accounts, while other plans are available only to organization and enterprise accounts.
- The plans
- GitHub Made All Its Core Features Free For Everyone - Here‘s Why You Should Care - ExpertBeacon - For years, some of GitHub’s most helpful features required users to upgrade from the free tier to a paid subscription ranging from $4 to $21 per user/month. However, GitHub recently announced that all of its core features are now included for free for all users.. In this post, I’ll summarize what changed, analyze why GitHub likely made this move, and explain why it matters so much for developers.
- Q&A from GitHub Sales Deelopment Representative
- Do I pay per user in the organization?
- Yes. All GitHub plans (Team or Enterprise) are billed per user, regardless of how many repositories they access.
- Do I have to pay a fee for the organization and then per user?
- No. There is no separate base fee. You only pay per active user in the organization. One user = one seat.
- Is a paid user in GitHub like a seat I can assign to any user I want?
- Yes. Each paid seat is tied to an individual GitHub account in your organization. You can invite/remove users, and the billing updates accordingly.
- What happens if I have more users than seats?
- You will automatically be billed for any additional users beyond your current seat count. GitHub tracks active users monthly for billing purposes.
- Are limitations applied to the users or the organization?
- It depends:
- Features like SSO, audit logs, and role-based access are tied to the organization’s plan (e.g., Team or Enterprise).
- Billing is per user.
- Storage limits, repository insights, and access controls also depend on the organization plan, not the user’s individual plan.
- It depends:
- If I have a Pro personal account, do my features carry over into the organization?
- No. Features from a personal Pro account apply only to your personal account and repositories, not to the organization. The organization will need its own paid plan (Team or Enterprise) to unlock advanced features.
- Do you have anymore information
- For a breakdown of GitHub’s per-user pricing model, this page is a helpful reference: About per-user pricing
- And to compare GitHub Free, Team, and Enterprise features, you can use this overview: GitHub Plans Comparison (scroll down).
- Do I pay per user in the organization?
- Upgrading / Downgrading Account Plan
- Downgrading your account's plan - GitHub Docs
- You can downgrade the plan for any type of account on GitHub at any time.
- After an organization's plan is downgraded, the organization will lose access to any functionality that is not included in the new plan. If an advanced feature, such as GitHub Pages, is not available for private repositories in your new plan, consider whether you'd like to retain access to the feature by making affected repositories public.
- Removing paid seats from your organization: To reduce the number of paid seats your organization uses, you can remove members from your organization or convert members to outside collaborators and give them access to only public repositories.
- Upgrading your account's plan - GitHub Docs
- You can upgrade the plan for any type of account on GitHub at any time.
- About upgrades
- Each account on GitHub is billed separately.
- Upgrading an organization account enables paid features for the organization's repositories only and does not affect the features available in repositories owned by any associated personal accounts.
- Similarly, upgrading a personal account enables paid features for the personal account's repositories only and does not affect the repositories of any organization accounts.
- Upgrading your personal account's plan
- You can upgrade your personal account from GitHub Free to GitHub Pro to get advanced code review tools on private repositories owned by your personal account.
- Upgrading your personal account does not affect any organizations you may manage or repositories owned by those organizations.
- Managing your organization's plan
- You can upgrade your organization's plan, add seats to your existing plan, or switch from per-repository to per-user pricing.
- Upgrading an organization does not affect your personal account or repositories owned by your personal account.
- If your organization is using a legacy per-repository billing plan, you can switch to per-user pricing at any time. You will not be able to switch back to repository pricing once you've upgraded to per-user pricing.
- If you'd like additional users to have access to your GitHub Team organization's private repositories, you can purchase more seats anytime.
- Downgrading your account's plan - GitHub Docs
- Organizations
- Github team users vs collaborators pricing. · community · Discussion #22012 · GitHub
- GitHub Free allows you to add as many members and collaborators to your organization as you’d like at no charge.
- If you decide to upgrade to GitHub Team, however, you must add a paid seat for each organization member as well as each collaborator. In your example, upgrading an 10-user organization from GitHub Free to GitHub Team would require 10 paid seats at $4 per month each, for a total charge of $40 per month.
- Although collaborators and organization members serve different purposes within GitHub, for organizations subscribed to GitHub Team collaborators must occupy a paid seat in order to access private repositories. Organization members always require a paid seat.
- If you have an existing subscription to GitHub Team with 10 users, then add another seat during the billing cycle, you’ll be charged a prorated amount of $4 to cover the period between when you added the seat and when the subscription typically renews.
- About per-user pricing - GitHub Docs - Learn about per-user pricing for organizations.
- People that consume a license:
- Organization members, including owners
- Outside collaborators on private repositories owned by your organization, excluding forks
- Anyone with a pending invitation to become an outside collaborator on private or internal repositories owned by your organization, excluding forks
- Dormant users
- People that consume a license:
- Github team users vs collaborators pricing. · community · Discussion #22012 · GitHub
- GitHub Pro
- GitHub Pro feature comparison is hidden
- You would expect these details to be available on the pricing page , but they are not. To find out the difference between
GitHub FreeandGitHub Profollow the instructions below:- Login --> Profile --> Settings --> Billings and plans --> Plans and usage --> Upgrade
- You can now see a side by side comparison on the 2 account plans.
- Upgrading your account's plan - GitHub Docs
- You can upgrade your personal account from GitHub Free to GitHub Pro to get advanced code review tools on private repositories owned by your personal account.
- Upgrading your personal account does not affect any organizations you may manage or repositories owned by those organizations.
- This has detailed instructions on upgrading to Pro
- Pricing on the home page is for organizations.
- Pro and a single Team user is $4 (which cannot be a coincidence)
- You would expect these details to be available on the pricing page , but they are not. To find out the difference between
- Is Github Pro free for students? · community · Discussion #158175 · GitHub - Yes, eligible students can get GitHub Pro for free through the GitHub Student Developer Pack.
- What happens to my repositories once the Pro membership expires? · community · Discussion #129354 · GitHub
- When a GitHub Pro subscription expires, the account transitions back to the free tier.
- This change primarily impacts features and limits but does not affect the availability or integrity of the repositories.
- Public repositories remain public and fully accessible, ensuring continued visibility and collaboration.
- Private repositories created during the Pro period retain their privacy, but the number of collaborators may be restricted to the limits of the free plan, typically capped at three.
- Advanced features exclusive to GitHub Pro, such as enhanced code review tools, repository insights, and additional CI/CD minutes and storage, become unavailable.
- Users may experience limitations if their usage exceeds the free plan’s data transfer and storage limits, potentially leading to restricted repository actions until usage is reduced or additional resources are purchased.
- Pro-specific support and advanced security features, like code scanning and secret scanning, are also discontinued.
- Despite these changes, all existing repositories remain intact and functional, ensuring no loss of data or accessibility.
- GitHub pro · community · Discussion #67993 · GitHub - Can someone please explain how the GitHub pro version works. I thought it works like having a Team organization account?
- GitHub Pro is a subscription plan for individual users on GitHub and is distinct from GitHub Team, which is designed for organizations. Here's how GitHub Pro works:
- Individual Subscription: GitHub Pro is meant for individual developers who want enhanced features and capabilities beyond what's available in the free GitHub plan. It's not associated with an organization or team account.
- Enhanced Features: GitHub Pro provides several benefits over the free GitHub account.
- In summary, GitHub Pro is a paid subscription plan for individual developers who want enhanced features and unlimited private repositories. It is not the same as a GitHub Team organization account, which is designed for collaborative work within teams or organizations and includes more extensive management and collaboration features.
- GitHub Pro is a subscription plan for individual users on GitHub and is distinct from GitHub Team, which is designed for organizations. Here's how GitHub Pro works:
- GitHub Pro feature comparison is hidden
GitHub Account Types
- General
- Types of GitHub accounts - GitHub Docs
- Accounts on GitHub allow you to organize and control access to code.
- User accounts - Every person who uses GitHub signs in to a user account.
- Organization accounts - An organization account enhances collaboration between multiple users, and an enterprise account allows central management of multiple organizations.
- Enterprise accounts - These allow administrators to centrally manage policy and billing for multiple organizations and enable innersourcing between the organizations.
- Accounts on GitHub allow you to organize and control access to code.
- GitHub: Everything you need to know about accounts and plans (Part I) - Accounts | Sogeti Labs - In this article, we will explore the different types of GitHub accounts and in a second one we will explain the different plans and billing.
- GitHub: Everything you need to know about accounts and plans (Part II) - Plans and Billing |Sogeti Labs - If you are considering using GitHub as a source code hosting and collaboration platform for your new projects, as well as for migrating projects from other DevOps platforms, one of the most important parts you should be familiar with is the offering and pricing model.
- Types of GitHub accounts - GitHub Docs
- Should I create separate work and personal GitHub accounts?
- why do I have a separate github account for work? - YouTube | anthonywritescode - I walk through why I keep my github accounts separate!
- Can keep work and personal stuff separate in particular notifications.
- Makes attribution clear
- Can show work done in works time.
- = edge case
- NB: If you work for yourself, this is definitely of no use to you. I also could not be bothered with 2 accounts.
- Should I create separate work and personal GitHub accounts? - Software Engineering Stack Exchange
- I say you can eat the cake in have it too! Introducing GitHub Organizations.
- Use your GitHub account for your personal projects, and create an organization for your professional projects. The organization's homepage will show the professional projects you want to introduce, and it'll have a link to your personal account that shows all the things you have done in GitHub.
- = use 1 account
- why do I have a separate github account for work? - YouTube | anthonywritescode - I walk through why I keep my github accounts separate!
- User Accounts
- Enhanced billing platform is now available for personal accounts - GitHub Changelog - As of February 13, 2025, new GitHub Free and Pro plan customers now have access to the enhanced billing platform—a suite of features designed to help users manage and understand their GitHub spending. All new users, regardless of plan type, are onboarded to this new experience.
- Organizations
- Organizations are billed per user.
- GitHub for teams · Build like the best teams on the planet · GitHub - Compare side by side, free and paid for organizations (Github Free and GitHub Team)
Organizations
Overview
- About organizations - GitHub Docs
- Organizations are shared accounts where businesses and open-source projects can collaborate across many projects at once, with sophisticated security and administrative features.
- Your team can collaborate on GitHub by using an organization account, which serves as a container for your shared work and gives the work a unique name and brand.
- Each person that uses GitHub always signs into a personal account, and multiple personal accounts can collaborate on shared projects by joining the same organization account.
- You can use organizations for free, with GitHub Free, which includes limited features on private repositories. To get the full feature set on private repositories and additional features at the organization level, including SAML single sign-on and improved support coverage, you can upgrade to GitHub Team or GitHub Enterprise Cloud. For more information, see GitHub’s plans.
- Enterprise accounts are a feature of GitHub Enterprise Cloud that allow owners to centrally manage policy and billing for multiple organizations.
- github organization plans | Bing Search
- GitHub organization plans are options for teams and businesses to use GitHub features and services. Organizations can use GitHub for free, with limited features on private repositories, or upgrade to GitHub Team or GitHub Enterprise Cloud for more features and support. GitHub Free for organizations includes private repositories for unlimited users, and GitHub Free for individual developers includes unlimited collaborators. To create an organization, you need to follow the prompts on the GitHub website.
- What Are GitHub Organizations, and Should You Use One? | How-To Geek
- GitHub Organizations is a feature of GitHub that allows you to create a central place where team members can access and manage repositories and other resources.
- Grouping them all under one name on a non-personal account is a great organizational tool. Repositories made under organizations will use the organization name instead of your personal account as the prefix, which can look more professional.
- Beyond that, Organizations also provide many features for teams, such as centralized user and permission management.
- Maintaining ownership continuity for your organization - GitHub Docs - Organizations can have more than one organization owner to avoid lapses in ownership.
- Limit on Write Collaborators | Github Organization (Free) · community · Discussion #140992 · GitHub
- Q:
- I want to create a Free Github Organization account, where I would have several private repositories.
- Are there any limits on the number of (free) members that can join the private repositories with write permissions? (I am mostly concerned about organization members; not external collaborators).
- I am being told that there is , but I can't seem to find anything in Github's documentation that says so...
- A:
- Great question! For a free GitHub Organization account, you can have unlimited private repositories, and there's no limit on the number of members within the organization. However, the distinction comes with permissions—free organization accounts can add as many members as they want, but those members all receive the same default permissions.
- If you're adding members to your organization, they will all get read or write permissions for private repositories depending on how you set up access. GitHub doesn’t explicitly limit the number of these organization members, but you might run into practical management issues if the group gets too large without paid features for more granular control.
- Q:
Setup / Configure
- nothing here yet
Creating a new Organization
- Creating a new organization from scratch - GitHub Docs - Create an organization to apply fine-grained access permissions to repositories.
- Make sure you have a personal account setup with 2FA, recovery emails and you have downloaded and printed your OTP codes out.
Converting an Account to an Organization
- It is best to setup a organization from scratch and convert only if needed.
- Converting a user into an organization - GitHub Docs
- You can convert your personal account into an organization. This allows more granular permissions for repositories that belong to the organization.
- An organization cannot be converted back to a user.
- Any commits made with the converted personal account will no longer be linked to that account. The commits themselves will remain intact.
- The personal account you want to convert cannot be a member of any organizations.
- How To Transform And Switch Your Account To Organization on Github - YouTube | How to Media
- Why is there an option to convert an account into an organization?
- It’s because organizations didn’t always exist.
- You aren’t supposed to create an account only to then turn it into an organization.
- How to turn a personal account into an org account · GitHub | baldwindavid
- Excellent explanation of the messages and terms when converting an account into an organization.
- This organization belongs to - Confused about converting account to organization..?? · community · Discussion #23263 · GitHub
- This organization belongs to:
- That option determines ownership of the organization with respect to our Terms of Service.
- If you select the " My personal account" option, the organization is bound to our Standard Terms of Service with you as the owner. Selecting the “A business or institution” option places the organization on our Corporate Terms of Service instead, with ownership held by an entity such as a company, non-profit, or group. Corporate Terms provide greater flexibility with regard to account ownership disputes and transfers, which can be beneficial in cases where an organization owner leaves a business or otherwise becomes unresponsive.
- Q:
- So if I select to set this up as corporate, because my company is indeed an S-Corp, would it still be showing up under /angelleye or does that get changed? That’s the part that’s confusing me, because it says the company “not angelleye” would control it.
- A:
- Your personal account will still have owner permissions for the organization, so the way in which you access the organization’s content remains the same, regardless of who owns the organization from a Terms of Service perspective.
- This organization belongs to:
- Convert Your Personal GitHub Account into an Organization | Step-by-Step Guide - YouTube - In this video, I’ll show you how to convert your personal GitHub account into an organization. Learn the step-by-step process, benefits, and why you might need to make this switch. Perfect for developers, teams, and project managers!
Transfer a repository to an Organization
- Expert guide: Transfer Github to Organization step-by-step - YouTube | TechTimeFly - This video will guide you through the process of transferring one or more repositories into an organization.
Personal Account or Organization
- Why you should create a GitHub Organization for your side project | by Adam Lehechka | Medium - There’s many amazing benefits that a GitHub organization can provide. And if you’re planning on your project being open source in a public repository then you can get all the great benefits completely free!
Roles
- About organization membership - GitHub Docs - You can become a member of an organization to collaborate with coworkers or open-source contributors across many repositories at once.
- Roles in an organization - GitHub Docs
- Organization owners can assign roles to individuals and teams giving them different sets of permissions in the organization.
- Outside collaborator, To keep your organization's data secure while allowing access to repositories, you can add outside collaborators. An outside collaborator is a person who has access to one or more organization repositories but is not explicitly a member of the organization, such as a consultant or temporary employee.
- Repository roles for an organization - GitHub Docs - You can customize access to each repository in your organization by assigning granular roles, giving people access to the features and tasks they need.
- Converting an organization member to an outside collaborator - GitHub Docs - If a current member of your organization only needs access to certain repositories, such as consultants or temporary employees, you can convert them to an outside collaborator.
Benefits of an Organization
- Can put all of a companies repos in one place
- Can be a separate assets that can be attached to the company rather than a personal account.
- It is not a personal account. a personal account should belong to a single person and not a company.
- Permissions can be more fine grained
- Organizations can be part of an enterprise account
How can I tell if a repository belongs to an organization?
- Click on the owner (eg: getk2)
- If there is a People tab, then it is an organization (eg: https://github.com/orgs/getk2/people)
Contributors / Collaborators / Members
- What is the difference between contributor, member and collaborator? - Open Source Stack Exchange
- Contributors - When a user's set of email addresses is found in the commit history of a github repo, github marks that user as a contributor.
- Collaborators - A user that has defined permissions in a github repo is marked as a collaborator. These permissions can vary and do not need to be the commit bit.
- Members - When a github repo belongs to an organization, users that have membership in that organization are marked "Member" in the same space used for "Contributor" and "Collaborator".
- Adding outside collaborators to repositories in your organization - GitHub Docs
- You can allow people who aren't members of your organization to access repositories that your organization owns.
- An outside collaborator is a person who is not a member of your organization, but has access to one or more of your organization's repositories.
- You can choose the level of access to grant for each outside collaborator.
- Unless you are on a free plan, adding an outside collaborator to a private repository will use one of your paid licenses. For more information, see "About per-user pricing."
Public vs Private
- Setting repository visibility - GitHub Docs - You can choose who can view your repository.
- Making a repository private
- Making a repository public
- Consequences of changing a repository's visibility
- Organization Members, Commits, Pull requests, Discussions and Wiki - What happens to them when changing repository visibility · Issue #38012 · github/docs · GitHub
- A feature request to update this document to include the missing items when changing visibility.
- Public repositories:
- Host open source projects in public GitHub repositories, accessible via web or command line. Public repositories are accessible to anyone at GitHub.com.
- + copy to the top ???
- Private repositories:
- Host code in private GitHub repositories, accessible via appliance, web, and command line. Private repositories are only accessible to you and people you share them with.
- + copy to the top ???
How to structure your Github Organization, Repositories and Users
This section will deal with configuring GitHub for your developing and company needs.
- The hierarchy of GitHub is as follows:
- Enterprise Account --> Organization --> Repository --> Users
- Orgs and Teams Best Practices · GitHub | joshjohanning - Orgs and Teams Best Practices. GitHub Gist: instantly share code, notes, and snippets.
- The intention of this document is to provide some guidance and suggestions to customers who are wondering how they should structure organizations and teams in their GitHub Enterprise environment. The idea isn't to give hard and fast rules on which approach is better than the other, but to give examples of when one approach might be preferable to another depending on the use case.
- The concept of Teams in GitHub allows for greater flexibility for collaboration and integration, as well as separation of repositories and permissions.
- Excellent article
- How should you structure your GitHub Organizations? - YouTube
- There are a lot of different ways to structure your GitHub Organizations. One organization to rule them all, multiple organizations, even LOTS of organizations. There are some pros and cons you need to consider with any method that you choose.
- Very chilled out video
- Enterprise account --> Organizations --> Repositories
- How many Organizations do we need?
- Strategies for using organizations in GitHub Enterprise Cloud - GitHub Resources
- Within GitHub Enterprise Cloud (GHEC), organizations are shared accounts where your users collaborate across many projects at once, with sophisticated security and administrative features. It’s important to plan your structure in advance to avoid creating unnecessary silos and increase administrative overhead. A good structure will facilitate collaboration and discovery while reducing administrative overhead.
- In general, we recommend creating the fewest possible organizations within your enterprise to accommodate your business needs.
- Model 1: Single Organization
- In this model, a single organization is used for all or the vast majority of repositories. Many small- to medium-sized organizations (less than 5,000 developers) use this approach to manage their GitHub environment.
- Model 2: Red-green-sandbox-archive
- Model 3: Portfolio company
- GitHub Organization Best Practices - A concise guide on best practices for managing single vs multiple GitHub Enterprise Organizations
- Note: Distinct organizations are NOT needed to limit repository access. Repository access can be limited via base user permissions and Teams.
- Individual organizations are intended for users who work together, i.e., whole engineering teams and their cross-functional counterparts.
- When does it make sense to create more than one organization?
- Expert guide: Transfer Github to Organization step-by-step - YouTube | TechTimeFly
- This guy uses repositories to separate his code by language.
- The video is just for context
GitHub Account Management
Does setting up a SSH key and PAT allow me to use them to recover my account with my email address when locked out of my account???
Account Setup
- Password
- Use a strong password
- Store the password in a secure password manager.
- Recovery codes
- Download them
- print them out
- install them into a secure password manager
- Enable 2FA
- with as many methods as possible except maybe SMS as this not classed as secure
- Use passeys?
- Create an SSH key
- Can this be used for account recovery
- Create a Personal Access Token
- Can this be used for account recovery
- Setup your profile
- Fill in your information and make sure only what you want is shown publicaly.
Account Recovery
Read this article, it is very clear and calming.
- How to Recover Your GitHub Account
- Regain access to your GitHub account with a step-by-step guide on using 2FA codes, email verification, and support requests for account recovery.
- Best Practices to Prevent Account Lockout
- Setting Up Multiple 2FA Methods for Backup
- Downloading and Securely Storing Recovery Codes
- Ensuring Access to Verified Devices and Email Addresses
- Recovery options are as follows (not all might be available to you):
- Recovery codes.
- Previously verified device
- SSH key
- Personal access token
- Additional Emails for recovery
- This is only useful if you do not have 2FA enabled on your account.
- Profile --> Settings --> Emails --> Add email address
- https://github.com/settings/emails --> Add email address
- If you do not have more than one verified email setup you will be prompted with this message:
- Recovering your account if you lose your 2FA credentials - GitHub Docs
- If you lose access to your two-factor authentication credentials, you can use your recovery codes, or another recovery option, to regain access to your account.
- For security reasons, GitHub Support will not be able to restore access to accounts with two-factor authentication enabled if you lose your two-factor authentication credentials or lose access to your account recovery methods.
- If you cannot use any recovery methods, you have permanently lost access to your account. However, you can unlink an email address tied to the locked account. The unlinked email address can then be linked to a new or existing account. For more information, see Unlinking your email address from a locked account.
- Recovering your account if you lose your 2FA credentials - GitHub Docs
- If you lose access to your two-factor authentication credentials, you can use your recovery codes, or another recovery option, to regain access to your account.
- Follow Instructions here and will need at least one of the following alternative authentication factors:
- Previously verified device
- SSH key
- Personal access token
- A member of GitHub Support will review your request and email you within three business days. If your request is approved, you'll receive a link to complete your account recovery process. If your request is denied, the email will include a way to contact support with any additional questions.
- GitHub Account Recovery Policy - GitHub Docs
- Get started, troubleshoot, and make the most of GitHub. Documentation for new users, developers, administrators, and all of GitHub's products.
- GitHub provides a number of account recovery methods including an automated recovery process if you have lost access to your GitHub.com account. If you cannot use any of the provided recovery methods, you have permanently lost access to your account.
- For security reasons, GitHub Support will not restore access to accounts with two-factor authentication enabled if you lose your two-factor authentication credentials or lose access to your account recovery methods. You must use existing account recovery methods.
- GitHub does not support any other means of account recovery, including social or ID verification, by members of GitHub’s staff. This policy is in place to protect your account from unauthorized access through social engineering.
- How to Recover Your GitHub Account - Regain access to your GitHub account with a step-by-step guide on using 2FA codes, email verification, and support requests for account recovery.
- GitHub Account Recovery Policy - GitHub Docs - Get started, troubleshoot, and make the most of GitHub. Documentation for new users, developers, administrators, and all of GitHub's products.
- New 2FA account recovery options via password reset flow - GitHub Changelog
- Users with two-factor authentication enabled can now begin the account recovery process from the password reset flow.
- With this change, a user can recover their account as long as they can perform email verification and provide a recovery factor, such as an SSH key, PAT (Personal Access Token), or previously signed in device.
- Unlinking your email address from a locked account - GitHub Docs - If you have lost your two-factor authentication (2FA) credentials and are unable to recover access, you can remove the connection between your email address and a 2FA locked account. The email address is then available for you to link it to a new or existing account, maintaining your commit history.
Authentication
- General
- About authentication to GitHub - GitHub Docs - You can securely access your account's resources by authenticating to GitHub, using different credentials depending on where you authenticate.
- Passkeys
- Passkeys are a password replacement that validates your identity using touch, facial recognition, a device password, or a PIN.
- Passkeys can be used for sign-in as a simple and secure alternative to your password and two-factor credentials.
- About passkeys - GitHub Docs
- Passkeys allow you to sign in safely and easily, without requiring a password and two-factor authentication.
- Passkeys are webauthn credentials that validate your identity using touch, facial recognition, a device password, or a PIN. They can be used as a password replacement or as a 2FA method. Passkeys can be used for sign-in as a simple and secure alternative to your password and two-factor credentials.
- Managing your passkeys - GitHub Docs - You may be prompted to register a passkey during sign-in, or you can choose to register a new passkey in your account settings. For 2FA users, you can upgrade existing eligible security keys into passkeys.
- Personal Access Token (PAT)
- Personal access tokens were initially introduced to replace passwords for authentication to GitHub's API and command-line interface. Over time, their functionality has expanded, including their use in account recovery scenarios.
- Managing your personal access tokens - GitHub Docs - You can use a personal access token in place of a password when authenticating to GitHub in the command line or with the API.
2FA
This is covering the use of 2FA on GitHub.
- If you loose your 2FA methods and your Recovery codes then you will be locked out of your account permanently, this is to protect GitHub and users from social engineering.
- You can use any 2FA method you have configured to login which is useful if you loose access to one.
- Make sure you set up as many recovery methods as possible.
- Having multiple 2FA methods reduces the risk of users getting locked out of their accounts
- 2FA does not just mean TOTP, you can also add SMS, Github Mobile.
- SMS is not really secure, but easy to setup and can prevent lockout.
- Download and print out your Recovery codes
- When you change your password your Recovery Codes will be revoked and new ones issued which you should download immediately.
- Download 2FA Recovery codes here:
Profile --> Settings --> Access --> Password and authentication --> Recovery options --> Recovery codes --> View
- General
- 2FA methods available
- Authenticator app
- Uses TOTP
- Use 2FAS as your OTP manager.
- SMS/Text message
- This is a code sent your mobile phone.
- It is better than nothing.
- Security keys
- This means physical keys such as YubiKeys.
- Uses WebAuthn
- Configuring two-factor authentication - Configuring two-factor authentication using a security key - GitHub Docs
- Not all FIDO authenticators can be used as passkeys, but you can still register those authenticators as security keys.
- Security keys are also WebAuthn credentials, but unlike passkeys they don't require user validation.
- Since security keys only need to verify user presence, they only count as a second factor and must be used in conjunction with your password.
- GitHub Mobile
- Install the GitHub app and use this as an authenticator.
- Easy to use and I recommend using this.
- Authenticator app
- 2FA methods available
- Official Docs
- Securing your account with two-factor authentication (2FA) - GitHub Docs - You can set up your account on GitHub to require an authentication code in addition to your password when you sign in.
- Configuring two-factor authentication recovery methods - GitHub Docs
- You can set up a variety of recovery methods to access your account if you lose your two-factor authentication credentials.
- Print your codes on paper and store securely in a password manager.
- If you enable/disable 2FA then your current codes will become invalid.
- Configuring two-factor authentication - GitHub Docs
- You can choose among multiple options to add a second source of authentication to your account.
- We strongly recommend using a time-based one-time password (TOTP) application to configure 2FA, and security keys as backup methods instead of SMS. TOTP applications are more reliable than SMS, especially for locations outside the United States. Many TOTP apps support the secure backup of your authentication codes in the cloud and can be restored if you lose access to your device.
- After you configure 2FA, your account will enter a 28-day check up period. You can leave the check up period by successfully performing 2FA in those 28 days. Otherwise, you will be prompted to perform 2FA in an existing GitHub.com session on the 28th day. If you cannot perform 2FA to pass the checkup, you must use the provided shortcut to reconfigure your 2FA settings and retain access to GitHub.com.
- Git Good at Securing your Code - How to enable 2FA on GitHub - YouTube | GitHub
- If you don't already have two-factor authentication setup, check out how to enable this feature now.
- This is an easy to follow video
- What was discovered when we enforced 2FA for millions of users - YouTube | GitHub
- GitHub product designer Hemant Kumar discusses implementing two-factor authentication (2FA) at scale, driven by empathy for our users and a commitment to software security.
- The project showcases cross-functional collaboration, user-centered design, and strategic communication, resulting in improved user experience while reducing support requests and account lockouts.
- This explains the process and what this means to a user.
- What I did
- Added 2x recovery emails
- Added a mobile phone for SMS recovery
- Added GitHub Mobile as a 2FA (installed and logged in on my phone)
- * (not done yet) Added TOTP using 2FAS (Android)
- Saved my recovery codes to my password manager (Bitwarden)
- Printed my recovery codes on paper
GitHub Services
Search
The search feature on GitHub is very powerful and is underused by a lot of people.
- Search Box
- Search in title
in:title findme
- Use of the
ANDkeywordis:issue state:open in:title issue AND reporter
- Search in title
- Using the API
- REST API endpoints for search - GitHub Docs - Use the REST API to search for specific items on GitHub.
- GitHub REST API: Get issue based only on title - Stack Overflow
GET /search/issues?q=text+to+search+in:title+repo:some/repo
- Documentation
- Searching issues and pull requests - GitHub Docs - You can search for issues and pull requests on GitHub and narrow the results using these search qualifiers in any combination.
- Understanding the search syntax - GitHub Docs - When searching GitHub, you can construct queries that match specific numbers and words.
- Other
- Github search cheatsheet from official docs. · GitHub - GitHub’s search supports a variety of different operations. Here’s a quick cheat sheet for some of the common searches.
- Understanding GitHub Code Search syntax - GitHub Docs - You can build search queries for the results you want with specialized code qualifiers, regular expressions, and boolean operations.
- How to search on GitHub with OR/AND operators - Stack Overflow
- How can I search an issue on GitHub that contains keywords "java" AND ("python" OR "C++")? Is it possible to represent a search with these logical operators like OR/AND?
- From the repository issues page, you can build advanced searches using the AND and OR keywords and parentheses for nested searches. This allows you to build more complex filters to find the exact set of issues you’re looking for.
Pages
- This free feature allows you to run websites directly from GitHub, even with your own custom domain name. Useful for small developers who are bandwidth constrained.
- GitHub pages host only static HTML pages. No server side technology is supported, so Node.js applications won't run on GitHub pages.
- GitHub pages does support the Jekyll template system.
- TL;DR
- Settings --> Code and Automation --> Pages
- You get one main website per account https://shoulders.github.io/ and one per project https://shoulders.github.io/mysql-slow-query-log-visualizer/
- You can select a branch and then a folder. You can free type a folder name.
- The site is regenerated automatically when you commit a change via github
- The regeneration is handled internally with a GitHub action.
- Setting branch back to none, then back to the selected branch will set off a build.
- Look in the actions tab to see the site getting built.
- Websites
- Jekyll • Simple, blog-aware, static sites | Transform your plain text into static websites and blogs - Transform your plain text into static websites and blogs
- Octocat.github.io
- If you prefer to not use the automatic generator, push a branch named gh-pages to your repository to create a page manually.
- In addition to supporting regular HTML content, GitHub Pages support Jekyll, a simple, blog aware static site generator written by our own Tom Preston-Werner.
- https://github.com/octocat/octocat.github.io - This is an example of the repo that controls a users main profile website, in this case Octocat.github.io.
- Documentation
- GitHub Pages | GitHub - Websites for you and your projects, hosted directly from your GitHub repository. Just edit, push, and your changes are live.
- Creating a GitHub Pages site - GitHub Docs
- You can create a GitHub Pages site in a new or existing repository.
- Create the entry file for your site. GitHub Pages will look for an index.html, index.md, or README.md file as the entry file for your site.
- It can take up to 10 minutes for changes to your site to publish after you push the changes to GitHub.
- Unpublishing a GitHub Pages site - GitHub Docs
- You can unpublish your GitHub Pages site so that your current deployment is removed and the site is no longer available. This is different from deleting the site.
- When you unpublish your site, your current deployment is removed and the site will no longer be available. Any existing repository settings or content will not be affected.
- Unpublishing a site does not permanently delete the site. For information on deleting a site, see Deleting a GitHub Pages site.
- Tutorials
- How to Use GitHub Pages in 2025! (Beginner's Guide) - YouTube | The Common Coder
- In this video, we'll guide you through the steps to set up and use GitHub Pages. We'll cover everything you need to know including an introduction to GitHub Pages, the difference between user sites and project sites, how to configure your repository to use GitHub Pages, and how to re-deploy your projects automatically whenever changes are made.
- Setting branch back to none, then back to the selected branch will set off a build.
- Look in the actions tab to see the site getting built.
- Excellent video.
- How to Host a Website on GitHub Pages Free (Custom Domain Setup Included) - YouTube - Master the art of hosting your website on GitHub Pages with a custom domain for that extra professional polish! In this comprehensive guide, we'll walk you through the entire process, from setting up your GitHub repository to configuring DNS records and seamlessly integrating your personalized domain. Elevate your online presence and impress visitors with your own custom domain on GitHub Pages.
- GitHub’s plans - GitHub Docs
- To publish a GitHub Pages site privately, you need to have an organization account. Additionally, your organization must use GitHub Enterprise Cloud.
- Deploy to `gh-pages` from a `dist` folder on the master branch - GitHub | cobyism
- Sometimes you want to have a subdirectory on the
masterbranch be the root directory of a repository’sgh-pagesbranch. This is useful for things like sites developed with Yeoman, or if you have a Jekyll site contained in themasterbranch alongside the rest of your code.
- Sometimes you want to have a subdirectory on the
- GitHub Pages for a repo with multiple subfolders · community · Discussion #58276 · GitHub
- Yes, it is possible to configure a single repository with multiple subfolders to be enabled for GitHub Pages, and each subfolder can have its own unique URL.
- Here's how you can achieve this:
- A GitHub Pages tutorial on how to host personal websites | TheServerSide
- GitHub Pages offers a free way to host a personal website and allows for the website to be indexed by Google. Follow this GitHub Pages tutorial to create a personal website that gets found in Google search.
- Has a YouTube video
- Step-by-Step Guide: Launching Your Website with GitHub Pages | by Shirley Berchel | Medium - This step-by-step tutorial will guide you through the process of setting up your very own website on GitHub Pages.
- How to Use GitHub Pages in 2025! (Beginner's Guide) - YouTube | The Common Coder
Gists
What are they and how to do you create, edit and share them.
- GitHub Gist — Crash Course - Neutron Dev - Learn everything about GitHub Gist in this FREE crash course. By the end of it you'll know how to create a gist, common use cases & best practices.
Apps
in the marketplace, how do i use them + put examples here.
GitHub Repositories
General
- About repositories - GitHub Docs
- A repository contains all of your code, your files, and each file's revision history. You can discuss and manage your work within the repository.
- When you create a repository, you can choose to make the repository public or private. Repositories in organizations that use GitHub Enterprise Cloud and are owned by an enterprise account can also be created with internal visibility.
- Public repositories are accessible to everyone on the internet.
- Private repositories are only accessible to you, people you explicitly share access with, and, for organization repositories, certain organization members.
- Branch Default Name
- Why GitHub renamed its master branch to main | TheServerSide - GitHub renamed the master branch to main for any Git repository, as it addresses cultural change like so many organizations that have nixed master-slave terminology in a time of social unrest.
- You can set the default branch name in your profile
Settings --> Code, planning and automation --> Repositories --> Repository default branch: master/main
Naming
- TL;DR
- kebab-case
- Lowercase letters
- Hyphens for word separation
- No spaces
- No numbers
- No emojies
- Say what the repo is about in 3–5 words max
- If you are company or team consider using a format such as:
- [prefix]-[project-name]-[suffix]
- [team-name]-[service-name]-[environment]
Links
- Naming Conventions for Git Repositories: A Quick Guide
- Discover essential naming conventions for git repositories to enhance organization and collaboration. Master the art of clear, impactful project titles.
- lowercase letters with hyphens for word separation to ensure consistency and ease of access.
- GitHub Repository Best Practices - DEV Community
- Top 10 tips for managing GitHub repositories effectively, covering naming conventions, branch protection, code reviews, and streamlined collaboration.
- Not just naming convention.
- GitHub Naming Conventions: Best Practices for Clean and Professional Repos | Medium | Towards Dev
- Whether you’re launching your next open-source library or just tidying up personal projects, consistent naming conventions on GitHub go a long way. Repos are the front doors to your code — so make them readable, discoverable, and professional.
- Use hypens not underscores
- Why hypens?
- Avoid CamelCase and Spaces
- Lowercase Is the Norm
- TL;DR
- Be descriptive but concise: Say what the repo is about in 3–5 words max.
- Use hyphens for word separation.
- Stick to lowercase for consistency.
- Avoid version numbers in the repo name — use Git tags or releases instead.
- A Guide to Git Repository Naming Convention
- Master the git repository naming convention with our definitive guide. Learn best practices, see examples, and enforce standards to boost team productivity.
- kebab-case:
- all lowercase letters, with words separated by hyphens.
- It’s the go-to choice for a reason—it’s clean, easy to read, and avoids compatibility headaches across different operating systems.
- Includes notes on prefixes and suffix (while using kebab-case)
- [prefix]-[project-name]-[suffix]
- [team-name]-[service-name]-[environment]
- GitHub - GoldenbergLab/naming-and-documentation-conventions
- Naming conventions are helpful practices that teams follow to write code together. - GoldenbergLab/naming-and-documentation-conventions
- github - Is there a naming convention for git repositories? - Stack Overflow
- If you plan to create a PHP package you most likely want to put in on Packagist to make it available for other with composer. Composer has the as naming-convention to use vendorname/package-name-is-lowercase-with-hyphens.
- 10 GitHub Repository Naming Best Practices - CLIMB
- When creating a GitHub repository, there are a few best practices to follow in order to make it easier for others to find and use.
- Repository Naming Conventions | Medium | Nurhidayat
- Establishing clear and consistent naming conventions for repositories is essential for maintaining organization, enhancing collaboration, and improving code discoverability across development teams.
- This article outlines best practices for naming repositories, categorized by project type, to ensure a structured and understandable system.
- slug-case (words separated by hyphens) = this is kebab-case
- {project}-{general|service}-{service-name}-{type}
- GitHub Repository Naming Guide | AD GitHub Usage Guide
- This guide is designed to support you in effectively utilizing GitHub within the Fermi-AD Organization
- Here are a few things to consider when naming your repo:
- We want repos to be easily findable. Consistency is key to making it easy for someone to find your repo.
- Because GitHub provides many of it’s functions via generated URLs and REST APIs we should also consider what characters are used in repo names. Some characters are automatically replaced by GitHub, like spaces are turned into hyphens.
- hyphens and lower case
- Why we use hyphens for spaces in URLs | AD GitHub Usage Guide
- URL Structure Best Practices for Google Search | Google Search Central | Documentation | Google for Developers - It's a good idea to keep your site's URL structure as simple as possible. Learn more about the URL format recommended by Google, such as the use of hyphens, underscores, and domain structure.
- Duck.Ai
- GitHub Repository Naming Best Practices
- GitHub doesn't enforce strict naming rules, but following conventions makes your repositories more professional, discoverable, and easier to navigate. Here are the recommended practices:
- General Guidelines
- Character Restrictions
- Use only lowercase letters, numbers, hyphens, and underscores. GitHub automatically converts uppercase letters to lowercase, and special characters (except hyphens and underscores) aren't allowed. Avoid starting or ending with hyphens or underscores.
- Length and Clarity
- Keep names concise but descriptive — ideally under 50 characters. The name should immediately convey what the project does. Avoid generic names like "project," "code," or "my-repo."
- Character Restrictions
- Naming Patterns by Project Type
Project Type Naming Pattern Example Language/framework library language-nameorframework-namepython-requests,react-routerTool or CLI application action-verbortool-purposegit-flow,docker-composeWebsite or service service-nameordomain-nameblog-nextjs,api-gatewayLearning/tutorial project learn-topicortopic-tutoriallearn-golang,javascript-fundamentalsFork or variation original-forkorvariant-descriptionlodash-es, prettier-plugin-vueFork or variation dotfilesorconfig-purposedotfiles,eslint-config - Additional Recommendations
- Use Hyphens Over Underscores
- Prefer hyphens (my-project) over underscores (my_project) because they're more readable in URLs and more commonly used in the JavaScript/web ecosystem.
- Avoid Redundant Information
- Don't include file extensions (.js, .py) or common prefixes like "the-" unless they're essential to the name.
- Industry Conventions
- Many organizations follow specific patterns:
- npm packages: lowercase with hyphens (eslint-plugin-react)
- Docker images: lowercase with hyphens or underscores (node-server)
- GitHub Actions: action-verb format (setup-node, publish-release)
- Many organizations follow specific patterns:
- What to avoid
- Mixed case — MyProject (GitHub converts it anyway)
- Spaces or special characters — `my project!
- Overly long names — my-incredibly-detailed-project-description-for-learning
- Ambiguous abbreviations — proj-x or `temp-code
- Dates or versions in the name — project-2024 (use tags and releases instead)
- Reserved keywords — names that conflict with GitHub or popular tools
- Use Hyphens Over Underscores
- Following these conventions makes your repositories more professional and helps users quickly understand what your project does.
- GitHub Repository Naming Best Practices
Setup
Once your organizational structure (or not) is configured you then actually need to create your repos. In this section we will deal with how to setup a nice looking repository to ge the best out of it.
- GitHub - KatherineMichel/setting-up-an-open-source-project - Setting Up An Open Source Project.
- Organization accounts are for code owned by groups (companies, OSS projects).
- Teams make permission management easier. A developer added to a team now has access to repos based on team access.
- Repository Access
- Public repo - anyone can access
- Private repo - only designated members can access
- Setting up your project for healthy contributions - GitHub Docs - Repository maintainers can set contributing guidelines to help collaborators make meaningful, useful contributions to a project.
- Always add tags ?
joomla
joomla-component
joomla-extensions
app-server
app-site
Github Logos and their Usage
- Official Docs
- GitHub Logos and Usage · GitHub - We’ve put together some guidelines for those times when you want to use our logos to show off your GitHub integration or link back to us. Happy coding!
- GitHub Logo Policy - GitHub Docs
- GitHub Trademark Policy - GitHub Docs
- Usage of the Combined logo and changing the colours.
- The combined GitHub logo (Octocat + wordmark together) and the SVG version you’re referring to are not part of the assets GitHub makes available for general public use.
- Per the GitHub Logo Policy, you may use the logos provided on the official GitHub Logos and Usage page in the specific scenarios described there, but other logo variations — including the combined lockup — are not offered for download or authorized for general use unless you have explicit written permission from GitHub.
- On your specific points:
- Use of the combined logo – Not permitted without explicit permission from GitHub. Only the individual logos provided on the official page are approved for use.
- Use of the SVG variant – Same as above; if it’s not one of the downloadable assets on the official page, it’s not approved for general use.
- Black and white variants – You can only use the color variations that are officially provided in the downloadable assets. If both black and white versions are included in the official logo pack, you may use them as-is (without altering proportions or colors). If they are not included, you would need explicit permission to use them.
- If you need to use the combined logo, the SVG version, or any color variant not included in the official assets, the next step would be to request permission directly from GitHub’s brand team.
GitHub Errors, Issues and their solutions
- Permalinks are not rendered into code blocks
- Issue
- When i am copying permalinks and then pasting them into a GitHub editor they are not getting parsed into code blocks.
- Cause
- If you look at the end of the faulty links you can see there is a alphanumeric code after the line definition eg: C1,C6 in the example below.
Bad: https://github.com/webmin/authentic-theme/blob/0ca0f9e215fdad49e028158f1f0d5096295a8595/tconfig-lib.pl#L201C1-L204C6
- If I remove C1 and C6 respectively at the end of the permalink, the permalink is rendered into a code block.
Good: https://github.com/webmin/authentic-theme/blob/0ca0f9e215fdad49e028158f1f0d5096295a8595/tconfig-lib.pl#L201-L204
- When you select by the code, the characters where you started and finished your selection from are added on the end in the form of C1,C2 and it is this new format blocking the rendering of this into a code block.
- If you look at the end of the faulty links you can see there is a alphanumeric code after the line definition eg: C1,C6 in the example below.
- Solution
- Select directly on the line numbers rather than selecting the code.
- Links
- Creating a permanent link to a code snippet - GitHub Docs - You can create a permanent link to a specific line or range of lines of code in a specific version of a file or pull request.
- Notes
- This should work cross repository but some people say it does not. I have not verified this either way.
- Issue
- "git-receive-pack not permitted"
- Might be because the git repootpry is archived.
- git-receive-pack not permitted - Bing Search
- The "git-receive-pack not permitted" error typically indicates a permissions issue when trying to push changes to a remote Git repository.
- ^M characters being shown in a GitHub Diff
- Issue
- As you can see there are these red ^M control characters and the text file does not have correct formatting because the line endings are not working as they should.
- As you can see there are these red ^M control characters and the text file does not have correct formatting because the line endings are not working as they should.
- Cause
- The line endings are not being handled correctly between Windows and GitHub
- Solutions
- Set your editor to work with
LF(Unix/Linux)locally - Set Git to automatically alter line from
CRLF(Windows)toLF(Linux/Unix)endings before submission and vice-versa upon checkout.
- Set your editor to work with
- Links
- What is the meaning of ^M in 'git diff'? - Stack Overflow
^Mrepresents carriage return (CR). This diff means something removed a Unicode BOM from the beginning of the line and added aCRat the end.- If
^Mis in the new-changes side (right/green side), then that means the file's line-endings were changed fromLFtoCRLF, otherwise, file wasCRLFand is now changed toLF. - The
^symbol stands for Control, so^Mmeans Ctrl+M. - To get from that to the actual ASCII character code, you take the base character and flip bit 6 (i.e. XOR with 64). For letters, that just means subtract 64. So e.g.
^Ais character code 1 (becauseAis 65).^Mis 77 - 64 = 13 (becauseMis 77), which corresponds to carriage return in ASCII. ^Lrepresents the form-feed character (FFis the abbreviation, not hexadecimal), and has ASCII value12or0x0C.Trygit config core.whitespace cr-at-eolto hide it from the diffgit config --global core.autocrlf true
- Difference Between Carriage Return (CR) and Line Feed (LF) ? How it is used in Different Operating System? | GeeksforGeeks - This article will explain their History, Usage in Different Operating Systems, Related Issues, what they are, when they were introduced, and how one can use them to address various issues arising from the e of CR, and LF.
- Why does Windows use CR LF? - Stack Overflow
- Historically when using teletypes
CRwould return the carriage to the first position of the line whileLFwould feed to the next line. - Using
CR+LFin the file themselves made it possible to send a file directly to the printer, without any kind of printer driver.
- Historically when using teletypes
- Why is the line terminator CR+LF? - The Old New Thing - This shows the practical difference between the
CRandLFwhen they were first used.
- What is the meaning of ^M in 'git diff'? - Stack Overflow
- Issue
GitHub URL Conversions
Get a Real Page URL from a Blob URL
I have found recently a lot of Google searches takes me to the repo/blob page for that particular GitHub asset, so I made these scripts.
The logic rule to convert a repo link to the rendered pages URL
Here I show you how you can manually convert the URLs which can be useful to also explain the process
## Formula for Converting
https://github.com/<owner>/<repo>/blob/<branch>/<content-path>/<file>.md
-->
https://<site-domain>/<lang>/<content-path>/<file>


## Example
https://github.com/github/docs/blob/main/content/search-github/searching-on-github/searching-issues-and-pull-requests.md
-->
https://docs.github.com/en/search-github/searching-on-github/searching-issues-and-pull-requests
Method 1 - Simple Javascript
javascript:(async function(){
  try {
    const repoUrl = window.location.href;

    if(!repoUrl.includes("/blob/")){
      alert("This does not appear to be a GitHub file URL.");
      return;
    }

    // Extract owner, repo, branch, and path
    const match = repoUrl.match(/github\.com\/([^\/]+)\/([^\/]+)\/blob\/([^\/]+)\/(.+)/);
    if(!match){
      alert("Failed to parse repo URL.");
      return;
    }
    const owner = match[1];
    const repo = match[2];
    const branch = match[3];
    let path = match[4];

    // Remove .md extension if present
    if(path.endsWith(".md")) path = path.slice(0,-3);

    // Try to get homepage from GitHub API
    const apiUrl = `https://api.github.com/repos/${owner}/${repo}`;
    const response = await fetch(apiUrl);
    const repoData = await response.json();

    let siteDomain = repoData.homepage || `https://${owner}.github.io/${repo}`;

    // Optional: detect /content/ folder like GitHub Docs
    if(path.startsWith("content/")){
      path = path.replace(/^content\//,'');
    }

    // Assume English for GitHub Docs style
    const lang = (owner === "github" && repo === "docs") ? "/en" : "";

    // Build final URL
    const finalUrl = `${siteDomain}${lang}/${path}`;
    window.location.href = finalUrl;

  } catch(e){
    alert("Error converting URL: " + e);
    console.error(e);
  }
})();
- This works if you paste it in to the console via DevTools.
- How it Works
- You click the bookmarklet while on a GitHub repo file.
- It parses the URL to get owner/repo/branch/path.
- Uses GitHub API to see if the repo has a homepage (common for Pages sites).
- If not, defaults to https://<owner>.github.io/<repo>.
- Removes content/ and .md if present (GitHub Docs style).
- Adds /en for GitHub Docs.
- Redirects your browser automatically.
Method 2 - Complex Javascript
Console Version
javascript: (async function(){
  try{
    const repoUrl = window.location.href;
    const blobMatch = repoUrl.match(/^https?:\/\/github\.com\/([^\/]+)\/([^\/]+)\/blob\/([^\/]+)\/(.+)$/);
    if(!blobMatch){
      alert("This doesn't look like a GitHub file URL (must be a /blob/ file page).");
      return;
    }

    const owner = blobMatch[1];
    const repo  = blobMatch[2];
    // const branch = blobMatch[3]; // branch not used but could be
    let path = blobMatch[4]; // e.g. content/search-github/....

    // If path contains a 'content' like folder used by many doc repos, strip known prefixes
    const prefixes = ["content/", "docs/content/", "docs/", "website/content/", "src/content/", "site/content/"];
    for(const p of prefixes){
      if(path.startsWith(p)){
        path = path.slice(p.length);
        break;
      }
    }

    // Remove .md if present
    if(path.endsWith(".md")) path = path.slice(0,-3);

    // Convert index/README to directory root
    path = path.replace(/(?:\/|^)(index|README)$/i, "");
    path = path.replace(/\/+$/,""); // trim trailing slashes

    // Special-case for official github/docs repo (friendly mapping)
    if(owner === "github" && repo === "docs"){
      const base = "https://docs.github.com";
      const langSegment = "/en"; // adjust if you need another language
      const final = base + langSegment + (path ? "/" + path : "");
      window.location.href = final;
      return;
    }

    // Try Pages API (gives correct html_url for Pages, including custom CNAME)
    let siteBase = null;
    try{
      const pagesResp = await fetch(`https://api.github.com/repos/${owner}/${repo}/pages`);
      if(pagesResp.ok){
        const pagesData = await pagesResp.json();
        if(pagesData && pagesData.html_url){
          siteBase = pagesData.html_url.replace(/\/+$/,"");
        }
      }
    } catch(e){
      // ignore and try fallback
    }

    // Fallback: repo homepage field
    if(!siteBase){
      try{
        const repoResp = await fetch(`https://api.github.com/repos/${owner}/${repo}`);
        if(repoResp.ok){
          const repoData = await repoResp.json();
          if(repoData && repoData.homepage){
            siteBase = repoData.homepage.replace(/\/+$/,"");
          }
        }
      } catch(e){}
    }

    // Final fallback: standard GitHub Pages pattern
    if(!siteBase){
      siteBase = `https://${owner}.github.io/${repo}`;
    }

    // Build final URL, avoid duplicate slashes
    const finalUrl = siteBase + (path ? (siteBase.endsWith("/") ? "" : "/") + path : "");
    window.location.href = finalUrl;
  } catch(err){
    alert("Conversion failed: " + err);
    console.error(err);
  }
})();
- This works if you paste it in the console via Dev Tools.
Bookmarklet Version
javascript:(async function(){try{const repoUrl=window.location.href;const m=repoUrl.match(/^https?:\/\/github\.com\/([^\/]+)\/([^\/]+)\/blob\/([^\/]+)\/(.+)$/);if(!m){alert("Not a GitHub /blob/ file URL.");return;}const owner=m[1],repo=m[2];let path=m[4];const prefixes=["content/","docs/content/","docs/","website/content/","src/content/","site/content/"];for(const p of prefixes)if(path.startsWith(p)){path=path.slice(p.length);break;}if(path.endsWith(".md"))path=path.slice(0,-3);path=path.replace(/(?:\/|^)(index|README)$/i,"");path=path.replace(/\/+$/,"");if(owner==="github"&&repo==="docs"){const final="https://docs.github.com/en"+(path?"/"+path:"");window.location.href=final;return;}let siteBase=null;try{const r=await fetch(`https://api.github.com/repos/${owner}/${repo}/pages`);if(r.ok){const d=await r.json();if(d&&d.html_url)siteBase=d.html_url.replace(/\/+$/,"");}}catch(e){}if(!siteBase){try{const r2=await fetch(`https://api.github.com/repos/${owner}/${repo}`);if(r2.ok){const rd=await r2.json();if(rd&&rd.homepage)siteBase=rd.homepage.replace(/\/+$/,"");}}catch(e){} }if(!siteBase)siteBase=`https://${owner}.github.io/${repo}`;const finalUrl=siteBase+(path? (siteBase.endsWith("/")?"" : "/")+path:"");window.location.href=finalUrl;}catch(e){alert("Error: "+e);console.error(e);} })();
- Not tries this version, but because it has no spaces, so it might not work as a bookmarklet.
Notes
- The bookmarklet uses GitHub's public API (no auth). Unauthenticated requests are rate-limited (60/hr per IP). If you hit rate limits, the script will fallback to
https://<owner>.github.io/<repo>or the repo homepage if present. - It expects you're on a
/blob/file page. It will alert if you're not. - It tries to be safe for many docs repo layouts (removes content/, docs/, index.md, README.md). If your repo uses a different structure, edit the prefixes array in the readable version.
- For
github/docsit forceshttps://docs.github.com/en/...which matches their site structure.
How do I see the Markdown for a Profile page
So you have come across a nice profile and want to know how they did certain badges or layouts on their profile page using Markdown, then these are the instructions for you.
Important Note
- Not all GitHub profiles have custom README files. The profile README feature is relatively new, so many users haven't created one yet.
- If the USERNAME/USERNAME repository doesn't exist or there's no README.md file, that user simply hasn't set up a custom profile.
Method 1 - View a GitHub Profile's Markdown
The README markdown, for a profile, is stored in a special repository. To see the markdown source code for any GitHub user's profile:
- Go to their profile repository: Visit https://github.com/USERNAME/USERNAME (replace USERNAME with the actual username). For example, if you want to see Elon Musk's profile markdown, you'd go to https://github.com/shoulders/shoulders.
- View the README file: Look for the README.md file in that repository. This is the file that displays on their profile.
- Click "Raw" to see the markdown: On the GitHub page for the README.md file, click the Raw button in the top-right corner of the file preview. This will show you the plain markdown source code without any GitHub formatting applied.
Method 2 - Direct URL
Alternatively, you can navigate directly to the raw markdown by following the URL logic below:
https://github.com/shoulders
-->
https://github.com/shoulders/shoulders/raw/main/README.md
-->
https://raw.github.com/shoulders/shoulders/raw/main/README.md
Get the GitHub Repository URL from the GitHub Page URL
Convert the URL by following the URL logic below:
## Logic
https://<USERNAME>.github.io/<REPOSITORY>/
-->
https://github.com/<USERNAME>/<REPOSITORY>

## Example
https://shoulders.github.io/mysql-slow-query-log-visualizer/
-->
https://github.com/shoulders/mysql-slow-query-log-visualizer
Repository Content
This content is not all specific to GitHub but deserves to be separate section.
General
- Camo Cache
- Purge GitHubusercontent Camo Cache with this GitHub Action | by pulkit kathuria | web-developer | Medium
- GitHub badges from services like shields.io are often cached by GitHub using camo. While this caching can improve performance, it can also lead to outdated badge information displayed in your README.md file.
- To ensure that your badges always show the latest data, you need to periodically purge the cache. This is where the “GitHub Action to Purge githubusercontent Camo Cache” is used by Github.
- Purge GitHubusercontent Camo Cache with this GitHub Action | by pulkit kathuria | web-developer | Medium
Donation Services
- Membership and One-Time Donation services
- GitHub Sponsors · GitHub - Invest in the open source projects you depend on with GitHub Sponsors.
- Patreon
- Patreon is the best place to build community with your biggest fans, share exclusive work, and turn your passion into a lasting creative business.
- This has button inside my personal GitHub account to link to a Patreon account.
- Ko-fi | Make money doing what you love - Join 1,000,000+ creators! Set up your free page to get tips, sell products, offer memberships, and grow your community.
- Open Collective
- Raise, manage and disburse money with full transparency.
- We make it easy to raise, manage, and disburse money with full transparency. Start your open collective, apply to a Fiscal Host, and unlock funding for your community—free from red tape. The future is collective.
- Open Collective is a legal and financial toolbox for groups. It’s a fundraising + legal status + money management platform for your community. What do you want to do?
- Buy Me a Coffee - Buy Me a Coffee is the best way for creators and artists to accept support and membership from their fans.
- Liberapay
- Liberapay is a recurrent donations platform. We help you fund the creators and projects you appreciate.
- Liberapay's recurrent donations system is designed to provide a stable crowdfunded basic income to creators, enabling them to keep doing great work that benefits everyone.
- One-Time Donations from Payment Processors
- PayPal Account | Mobile Wallet and More | PayPal UK - Use your PayPal account to spend, send, and manage your money. Or, create a merchant account for your business. And so much more. Discover the details here.
- Stripe | Financial Infrastructure to Grow Your Revenue - Stripe is a financial services platform that helps all types of businesses accept payments, build flexible billing models and manage money movement.
- Wishlists and Credits
- Steam
- Steam is the ultimate destination for playing, discussing, and creating games.
- Create a wishlist and allow users to purchase Games or Credits.
- Welcome to GOG.com | best PC games DRM-free
- Download the best classic and new games on Windows, Mac & Linux. A vast selection of titles, DRM-free, with free goodies and 30-day money-back guarantee.
- Create a wishlist and allow users to purchase Games for you.
- Amazon
- Online retail giant.
- Create a wishlist and allow users to purchase stuff for you.
- Steam
Profile Achievements and Badges
- GitHub - gomzyakov/github-achievements - Complete list of all GitHub profile Badges and Achievements.
- 100% Guide to Get Github Achievements in 2025 - Make your Github profile look PRO with a list of all achievements. Find everything you need to boost your GitHub badges, highlights and achievements.
- GitHub - iamAntimPal/GitHub-Achievements - A complete collection of GitHub profile badges and achievement icons to boost your profile. Dynamic, customizable assets with guidelines to showcase your contributions, stats, and milestones.
- GitHub - gomzyakov/github-achievements - Complete list of all GitHub profile Badges and Achievements (20+ languages)
README.md Content
Things like flags and badges. I will add the code and tutorials for them here.
Badges
- I cannot find an article listing all of the GitHub badge commands:
[github-downloads-uri][![Version][github-version-img]][github-version-uri][![Downloads][github-downloads-img]][github-downloads-uri][![Size][github-size-img]][github-size-img]- etc...
You will see these badges all over the place and they can be very useful to provide feedback to you userbase. Essentiall they are dynamically created images which can also be clickable.
These badges are small visual labels that show project stats such as version, downloads, file size, commit activity, or contributors.
They can be used in your Profile or on a project's README.
Examples
- Open-Shell-Menu/index.md at gh-pages · Open-Shell/Open-Shell-Menu · GitHub
- clipboard_copy/README.md at main · Augeaz/clipboard_copy · GitHub
- README.md code
[![Version][github-version-img]][github-version-uri]
[![Downloads][github-downloads-img]][github-downloads-uri]
- kefir500 (Alexander Gorishnyak) · GitHub
## ? Projects [](https://github.com/shoulders/dns-hijacking-inspector) [](https://qwertycube.com/dns-hijacking-inspector/)  ## ?️ Tech Stack ### Languages     ### Frontend    ### Backend   ### Desktop   ### Mobile  ### Deployment   
- Quick Badge Template
[](https://github.com/USERNAME/REPO/releases) [](https://github.com/USERNAME/REPO/releases) [](https://github.com/USERNAME/REPO/commits) [](https://github.com/USERNAME/REPO/graphs/contributors) [](LICENSE)
- An example from (Aetherinox / csf-firewall)
<img src="/docs/images/logos/csf.png" height="230"> <!-- prettier-ignore-start --> [![Version][github-version-img]][github-version-uri] [![Downloads][github-downloads-img]][github-downloads-uri] [![Size][github-size-img]][github-size-img] [![Last Commit][github-commit-img]][github-commit-img] [![Contributors][contribs-all-img]](#contributors-) [](https://docs.configserver.dev) <!-- prettier-ignore-end --> <div align="center"> [](https://discord.configserver.dev)[](https://discord.configserver.dev)
Combined Badge Generators
- GitHub - Naereen/badges
- Markdown code for lots of small badges (shields.io, forthebadge.com etc).
- Contributions are welcome! Please add yours!
- GitHub - Ileriayo/markdown-badges
- Badges for your personal developer branding, profile, and projects.
- A massive list of badges and their codes.
- GitHub - alexandresanlim/Badges4-README.md-Profile
- Improve your README.md profile with these amazing badges.
- A massive list of badges and their codes.
- GitHub - cssho/VSMarketplaceBadges
- Version, installs and rating badges for Visual Studio Marketplace.
- Old and not 100% working, but this is a HTML version that could be forked.
- VSMarketplaceBadges.dev
Specific Service Providers Badge Generators
- Build your app badge - Microsoft Apps - The Microsoft Store app badge is the best way for you to display, direct, and track traffic from your assets to the Microsoft Store listing.
- Microsoft Store Badge Generator (GitHub - jasonwei512) - Generate a rating badge for your Microsoft Store app.
- Flathub Official Badges | Flathub - Official badges to promote your app on Flathub
- DeepWiki Badge Maker - Generate a badge linking to DeepWiki documentation for your GitHub repository.
- Example
Documentation [](https://deepwiki.com/michen00/invisible-squiggles)
- Example
Tutorials
- How to Use GitHub Badges to Stop Feeling Like a Noob – TheLinuxCode - This guide will share insider tips on effectively using badges to skill up with confidence.
- GitHub Markdown Badges Explained - Learn about GitHub Markdown badges, how to add them to your project, types of badges, customizing tips, best practices, and resources. Get started with GitHub badges today!
- Adding a workflow status badge - GitHub Docs - You can display a status badge in your repository to indicate the status of your workflows.
Providers
- GitHub - badges/awesome-badge
- A curated collection of awesome things related to status badges.
- While this list is maintained by members of the Shields core team, it includes Shields-related and non-Shields-related resources.
- Shields.io
- Concise, consistent, and legible badges
- Shields.io is the official universal badge generator.
- You can customize color, style, and text for any metric or service.
- Simple Icons
- SVG icons for popular brands
- You can combine Shields.io + Simple Icons for almost any logo.
- Home of the bulk of the icons used by both Shields and Badgen.
GitHub Actions
- badge-generator · Actions · GitHub Marketplace
- Generate and save custom Shields.io badges directly from your GitHub Actions workflow
- badge-generator is a GitHub Action that creates dynamic, customizable badges using Shields.io.
- Perfect for displaying code coverage, build status, quality metrics, or any custom label and value in your repository.
README.md generators
- RepoLaunch - GitHub README Generator - Create stunning GitHub README files with our easy-to-use templates. Showcase your work and projects professionally!
- GitHub - KasRoudra/repository-readme-generator - Repository readme generator is a website/web-application to generate beautiful README.md for your repository. You can copy or download that. Enjoy!
Contributors Grid / Table / Picture
- Scripts (Repositories)
- Contributors - vscode-material-icon-theme/README.md at main · material-extensions/vscode-material-icon-theme · GitHub
- Builds a single page with images, creates a screenshot with Puppeteer, then uploads and inserts tot he README.md
- This is not a standalone script, but if license allows should be useable.
- [idea] Adding Github icons of contributors in the README · Issue #448 · material-extensions/vscode-material-icon-theme · GitHub
- Adding Github icons of contributors in the README by PKief · Pull Request #480 · material-extensions/vscode-material-icon-theme · GitHub - Closes #448.
- Current script - vscode-material-icon-theme/src/scripts/contributors at main · material-extensions/vscode-material-icon-theme · GitHub
- GitHub - all-contributors/all-contributors - Recognize all contributors, not just the ones who push code.
- GitHub - ngryman/contributor-faces - Put your contributors faces in your readme.
- GitHub - sallar/github-contributions-chart - Generate an image of all your Github contributions
- Contributors - vscode-material-icon-theme/README.md at main · material-extensions/vscode-material-icon-theme · GitHub
- Scripts (User)
- How to Display Contributor Profile Pictures in Your GitHub README | by Basavaraja V | Medium
- Are you looking for a way to show your contributors’ profile opictures in your GitHub README file? While GitHub provides an API to retrieve contributors’ information, it can be a hassle to set up. Luckily, there’s an easy way to display profile pictures without using the API.
- In this article, we’ll show you how to display contributor profile pictures using a simple code snippet.
- How to Display Contributor Profile Pictures in Your GitHub README | by Basavaraja V | Medium
- GitHub Actions (Repositories)
- Contribute List · Actions · GitHub Marketplace · GitHub - Automation of contributors list in README.md
- Websites (Repositories)
- contrib.rocks - To Keep in sync your contributors list without any pain, ENTER repository name and GENERATE an dynamic image URL for displaying it!sssssss
- contrib.rocks: Generate an Image of GitHub Repositories Top Contributors | Open {re}Source - contrib.rocks generates an image of GitHub repositories top contributors.
- Example code
<!-- Copy-paste in your Readme.md file -->

<a href = "https://github.com/open-reSource/openresource.dev/graphs/contributors">
  <img src = "https://contrib.rocks/image?repo=open-reSource/openresource.dev"/>
</a>

Made with [contributors-img](https://contrib.rocks).
- Example code
- Display GitHub contributors in README | remarkablemark - How to display GitHub contributors in README with Open Collective which has an embed for displaying contributors.
- Websites (User)
- GitHub Contributions Chart Generator - See all of your GitHub contributions in one image!
- GitHub Contribution Chart Generator API - PublicAPI - GitHub Contribution Chart Generator API provides Create an image of your GitHub contributions
- Gitchart - GitHub Contribution Graph Generator - Transform your GitHub contribution history into beautiful, customizable SVG graphs. Perfect for adding to your portfolio, README, or anywhere you want to showcase them.
Markdown (Guides, Examples, Snippets and Templates)
- Guides
- Markdown style guide | styleguide - Style guides for Google-originated open-source projects
- Basic Syntax | Markdown Guide - The Markdown elements outlined in the original design document.
- Markdown Code Blocks - Supported Languages · GitHub
- Tutorials
- Creating diagrams - GitHub Docs - Create diagrams to convey information through charts and graphs
- How to set an image size in Markdown
- There is no native way in markdown, you need to use the
<img>tag. - image resize in github flavored markdown. · GitHub | uupaa - image resize in GitHub flavoured markdown.
- How to set image size in Markdown - Markdown does not have a standard way to change the size of an image, common way to change image size in Markdown is to use some HTML code instead of Markdown syntax.
- Changing image size in Markdown - Stack Overflow - How can I change the size of an image using Markdown?
- Discourse Format

- There is no native way in markdown, you need to use the
- Add images to the README.md
- How to Add Images to README.md on GitHub? - GeeksforGeeks - In this article, we will learn how to add images to README.md in GitHub and the different ways to do so.
- 4 Ways to Add Images to GitHub README + 1 Bonus Method | Cloudinary - GitHub is a popular platform for storing, managing, and sharing source code. README.md is your Github repository's welcome mat.
- How to add images to README.md on GitHub? - This tutorial covers adding images or screenshots to the GitHub markdown README.md file and resizing images using syntax HTML image tags and examples.
- Hidden Details Blocks
## Closed by default (Standard)
<details>
<summary>Always visible</summary>
Content is hidden by default
</details>

## Open by default
<details open>
<summary>Always visible</summary>
Content is visible by default
</details>

## Nestable
<details>
<summary>Parent Section</summary>
<details>
<summary>Child Section</summary>
Nested content here
</details>
</details>
Repository Layouts
- Generate a new repository using an existing repository as a tempalte using this command:
https://github.com/<user>/<repo>/generate
- Best Practices
- Best Practices for Organizing Git Repositories | by Tosin Akinosho | Medium
- Git has become an essential tool for version control and collaboration in modern software development. However, as projects grow in complexity and teams expand, maintaining a clean and organized Git repository structure becomes increasingly crucial.
- In this article, we’ll delve into the best practices for organizing Git repositories, highlighting the importance of clear directory structures, effective Git command usage, repository cleanliness strategies, and collaboration tips for teams.
- GitHub Repository Structure Best Practices | by Soulaiman Ghanem | Code Factory Berlin | Medium
- Whether we start a new project for private or for open source, we can follow some best practices to organize the repository for better team contribution and more elegant project structure.
- We have created a repo that contains all the mentioned files and folders, please feel free to use it as a starting template.
- Please note that you can also use the repo as template.
- GitHub is full of open source projects. However, I can recommend the followings 2 projects as a starting point to watch and learn the repo structure as well as contributing best practices:
- This article describes the structure.
- ideal github repo layout | Google Search - The AI description is quite useful
- How to Structure Files and Folder in your Project? - GeeksforGeeks
- Maintaining a clean, organized file and folder structure can significantly impact a project’s success in the fast-paced web development world.
- This article will go through the best practices and show you how to improve your project's file layout.
- Best Practices for Organizing Git Repositories | by Tosin Akinosho | Medium
- Skeleton Repositories
- GitHub - CodeFactoryBerlin/OpenSourceRepoTemplate - Example repository template for opensource projects.
- GitHub - thephpleague/skeleton - A skeleton repository for League Packages.
- Example Repositories
File and Templates
- .gitignore
- GitHub - groda/the_ultimate_gitignore_guide
- Everything you never knew you needed to know about .gitignore! This beginner-friendly guide offers practical tips to keep your Git repos clean and your workflow efficient, with clear examples to help you master the basics and best practices of managing ignored files.
- How to format a .gitignore file?
- What happens to tracked files after being added to .gitignore?
- gitignore.io - Create Useful .gitignore Files For Your Project - Create useful .gitignore files for your project
- GitHub - github/gitignore - A collection of useful .gitignore templates.
- Git - gitignore Documentation - gitignore - Specifies intentionally untracked files to ignore
- Git Ignore and .gitignore | W3Schools - The
.gitignorefile tells Git which files and folders to ignore (not track). - Git Ignore and .gitignore | GeeksforGeeks
- When working with Git, you often have files and directories that you don't want to be tracked in your repository. These could be sensitive data files, temporary files, or even operating system-specific files.
- Managing these untracked files is where the .gitignore file comes into play. In this article, we'll explore the importance of Git Ignore, its purpose, and practical examples of how to use it effectively in your projects.
- .gitignore file - ignoring files in Git | Atlassian Git Tutorial - Git ignore patterns are used to exclude certain files in your working directory from your Git history. They can be local, global, or shared with your team.
- GitHub - groda/the_ultimate_gitignore_guide
- .gitattributes
- What Is The .gitattributes File? - Ken Muse - You've seen the file, but do you understand it's purpose? Git has the ability to customize how it handles the files you edit. Today we explore how that works.
- Code of Conduct
- code-of-conduct - IndieWeb - A CC0 code of conduct that you can use.
- .github/CODE_OF_CONDUCT.md at master · google/.github · GitHub
- Default configuration for @google repos.
- This document was adapted from the IndieWeb Code of Conduct and can also be found at https://opensource.google/conduct/.
- CODEOWNERS
- About code owners - GitHub Docs - You can use a CODEOWNERS file to define individuals or teams that are responsible for code in a repository.
Git
General
I will include how to use Git in VSCode tips and tricks.
- Official Sites
- Git for windows - Discussions | GitHub - Explore the GitHub Discussions forum for git-for-windows git. Discuss code, ask questions & collaborate with the developer community.
- Commands
- Git Cheat Sheet | GeeksforGeeks
- Git Cheat Sheet is a comprehensive quick guide for learning Git concepts, from very basic to advanced levels. By this Git Cheat Sheet, our aim is to provide a handy reference tool for both beginners and experienced developers/DevOps engineers.
- This Git Cheat Sheet not only makes it easier for newcomers to get started but also serves as a refresher for experienced professionals.
- Git commands: A comprehensive cheat sheet (with examples) - Sling Academy - This comprehensive cheat sheet will take you through the basic to advanced Git commands with examples and expected outputs, helping you navigate and use Git more effectively.
- Git Cheat Sheet - GeeksforGeeks
- A concise, well-structured guide for developers and DevOps engineers ideal for both beginners and experienced users.
- It covers everything from Git installation (Linux, Windows, macOS) to configuration, core commands, branching, merging, history management, and collaboration.
- Perfect for quick reference during development and deployment.
- Patch software on Linux, using GitHub (from virtualmin)
- With inux you can get coed straight from GitHub and apply it to your Linux files as shown in this example below:
## CentOS / Alma / Rocky / RHEL
cd /usr/libexec/webmin/virtual-server

## Ubuntu
cd /usr/share/webmin/virtual-server

## Common (the actual patch command)
curl https://github.com/virtualmin/virtualmin-gpl/commit/7037f778b30eda80bb9a8a3a1bd4065377763b1c.patch | git apply --reject --whitespace=fix
curl https://github.com/virtualmin/virtualmin-gpl/commit/85f803eb05e1fe8db0b59bd5a44fec8590034e88.patch | git apply --reject --whitespace=fix
This is from https://github.com/virtualmin/virtualmin-gpl/issues/747
- With inux you can get coed straight from GitHub and apply it to your Linux files as shown in this example below:
- Uploading a Project to GitHub and Collaborating with Others | CodeThePixel.com (CTP)
- In this tutorial, we will explore the process of uploading your project to GitHub, ensuring your code is secure and accessible.
- This shows of how to use the commands in context and has a small list of thema t the bottom.
- Git Cheat Sheet | GeeksforGeeks
- Working Tree
- Git – Working Tree | GeeksforGeeks - When we work with Git we mainly deal with the files and folders but one should not just relate Git with this, but Git provides us just more than that with Git Working Tree being one of them.
- The Git working tree, index and commit history explained by example | TheServerSide - The Git working tree serves as the most important part of the inner workings of the DVCS tool. A developer must have a firm grasp of what the working tree tracks, and how the status command keeps tabs on any file system changes.
- History
- How to view the Git History in Visual Studio Code | bobbyhadz - A step-by-step guide on how to view the Git History in Visual Studio code, using native functionality or extensions.
- GitLens, Git History (Don Jayamanne)
- How to view the Git History in Visual Studio Code | bobbyhadz - A step-by-step guide on how to view the Git History in Visual Studio code, using native functionality or extensions.
- Committing
- How to Undo the last Git Commit in Visual Studio Code | bobbyhadz - A step-by-step guide on how to undo the last git commit or reset to a previous commit in Visual Studio Code.
- .gitconfig (Git Global Configuration)
- Using VS Code as default Git editor, difftool and mergetool | bobbyhadz - A step-by-step guide on how to use VS Code as the default Git editor, difftool and mergetool.
- What is Gitconfig File: A Beginner's Guide to Understanding Git Configuration - BlinksAndButtons
- The Gitconfig file is a crucial aspect of the Git version control system that allows users to configure various settings and personalize their Git experience.
- Gitconfig, also known as the Git configuration file, is a text file that resides on your local system and contains configuration options for your Git setup. It enables you to customize various aspects of Git, such as user information, aliases, color settings, and more.
- How to use the git .gitconfig file for a more efficient workflow | TechRepublic - Jack Wallen shows how to use the .gitconfig file for global git configurations and a more efficient developer setup.
- config - Where is the global Git configuration data stored? - Stack Overflow
- .gitattributes (Repository Configurations)
- Git Attributes | Git
- Using attributes, you can do things like specify separate merge strategies for individual files or directories in your project, tell Git how to diff non-text files, or have Git filter content before you check it into or out of Git.
- In this section, you’ll learn about some of the attributes you can set on your paths in your Git project and see a few examples of using this feature in practice.
- Git Attributes | Git
What Git stores
- Git tracks:
- Source code and project files
- Commits
- Branches
- Tags
- References
- Git objects (blobs, trees, etc.)
- Git does not track:
- Issues
- Pull Requests
- Wikis
- Project boards
- Discussions
Issues
- Issues in GitHub - GeeksforGeeks
- GitHub is more than just a platform for hosting code; it’s a powerful tool for managing projects and collaborating with teams. One of the key features that provides this is the Issues system. GitHub Issues helps developers track bugs, enhancements, and tasks, ensuring that projects stay organized and on track. In this article, we'll see what GitHub Issues are, how to use them effectively, and best practices for managing them.
- Issues are Bolt Ons and are not transferred with forks.
Working with Forks
- Fork a repository - GitHub Docs - A fork is a new repository that shares code and visibility settings with the original “upstream” repository.
- You can now fork a repo and copy only the default branch - GitHub Changelog
- Previously, when creating a fork all branches from the parent repository were copied to the new fork repository. There are several scenarios where this is unneeded, such as contributing to open-source projects. When all branches are copied, it could result in slow repo cloning and unnecessary disk usage. With this new feature, only the default branch is copied; no other branches or tags. This may result in faster clones because only reachable objects will be pulled down.
- Forking a repository versus duplicating a repository - About forks - GitHub Docs - If you want to create a new repository from the contents of an existing repository but don't want to merge your changes to the upstream in the future, you can duplicate the repository or, if the repository is a template, you can use the repository as a template.
- When forking a repository on GitHub, you have the option to select "Copy the default branch only."
- If you leave this option unchecked, GitHub will copy all branches from the source repository into your fork.
- This means your fork will include every branch present in the original repository, not just the default branch (commonly named main or master). This can be beneficial if you need access to multiple branches for development or reference purposes.
- For more details, you can refer to GitHub's official documentation on forking repositories here.
- When I fork a repository are the issues copied as well?
- No, when you fork a repository on GitHub, the issues from the original repository are not copied to your fork.
- Forking creates a new repository that includes the code, commit history, branches, and tags, but it does not include issues, pull requests, or other metadata.
- This design ensures that discussions and issue tracking remain centralized in the original repository, preventing fragmentation across multiple forks.
- If you need to reference or track issues in your forked repository, GitHub provides the ability to transfer individual issues between repositories. This process must be done manually for each issue. For detailed steps, see Transferring an issue to another repository.
- Alternatively, if you're looking to duplicate a repository along with its issues, you might consider using third-party tools or scripts that utilize GitHub's API to export and import issues. However, these methods require additional setup and permissions.
- Issues are not part of Git — they are a feature provided by GitHub (and other Git hosting platforms like GitLab or Bitbucket).
- Issues are not stored in the Git repository itself. They live on the GitHub platform, as part of its web-based features for project management, collaboration, and discussion.
Git GUIs and Apps
These are just here for reference, you should only use VSCode with the relevant extensions. It should be noted most IDE also have visual GUIs for handling Git.
- GitHub Desktop (by GitHub)
- Whether you're new to Git or a seasoned user, GitHub Desktop simplifies your development workflow.
- Looks lke VSCode, probably is the same codebase.
- Git, GitHub, & GitHub Desktop for beginners - YouTube | Coder Coder - In this video we'll be going through the basics of Git, GitHub, and GitHub Desktop app-- how to set them up and use them to track your code changes.
- Git GUI Clients | git-sc.com
- Git comes with built-in GUI tools for committing (git-gui) and browsing (gitk), but there are several third-party tools for users looking for platform-specific experience.
- GitHub Desktop | Simple collaboration from your desktop · GitHub - Whether you're new to Git or a seasoned user, GitHub Desktop simplifies your development workflow.
Repository Files and Folders
There are all of these files and folders that everyone seems to use so I am going to try and get a full list.
- .github/
- GitHub settings folder which holds things like issue templates.
- .vscode/
- VSCode workspace settings folder
- Workspace settings are specific to a project and can be shared with other developers on your team.
- .vscode/extensions.json
- Recommended extension settings that should be followed by the entire team.
- .vscode/launch.json
- Debug configurations, usually shared between a team.
- .vscode/tasks.json
- tasks and build commands, usually shared between a team.
- Integrate with External Tools via Tasks - Expand your development workflow with task integration in Visual Studio Code.
- .vscode/settings.json
- Used to enforce project-specific settings and overrides global user settings, e.g. specific formatting rules.
- .phan/...
- .editorconfig
- .env
- .gitattributes
- .gitignore
- GitHub - github/gitignore - A collection of useful .gitignore templates.
- .git-blame-ignore-revs
- .gitmodules
- .prettierrc
- prettier config file
- .prettierignore
- file to say which files/folders should be ignored by prettier
- .php_cs.cache
- .vscodeignore
- It’s a file used when packaging VS Code extensions.
- It tells the VS Code extension packaging tool (e.g.,
vsce) which files/folders to exclude from your.vsixpackage.
- .travis.yml
- .php-cs-fixer.dist.php
- .drone.yml
- .appveyor.yml
- .eslintrc
- ESLint config file.
- As off ESLint v9.0.0 it is deprecated.
- .eslintrc.js
- ESLint config file.
- As off ESLint v9.0.0 it is deprecated.
- .eslintrc.json
- ESLint config file
- As off ESLint v9.0.0 it is deprecated.
- .eslintignore
- Files to be ignored by the ESLint processor
- eslint.config.js
- ESlint V9.0.0+ config file ???
- Use Case: CommonJS module system.
- Default Behaviour: If your project uses Node.js with CommonJS (default for older Node.js versions or projects not explicitly using ES modules), this is the standard choice.
- eslint.config.mjs
- ESlint V9.0.0+ config file
- Use Case: ES module system.
- Default Behaviour: If your project uses ES modules (e.g., "type": "module" in package.json), you should use .mjs for compatibility.
- When I
initeslint in vscode vianpmthen aeslint.config.mjsis created.
- .tsconfig.json
- webpack.config.js
- yarn.lock
- package.json
- package.yaml
- package-json-schema.json
- package-lock.json
- package.nls.json
- checkstyle.json
- composer.json
- composer.lock
- web.configruleset.xml
- renovate.json
- phpunit.xml.dist
- phpunit-pgsql.xml.dist
- phpstan.neon
- cypress.config.dist.mjs
- build.xml
- CODE_OF_CONDUCT.md
- LICENSE
- LICENSE-CODE
- README.md
- SECURITY.md
- SUPPORT.md