Items filtered by date: December 2014
6TO4 adapter issue
6to4 Adapter is basically just a virtual adapter which microsoft has developed to change the IPv6 to IPv4 internally.
There is some compatibility issue with Vista and so it keeps on showing these errors and warnings. Also a 6tOP adapteer keeps on getting created
To stop the 6TOP adapters being created we have to remove the problem. this is cause by network adapters not having matched ipv4 and ipv6 settings. This is where the 6TO4 adapter comes in to play, it translates between IPV4 and IPV6 but because of the issues caused by Vista it keeps on creating them.
- check all adapters have IPV4 and IPV6 enabled or disable all IPV6 in adapters
- then delete all the erronoues drives 6to4 and isatap if required
Other Things to Try
- Uninstall any ADSL modem drivers or other network adpaters
- check other adaptors settings do they have ipv6 enable. ie if they dont a tunnel adaptor 6to4 will be created. if there are incompatability issues one might be created every connection
- update speedtouch drivers + all other network drivers
It's not used so no it's not important. Do the following:
- Go to the Control Panel and select Network & Sharing center.
- Click manage network connections and disable your dial up/broadband if you use wireless. Disable wireless if you use dial up/broadband.
- Right click your network connection and then left click properties.
- Uncheck the Internet Protocol Version 6 (TCP/IPv6)
- Click OK and exit.
This will eliminate connection/hangup issues as well.
If you are not sure google IPv6 6to4. It basically works with how ip addressess are issued, and we won't be needing it any time soon. For example:
IPv4: 4,294,967,296 addresses (what we use now)
IPv6: 340,282,366,920,938,463,463,374,607,431,768,211,456 addresses. (what we'll use in the future)
My Ubuntu Linux Notes
These are my notes specific to Ubuntu Linux.
- General
- RootSudo - Community Help Wiki
- In Linux (and Unix in general), there is a SuperUser named root. The Windows equivalent of root is the Administrators group. The SuperUser can do anything and everything, and thus doing daily work as the SuperUser can be dangerous.
- By default, the root account password is locked in Ubuntu. This means that you cannot login as root directly or use the su command to become the root user.
- How to use the ping Command on Ubuntu - Pi My Life Up - Check your devices network connectivity
- RootSudo - Community Help Wiki
- GUI
- Disable / Turn Off Lock Screen on Ubuntu 22.04 Jammy Jellyfish Linux - Linux Tutorials - Learn Linux Configuration - In this tutorial, we show the steps to disable / turn off the lock screen on Ubuntu 22.04 Jammy Jellyfish Linux.
- Root Account
- Root is disabled
- Ubuntu is one of the few Linux distributions out there that will not enable the root account. If you want to do something with root permission on the console you have to type sudo before the command.
- As you have noticed during the Ubuntu installation there was no question about the root password, as you might have been use to see during other Linux distribution installation process.
- How to login as root in Linux - Ubuntu | Linux in a Minute - YouTube
- In this Linux in a Minute video you will learn how to login as root in Linux - Ubuntu. The root user is unable to login by default in Ubuntu Linux. This video will show you how to work around that for temporary root access, as well as show you how to reset the root user's password so that you can use it on a permanent basis.
- Watch this video and everything will be answered.
- The code
Temporarily login as root:
sudo -s

Swap user to root. The root user must have a password set:
su root

Change the root user password:
sudo passwd root
- Login as Root in Ubuntu GUI
- If you really want it, you can log in as root into the Ubuntu desktop using GNOME. Here's how to do that.
- By default, Ubuntu disables the root account. You must use the sudo command for any tasks requiring root privileges.
- How to Enable and Disable Root User Account in Ubuntu | Linuxize
- In Ubuntu Linux the root user account is disabled by default for security reasons. Ubuntu users are encouraged to perform system administrative tasks by granting administrative privileges to regular user using a tool named sudo. If for some reason you need to enable the root account, you just need to set a password for the root user. If you previously enabled the root user in Ubuntu and now you want to disable it, set the root password to expire.
Disable the root account password:
sudo passwd -l root
- In Ubuntu Linux the root user account is disabled by default for security reasons. Ubuntu users are encouraged to perform system administrative tasks by granting administrative privileges to regular user using a tool named sudo. If for some reason you need to enable the root account, you just need to set a password for the root user. If you previously enabled the root user in Ubuntu and now you want to disable it, set the root password to expire.
- How to Enable Root Login on Ubuntu? – TheITBros - In this post we will show you how to enable root login on Ubuntu
- Forgot Root password
- Forgot My root Password - Ask Ubuntu
- How to Reset Forgotten Root Password in Ubuntu 20.04 - VITUX - I will show you how to reset the root password on an Ubuntu 20.04 system by modifying the Grub boot loader configuration and booting Ubuntu into a rescue mode.
- Ubuntu 20.04 reset root password - Linux Tutorials - Learn Linux Configuration - The objective of this tutorial is to reset a lost root or user password on Ubuntu 20.04 Focal Fossa Linux.
- Allow Root to use SSH
- Enable Root Login via SSH In Ubuntu - Liquid Web
- By default, SSH on Ubuntu comes configured in a way that disables the root users log in. This was originally enabled as a security precaution which means that you cannot directly log in as the root user over SSH.
- However, you can usually get around the need for root ssh login by using the sudo command.
- In some cases, though it’s just more convenient to get directly logged in as root.
- Make sure you are logged in on the terminal as root.
- Edit the relevant config using nano (an easy to use editor)
sudo apt-get install nano
sudo apt-get install nano
sudo nano /etc/ssh/sshd_config
- Add the following permit rule in the correct section as shown below
# Authentication:
PermitRootLogin yes
- Save and exit the file.
- Restart the SSH server using either of these methods
systemctl restart sshd

or

service sshd restart
- Done, you can now login with SSH and FTP over SSH as root.
- Enable Root Login via SSH In Ubuntu - Liquid Web
- Root is disabled
- apt vs apt-get
- What is the difference between apt and apt-get? - Ask Ubuntu
- Difference Between apt and apt-get | Baeldung on Linux - Learn the difference between the apt and apt-get utilities in Linux.
- Tutorials
- INSTALL UBUNTU - Server 20.04 LTS - Code Intrinsic
- Simple Guide how to setup USB Installation Disk, followed by installation instruction step by step.
- Do not use LVM Groups. These are dynamic disks and have to be online to be imaged.
- How To Install and Secure phpMyAdmin on Ubuntu 20.04 | DigitalOcean - In this guide, we’ll discuss how to install and secure phpMyAdmin so that you can safely use it to manage your databases on an Ubuntu 20.04 system.
- Change Hostname on Ubuntu 20.04 {via GUI or Terminal} - Change the hostname on Ubuntu 20.04 in a few simple steps by choosing one of the methods described in this article.
- INSTALL UBUNTU - Server 20.04 LTS - Code Intrinsic
- LetsEncrypt
- How To Create Let's Encrypt Wildcard Certificates with Certbot | DigitalOcean - A wildcard certificate is an SSL certificate that can secure any number of subdomains with a single certificate. You may want a wildcard certificate in cases where you need to support multiple subdomains but don’t want to configure them all individually.
- How To Secure Apache with Let's Encrypt on Ubuntu 20.04 | DigitalOcean - In this guide, we’ll use Certbot to obtain a free SSL certificate for Apache on Ubuntu 20.04, and make sure this certificate is set up to renew automatically.
- Networking
- Configuring
- alias - How do I add an additional IP address to an interface in Ubuntu 14 - Ask Ubuntu - I want to have the wired interface simultaneously obtain a DHCP address, and also alias a fixed address so I can communicate with a device with a fixed IP address on a different subnet over the same link.
- Static IP
- How to Set a Static IP Address in Debian - Learn how to set a static IP address in Debian with this step-by-step tutorial. Ideal for beginners and experts looking to enhance network configuration skills.
- Set static IP in Ubuntu using Command Line | Learn Ubuntu - Everything you need to know about setting static IP on an Ubuntu machine using the command line.
- Change IP address on Ubuntu Server - Linux Tutorials - Learn Linux Configuration - In this tutorial, we show the step by step instructions to change the IP address from command line on an Ubuntu Server Linux system.
- Manual Network Configuration in Linux and How to Set a Static IP Address | Baeldung on Linux - Explore network configuration under many different Linux distributions, with the main goal of setting a static IP address.
- Enable/Disable
- command line - Enabling and disabling network card through commandline - Ask Ubuntu - Can anybody help me to how can I enable and disable network card through terminal?
- How to Restart Network in Ubuntu [Command Line & GUI] | It's FOSS - Here are 6 ways you can restart the network in Ubuntu and other Linux distros. Also learn to refresh wireless network connection in Ubuntu Linux.
- Restart Network in Ubuntu Command Line | Learn Ubuntu - From systemd to ip, learn various ways of restarting the network in Ubuntu command line.
- nmtui
- How to Configure IP Network with 'nmtui' Tool - nmtui is a graphical command-line utility that allows you to easily configure your network interfaces in Linux distributions using a graphical display.
- Install nmtui (the utility didn't work right on Debian 12)
# Become root
$ su

# Install nmtui (the package itself is called network-manager)
$ apt-get install network-manager

# Launch it by typing in terminal
$ nmtui
- How to use
nmcli d- will show you which network device is live, make a note of it eg: `eth0 (Wired connection 1)`
nmtui- Edit Connection
- you will now probaly see 2 connections
- `Wired connection 1`
- `enp0s3`
- Examine both and you will find the settings of the dead connection (eg: enpp0s3)
- Delete the dead connection
- optionally you can leave it present until you know things are working but at the very least you need to remove or change it's IP and then deactivate it.
- Add to your new connection.
- Reboot server
- Links
- How to Configure CentOS Network Settings {via terminal or GUI) - Configure CentOS network settings via command line or the Network Manager TUI. Master the CentOS 7 network config and set up a static IP or DHCP with ease!
- No Network cards will come up
if you have nmtui or nmcli installed it would be easier to use those utilities but they are required to be installed before you have issues.
- This is indicated by
- No flashing NIC LEDs when connected to a network with an RJ-45 cable
- You do not have an IP address (assuming DHCP) when you run the command
ip a
- Caused by
- For me it was caused by putting my hard drive in another PC and trying to run the OS from that.
- Solution
- Plug a network cable in to your network card (must be connect to a network)
- Run this command get a list of your network card interface names and then select the NIC you are going to use. It is easier if you only have one NIC to work with. (eg enp2s0)
ip a
- Force the network card to come up (might not be needed)
ip link set enp2s0 up
- navigate to and list the directory
/etc/netplan/
ls
- There should only be one file which you should edit with nano
nano 01-netcfg.yaml
or
nano 00-installer-config.yaml
- You will now be presented with the following information (or similiar)
# This is the network config written by 'subiquity' network: ethernets: enp5s0: dhcp4: true version: 2 - As you can see the network interface does not match that of the installed NIC. Correct the entry. (eg enp5s0 --> (eg enp2s0)
- Now apply the changes with netplan
netplan apply
- Your network should come back online.
- This is indicated by
- Configuring
- Enable Brotli compression
- Key points to get this working
- This requires an Apache module to be installed.
apt install brotli
a2enmod brotli
- You enable compression by putting directives in the Apache Config or .htacces file. However compression is then statically set with this command rather than being controlled by your CMS/PHP.
<IfModule mod_brotli.c> AddOutputFilterByType BROTLI_COMPRESS text/html text/plain text/xml text/css text/javascript application/x-javascript application/javascript application/json application/x-font-ttf application/vnd.ms-fontobject image/x-icon </IfModule> - To use in PHP you will need a 3rd Party PHP extension.
- GitHub - kjdev/php-ext-brotli: Brotli Extension for PHP
- Added brotli native in PHP · Issue #11504 · php/php-src · GitHub
- PECL :: Package :: brotli
- How to Install PHP PECL Extensions - ServerPilot - PECL extensions are third-party extensions for PHP. These extensions often add new built-in functions to PHP that do not exist in the core PHP language.
- Setting up Brotli Extension for PHP | Nick Dickinson-Wilde - The Brotli extension for PHP, integrates the Brotli compression algorithm for use in PHP. Brotli compression is similar to gzip but has a higher compression ratio - up to 30% bandwidth savings.
- This requires an Apache module to be installed.
- Test Brotli is enabled and working on your Website
- Brotli Test - Verify Brotli Compression Support | KeyCDN Tools - Test if a server supports the Brotli compression. The Brotli algorithm, which is the successor of Gzip, allows better and faster compression results.
- Check if your website supports Brotli compression | Brotli.Pro - Scan your website now and start the free Brotli compression test for your page!
- Virtualmin
- How to use brotli compression instead of gzip - Virtualmin - Virtualmin Community
- Brotli Compression - Virtualmin - Virtualmin Community
- It is, marginally. On text files it can compress between 10% and 15% smaller than Gzip. The problem though is that Gzip has been around for nearly 30 years now and Brotli has only been around for 5 or 6 years. I always err on the side of caution and stick with the tried and true.
- Information
- Brotli - Wikipedia
- What is Brotli Compression and Why Do I Need It For My WordPress Site? | Boldgrid
- Ubuntu Manpage: brotli - brotli, unbrotli - compress or decompress files
- Enable HTTP (brotli) compression - Configuring WordPress Browser Caching using W3 Total Cache by BoldGrid
- While gzip has long been a staple in performance optimization, Brotli compression is emerging as a cutting-edge partner in caching and speed. Developed by Google, it offers even more impressive compression capabilities, often achieving a 10-20% reduction in file size compared to gzip. This translates to smaller files, faster transfers, and enhanced caching benefits. While Brotli compression is more powerful than gzip, the Brotli compression process is slower making gzip preferable if you host a large amount of dynamic content that cannot be cached.
- The brotli PHP extension must be installed on your server in order to use this option. If you would like to use this feature and are unable to enable it, reach out to your host for further assistance.
- Apache Installation
- Enable Brotli Compression for your Apache server in less than 5 minutes | Brotli.Pro
- Learn how you can enable Brotli compression for your Apache web server in a couple of minutes!
- Gives an explantion of the options
- Seems to be a homepage for the software.
- How To Enable Brotli Compression In Apache 2.4 - This guide shows you how to utilize the efficient brotli compression for you website.
- How To Enable Brotli Compression in Apache – TecAdmin - This tutorial helps you to enable brotli compression in the Apache webserver.
- How to Add Brotli Compression Support on Apache - Linux Tutorial Hub
- This guide shows how to add Brotli compression support on Apache. If you want to add Brotli support then this tutorial is useful for you.
- ou can use the curl command to test Brotli support:
curl -I -H 'Accept-Encoding: br' http://example.com
- ss
- Enable Brotli Compression for your Apache server in less than 5 minutes | Brotli.Pro
- Key points to get this working
Logical Volume Management (LVM)
This is enabled by default in the Ubuntu setup but can easily be unchecked and avoided.
- General
- Key Features
- LVM is a dynamic disk that has to be online to be cloned.
- Partitions can be resized or moved while online without affecting services.
- LVM can do snapshots.
- The LVM has to be on for it's partitions to be cloned.
- It is designed for larger installations.
- Don't use for Virtual machines. Snapshoting will be done above the VM if at all (i.e. TrueNAS). Adding LVM adds an extra layer of complexity.
- Other phrases: LVM Group / LVM Volumes / LVM Storage / Dynamic LVM GPT
- Lvm - Ubuntu Wiki - LVM stands for Logical Volume Management. It is a system of managing logical volumes, or filesystems, that is much more advanced and flexible than the traditional method of partitioning a disk into one or more segments and formatting that partition with a filesystem.
- server - What is LVM and what is it used for? - Ask Ubuntu
- As a Linux/Ubuntu newbie, what is LVM and what is it used for? In terms of a web server installation, what benefits does it provide? Would you recommend using it?
- You can think of LVM as "dynamic partitions", meaning that you can create/resize/delete LVM "partitions" (they're called "Logical Volumes" in LVM-speak) from the command line while your Linux system is running: no need to reboot the system to make the kernel aware of the newly-created or resized partitions.
- Other nice features that LVM "Logical Volumes" provide are:
- If you have more than one hard-disk, Logical Volumes can extend over more than one disk: i.e., they are not limited by the size of one single disk, rather by the total aggregate size.
- You can set up "striped" LVs, so that I/O can be distributed to all disks hosting the LV in parallel. (Similar to RAID-0, but a bit easier to set-up.)
- You can create a (read-only) snapshot of any LV. You can revert the original LV to the snapshot at a later time, or delete the snapshot if you no longer need it. This is handy for server backups for instance (you cannot stop all your applications from writing, so you create a snapshot and backup the snapshot LV), but can also be used to provide a "safety net" before a critical system upgrade (clone the root partition, upgrade, revert if something went wrong).
- While being most useful on server systems, I think that features 1. and 3., combined with LVM's ability to create/resize/delete LVs on the fly, are quite handy on desktop systems as well. (Especially if you experiment a lot with the system.)
- Downsides
- Of course, all of this comes at a price: the initial setup of LVM is more complex than just partitioning a disk, and you will definitely need to understand the LVM terminology and model (Logical Volumes, Physical Volumes, Volume Groups) before you can start using it. (Once it is set up, using it is much easier, though.)
- Also, if you use LVM across hard drives, you may lose all your data when only one drive fails.
- What is LVM?
- When should you use LVM?
- The first thing your should consider before setting up LVM is what you want to accomplish with your disks and partitions. Some distributions, like Fedora, install with LVM by default.
- If you are using Ubuntu on a laptop with only one internal hard drive and you don't need extended features like live snapshots, then you may not need LVM. If you need easy expansion or want to combine multiple hard drives into a single pool of storage then LVM may be what you have been looking for.
- Setting up LVM in Ubuntu
- What is Logical Volume Management and How Do You Enable It in Ubuntu? | How-To-Geek
- Logical Volume Management (LVM) is a disk management option that every major Linux distribution includes.
- Whether you need to set up storage pools or Logical Volume Management (LVM) is a disk management option that every major Linux distribution includes.
- Whether you need to set up storage pools or just need to dynamically create partitions, LVM is probably what you are looking for.
- First thing to know about using LVM is there is no easy way to convert your existing traditional partitions to logical volumes. It is possible to move to a new partition that uses LVM, but that won't be something that we will cover in this article.
- Logical Volume Manager (LVM) versus standard partitioning in Linux | Enable Sysadmin | Red Hat - Use this guide to integrate the flexibility, scalability, and increased features of LVM into your server storage strategies. Traditional partitioning is good, but LVM is better.
- Key Features
- Misc
- Are there any LVM like solutions for Windows? - Super User
- 500GB drive fitted, only 50GB showing in Virtualmin - Virtualmin Community
- I have set up an HP Proline server with a 500GB drive with Centos 6.2 and Virtualmin 3.97. Having restored a few servers from backups, I have noticed that I am nearly out of disk space. Virtualmin reports “Local disk space 49.69 GB total, 46.74 GB used”.
- It looks like you’re running LVM there… your partition is setup for 500GB, but the LVM volume that’s mounted is only 50GB.
- Linux mount an LVM volume / partition command - nixCraft - Learn how to mount an LVM parition on Linux and access data using the command line options.
- Tutorials
- How to Migrate Ubuntu installed on a LVM Logical Volume from a MBR disk to a GPT disk on non-(U)EFI hardware without data loss - Community Help Wiki - Here is an example where this could be useful.
- Adding a New Disk to an Ubuntu 22.04 Volume Group and Logical Volume – Answertopia
- In this chapter, we will look at the steps necessary to add new disk space to both a volume group and a logical volume to add additional space to the home file system of an Ubuntu system.
- LVM provides a flexible and high-level approach to managing disk space. Instead of each disk drive being split into partitions of fixed sizes onto which fixed-size file systems are created, LVM provides a way to group disk space into logical volumes that can be easily resized and moved.
- How to Manage and Use LVM (Logical Volume Management) in Ubuntu | How-To-Geek - Today we are going to walk you through some of the key management tools of LVM so you will be confident when setting up or expanding your installation.
- Cloning / Imaging
- dd
- This can be used to clone LVM partitions.
- 'dd' command in Linux - GeeksforGeeks - dd is a command-line utility for Unix and Unix-like operating systems whose primary purpose is to convert and copy files.
- linux - Cloning HDD containing /boot and LVM to new HDD - Super User
- dd will handle the LVM just fine.
- Make sure your boot loader points to the right drive on your clone, otherwise it won't boot.
- Finally, you will need to resize the LVM on the clone. Technically you should be able to enlarge a logical volume without a problem while it is mounted, but I suggest doing all operations of this nature on unmounted drives.
lvresize -L <new size>G --resizefs MyLVGroup/myvol
- will resize the partition and the filesystem at the same time. Tip: add + right before <new size> in the above command to extend by that amount instead of resizing to it.
- To extend the logical volume separately from resizing the filesystem do the following:
lvresize -L +<amount to extend>G MyLVGroup/myvol
- Then expand the filesystem with:
resize2fs /dev/MyLVGroup/myvol
- Look at askubuntu's Q "How can I resize an LVM partition? (i.e: physical volume) and archwiki's LVM - Volume Operations for more information on resizing the LVM.
- linux - LVM and cloning HDs - Super User - Several methods mentioned here
- LVM and cloning HDs | jcea.es - Instructions on how to image a LVM.
- ubuntu - How do I clone a VM drive using LVM to a smaller drive? - Unix & Linux Stack Exchange
- LVM and the Ease of Migrating to a New Drive - Heiko's Blog - LVM Logical Volumes provide a powerful storage solution. Here I show how to use the LVM pvmove command to relocate data without downtime.
- Migrating LVM Partitions to New Logical Volume (Drive) - Part VI - In this article we will show you how to migrate existing logical volumes data to other new drive without any downtime and data-loss using LVM migration feature.
- partitioning - How to move / copy logical volume (lv) to another volume group (vg)? - Ask Ubuntu - Basically, I want to move / copy several logical volumes (lv) into a new volume group (vg). The new volume group reside on a new set of physical volumes. Does anyone know how to do that safely without damaging to the data inside those logical volumes?
- dd
- Backup
- How To Take LVM Backup In Easy Steps | Zindagi Technologies - In our previous blog, we show how we configure Logical Volume Group. Now, if we are talking about LVM backups, for many several reasons a volume group may become corrupted after unintended user intervention. there are two useful commands – vgcfgbackup and vgcfgrestore. Using this command, we take a backup of our accidentally delete the volume and we also restore it. These commands allow you to back up the metadata of the volume group. In many cases, the LVM configuration is corrupted. LVM may also be damaged when some disk fails and rebooting OS fails to boot. Therefore, it is important to have an LVM configuration backup.
- Resizing
- HOWTO: Resize a Linux VM's LLVM Virtual Disk on a ZVOL | TrueNAS Community
- If you have a Linux VM, which uses the LLVM filesystem, you can easily increase the disk space available to the VM.
- Full instructions on how to increase a LVM Volume on a TrueNAS VM.
- These instructions will aslo work with adaptation for many other scenarios.
- HOWTO: Resize a Linux VM's LLVM Virtual Disk on a ZVOL | TrueNAS Community
SORT these below
- Use Synaptic Package Manager in the GUI for a easier experience installing and removing packages.
sudo apt install synaptic
- Use Synaptic for more advanced software management
- BEST Package Manger for Ubuntu/Debian - YouTube
- Quickly overviewing the APT Package Manger for Ubuntu and other Debian based systems, Synaptic. This package manager is a classic. Similar layout to the GUI of the YaST application in OpenSUSE.
sudo add-apt-repository universe
sudo apt update
sudo apt install synaptic
- Quickly overviewing the APT Package Manger for Ubuntu and other Debian based systems, Synaptic. This package manager is a classic. Similar layout to the GUI of the YaST application in OpenSUSE.
- The location where packages are run from and placed with wget are /home/shoulders/
- By default the root account is disabled for security.
- gadmin-proftpd is a GUI for proftpd ftp server
- sudo / su is a command to allow you to run as root. Similiar to 'Run as administrator'
- Alt + F2 brings up the terminal
- First press "Alt F2" on your keyboard then type in "gksu nautilus".
- Now you are running the file browser as root in gnome.
- Or you can do the same thing in kde only look for "run command" in the kmenu and type in "kdesu dolphin".
- To run file explorer as root
- security - What is the difference between "gksudo nautilus" and "sudo nautilus"? - Ask Ubuntu
- Old way using using gksudo nautilus and sudo nautilus through Alt+F2. What's the difference? They look very similar!
- gksu Removed From Ubuntu, Here's What You Can Use Instead
- gksu is deprecated. It is removed from Debian, Ubuntu 18.04 and other newer Linux distribution version. You can achieve the gksu functionality with gvfs admin backend. Here’s how to do that.
- gksu was the program that provided a GTK frontend for su and sudo. This way graphical applications were allowed to be run with root privileges.
So, if you were using a command like this with gksu:
gksu gedit /etc/default/apport

You can use the following command instead:
gedit admin:///etc/default/apport

to run file explorer as root (I think):
admin:///nautilus
- [Quick Tip] Enable ‘Open as Administrator’ Option in Ubuntu 22.04 | UbuntuHandbook - Want to open folder or edit file as administrator (aka root in Linux)? Here’s how to do the trick by adding menu option in Ubuntu 22.04 file manager.
- 3 Quick and Easy Ways to Open Any File as Root in Ubuntu - Make Tech Easier - Accessing the root user from the GUI can be tricky to a new Linux user. Learn how to open files as root from the desktop in Ubuntu.
- How to open Ubuntu file manager as root user - Linux Shout - By default, the File Manager in Ubuntu or in any other Linux distro uses a non-root user. I mean a user that doesn’t have Administrative rights can access them graphically. It improves overall system security.
- How to Open Files and Folders as Administrator in Nautilus File Manager in Linux - Learn to add an “Open as Administrator” option in the right click context menu in Nautilus file manager in Ubuntu and other Linux distributions.If you want to open or edit a file as root, you can always do that in the terminal. I know a few people don’t
- security - What is the difference between "gksudo nautilus" and "sudo nautilus"? - Ask Ubuntu
Retrospect Various Issues
Retrospect will not sync files and copy data properely even when configured properely, try the following
- make more free space on the drive i want to back up ie. D: drive
- delete the configuration file and resetup
- turn of damon tools, reg mechanic , antivirus and other stuff like that
- reinstall might help
- leave for ages
Also See Understanding the Retrospect HD Restore Log [193431]
Log Location
Vista / Windows 7 - C:\ProgramData\RetroExp\operations_log.utx
How to Install Sage Corporation TAX
- Corporation Tax is files based
- These are the files to backup
c:\Shared Files\Sage Corporation Tax\ - there are good upgrade instructions on the install disk
- on josies server the files are located at c:\Shared Files\Sage Corporation Tax\
- the client data files are located c:\Shared Files\Sage Corporation Tax\Client Data\
- all client machines have their z:\ drive mapped to c:\Shared Files\Sage Corporation Tax\
- the update only updates sage corporation tax and will not affect any other sage product. it primarily only update the programs software but can alter databases.
Installing Sage Corporation Tax as a network install version
First, On the server:(assumes server name is \\server)
- create a folder for containing all you sage corporation tax files, i used 'Sage Corporation Tax' and i placed it on the server as follows:
C:\Shared Files\Sage Corporation Tax\ - share out 'Sage Corporation Tax'. I gave everyone access rights (tweak these if required)
- within 'Sage Corporation Tax' folder, create 2 sub folders:
'Install Files' - this will contain install files
'client Data' - this will contain the actual data - copy the content of the whole install CD from sage to 'Install Files'
Second, your first client PC: - might be required on secondary client PCs, or just run setup from network location - needs checking
- map Z:\ drive to \\server\Sage Corporation Tax - (if you have issues use a batch file to create persistent connection)
- run setup from the z:\Install Files
- follow the installation through as default until you come across, set the 'shared files location and 'working folder'. Set as below
shared folder = Z:\
working folder = Z:\Client Data\
- continue installation and finish
- run sage corporation tax and login
default username and password are:
administrator
password - you should now be prompted to enter a serial/activation key, for this contact sage
tweaks that are required after install:
- NB: short name = client file name
check software is correctely pointed to files
- open up corporation tax tools\application settings\shared folder
password = (changes every hour, get from sage)
it should say z:\
network deployment settings
to setup the the automatic client machines over the network automatically a folder has been setup on the server
c:\Shared Files\Sage Corporation Tax\Install Files\
This needs to be tied in to the client machines as follows:
set this folder for network deployment in sage tracker
- open Programs / SAGE / Sage Tracker (powered by ONESOURCE)
default username and password:
administrator
password - goto File / Launch Policy Editor
- This will open the 'ONESOURCE Policy Settings' Window
- select the 'Network Deployment' Tab
- set the CD image location to:
Z:\Install Files - (not c:\Shared Files\Sage Corporation Tax\Install Files\) - 'Policy file' should be pointing to Z:\client.policy
you can then copy all the contents of the corporation update cd from sage in to the is folder
c:\Shared Files\Sage Corporation Tax\Install Files\, if there is already stuff in there delete it.
now when a client logs in to there machine it will prompt for an update to be applied etc..
Additional Operations
create a new company
- intially we need to make sure the client files default location is correct
- select save
- it should prompt you where to save files, select Z:\CLIENT DATA
delete a company
- this is done through 'sage tracker', open the tracker software
- select files/clients/remove
- a tree structure will with a + next to it to and it will expands to like below:
All year-ends for all clients
All year-ends for Lancastrian It
31/03/2010 - z:\CLIENT DATA\Lancastrian IT09.ABC
31/03/2010 - <unknown>
- you put a tick in what you want to delete.
- selecting All year-ends for all clients deletes everything,
- to delete just the company in question select All year ends for Lancastrian IT09.ABC
- or you can just delete a particular period for a particular company
UPGRADING - (when a new CD comes out)
- delete the contents of the z:\Install Files\ (on the server it is c:\Shared Files\Sage Corporation Tax\Install Files\ ) and then copy the new CD contents into it.
Following the instructions below if sage prompts for a software update when a user logs on:
The client is prompted to run the update the following options appear
First Page of options:
- select single user
- select multi user
you should choose multi user
- single user will install all files locally
- multi user will assume that the install is a network based and will read the setup information, and use that setup information to perform the update with the network settings already in place
- leave the install directory alone as you do not need to change it from default
- the install then starts.
- that is all that is required the software will now work as normal
Backing Up
- sage corporation tax has no automatic backup procedure
- to backup the following folder on the server needs to be backed up
c:\Shared Files\Sage Corporation Tax\ (possibly just client data) - if normal backup is configured to backup the whole of the c:\Shared Files\, nothing else is required as backups are by proxy automatic
Additional Notes - not clarified and at what point they are needed. They should be part of intial installation or possibly the upgrade procedure
- Next
- Accept
- Select Multi User
Destination Folder = C:\Program Files\Sage\SCT(pbo)\ - next
working folder = Z:\Client Data - next
abacus = onesource - check sage Tracker works
Sage Corporation Tax is not SQL based but file based
Additional Notes
I found these notes about installing Sage Corporation Tax, I am note sure when i did these and if they are better than the ones above. So for completeness i am adding them. I can always delete them later if they are no good.
Installing sage corporation tax
- on the server setup a shared folder, i used 'Sage Corporation Tax', mapped to clients as Z:\
- Create 2 folders, 'Install Files', 'client Data'
- copy the files of the install CD to 'Install Files'
- run setup from the z:\Install Files
- follow the installtion through as default until you come across an options to set the 'shared files location
- set this location as z:\
- continue installation and finish
default username ad password are
administrator
password
- run sage corporation tax and login
- you should now be prompted to enter a serial/activation key, for this contact sage
tweaks that are required after install:
short name = client file name
- check software is correctely pointed to files
open up corporation tax tools\application settings\shared folder
password = 20 (changes every hour)
it should say z:\ - network deployment settings
open up sage tracker file\launch policy editor
network deployment
make sure it points at z:\Install Files
when a new CD comes out, delete the contents of the z:\Install Files and then copy the new CD contents into it.
When a user then logs on, sage will prompt for a software update if required. - intially we need to make sure the client files default location is correct
create a new company
select save
it should prompt you where to save files, select Z:\CLIENT DATA - delete a company
this is done through 'sage tracker', open tracker
select files/clients/remove
a tree structure will with a + next to it to and it will expands to like below:
All year-ends for all clients
All year-ends for Lancastrian It
31/03/2010 - z:\CLIENT DATA\QuantumWarp09.ABC
31/03/2010 - <unknown>
You put a tick in what you want to delete.
- selecting All year-ends for all clients deletes everything,
- to delete just the company in question select All year ends for Lancastrian IT09.ABC
- or you can just delete a particular period for a particular company
How to Install Sage Accounts Production
- sage acounts productions is file based
- the data to backup is
C:\Shared Files\Sage Accounts Production\ (data is actually in C:\Shared Files\Sage Accounts Production\\APEXDATA\) - install disc has some good instructions on it
- 'Sage Practice Solution' is SQL based and present on the same disc
These are instructions to set Sage Accounts Production as a network based setup
These instructions install the data files and a setup program to the remote location you select only. it does not install the software but rather create the data container
The Following Assumes:
- the server is called \\server
- shared folder for Sage Accounts Productions Data is - C:\Shared Files\Sage Accounts Production\
- mapped drive letter to use on the clients is Y:
Server:
- create a folder on the server
C:\Shared Files\Sage Accounts Production
- share it out, everyone permissions unless other is required
- put install CD in the Server
- Run setup/install
- select network install
- next
- you will no be prompted to confirm where the 'Client List' and 'Client Data' will live. (This part will configure the ini file of the shared folder), Set as follows:
Client List - Y:\APEXDATA\ - aka 'Client List Path'
Client Data - Y:\APEXDATA\ - aka 'Default Data Path'
- click next and finish install
- The server setup should now be finished and you will see the following message.
Client Setup
- map \\server\Sage Accounts Production\ folder to Y:\
- Run Y:\setup.exe
- this will install 'Sage Accounts Prodcution' to the local/client machine with the settings already preset from the server (ie data locations)
- on a fresh install the serial which is randomly created in the software needs to be validated by Sage,
- once validated on one machine all installs are validated because it validates the data files not the PC
- do updates, and is now done
Upgrading
Server
NB: 'Practise Solution' is installed as well as 'Sage Accounts Productions' from the same disk.
- put DVD in to the server
- click next
- backup page appears
- backup files for practice solution
- doing install
- the process backsup 'Sage Financial Database'
Client
- open client and they will start to update
- select workstation if asked
Additional Notes
I found these notes about installing Sage Accounts Production, I am note sure when i did these and if they are better than the ones above. So for completeness i am adding them. I can always delete them later if they are no good.
Installing Sage Accounts Production?
- create a folder on the server
- share it out, i used y:
- put cd in and run on client
- select network install
what this does is installs the data files and a setup program to the remote location you select only.
it does not install the software but rather create the data container
- when the above has completed go to the shared 'Sage Accounts Production' folder ie y:\ and run setup.
- this will install 'Sage Accounts Prodcution' to the local machine with the settings already preset - on a fresh install the serial wihich is randomly created in the software needs to be validated by sage,
- once validated on one machine all installs are validated because it validates the data files - do updates, and is now done
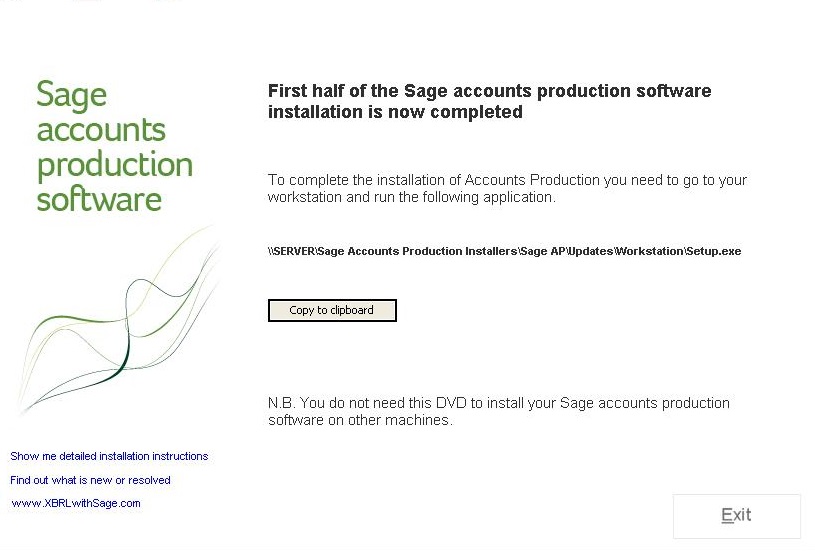
Updating
Just run this, select workstation and all is well
\\SERVER\Sage Accounts Production Installers\Sage AP\Updates\Workstation\Setup.exe
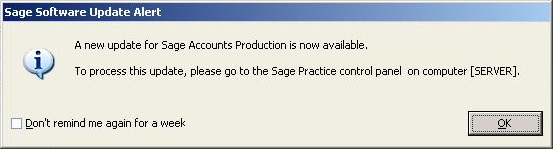
Update Alert
Your workstations might see this message pop up if there is an update available
Manually download definition updates for Malwarebytes
Method 1
- For Windows XP and 2000 users, open and copy from the following location:
C:\Documents and Settings\All Users\Application Data\Malwarebytes\Malwarebytes' Anti-Malware\rules.ref - Windows Vista and Windows 7 users, open and copy from the following location:
C:\ProgramData\Malwarebytes\Malwarebytes' Anti-Malware\rules.ref
Method 2
Download a manual definition updater here
HP Laserjet 1012 recognized as an Unspecified device
When I try to set up a Laserjet 1012 on 32 bit Windows 7, the machine chooses IEEE 1284.4 generic printer drivers, and the installation fails. The printer shows up as an HP 1012 under Unspecified devices, and nothing new shows up under Printers and Faxes. I have HP VIsta drivers that HP claims will work under Windows 7.
1. Install the printer with the following drivers (please note that this works on the 32-bit version of Windows 7)
HP LaserJet 1012 Printer- HP LaserJet 1010/1012/1015 Host Based Driver - HP Business Support Center
2. The printer might not work at first, but it is ok, as long as Windows grabs the drivers into its database.
3. Go to START > Devices and Printers... Remove ALL your printers...
4. Restart your computer
5. After logging in, Windows will automatically detect and reinstall your printers, including the HP1012 using a driver called HP1012HB
HB stands for Host Based.
or
1) Select the driver manually.
2) Click "Windows Update" to force Windows to refresh the driver list.
3) Select HP Lasterjet 1015.
or
The 1012 will install on my 64-bit Windows 7 Home Premium machine two ways:
1. Download the LaserJet 1015 64-bit host based driver from the HP site and extract it to a folder on your hard drive. Install the 1012 and point to the folder when prompted for a driver. The printer will show up as a LaserJet 1012HB. The downside to this solution is that printing will take up to twice as long as you're used to.
2. Click "add a printer" and install a phantom LaserJet 3055 PCL5 using the Windows version of the driver (you may need to use Windows Update for that choice to show up.) Plug in the printer and it will be recognized as an "unrecognized device," but it will print as the LaserJet 3055 (you can make that the default.) The unrecognized device Icon may eventually disappear -- mind did.
The 3rd method some people have suggested -- installing a phantom 1015, then trying to install the 1012 XP driver, then deleting the 1015, then plugging in the printer -- works on my 32-bit machine but not the 64-bit.
Meanwhile, with the help of a post in another HP thread, I was able to solve the issue of printing across the network! The author wrote:
"Re: printing to HP laserjet 1012 on home network I'd say that the driver that the XP machine is using is the not the same name as the driver that is installed on the Vista machine. You will not be able to connect to the printer over RPC (Remote Procedure Calls) but you can connect using SMB (Server Messaging Blocks).
Create a local printer on the Vista machine that uses a Local Port in the form \\XPMachine\Printshare. Use the driver that was installed when you plugged the device directly to the USB port."
How to stop auto import of images by Picasa
Whenever I put my memory card in the card reader, it would open Picasa and start to import, pictures and videos. I organize my photos in my E:/ partition, and do not want Picasa to import anything unless I specifically tell it to.
To stop Picasa from uploading all your pictures from the card, go to Windows Explorer, right click the card and select Properties. Then select the AutoPlay tab. Then, in the drop down box, select "Mixed content". Then click "Open folders to view files". [Apply] and [ OK ]. Now when you plug in the card in the card reader it'll only open a Windows Explorer window so you can view the files.
Internet Explorer was not able to open this Internet site
Internet Explorer was not able to open this Internet site can happen when you try and download a PDF from a HMRC website. It seems to be caused becaus ethe PDF needs to be encrypted.
If you use Microsoft Internet Explorer you may need to adjust your settings to successfully download the software.
In Internet Explorer for Windows:
(1) go to Tools - Internet Options
(2) Advanced tab
(3) under Security, ensure the ‘Do not save encrypted pages to disk’ is checked
(4) click Ok
Get Started with Office Live (add-in) window keeps popping up
Cause
The add-in was installed under another user account and the OfficeLive registry subkey necessary for that checkbox entry to be logged in the registry is not created for other users. You need to manually create the OfficeLive subkey under HKEY_CURRENT_USER\Software\Microsoft for any user on that computer that wants to suppress that add-in by checking the box. After the OfficeLive subkey is created the appropriate registry entry FirstRunDontShow will be created once Word, Excel, and PowerPoint are started and if the checkbox is selected it will no longer show on subsequent launches of those applications.
The issue can be resolved by adding a base registry key named OfficeLive under the HKEY_CURRENT_USER\Software\Microsoft subkey, once that key has been created the next time you start Word it should create two new DWORD entries (FirstRunCredsDeleted and FirstRunDontShow), both set to 1.
Solution
Install Office Live Update 1.4
OR Registry FIX
Steps:
WARNING : If you use Registry Editor incorrectly, you may cause serious problems that may require you to reinstall your operating system. Microsoft cannot guarantee that you can solve problems that result from using Registry Editor incorrectly. Use Registry Editor at your own risk.
1. Logged in as the user that has the problem, click on Start, clcik Run, type regedit, click OK.
2. On the left pane expand HKEY_CURRENT_USER, expand Software, select Microsoft.
3. From the Edit menu point to New and select Key.
4. Type OfficeLive and press the Enter key.
5. Close Registry Editor.
6. Start Word, Excel, or PowerPoint, you'll get the prompt, make sure 'Do not show me this message again' is checked, click Continue.
7. Close the application (Word, Excel, or PowerPoint), the registry DWORD values should be created under OfficeLive for that user.