Items filtered by date: December 2014
My APC SMT1500IC UPS Notes
These are my notes on using and configuring my APC Smart-UPS SMT1500IC 1500VA with SmartConnect.
General Notes
- Websites
- Different software versions
- There are two versions of PowerChute. The Personal Edition and the Business Edition. The personal Edition does not recognize the professional UPS.
- Maintenance and longer life
- How to Maintain UPS Batteries for a Longer Life | UPS Systems - How do you protect your UPS? By looking after the batteries. Find out how to best look after your UPS devices here and get in touch for more support today.
- UPS Battery Maintenance: 7 Tips & Tricks for Longer Life - Powertron Battery, Santa Ana CA - Ensure optimal UPS performance with our maintenance tips, including battery care, calibration, and load management. Extend UPS life and avoid downtime.
- Help with APC UPS - SMT vs SMC? - General Support - Unraid
- SLA batteries don't like being drained fully, it wears them out prematurely. You really should be configuring your setup so the batteries still have 50% power left after a successful shutdown event.
- Also, keep in mind that power outages seem to follow murphy's law, and your server will be busy in some task and may take longer than anticipated to complete a clean shutdown.
- What is the shelf life of a sealed lead acid (SLA) battery? – BatteryGuy.com Knowledge Base - The shelf life of sealed lead acid batteries varies according to several factors.
- Minimum Load
- The minimum load is 10% on my SMT1500IC which translates to 100W, my server is using 70W which is below the minimum load. 100W usage will give me 2h52min runtime at current levels.
- Rated power in W: 1000 W
- Rated power in VA: 1500 VA
- This means I probably went overkill on my purchase, but I was originally running 2 PCs of the UPS until I decided virtualisation was the way to go.
- I need to test the minimum load theory
- APC UPS units and minimum load... | Reddit
- Q:
- I need a new UPS and for various reasons have settled on the APC SMT*** series. I'm in a 240v country. The SMT750i would fit the bill, my load is very low maybe 100-200w, however I have the chance to get a used SMT3000i for less than the cost of a new SMT750i.
- However one thing confuses me... on the APC site it indicates for each UPS the minimum load is 10% of the maximum, so in the case of SMT3000i it says 270w. I messaged APC support and they said that was the case. I asked what would happen if you had a load of less than that, or a load of 400w then switched off one device bringing the load to 200w, and they said the UPS would beep and then shut down the output completely.
- A:
- This would only make sense to me if they had an “auto-off” feature that waited for load to drop below 10%, then taking this as a sign that you’ve shut everything down, switch off the output to save wear on the batteries. Otherwise theoretically the thing would just keep burning batteries until they ran to zero.
- 18 months ago I ran a couple of LED christmas tree lights off a pair of SRT3000XLI 3kVA UPSes as no mains power was available - total load of probably 5 watts per device, estimated battery duration in excess of 48 hours. No issues whatsoever - but note this was battery only, no mains power to battery transfers as would happen with a mains outage.
- Line interactive UPS's don't really care about the load if it's less than maximum. Larger UPS would use more power for housekeeping, that's why they define a minimum load. It's a minimum reasonable load in fact. Below that threshold you'd be in the low efficiency range due to UPS self-consumption.
- This is exactly what happened to us. We verified that our UPS was working correctly, battery had recently been replaced, 100 % charged ... then we had a power outage and the UPS switched off immediately. APC support just replied "your load was too low, it must be at least 10 % or the UPS will shut down."
- Q:
- The minimum load is 10% on my SMT1500IC which translates to 100W, my server is using 70W which is below the minimum load. 100W usage will give me 2h52min runtime at current levels.
- Buying Guides
- What are the various generations of Smart-UPS Products? | APC Canada - What are the various generations of single phase Smart-UPS Products? There are pictures to help identification as well.
- Help with APC UPS - SMT vs SMC? - General Support - Unraid
- SMT will give you longer runtime. It's more of an enterprise grade model than the SMC.
- Also with the SMT you can add that network management card into the back of it.
- Is this the older version of the smc1000i? what's the difference between smc and smt? | Amazon.co.uk: Customer Questions & Answers
- The main differences between SMC and SMT is:
- SMT has a higher output power capacity at 1000 watts compared to only 900 watts for the SMC.
- SMT has a Network Management Card slot for use with network communication.
- SMT units have a 3 years factory warranty while the SMC only have 2 years factory warranty.
- The main differences between SMC and SMT is:
- SMC vs SMT (pdf) | APC
- Which Smart ups? | MacRumors Forums
- I have been using a APC SmartUPS 1500 for several years with no problems.
- In simple terms, a true "Sine Wave" output mimics the power coming from your electrical outlets and provides more total power (energy) to your computer than does a "Step Wave" output which has many gaps. This causes the power supply in your computer to work harder to deliver the required current needs when running from a stepped input waveform.
- There is an alternative supplier remember - CyberPower. The forum search will show you plenty of threads.
- As long as you buy a Pure Sinewave model rather than a Stepped Sinewave you will be fine. For APC that means the SmartUPS (pure) not the BackUPS (stepped) range.
- To reduce risk of mission critical parts, I always advice a preventative maintenance plan. Rule of thumb, replace your PS every 6 - 8 years.
- I've used Tripp-Lite UPSs in the past and they worked fine. But, as everyone has stated, APC seems to be the gold standard now. However, you should have no issues with the Tripp-Lite and it should work fine for you.
- Some Shops (note used or recommending)
- UPS, New Batteries - UPS Trader
- Supplier of Refurbished UPS, New Batteries and UPS associated hardware. 12 Month RTB warranty and new batteries as standard.
- We have been retailing UPS and associated hardware since Aug 2001. We have thousands of units in stock and have extended experience of working with UPS. We can guide customers to the the best option for their specific use, and all of our units are priced at a fraction of their original RRP. Unless stated otherwise, our UPS will have new cells fitted and 12 month RTB warranty with us. They will all be fully functional.
- We also offer the battery packs that UPS are dependent upon.
- Has a support forum.
- Scan
- eBuyer
- Amazon
- Box
- eBay
- Comms Express
- UPS, New Batteries - UPS Trader
- How to turn off
- how to turn off apc ups? - YouTube
- Press and hold the power button on the front and as soon as you hear the beep, release the button.
- This is not in the manual
- SMT1500IC - just press and hold the power button until unit powers off.
- how to turn off apc ups? - YouTube
PowerChute
- Last time I checked, you cannot read the serial number of the UPS via PowerChute
- PowerChute does not do days. (I think this refers to setting the installation date.)
- How do I request a new feature in future versions of APC by Schneider Electric products? - APC USA
- For DCIM products such as StruxureWare Data Center Expert, StruxureWare Data Center Operation, StruxureWare Portal and NetBotz, you can enter your request here.
- For all other APC products, such as Uninterruptible Power Supplies, Power Distributions Units, Automatic Transfer Switches, Network Management Cards, Acccessories and PowerChute software, you can enter your request on the contact form here.
Shutting down a PC with your UPS
- Software
- Network UPS Tools (NUT)
- You can NUT to interact with your UPS using serial, TCP/IP, USB
- See my article TrueNAS notes for more information, My TrueNAS SCALE Notes | QuantumWarp
- Some platforms have NUT already baked into their software.
- PowerChute Network Shutdown v4.4.1 (Windows, Linux, Windows Virtualization Installer for Nutanix/Hyper-V/SCVMM) - This product is discontinued
- Network UPS Tools (NUT)
- Shutdown multiple PCs with one UPS/ PowerChute
- APC UPS USB Shutdown multiple devices? | Reddit
- I have
apcupsdinstalled on a raspberry pi connected to my APC ups via usb. Each of my devices have a bash script that polls the raspberry pi for the time remaining on the battery. Each is set to shut down at different times keeping the most important devices running as long as possible. - Most UPS management software allows custom shutdown scripts. For the single hypervisor host + multiple VMs scenario I prefer configuring VM shutdowns in the script running on the host in standalone mode vs host running UPS management server and each VM running its own client. It makes for much simpler and robust architecture
- Cyberpower custom shutdown
- I have
- Shutting down multiple servers with single APC PowerChute Agent - Mysysadmintips
- A company had a singe APC Smart-UPS 1500 device connected to a Windows Server 2008. They also had a Windows Server 2003 and wanted both servers to be properly shutdown In an event of power failure.
- APC PowerChute Agent normally can only shut down a server to which it has direct connection. Luckily, APC PowerChute Console allows to run a bat script before Agent host server is shut down.
- Configure APC UPS to shut down multiple PCs | Dartcom
- Example Windows command
shutdown.exe -m \\server -s -t 15
- APC UPS USB Shutdown multiple devices? | Reddit
- Shutdown Virtualbox / Virtual Machines
- [SOLVED] Make ups turn ubuntu off and virtual box save state - This page has a discussion and scripts.
- VirtualBox Startup Script - CHARLES AUER (dot) NET - VirtualBox Startup Script
- Set up virtual machines shutdown using powerchute from APC - Virtualization - Spiceworks Community - Hi everyone. I have been searching how to set up my vm’s auto shutdown using vmware for VMware ESXi 4.1.0 but I have not found it easy.
Battery Installation
When you initially setup the UPS and you come to the install date, use only the arrow keys to configure the date as pressing enter accepts the date and sets it. This can be awkward to change. This does not affect any of the performance of the UPS but does change the predicted fail date of the battery which is about 4.5+ years.
- When you connect the UPS to the mains power (Utility) the control unit is on i.e. the menu display and configuration options. The output power to which you will connect your protected devices is not on.
- Power Button
- The power button controls the power to the outlets only, not the menu and config control circuitry.
- If the unit is 'on' and you press the power button, a menu with different options is presented rather that the power outputs just being terminated.
- The battery tab at the back
- This is the blade connector you had to connect when setting the unit up
- It can be safely removed while the unit is on as I have to do this while on the phone with an APC support tech. I have done this several times and caused me no issue.
- If possible I would make sure you kit is turned off and unplugged from the UPS when doing this.
- I believe this is to allow hot swapping of batteries.
- The tab at the back just connects the battery circuit to allow charging and to be able to use them as the power supply.
- The UPS will charge the batteries whether the unit is on or off as long as it has a good mains connection (and of course the battery tab is installed)
- SmartConnect - Smart-UPS™ - Welcome
- This is great for basic monitoring for people at home or small installs.
- You cannot configure the device remotely with this platform.
- It allows you to do remote firmware updates.
- The platform emails you when there are issues with your UPS.
- Limited for professionals but useful for the small guy.
- Registering your UPS gives you +1year warranty on the battery. This alone is worth registration.
- The SMT range uses PowerChute Business Edition software. Available for Windows and Linux.
Changing the Battery Install date
Do not have any kit connected as I am not sure if this will cause any issue.
Method 1 (unverified)
How to Update Battery Date for Smart UPS during Battery Insertion - YouTube
This example shows the procedure using a rack mount UPS, the only difference is that the battery connection for my UPS is at the back, the 'Battery Tab'
- Pull Battery Tab out
- Wait for the UPS to give a battery warning.
- Plug the Battery Tab bag in
- Follow the menu and set the new battery install date.
Method 2 (didn't work)
- Pull Battery Tab out
- Factory reset
- Power Off via menu
- Disconnect mains supply (Utility)
- Wait 30 seconds
- Re-Install battery Tab
- Reconnect the mains supply (Utility)
- Access menu by pressing the enter Key
- Follow the wizard
Method 3 (didn't work)
- Pulled tab out at the back
- Reset to Factory

to
- (Optional) Instead of doing a factory reset you can just run the setup wizard from the menu and should have the same effect as a factory reset without loosing your settings.
- Enter Setup
Wizard:
to
- Enter Setup
- Follow the setup wizard
- Setup Wizard
Press any key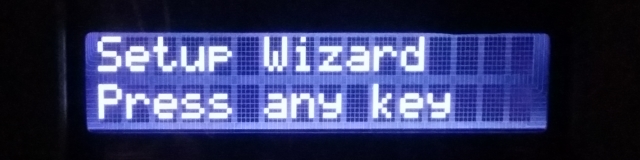
- Language:
English
- Output Voltage:
230v
- Local Power:
Quality
- Menu Type:
Standard/Advanced
to
- The unit will reboot
- New Battery
Installed
to
(now when you select Yes, this just goes to the 'Setup Complete',
it should go to the 'Battery Install
Battery Install
Date: 05-may-2021
just use the arrow keys for setting the date and then enter when finished - Setup Complete

- Setup Wizard
Method 4 (doesn't work)
These are the official guides from APC.
The reason they are no good is that they tell you to go to the "Install New Battery" from the configuration menu, but this does not exist.
- The Replace Battery Date on my new SMT series Smart-UPS is incorrect. | Schneider Electric Global
- The Replace Battery Date on my new SMT series Smart-UPS is incorrect. | APC Australia
Method 5 - Using PowerChute
I have not used this to change my 'Battery Installation Date' but I cant see why it will not work.
- Install PowerChute
- Connect your UPS
- Change your date and apply.
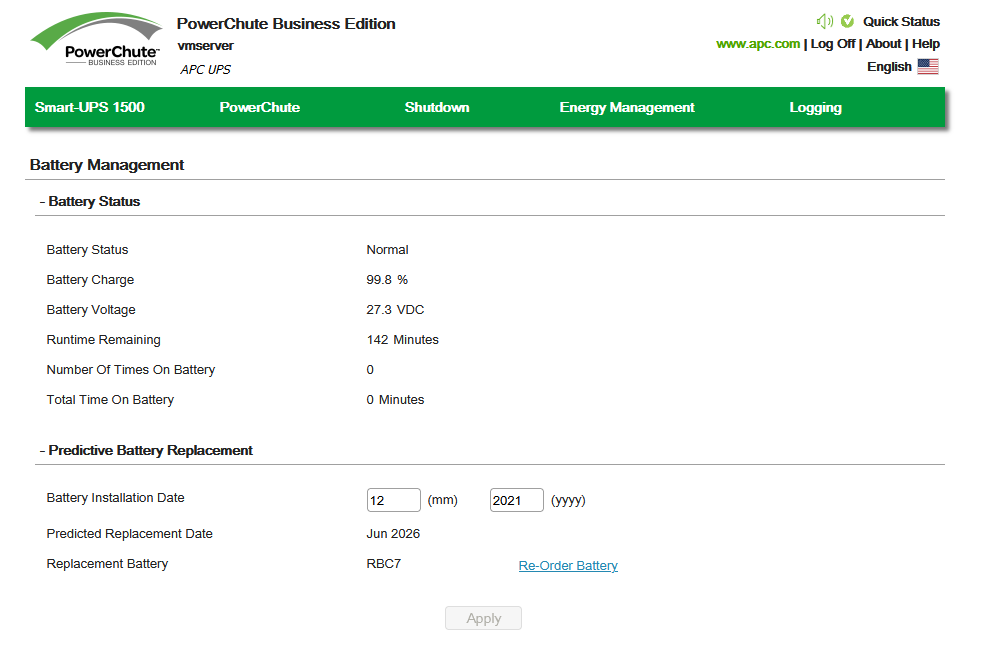
NB: This method does not have an option to change the day, only the month and year.
Troubleshooting
- Why is my new battery only charging up to 99%
- It could take 24-48hr to get up to 100% so don't worry it it takes a while
- Why does the UPS show that the battery is full and does not charge it even if it is empty? - Quora
- All the batteries looses some charge when kept idle.
- To maintain this 100% charged state, a UPS charges it at a very low rate, hence you get full battery even when you are not using it.
- PowerChute - UPS Communication Lost
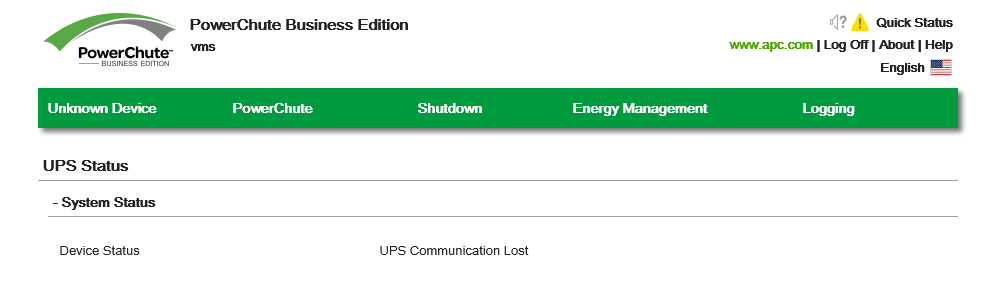
- Unplug and re-plug USB cable. It does not matter if you have restarted or turned the PC on or off. This could be because of an always on power supply to the USB bus of your PC, not all PCs have this feature.
- Solved: UPS Communication Lost - Schneider Electric Community
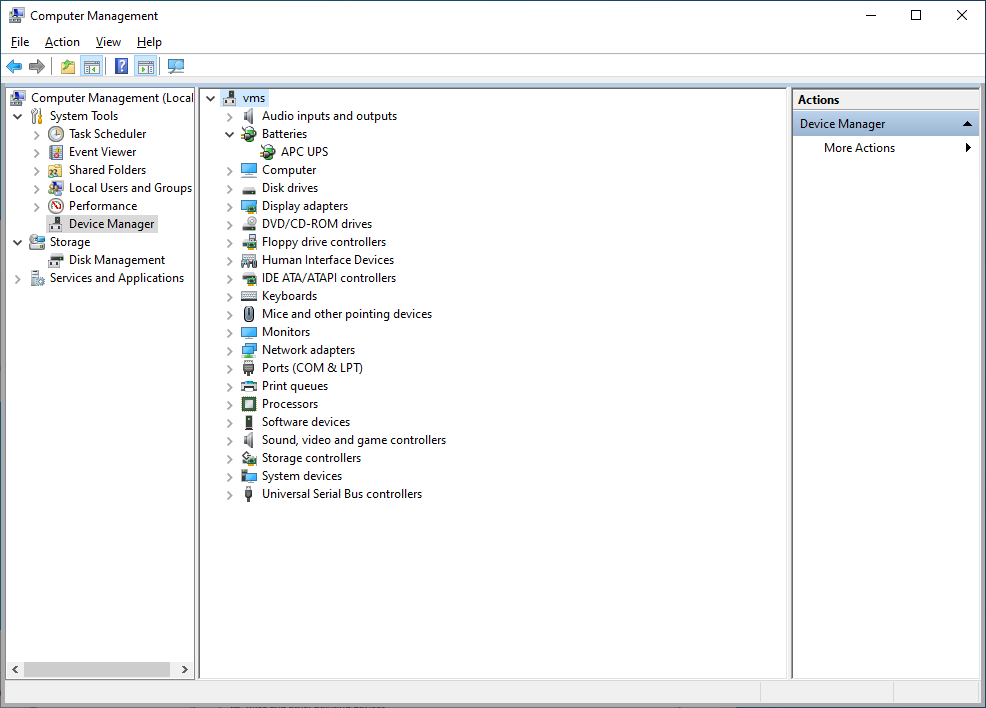
- Q: I have my SMT1500C connected to my computer via USB and it only retains the USB connection for 15-20 minutes after login before disconnecting; the only way to get the connection back is to unplug and plug in the USB cable again. When the connection is lost, Device Manager shows the USB connection is working under Human Interface Devices and shows the unit under Batteries. Also, the APC PBE Agent service is running and restarting the services doesn't resolve the problem. I've had this unit for less than a week and this has been an issue from day 1.
- A: The next time this happens reset comm of the SMC. On the display interface hold the MUTE and MENU buttons simultaneously for 5 seconds. The display flashes to indicate that comm has restarted.
My Double Glazing Windows Notes
Minimum Glazing Specs you should have
As standard, most double glazing should be supplied with argon cavity gas, at least 1 low-e coating and a warm edge spacer.
- Warm Heat Bar
- Coated Float Pane : Low E (emissivity) Glass / Pilkington K glass (is Low E Glass) / Planitherm (is Low E Glass)
- Argon filled (krypton is better)
My Choice
- Planitherm Confort Glass
- Planitherm Comfort Glass is the best glass choice for most houses
- OuterPane: 6.8mm STADIP SILENCE (2 sheets of glass with laminate in the middle)
- Inner Pane: 4mm PLANITHERM TOTAL+ (like K glass, this is also called the floating pane)
- Cavity: 16mm | Argon gas filled | Warm edge spacer (cavity might be a bit wider on 28mm cassette 28 - 6.8 - 4 = 17.2mm)
- Comfort | Planitherm
- Planitherm Glass Technical Specs (PDF)
- Frame
- Profile 22 - 5 baffles ???
- Rehow - 3 baffles ???
- Windows
- Full 90 degree openers
- Furniture
- Brushed Chrome or Satin Finish ???
This is the research I have done to decide what new type of windows I should put in my house.
- Sound Reduction
- 4mm+6mm: Domestic windows are typically 4-6mm thick. It follows that the thicker the glass, the better the noise insulation but it is also important to note that different glass thicknesses reduce different noise frequencies. So, if your double-glazed unit has one pane of glass at 4mm thick and one at 6mm thick, this will reduce noise across a wider frequency range than if they were the same thickness.
- Gases
- Argon (Krypton is better for price)
- Correct Spacing
- To get the maximum benefit from your double glazing, the gaps between the panes of glass should be 16mm and the gap between the two glass panes should be filled with argon gas, which adds another layer of heat insulation. If the gap is reduced then the thermal performance is reduced, unless you use a very expensive gas such as krypton.
- In a 28mm cassette, triple glazing is worse than double glazing because the minimum gap between the panes is violated.
- Triple Glazing:
- is only really needed in extreme conditions.
- is best in a 32mm cassette
- is a lot more expensive
Triple Glazing Vs Double Glazing
- Triple Glazing v Double Glazing – Regency Glass
- The key to the differences in performance between double and triple glazing is the selection of glass types, cavity widths, gas filling and overall unit thickness.
- Most double glazing in the UK consists of : 4mm clear glass / 20mm cavity / 4mm low e glass
- This makes the overall unit thickness 28mm and this is pretty much standard for all UK uPVC window manufacturers and tends to mean that most manufacturers will put a triple glazed unit into this 28mm space. Depending how the glazing is made up, the window could actually have worse energy saving properties with a TGU than with the DGU it replaces:
- Triple glazing in a 28mm cassette is worse than double glazing.
- Triple glazing to be better has to be in a larger casssette such as a 36mm
- Is bigger always better – triple better than double? - BRE Group
- For years the domestic window market in the UK has developed on the premise that bigger is better. double glazing grew from an overall thickness of 20mm to 24mm and finally settled on 28mm even though thermally, with either air or argon cavities, 24mm is the optimum size. Frame depths grew from nominally 60mm to 70mm for no great technical improvement, just the misconception that bigger is better.
- There are some technical thermal numbers here.
- Triple Glazing - Is it really worth it?
- Today’s standard double glazing units are generally 28mm in thickness with a configuration of 4-20-4mm, which represents, glass thickness, cavity depth and glass thickness.
- As standard, most double glazing should be supplied with argon cavity gas, at least 1 low-e coating and a warm edge spacer.
- Triple glazing is generally supplied with an overall thickness of 28 – 44mm.
- A 28mm unit with 1 low-e coating will achieve a centre pane u-value of 1.3, in this configuration, triple glazing would not be more energy efficient than a double glazed unit.
- If you are considering upgrading your new windows to triple glazing we would recommend a minimum overall unit thickness of 36mm (4-12-4-12-4) with 2 Low e coatings, Argon cavity gas and warm edge spaces used to join the glass panes together.
- Triple glazing – Is it worth it? - TheGreenAge
- Triple Glazing v Double Glazing – Regency Glass
- Double Glazing versus Triple Glazing Is one really better than the other?Double glazing is better than single glazing: FACT Therefore triple glazing must be better than double glazing: FACT…..(well not always) The key to the differences in performance between double and triple glazing is the selection of glass types, cavity widths, gas
4mm / 6mm
- Double Glazing thickness | Screfix
- How Thick is Double Glazed Glass for Windows? [Full Guide]
- You can also use thicker glass, which can achieve slightly better thermal insulation benefits and significantly improved acoustic benefits.
- It’s possible to use two different glass thicknesses in one IGU, such as 6mm for the inner pane and 10mm for the outer pane. In fact, using varying thickness can be effective for blocking low frequencies of sound, like traffic noise.
- How thick is the gap in a double glazing unit?
- The space in between will usually range from 6mm to 20mm.
- For greater energy efficiency, 10 to 20mm is a good idea, with at least 12mm being effective for both thermal and acoustic insulation concerns.
- In situations where a bigger air gap is not able to be used due to frame thickness restrictions this is where a high performance Low E Glass and Argon Gas installed inside the IGU will pick up the performance of a thinner IGU helping it perform like a thicker air space.
- Double Glazing Experts In Brighton | Top Notch Sash
- Describes the different gasses: Argon, Krypton, Xenon
- Best Practise Specifying for Noise Reduction | Secondary Glazing London
- noise reduction is better with 6mm
- Insulating Glass Units and Acoustics (pdf)(Dual Seal Glass)
- Detail write up on how the glass can affect the sound
- Cavity widths in the normal range of 6mm to 20mm, between the panes in double glazing units, provide similar performances, with no significant variation in sound reduction.
- The inclusion of argon gas within the cavity of an insulating glass unit will exhibit a similar acoustic performance as units with the same glass combination and air in the cavity.
- To maximise the acoustic benefits, the laminated pane of an insulating glass unit may be glazed to the warmer side, usually inside of the building.
- Triple glazing units do not always improve the noise reduction in comparison to double glazing, i.e. test data should be considered prior to selection of any glazing.
- Window acoustics and noise control | BUILD
- 24mm Double glazing... — MoneySavingExpert Forum
- They can be made really narrow and maintain their thermal efficiency if they are krypton filled and made with low iron glass, and warm-edge spacers, and even lower-e glass - there are endless options.
- If you want to improve accoustic insulation without shelling out for the fanciest glass or ugly secondary glazing then have the units made with different thickness panes of glass (say 4mm/14mm spacer/6mm for a 24mm unit), or with different materials (have one of the panes made with laminated glass, say) or both.
- "My understanding of document L is that 16mm is considered the optimum air gap."
- Why choose double glazing? | EW Grace Glass
- Correct installation of good quality double glazing units can lead to a noticeable reduction in noise levels inside the home. There are two vital components to this, however: the thickness of the glass and the air gap between the glass.
- Domestic windows are typically 4-6mm thick. It follows that the thicker the glass, the better the noise insulation but it is also important to note that different glass thicknesses reduce different noise frequencies. So, if your double-glazed unit has one pane of glass at 4mm thick and one at 6mm thick, this will reduce noise across a wider frequency range than if they were the same thickness.
- To get the maximum benefit from your double glazing, the gaps between the panes of glass should be 16mm and the gap between the two glass panes should be filled with argon gas, which adds another layer of heat insulation. If the gap is reduced then the thermal performance is reduced, unless you use a very expensive gas such as krypton.
Different Types of Glass
- Choosing the Right Glass for You | Planitherm
- This out lines their different types of glass and what they are for
- Planitherm Glass Technical Specs (PDF)
- PLANITHERM® TOTAL+ | Saint-Gobain Building Glass
- This describes the glass much better.
- Saint-Gobain Glass STADIP SILENCE (Planitherm)
- SGG STADIP SILENCE is an acoustic laminated safety glass, consisting of two or more sheets of glass bonded together by one or more acoustic Polyvinyl Butyral interlayers, known as PVB (A).
- Planitherm Glass Specification Broshure (PDF)
- A very detailed broshure
- Casement Windows - Double & Triple Glazing - Andover, Hampshire
- Thermal Control Glass - PLANITHERM ONE | Saint-Gobain Vitrage Bâtiment
- PLANITHERM ONE represents the most advanced thermal insulation performance within the PLANITHERM family. It offers the lowest possible centre pane U-value available from a double or triple glazed unit in the UK today.
- Why should I specify Low Iron Glass? » IQ Glass News
- The beauty of a glass structure is that they are clear and transparent. Large elevations of glass, especially frameless structural glass, provide unparalleled levels of light ingress into a space as well as fantastic viewing portals out over views. But did you know that ‘clear glass’ is not in fact totally clear?
- The Difference Between Clear Glass & Low-Iron Glass
- The difference between clear glass and low-iron glass is the greater transparency of the latter, making it more ideal for certain uses such as frameless glass walls, display cases, partitions and dividers, and other appearance-driven applications.
- Double glazing and energy efficiency - Aztec Windows (Coventry) Ltd
- So what is double glazing? What are the options? And how much do they differ from each other? The obvious answer is its two pieces of glass sealed
- Glass types available on Everest windows | Everest
- When choosing windows there is a wide choice of glazing options and types of glass. Discover more about window glass including double and triple glazing.
- Glass Types – Regency Glass
- Glass Different types of glass, Float glass, This is standard clear glass. Most glass types begin as clear float. Most units will have a pane of clear float that has no additional coatings or properties. Usual thickness for glazing is 4mm but 6mm and 10mm are also available. Low iron glass, This is the same as float glass but
- Glass Options | Clearview Secondary Glazing
- Excellent description of the different types of glass.
- Photographic examples of the different type of obscure glass (i.e. type you would use in your bathroom)
- The 3 Types Of Glazing: Your Essential Guide To Making The Best Decision | Clayton Glass
- Gives you the ideal situations for each type of glazing style and the suitable environments.
- Glass Guide - choosing the right type of glass (PDF) (fgmwindows.ie)
- Toughened Glass FAQs. Everything you need to know about⦠| by Toughlaze UK | Medium
General
- Sash windows : know your glass types and double glazed units
- Important Things to Know About Buying Double Glazed UPVC Windows
- If the window is of low quality, all the Argon gas could have leaked out within 2 or 3 years. A high performance UPVC window can reduce that loss to around 1% per year.
- It bears repeating that the industry itself mostly agrees that 14mm to 16mm (22mm to 24mm overall) is perfectly adequate for the majority of circumstances.
- How Do Double Glazed Windows Save Energy?
- Secondary Glazing - Frequently Asked Questions - Secondary Glazing Ireland | Window Home Improvements |
- Glazing Units - Double Glazed Units - 4mm Argon/ A Rated - Online Quotation | Easyfit Window Warehouse Ltd
- Glass Thickness must be upgraded from 4mm to 6mm if:
- Over 1300mm Both Sides.
- The largest size is over 2400mm.
- Glass Thickness must be upgraded from 4mm to 6mm if:
- FENSA or CERTass- which is better?
- PVC Windows - How to choose the best and what price should you pay?
- The CLEAR GUIDE To Replacing Your Glass In Double Glazing Quickly & Easily | replacedoubleglazing.com
- This is a guide on how to swap your own windows.
- Glazing | YourHome
- How Does Double Glazing Work (what is double glazing)?
- A double glazed window has two panes of glass that sandwiches Argon gas to create an air gap and insulate against heat transfer between two differing temperature zones. Our guide explains how does double glazing reduces heat loss, noise and condensation and tells you how it's made.
- How to Make a Sealed Unit | Thermoseal Group
- An insulated glass (IG) sealed unit is made with two panes of glass (although triple glazing and even quadruple glazing with three or four...
Gas Types
- Double Glazing Experts In Brighton | Top Notch Sash
- This descibed the 3 types on gas: Argon, Krypton and Xenon
Warm Edge / Warm Heat Bar
- Warm Edge Spacer Bar | Improved Thermal Efficiency
- All our Double Glazed Units have a Warm Edge Spacer Bar on each side of the unit, which significantly improve thermal retention, resulting in lower heating bills & C02 emissions. Request a free quote today.
- Warm Edge Technology | Thermoseal Group
- What is Warm Edge Technology? Up to 80% of energy loss through a window occurs at its edge. Warm edge products aim to minimize this energy loss....
- Warm Edge Spacers - Toughened Glass - Glass Supplier » Ecoglass
- Using the best quality glass and spacers we can produce the perfect sealed units for your needs.
Suppliers
- Home | Planitherm - they do their own version of K glass
- Glass for Your Home | Windows, Doors, Roofs, Glazing | Pilkington - K Glass
Double Glazing Trim
- Profile 22 - 5 baffles
- Rehow - 3 baffles
My Zgemma H2S Notes
Default name for Zgemma H2S http://zgemmah2s/
Others can be found at here and then:
- Spoiler: Installation Step 1 Getting ready for WooshBuild Infinity
- Spoiler: Select the make of your box from this list and then the model
- Spoiler AirDigital (Zgemma)
Zgemmas are made by AirDigital
Flashing a new firmware (openATV used as example)
Get firmware here : openATV Nightly Downloads - Zgemma H2S
- Extract the firmware into the root of a pendrive so you see the folder structure /zgemma/h3/
- Power off the Zgemma
- Plug the USB drive in with the extracted firmware
- Turn on the Zgemma
- When the front panel says Flash, press the power button
- The unit will now flash the new firmware
Folowups
- Install e2iPlayer
- Plugins --> Download Plugins --> extensions --> e2iplayer
Notes
- Inside the /zgemma/h3/ folder there is a file called noforce, rename this file to force to force an update without confirmation.
- This will wipe all of your settings
- If you want to backup to a pendrive you must put the following empty file on the root of the pen drive backupstick.txt so your box knows its a valid backup device.
OpenATV
Set a Password
This is needed so things like FTP and remote Webif will work.
Notes
- Change User and Password for OpenWebif - Enigma2 System Utility Plugins - Linux Satellite Support Community - Change the password via SSH
adduser admin -h /dev/null -H -s /bin/false -G root
userdel newuser
Configure Webif
I want to use my Webif remotely so i need to do the following
- Set a system password (if not already done above)
- Go to the Webif config and set the following
- Enable HTTP Authentication: yes
- HTTP: 8001
- Enable HTTPS: yes (optional)
- HTTPS port: 8002
- Enable Authentication for streaming: yes ?
- Streaming port: 8003
Notes
- If you are running a VPN on the box, Webif will not work because the IP is not your public IP.
Change HDD device Location
Sometimes the USB device that the Zgemma uses is not set correctly. In days pas this could be quite a manually task changing all of the mounts but this is now easy.
- Press the blue Button
- Goto Mounts --> Device Manager
- Select the new location for the HDD
- Click 'Use as HDD'
- Done
FTP not Working
- Is FTP enabled on the box?
- check (Menu --> Setup --> System --> Network --> FTP Setup)
- In OpenATV 6.4+ root has been restricted and you cannot use FTP until you set a password
- You must use `SFTP over SSH` not standard FTP
- When you login, make sure you go up to see all files, files = /media/hdd/
USB keyboard not working
- Login into openwebif
- Goto (Settings --> keyboard setup --> keyboard map --> USB Keyboard English (QWERTY))
No free space on / HDD / error in IPTV when there is
This is an old way of fixing the HDD issue but might be useful for a reference.
You get error warnings on your Zgemma H.S2 running Wooshbuild that there is no free space on /hdd/movies/ or other such locations on the hdd when there is actually free space. This error is common in the IPTV application.
Cause
This is caused by
- Incorrect mounting of the of the USB, SD card or Hard drive. Either the mount name is wrong or does not exist
- or you have not initialised the media.
- In my case is was because during the installation I intialised a SD Card to be used while it was in rear USB socket and then after the setup was complete I moved it to the SD card reader on the front right which broke the mount name /hdd/
- The media is actually full or faulty.
Solution
All apps seem to be hardcoded to use the /media/hdd/ mount
- Make sure the USB, SD card or Hard drive is in the port it is going to stay in. It can be moved later.
- Intialise the media (optional). This will wipe everything on the drive, so if you have all of your recordings on the media you might not want to do this and only needs to be done in the media is not initialised.
- Power on the Zgemma box
- Once loaded navigate to (Menu --> Info Panel --> Plugins --> Mount Manager)
- You are now in the mount manager and one of the following should be done depending on your situation
- There are no mounts - This means your media is not mounted at all
- Select your device and mount it
- There is one mount present - This assumes you only have 1 external media plugged in.
- edit the mount to make it show /media/hdd/.
- you can change its mount name by using the left and right arrows on the remote
- There are no mounts - This means your media is not mounted at all
Notes
Upgrading OpenATV
- backup settings (should be to your SD Card)
- (optional) I manually make a copy of the backups to my PC via FTP
- make a USB drive with the new image on
- flash the new image
- When the flash is complete and the new version of OpenATV has loaded it will ask you if you want to restore your settings
- Select yes and your settings will be imported
- You will now be asked is you want to import your plugins
- I think this will try and find the matching package in this version extension repor rather than copying the plugin from the backup
- If the upgrade is between major versions such as 6.4 to 7.1 (i.e. Python 2 --> 3) you might not want to import your plugins.
- You can try importing plugins and if it it fails just repeat this process and dont import plugins.
- Done
Misc Notes
not here yet
WooshBuild (this is no longer supported)
Install Wooshbuild
- Open a terminal in Webif
- Run the following command
opkg install http://wbuildx.co.uk/setup.ipk
- Follow the onscreen instructions
Notes
- Wooshbuild only works on OpenATV 6.4 or older becasue newer version of OpenAtv now use PY3
- WooshBuild Infinity - For ALL Enigma2 boxes | Techkings - The official install thread
- WooshBuild Infinity, an Enigma2 image ALL Enigma2 boxes. No Download required - points to the install thread, other than that just gives a bit of history.
Manually update e2iPlayer (maxbambi)
The version of e2iPlayer that Wooshbuild installs is too old and does not have some of the update options so this plugin needs to be updated. The instructions below assume you have used Wooshbuild rather than a complete vanilla OpenAtv install.
- Connect to your Zgemma with ftp
- backup the folder /usr/lib/enigma2/python/Plugins/Extensions/IPTVPlayer/
- Delete the folder /usr/lib/enigma2/python/Plugins/Extensions/IPTVPlayer/
- Not sure weather to delete this folder or allow them to be over written.
- I deleted and started fresh which seems to work
- Download the latest e2iPlayer files from maxbambi repo https://gitlab.com/maxbambi/e2iplayer/-/archive/master/e2iplayer-master.zip
- Extract this archive on your PC
- FTP the folder /e2iplayer-master/IPTVPlayer/ to /usr/lib/enigma2/python/Plugins/Extensions/ (ignore the other files in the archive)
- Reboot the Zgemma
- Got to the e2iplayer config and set the following
- The preferred update server = Gitlab
- Select Gitlab repository owner = maxbambi
- Update packet type = with source code
- Use the PyCurl for HTTP(S) requests = yes.
- Done
Notes
- E2iPlayer | maxbambi - GitLab - This is getting updated.
- TS-E2iplayer - Linux Satellite Support Community - Some detailed install notes.
- Update on E2iPlayer | Page 49 | Techkings - This is still a current thread
- LATEST UPDATED E2IPLAYER IPK | Page 13 | Techkings - This is an outdated thread.
- [ENGLISH] E2iPlayer - development thread - Original development thread for e2iplayer.
- E2Iplayer (Iptv player) discussion - Page 102 - Enigma2 IPTV Plugins - Linux Satellite Support Community - Some active development of e2iplayer here.
Install TSI Player
This requires e2iPlayer to be installed because it is a plugin of e2iPlayer rather than a standalone OpenAtv extension.
- Run the following code from your Webif terminal
wget --no-check-certificate "https://gitlab.com/Rgysoft/iptv-host-e2iplayer/-/archive/master/iptv-host-e2iplayer-master.zip" -O /tmp/iptv.zip && unzip /tmp/iptv.zip -d /tmp/ && cp -rf /tmp/iptv-host-e2iplayer*/IPTVPlayer /usr/lib/enigma2/python/Plugins/Extensions
- The script above will grab the code from the repo and install it into /usr/lib/enigma2/python/Plugins/Extensions/IPTVPlayer/
- Reboot the Zgemma
- The icon for TsiPlayer will be under the 'All' group but can be added to any other group by highlighting it, pressing menu and selecting which group to put it in.
Notes
- Rgysoft / iptv-host-e2iplayer · GitLab - Official Repo
- e2i player alternatives? | Techkings - This thread has the original script that I modified (above) to install maxbambi because the archive.zip is no longer present.
Setup Digibit VPN
Install the plugin from Wooshbuild plugins feed and set your account details.
Subtitles don't work
- Goto e2iplayer
- Where you select country, select other
- then media player
- this will allow you to play a downloaded file and load the subtitle manager thing to grab a .srt etc..
Notes
- Only e2iplayer has subtitles via external files
- The normal media player will read embedded subtitles.
Box is crashing when running Wooshbuild setup
I have been trying to install wooshbuild infinity on my h.2s with satellite for my live channels but during the setup it always crashed just after when you select 'do you only want to see FreeSAT channels'.
- If i select IPTV option instead of satellite channels, then Wooshbuild will install.
- my satellite dish is connected but I dont have a signal because of the scaffolding around my house, but I do want to use the satellite channels when it comes down.
Solution
- Wooshbuild Support Thread | Page 312 | Techkings
- The answer is in your post, No signal on your satellite means you can't configure your Tuners that is why your box is crashing.
Using PyCurl for downloading from HTTPS
I dont know if this is better or worse using this when watching streams, however it appears that it needs installing.
- Load OpenWebif in your browser (enable this plugin if it is not enabled already)
- Goto: Extras --> Settings --> Packages --> All
- Filter by 'curl'
- Install 'python3-pycurl' by clicking on the green disk icon, wait and it will be installed but you will get no notification
- Reboot your box
- Enable PyCurl in e2iPlayer's options
Links
- Set top Box Projects
- openATV
- OpenATV Downloads - Zgemma H2S
- openatv · GitHub - openatv has 25 repositories available.
- openatv/enigma2: openatv-gui | GitHub - openatv/enigma2 repo
- Requirements
- RAM: 16GB
- SWAP: 8GB
- CPU: Multi core\thread Model
- HDD: for Single Build 250GB Free, for Multibuild 500GB or more
- NB: My H2S zgemma runs this perfectly fine and has nowhere near these specs.
- OpenPLi
- We are a community project focused on developing software for open source DVB receivers using the linux operating system and the Enigma2 application.
- Downloads | OpenPLi - Open Source Set-Top Box Software
- OpenViX
- OpenViX Forum
- OpenViX is a community based Opensource project focused on developing user friendly, easy to use Linux Enigma 2 set top box software. OpenViX is created by enthusiasts for enthusiasts.
- Zgemma Images
- Miraclebox?
- OpenHDF
- GitHub - openhdf/enigma2: OpenHDF Enigma2
- Airdigital - HDFreaks - Basteln bis der Arzt kommt - Forum + links to the images. Mostly in German.
- OpenSPA Downloads
- not sure what this is
- OpenDroid
- New Opendroid 7.1 | droidsat.org - Mostly in italian but this is the official forum of this project.
- Opendroid images - This is a website to download the OpenDroid images. This site is not 100% functional at the minute.
- Opendroid - Linux Satellite Support Community - Related thread in English
- opendroid-Team (Opendroid) · GitHub - Opendroid-Team has 40 repositories available. Follow their code on GitHub.
- Requirements
- RAM: 16GB
- SWAP: 8GB
- CPU: Multi core\thread Model
- HDD: for Single Build 250GB Free, for Multibuild 500GB or more
- EGAMI
- OpenHDF
- openNFR
- Blackhole
- OpenBh
- OpenSpa
- teamBlue
- DreamOS - Nor sure what this is - 'Dream Boxes' only
- openATV
- OpenATV configure Scripts
- WooshBuild Infinity
- An Enigma2 image for any Enigma2 set top box (STB). No WooshBuild Enigma2 image download is required, just one simple step. Satellite, Freesat, Freview, saorview and cable are all supported.
- OpenATV 6.4 is the last compatible version
- Grogbuild FreeRange
- An Enigma2 build built on OpenATV for use on any Enigma2 based set top box, now works with both openVix as well as Open ATV 6.1 & 6.2
- OpenATV 6.4 is the last compatible version but I have not tried it on 7 myself
- This might get upgraded to Python3/OpenATV 7.x+
- Grogbuild FreeRange for all enigma2 boxes | Techkings - Installation instructions
- WooshBuild Infinity
- Forums
- Tutorials
- Tutorial 4: Networking with OpenWebif, FTP and SSH - TVROSat
- Troubleshooting | satellite-king.yolasite.com - A load of questions and answers on how to use the Zgemma box and openATC
- The complete idiots guide to installing Kodi & Mobdro with EVERY step explained | Techkings - How to stream from your Zgemma to a Kodi install.
- How To Install E2Istream - tech2guides.co.uk - How to install e2iplayer from the command line. An old tutorial but it shows you how to do it.
- ENIGMA2.net - A blog website based on the Enigma2 set-top boxes. It pulls news feeds from all over the place and has a good list of available images.
- Downloads
- Downloads - Shenzhen Air Digital Technology Co.,Ltd Gemma Technology(Shenzhen) Co.,Ltd - Original downloads for the Zgemma H2S and other models.
- Enigma2 Plugins - Linux Satellite Support Community - seems to have a big list of plugins from the Zgemma and other boxes.
- Resources | Techkings - A big resource of plugins and stuff for satellite boxes
- Latest Software Enigma 2 - A load of downloads here but i cannot work out if it is a spam site.
- E2iPlayer (Python 3)
- GitHub - Blindspot76/e2iPlayer-Python3 - I think you can download it here.
- E2Iplayer (Iptv player) discussion | Linux Satellite Support Community - Forum thread dedicated to this plugin.
- This is now present in the extensions feed and can be easily installed.
- GitHub - oe-mirrors/e2iplayer
- Old E2iPlayer repos
- E2iPlayer | E2iPlayer - Old, not updated.
- E2iPlayer | zadmario - Old, possibly gets updates.
- E2iPlayer | vline - Old, not updated.
- Installing Kodi on ZGemma
- Not all boxes support Kodi
- If Kodi is supported you will find it in the extensions list where you can install it easily.
- Only modern boxes support Kodi becasue it needs a powerful box
- You can easily check packages available via OpenWebif
- You can manually install Kodi (if it is available) via a manual command inb the terminal. This one updates the extension list and then installs
opkg update && opkg install enigma2-plugin-extensions-kodi
- Streaming - Kodi <--> ZGemma
- Enigma2 Backend - Official Kodi Wiki
- Add-on:Enigma2 Client - Official Kodi Wiki
- How to Configure Kodi to Watch Satellite Channels from Enigma2 Receiver | YouTube | engineerkhan15 - Complete method to configure Kodi to watch satellite channels from an Enigma2 receiver (Dreambox, Vu+, Zgemma etc.) using Vu+/Enigma2 Client. I am using this method to watch Sun DTH HD (HEVC) channels in Kodi on M8S+ TV box. But if you don't have a TV box, you may install Kodi on PC/laptop and watch those channels with this method.
- Control Enigma2 / Zgemma from Android
- OE-Alliance - What is it?
- OpenVix and openATV had the idea to create a common build environment for the new OE-CORE and work together to optimize this environment.
- Explanation: OE-CORE is a build environment by Openembedded, Dream multimedia calls it OE 2.0, openPli calls it Pli 3.
- All teams are using almost the identical build environment, so why not creating something together? The answer is the OE-Alliance.
- Since we have a name now, we created a GIT repository quickly and the integration can be started.
- The OE-Alliance is the base for each team, which is interested in building an OE-CORE image. We have discussed this already with several teams and they quickly agreed to work together.
We think that our new companionship should be visualized, so we created a logo. We call it the Seal. - The seal contains one golden star for each team which is part of the OE-Alliance. As you see we currently have 13 stars, representing the following teams: (25.05.2013)
- openATV , openViX , openMips , Egami Team , odin-support , xtrend-support , Technomate, HDF-Team, SIF-Team, MixOS, Octagon, openSPA , Axas , MiniCat-TV , openSWF
- Because the OE-Alliance is the build environment, each team will continue to provide his own team image. As you know each team maintains his own Enigma and his own skin, which makes the difference of each single team image.
- Info: OE-Alliance offers the following: Makefile, Linux, driver, tools, common plugins and technical support among the teams
- For those with technical interest: You can track all changes and improvements in the OE-Alliance GIT from now on.
- OpenVix and openATV had the idea to create a common build environment for the new OE-CORE and work together to optimize this environment.
- SSL / TLS Versions
- OpenATV 7.1
- Uses a modern version of OpenSSL SSL/TLS library which supports TLS v1.3 and because of the shared OE-CORE other modern images will also support this.
- Openssl 3.0.2-r0.1
- OpenATV 7.1
- Streamlink
- [PLUGIN] Streamlink – ENIGMA2 - Installation instructions
- This plugin is available in the extensions list but does not currently work in my version of OpenATV
- UK Box Suppliers (I have not bought from any of these but good for looking at)
- OPENBOX® | IPTV Boxes | Satellite and Cable TV Boxes - We sell TV Set Top Boxes and IPTV Box from all the major brands like OPENBOX , MAG Boxes, Android boxes, Zgemma boxes, Streaming TV Boxes
- World of Satellite - Home of ViX Team - Satellite Support Forum - They also sell boxes
- OpenWebif
- Can install .IPK files if enabled in the plugins settings. This option is only availabe to be set directly on the box (i.e. using the remote control)
- MediaPortal
- When you press the 'Portal' button on the remote it says you need to install the 'MediaPortal' plugin.
- MediaPortal is only Python 2 compatible and there will be no open release of this software for Python 3 images.
- The Portal button will probably be remapped before long.
- Mediaportal Plugin MOD for Python 3 - ARMv7 Box with openATV 7.0 - NOT DreamOS - Enigma2 Multimedia Plugins - Linux Satellite Support Community
- Mediaportal for Python 2 is End of Life and the coder only wants to develop furthermore for Dream Boxes.
How to install OpenWRT on a Bare Metal PC
this notes are in progress + take my notes from my virtual box tutoaril as they will share with this alomost
- in the bios turn evrything of that you are not going to use (keep serial obviously)
- Select your image
- You should use the 64 version as most modern PCs are 64-bit now
- There are 2 types of full images that we can use
- generic-ext4-combined-efi.img.gz or generic-ext4-combined.img.gz
- if you have an EFI PC then you should use this the EFI version
- Installing your image method
- Expand the drive image
- convert img --> VHD with vboxmanage (or other converter) and then use a standard disk image utulity to put it on the real hdd
- use a disk utility that can use the image file as is and install it on to the PC
- Boot of a linux distro and use DD to rawwrite the image to the PC
- Expand the ext4 partition to allow a lot more stuff to be installed.
- Expand the drive image
- Install additional hardware
Links
- [OpenWrt Wiki] OpenWrt on x86 hardware (PC / VM / server) (Legacy bios, this methos is slightly easier)
- Basic instructions on installing OpenWRT
- The different Disk image types are explained here.
- within the images thre are EFI and non-EFI version which is not noted. These are your basic different types of PC. Legacy and EFI/UEFI
- The 64-bit image supports Intel and Realtek Ethernet chipsets.
- NVMe SSD support is available since OpenWrt 21.02.
- The installation consists of writing a raw disk image on the drive which will boot OpenWrt system.
- If you had used a -combined-efi.img.gz type of image to install, the GPT partition UUID of your root partition would have been changed and you need to update the entries of GRUB, otherwise your device won't be bootable after reboot: (if using command line)
- [OpenWrt Wiki] OpenWrt on UEFI based x86 systems (modern systems, this is prefered if your PC supports it)
- UEFI boot has been required for years now, boards that only support UEFI are common, and Intel has stated back in 2017 that “legacy” BIOS will no longer be supported after 2020.
- Run LEDE as a Virtualbox virtual machine | QuantumWarp
- Index of /releases/21.02.0/targets/x86/64/ - 21.02.0 targets
- resizing squashfs partition
- Expanding OpenWrt squashfs image? (SDcard) - #3 by dipswitch - Installing and Using OpenWrt - OpenWrt Forum - this has some useful notes on what a guy did.
- Resizing F2FS overlay | [OpenWrt Wiki] OpenWrt on x86 hardware (PC / VM / server) - this might allow me to resize the compressed partition
- the squashfs has a failsafe and reset option.
- WHAT IS Flash-Friendly File System (F2FS)? — The Linux Kernel documentation
- Upgrading a PC OpenWRT installation (after backing up) | [OpenWrt Wiki] OpenWrt on x86 hardware (PC / VM / server)
- you can use the basic sysupgrade (not recommended)
- Extracting boot partition image from ext4-combined.img.gz and writing it, then uncompressing rootfs.tar.gz to existing rootfs partition.
- As said above, there are 2 options for upgrading rootfs partition, when we are using the ext4 file system and not squashfs: writing ext4-rootfs.img.gz image or uncompressing rootfs.tar.gz into existing partition. ????
- Installation Tutorials
- [OpenWrt Wiki] OpenWrt on x86 hardware (PC / VM / server) - Official install instructions for MBR PCs
- [OpenWrt Wiki] OpenWrt on UEFI based x86 systems - Additional Official instructions for EFI/UEFI PCs
- OpenWRT installation instructions for APU2/APU3/APU4 boards | TekLager - installation on a homemade router (not quite a full PC)
- How-to install LEDE on x86 - Hardware Questions and Recommendations - OpenWrt Forum - Some decent instructions
- OpenWRT - x86 PC Installation - Live USB - YouTube | Van Tech Corner - A nice easy to follow video
- OpenWRT - x86 PC - Install to Hard Drive - YouTube | Van Tech Corner - A nice easy to follow video
- Install OpenWRT with LuCI on VirtualBox - YouTube ################ add this to my virtual box tut)
- Additional hardware installtion tutorial
- OpenWRT - Install and Configure Wireless Network Adapter - Wallys DR900VX Dual Band WiFi - YouTube | Van Tech Corner - How to install a Wifi card
- KMOD = Kernel mods
- ext4-rootfs.img.gz = data parititon
- rootfs.tar.gz = boot partition
Atari ST Disk Transfers
These are a collection of notes for newbies. I point to other peoples work and highlight the main points.
Imaging Methods
Use the MSA (Magic Shadow Archiver) file format as it stores disk geometry and other things which can get around some weak disk protections.
Floppy Image & file transfer program (best)
This is a modern Windows based disk acquisition and image file handler. It will handle some copy protections I believe but not all, for that you will need a KyroFlux device.
Their instructions are straight forward and I guide you to them for further advise.
Make Disk
This is the simplest method to image disks using DOS but is an old way of doing it becasue of the use of DOS. Also makedisk cannot handle copy protected disks.
- Create a PC running DOS 6.22 (or FreeDOS should be fine) and Hard Drive formatted in FAT32 which does not have to be to large
- Copy the makedisk command onto the harddrive
- Use a command similar to these below
makedisk /read /auto /msa /slow TEST.ST  (this creates an image from a floppy disk)
makedisk /write c:\test\TEST.MSA /auto   (this writes an image to a floppy disk)
- /slow is used on disks that you are having trouble reading, but does not harm when running on healthy disks either, it is just more thorough
- /msa is used to specify the outputted image image should be a Magic Shadow Archiver formatted file.
Pasti
Pasti can handle protected disks and other images but you need a real ST to use this software.
OniFlop
This can handle a wide variety of disks including Atari ST. I am not sure how well it handles copy proteced disks.
Notes
- PaCifiST, an emulator, on a PC can be used to access the floppy drive without windows stepping in between. You can use formatting tools with it. from here
- Is it possible to use Pasti to copy disks in an emulator? see WTF is "Pasti" - Atari ST/TT/Falcon Computers - AtariAge Forums
- Windows 10 is blocking access to 720kb disks when using USB?
- Internal 3.5 FDD are better than USB ones.
Links
- Misc
- Make USB Floppy Drive appear as A: | QuantumWarp - Sometimes a USB disk will appear as B: and this fixes this issue.
- Using an SD card and Ultrasatan to Transfer Files from PC to ST | jamesfmackenzie.com - If you want to make a large number of files available on your ST, Ultrasatan is the way to go.
- Use Your PC to Create a Bootable Atari ST Game Disk | jamesfmackenzie.com
- new to ST, any advice - Atari ST/TT/Falcon Computers - AtariAge Forums
- NEC floppy troubles.. - Atari-Forum - About selecting the correct FDD for your ST
- Atari-Compatible 3.5" Floppy Drives - Vintage Computer Forum
- Using Floppy Disk to Transfer Files from PC to ST | James Mackenzie's Blog - An easy method just using floppy disks.
- No ID Address Mark Was Found On The Floppy Disk
- This is usually caused by a dirty floppy disk head, Faulty floppy drive or expired floppy disk
- No ID Address Mark Was Found On The Floppy Disk: 3 Fixes - Internet Access Guide - No ID address mark was found on the floppy disk: There might be a problem in your system that may be making it not read the storage device.
- No ID address mark was found on the floppy disk | Microsoft Technet
- The following advice from Microsoft is the only piece of info I could find (after exhaustive searches in the "knowledge base") specific to the ID Address mark problem.
- Some technical information here
- Floppy Disk Issue | Tech Support Guy
- Hello everyone,Ever since I began using Windows XP, I am not able to access the "A" Drive. I inserted a floppy disk into this drive today and a message came up saying "A: is not accessible. No ID address mark was found on the floppy disk. What does this mean and how can I access this drive...
- I am not sure if this will work anymore, but it will not hurt to try.
- Floppy Disk History | cs.mcgill.ca - nA floppy disk is a data storage device that is composed of a disk of thin, flexible ("floppy") magnetic storage medium encased in a square or rectangular plastic shell. Floppy disks are read and written by a floppy disk drive or FDD, the latter initialism not to be confused with "fixed disk drive", which is an old IBM term for a hard disk drive.
- Forums
- exxos's Atari, Amiga & retro forum
- AtariAge - Have You Played Atari Today?
- Atari-Forum - A forum about Atari 16/32 computers and their clones. This forum is in no way affiliated with Atari Interactive.
- Useful Sites
- Atari Forum Wiki - This is a mirror of the Atari Forum Wiki
- Floppy Drive and Disk image format information
- Atari ST Preservation & Backup | Info-Coach - A document that describes the copy protection mechanisms used on Atari mainly from a "hardware point of view" (e.g. detail analysis of the flux transitions sampled from FD) and not from a "software point of view" (how a program tests these protections).
- Atari ST Protection Mechanisms | Info-Coach - This page presents several Atari Floppy Disks image's formats. These images can be used for emulation or for preservation backup / copy of original Atari floppy disks. Some of these formats can be used directly (for example Pasti STX) in hardware / software emulators while some other may require to be converted (for example Kryoflux Stream files) by program like Aufit. This explains all of the different image formats.
- Atari ST Diskette Information | Atari ST FD Information - This page contains quite a lot of information related to the Atari ST diskettes: This includes information on the Floppy Disk Media (down to the flux level), the FD Drives, the FD controller, the FD copy protection mechanisms, the FD layouts , FD specific hardware solutions, etc ... The end goal is to help the understanding of the duplication (backup) of Atari ST diskettes (protected or not) and this should not be confuse with a preservation project like PASTI.
- List of floppy disk formats - Wikipedia
- Pasti (STX) floppy image format - This description is based mostly on Markus Fritze's article. He is floppy expert and made some protections for Atari ST in past. I added couple things to it + rearranged some parts . Made without format's author contribution, this is certainly not complete. May contain some minor errors, but intention is to help people who want to do something more with thousands of STX images available - and not just playing under emulators.
- Really Atari ST? | Hacker News - An interesting thread on this topic.
- Atari ST Protection Mechanisms - Describes some of the protections used by the Atari ST as well as techniques to reproduce copy protected FD.
- MSA vs ST
- ST format does not hold parameters of floppies separately, it uses values from boot sector. They are correct in most cases, but some titles have invalid values in boot sectors. Very likely such titles will not work with Image Runner, since they use not regular filesystem. MSA format is better - it holds in header physical floppy parameters as track count, sectors/track and side count. Unfortunately, there is a lot of oversized floppy images on DL sites. Often there is too much track without need, single sided floppy imaged as double sized etc. It is useful to read what writes about how to copy such titles/menus and then doing new image only with used tracks. How? Writing out to floppy (some in good shape), and then imaging with correct parameters. Or better do it without physical floppy, in emulators.
- MSA is better format than ST - it holds some useful infos (floppy Geom.) which helps with non-standard floppy formats.
- Image Formats
- ST = The orginal disk image.
- MSA = Magic Shadow Archiver, A standard ST image with a MSA header contained in a compressed archive
- STX = Supports copy protected disks
- STT = not sure what this is but i think it supports copy protected disks
- Q75131: Standard Floppy Disk Formats Supported by MS-DOS | KnowledgeBase Archive - An Archive of Early Microsoft KnowledgeBase Article on Floppy disk formats MS-DOS used.
- MSWIN4.1 FD Boot Record - Complete examination of Microsoft's MSWIN4.1 Floppy Disk Boot Record.
- Check your floppy can write weird formats
- A fix for corrupt data / Getting Gods from Image to Disk
- Some instructions to try here
- "Parameters not compatible"
- A fix for corrupt data / Getting Gods from Image to Disk
- Some formats information
PC 720KB disk (79 Tracks ??)
ST 720KB disk (80 Sectors/Tracks Cylinders 9, Sides 2)
ST 720KB : track=80, head=2, sector=9, block=512
PC 1.44MB (18 Sectors/Tracks, Cylinders 80, Sides 2)
- List of floppy disk formats - Wikipedia
- Floppy Disk Formats | Phil Storrs PC Hardware book - A teardown of a Floppy Disk Drive.
- Formatting a disk in windows
- Formatting a 720K floppy disk over USB fails with Windows 10 - Retrocomputing Stack Exchange
- This tells you about swapping the driver that Windows is using for the USB drive.
- ufiformat
- If you have a Linux system handy, you can determine your drives’ capabilities by querying it with these following commands
- ufiformat -i or ufiformat /dev/sda
- Make sure there is a DD disk in the drive and if it displays the expected data then your USB FDD read DD disks
- You will most likely have to download this when prompted.
- You might need to use sudo if you dont have permission.
- manual here
- High-density and double-density disks use magnetic media with different coercivity, requiring different field strengths to write data; a double-density drive can’t reliably format or alter a disk that’s been written to by a high-density drive. 1.44MB disks are not ideal to be used as DD because they have different magnetic strengths to DD disks.
- Note that the holes in disks’ cases don’t determine the formats one-for-one. A DD disk will always end up formatted in double-density, and a DD drive will always format in double-density. An HD drive can theoretically operate in both modes (and will do so automatically with a DD disk). An HD disk can be formatted as a DD in a HD drive, but as mentioned previously will be unreliable in a DD drive; an HD disk formatted as a DD in a DD drive will work fine. You can use DD disks as HD by drilling an extra hole but then you’re taking your chances with the magnetic support.
- use a dos prompt to format a 720KB disk: format a: /t:80 /n:9 because DD formatting removed in the Windows GUI and has to be done through the command line
- You can use 1.44MB disks as DD disks by covering up the hole that is not the write protect. This is a light sensitive trigger and not a physical one so using transparent sellotape will not work, the material has to be opaque.
- Not all USB drives support 720KB
- 720k Floppies with Windows 10 and a USB Floppy drive. - Atari-Forum
- Just to be clear, some (including some new-ish) USB drives support 720k but not all of them. All of them support 1.4M.
- Also, the motors in them will not always turn slightly stiff disks fast enough for it to access data on the disk.
- DOS Command: DRIVPARM - Used in the CONFIG.SYS file to set parameters for a disk drive.
- How to Format floppies - My Notes
- The only way to format a floppy consistently is to use a windows 98SE boot disk (put it on a pendrive)
- This is a dumb formatter and ignores a lot of issues and just formats the disk.
- Other methods using the 3rd party tools might help fix more corrupted disks, but 98se formats amiga disks ok.
- External USB drives do not all support 720kb disks and are not as sensitive as a standard internal floppy drive, so avoid them at all cost. You sanity depends on it.
- If after you have formatted a disk in win98se successfully and the disk still does not work, then it is probably corrupt and needs chucking in the bin (if you are sure you hardware is ok)
- USB FDD drives don't do 720KB disk mainly because of the driver, not the hardware. ie try in linux, but I cannot guarantee this will work either because the USB drives are cheap and might be hardware encoded just to do 1.44MB disks.
- Format a 1.44MB floppy disk in windows 7 using an internal drive
- Format command
format a: /f:720
format a: /t:80 /n:9
- This will reformat Amiga disks
- Format command
- Windows will not format a 720KB disk
- I think the only way is to use Windows 7 or lower and then you have to use the command prompt.
- NFormat Floppy Disk Formatter
- NFORMAT is a disk formatter designed to dynamically format floppy disks for MS/PC-DOS. The internal parameter editor or command line options let you specify parameters that allow you to get up to 23% more data space from your floppy disks.
- Formatting a 720K floppy disk over USB fails with Windows 10 - Retrocomputing Stack Exchange
- Trouble Shooting Floppy Disks in Windows
- 'Invalid media or Track 0 bad - disk unusable'
- 3.5" Floppy track 0 bad fix | YouTube | YesterGearPC II - Useful utility that brings the disk back to life and can be formatted
- 3,5" Floppy Track 0 Bad fix | Vintage Computer Federation Forums
- 3,5" Floppy Track 0 Bad fix tutorialI have discovered a method to fix this strange issue. It can be used on old floppy-s. This tutorial will explain how this process work, what tools you need for it, and how to fix these floppys.
- You will need an old 1.44MB drive. (if you are doing 720k floppy's, you will probably need an actual 720k floppy drive, or at least set the floppy type to 720k in bios)
- 6 Solutions to “Invalid Media or Track 0 Bad” Error in Windows
- If “invalid media or track 0 bad - disk unusable” occurs to SSD/HDD/USB/memory card, try those effective solutions on this page.
- Great technical diagram - only for hdd
- How to Physically clean floppy disks! | YouTube | Spirantho
- A brief video of how to clean a dead floppy disk! Check out our shop for fully working cassettes and disks for various formats, 8-bit and 16-bit
- Remember - only do this on disks that don't work (obviously!) and if you can - make a backup as soon as the disk is working again!
- How to troubleshoot floppy disk drive issues - Help with troubleshooting a computer floppy diskette drive and what to do if a computer cannot read a floppy disk.
- Floppy Disk is Not Accessible, Not Formatted, or Not Recognized by Windows - Microsoft Support
- SOLVED: File Explorer keeps trying to seek my floppy drive after updating to version 20H2 | Microsoft Community
- If you get a boot sector error it does not mean the boot sector is fault just that is is not a standard one.
- If you see RNF errors then the floppy disk is bad.
- Some questions about floppy imaging/archiving | Atari Forum
- What image format to use?
- What's an RNF error?
- What to do with "bad" disks?
- Some questions about floppy imaging/archiving | Atari Forum
- Low Level Format
- Does low-level formatting improve floppy disk longevity? - Retrocomputing Stack Exchange
- I have a dozen or so 3.5" floppy disks from the 90's and most of them show bad blocks when I scan them with badblocks. If I do a low-level format, where the sectors are laid down again, will that make the floppies more reliable? I don't care about preserving the contents; just wondering if I should throw them out or keep trying to use them.
- It won't improve "disk longevity", but it will make the disks usable again. How long they'll stay usable depends on a lot of things.
- Does low-level formatting improve floppy disk longevity? - Retrocomputing Stack Exchange
- 'Invalid media or Track 0 bad - disk unusable'
- Floppy Disk Imaging Software
- Floppy Image & file transfer program
- This seems to be the goto imaging software which will handle a lot (not all) exotic formats. It requires an internal FDD 3.5 inch drive and controller which it uses a custom low level floppy driver which overrides limitations of standard Windows floppy drivers.
- Not sure it does copy protected disks.
- It does over sized disks
- Can convert MSA to ST. And can write MSA images onto floppies, so even no need for conversion.
- OmniFlop
- A 'universal' floppy disk reader, writer, and tester for the IBM PC or compatible which can handle alien floppy and exotic disk formats not normally supported by DOS, Windows and Linux. It was first released in December 2004. this will read many different formats including a multitude of Atari ST formats, a complete list is available on its homepage. The documentation says you need an internal FDD to use it but the a tutorial above uses a USB drive.
- dd -or- OMNIFLOP -or- SDISKW ? | llamamusic.com - Using "dd", OmniFlop or SDISKW depends on the method you create sample disks or image files. Each one has an advantage over the other.
- This has its own driver which you manually have to install. This drive also requires the driver enforcement to be disabled.
- Pasti Atari ST Imaging & Preservation Tools
- Our main goal is the preservation of Atari software in its original unmodified form. Original software is normally stored on diskettes with custom format or copy protection.
- Pasti is a package of software tools for imaging and preservation of Atari software. The two major components are the imaging tools and the emulation helper tools. This has tools for windows and real Atari ST.
- This software will copy disks using a single floppy disk, an Atari ST and a PC. http://pasti.fxatari.com/
- The imaging tools produce a disk image file from an original disk. It works very similarly to standard imaging tools like Makedisk, but they can image virtually any ST disk including copy protected disks.
- I think this creates STX images with the copy protection in tact.
- WTF is "Pasti" - Atari ST/TT/Falcon Computers - AtariAge Forums - Pasti explained in simple terms.
- Quickstart guide for making Pasti-images | atari-forum.com
- Pasti can be used to run exotic disks images (protected) in emulators and then allow the extraction of them.
- MakeDisk
- Might not work properly on anything later than XP
- No official site, available on the internet though.
- v1.5 is the latetst I could find
- Windows Floppy Disk Copy (wfdcopy) | SourceForge.net
- wfdcopy is a floppy disk image maker for Windows, its main purpose is to read floppy disks into image-files but it can be used to write them back or to copy a disk
- It was wrote mainly to convert floppy disks into image-files for use in emulators, especially Atari ST emulators (that why the filename extension is ".st" by default).
- It should read any Atari ST and PC disks, including "overformatted" ST disks.
- if you have something else than a *real* 3"1/2 1.44Mb floppy drive then your drive is not supported and wfdcopy may not work properly.
- MSA Converter Website - MSA Converter is an utility destinated to convert and manipulate the disk image files used by ATARI ST emulators. It is designed to work with Windows 95 and more. It also allows to view some of the graphic image formats used on Atari directly from disk images or from the hard disk.
- STDISK, Image writing utility for Atari ST disk images. - STDISK is our new utility to get those pescy Atari ST .st and .msa images onto innocent, unsuspecting DD (and wannabe DD) floppies... As this was something that gave us more trouble than was good for anybody, we've started making this utility.
- hmsa - Atari MSA / ST disk image creator and converter | Ubuntu Manpage - A linux utility
- fdrawcmd.sys | simonowen.com
- A floppy filter driver for Windows 2000/XP/2003/Vista/2008/7/8/10.
- The driver exposes command-level access to the µPD765a floppy disk controller, making it possible to read/write many non-standard and copy-protected disk formats.
- This is the low level driver a lot of ST imaging programs use.
- SAMdisk | Simonowen.com
- SAMdisk is a command-line disk image utility for Windows, Linux, and macOS.
- Read and write almost any soft-sectored floppy disk format compatible with the PC floppy controller, including some traditionally copy-protected formats. Also supports hard disk imaging to and from HDF and raw formats.
- Low-level floppy device access requires the fdrawcmd.sys driver to be installed.
- DD for Windows
- Floppy Image - Win3x.Org
- The 1.5.2 version of floppy disk is the last freeware of this program. This program, made in 2001, can make images of 5.25 and 3.5 inches floppies in 360k, 1.2 mb, 720k and 1.44 mb. It can make them in .IMG, .IMZ(compressed) and in .EXE. It can work under windows 95 and nt 4.0 minimum and waise only 316kb. You should also notice that the program only work in windows 95 with some updated .dll, which are included in the .7z file.
- Read and write Atari ST floppy disks with a PC and an USB drive | YouTube | Vretrocomputing - Read and write Atari ST 720 KB floppy disks directly with a PC and an USB floppy drive. Convert real 720 KB floppies into ST files, and conversely.
- Image runner for Atari ST(E) machines - Floppy image mounting on real Ataris
- Floppy Image & file transfer program
- Disk Images in Linux
- Create mount and copy floppy disks images under linux | A fork in the road
- Create a disk image from the physical drive: cat /dev/fd0 > imagefile.st
- Copy image to the phyisical drive: cat imagefile.st > /dev/fd0
- might need to use sda instead of fdo
- cat /dev/sda will show everything that's currently written to the full disk so i think this will only work for valid file systems.
- Creating Floppies from Disk Images | Debian
- Writing ST disks with linux..ANY IDEAS??? - Atari-Forum - Some solutions here for mounting and writing.
- Creating Atari ST disks from disk image files on Linux – Kev's Development Toolbox
- Digital Archaeology: Recovering your Digital History | The New York Public Library -A history of floppy disks and some instructions on how to image the disks.
- DD Utility
- How to use CAT & DD command in Linux to Clone Disks - LinuxTechLab
-
Example DD command
dd if=/dev/floppy0 of=mydisk.img bs=1M
- Format USB flashdrive that won't mount? [SOLVED] - Linux Mint Forums - This has related information.
- Gentoo Forums :: View topic - Can't access floppy [SOLVED]
- How to make a floppy disk image - MSX Wiki
- This page describes how to create regular MSX disk images using a MSX, PC or Mac. Disk image files used on MSX use generaly .DSK as name extension. A DSK file is disk image without copy protection. It has no header.
- Linux formatting commands and how to create a standard Linux disk image.
- Create mount and copy floppy disks images under linux | A fork in the road
- Formatting floppy disks in Linux
- Use Gparted
- FormatFloppy - Debian Wiki - In Linux, you can format a floppy disk as a DOS disk or a Linux disk.
- How to format 720k FAT (ie: MS-DOS) floppy on Linux using USB floppy drive - Unix & Linux Stack Exchange
- formatting a floppy | linuxquestions.org
- Format floppy disk in LMDE - Linux Mint Forums
- (SOLVED)How do you format with linux - Linux Mint Forums
- KFloppy
- Kfloppy Formatter is a utility that provides a straightforward graphical means to format 3.5˝ and 5.25˝ floppy disks
- The Kfloppy Formatter Handbook - kfloppy.pdf -A manual for the software.
- The Kfloppy Formatter Handbook - The online version of the manual.
- Kfloppy does not work on external USB floppy
- Kfloppy does not work on external USB floppy .I get the error "Internal error.Device not correctly defined."I have Suse linux 11.4. The external floppy works perfectly under Windows XP .Has anyone an idea how to repair it?
- So, Kfloppy only works with the old style floppy interface and does not work with USB, at all.
- Gives an alternative way to format a floppy disk.
- Installion: How To Install kfloppy On Linux Mint 17.1 - Here you will find instructions on How To Install kfloppy On Linux Mint 17.1
- Gentoo Forums :: View topic - kfloppy error: device not correctly defined - Anytime I try to use kfloppy to do anything (quick format, full format, ...), I receive the error: "Internal error: device not correctly defined"
- Problem with my floppy drive / Newbie Corner / Arch Linux Forums - Today i tried to use my old floppy drive. I tried to format some floppies with Kfloppy but it says something like: Internal error: device not correctly defined.
- Getting kfloppy to work on Linux Mint - My Instructions
open terminal
sudo apt-get install kfloppy
[enter password]
reboot (optional?)
open up terminal
sudo kfloppy
[enter password]
select option including primary drive
click format
- I did add myself to floppy group and then i successfully formatted a 1.44mb disk. But this might just be a coincidence. So i don't think it did anything because the drive responded
- ufiformat
- This is only for USB FDD
- Example command
ufiformat -f 720 /dev/sda
- Works a treat with no errors. this is good for fixing Amiga formated disks.
- This command might work
sudo /sbin/mkdosfs -I /dev/sdj -n MYFLOPPY
- Check your A: drive works by formatting a disk in windows, writing a file and then reading that file
- Collections of disk transfer Tools
- Disks Tools - Atari ST - Essential software (The List) - Both PC and ST utilities, very useful. Many other utilities aswell.
- ST-Utils - Small programs to help you out on your Atari or on your pc .... With everything you need to archive your old games or to create ST game disks from the files on this site ...
- Imaging Tutorials
- Read and write Atari ST floppy disks with a PC and an USB drive - YouTube - French guy shows how to read and write Atari ST 720 KB floppy disks directly with a PC and an USB floppy drive. Convert real 720 KB floppies into ST files, and conversely.
- Transfer Atari ST images from PC to Atari ST using floppy disks – Video Game Stuff - This is an easy tutorial using a TEAC FD-05PUB External Floppy Disk Drive Unit and OmniFlop.
- Atari ST Disk Imaging Tutorial - Atari ST / TT / Falcon Computers - Atari Forums - Using Floppy Imaging & Transfer Program this tutorial tell you how to put an image back on to a real floppy disk to use in your Atari ST.
- Atari ST - How to write images to disk from PC - YouTube - Using 1.44MB disk and Floppy Image & file transfer programhttps://www.youtube.com/watch?v=ReCdd1gZxSM
- Download Atari ST software with a PC and a floppy disk - YouTube - The french guy showing how to make an ST disk from an image and a 1.44MB disk.
- The Floppy Mystery Data transfer between Atari ST and PC/Windows with floppies | Atari-Forum
- I will try here to give up-to date, correct and complete explanation about troubles in data transfer between 16-bit Ataris and modern PCs using floppy disks. And of course how to do it, without data loss, corruption. Unfortunately, most of related site is obsolete or dead. There are guides, explanations around, with incorrect and shallow statements, which just increase already big confusion in all this.
- Disk Recovery Software
- GitHub - ChrisBertrandDotNet/ST-Recover
- ST Recover can read Atari ST floppy disks on a PC under Windows
- ST Recover can read Atari ST floppy disks on a PC under Windows, including special formats as 800 or 900 KB and damaged or desynchronized disks, and produces standard .ST disk image files. Then the image files can be read in ST emulators as WinSTon or Steem.
- Old Floppy Disks Won't Read | Motherboard Forums - I have 20 old floppy disks I need to access. They are high-densitydisks. They were bought pre-formatted, and the files were saved with Windows 95. I am now trying to access them using a PC running Windows XP Pro SP2. But I get: "The disk in drive A is not formatted. Would you like to format it now?"
- GitHub - ChrisBertrandDotNet/ST-Recover
- Other Hardware
- HxC Floppy Emulator | HxC2001 HeadQuarters - A Universal Floppy Disk Drive Emulator. The HxC Floppy Emulator project main idea is to completely replace the floppy disk drive by an electronic device. This electronic device emulate the floppy disk drive behavior and functionnalities.
- Jookie's home page » UltraSatan - The Ultrasatan is a hard disk replacement for your Atari ST - and it uses SD cards for storage. Whilst not specifically intended for file transfer, by partitioning and formatting the SD card in the right way, you can mount the SD card on both your PC and ST - and hence use it to transfer files.
- KryoFlux
- KryoFlux is a USB-based device designed specifically for the reliability and precision needed to acquire reliable low-level reads suitable for software preservation.
- This is the official hardware developed by The Software Preservation Society, an authority in authentic floppy disk imaging and preservation.
- LGR - Kryoflux USB Floppy Disk Controller Overview - YouTube - A demonstration and overview of the capabilities of the Kryoflux USB High Definition Flux Sampler.
- Arduino Nano Floppy Emulator For When Your Disk Is Not Accessible | Hackaday - Among the plethora of obsolete removable media there are some which are lamented, but it can be difficult to find those who regret the passing of the floppy disk.
Print 2 full pages on single sheet of paper with HP a printer
These are my instructions on configuring my HP 2015n printer to invisibly (to applications) print 2 pages on a single sheet on a single piece of paper.
These instructions might work on different printers as long as they have the feature set in their driver.
Configure the printer defaults
These settings will make the printer scale the full pages and print them 2 a page.
- Goto
All Control Panel Items --> Devices and Printers
or
All Control Panel Items --> Printers - Your HP Printer --> printer preferences --> Finishing --> Pages per Sheet
- Set to 2
- This will do what it says, 2 pages onto 1.
- You can only select one of these options at a time. If you choose one the other settings will be wiped out.
Notes
- Your HP Printer --> printer preferences --> effects--> % of Normal Size
- This will reduce the print size for each page. The pages will stay separate so this setting does not work.
Create new printer instance (optional)
Setting up a new printer with these options as the default settings will make your lifer easier rather that having to select these options each time you print or reverting the defaults when you are finished.
When I say setup another printer I mean we will use the same physical printer but install another instance of the printer which we can then configure as required.
So follow one of the tutorials below
- Therry - How can I make a copy of a printer in Windows 10?
- How to Install the Same Printer Twice (With Different Settings) on Windows
Outlook 2016/2019 PayPal Receipt Printing - Only print pages 1 and 2
This all started because I printout my PayPal receipts and because of their formatting can take several sheets of paper. Often the last sheet would just have 1 word on it.
I started by manually just printing the first 2 pages, but this is time consuming so I wrote a macro just to print the first 2 pages of the PayPal receipt to the default printer so I could achieve the same thing but with 1 button click which is what I will show you how to do below.
Then I moved on and configured my printer to print 2 pages on every sheet. So instead of an average of 3 A4 pages every receipt I now just use 1. This has the added advantage that some times a receipt is 1 page and sometimes it is 2 pages so no more paper that what is absolutely needed is used.
I then also created a memo style in Outlook with the margins reduced. (Optional)
This is best solution for printing PayPal Receipts.
See Print 2 full pages on single sheet of paper with HP a printer | QuantumWarp
Instructions
To get this to work there are several parts, building the macro (which is done for you), installing the macro and then creating a button in Quick Access Toolbar to run it.
The Macro (2022)
' Outlook 2016/2019 PayPal Receipt Printing - Only print pages 1 and 2

Sub PayPal_Receipt_Printing()

SendKeys "%"
SendKeys "FPR"
SendKeys "%{S}"
SendKeys "1-2"
SendKeys "{ENTER}"
DoEvents
SendKeys "{NUMLOCK}{NUMLOCK}"

End Sub
Old Version
The code below worked for a while but recently stopped working after a Windows update but I am leaving it here for reference because there might old versions of office this is needed for and I can see what I changed to get it to work.
' Outlook 2016/2019 PayPal Receipt Printing - Only print pages 1 and 2

Sub PayPal_Receipt_Printing()

SendKeys "%FPR"
SendKeys "%S"
SendKeys "1-2"
SendKeys "{ENTER}"
DoEvents
SendKeys "{NUMLOCK}{NUMLOCK}"

End Sub
How I fixed this
- The error started occuring after a Windows/Office Update
- When i run a macro in office it makes a noise/alert/bong and appears not to run
- This alert was caused by incorrect keypresses generated by the macro caused by changes to how the code is interpreted after an update.
- The macro is running correctly, but not as you expect.
- Becasue the macro does not crash, there are no error to be generated.
- I found the error by REMMING out all of the lines in the VBA and check each line/action until the issue is found.
- I run each line one by one to see where the bong was generated.
- I REMMED out all the lines except the first one, checked, then uncommented the second line and rechecked etc..
- I fixed the script by appling these changes:
- SendKeys "%FPR" is now broken into 2 lines. For some reason the code on one line was not longer accepted.
- SendKeys "%"
- SendKeys "FPR"
- I have also changed SendKeys "%S" to SendKeys "%{s}" as there was a change in how the asset on the print dialogue box is selected or how this particular line was handled.
- SendKeys "%FPR" is now broken into 2 lines. For some reason the code on one line was not longer accepted.
Code explained
- SendKeys "%FPR"
- Press the keys: Alt --> F --> P --> R
- Use to work but stop working after a recent update.
- SendKeys "%"
- Press the keys: Alt
- Works fine when it is on its own
- SendKeys "%{FPR}"
- While holding the ALT key press F --> P --> R
- This should work
Install the Macro and create a Quick Access Toolbar button
- Outlook 2010 Macro to print first page of email - YouTube - This video shows you how to set everything up, however you should use my script above.
Test Print
Remembering that this script will use your default printer, do a test print and then you are done.
The rest of this article is for reference.
Notes
- Using VBA Editor in Outlook
- To run the macro from Outlook 2007 or older, go to Tools --> Macro --> Macros and select the macro.
- In Outlook 2010, you need to show the Developer ribbon first (File --> Options --> Customize Ribbon --> check Developer ribbon on the right).
- In Outlook pressing Alt+F11 opens the Microsoft Visual Basic for Applications editor
- You can also open the Macros dialog using Alt+F8 (all versions).
- How to use Outlook's VBA Editor
- Multiple Printers in Windows
- Print Selected Pages
- Various Outlook VBA
- Print Emails Automatically - VBOffice
- Print Attachments Automatically - VBOffice
- How to print emails and attachments from Outlook: the basic useful facts | MAPILab blog - Various printing issues with Outlook discussed here with solutions with such topics as automatically printing attachments.
- Outlook VBA Macros - VBOffice - Free VBA macros for Microsoft® Outlook®. Get more than 100 ready-to-use scripts, or use the samples as a template for your own programming.
- Macros not working
- Macros not working after you restart Outlook this will be because of macro security and there are 2 options
- change this setting :: Trust Centre -> Macro Settings --> Notifications for all macros
- self sign the VBA script (not sure how to do this)
- Outlook Macro Stops Working (or Doesn't Work to Begin With)? - jmerrell.com
- Outlook macros are not enabled - Microsoft Community
- Macros disabled and can't enable them to run - Microsoft Community
- Outlook 2016 - Macros no longer work after upgrading from Outlook 2013 - Microsoft Community
- Outlook 2019/365: Enable or Disable Macros | technipages
- How to create Outlook macros in Office 2016 & 2019? | EasyTweaks.com
- Outlook macro blocked since update 1902 + other bugs - Microsoft Community
- Macros not working after you restart Outlook this will be because of macro security and there are 2 options
- Self Sign Macro
- Outlook Macro Stops Working (or Doesn't Work to Begin With)? - jmerrell.com - I remembered when I originally created the macros several years ago (on my previous computer) I had to create a digital signature and sign the macros in order to get past the Trust Center security settings. Luckily doing so isn’t that complicated.
- Signing your own macros with SelfCert.exe - HowTo-Outlook - Sign your own macros with SelfCert.exe so there is no more need to lower your security settings to get rid of VBA macro security prompts.
- Digitally sign your macro project - Use a certificate to digitally sign your macro project.
- Misc
- Outlook macro blocked since update 1902 + other bugs | Microsoft Forums
- After countless hours of investigation time and productivity loss, I finally found the problem: for an unknown reason my file vbaproject.otm was corrupt: although I was still able to view it, edit it and save it, any attempt to run a macro returned the error "macro in this project are disabled" although the macro settings were set to "Notifications for all macros"!
- To fix the issue, I copied my macro to a text file (luckily I only had code!) then deleted the file. Outlook created a new blank file at startup where I just had to paste the copied code.
- Outlook macro blocked since update 1902 + other bugs | Microsoft Forums
Numlock gets turned off when using SendKeys
The NumLock would always turn off after running the script no matter what. These are my notes on resolving this issue.
When you use SendKeys the NumLock is turned off due to a bug in Visual Basic.
Solutions from Microsoft
I found these towards the end of my research and they pretty much the best way of fixing this issue.
Executing two or more SendKeys statements in a row results in turning off the NumLock key. This problem may also affect the CapsLock and ScrollLock keys.
- see BUG: Multiple SendKeys Statement Turns Off NumLock Key | Microsoft Support - This gives the follow work arounds:
- Send all the characters in a single SendKeys statement. -or-
- Execute a DoEvents function between each SendKeys statement. However, depending on the complexity of the key strokes, this may not work in all cases. -or-
- Determine the setting of the NumLock key prior to using SendKeys. Then, turn off the NumLock before using SendKeys. After using SendKeys, reset the NumLock to its previous setting. This is accomplished using the GetKeyboardState, keybd_event and SetKeyboardState API functions. See the REFERENCES section below for more information. -or-
- Use API functions instead of SendKeys. See the REFERENCES section below for more information,
- See: How To Toggle the NUM LOCK, CAPS LOCK, and SCROLL LOCK Keys | Microsoft Support
- Backup of the article: Microsoft KB Archive/179987 - BetaArchive Wiki
My Solution 1 - DoEvents
If you look in the script above you can see the following code taken from SendKeys is messing with my NumLock key via VBA code in Access form - Stack Overflow
DoEvents
SendKeys "{NUMLOCK}{NUMLOCK}"
This solution seems to work really well and perhaps can be expanded for Caps Lock and Scroll Lock if needed.
My Solution 2 - Sense NumLock state and then restore after SendKeys (GetKeyState/GetAsyncKeyState)
I spent quite a bit of time trying this but could not get it to work so I am including my notes and research here for future reference.
The code below I managed to get to sense when a key was pressed down and shows how to use the High/Low bit thing by using Hex codes
' Get Numlock status

Private Const VK_NUMLOCK = &H90
Private Const VK_SCROLL = &H91
Private Const VK_CAPITAL = &H14

Private Declare PtrSafe Function GetAsyncKeyState Lib "user32" (ByVal vKey As Long) As Long

Private Function KeyDown(ByVal vKey As Long) As Boolean
   KeyDown = GetAsyncKeyState(vKey) And &H8001
End Function

Sub Test_Key_down()

If KeyDown(vbKeyNumlock) Then MsgBox "The NumLock key is pressed down!"

End Sub
Notes
- I can then get state before running the code and restore it aftewwards to fix bug.
- I cannot get the live state of the NumLock using this method
- All Declare Statements must now include the PtrSafe keyword when running in 64-bit versions of Microsoft Office. The PtrSafe keyword indicates a Declare statement is safe to run in 64-bit versions of Microsoft Office.
- SendKeys is messing with my NumLock key via VBA code in Access form - Stack Overflow - Answers here.
- &H8001 = checks if the key is down has been pressed in this process. it is not cleared until new process.
- &H8000 = checks if the key is down
- &H0001 / &H1 = checks if the key has been pressed in this process. it is not cleared until new process.
- this only does keys, I cant get it to recognise the state of the numlock light
- process/message que clears after about 5 seconds
- 0x8001 = Low bit
- 0x8001 = High bit
- 0x8001 = -32767
- If the function succeeds, the return value specifies whether the key was pressed since the last call to GetAsyncKeyState, and whether the key is currently up or down.
- If the most significant bit is set, the key is down, and if the least significant bit is set, the key was pressed after the previous call to GetAsyncKeyState. However, you should not rely on this last behavior; for more information, see the Remarks.
My Solution 3 - Sense NumLock state and then restore after SendKeys (Keyboard Events)
I never tried this option as it looked very complicated and I do not want to learn VB.
Outlook VB General Notes
- General
- VB (Visual Basic) is NOT the same as VB.net , there are also similaritwes with C++ and C#
- VBA (Visual Basic for Applications) it is a crippled version of VB and not everything works or is available (perhaps context of application only)
- Adding `True` on to the end of `SendKeys` commands does not seem to make any difference
- People say dont use SendKeys because of these issues and use something like keyboard events instead.
- PtrSafe keyword must be used on 64-Bit systems. Don't know why
- VBA Printing Scripts
- ff
- General Example Scripts (to overcome NumLock getting turn off)
- SendKeys is messing with my NumLock key via VBA code in Access form - Stack Overflow
- number lock turns off intermittently - Microsoft Community
- Turning on the "Num Lock" key-VBForums
- vb.net - Why GetAsyncKeyState not work on MS Excel - Stack Overflow
- vba - Turning NUMLOCK on at the end of a macro run - Stack Overflow
- How can Excel vba detect if Caps Lock or Num Lock is on?
- detecting the keyboard scroll lock state (example)-VBForums
- [CC++] - about GetKeyState() - Gives the following descriptions
- GetKeyState tells you only the state of the keyboard now. If someone presses a key and release it while your loop is executing, that won't be detected.
- GetKeyState works based on Keypress/release messages already retrieved. If' you're in the main window thread and you've not made any provision in your loop to process messages, the state reflected won't change.
- GetAsyncKeyState may work better for you. First, it bypasses the message processing so it reflects the actual state of the keyboard. Second, it has a features where it tells you via the low order bit if the key was pressed between calls to GetAsyncKeyState. This is still problematic because any application on the system calling GetAsyncKeyState will reset that value.
- determine if a key has been pressed using GetAsyncKeyState() - This has a script worth looking at
- Outlook 2010 - macro "Print 1st page" - Problem with Num Lock turning off
- Example Keyboard event scripts
- vba - Send Keys is Disabling NumLock - Stack Overflow - An extensive keyboard event script
- FreeVBCode code snippet: Toggle NumLock Key - Keyboard event
- [RESOLVED] Caps Lock/Num lock on or off?-VBForums - Keyboard event
- VB Helper: HowTo: Turn CapsLock on and off
- Activating CapsLock, NumLock, ScrollLock and PrintScreen on NT-Based Systems | Visual Basic Developers Resource Centre
- Turning on the "Num Lock" key-VBForums
- Significant Bits
- VS 2010 Stop GetAsyncKeyState repeating-VBForums - If we read the documentation, we see that GetAsyncKeyState() already tells us if the key's been pressed again or if it's a "repeat":
- If the most significant bit is set, the key is down, and if the least significant bit is set, the key was pressed after the previous call to GetAsyncKeyState.
- Although the least significant bit of the return value indicates whether the key has been pressed since the last query, due to the pre-emptive multitasking nature of Windows, another application can call GetAsyncKeyState and receive the "recently pressed" bit instead of your application. The behavior of the least significant bit of the return value is retained strictly for compatibility with 16-bit Windows applications (which are non-preemptive) and should not be relied upon.
- c# - What are these numbers in the code GetAsyncKeyState(VK_SHIFT) & 0x8000 ? Are they essential? - Stack Overflow
- First and Last Bit of GetAsyncKeyState
- VS 2010 Stop GetAsyncKeyState repeating-VBForums - If we read the documentation, we see that GetAsyncKeyState() already tells us if the key's been pressed again or if it's a "repeat":
- SendKeys
- GetKeyState()
- This gets a snapshot of the message que and not the live keyboard
- GetKeyState function (winuser.h) - Win32 apps | Microsoft Docs
- [RESOLVED] simple question - getkeystate api-VBForums
- VBA Remember Numlock State | MrExcel Message Board - Very simple code that uses <>
- GetAsyncKeyState()
- This get the live position of the keys. I cannot get this to get the NumLock state.
- GetAsyncKeyState function (winuser.h) - Win32 apps | Microsoft Docs
- GetAsyncKeyState - Some scripts to look at
- vb.net - How can I use GetAsyncKeyState to implement a global hotkey? - Stack Overflow
- VS 2010 GetAsyncKeyState-VBForums
- c# - GetAsyncKeyState Explanation required - Stack Overflow
- Wait Until a Key is Pressed with GetAsyncKeyState VBA - wellsr.com
- Return Values Of GetAsyncKeyState() - C# | Dream.In.Code
- GetKeyboardState()
- This might allow you to access the NumLock toggle status.
- GetKeyboardState function (winuser.h) - Win32 apps | Microsoft Docs
- Visual Basic General
- Only comments may appear after End Sub, End Function, or End Property | Microsoft Docs
- Virtual-Key Codes (Winuser.h) - Win32 apps | Microsoft Docs - The page shows the symbolic constant names, hexadecimal values, and mouse or keyboard equivalents for the virtual-key codes used by the system. The codes are listed in numeric order.
- Keycode constants | Microsoft Docs - The following constants can be used anywhere in your code in place of the actual values.
- VBA Boolean Data Type | Examples to Use Excel VBA Boolean Operator - How to set a variable
- Boolean Data Type - Visual Basic | Microsoft Docs
- VBA: Sub vs Function - Overview, Key Differences, How To Write
- The usage and difference of getkeystate and getasynckeystate and Getkeyboardstate functions | alibabacloud
- c++ - GetKeyState() vs. GetAsyncKeyState() vs. getch()? - Stack Overflow
- What are &H1, &H8000, etc.? - Visual Basic (Classic) - Tek-Tips
- What does the 0x80 code mean when referring to keyboard controls - Genera Codice
- The code in this project must be updated for use on 64-bit systems | Microsoft Docs
CWP Full setup in VirtualBox on Windows behind a NAT
These instructions are for CWPpro but will work for the most part with the free version of Control Web Panel. For the yearly cost of the Pro version it is worth paying the $12 and trying the full software out from the start. This will also support the project.
For reference I used:
- CentOS-7-x86_64-Minimal-2009
- CWPpro v0.9.8.1074
- VirtualBox v6.1.22-144080
Following these instructions will take around 5 Hours to complete and this assumes you have built your Windows 10 Pro PC.
I do not cover every aspect because I am not a professional but this should be a good baseline. But what it does cover is:
- Setting up a Windows 10 Pro PC (not extensively).
- Setting up a Oracle VirtualBoc Virtual Machine instance with all of the correct settings.
- Setting up of CWP and all of those settings that most people want.
- Configuring your local network with OpenWRT
Just follow the guide through from beginning to end and everything will work. I built the guide as I figured things out.
Prerequisites
It is easier to get these things together before you start.
- CWP Pro License
- Static IP (Public) for CWP (13.13.13.13)
- Static IP (Lan) for VM Server (192.168.1.10)
- Static IP (Lan) for CWP (192.168.1.11)
- FQDN - Domain name for the server/yourlocalnetwork (mydomain.com)
- Windows 10 Pro PC
- 16GB
- 500GB HDD/SSD (doesn’t have to be this big, but this is a suitable size, you have to consider wear rate on an SSD)
- VirtualBox
- VirtualBox Addons
- VB Guest Additions (optional) – Allows for copy and past between OS and is GPL (I believe)
- virtualbox.org • View topic - Guest addition license GPL or PUEL?
- Oracle VM VirtualBox Extension Pack (restricted License) – Do not install as can license agreement for using VirtualBox (i.e. no longer free)
- Installed on RAID 0 (optional)
- Remote Desktop (RDP) or other remote software
- Network Card
- CentOS 7 64-Bit
- Minimal is recommended version. (RECOMMENDED)
- Downloads
- Different ISOs explained
- CentOS 8 has been discontinued (31-12-2021)
- CentOS Stream is the new version but not yet fully supported by CentOS CWP
- CentOS is supported until 30-Jun-2024
- There will be an upgrade path from CentOS 7 to CentOS Stream
- The Future of CentOS Stream with CWP - Control WebPanel Wiki
Setup Windows 10 Pro PC
You can use your own Virtual Machine server if you have one. My preference is VirtualBox because it is free but VMWare should do just fine.
- PC Name: vmserver
- Give PC static IP
- NAT’ed network: give it an internal IP 192.168.1.10
- Direct on the internet: give it a real IP address
- NAT’ed network: give it an internal IP 192.168.1.10
- Disable Sleep (set to never sleep)
- Disable sign-in on wake up
- Run the command: ms-settings:signinoptions
- Require sign-in: Never
- Disable Windows 10 automatic updates
- This is important to prevent Windows from corrupting your VM.
- Use Group Policy Editor method only
- How to stop automatic updates on Windows 10 | Windows Central - A well written article.
- You ant to use the Limit updates with option 2 as recommended.
- Other software you want to install (optional)
- Update Windows
- Disable Page Swap (optional)
- Will this improve speed and reliability?
- I do not know
- Disable automatic Defrag as this is not needed because
- This VM is used a fixed disk with pre-allocated space and that is where the fragmentation will happen
- I am using SSDs
- You can manually run disk defragmentation on your 'Standard' hardrives when required.
- Free up resources for the use of the VMs
- Setup password on the user account
- make the user automatically login to window 10
- Setup RDP / Remote control
- How to EASILY Set Up Remote Desktop on Windows 10 - YouTube
- You cannot use blank passwords
- Install VirtualBox
- Install to C:\Program Files\VirtualBox\ or the default location if you prefer.
- Install Guest editions only (if required)
Check your RAID
Not everyone will use a RAID, but should. A few simple checks to make sure everything is correct is a good idea.
The information below is for standard RAIDs found on Desktop PCs and not ones on ZFS or anything funky like that.
- If you are using SSDs on your RAID check to make sure your RAID has presented the RAID as an SSD otherwise you might burnout your drives quicker. This should only be an issue on old RAIDS pre-SSD.
- Check your hardware RAID is recognise as 1 drive in Disk Management so you know you have configured it correctly.
- Install any RAID specific drivers/utilities that came with your motherboard or RAID card so you can do proper monitoring of the drives hardware.
- Configure and RAID utilities to send you email alerts.
- When SSDs are used in a RAID:
- the 'Scheduled Optimisation' should be disabled (if not already) because you cannot trim a RAID as it is made up of more than one drive, and these commands are direct drive commands. Newer RAIDs will have this feature built into their utilities which can see the drives independantly and can make the appropriate adjustments.
- 'Scheduled Optimisation' is found in the Windows defrag utility and this is where I can check these settings.
- Standard drives in a RAID can be defragged as normal because the commands will be handled correctly.
Create a VirtualBox VM
These are my settings for VirtualBox but you might want to modify them slightly which will be fine.
If a setting is not mentioned or is crossed out below, leave it as default.
Using the wizard create your VM with the following settings
Using the Guided or expert mode will give the same outcome.
- Name and Operating System
- Name: CWP
- Machine Folder: C:\Users\{user}\VirtualBox VMs
- Type: Linux
- Version: Red Hat (64-bit)
- Memory size: 4096MB
- Hard Disk
- Create a new virtual disk now
- VDI (Virtual Disk Image)
- Fixed Size
- File location and size
- 50GB
- C:\Users\{user}\VirtualBox VMs\CWP\CWP.vdi
- This will create a file that is 50GB so will add 50GB of wear to your SSD. But don’t worry this is ok and expected and is a one time deal.
Edit new VM Machine settings
There is currently a bug with rebooting a VM when running in EFI mode with more than 1 CPU. See notes below.
CWP/CentOS works with each type of VirtualBox Start Up. You should look into which one suits you best.
I use Normal until everything is setup and then use Headless when it goes into production.
We now need to finish configuring the VM so it performs better with CentOS Linux.
- Only change settings mentioned, the rest should be left as default
- General --> Description
- Control Web Panel
- System --> Motherboard --> Boot Order
- Optical
- Hard Disk
- Eject ISO after OS setup
- System --> Motherboard --> Chipset
- System --> Motherboard --> Enable EFI
- System --> Motherboard --> Hardware Clock in UTC Time = off. This keeps the time the same as the Host
- System --> Motherboard --> Processors --> 2 CPUs (My Host has 6 cores)
- System --> Acceleration --> Paravirtualization Interface --> KVM
- System --> Acceleration --> VT-x/AMD-V --> Enabled (If present)
- Display
- Video Memory: 64MB (Default: 16mb / VMSVGA)
- Graphics Controller: VBoxSVGA + no 3D acceleration
- Enable 3D Acceleration: yes
- Storage
- SATA Controller
- Name: SATA
- Type: AHCI
- Port Count: 2
- Use Host I/O Cache: off
- HDD/SSD
- Solid-state Drive: Yes if you are using SSD
- Hot-pluggable: off, leave this off
- Add optical Drive to the SATA controller with the following:
- Live CD/DVD: no
- Hot-Pluggable: no
- Remove the IDE Controller
- NetworkAdapter 1
- EnabledAttached to: Bridged Adapter
- Promiscuous Mode: Deny
- SATA Controller
Notes
- General
- A Complete Guide to Using VirtualBox on Your Computer - An excellent guide to VirtualBox cover most areas.
- VMware vs VirtualBox: Full Virtual Machine Comparison - History-Computer
- VMware vs VirtualBox: Torn between the two? Discover their differences to be able to choose the right virtualization software for your needs.
- Excellent article
- VirtualBox License: Free, open-source under GNU GPL v2 with PUEL for commercial use of Extension Pack
- However, it’s worth noting that the VirtualBox Extension Pack Enterprise Pack is subject to the VirtualBox Personal Use and Evaluation License (PUEL). As such, personal use of this extension is free but commercial users must purchase a license.
- General Settings
- Chipset
- UEFI
- Virtualisation
- Display
- Storage
- Chapter 5. Virtual Storage
- Emulate different types of hard drives (SATA, IDE, SCSI, ...) and SSDs (NVMe) with VirtualBox 6.0 / 5.2 - Virtualization - Tutorials - InformatiWeb - good explations about all of the settings. Sata is better performance.
- Hard disk controller | Oracle VirtualBox
- 50Gb Fixed/Pre-allocated/Thick Virtual Drive, Why?
- Fixed for production, Dynamic for development and messing about.
- Fixed: Your VM will always have the space on the disk that is advertised to it. This is especially useful when you are running multiple VMs on the same Host
- Fixed: less computation and disk activity overheads than that of a dynamic disk.
- Fixed: less chance of corruption and repairs are more likely to be easier
- Fixed: slight performance (more so with HDD)
- When an OS asks for a new allocation, it usually occupies a previously unoccupied cluster. When it "deletes" data, it simply marks the cluster as empty, internally. VirtualBox will allocate an actual "cluster" on the host when asked, but it can't know when a "cluster" is freed. So keep writing/deleting data (from temp to cache) will get your dynamically sized VDI to its maximum size. Source: virtualbox.org • View topic - Dynamically allocated storage exploded to full size without warning
- Can virtual storage shorten the life of SSD? - Super User = No
- VirtualBox Guest Window Modes
- Normal Start
- Starts a VM showing a GUI window which cannot be closed. This is the default.
- Headless Start
- Starts a VM without a window for remote display only.
- When VM running in headless you will also be able to connect and disconnect the GUI (Using Show and Machine -> Detach GUI options) without closing the VM.
- Detachable Start
- The guest window appears but can be disappeared by the guest window Machine menu, Detach GUI.
- Starts a VM with a detachable UI.
- Technically, it is a headless VM with user interface in a separate process started by default.
- This is an experimental feature as it lacks certain functionality, such as 3D acceleration. I am not sure about this statement, it might just be this option starts with the window open, however when you start in this mode a message does come up about starting a new process whereas headless does not.
- If the guest window is not present you can get it back again
- Click the show button at the top of the main window
- From the main VirtualBox window, double click the guest (in the list on the left where it says running), as if you are starting it after it has already been started.
- Right click and select show. (Headless Start / Detachable Start Only)
- Preview windows and be disabled by right clicking on it.
- 7.1.2. VBoxHeadless, the Remote Desktop Server
- 8.12. VBoxManage startvm
- virtual machine - Why is Virtualbox start mode not detachable by default - Super User
- Virtualization - Starting VirtualBox VMs and Start Mode Overview - YouTube - This shows the different types of start.
- CentOS running VirtualBox (headless mode) – SimplyGeek.co.uk
- Different methods to start in headless from the command line and keyboard shortcut
- ubuntu - Run VirtualBox in background, without a window? - Super User
- Hold down Shift when launching the VM from the Manager.
-
VBoxManage startvm "{VMName}" --type headless VBoxManage startvm Debian --type headless VBoxHeadless --startvm "{VMName}" VBoxHeadless --startvm Debian - Use VBoxManage as this will start the VM as you expect but if you use VBoxHeadless the VM will start, but there will always be a command prompt onscreen which defeats the object and if you close this window the VM will be killed immediately which risks your data.
- What does it mean when you run your machine in a headless or detachable state? What benefits do both provide? : virtualbox - A down to earth explanation of healess mode and when to use it.
- virtual machine - Why is Virtualbox start mode not detachable by default - Super User - A quick overview of the different modes.
- Why is VirtualBox’s start mode not detachable by default? - Quora - A quick simple answer.
- Headless is the correct choice
- Headless and detachable are the same except for headless starts without a monitor.
- Headless can show a monitor by clicking on the show button
- To hide the window click on the cross top right and select "Continue running in the background"
- These 2 modes are ideal for no GUI stuff such as CLI based applications. It will run windows etc.. but things like 3D acceleration and Host/Guest interactions (i am guessing) are affected.
- No distracting window open on your VM Server
- Normal Start
- VirtualBox reboot issue when in EFI mode with more than 1 CPU
- This bug has been reported to Oracle. #20468 (VM crashes during reboot if EFI is used on Ryzen CPU) – Oracle VM VirtualBox
- A Forum Thread here where I found the solution/workaround - virtualbox.org • View topic - VM crashes upon reboot using EFI and this is a related thread virtualbox.org • View topic - VM crashes on reboot if using EFI
- The error would be accompanied by entries in the log file similiar to
00:09:27.886256 Changing the VM state from 'RUNNING' to 'GURU_MEDITATION' 00:09:27.886303 Console: Machine state changed to 'GuruMeditation' 00:09:27.886560 !!!!!!!!!!!!!!!!!!!!!!!!!!!!!!!!!!!!!!!!!!!!!!!!!!!!!!!!!!!!!!!!!!!!!! 00:09:27.886561 !! 00:09:27.886562 !! VCPU1: Guru Meditation 1155 (VINF_EM_TRIPLE_FAULT) 00:09:27.886645 !! 00:09:27.886652 !! Skipping ring-0 registers and stack, rcErr=VINF_EM_TRIPLE_FAULT 00:09:27.886660 !! 00:09:27.886660 !! {mappings, <NULL>} 00:09:27.886661 !! 00:09:27.886670 !! 00:09:27.886670 !! {hma, <NULL>} 00:09:27.886671 !! 00:09:27.886673 Hypervisor Memory Area (HMA) Layout: Base 00000000a0000000, 0x02800000 bytes 00:09:27.886678 00000000a1129000-00000000a113a000 000000000db10000 ffffdf829833e000 LOCKED alloc once (PGM_PHYS) 00:09:27.886684 00000000a111b000-00000000a1129000 000000000b690000 ffffdf829b47d000 LOCKED alloc once (VMM) 00:09:27.886690 00000000a110d000-00000000a111b000 000000000b680000 ffffdf829b46f000 LOCKED alloc once (VMM) 00:09:27.886696 00000000a030c000-00000000a110d000 0000000009d60000 ffffb4753b800000 LOCKED alloc once (PGM_PHYS) 00:09:27.886700 00000000a0279000-00000000a030c000 0000000009ac0000 ffffdf8295010000 LOCKED alloc once (PGM_POOL) 00:09:27.886706 00000000a0278000-00000000a0279000 0000000009ab0000 ffffdf8290f60000 LOCKED alloc once (CPUM_CTX) 00:09:27.886710 00000000a0038000-00000000a0278000 0000000009870000 ffffb4753b200000 LOCKED Heap 00:09:27.886715 00000000a0023000-00000000a0038000 00000000095a0000 ffffdf8290f4a000 LOCKED VMCPU 00:09:27.886720 00000000a000e000-00000000a0023000 0000000009580000 ffffdf8290f34000 LOCKED VMCPU 00:09:27.886724 00000000a0000000-00000000a000e000 0000000009570000 ffffdf8290f24000 LOCKED VM 00:09:27.886729 !! 00:09:27.886729 !! {cpumguest, verbose} 00:09:27.886731 !! - This issue means that if you are running in EFI mode and have more than one CPU when you reboot your system it will crash. A 'Guru Meditation' crash which is serious. I have come across 2 types of crash depending on what mode you have start the VM in.
- Normal mode will present you with this error and you can click Ok and the PC will power of.
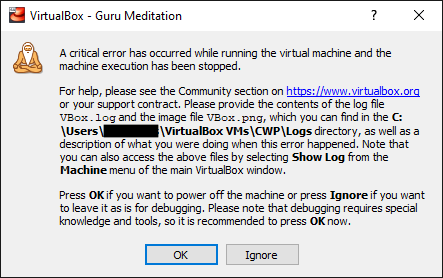
- Headless/Detachable mode will crash and leave a process running that you need to stop manually. It will show as below in the manager app.
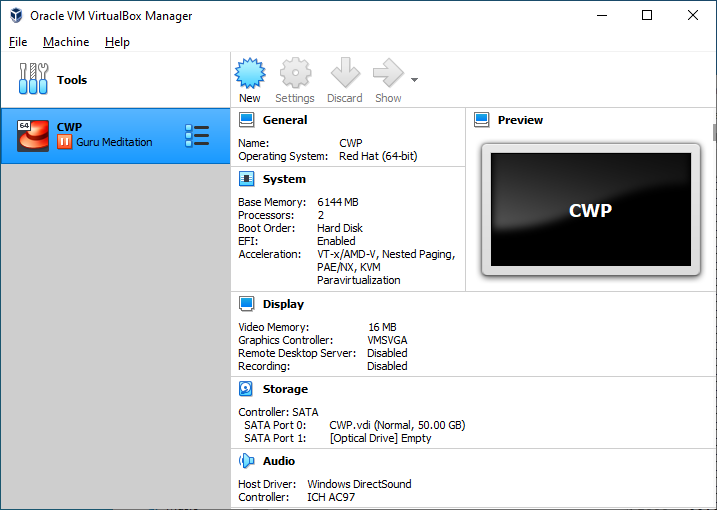
- You can stop the process with either the Windows Task manager or a VirtualBox command line shown below:
(From VM in virtualbox is already locked for a session (or being unlocked) - Stack Overflow)vboxmanage startvm <vm-uuid> --type emergencystop
- Guru Meditation - Wikipedia
- windows - VirtualBox - Guru Meditation - Super User
- What the heck is this Virtualbox Guru Meditation error about? - fixedByVonnie
- You can stop the process with either the Windows Task manager or a VirtualBox command line shown below:
- Normal mode will present you with this error and you can click Ok and the PC will power of.
- VirtualBox Debugging
- VirtualBox Guest Editions
- As mentioned in Section 1.2, “Some Terminology”, the Guest Additions are designed to be installed inside a virtual machine after the guest operating system has been installed. They consist of device drivers and system applications that optimize the guest operating system for better performance and usability. See Section 3.1, “Supported Guest Operating Systems” for details on what guest operating systems are fully supported with Guest Additions by Oracle VM VirtualBox.
- Chapter 4. Guest Additions - gives features list
- Not all OS are support, Windows and Linux including CentOS because it is based on RHL (Red Hat Linux)
- Licensing_FAQ – Oracle VM VirtualBox - The GPLv2 allows you to distribute the VirtualBox Guest Additions, in modified or unmodified form, as long as you adhere to the terms and conditions of the GPLv2.
- I am not sure about installing Guest Additions just to be able to copy and paste when I can do screenshots or use Putty for SSH which has full copy and paste. It installs a load of stuff and needs to be kept up to date. Also with CWP you are running the minimal version so a lot of dependencies might be missing. Install at your own risk.
- Upgrading VirtualBox
- When you upgrade VirtualBox, select the options you want otherwise it removes them, i.e. desktop shortcut.
Install CentOS (Minimal)
I will install CentOS using EFI but pay attention to the reset bug
CentOS 7 (Minimal) is the recommended version of the OS to use when installing CWP. It should be also noted there is no uninstaller but you should never need one.
- Read the Official Installation Instructions
- Mount CentOS-7-x86_64-Minimal-2009.iso in the optical drive
- Set the Optical drive to boot first. (for EFI bios this is currently ignored)
- Power on the VM
- If UEFI Interactive Shell appear instead of the CentOS DVD booting then follow the instructions below, else skip this section. This is a VirtualBox Bug.
- Let the timeout finish or press Esc (both end up at the same place)
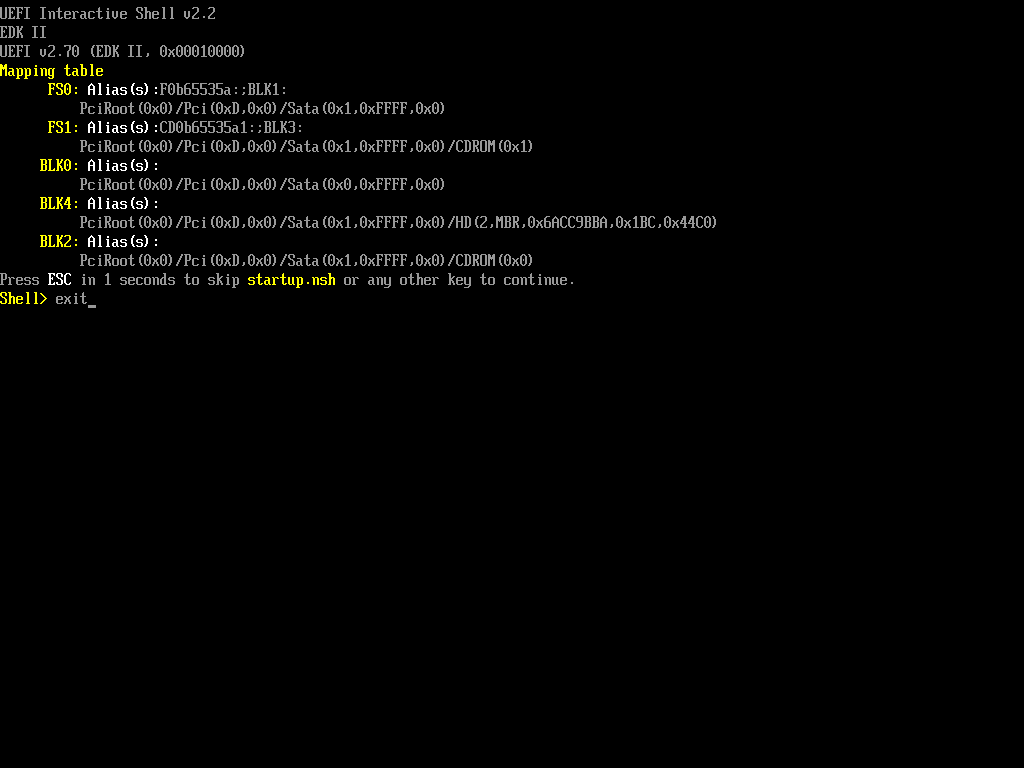
- Type exit (and press return)
- Select Boot Manager
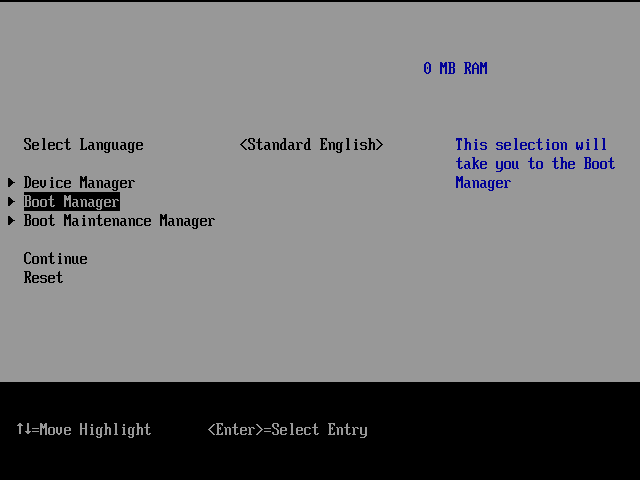
- Select UEFI VBOX CD-ROM VB1-1a2b3c4d

- CentOS option does not work
- This loads EFI/BOOT/BOOTX64.EFI
- CentOS DVD will now boot
- Let the timeout finish or press Esc (both end up at the same place)
- Select Install CentOS 7
- Set your language and click `Continue`
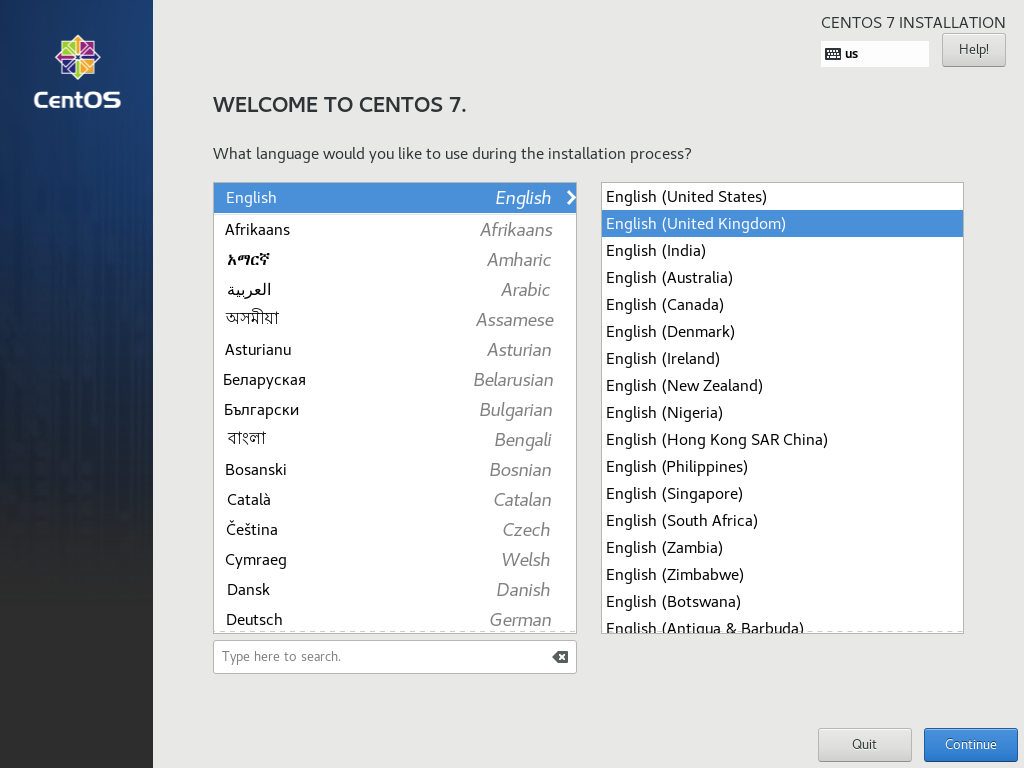
- The keyboard layout will change to your localization.
- Installation Summary should now be shown:
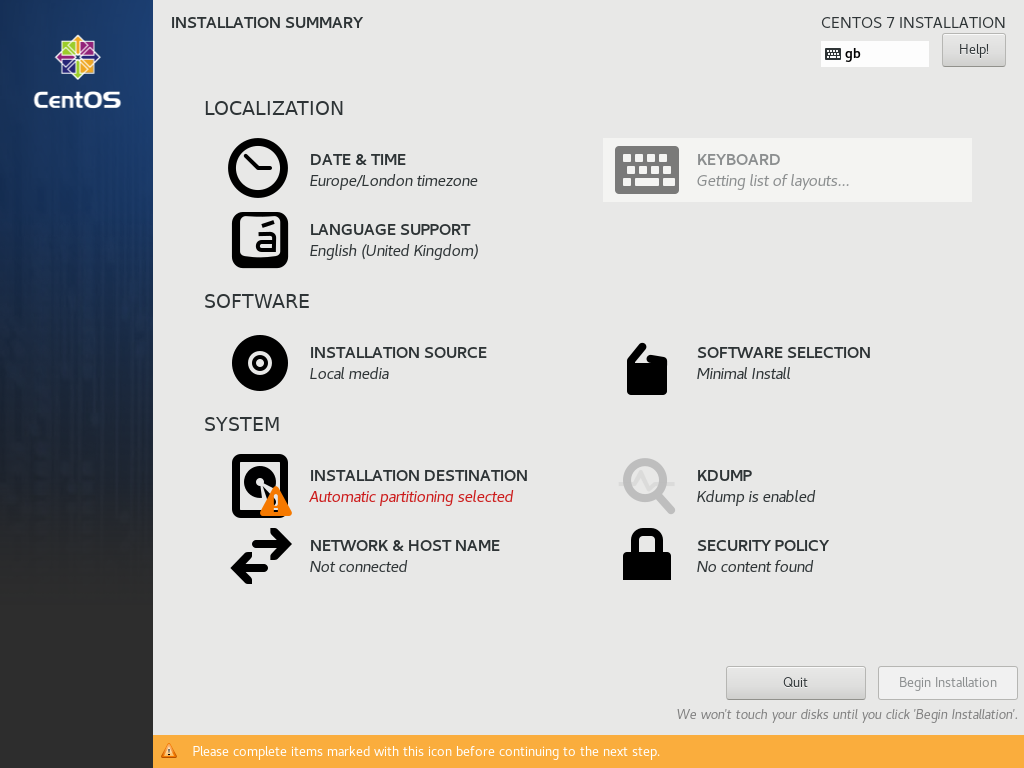
- Configure 'Installation Destination'
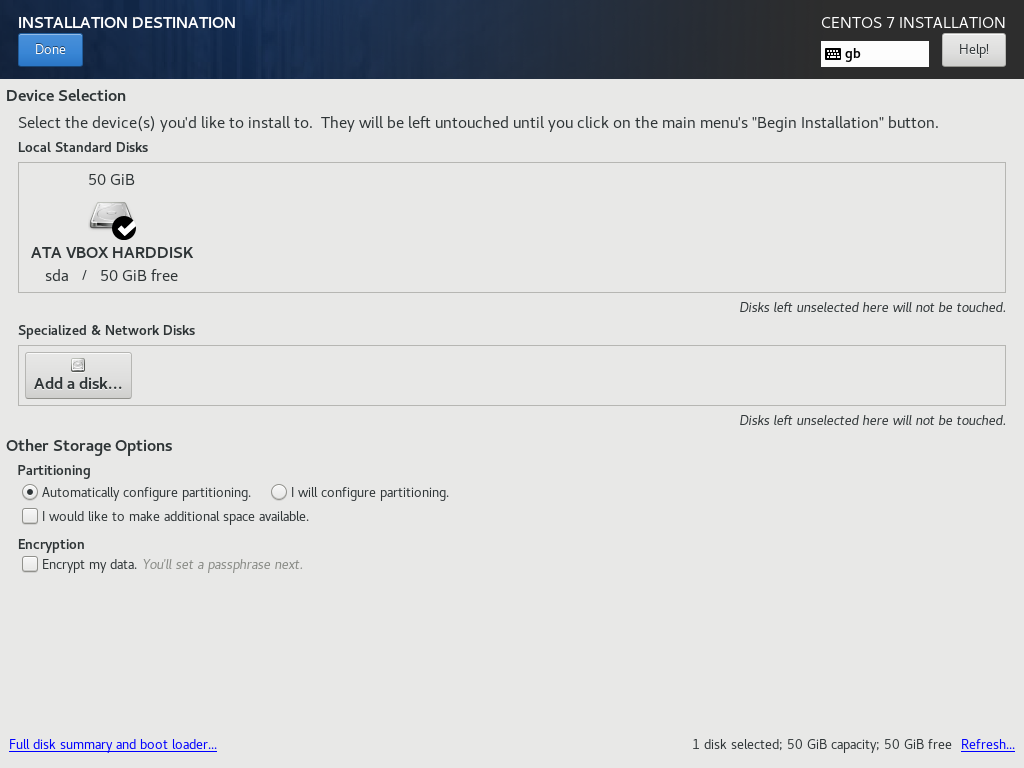
- This needs to be set manually.
- Go in and select the disk and leave everything on auto unless you want something different
- Installation Destination: Just click into it and check the information. Do not change anything. Click `Done`
- Configure 'Network and Host Name'
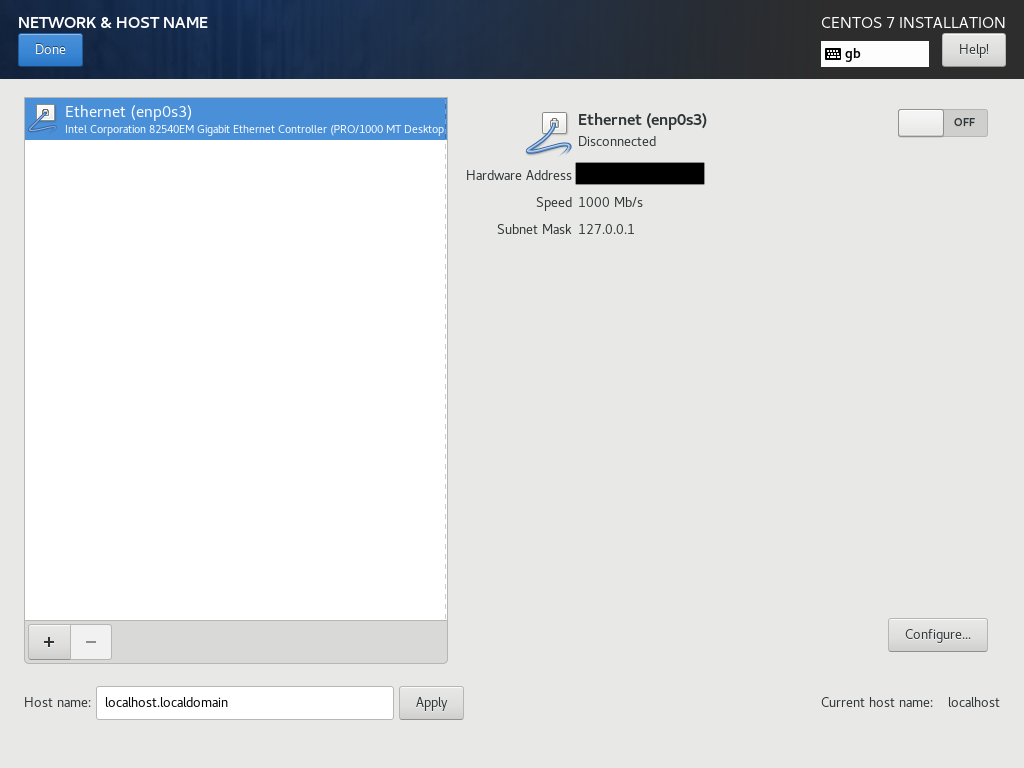
- Configure Ethernet (enp0s3)Enable Ethernet (enp0s3)
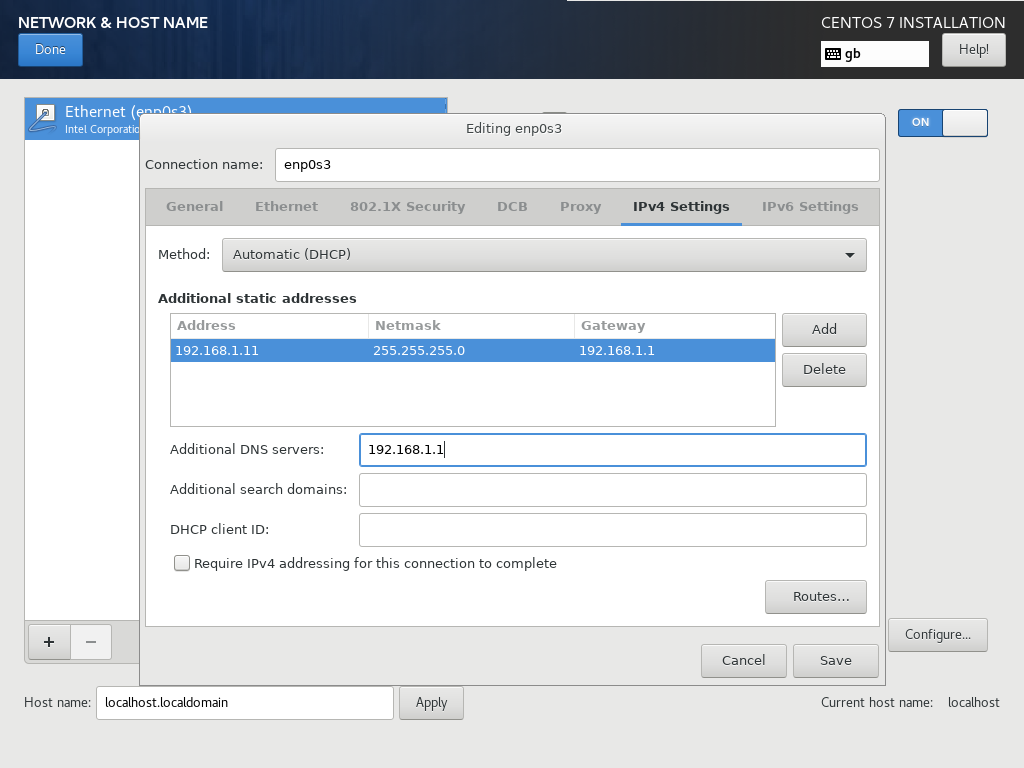
- General --> Automatically connect to this network when it is available: yes
- General --> All users may connect to this network: yes
- IPv4 Settings --> Method: Manual
- IPv4 Settings --> Addresses --> Add
- Address: 192.168.1.11
- Netmask: 255.255.255.0
- Gateway: 192.168.1.1
- IPv4 Settings --> DNS servers: 192.168.1.1
- IPv4 Settings --> Require IPv4 addressing for this connection to complete: Yes
- IPv6 Settings --> Method: Ignore
- Click `Save`
- Enable Ethernet (enp0s3) (if not already)
- Set Host name
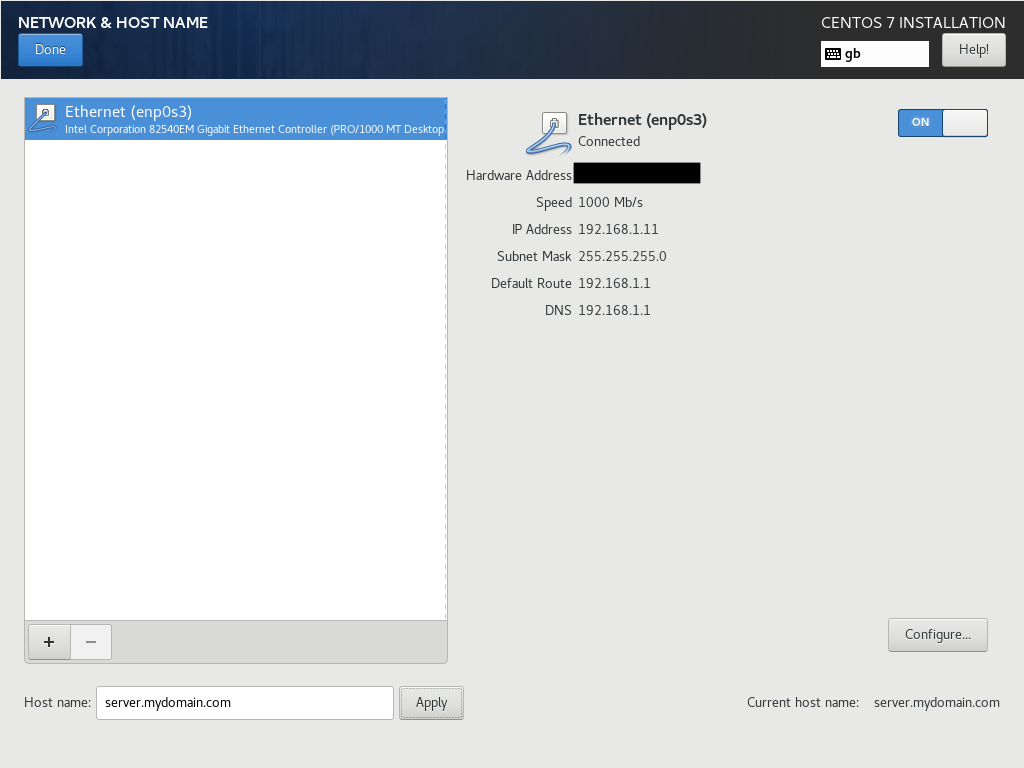
- Host name server.mydomain.com
- Click `Apply`
- Check setting are correct in the summary.
- Click `Done`
- Configure Ethernet (enp0s3)Enable Ethernet (enp0s3)
- All settings should now be correct.
- Click `Begin Installation`
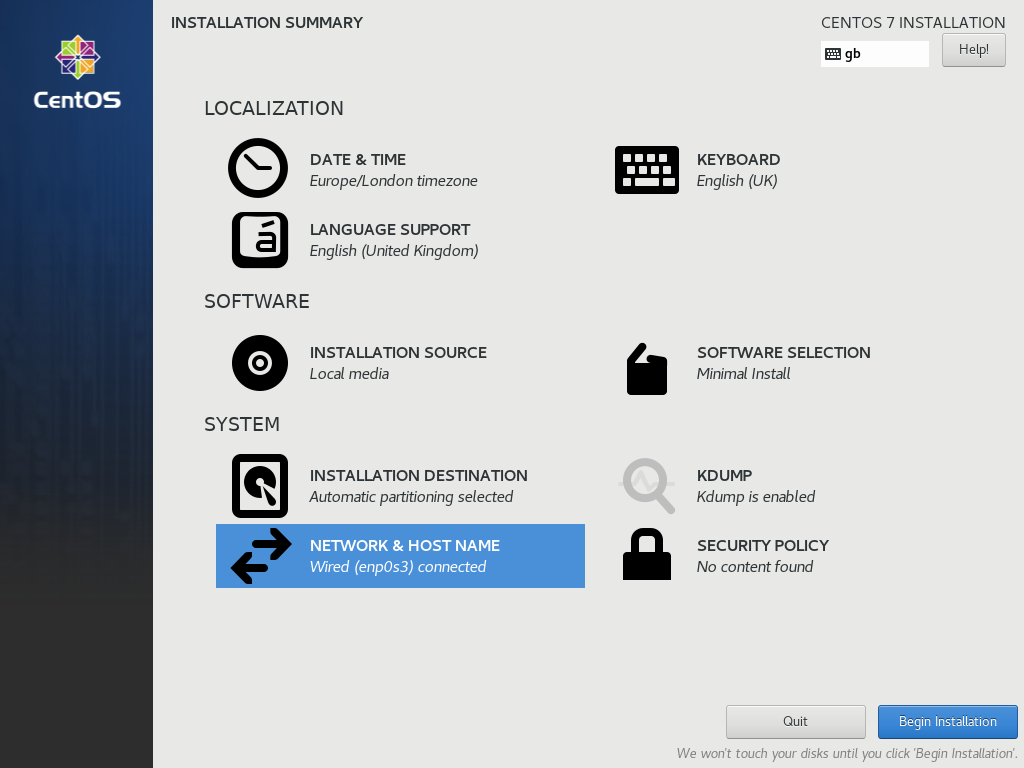
- CentOS will now install the required files
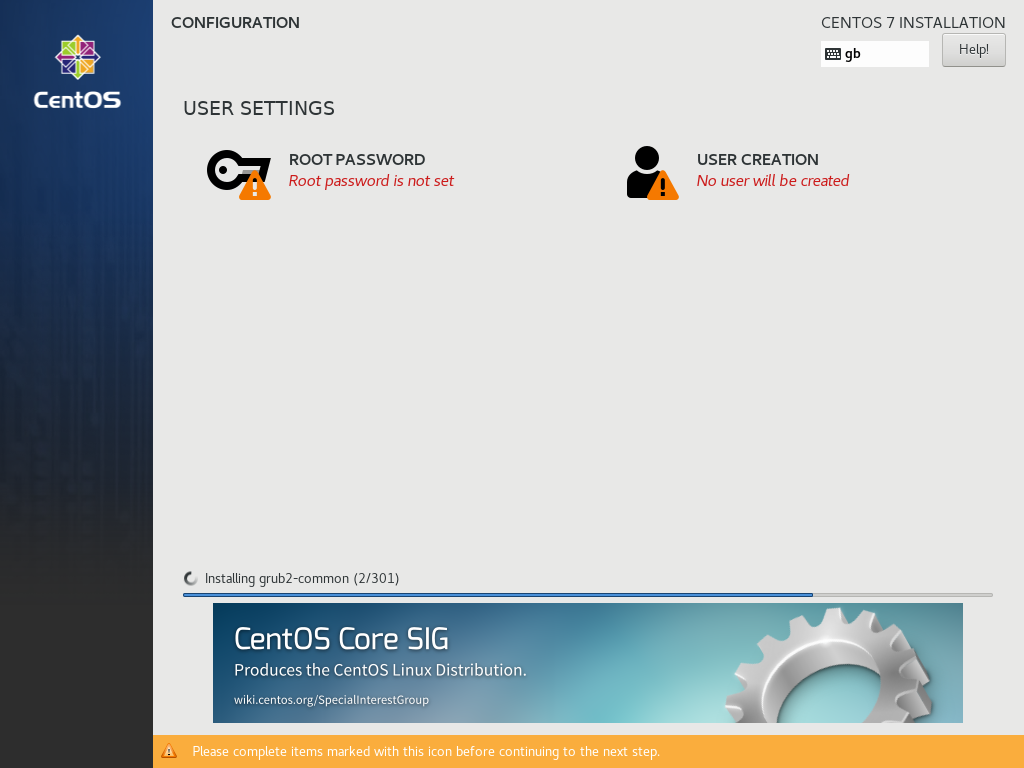
- Set a Root Password (Once the file installation has completed)
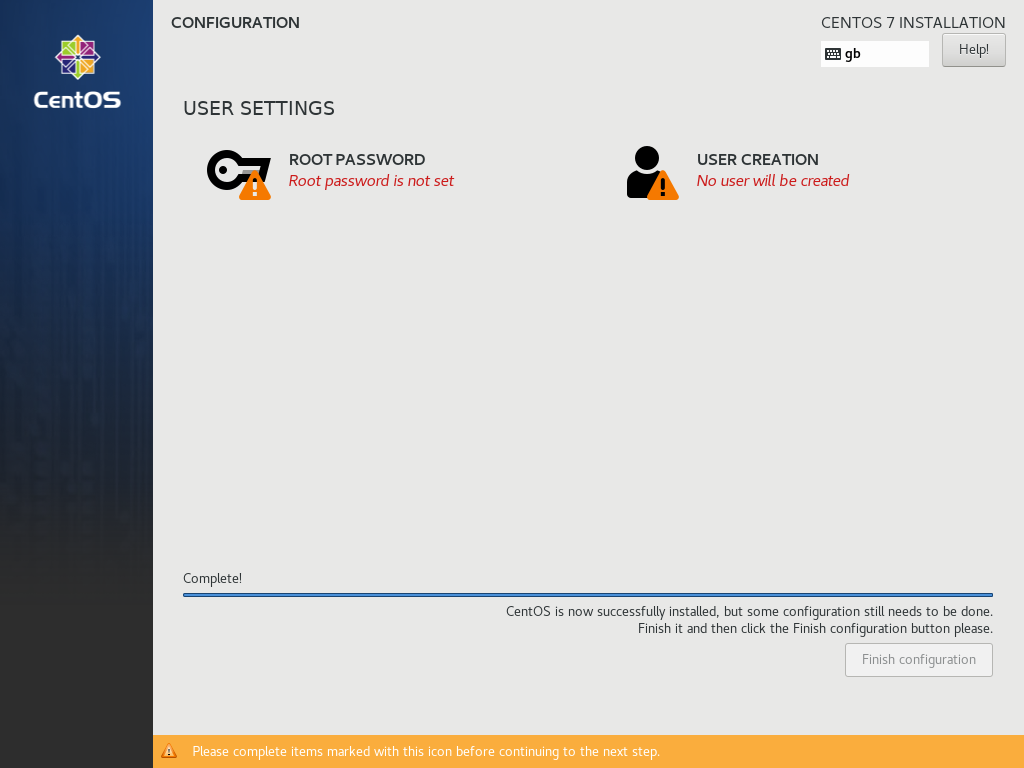
You will now see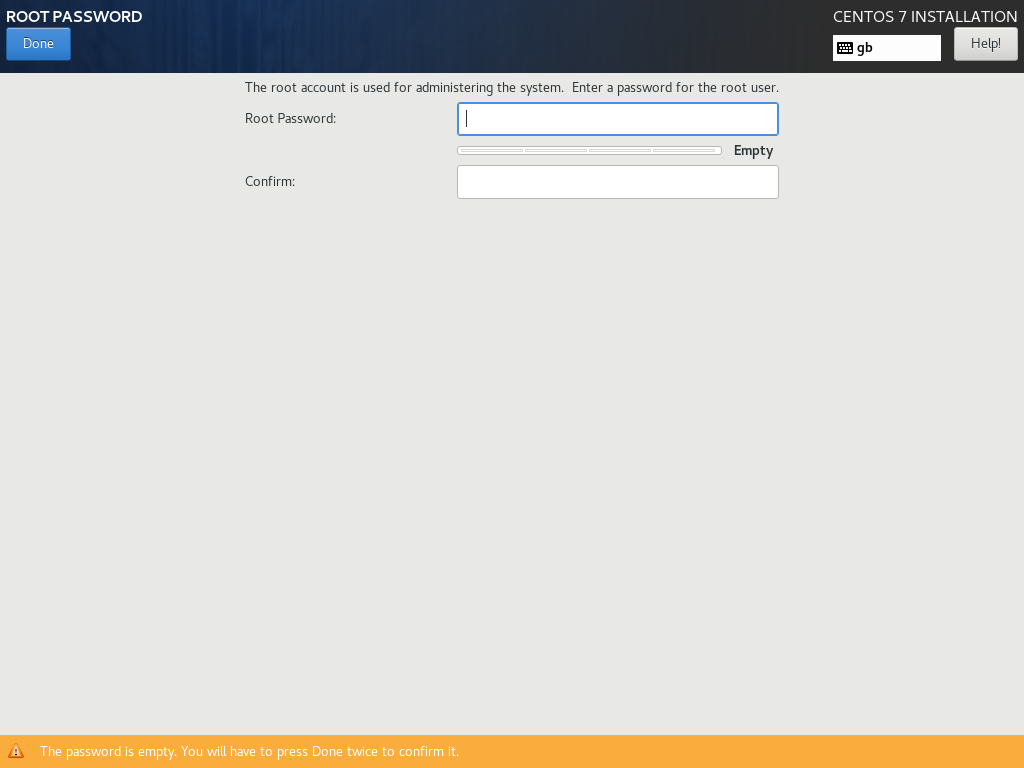
- Do not create a user account here, we will do that later.
- Configure 'Installation Destination'
- Click 'Finish Configuration' (CentOS is now sucessfully installed, but some configuration still needs to be done)
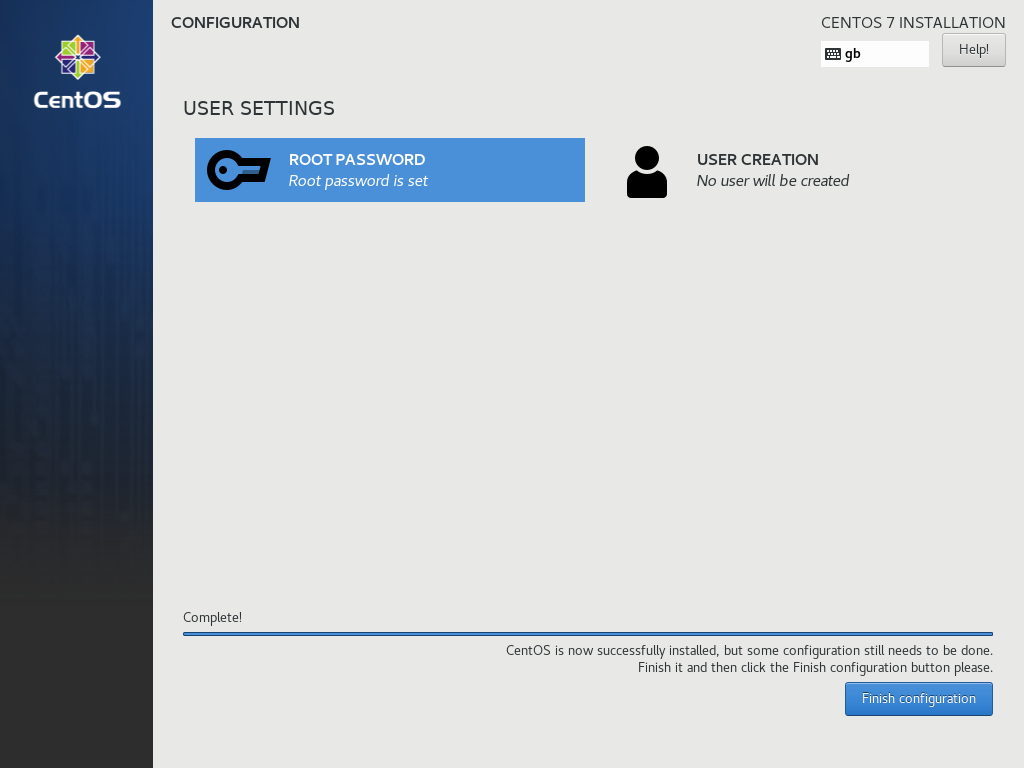
You will now see
- Click `Reboot`
- CentOS Automatically ejects the DVD so you dont have to do anything
- Remove the CentOS DVD
- it might have already been ejected by CentOS installer
- Login with your root credentials
- enter the command shutdown (this will power CentOS off)
- Eject the CentOS-7-x86_64-Minimal-2009.iso from the VM
- Change the boot order by deselecting the Optical drive is no longer a boot device.
- Power up the VM
- The VM will now reboot
- Login with your root credentials when the terminal appears
- Configure the network card with the static IP you have selected for CWP (if not already done in the CentOS wizard)
- use `NetworkManager Text User Interface`
- Command
nmtui

or

nmtui edit enp0s3 (might work)
- IPv4 Configuratioin
- Addresses: 192.168.1.11/24 (or 192.168.1.11)
- Gateway: 192.168.1.1
- DNS Servers 192.168.1.1
- Addresses: 192.168.1.11/24 (or 192.168.1.11)
- Search domains: leave empty
- Routing: No custom routes
- Never use this network for default route: leave unticked
- Ignore automatically obtained routes: leave unticked
- Ignore automatically obtained DNS parameters: leave unticked
- Ignore IPv6 Configuration: Ignore
- Automatically connect: Yes
- Available to all users: Yes
- Command
- Goto the command prompt
- use `NetworkManager Text User Interface`
- Setup Hostname (server.mydomain.com) (if not already done in the CentOS wizard)
- Use either the nmtui utility or type the following into the terminal
hostname server.mydomain.com
- Default is localhost.localdomain
- Preparing Server
- Install required packages for CWP installation:
yum -y install wget
- Update your server to the latest version (might take a while)
yum -y update
- Reboot the server
reboot
- Install required packages for CWP installation:
Notes
- Basic Installation Guides
- Installation Instructions – Control-WebPanel [CWP] - Official Instructions
- CentOS Web Panel - Installation Instructions | Control Web Panel - Old instructions
- How to Install CentOS 7 (Easiest Guide With Screenshots) - Install CentOS via the GUI
- Installing and configuring CentOS 8 on Virtualbox [updated 2021] - Infosec Resources - A basic guide
- CentOS Web Panel Installation - Step by step Guide - Super simple instructions
- Install CWP (Centos Web Panel) on CentOS 7 - Linux Windows and android Tutorials - Instructions with pictures
- Install And Configure CentOS Web Panel (CWP) Easy Setup Guide
- Installation of CWP - Centos Web Panel and Softaculous on your VPS - YouTube - 26 mins long
- How to Install CentOS Web Panel (CWP) on CentOS 7 | Tec mint
- CWP Guide: Initial CWP Configuration After Fresh Install – Server DIY
- CentOS Web Panel: How to install it on CentOS 7 or 8 Linux - Linux Shout
- More Complex Installation Guides
- Centos Web Panel - Basic Configuration - good pictures but of an older version, includes FTP of TLS
- How to Set up a CentOS Web Panel - Alibaba Cloud Community - Basic setup but clean.
- How to Install and Configure CWP(CentOS Web Panel) on CentOS 7
- Install & Configure CWP on CentOS - The Complete Guide to Make Your VPS Ready
- Need help setting up domain on CWP panel. I currently have domain setup through DO | DigitalOcean
- Users
- Change Server Shared IP (main IP)
- [Tutorial] How to Change the IP Address of Server?
- How to change main IP of the server in CWP Panel - Knowledgebase - HostSailor
- IP changes via the command line
- Use `NetworkManager Text User Interface` (nmtui - see notes below)
- How to configure (additional) IPv4 addresses on CentOS | Snel.com
- (CWP Settings --> IP Manager) = This is in beta and is not fully tested. I have not used this method and there are no instructions.
- Change Server NAT Local IP after the initial installation
- Change the servers IP on the interface
- Login to the CWP from the local terminal (you can use SSH or the CWPpro terminal)
- run the command nmtui
- Edit a connection
- Edit enp0s3 - Yous might have a different name if not using VirtualBox.
- Change the Addresses, Gateway and DNS servers to match the new IP address
- Click 'OK'
- Click 'Back'
- Click 'Ok'
- Click 'Quit
- Now restart the VM by typing shutdown -r
- Update the IP in CWP settings
- Goto (CWP Settings --> Edit Settings)
- Make sure that NAT Local IP has your new IP address and if not set it.
- Set Rebuild vHosts to be checked
- The option will 'Rebuild All webServers vHosts with the new IP changes'
- vHosts are the config files apache uses to setup the domains on the server
- Click 'Save Changes'
- Update the IP in the vhosts
- NB:
- The default apache web server IP is set here /usr/local/apache/conf/sharedip.conf
- How to Fix the ERR_SSL_PROTOCOL_ERROR message - This is because you have not rebuilt the vHosts or one of the errors outlined in the article.
- Change the servers IP on the interface
- How to rebuild all Apache virtual hosts at once (not just IP address change)
- There are times when you want to make updates to all of your domain vHost files (not just the IP)
- (optional) Edit the vHosts template according to your needs
- In the GUI (WebServer Settings --> WebServers Template Editor)
- The files are located here: /usr/local/cwpsrv/htdocs/resources/conf/web_servers/vhosts/
- Goto (WebServer Settings --> WebServers Main Conf)
- Check the settings are correct
- 'Additional Options:' / 'Rebuild all vhosts on save' = checked
- Click 'Save Changes'
- NB:
- If you have updated the IP addresses in (CWP Settings --> Edit Settings) these change should also get reflected in this update.
- This will change every account so I think if you have some on CGI PHP and some on PHP-FPM they will all be made the same. The same is so for the other settings such as PHP version.
- how to rebuild all apache virtual hosts
- Default Page Displayed for all domains - Control WebPanel Wiki - An example on why to rebuild your vHosts.
- How to Enable Wildcard Domain Vhost in Nginx and Apache - CWP/Centos - Mystery Data - An excellent tutorial as ever.
- Manually update IPs in the vHosts
- The vhosts files are located at /usr/local/apache/conf.d/vhosts/
- Windows method (easiest)
- Ftp in to your CWP server
- Download all the files in /usr/local/apache/conf.d/vhosts/
- Make a copy of these files and put somewhere safe
- Using Notepad++ open all of the files
- Replace all instances of the old Ip with the new IP
- Upload the new files back to /usr/local/apache/conf.d/vhosts/ overwriting the old ones.
- Restart the Apache service
- Linux
- Use the grep command and replace all instances of the old IP with the new IP (not sure what the command is)
- Restart Apache
- NB
- I would advise to make sure you have updated the relevant IPs in CWP settings
- In each vHosts file there is more than 1 reference to the IP addresses.
- While figuring this out I had left my CWP server on all night after just changing the IP and the vHosts had been updated/refreshed by a CWP update by the Anacron daily cron run at 04:22 ish.
- nmtui
- VM Network
- UEFI Interactive Shell will appear instead of the CentOS DVD booting. This is a VirtualBox Bug. So we need to follow this fix:
- Keep EFI enabled. Ignore the fixes that tell you to turn this off
- You are getting the EFI Shell page instead of booting [add picture]
- Virtualbox UEFI Shell startup.nsh Error Fixed (MacOS, Linux, Windows any OS) - YouTube - This tells you how to boot using the shell
- virtual machine - VirtualBox: Guest suddenly boots only into UEFI Interactive Shell - Unix & Linux Stack Exchange
- Some say you can set the boot device using Esc, F2, F12 on the VM Bios splash screen. The hotkeys are Esc for UEFI BIOS and F12 for legacy BIOS.
- When you are on legacy bios the F12 is an option
- #19364 (EFI boot from ISO does not work in existing VMs) – Oracle VM VirtualBox - You cannot change the boot order of EFI devides
- Virtualbox only boots from USB when EFI is chosen. The USB has to be a real USB stick or device, as best I gather, not an image file on a USB stick.(not confirmed)
- CentOS 7.4 [1708] - boot problems in UEFI mode on VirtualBox 5.x - CentOS - This is a known issue. VirtualBox UEFI is not offering a permanent virtualized NVRAM.
- Quick Fix: Virtualbox UEFI Booting Error - YouTube - Excellent video on configuring via the EFI Shell
- I probably got this error because I swapped the hard disk out manually so i could start fresh.
- Option 1 - The easy one
- Type exit (and press return)
- Select Boot Manager
- Select UEFI VBOX CD-ROM VB1-1a2b3c4d
- Centos option does not work
- This loads EFI/BOOT/BOOTX64.EFI
- CentOS DVD will now boot
- Option 2 - Use the UEFI Interactive Shell to execute the boot file
- From the list on shell screen you will see you CDROM listed in the mapping table, probably FS1
- FS1:
- cd EFI/BOOT
- BOOTX64.EFI
- NB: Once on the FS1 you can also do EFI/BOOT/BOOTX64.EFI as one command
- CentOS DVD will now boot
Install CWP
Now your VM has CentOS insatlled we can proceed and install CWP.
CWP installer can run more than 30 minutes because it needs to compile Apache and php from source but might be a lot quicker on modern PCs.
- Boot the VM to the CentOS terminal prompt or (optionally) this is a good time to start using PuTTY if you know what you are doing so you can copy and paste from the terminal.
- You can use the local IP 192.168.1.11 and port 22
- Login with root
- Run the commands (the last one might take a while)
cd /usr/local/src
wget http://centos-webpanel.com/cwp-el7-latest
sh cwp-el7-latest -restart yes --phpfpm 7.4
The --phpfpm 7.4 switch did not work for me. - When the installer is finished, you will see your credentials displayed, copy them down safely.
############################# # CWP Installed # ############################# Go to CentOS WebPanel Admin GUI at http://SERVER_IP:2030/ http://13.13.13.13:2030 SSL: https://13.13.13.13:2031 --------------------- Username: root Password: ssh server root password MySQL root Password: xxxxxxxxxxxx ######################################################### CentOS Web Panel MailServer Installer ######################################################### SSL Cert name (hostname): server.mydomain.com SSL Cert file location /etc/pki/tls/ private|certs ######################################################### Visit for help: www.centos-webpanel.com Write down login details and press ENTER for server reboot! Please reboot the server! Reboot command: shutdown -r now - Reboot the server as requested
shutdown -r now
Notes
- CentOS boots with host log errors shown onscreen
[    1.926356] [drm:vmw_host_log [vmwgfx]] *ERROR* Failed to send host log messa
[    1.926494] [drm:vmw_host_log [vmwgfx]] *ERROR* Failed to send host log messa
- #19168 (Error [drm:vmw_host_log [vmwgfx]] in version 6.1.0) – Oracle VM VirtualBox - A bug in VirtualBox due to the Graphics Controller.
- boot - Why does "drm:vmw_host_log [vmwgfx]] *ERROR* Failed to send host log message" show up and what can I do to fix it? - Unix & Linux Stack Exchange
- CentOS has mutliple boot options after an upgrade (you will only see this after running CWP for a while and it has updated the Linux Kernel)
- This is normal behaviour and is nothing to worry about.
- Multiple boot options (in grub boot list) appeared after yum update - Server Fault
- Does it mean I now have multiple OS installed? No, just other versions (usually older) of the kernel, as noted above.
- Will my grub list grow if I do future yum update? Yes, each time you update the kernel, you will get a new entry. (These might be limited to 3 extra entries.)
- Do I need to clean up old item from the list? No. Probably the easiest way if you want to would be to go to /boot and remove the older kernels and related files (they will have the same string in the middle, such as 2.6.9-42). I would at a minimum keep the current and previous version (i.e. two known good configs), just in case. But frankly, who cares? Not much space(14MB for the example bellow), and you can just ignore the old stuff, as it's down the bottom of the screen.
- use below command to clear previous kernels. (NOT TESTED by me)
package-cleanup --oldkernels --count=1
- Why do I get multiple choices in the boot menu each time I update Fedora? - Quora
- Fedora and most linux I know won't "update" the Kernel, mainly because it is running at the time and because sometimes newer kernels break things, so it's good to have a fallback, so they install a new kernel alongside the old one and update the boot manager (GRUB usually)
- So if you don't want all the options, only the most recent one what you can do is uninstall it and update the boot manager config. Use the instructions in this article (NOT TESTED by me).
- This article also tells you how to permanently set the max kernels limit.
installonly_limit=2
- YUM/DNF Remove Old Kernels on Fedora/CentOS/RHEL – If Not True Then False
Create Primary Domain User Account
Although you don't have to create an account for the Primary Domain on the server for it to work, it makes sense too unless you have a reason otherwise.
- User Accounts --> New Account
- Domain: mydomain.com
- Username: mydomain
- Package: default (we will change this later)
- Reseller: Ticked
- Leave the rest of the settings as they are
Configure CWP (Preliminary – Error Messages)
Now that CWP is installed we need to configure it
- Log in to your CWP cpanel using the link provided by the installer on your server. You will need to use FireFox to get past the SSL issues.
Control WebPanel Admin GUI at: http://13.13.13.13:2030/ or https://13.13.13.13:2031/- The local IP 192.168.1.11 will work if these don't at the minute
- Username: root
- Password: YOUR_ROOT_PASSWORD
Ypu will now see some errors as shown in the picture below (or similiar)
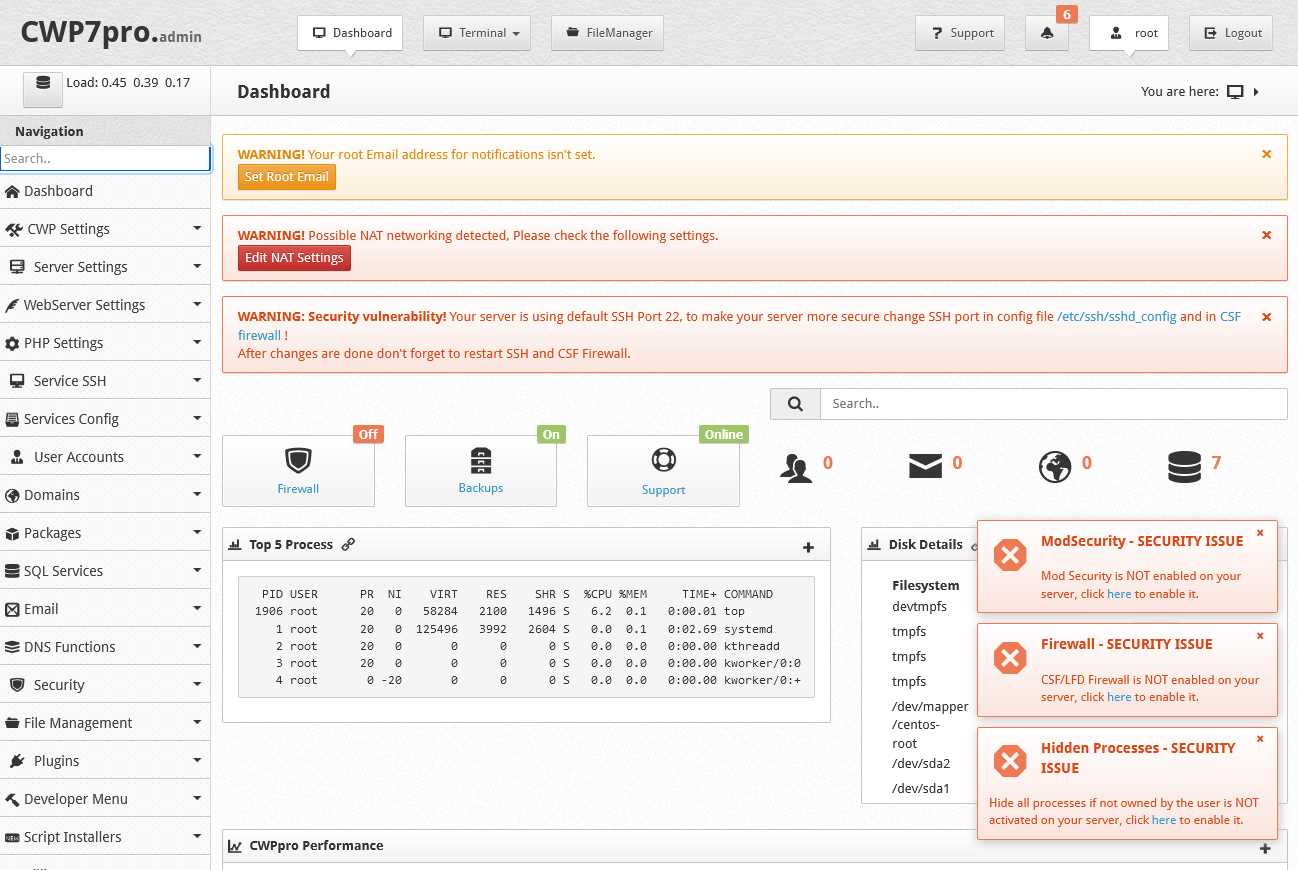
- CWP Settings --> Edit Settings
- (WARNING! Your root Email address for notifications isn't set.) (WARNING! Possible NAT networking detected, Please check the following settings.)
- Shared IP: should be your public IP and does not need changing. (13.13.13.13)
- Apache port: should be 80 and does not need changing
- Set Admin email: no-reply@quantumwarp.com
Forward server system emails: yes (for now) - CSF/LFD Alerts: no-reply@quantumwarp.com (for now)
- NAT Local IP: should be 192.168.1.11 (what you set on the network in CentOS earlier)
(If you see multiple IPs in the drop down see the notes below)
Activate NAT-ed network configuration: Yes
Read instructions by clicking the link - Default DNS Zone template, leave as default.tpl
- CWP Updates: leave as Stable
- Rebuild vHosts: yes
- GoAccess Stats: Leave ticked (not sure why this setting is here)
- Save changes
- WebServer Settings --> Select Webservers --> Save & Rebuild Configuration (dont change anything on this page yet)
- Enable Firewall
- (CSF/LFD Firewall is NOT enabled on your server, click here to enable it.)
- Security --> Firewall Manger
- Enable Firewall (button at top)
- Change SSH port for security
- (on the Service and Firewall) (WARNING: Security vulnerability! Your server is using default SSH Port 22, to make your server more secure change SSH port in config file /etc/ssh/sshd_config and in CSF firewall !)
- You dont have to do this if you are behind a NAT and you are never going to present SSH to the internet, but it is still recommended.
- SSH Server
- Services --> SSH Configuration
- Change `#Port` --> `Port 8128`
- Click Save
- Goto Dashboard
- Restart SSH Server
- Click on SSH Server Status button to check it is now on the new port
- CSF Firewall
- Security --> CSF Firewall --> Firewall Configuration
- Add the port 8128 to the end of the values + remove port 22:
- # Allow incoming TCP ports
- # Allow outgoing TCP ports
- Save Changes
- Security --> Firewall Manager
- Restart the Firewall
- Test SSH (with PuTTY)
- Enable Mod Security
- (Mod Security is NOT enabled on your server, click here to enable it.)
- Security --> Mod Security
- Click ‘Install Mod Security now’ button
- Enable Comodo WAF rules (if not already) (are OSWASP better?)
- Make sure Process the rules is selected
- Click `Save Configurations` just to make sure.
- Restart Apache Webserver: The button is at the top right.
- Fix the following error shown on the page `Server Settings --> Change Hostname`
Your Hostname is: server.mydomain.com and it resolves to IP: (ERROR: You don't have a valid hostname set!)
- DNS Functions --> List DNS Zones --> mydomain.com.db --> Edit Records
- Add a new record
- Record Name: server
- TTL: 14400
- Direction IPv4 address: 13.13.13.13 (your public IP)
- Goto the top right of the page and you will see the 'Info' box
- Restart BIND DNS Server
- Some times you have to wait and Flush your DNS on your PC as the domain did not immediately come on.
- When it did not work straight away I deleted it and then added another subdomain to see if that worked and it did, i then added the server subdomain afain and it worked. (restarted BIND inbetween change)
- Manage Hostname in CentOS Web Panel | Hostwinds
- CWP DNS Part 1 : How to Configure DNS properly for CentOS WebPanel on CentOS 7.6 - This covers the server nameserver and hostname DNS, not very clear but it is the issue I am having and go through a bunch of things (if needed)
- Hidden Processes – Security Issue (Hide system processes from users - Control WebPanel Wiki) (Hide all processes if not owned by the user is NOT activated on your server, click here to enable it.)
- This requires at least one account to be setup and the error be resolved.
- Security --> Secure Processes
- Click ‘Enable Protection’
- Test the protection is working
- Reboot server
- Server Settings --> Reboot Server --> Reboot Server Now
Notes
- General
- Web Server Setup Series - Fix CWP Errors & Warnings To Improve Server Security - This covers all of the errors and initial setup.
- Change SSH Port
- NAT Local IP / CentOS has multiple local IP addresses
- This is caused by you not setting the IP address correctly and inparticular you have added a static IP address but left the adapter on DHCP which basically gives the network card 2 IP addresses.
- To fix this edit the file /etc/sysconfig/network-scripts/ifcfg-enp0s3
TYPE=Ethernet
PROXY_METHOD=none
BROWSER_ONLY=no
BOOTPROTO=dhcp
DEFROUTE=yes
IPV4_FAILURE_FATAL=no
IPV6INIT=no
IPV6_AUTOCONF="yes"
IPV6_DEFROUTE="yes"
IPV6_FAILURE_FATAL="no"
IPV6_ADDR_GEN_MODE="stable-privacy"
NAME=enp0s3
UUID=adfa1901-1eee-4cee-b2c4-62a2bf6323f4
DEVICE=enp0s3
ONBOOT=yes
IPADDR=192.168.1.11
PREFIX=24
GATEWAY=192.168.1.1
DNS1=192.168.1.1
- Change BOOTPROTO=dhcp --> BOOTPROTO=static
- Save file
- Reboot the server
- Rebuild all hosts by saving vcwp settings again + rebuiild apache to be on the safe side (not sure hat this is about)
- Reboot your router
- Otherwise you might get resolution issues and the CWP control panel will not load becasue of routing issues.
- NB: you can use nmtui to correct the network settings (I think) instead of editing the file above.
- Linux set Static IP
- Create Multiple IP Addresses to One Single Network Interface
Configure CWP (in-depth)
In this section we will complete the setup of CWP now we have got rid of the errors.
- Longer Installation Guides
- Install & Configure CWP on CentOS - The Complete Guide to Make Your VPS Ready - Very detailed Guide of the whole CWP setup (exluding OS and VM). This is very good.
- CentOS Web Panel Tutorials - YouTube - A video series on by Radix Code - Ignore the section about setting up a SWAP file.
- [Tutorial] How to configure your server - A forum post from a real user
Hostname
- Refresh the Hostname
- (Server Settings --> Change Hostname)
- Keep all the settings the same and just click 'Change Hostname'
- This will:
- Refresh/Create all of the relevant settings
- Trigger SSL creation
- Generate the DNS zone for the server (i.e. server.mydomain.com.db). This is not created during the intial setup, either by design or is a bug.
Notes
- No SSL on the servers hostname
- This could be caused by the server no yet having polling Letsencrypt yet
- Fixes (assumes hostname settings are correct)
- Access https://server.mydomain.com:2031/ which should trigger a lookup
- Refresh Hostname: Server Settings --> Change Hostname --> Change Hostname (this will not change anything but trigger lookups if needed)
- Cannot Access Cpanel via hostname
- You need to make sure that you have set up port forwarding.
- If you are trying to access via the server hostname and you are local, then you need to make sure that the forwarding rules have NAT Loopback enabled (otherwise you will go made). I modified my rules so for these admin panels that NAT Loopback happens but the panels are not accessibly from the internet.
- Changing Hostname (If you need to change your hostname in the future becasue CWP does not handle the removal of the old server name)
- Use the process above
- Delete the old DNS zone manually for the old hostname.
- Make sure the server's name is not defined as a subdomain in your Primary Domain User Account DNS Zone.
- Don't forget that the old name might still be cached in other places because of TTL so it might still ping for a while. If you are still setting up you could just power all of your equipment down to speed things up.
- Delete DKIM entries in:
- /etc/opendkim/TrustedHosts
- /etc/opendkim/SigningTable
- /etc/opendkim/KeyTable
- /etc/opendkim/userkeys/[old server domain folder]
Nameservers
For this you need a real domain (mydomain.com) and your public static Ip (13.13.13.13) from earlier.
- Register Nameservers at a registrar
- Login to your account at the registrar for your domain
- Register the following Child Name Servers under your domain:
Child Name Servers are Name Servers which are registered under your Domain Name.
Once registered, you can use these Child Name Servers in turn as Name Servers for registering other Domain Names
- ns1.mydomain.com 13.13.13.13
- ns2.mydomain.com 13.13.13.13
- It is correct to have the same IP twice (for most people)
- Now you might have to also register these as Parent Name Servers aswell under domains account.
- Change CWP Name Servers
- DNS Functions --> Edit Nameservers IPs
- Changes name servers to:
- Name Server 1: ns1.mydomain 13.13.13.13
- Name Server 2: ns2.mydomain 13.13.13.13
- Keep Options ‘Update DNS zone file’ and ‘Restart DNS Server’ ticked
- Save changes
- Dashboard --> Service Status --> BIND DNS Server --> Restart
- Server Settings --> Reboot Server --> Reboot Server Now
- Reboot your router (this is important to get rid of improper routing it might have stored)
Notes
- The domain resolution test done when you save the nameservers, I think, is done by CWP servers (ie external to your internal server).
- If you get the error:
ns1.mydomain.com resolves to ; <<>> DiG 9.11.4-P2-RedHat-9.11.4-26.P2.el7_9.5 <<>> A ns1.mydomain +short @8.8.8.8 ;; global options: +cmd ;; connection timed out; no servers could be reached
ns2.mydomain.com resolves to
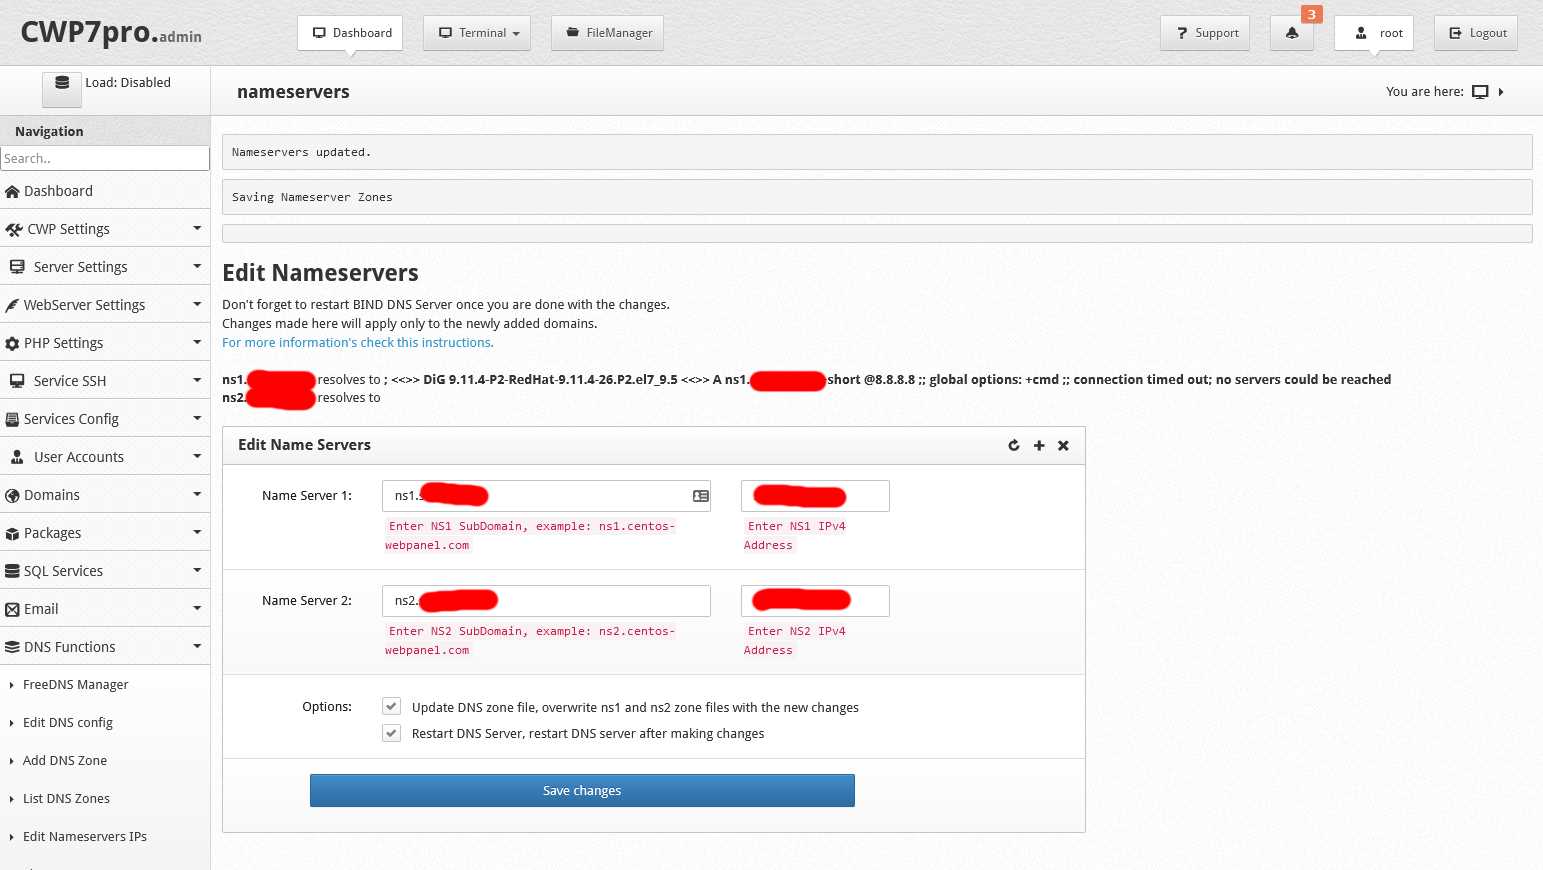
This is cause by one or both of these:- The Nameservers DNS update has not propagated yet.
- The DNS port 53 is not open or properly forwarded on your NAT router.
- If you get the error Nameserver is not authoritative when checking mydomain.com on leafdns then this is probably because you have not setup a hosting account to match your servers primary domain (mydomain.com).
- How To setup Name servers
- How To Setup Own Name Server Using CentOS Web Panel || TECH DHEE - YouTube - This video uses ResellerClub as the registrar.
- How to set up nameservers in CWP - PlotHost
- How to setup Name Servers ? - Control WebPanel Wiki
- Original Nameservers for reference
ns1.centos-webpanel.com resolves to 54.36.136.192
ns2.centos-webpanel.com resolves to 198.27.104.41

ns1.centos-webpanel.com 127.0.0.1
ns2.centos-webpanel.com 127.0.0.1
Correct DNS Zone on Primary Domain User Account
Now that the name servers have been changed, the Primary user account needs to be updated to reflect the change
- (DNS Functions --> List DNS Zones --> mydomain.com.db --> Edit Records)
- Change the following (text replace, might be in many records) (edit file is quicker)
- The RNAME on your primary account should be postmaster.mydomain.com
- the RNAME is an email address where the `@` is swapped with a `.`
- I do not have an address postmaster@mydomain.com but when i rebuilt the Zone it uses the email from the mydomain.com user account.
- centos-webpanel.com --> mydomain.com
- The RNAME on your primary account should be postmaster.mydomain.com
Notes
- Do not rebuild the zone, this will wipe out many Zone records
- The primary user account some records in it that will not be re-added by rebuilding the domain so would need adding manually.
server 14400 IN A 31.125.252.137

ns1.mydomain.com. 14400 IN A 31.125.252.137

ns2.mydomain.com. 14400 IN A 31.125.252.137
- I am not 100% the nameserver A records becasue the ns1.mydomain.com and ns2. mydomain.com have their own record files (ns1.mydomain.com.db / ns2.mydomain.com.db)
- smtp, pop, pop3, imap, webmail, cpanel, cwp subdomains are missing, DKIM is not setup properly and the SPF record is missing.
- See forum questions below for a full text comparison of an account before and after a rebuild.
- Only the records that were created before changing your name server are corrupted.
Set rDNS and PTR
These must be changed at your ISP or IP provider. These records allow your server domain to be worked out from the IP address.
A good rDNS is better for your server reputation and will allow more successful delvery of email.
Plusnet/BT/UK ISPs: By default thier IPs from ISP are on the Spamhaus 'Policy Block List' because it should not be sending emails. So you might need to contact your ISP to have the Ip removed from the list. I did manage to remove myself from the SPAMHaus PBL list byt looking up my IP and then expanding the message at the bottom, fill in the required information and soon after I was removed for the list. This might not be the case for all ISPs.
- rDNS / PTR record - Plusnet Community
- Reverse ptr record - Plusnet Community
- rDNS and I'm confused | CWP forum
- What is rDNS
Port Forwarding
CentOS Mostly Used Ports - Control WebPanel Wiki
- Only open the ports you require.
- These are the ports I have forwarded to allow the basic functionality of the server on the internet but keeps all admin functions (such as control panel) restricted to my local network. You dont even need the email ones if you are not running email and some people dont use Port 25 as standard
- 25 - SMTP/EMAIL
- 26 - SMTP (this port is not enabled in the firewall by default)
- 53 - BIND/DNS
- 80 - HTTP / Apache Web server
- 110 - POP3/EMAIL
- 143 - IMAP
- 443 - HTTPS / Apache Web server SSL
- 465 - SMTP/EMAIL SSL/TLS
- 993 - IMAP/EMAIL SSL
- 995 - POP3/EMAIL SSL
- 2030 - CWP Admin
- 2031 - CWP Admin SSL
- 2082 - CWP User Panel
- 2083 - CWP User Panel SSL
- 2086 - CWP Admin (same as 2030)
- 2087 - CWP Admin SSL (same as 2031)
- OpenWRT Router Port Forwarding including Local Access
- OpenWRT Port Forward Rules
I use a seperate rule for local traffic because you want all ports available on your server to the local network for admin purposes but only the specified ones present to the internet. All ports are available via 192.168.1.0/24 anyway, but we want to use server.mydomain.com locally.
You need to create the Local Traffic Rule once but a Standard Port Forward Rule for each port you want to forward to the interent.
- Local Traffic Rule
- Name: CWP (All Ports / LAN Only)
- Protocol: TCP+UDP
- Source Zone: wan/wan6
- Source MAC Address:
- Source IP address: 192.168.1.0/24 (this is an IP range)
- Source port:
- External IP address: 13.13.13.13
- External port:
- Internal zone: lan
- Internal IP address: 192.168.1.11
- Internal port:
- Enable NAT Loopback: Ticked
- Extra arguments:
- Standard Port Forward Rule (change the port numbers for the required port)
- Name: CWP (BIND/DNS)
- Protocol: TCP+UDP
- Source Zone: wan/wan6
- Source MAC Address:
- Source IP address:
- Source port:
- External IP address: 13.13.13.13
- External port: 53
- Internal zone: lan
- Internal IP address: 192.168.1.11
- Internal port: 53
- Enable NAT Loopback: NOT ticked
- Extra arguments:
- Local Traffic Rule
- OpenWRT Port Forward Rules
Notes
- OpenWRT
- How to configure totally open DMZ with OpenWRT? - Server Fault - The easy way. Do not leave this on as it is just for testing. This method also routes all local traffic to the to the CWP server without using the Hostnames method below.
- If you have another rule for Portforwarding you can use this method to allow specific IP address locally to use you server nd keep the DMZ for external traffic only except for a specified IP by add this addition rule. Basically create rule using the above but then edit the rule and specify the following:
- External IP address: 13.13.13.13
- The CWP server needs to be connected to the outside world properly for this to work as your laptop will do DNS lookups starting at your authorative DNS servers at your registrar.
- Network --> Hostnames - This can be used to tell OpenWRT to route all internal calls to a domain to a local address. This is not the same as DMZ. This will allow you to use CWP without it being on the internet or using the hosts trick. This causes the loading of the website to be slow becasue of this extra routing, this might also just also be my low power router.
- I removed NAT Loopback from the standard port forward rules. This will reduce the CPU overhead by a little and when I disable the (All Ports/LAN Only) rule then all ports locally routed will stop working preventing confusion.
- If the rules dont behave as expected and you have double checked them, you should restart all network kit so you flush all of their DNS and prebuilt traffic routes.
- OpenWRT, once a route is established that route will have a TTL similiar to DNS.
- FlushDNS can be used on your PC but will not change IP routing on other devices.
- How to configure totally open DMZ with OpenWRT? - Server Fault - The easy way. Do not leave this on as it is just for testing. This method also routes all local traffic to the to the CWP server without using the Hostnames method below.
- NAT Loopback
- NAT loopback enables a user on the trusted or optional networks to connect to a public server with the public IP address or domain name of the server, if the server is on the same physical OpenWRT network.
- Disable NAT loopback for guest network - Network and Wireless Configuration - OpenWrt Forum - You can use hostnames for local routing. I found this to be slow and you might nto add an entry for every subdomain.
- iptables - How does NAT reflection (NAT loopback) work? - Unix & Linux Stack Exchange - in-depth explanation
- My notes: NAT loopback is where the router inspects the target IP of the request/packet and if it sees that the target is its public IP it will loop the request back into the network to the defined local IP (as per the rule) as if it has come from the outside in the first place. This options just says to the router perform this check and then do the looping.
- NAT Loopback allows traffic sent to public IPs to be routed back to the local network if the IP/Server is present on the local network. This is perfect when you are running a server on your LAN that is connected to the internet by port forwarding. Normally you would get a failed message:
Forbidden
Rejected request from RFC1918 IP to public server address
- If you disable the CWP (All Ports / LAN Only) which has NAT Loopback enabled, you will also get the RFC1918IP error when you try and lookup server.mydomain.com:
The CWP server is now present on the internet.
Cgroups
Cgroups allow you to limit resources per user — such as CPU %, system memory, network bandwidth, or combinations of these resources. You have to create a Cgroup and then assign it in the package. This is good for preventing server abuse byt the user or a hacker. You have to create a Cgroup before it can be assigned to a package or user so we will do this before creating our packages.
- Security --> Cgroups Resource Limits
- Click `Install service`
- On the same page, got to the `Enable limit resources` and select the following
- CPU - Limit CPU usage
- Memory - Limit Memory usage
- Disk I/O - Limit Disk I/O read/write
- Click `Save`
- Add these policies
- Internal
- Name: Internal
- cpu % (min 1 max 200): 150
- rmem: 1G
- vmem: 2G
- read: 10000
- write: 10000
- Update user's config files?: Ticked
- Client
- Name: Client
- cpu % (min 1 max 200): 50
- rmem: 512M
- vmem: 1G
- read: 1000
- write: 1000
- Update user's config files?: Ticked
- Click `Restart service` (not sure if I need to do this to apply the new policies)
- Internal
Notes
- cGroups Resources Limits | Control-WebPanel Documentation - New document
- Cgroups - Limits per User - Control WebPanel Wiki - An excellent tutorial on Cgroups, innodes and User Limits.
- According to the video above, you should always have more vmem that rmem but he did not give a ration or resons for this.
- Cgroup and Package Resource Limits - A nice cPanel to CWP comparrision
- Cgroups is also known as Control Groups.
- Chapter 1. Introduction to Control Groups (Cgroups) Red Hat Enterprise Linux 6 | Red Hat Customer Portal
- VMEM (Virtual Memory = RAM + swap)
- Cgroup In Package Creation Question - cgoups is still not working from the packages but this might be soon since its there, for now you must still use cgroups module.
- How to configure Linux Resource Groups (cgroups) for MySQL – The Geek Diary
Packages
Setup the following packages. These are not mandatory but are a good baseline for you to start from and make managing your server easier. If you are migrating from cPanel I think the packages might be created automatically.
Packages are found at: Packages --> Packages
- Create Primary package (Primary Domain Account)
- Name: Primary
- Disk Quota MB: 5000
- FTP: 1
- Email Lists: -1
- Sub Domains: -1
- Addon Domains: -1
- cgroups: Internal
- apache_nproc: 40
- nofile: 150
- Type: Reseller
- Bandwidth MB: -1
- Email Accounts: -1
- DB: -1
- Parked Domains: -1
- Hourly Emails: 200
- nproc: 40
- inode: 0
- NodeJs App: 0
- Accounts: 500
- Update Quota: [unticked]
- Create Internal Package (Company Accounts)
- Name: Internal
- Disk Quota MB: 5000
- FTP: 1
- Email Lists: -1
- Sub Domains: -1
- Addon Domains: -1
- cgroups: Internal
- apache_nproc: 40
- nofile: 150
- Type: General
- Bandwidth MB: -1
- Email Accounts: -1
- DB: -1
- Parked Domains: -1
- Hourly Emails: 200
- nproc: 40
- inode: 0
- NodeJs App: 0
- Update Quota: [unticked]
- Create Bronze package (for clients)
- Name: Bronze
- Disk Quota MB: 500
- FTP: 1
- Email Lists: 5
- Sub Domains: 5
- Addon Domains: 5
- cgroups: Client
- apache_nproc: 40
- nofile: 150
- Type: General
- Bandwidth MB: -1
- Email Accounts: 5
- DB: 1
- Parked Domains: 5
- Hourly Emails: 100
- nproc: 40
- inode: 100000
- NodeJs App: 0
- Update Quota: [unticked]
- Create Silver package (for clients)
- Name: Silver
- Disk Quota MB: 1000
- FTP: 1
- Email Lists: 10
- Sub Domains: 5
- Addon Domains: 5
- cgroups: Client
- apache_nproc: 40
- nofile: 150
- Type: General
- Bandwidth MB: -1
- Email Accounts: 10
- DB: 5
- Parked Domains: 5
- Hourly Emails: 150
- nproc: 40
- inode: 125000
- NodeJs App: 0
- Update Quota: [unticked]
- Create Gold package (for clients)
- Name: Gold
- Disk Quota MB: 1500
- FTP: 1
- Email Lists: 15
- Sub Domains: 10
- Addon Domains: 10
- cgroups: Client
- apache_nproc: 40
- nofile: 150
- Type: General
- Bandwidth MB: -1
- Email Accounts: 15
- DB: 5
- Parked Domains: 10
- Hourly Emails: 200
- nproc: 40
- inode: 150000
- NodeJs App: 0
- Update Quota: [unticked]
- Set your Primary Domain User Account (acc: mydomain / mydomain.com) to have the package of Primary. It is best not to use the default package.
- User Accounts --> List Accounts --> mydomain --> edit
- Account Type: Reseller
- Package: Primary
- Leave the rest of the options
- `Backup user account` = add the account into the backup routine when it is run.
- Click `Update`
You now have seperate packages for your company and client accounts.
Notes
- Create/delete hosting packages in CWP - PlotHost
- Cgroups
- Cgroups allow you to limit resources per user — such as CPU %, system memory, network bandwidth, or combinations of these resources.
- Just installed above.
- apache_nproc
- It is the process number limit for a certain user, but specifically for Apache.
- nofile
- It is the number of open files limit for a certain user. 150 is the recommended, too high and the server will slow and too low and things like IMAP will stop working.
- The number of files allowed to be read/executed at the same time.
- Type
- General - This is a standard client account.
- Reseller - This tags the account as a reseller and obviously gives it reseller functionality and permissions. when this option is checked a new input box appears called `Accounts` which allows you to set a limit on the number of client accounts this reseller can own. `Accounts` has to be an integer.
- nproc
- It is the process number limit for a certain user.
- inode
- It Indicates the inode limit for a certain user.
- It is ok to leave this as 0 as there are usually other limits set in a package.
- Innodes are used by the file system to store data block locations and metadata because the innode size is relatively small and predictable there usually is no problem with allowing unlimited inodes.
- If a user is filling up all available inodes possibly with zero byte file data then you do have the ability to restrict their inode limit forcing them to free up used inodes in order to create new ones.
- Inode is a data structure that stores the information about all files created on your hosting account. The number of inodes indicates number of files, folders, email or anything you store on your web hosting account. Each file on your web hosting account is identified by an inode number in the file system. Inodes store the important data about files such as user, group ownership, access mode and file type.
- Suggestions for Inode, No of Files, Process Limits - Cloud - Good discussion with suggestions.
- NodeJs App
- Number of NodeJS apps a user can create. This will require NodeJS Manager to be installed.
- CWP - Admin Panel: NodeJS Manager - YouTube - Goes into a little about nodejs and Apps.
- I am leaving this of on all of my accounts until i find a need for it.
- process limit
- (0 = no processes allowed)
- This limits the number of processes for an account. This setting prevents the user from exceeding the limited number of PHP web processes. Its generally recommended to allow at least 30 to 50, however using this limit is particulary good when using PHP CGI to prevent users with high traffic from overloading the server, the downside is that since this limit is userwide it can also have restrictions on IMAP connections if the number is set to low and the user has many IMAP connections.
Features
The feature manager allows you to filter / block modules for use in the user module.
Feature Manager | Control-WebPanel Documentation
User Accounts --> Features,Themes,Languages --> Feature Manager
I think the accounts have all features available until you assign a feature set.
You can assign these features to an account or package. I will always choose to do these things by packages because it is the way I have done it in cPanel.
When you select these options you might not currently have all of the servers or things installed. Select your options as if they were so they match up when you later add the required features.
- Create Internal feature list (this is for all company accounts) and assign it to the Primary and Internal packages
- Name: Internal
- Type: Package
- Accounts: Primary, Internal
- Click `Mark all`
- Click `Create and Save this rule >>`
- Create Client feature list (this is for all client accounts)
- Name: Client
- Type: Package
- Accounts: Bronse, Silver, Gold
- Click `Mark all`(You can come back to edit this feature list later or do it now if you are familiar with CWP)
- Click `Create and Save this rule >>`
You now have seperate feature sets for your company and client accounts.
Notes
- The menu items for the features will be present in the users control panel even if the service is not installed but it is enabled in the feature set.
Create a User Test Account
This is a very useful thing to have. It is just a simple account you can use to see what clients see.
- User Accounts --> New Account
- This is just an example (but will work)
- Domain Name: test.acc
- Username: testacc
- Password: xxxxxx
- Admin email: no-reply@test.acc
- Server IPs: 13.13.13.13
- Package: Bronze
- Additional Options: Select:
- Backup user account
- AutoSSL: Domain must be pointed to the server
Apache
- Set Web Server Type
- WebServer Settings --> Select WebServers --> Setup default Web Servers --> Apache Only (this is default)
- Dont make any changes to the page
- Click `Save & Rebuild Configuration` (this might not be needed here but does not harm)
- Update Apache to the latest version
- Check you have terminal access via SSH first using putty (for saftey)
- Check the new version you are going to install is newer than the current version.
- You should also be aware that if you have installed the TLS1.3/HTTP2 upgrade from MysterData then this might fail. (see notes below)
- WebServer Settings --> Apache Re-Build --> Select NEW Apache version
- Select the latest version
- Click `Next`
- Leave all options as there are unless you know what you are doing.
- Click `Start Compiler in Background`
- HTTP2 + TLS1.3 (select the correct version for your Apache build)
- How to Enable TLS 1.3 (and HTTP2) in Apache on CWP- Control Web Panel Centos 7 Centos 8 EL7 El8 | Mystery Data - (Apache Only) configurations (new article)
- I just use the CWPPro Terminal from the control panel to do this work and it was completely successful.
- Also TLS1.2+ is now required.
- from the article: This tutorial will enable HTTP/2 and TLSv1.3 automatically if you’re using nginx as proxy or nginx + php-fpm follow this tutorial too How to Enable TLS 1.3 in Nginx CWP/Centos 7/Centos 8/EL7/El8 | Mystery Data
- How to Enable HTTP/2 on CWP7 - Centos Web Panel | Mystery Data - (Nginx + Apache) or (Nginx + Apache + Varnish) configurations
- How to Enable TLS 1.3 (and HTTP2) in Apache on CWP- Control Web Panel Centos 7 Centos 8 EL7 El8 | Mystery Data - (Apache Only) configurations (new article)
Notes
- These settings here do not affect the apache daemon for the CWP panel. It has its own Apache for this (I think). It is running PHP 7.1 so cannot be broken by people reconfiguring their server. I got this location by look at the cron jobs that are run by the root.
/usr/local/cwp/php71
- CWP WebServers Config | SaadHost very in depth article
- Apache vs Nginx: Practical Considerations | DigitalOcean
- Select Server Type
- don't really understand the other technologies so I will leave the default Apache only setup because there is less to go wrong and I am use to Apache because I have been using Xampp which is Apache based. Apache on its own is proabbly good for development and low traffic sites.
- Nginx & Varnish & Apache is the best performance option and good for high traffic sites. This seems to be the recommended option by professionals and I will change to it once I have got use to the server.
- Force Apache to use PHP-FPM Selector
- WebServer Settings --> Select WebServers --> Setup default Web Servers --> Select Default Apache PHP-FPM version
- WebServer Settings --> Select WebServers --> Setup default Web Servers --> Select Default Nginx PHP-FPM version
- I have not choosen this option at this time.
- This will disable PHP Selector 2 and PHP Version Switcher.
- If you choose this option, you would have to select a default Apache PHP-FPM and Nginx PHP-FPM version on this page. I am not sure if it would continue to use the server's default php.ini file.
- What are these? (add Nginx and Varnish add extra hurdles when developing web sites)
- Apache
- Your basic Web Server
- The Apache HTTP Server Project is an effort to develop and maintain an open-source HTTP server for modern operating systems including UNIX and Windows. The goal of this project is to provide a secure, efficient and extensible server that provides HTTP services in sync with the current HTTP standards.
- Nginx
- NGINX is a web server that can also be used as a reverse proxy, load balancer, mail proxy and HTTP cache.
- NGINX accelerates content and application delivery, improves security, facilitates availability and scalability for the busiest web sites on the Internet.
- NGINX is open source software for web serving, reverse proxying, caching, load balancing, media streaming, and more. It started out as a web server designed for maximum performance and stability.
- Nginx excels at serving static content quickly and is designed to pass dynamic requests off to other software that is better suited for those purposes.
- Varnish
- This is a cache based in RAM.
- Varnish Cache is a web application accelerator also known as a caching HTTP reverse proxy. You install it in front of any server that speaks HTTP and configure it to cache the contents. Varnish Cache is really, really fast. It typically speeds up delivery with a factor of 300 - 1000x, depending on your architecture.
- What is Varnish cache and how it works? - Interserver Tips
- LightSpeed
- A commercial webserver dedicated to speed.
- Apache
- Other HTTP2 / TLS1.3 articles (older or untested)
- How to Enable HTTP/2 for Apache in CWP with mod_http2 module | Mystery Data - For use with Apache Only configurations (old article, reference only)
- Enable Mod_HTTP2 for Apache in CWP
- How to Enable TLS 1.3 in Apache and Nginx
- apache httpd - How to enable TLSv1.3 in Apache2? - Unix & Linux Stack Exchange
- Rebuilding Apache broke CWP
I did this and my server broke. It was running extremely slowly on the terminal and the websites would not load. The CWP panel might of come up if left long enough
- Cause
- Perhaps this is becasue I used MysteryData's tutorial to add TLS1.3 and HTTP2 via his custom script.
- The new Apache version was older that the one the MysteryData script installed (I re-compiled without checking this) and this old apache version is not compatible with TLS1.3
This script installed Apache 2.4.48 and the latest kernel available in the list was 2.4.46 and 2.4.39 was highlighted. So I might of broke this by selecting an old verion of Apache. So Make sure you check the Apache versions and do a backup first.
- Fixes I tried (in order just incase it makes a difference)
- I ran this to try and fix it Install Latest Apache 2.4.48 version In CWP - Control Web Panel | Mystery Data but it did not fix it. It might of fixed the CWP panel only.
- I fixed this by doing server resets of CWP directly typing into the terminal screen on the VM. I then fully shutdown the CWP server, VirtualBox and rebooted the Host PC. The process or a combination of this might of cleared the cache, completed rebuild etc.. This got the CWP panel loading but the main apache server is still down.
- When you goto restart the failed apache service you get this error: See httpd won't start on default CentOS 7 installation | Linode Questions
Job for httpd.service failed because the control process exited with error code. See "systemctl status httpd.service" and "journalctl -xe" for details.

if you look at the log file by clicking the button you will see this line of noteJun 27 11:05:04 server apachectl: SSLProtocol: Illegal protocol 'TLSv1.3'
-
So Apache failing to load is most likely becasue I added TLS1.3 and HTTP2 with the Mystery Data scripts and in particular the TLS1.3 protocol is not compatible with Apache. This might of only just been added or it is some other incompatiblilty.
-
To fix the reamin Apache issue I reran How to Enable TLS 1.3 in Apache on CWP- Control Web Panel Centos 7 Centos 8 EL7 El8 | Mystery Data
-
Links
- CWP - Apache Re-Build - PlotHost
- Apache Builder (compiler) not working
- apache won't start httpd service start centos 6.3 - Server Fault
- apache httpd - How to enable TLSv1.3 in Apache2? - Unix & Linux Stack Exchange
- ssl - Apache reporting "Illegal protocol" when using TLSv1.3 with OpenSSL 1.1.1b installed - Stack Overflow
- Cause
FTP
This is mostly setup but for a couple of settings in the FTP manager
- Set the following settings in FTP Manager (File Management --> FTP Manager V2 --> Edit Configuration)
- TLS: 2 (This allows only encrypted connections)
- TLSCipherSuite: HIGH (default HIGH:MEDIUM:+TLSv1:!SSLv2:!SSLv3)
- Click on `Update` not reset.
- You need to create a user as non are created by default like in cPanel (optional)
- File Management --> FTP Manager V2 --> Add User
- Fill in the details
- Click `Submit`
- TLS1.2+ is now required.
Notes pure-ftpd Setup Passive FTP Ports - Control WebPanel Wiki
- How to install TLS for FTP - Control WebPanel Wiki - This also explains the setting TLS
- FTP - Control WebPanel Wiki
- You have to create FTP users manually. They are not automatically created when you create a user account.
- The CWP FTP server is pure-ftpd.
- pure-ftpd TLS Documentation
- TLS - There is a Level 3 option, see the ACCEPTING TLS SESSIONS section in the pure-ftpd TLS documentation.
- TLSCipherSuite
- HIGH = all ciphers using greater than 128-bit encryption
- This is a standard format list of the SSL/TLS ciphers Pure-FTPd should use. Typically this will only need to be adjusted for PCI compliance.
- pure-ftpd Cipher Suite Documentation
- These cipher suites are all OpenSSL based
- OpenSSL Ciphers Documentation
- openssl ciphers -- SSL cipher display and cipher list tool
- Transport Layer Security - Wikipedia
- FTP, FTPs, FTPes, SFTP explained - Control WebPanel Wiki
- FTP Manager v2 | Control-WebPanel Documentation
- The connection details will be as follows (example)
- Connection type: `Require explicit FTP over TLS` / `FTP using explicit SSL (Auth TLS)` / FTPES
- TLS1.2 (TLS 1.1 might be supported but I cannot tes
- Port: 21
- Address or URL: mydomain.com
- User: ftpuser@mydomain.com
- Pass: xxxx
- Error: Server sent passive reply with unroutable address
PHP
Configuring the PHP service is good for security and performance.
- Set the Server's default Global PHP version
- PHP Settings --> PHP Version Switcher --> PHP Version = 7.4.20 (or your preference. php 8.0 is not mainstream yet)
- Select Options/Modules/Extensions (These are PHP extensions that are added into PHP when it is compileds or it compiles them and attaches them)
- Check them over but the ones that come up should be fine (if you have not changed them). You can always recompile later with different options.
- Click `Save & Build` (CWP will now compile PHP from source in the background)
- PHP Selector 2
- Standard PHP Parser (PHP-CGI)
- This feature lets you install additional PHP versions in the CWP. This is the selector for the legacy CGI-based PHP method like SuPHP. You can use a different PHP-CGI version per account/domain rather than the server default one.
- I am not going to use any on this page because I want to use the faster PHP-FPM.
- Installation will be similiar to setting the servers default PHP version except you might select several versions and you can select options and other things specific to the particular version before you Compile
- I am not sure what happens if you select the same version as the servers default version.
- I think this is the same PHP parser type that the server default is running.
- PHP-FPM Selector
- This lets you also install and use additional PHP versions. The difference is that it selects PHP Fast CGI Manager (PHP-FPM) versions instead of traditional CGI.
- Select:
- PHP-FPM 7.4.20
- with default options
- same as the server default PHP version
- PHP-FPM 8.0.7
- with default options
- for testing
- PHP-FPM 7.4.20
- Click `Start Compiler (build & install)` (it does take a while to compile, especially if you have chosen a few PHP versions)
- Enable auto update for the PHP version you have just installed.
- The servers version might autoupdate anyway when the server updates, other than that there is no option for it.
- Apply the relevant PHP version to any accounts that already exist that you wish to upgrade/change. They should all currently be on the default legacy CGI PHP parser (server default)
- So far I can only change this in the user's control panel, not on mass. I will add the command or instructions here when I find one.
- Configure all of your php.ini files to your taste
- Dont forget about the multiple versions of the php.ini , one for each version of PHP installed for each enging type (PHP-FPM / Apache Module)
- (PHP Settings --> PHP.ini Configuration) - This is the servers main/default version of php.ini
- (PHP Settings --> PHP Selector--> PHP x.x --> Edit php.ini) - When you use multiple versions of PHP as an Apache Module you need to edit these.
- (PHP Settings --> PHP-FPM Selector --> PHP x.x --> Edit php.ini) - When you use PHP-FPM you need to edit the different version of the php.ini here. Save and then restart that particular version. There is no need to rebuild.
- Before making changes to the file, always click on the `Create File Backup` button
- The default server on gets stored at /usr/local/php/php.ini - CWP might do an automatic backup upon save.
- Once you have configured all of your php.ini files I would recommend you download them and store them as a reference just incase they get wiped out in an upgrade or something else unpredicted especially if you have a complicated chages you have made.
- Once you have made the changes make sure you restart the relevant services or just restart the server for quickness.
- Changes I have made to the default file (these might be a bit generous for a standard webhost, so the ones where I have increase values, ignore them)
disable_functions = "" --> "system,passthru,popen,exec,proc_close,proc_get_status,proc_nice,proc_open,proc_terminate,highlight_file,escapeshellcmd,define_syslog_variables,posix_uname,posix_getpwuid,apache_child_terminate,posix_kill,posix_mkfifo,posix_setpgid,posix_setsid,posix_setuid,escapeshellarg,posix_uname,ftp_exec,ftp_connect,ftp_login,ftp_get,ftp_put,ftp_nb_fput,ftp_raw,ftp_rawlist,ini_alter,ini_restore,inject_code,syslog,openlog,define_syslog_variables,apache_setenv,mysql_pconnect,eval,phpAds_XmlRpc,phpAds_remoteInfo,phpAds_xmlrpcEncode,phpAds_xmlrpcDecode,xmlrpc_entity_decode,fp,fput,shell_exec,apache_get_modulesi"
expose_php = On --> Off
max_execution_time = 30 --> 180
max_input_time = 60 --> 180
max_input_vars = 4000
memory_limit = 128M --> 256M
post_max_size = 8M --> 64M
upload_max_filesize = 2M --> 64M
date.timezone = "Europe/London"
- A lot of companies disable mail() to prevent spam. Just add 'mail' to the end of disable_functions. I use mail function because there is onyl my stuff on the server and it prevents me from having to setup sMTP on every CMS or PHP script I want to use. If you have customers on your server then definately disable the mail function.
- changes of note, but I have not changed them (might do)
zlib.output_compression = Off
error_reporting = E_ALL & ~E_DEPRECATED & ~E_STRICT --> E_ALL & ~E_NOTICE

; http://php.net/track-errors
;track_errors = Off

; http://php.net/html-errors
;html_errors = On

; http://php.net/register-argc-argv
register_argc_argv = Off

; http://php.net/allow-url-fopen  (I have this on all the time, but should it be off by default)
allow_url_fopen = On
- Dont forget about the multiple versions of the php.ini , one for each version of PHP installed for each enging type (PHP-FPM / Apache Module)
- Force Apache to use PHP-FPM Selector
- I am only going to use PHP-FPM so i need this option.
- WebServer Settings --> Select WebServers (This will be quick becasue we are not re-compiling anything)
- Select Default Apache PHP-FPM version: 7.4
- Select Default Nginx PHP-FPM version: 7.4 (I do not have NginX installed at this time, but does not harm to apply this setting now so I can forget about it)
- Force Apache to use PHP-FPM Selector: Ticked
- Click `Save & Rebuild Configuration`
- The switch will be almost instant and this is normal.
Notes
- Each PHP version for each type of PHP parser (Selector) has its own php.ini
- If you are using Snuffleupagus (see in the security section below) you will need to manually add it again to any new versions of PHP you install, PHP version upgrades should maintain the software.
- PHP-FPM
- This create helpers per account so is more resource intensive but does allow for much quicker parsing of PHP becasue the workers are already spooled up. I would not recommend this for all of your accounts on your server if you have a lot of them.
- When you have made changes to the PHP-FPM version specific php.ini you need to relaod the service, restarting Apache will not reolad the config file becasue it is not an Apache moduel.
- AutoUpdate - This enables/disables auto update of the PHP Version ie 7.4, 8.0, so the PHP is always on the latest Patch version (security release)
- How to disable php/php-fpm selector - Control WebPanel Wiki
- allow_url_fopen is considered dangerous?
- The 8.0.7 php.ini is slightly different to the 7.4.20 php.ini but the normal PHP and PHP-FPM version are the same even though there are in different places on the server.
- the PHP-FPM and normal php have different settings for this
- PHP Standard ;cgi.fix_pathinfo=1
- PHP-FPM: cgi.fix_pathinfo=1
- Disable Dangerous PHP functions.
- A lot of these functions are not needed in everyday use on a public webserver but can be dangerous to have on, so they need to be turned off by default and then if you do actually find you need them that is the time to turn them on.
- How to disable dangerous php functions - Control WebPanel Wiki
- Force Apache to use PHP-FPM Selector
- After you have enabled this:
- The menu items for PHP Version Switcher and PHP Selector 2 (NEW) are still present but with a warnings at the top of each of the pages.
- In PHP Selector 2 (NEW), The PHP versions are obviously just disabled but all compile and delete functions still work which is why the switch is so quick no re-compiling takes place.
- After you have enabled this:
- Divi Recommendations -
- These are the official onces found in the 'Support Center' of the Divi options.
max_execution_time = 120
max_input_time = 60
max_input_vars = 1000
memory_limit = 128M
post_max_size = 64M
upload_max_filesize = 64M
- How To Set the Best Server Settings for Divi Websites | Divi Space
- How to Fix the Divi Builder Timeout Error on your Wordpress Website | Divi Space
- Divi recommended configuration for server and hosting environment - Canagon
- 180 seconds is a commonly recommended max time across all themes. The reason for this is not normally because the Theme requires this but to allow certain 3rd party plugins enough time to do complex operations. A normal website does not need this much time to do anything, but if you have a plugin with backend features that might be doing complex background stuff, you could cause unexpected behaviors by setting your max time too low.
- Solved: Fix the Divi Builder Timeout Error (Quick and Easy) • Divi Cake
- Recommended Settings for Divi Hosting | aspengrovestudios
- A set of PHP system compliance settings were provided by Elegant Themes support. We are going to explore each setting and what it does. If you read previous articles about this, check the settings on this one as they’ve been upgraded several times.
- These are the official onces found in the 'Support Center' of the Divi options.
Database / MySQL / phpMyAdmin
- Set default database collations to utf8mb4_unicode_ci (this collation is the modern standard now)
- (SQL Services --> MySQL Configuration --> Contents of File: /etc/my.cnf)
- The default my.cnf file is shown below and is for reference. The file is a lot more empty that I expect and I have reported this ont he CWP forum here.
#
# This group is read both by the client and the server
# use it for options that affect everything
#
[client-server]

#
# include *.cnf from the config directory
#
!includedir /etc/my.cnf.d
- Click `Create File Backup` (at the bottom)
- Add the following code at the end of the file
[client]

default-character-set = utf8mb4

[mysql]

default-character-set = utf8mb4

[mysqld]

collation-server = utf8mb4_unicode_ci
init-connect = 'SET NAMES utf8mb4'
character-set-server = utf8mb4
- Click `Save`
- Goto the Dashboard
- Reboot the MySQL Database Server
Notes
- MariaDB Defaults of note:
- The database package is MariaDB
- innodb-file-per-table: True
- default-storage-engine: InnoDB
- General
- After changing the collation as noted above, in phpMyAdmin --> Variables, all collations show correct but collation database shows a (Session value) of latin1_swedish_ci and i dont know why or how to fix it. I would like it to match.
- Changes made in phpMyAdmin --> Variables are not persistent. When the server is rebooted the changes made there will be lost.
- Unknown/unsupported storage engine: InnoDB | MySQL Ubuntu - Server Fault
- The ibdata file contains the data (unless you have file-per-table). The ib_logfile files are the replay logs that contain the data for database-altering transactions that may have been in process when/if the database crashed. If you were able to shutdown the server successfully, deleting these log files won't hurt you. If it crashed, then you need them.
- Can't read my.cnf file bug | CWP Forum
- the problem here is that my.cnf needs to be saved with the new line at the end of the file. Some editors, e.g. vim do it automatically and they put a "new line" character at the end of each file - without having the user to actually see it - so it appears that the file ends with the very last character.
- However if you open this file up with with a different editor, e.g. Mousepad, you will find out that tere is an extra line - a new line - at the end of the file. If there is not - that is the problem - because MySQL fails to process that kind of configuration.
- Apparently there is a standard for having files end with a new line. Some software upholds it strictly (e.g. MySQL) and that's why we can find this error in MySQL explicitely.
- Details: https://stackoverflow.com/questions/729692/why-should-text-files-end-with-a-newline
- Manually Upgrading MariaDB
- This will allow you to use a different branch of MariaDB
- Current CWP uses the oldest branch 10.2.x
- The newest branch is 10.6.x
- Update/Upgrade to MariaDB 10.6/10.5/10.4 on VestaCP/CWP/CentOS 8 Stream/CentOS 7 - Mystery Data
- Upgrade MySQL Server in CWP | Bullten - In this tutorial we will show you how to upgrade MySQL server in CentOS Web Panel.
- error while upgrading mariadb - Some useful solutions here.
- Get the MariaDB variables
- MariaDB default my.cnf in sources - Stack Overflow
- No, MariaDB does not have a configuration file which would list all available options and their default values. Different MariaDB packages might provide some configuration files, but those are different, they only contain a small subset of options, and the values are different from default ones.
- You can output the default MariaDB variables and settings by running:
Default configuration and explanation of the settings
mysqld --no-defaults --verbose --help

or, on a running 10.1+ server, by executing
SELECT variable_name, default_value FROM information_schema.system_variables ORDER BY variable_name
- You can output the current MariabDB variables:
- In the CWP GUI (SQL Services --> MySQL Manager --> Settings --> Show MySQL Variables) This runs mysql -e "show variables;" -B
- From the command line run one of these:
mysqld --verbose --help

mysqladmin variables
- SHOW VARIABLES - MariaDB Knowledge Base
- MySQL Tutorial => SHOW VARIABLES example | RIP Tutorial
- MariaDB default my.cnf in sources - Stack Overflow
- Removing unwanted Users
- After importing user accounts from cPanel I found i have a lot of unwanted MySQL users
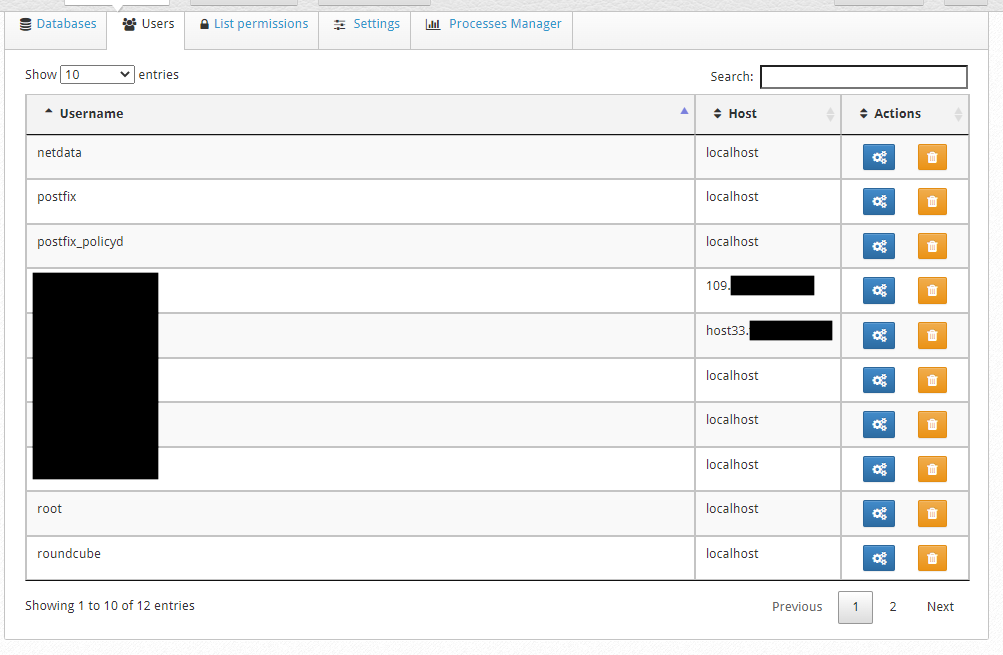
- I clicked on the delete icon for the relevant user and got the standard warning message
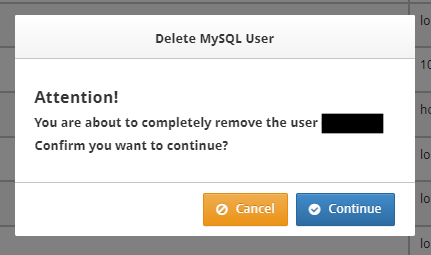
- but could not use the CWP GUI to remove them because whern I clicked 'Continue' I got the following error message, Error Invalid System User.
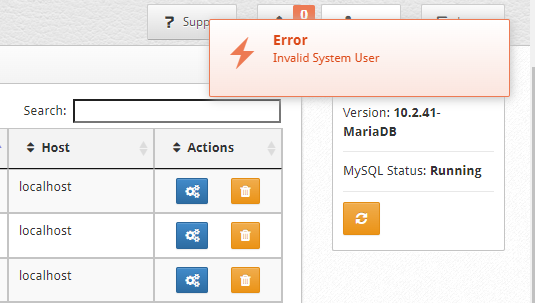
- The solution is simple to delete the users as the CWP GUI clearly has a bug:
- Goto (CWP Admin --> SQL Services --> phpMyAdmin --> Users Tab)
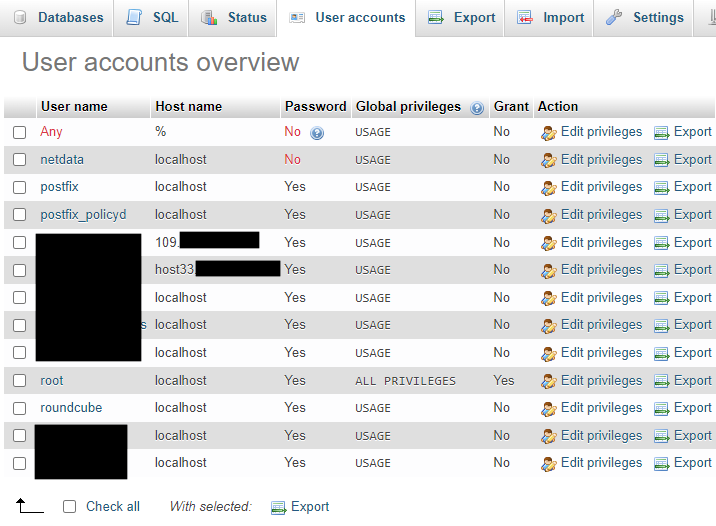
- Select the users you don't want
- Scroll down to 'Remove selected user accounts'
- Click 'Go'
- This will delete the users with no issue. Doing this by the SSH will have the same outcome.
- Goto (CWP Admin --> SQL Services --> phpMyAdmin --> Users Tab)
- How to Show Users in MySQL using a Linux Terminal - via SSH and this is a great tut
- MySQL “show users”: How to list the users in a MySQL database | alvinalexander.com
- There might be duplicate users. This is because MySQL filters access to a server according to the IP address it comes from. So you can also add a host column.
- After importing user accounts from cPanel I found i have a lot of unwanted MySQL users
Email Server
- Postfix is an MTA
- Dovecot is a message store Accessor/Provider, POP3/IMAP Server.
Postfix and Dovecot are both required for a full email system and should already be running and this is why you are already (if configured) getting server notification emails.
- Start disabled services (you will see they have an error, just ignore these) (Service Recovery FAILED!! I'm reporting this issue to main CWP artificial intelligence system!)
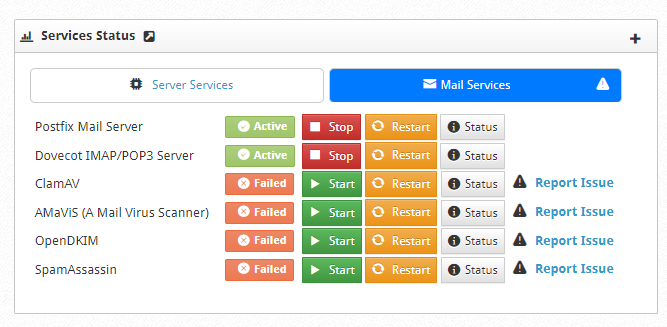
- Dashboard --> Services Status --> Mail Services
- ClamAV
- AMaViS (A Mail Virus Scanner)
- OpenDKIM
- SpamAssassin
- DKIM
- Email --> DKIM Manager
- Nothing to do already setup
- SPF make ~all --> -all
- Email --> SPF Manager
- Edit DNS Zone
- Custom DNS Zone Template - Control WebPanel Wiki
- Open file manager and navigate to:
/usr/local/cwpsrv/htdocs/resources/conf/dns/bind/zones/
- Copy the file default.tpl --> custom.tpl so it is in the same directory. (You will have to copy it to another folder, rename it, move back to the zones folder)
- Edit the custom.tpl
- Change the following
@	14400	IN	TXT	"v=spf1 +a +mx +ip4:%ip% ~all"

-->

@	14400	IN	TXT	"v=spf1 +a +mx +ip4:%ip% -all"
- CWP Settings --> Edit Settings -->Default DNS Zone template = custom.tpl
- Click `Save Changes`
- This will not change accounts that have already been created including the Primary account. so either manually edit the DNS zones or use a script to change many. But go through and change all of the relevant zones.
DNS Functions --> List DNS Zones --> mydomain.com --> Edit File/Edit Records
- DMARC
- This appears to be configured and running.
- If you want to change the DMARC defaults then edit the custom.tpl zone file:
/usr/local/cwpsrv/htdocs/resources/conf/dns/bind/zones/custom.tpl
- NB: This will not change accounts that have already been created including the Primary account. So either manually edit the DNS zones or use a script to change many.
(DNS Functions --> List DNS Zones --> mydomain.com --> Edit File/Edit Records)
- NB: This will not change accounts that have already been created including the Primary account. So either manually edit the DNS zones or use a script to change many.
- Tutorials
- Creating DMARC Record to Protect Your Domain Name From Email Spoofing
- This is really easy to read and explains everything well including testing and processing reports.
- Why I’m still using p=none policy?
- Firstly, it’s because of Microsoft. mails forwarded from Microsoft Outlook Mailbox can fail DKIM check, which is bad. For this reason, I cannot set my DMARC policy to quarantine or reject.
- Another reason is that I’m using MailChimp to send newsletters to my email subscribers. MailChimp uses its own domain in the Return-Path header and its own DKIM signature for the signup confirmation email, which causes DMARC failure.
- Having a p=none policy is better than having no DMARC record. Although p=none cannot prevent email spoofing, at least my legitimate emails have a better chance to be placed in inbox.
- How to Setup DMARC records in cPanel | InMotion Hosting
- Does anyone have DMARC working? - DMARC Example.
- Creating DMARC Record to Protect Your Domain Name From Email Spoofing
- Antispam
- Install Spamhaus:
- Email --> AntiSpam --> Install Spamhaus
- SpamExperts: This is a commercial professional antispam service.
- Install Spamhaus:
- Webmail
- Email --> Roundcube Webmail
- Nothing to do already setup
- Configure Postfix
- Email --> MailServer Manager
- When the functions are enabled then they have a tick in their box when the page loads. You need to rebuild the Mail Server to allow the Domain name to be updated correctly.
- Select the following:
- ClamAV, Amavis & Spamassassin, Requires 2Gb+ RAM
- Drop all emails if no rDNS/PTR
- Installs DKIM & SPF, enables DKIM for New Accounts and Domains
- Installs Policyd, enables hourly email limit per domain.
- Resource Usage - These use a lot of resources
- ClamAV (CPU 5%-20%, RAM 1.2GB-2.0GB+)
- Amavis (CPU 5%-20%, RAM 1.2GB-2.0GB+)
- Spamassassin (CPU?,RAM?)
- Hostname: server.mydomain.com
- Domain: mydomain.com
- Click `Rebuild Mail Server`
- Click `Update ClamAV Database`
- Click `Restart All Mail Server Services`
Notes
- Uninstalling ClamAV, Amavis & Spamassassin
- Email --> MailServer Manager
- Untick 'ClamAV, Amavis & Spamassassin, Requires 2Gb+ RAM'
- Rebuild Mail Server
- (optional) Remove from ServicesMonitor
- Services Config --> ServicesMonitor (systemd)
- Untick (amavisd.service / clamd.service / spamassassin.service)
- How to create a perfect Mail Server using CWP - ArtSysOps - Some of this is done automatically now.
- Reduce maximum attachment file size from 75mb
- Postfix
- CWP - Admin Panel: Postfix Mail Server Stats & Graphs - YouTube
- Postfix attachment size - this has commands
- Increasing Attachment Size in Posfix - this has commands
- Default is 20MB
- How do I remove maximum limit size for email? | DigitalOcean - Conf file location
- Roundcube is showing allow attachmentsize of 75mb
- Change the email attachment file size in vestacp - BoredAdmin - Roundcube might be getting this from the PHP values (not the client facing service though)
- Postfix
- Retry time not reached for any host - cPanel - First2Host
- postfix needs port 25 open so make sure it is. You will be able to send emails but not receive them.
- How To Configure a Mail Server Using Postfix, Dovecot, MySQL, and SpamAssassin | DigitalOcean - For general reference
- Configuring Sendmail SMTP server on CentOS & Scientific Linux - For general reference
- How to Debug Mail Server issues - Control WebPanel Wiki
- sendmail / mail() works out of the box on CWP.
- Checking sendmail / mail()
- How to Fix the WordPress Not Sending Emails Issue in 2021 - A useful article to read. It is WordPress based.
- PHP | function_exists() Function - GeeksforGeeks - Check PHP function exists and a small test script for sending emails
- email - How to check if PHP mail() is enabled? - Stack Overflow - PHP test script
- PHP check if mail() function is enabled on your server - A nicely laid out tutorial.
- Check & Log Email – WordPress plugin | WordPress.org - WordPress plugin
- A simple email tester
- It uses the logged in user's email for the send from email address
Settings --> General --> General Settings --> Administration Email Address
- Make sure the SPFrecord allows the use of your server's IP
- Make sure the MX record is pointing to your server.
- Make sure you do not have a WordPress plugin overriding the mail() funciton such as Easy WP SMTP.
- Chase a PHP script that is spamming
- You need to add a header to emails that are sent from PHP which shows the UID of the PHP file (possible the innode number)
- This is set by change the following value in all of your active php.ini files.
; Add X-PHP-Originating-Script: that will include uid of the script followed by the filename
mail.add_x_header = On
- You only need to port forward 25 to recieve emails not to be sent administration emails.
- IMAP and POP3 are not required for sending emails.
- How to secure Postfix using Let's Encrypt - Tutorial - UpCloud
- Nameservers do not get DKIM and SPF records
- This might be normal because they will never be required to send emails
Remove 'cwp' subdomain from the Default DNS Zone (optional)
This has to be done here so all of your new accounts dont get this vestigial subdomain.
It is my opinion this is not really used by anything anymore and that is why this is optional.
- Edit the following file (you should of created the file custom.tpl earlier)
/usr/local/cwpsrv/htdocs/resources/conf/dns/bind/zones/custom.tpl
- Remove the line
cwp 14400 IN A %ip%
- This will not change accounts that have already been created including the Primary account. So either manually edit the DNS zones or use a script to change many.
Firewall
- Country Blocking / IP to Country Lookups / GeoIP / Geolocation
-
If you are running a network firewall such as pfSense, then do the Country Blocking in that device, so all network devices can benefit from that single ruleset but keep the lookup service enabled here to allow for IP to country lookups
- Security --> CSF Firewall --> Firewall Configuration
- Set your provider (MaxMind is preferred)
- MaxMind
- Get a MaxMind license Key: GeoLite2 Sign Up | MaxMind (I created a proper MaxMind account first)
- CC_SRC = "1"
- MM_LICENSE_KEY = "" (fill in your license key)
- DB-IP, ipdeny.com, iptoasn.com
- CC_SRC = "1"
- MaxMind
- (optional) Set the countries to block
- Search for CC_DENY = ""
- Change to CC_DENY = "CN,RU"
- (optional) block all countries except those specified:
- Search for CC_ALLOW_FILTER = ""
- Change to CC_ALLOW_FILTER = "CN,RU"
- Click `Save Changes` (at the bottom)
- Restart the firewall (Security --> Firewall Manager --> Restart)
-
- Check all of the ports, close ones not used - even if the port is not forwarded (i.e. just on LAN).
- SSH restriction rule
Notes
- Country Blocking
- Do NOT use CC_ALLOW = ""
- WARNING: CC_ALLOW allows access through all ports in the firewall. For this reason CC_ALLOW probably has very limited use and CC_ALLOW_FILTER is preferred
- How to block countries in CSF firewall - Let's figure it out - This explains everything in detail.
- Country Codes
- CSF Country Code List - Knowledgebase - DotBlock - A full list of country codes.
- List of ISO 3166 country codes - Wikipedia
- MaxMind
- As of 2019-12-29, MaxMind REQUIRES you to create an account on their site and to generate a license key to use their databases, see: Significant Changes to Accessing and Using GeoLite2 Databases
- Use MaxMind’s GeoIP Lite to block a whole country Via CSF - Learn how MaxMind’s GeoIP Lite block a Whole Country Via CSF from the in-house experts at Bobcares.
- How to Block Traffic by Country in the CSF Firewall - Liquid Web - Block traffic from a specific list of countries to your website using the ConfigServer Firewall (CSF) plugin in WHM. Our three-step tutorial walks you through configuring your firewall.
- Do NOT use CC_ALLOW = ""
SSL / HTTPS / AutoSSL / LetsEncrypt
- Set autorenew
- WebServer Settings --> SSL Certificates --> Configure
- Auto Renewals
- Active: yes
- Auto renew AutoSSL: yes + Renew all SAN
- Autorenew every: 60 days
- Automatic SSL generation:
- Active: yes + Admin and User
- Generate SAN automatically: mail, webmail, ftp, cpanel = yes
- The automatic generation task will be executed every day at: 01:00 (less traffic at this time)
- Generate SSL for mydomain.com
- WebServer Settings --> SSL Certificates --> AutoSSL [FREE]
- User: mydomain
- Domain: mydomain.com (main)
- Additional Servers: mail, webmail, ftp, cpanel
Notes
- SSL settings are defined in the file
/usr/local/apache/conf.d/ssl.conf
- Out of the Box, my server scores A Grade. It needs a little work to get A++ grade.
- Letsencrypt Free SSL on CWP - Control WebPanel Wiki
- apache httpd - How to enable TLSv1.3 in Apache2? - Unix & Linux Stack Exchange - this says where to set SSL ciphersuites
- [Tutorial] Strong SSL Security for Apache
- Enable AutoSSL in CentOS Web Panel | Hostwinds
- Subdomains do not have a Cert/SAN for mail, webmail, ftp, cpanel unless you manually add them even though Automatic SSL generation has them all ticked.. After which then will autorenew.
- Manually add them here: (WebServer Settings --> SSL Certificates --> mydomain --> Admin services)
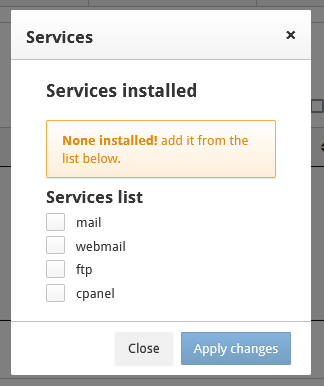
- Manually add them here: (WebServer Settings --> SSL Certificates --> mydomain --> Admin services)
- FAQ - Let's Encrypt - This recommends renew your certificate every 60 days.
- How to get A+ on SSL Labs
- Get A+ Score Rating with SSLLabs Qualys in CWP - Control web panel | Mystery Data - Simple guide to follow, I have not done this yet. CWP CipherSuite is the same.
- https://www.namecheap.com/support/knowledgebase/article.aspx/9752/38/how-do-i-get-a-rating-in-ssllabs/
- HSTS is needed for extra points
- https://www.google.com/search?client=firefox-b-d&q=ssl+a%2B%2B+grade
- https://github.com/ssllabs/research/wiki/SSL-Server-Rating-Guide
- No SSL have been generated for this user account / You are not able to add a SSL for mail, webmail, ftp, cpanel
- This is because you have not forwarded the `A` for the test.acc and potentially the subdomains (mail, webmail, ftp, cpanel) or set the nameservers to point to ns1.mydomain.com / ns2.mydomain.com
- All domains will automatically get a HTTPS certificate added if Automatic SSL generation is acticated. You do not need to manually install a certificate before.
- I have not found a domain opt-out for HTTPS certs. If you delete one it will just be recreaed on the next CRON interval.
- When a new account is created the SSL scripts are run for that account to install the required certificates.
Security
The more resources you install the more resources you use. I dont know if you need to install each one of these.
- Connect via SSH with PuTTY and make the root password complex and create a user as they might not be the strongest ones set earlier because you could not copy and paste.
- Follow this guide Step 1 - 4 (if you dont know how to chage passwords and create new users via the command line).
- Basic Security Measures For Setting Up A CentOS 7 Server
- Install PHP Defender (Snuffleupagus)
- Dont Install this
- First time I enabled it all of my wordpress installs were broken
- You must restart the whole server to unload it, just deleting the instances from the security centre and restarting Apache is not enough. I am running PHP-FPM.
- You might also need to reboot the server for the modules to become live.
- If you don want to install make sure you have a full server backup
- Here are some example errors:
Apache Error Log (sitea)
[Thu Dec 23 19:47:52.977523 2021] [proxy_fcgi:error] [pid 4659:tid 139985935795968] [client 192.168.1.1:58256] AH01071: Got error 'PHP message: PHP Fatal error: [snuffleupagus][0.0.0.0][disabled_function][drop] Aborted execution on call of the function 'ini_set', because its argument '$varname' content (display_errors) matched a rule in /home/mydomain/public_html/sitea/wp-includes/load.php on line 465'
[Thu Dec 23 19:47:53.157871 2021] [proxy_fcgi:error] [pid 4659:tid 139985935795968] [client 192.168.1.1:58256] AH01071: Got error 'PHP message: PHP Fatal error: [snuffleupagus][0.0.0.0][disabled_function][drop] Aborted execution on call of the function 'ini_set', because its argument '$varname' content (display_errors) matched a rule in /home/mydomain/public_html/sitea/wp-includes/load.php on line 465', referer: https://sitea.mydomain.com/
[Thu Dec 23 19:47:54.155940 2021] [proxy_fcgi:error] [pid 4659:tid 139985935795968] [client 192.168.1.1:58256] AH01071: Got error 'PHP message: PHP Fatal error: [snuffleupagus][0.0.0.0][disabled_function][drop] Aborted execution on call of the function 'ini_set', because its argument '$varname' content (display_errors) matched a rule in /home/mydomain/public_html/sitea/wp-includes/load.php on line 465'

Apache Error Log (siteb)
[Thu Dec 23 19:26:46.802401 2021] [proxy_fcgi:error] [pid 1642:tid 140310124496640] [client 192.168.1.1:49326] AH01071: Got error 'PHP message: PHP Warning: [snuffleupagus][0.0.0.0][config][log] It seems that you are filtering on a parameter 'var_array' of the function 'extract', but the parameter does not exists. in /home/mydomain/public_html/siteb/wp-includes/template.php on line 762PHP message: PHP Warning: [snuffleupagus][0.0.0.0][config][log] - 0 parameter's name: 'arg' in /home/mydomain/public_html/siteb/wp-includes/template.php on line 762PHP message: PHP Warning: [snuffleupagus][0.0.0.0][config][log] - 1 parameter's name: 'extract_type' in /home/mydomain/public_html/siteb/wp-includes/template.php on line 762PHP message: PHP Warning: [snuffleupagus][0.0.0.0][config][log] - 2 parameter's name: 'prefix' in /home/mydomain/public_html/siteb/wp-includes/template.php on line 762PHP message: PHP Warning: [snuffleupagus][0.0.0.0][config][log] It seems that you are filtering on a parameter 'var_array' of the function 'extract', but the parameter does not exists. in /home/mydomain/public_html/siteb/wp-includes/template.php on line 762PHP message: PHP Warning: [snuffleupagus][0.0.0.0][config][log] - 0 parameter's name: 'arg' in /home/mydomain/public_html/siteb/wp-includes/template.php on line 762PHP message: PHP Warning: [snuffleupagus][0.0.0.0][config][log] - 1 parameter's name: 'extract_type' in /home/mydomain/public_html/siteb/wp-includes/template.php on line 762PHP message: PHP Warning: [snuffleupagus][0.0.0.0][config][log] - 2 parameter's name: 'prefix' in /home/mydomain/public_html/siteb/wp-includes/template.php on line 762PHP message: PHP Warning: [snuffleupagus][0.0.0.0][config][log] It seems that you are filtering on a parameter 'var_array' of the function 'extract', but the parameter does not exists. in /home/mydomain/public_html/siteb/wp-includes/template.php on line 762PHP message: PHP Warning: [snuffleupagus][0.0.0.0][config][log] - 0 parameter's name: 'arg' in /home/mydomain/public_html/siteb/wp-includes/template.php on line 762PHP message: PHP Warning: [snuffleupagus][0.0.0.0][config][log] - 1 parameter's name: 'extract_type' in /home/mydomain/public_html/siteb/wp-includes/template.php on line 762PHP message: PHP Warning: [snuffleupagus][0.0.0.0][config][log] - 2 parameter's name: 'prefix' in /home/mydomain/public_html/siteb/wp-includes/template.php on line 762'
[Thu Dec 23 19:26:53.844567 2021] [proxy_fcgi:error] [pid 1696:tid 140310174852864] [client 192.168.1.1:49334] AH01071: Got error 'PHP message: PHP Warning: [snuffleupagus][0.0.0.0][config][log] It seems that you are filtering on a parameter 'var_array' of the function 'extract', but the parameter does not exists. in /home/mydomain/public_html/siteb/wp-includes/template.php on line 762PHP message: PHP Warning: [snuffleupagus][0.0.0.0][config][log] - 0 parameter's name: 'arg' in /home/mydomain/public_html/siteb/wp-includes/template.php on line 762PHP message: PHP Warning: [snuffleupagus][0.0.0.0][config][log] - 1 parameter's name: 'extract_type' in /home/mydomain/public_html/siteb/wp-includes/template.php on line 762PHP message: PHP Warning: [snuffleupagus][0.0.0.0][config][log] - 2 parameter's name: 'prefix' in /home/mydomain/public_html/siteb/wp-includes/template.php on line 762PHP message: PHP Warning: [snuffleupagus][0.0.0.0][config][log] It seems that you are filtering on a parameter 'var_array' of the function 'extract', but the parameter does not exists. in /home/mydomain/public_html/siteb/wp-includes/template.php on line 762PHP message: PHP Warning: [snuffleupagus][0.0.0.0][config][log] - 0 parameter's name: 'arg' in /home/mydomain/public_html/siteb/wp-includes/template.php on line 762PHP message: PHP Warning: [snuffleupagus][0.0.0.0][config][log] - 1 parameter's name: 'extract_type' in /home/mydomain/public_html/siteb/wp-includes/template.php on line 762PHP message: PHP Warning: [snuffleupagus][0.0.0.0][config][log] - 2 parameter's name: 'prefix' in /home/mydomain/public_html/siteb/wp-includes/template.php on line 762PHP message: PHP Warning: [snuffleupagus][0.0.0.0][config][log] It seems that you are filtering on a parameter 'var_array' of the function 'extract', but the parameter does not exists. in /home/mydomain/public_html/siteb/wp-includes/template.php on line 762PHP message: PHP Warning: [snuffleupagus][0.0.0.0][config][log] - 0 parameter's name: 'arg' in /home/mydomain/public_html/siteb/wp-includes/template.php on line 762PHP message: PHP Warning: [snuffleupagus][0.0.0.0][config][log] - 1 parameter's name: 'extract_type' in /home/mydomain/public_html/siteb/wp-includes/template.php on line 762PHP message: PHP Warning: [snuffleupagus][0.0.0.0][config][log] - 2 parameter's name: 'prefix' in /home/mydomain/public_html/siteb/wp-includes/template.php on line 762'
[Thu Dec 23 19:27:27.416398 2021] [proxy_fcgi:error] [pid 1696:tid 140310174852864] [client 192.168.1.1:49349] AH01071: Got error 'PHP message: PHP Warning: [snuffleupagus][0.0.0.0][config][log] It seems that you are filtering on a parameter 'var_array' of the function 'extract', but the parameter does not exists. in /home/mydomain/public_html/siteb/wp-includes/template.php on line 762PHP message: PHP Warning: [snuffleupagus][0.0.0.0][config][log] - 0 parameter's name: 'arg' in /home/mydomain/public_html/siteb/wp-includes/template.php on line 762PHP message: PHP Warning: [snuffleupagus][0.0.0.0][config][log] - 1 parameter's name: 'extract_type' in /home/mydomain/public_html/siteb/wp-includes/template.php on line 762PHP message: PHP Warning: [snuffleupagus][0.0.0.0][config][log] - 2 parameter's name: 'prefix' in /home/mydomain/public_html/siteb/wp-includes/template.php on line 762PHP message: PHP Warning: [snuffleupagus][0.0.0.0][config][log] It seems that you are filtering on a parameter 'var_array' of the function 'extract', but the parameter does not exists. in /home/mydomain/public_html/siteb/wp-includes/template.php on line 762PHP message: PHP Warning: [snuffleupagus][0.0.0.0][config][log] - 0 parameter's name: 'arg' in /home/mydomain/public_html/siteb/wp-includes/template.php on line 762PHP message: PHP Warning: [snuffleupagus][0.0.0.0][config][log] - 1 parameter's name: 'extract_type' in /home/mydomain/public_html/siteb/wp-includes/template.php on line 762PHP message: PHP Warning: [snuffleupagus][0.0.0.0][config][log] - 2 parameter's name: 'prefix' in /home/mydomain/public_html/siteb/wp-includes/template.php on line 762PHP message: PHP Warning: [snuffleupagus][0.0.0.0][config][log] It seems that you are filtering on a parameter 'var_array' of the function 'extract', but the parameter does not exists. in /home/mydomain/public_html/siteb/wp-includes/template.php on line 762PHP message: PHP Warning: [snuffleupagus][0.0.0.0][config][log] - 0 parameter's name: 'arg' in /home/mydomain/public_html/siteb/wp-includes/template.php on line 762PHP message: PHP Warning: [snuffleupagus][0.0.0.0][config][log] - 1 parameter's name: 'extract_type' in /home/mydomain/public_html/siteb/wp-includes/template.php on line 762PHP message: PHP Warning: [snuffleupagus][0.0.0.0][config][log] - 2 parameter's name: 'prefix' in /home/mydomain/public_html/siteb/wp-includes/template.php on line 762'
[Thu Dec 23 19:27:58.554425 2021] [proxy_fcgi:error] [pid 1696:tid 140310174852864] [client 192.168.1.1:49350] AH01071: Got error 'PHP message: PHP Warning: [snuffleupagus][0.0.0.0][config][log] It seems that you are filtering on a parameter 'var_array' of the function 'extract', but the parameter does not exists. in /home/mydomain/public_html/siteb/wp-includes/template.php on line 762PHP message: PHP Warning: [snuffleupagus][0.0.0.0][config][log]
- (Security --> Security Center --> PHP Defender)
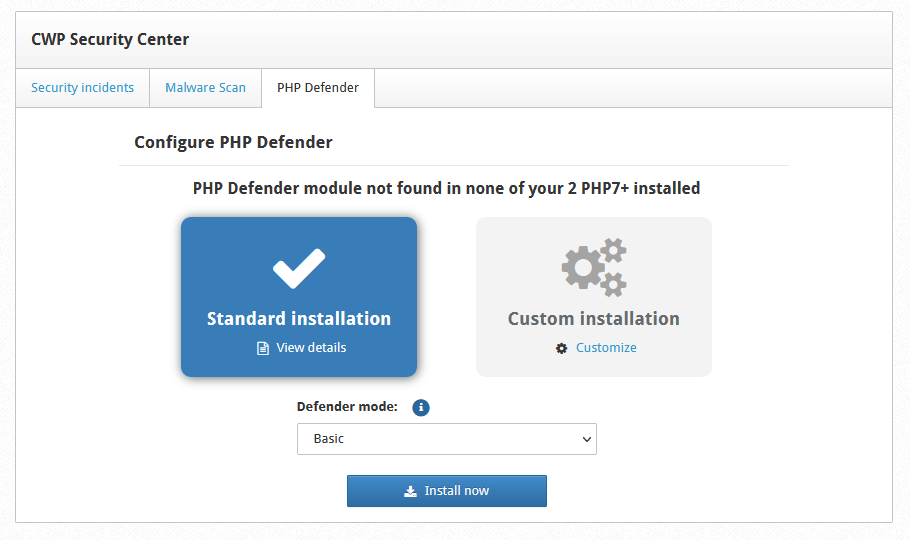
- If you click on 'View details' you get
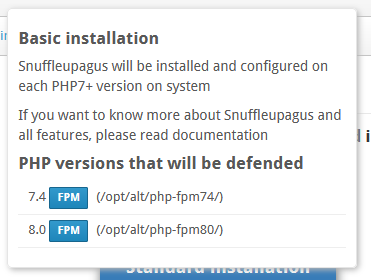
- Standard installation (Only change this if you know why)
- Defender mode: Basic (Only change this if you know why)
- Click 'Install now'
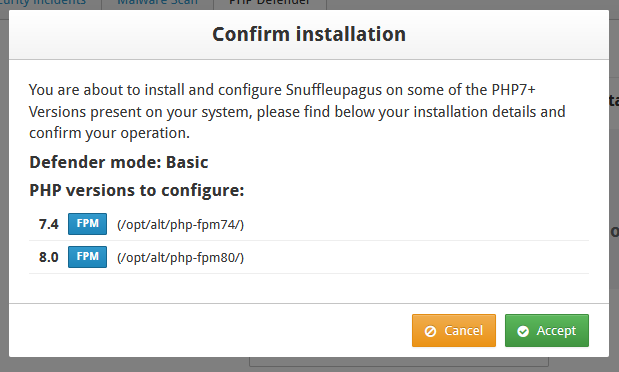
- Click 'Accept'. This will install Snuffleupagus for all of your PHP versions, there is no option to select individual version yet.
- You can now configure the Snuffleupagus settings individual for each version
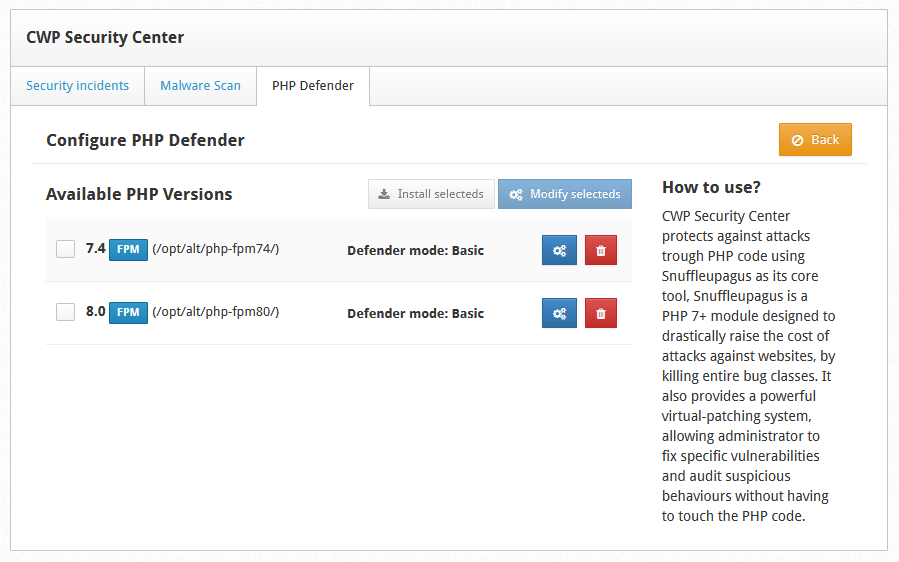
- Dont Install this
- Scan all accounts for Malware (optional)
- Security --> Security Center --> Malware Scan --> Accounts Scan (All accounts)
- Install Maldet : Linux Malware Detect (LMD)
- A malware scanner for Linux. It is particularly effective for the detection of php backdoors, darkmailers and many other malicious files that can be uploaded on a compromised website.
- Security --> Security Maldet Scan --> Install Maldet
- Update and scan for malware
- Install Rkhunter
- rkhunter (Rootkit Hunter) is a Unix-based tool that scans for rootkits, backdoors and possible local exploits. It does this by comparing SHA-1 hashes of important files with known good ones in online databases, searching for default directories (of rootkits), wrong permissions, hidden files, suspicious strings in kernel modules, and special tests for Linux.
- Security RKHunter Scan --> Install Rkhunter
- Update and scan for malware
- Configure rkhunter (RooktKit Hunter)
- Correct the email address (bug) to send the rkhunter cron emails to
- Edit the file /etc/cron.daily/rkhunter or /etc/sysconfig/rkhunter
- Change the file as follows:
MAILTO=root@localhost

to

MAILTO=root
- Run the following commands from the terminal and they will fix the errors in the rkhunter email (as shown below)
---------------------- Start Rootkit Hunter Scan ---------------------- Warning: Checking for prerequisites [ Warning ] The file of stored file properties (rkhunter.dat) does not exist, and should be created. To do this type in 'rkhunter --propupd'. Warning: WARNING! It is the users responsibility to ensure that when the '--propupd' option is used, all the files on their system are known to be genuine, and installed from a reliable source. The rkhunter '--check' option will compare the current file properties against previously stored values, and report if any values differ. However, rkhunter cannot determine what has caused the change, that is for the user to do. Warning: The command '/usr/sbin/ifdown' has been replaced by a script: /usr/sbin/ifdown: Bourne-Again shell script, ASCII text executable Warning: The command '/usr/sbin/ifup' has been replaced by a script: /usr/sbin/ifup: Bourne-Again shell script, ASCII text executable Warning: The command '/usr/bin/egrep' has been replaced by a script: /usr/bin/egrep: POSIX shell script, ASCII text executable Warning: The command '/usr/bin/fgrep' has been replaced by a script: /usr/bin/fgrep: POSIX shell script, ASCII text executable ----------------------- End Rootkit Hunter Scan ------------------------ sudo rkhunter --propupd
- This above command lets the scanner know about the current state of specific files. This process helps to avoid false alarms during scanning.
- the result will look like
[root@cwpserver /]# rkhunter --propupd
[ Rootkit Hunter version 1.4.6 ]
File created: searched for 176 files, found 131
[root@cwpserver /]#
- This will not harm your server.
- sudo rkhunter --checkall
- After updating the file properties, run the following command to scan CentOS to detect any vulnerabilities or rootkits.
- This scanner runs through the system commands, network settings, localhost settings, and files to check for actual rootkits, malware, and vulnerabilities. The findings of the scan get recorded on to a log file.
- This is the summary from the end and is only a small part of what was reported on screen
System checks summary ===================== File properties checks... Files checked: 131 Suspect files: 0 Rootkit checks... Rootkits checked : 492 Possible rootkits: 0 Applications checks... All checks skipped The system checks took: 3 minutes and 11 seconds All results have been written to the log file: /var/log/rkhunter/rkhunter.log No warnings were found while checking the system. [root@cwpserver /]# - This will not harm your server.
- This does not generate an email like the cronjob does.
- (optional) sudo cat /var/log/rkhunter/rkhunter.log | grep -i warning
- This command will show a condensed look at the scan log.
- sudo rkhunter --propupd
- Correct the email address (bug) to send the rkhunter cron emails to
- Install Lynis Scan
- Lynis is a battle-tested security tool for systems running Linux. It performs an extensive health scan of your systems to support system hardening and compliance testing.
- Security Lynis Scan --> Install Lynis
- Scan and read the log
- Symlink Scan
- A symbolic link, also termed a soft link, is a special kind of file that points to another file, much like a shortcut in Windows. In many cases, this is used by hackers to get access to other users files. This module will help you to locate all symlinks.
- Security --> Security Symlink Scan --> Scan User
- Restrict SSH to local network
- Even though my server is on a NAT'ed network and I have not port forwarded the 8128 port for SSH it is a good practise to add a rule which can be altered later.
- Edit file /etc/hosts.allow and add the line:
sshd: 192.168.1.0/24
- Edit file /etc/hosts.deny and add the line:
sshd: ALL
- Goto the dashboard
- Restart SSH Server
- Restrict FTP to local network
- Even though my server is on a NAT'ed network and I have not port forwarded the 21 port for FTP it is a good practise to add a rule which can be altered later.
- Edit file /etc/hosts.allow and add the line:
ftpd: 192.168.1.0/24
- Edit file /etc/hosts.deny and add the line:
ftpd: ALL
- Goto the dashboard
- Restart SSH Server
- Change SSH to use keys and not passwords (optional)
- Enforce HTTPS on Webmail and User Cpanel
- Cpanel and Webmail (no ports)
- cant figure it out
- Webmail (port 2095)
- Edit the file
/usr/local/cwpsrv/conf.d/webmail.conf
- Uncomment the following section (not the title though)
# Disabled forced ssl, uncomment if you want to force ssl #if ($host != "localhost"){ # return 301 https://$host:2096$request_uri; #} - Save the file
- Goto the dashboard
- Restart the Server (because this is the CWP Apache server, not the client facing one)
- Edit the file
- Cpanel and Webmail (no ports)
- Login Brute Force Protection
- Security --> User Login Security --> Configurations --> Configuration and settings for blocking and user session initiation
- Active: Yes
- Failed Attempts: 3
- Suspend for: 5 Min.
- Blocking by firewall: Ticked
- Make MySQL stronger
- Current password length is 12 characters and I want 16 charaters
- Open terminal with root permissions
- Run
sh /scripts/mysql_pwd_reset
- Enter a new root password only using 'a-zA-Z0-9' to prevent script issues.
- check the root password has changed with
grep password /root/.my.cnf
- If the CWP panel is open you will now get this error and MySQL permmissions will need fixing in the next step.
Warning: mysqli_connect(): (HY000/1045): Access denied for user 'root'@'localhost' (using password: YES) in /usr/local/cwpsrv/htdocs/resources/admin/include/functions.php on line 0

Warning: mysqli_connect(): (HY000/1045): Access denied for user 'root'@'localhost' (using password: YES) in /usr/local/cwpsrv/htdocs/admin/admin/index.php on line 0


Trying to start mysql server, please wait!
Try to restart CentOS Web Panel with command: sh /scripts/restart_cwpsrv

**Check your MySQL root password in: /usr/local/cwpsrv/htdocs/resources/admin/include/db_conn.php and /root/.my.cnf


Warning: mysqli_error() expects exactly 1 parameter, 0 given in /usr/local/cwpsrv/htdocs/admin/admin/index.php on line 0
Could not connect:
- To Fix the error above open up a terminal with root privilages (taken from here How to Reset and Recover MySQL or MariaDB Root Password on SystemD Linux | Mystery Data
-
systemctl stop mysqld
systemctl set-environment MYSQLD_OPTS="--skip-grant-tables"
systemctl start mysqld
mysql -u root
- Run these MySQL commands - change MyNewPassword with the password from earlier
mysql> UPDATE mysql.user SET authentication_string = PASSWORD('MyNewPassword') WHERE User = 'root' AND Host = 'localhost'; mysql> FLUSH PRIVILEGES; mysql> quit - Run these final commands
systemctl stop mysqld
systemctl unset-environment MYSQLD_OPTS
systemctl start mysqld
- Test your password works with
mysql -u root -p
-
Notes
- CWP Security Instructions - Control WebPanel Wiki - Useful reading but be aware some of the information will be out of date (such as specific settings).
- Basic Security Measures For Setting Up A CentOS 7 Server - This covers lots of security methods including CentOS user and password management.
- PHP Defender (Snuffleupagus)
- CWP - Admin Panel: Security Center - YouTube
- Mod Security per domain management
- Malware Scan with detailed scan options
- PHP7 Defender additional security level using Snuffleupagus
- Snuffleupagus — Official Site
- Documentation and changelog are all here.
- Snuffleupagus is a PHP7+ and PHP8+ module designed to drastically raise the cost of attacks against websites. This is achieved by killing entire bug classes and providing a powerful virtual-patching system, allowing the administrator to fix specific vulnerabilities without having to touch the PHP code.
- If you are using Snuffleupagus you will need to manually add it again to any new versions of PHP you install, PHP version upgrades should maintain the software.
- Snuffleupagus, an excellent module to block vulnerabilities in PHP applications | Linux Addicts
- What the f*ck is a Snuffleupagus? | by Living The Dream | Medium
- CWP - Admin Panel: Security Center - YouTube
- SSH
- SSH Protocol Explained | N-able
- How to restrict SSH access only to specific IPs - Tutorials and How To - CloudCone - Simple instructions using the same method as cPaenl with the GUI.
- Understanding TCP Wrappers (/etc/hosts.allow & /etc/hosts.deny) in Linux – The Geek Diary - This goes indepth about TCP wrappers.
- 11.10 - How can I setup SSH so that it is restricted to my local network? - Ask Ubuntu
- Allow Or Deny SSH Access To A Particular User Or Group In Linux
- Ssh login only from one ip
- How to Change SSH Port and Implement Hardening On Centos 7
- Enforce HTTPS on Webmail and User Cpanel
- CWP: Redirect Admin/User/Wemail panel from http to https - edit the webmail.conf - This method is already present in the webmail.conf - This article also list the locations of relevant files that handle the enforcing of HTTPS.
- Ports used by CentOS Web Panel - PlotHost - /usr/local/apache/htdocs/.htaccess I think this does it for all CWP non HTTPS but I only need for webmail because the rest ahs been fixed.
- Apache HTTP to HTTPS htaccess redirect on CWP – Centos WebPanel | Bots! - Via the htaccess
- how to force https on rouncube webmail - via the vhosts file - possibly a bit hacky
- how to disable force SSL on login on centos web panel - YouTube
- How to configure custom apache redirects in Centos WebPanel (CWP) - ArtSysOps - How to use the Apache re-direct manager. These are static and dont take into account the users domain.
- PHP FastCGI Example | NGINX - Defined variables used in Apache Host conf files
- Configuring a Web Server (Symfony Docs)
- Apache HTTP Server Version 2.5 Documentation - Apache HTTP Server Version 2.5
- The commands in the conf files are called Directives
- You define your own variables to use within the conf files
- Directive Index - Apache HTTP Server Version 2.4
- Apache HTTP to HTTPS htaccess redirect on CWP - Centos WebPanel | Mystery Data - Only for user accounts
- Webmail file at /usr/local/apache/conf.d/hostname-ssl.conf | hostname-ssl.conf | webmail.conf
- Apache Redirect to HTTPS - SSL Certificates - Namecheap.com
- Edit Vhosts Template, maybe this is an option.
- WebServer Settings --> Edit Vhosts Template --> Httpd
- HSTS
- How to clear HSTS settings in Chrome and Firefox
- HSTS - How to Use HTTP Strict Transport Security _ What it is and where to add it.
- How to check if HSTS is enabled - SSL Certificates - Namecheap.com - how to manually check if HSTS is enabled.
- HTTP Strict Transport Security Header Testing Tool - Simple testing tool
- How to Enable HTTP Strict Transport Security (HSTS) in WordPress - Thomas Griffin
- A Detailed Guide To Add WordPress Security Headers - Patchstack - Where to add stuff, very detailed not just for WordPress.
- How to Add HTTP Security Headers in WordPress
- W3 Total Cache is adding HSTS Header
- HTTP Strict Transport Security policy header exists after uncheck the checkbox | WordPress.org
- Performance -> Browser Cache -> HTTP Strict Transport Security policy.
- MySQL
- Maximum Password length (32 characters)
- CWP MySQL password changing scripts
- They are exactly the same
- You can enter your own or select random see this example
[root@server ~]# sh /scripts/mysql_pwd_reset

Enter the new root password (at least 8 chars).
Or leave it empty if you would like to generate it.
Or press CTRL+C to abort and do not touch it

Enter MySQL root password:
- The random password is a 12 character long password using 'a-zA-Z0-9' if left to its own devices.
- Safer to use 'a-zA-Z0-9' to prevent script issues
- CWP Script
/usr/local/cwpsrv/htdocs/resources/scripts/mysql_pwd_reset
- Generic location
/scripts/mysql_pwd_reset
- How to reset MySQL root password - Control WebPanel Wiki - script by CWP to change password
- Process for changing MySQL root password on CentOS Web Panel from command line · GitHub - This utilises CWPs script but has more steps. I am not sure what the extra steps are for
- The MySQL Root password changing script is broken
- how to check my current MySQL root password
- Both passwords are updated here
/usr/local/cwpsrv/htdocs/resources/admin/include/db_conn.php
/root/.my.cnf
- To fix the issue after running the script, follow the instructions on this article using the new root password.
- Use MySQL to change password (not CWP script)
- How to reset MySQL root Password in CWP – OpenTechy.com
- How to Reset and Recover MySQL or MariaDB Root Password on SystemD Linux | Mystery Data - We will explain how to reset or recover forgottent MySQL or MariaDB root password in Linux.
- Use MySQL to generate random password
- MySQL Security â Random Password Generation | by Akademily | Medium - a very detailed article
- MySQL Security – Random Password Generation | dasini.net - Diary of a MySQL experts
- random password generator for mysql · GitHub - SQL code to generate random password
- MySQL Password Generator (not sure what this is generating)
- Forgotten MySQL root password
- from the SSH run this command which will reveal the password
grep password /root/.my.cnf
- This definately works
- How to check current MySQL Root Password on Centos 7 with SSH - Knowledgebase - HOSTNOX
- from the SSH run this command which will reveal the password
- Linux Hosts File
- Configure rkhunter (RooktKit Hunter)
- Config file /etc/rkhunter.conf
- Main Script /usr/bin/rkhunter
- Daily cronjob /etc/cron.daily/rkhunter
- Logs are at /var/log/rkhunter/
- Install and Config Tutorials
- Scan CentOS for Malware, Viruses, and Rootkits | interserver
- An adequately updated configuration file and the regularly updated system gives an extra layer of protection to your server. But it is essential to scan your system for malware, viruses, and rootkits frequently. Regular scanning helps to make sure that your server is clean from malware, virus, and rootkits. In this tutorial, we can check different tools to Scan CentOS Server for Malware, Viruses, and Rootkits.
- Simple instructions on how to install ClamAV, Rkhunter and Chkrootkit
- Rootkit Hunter - Documentation
- rkhunter (Root Kit Hunter) is a Unix-based tool that scans for rootkits, backdoors, and possible local exploits. It is a good part of a hardened web server, and is designed to notify the administrator quickly when something suspicious happens on the server's file system.
- Scan CentOS for Malware, Viruses, and Rootkits | interserver
Create a secondary user
This is a safety measure so if the root account gets comprimised you can still get in with this account.
- Open up the CWPpro terminal (or SSH)
- Run the command
adduser backupuser
- Now assign a password to the user by using the command
passwd backupuser
Notes
- Add User to CentOS
- How To List Users in CentOS 7
- How To List Users in CentOS 7 - Liquid Web
- To get a simple list of usernames, enter the command below. This will show only the usernames and is easy to read.
cut -d: -f1 /etc/passwd
- This article also goes into getent
- To get a simple list of usernames, enter the command below. This will show only the usernames and is easy to read.
- How to List Users in CentOS 7 - e Learning
- To Get Only the Usernames from passwd file Type. This will show a list of only usernames and is easy to read.
cat /etc/passwd | awk -F: '{print $1}' - Also, we can use getent command to get entries from the passwd file and display the user list in CentOS 7. This will show the username, home directory and some other stuff.
getent passwd
- To Get Only the Usernames from passwd file Type. This will show a list of only usernames and is easy to read.
- How To List Users in CentOS 7 - Liquid Web
- To Change a users password
- login to the terminal as root and run the following command for the appropriate user.
passwd <username>
- How to Reset User's password on CentOS/RHEL - root and non-root methods.
- login to the terminal as root and run the following command for the appropriate user.
Monitoring (Watchdog)
- Services Monitoring (for initd services)
- Services Monitor will automatically restart off-line services and send an email notification.
- Services Monitoring (systemd services) is required for this to work.
- Services Config --> ServicesMonitor (init)
- Enable: Yes
- Email notifications to: youradmin@mydomain.com
- Check every: 15 mins (some people might want this to be set to 5 mins, you can change it later if you want)
- network / Exit status: 0 :: I dont know what this is so I will leave it unticked.
- Services Monitoring (for systemd services)
- Services Monitor will automatically restart off-line services and send an email notification.
- This is good becasue failed services will get restarted automatically.
- Services Config --> ServicesMonitor (systemd)
- Enable: Yes
- Email notifications to: youradmin@mydomain.com
- Just use the list below or your prefered selection:
- amavisd.service (If you enable the option AntiSpam/AntiVirus in Postfix, this setting is irrelevant)
- clamd.service (If you enable the option AntiSpam/AntiVirus in Postfix, this setting is irrelevant)
- crond.service
- csf.service
- dovecot.service
- httpd.service
- lfd.service
- mariadb.service
- opendkim.service
- php-fpm74.service
- php-fpm80.service
- postfix.service
- pure-ftpd.service
- spamassassin.service (If you enable the option AntiSpam/AntiVirus in Postfix, this setting is irrelevant)
- sshd.service
- Monitoring via Monit
- Install Monit
- Services Config --> Monit Monitoring (cwppro) --> Install Monit
- Click `Start`
- Configure Monit notification email address target
- goto (Services Config --> Monit Monitoring (cwppro) --> Configuration Files --> Main Configuration)
- Change the following in the file that has just opened
set alert root@localhost

to

set alert youradmin@mydomain.com
- Click (Services Config --> Monit Monitoring (cwppro) --> Restart)
- Configuring the actions Monit does
- By default in (Services Config --> Monit Monitoring (cwppro) --> Managed Services) there are 3 tasks/actions configured.
- Process - php-fpm74, rocess
- php-fpm80, System
- server.mydomain.com
- This service can restart failed services and many other things so systemd might not be needed?
- I will ask for more information on how to configure monit.
- By default in (Services Config --> Monit Monitoring (cwppro) --> Managed Services) there are 3 tasks/actions configured.
- Notes
- CWP - Admin Panel: Monitoring the server services with Monit - YouTube
- Pro-active monitoring utility for unix systems.
- Monit is a utility for managing and monitoring, processes, files, directories and devices on a UNIX system. Monit conducts automatic maintenance and repair and can execute meaningful remedial actions in error situations.
- Monit - Official Website - Easy, proactive monitoring of processes, programs, files, directories, filesystems and hosts.
- Monit Manual - Official Documentation
- How to Install and Setup Monit (Linux Process and Services Monitoring) Program
- CWP: How to monitor CWP Server Services using Monit on CentOS 7.6
- CWP: How to Add Let's Encrypt SSL to Monit on CentOS 7.6
- Install Monit
- Netdata Service Monitor (5-20% CPU, RAM? not sure)
- (Graphs --> Netdata)
- Please note that Netdata is high resource demanding for low-performance servers, we recommend installing only on the servers with multiple CPUs and memory 4GB+
- Don't install this on low power servers. It is not a monster but does need feeding.
- Netadata does take a while to install.
- It is run outside of the cpanel so is like a seperate Website.
- Designed by system administrators, DevOps engineers, and developers to collect everything, help you visualize metrics, troubleshoot complex performance problems, and make data interoperable with the rest of your monitoring stack.
- Netdata’s distributed, real-time monitoring Agent collects thousands of metrics from systems, hardware, containers, and applications with zero configuration. It runs permanently on all your physical/virtual servers, containers, cloud deployments, and edge/IoT devices, and is perfectly safe to install on your systems mid-incident without any preparation.
- How to update Netdata In CWP Control WebPanel Centos/RHEL/Ubuntu/Debian | Mystery Data
- Not sure what most of the metrics are so I will probably uninstall this until I do.
- You can potentially measure these metrics from the Netdata Cloud which also seems to be free.
- If your server is not running this then potentially it might be more responsive.
Branding
- Upload a logo
- (User Accounts --> Features,Themes,Languages --> Branding)
- Browse and upload your logo.
- The logo will appear on dark and light backgrounds and this can be seen on the client login page (light background) and then once in the clients cpanel (dark background).
- The logo will be automatically renamed.
- Set Servers default website to a blank page
- server.mydomain.com actually has a website and the files are located at /usr/local/apache/htdocs/
- This default site is possibly used for other things on the server and might get refreshed during an update wiping any of your changes.
- The reason we do this is because we want to brand our default templates to look more professional and a few technical people will always go and have a look what is running.
- You can use a completely branded HTML page but I thing for the server a blank one is better and quicker to do.
- Backup the file /usr/local/apache/htdocs/index.html (rename it orig-index.html)
- Edit /usr/local/apache/htdocs/index.html and replace the content with the following code
<html><body bgcolor="#FFFFFF"></body></html>
- NB: The default apache web server IP is set here /usr/local/apache/conf/sharedip.conf
- Custom Account Templates
- Custom Account Templates - Control WebPanel Wiki
- Suspended Account Template - The default template is ok and can be left.
- New Account Template - I will replace this with a fully branded holding page.
- New Domain Template - I dont know what this is for.

I will replace this will a blank index.html
<html><body bgcolor="#FFFFFF"></body></html>
- New SubDomain Template

I will replace this will a blank index.html - A subdomain does not need a fully branded holding page.
<html><body bgcolor="#FFFFFF"></body></html>
Updates
- CWP
- CWP updates itself automatically but you can force this by clicking on the `CWP Update` button on the dashboard.
- Dependencies (Yum/rpm)
- I dont think these update automatically but you are warned stuff is out of date.
- Server Settings --> Yum Manager --> Updates List --> Update All
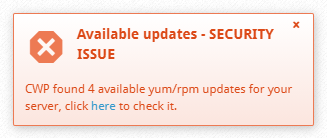
Configure CWP (Notifications and Alerts)
We need to configure CWP to send error notifications and unless you know where to click this can be hidden.
- Click on the Bell icon
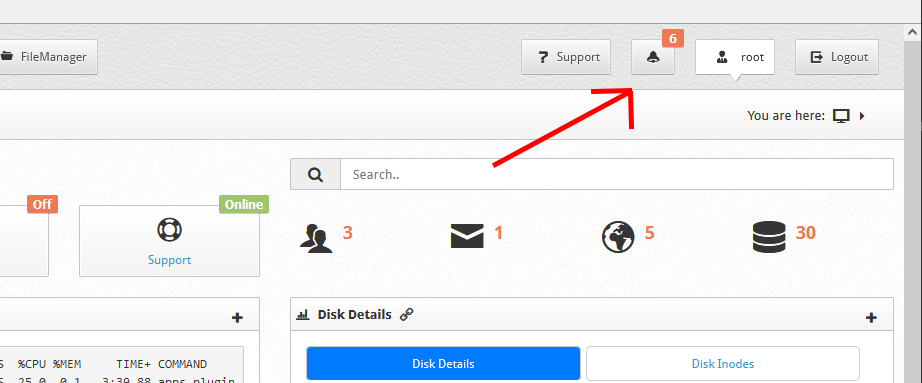
- This will now take you to the 'Notifications and Alerts' page with some messages, ignore these for now.
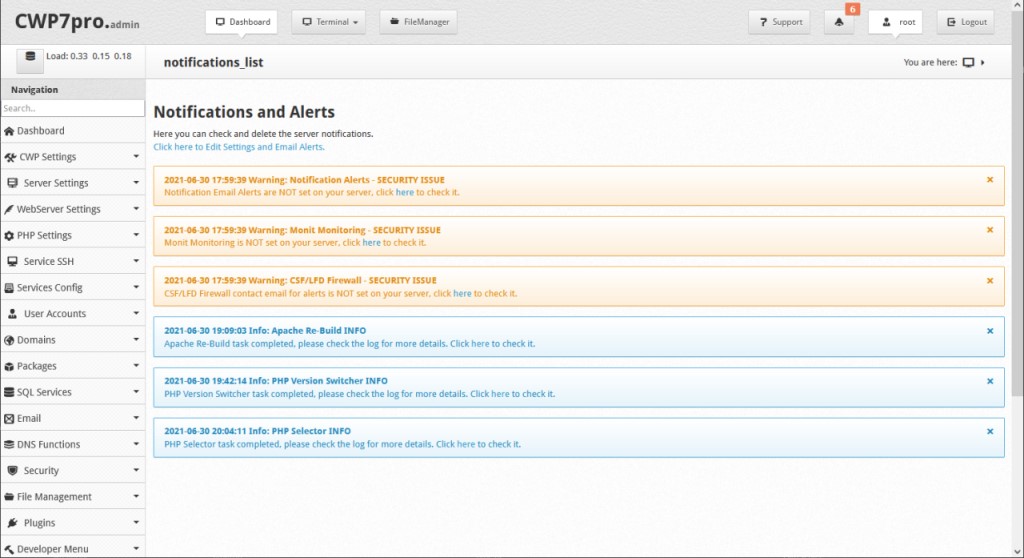
- Click on 'Click here to Edit Settings and Email Alerts.' (at the top of the messages.) to take you to the 'Notification Settings' page.
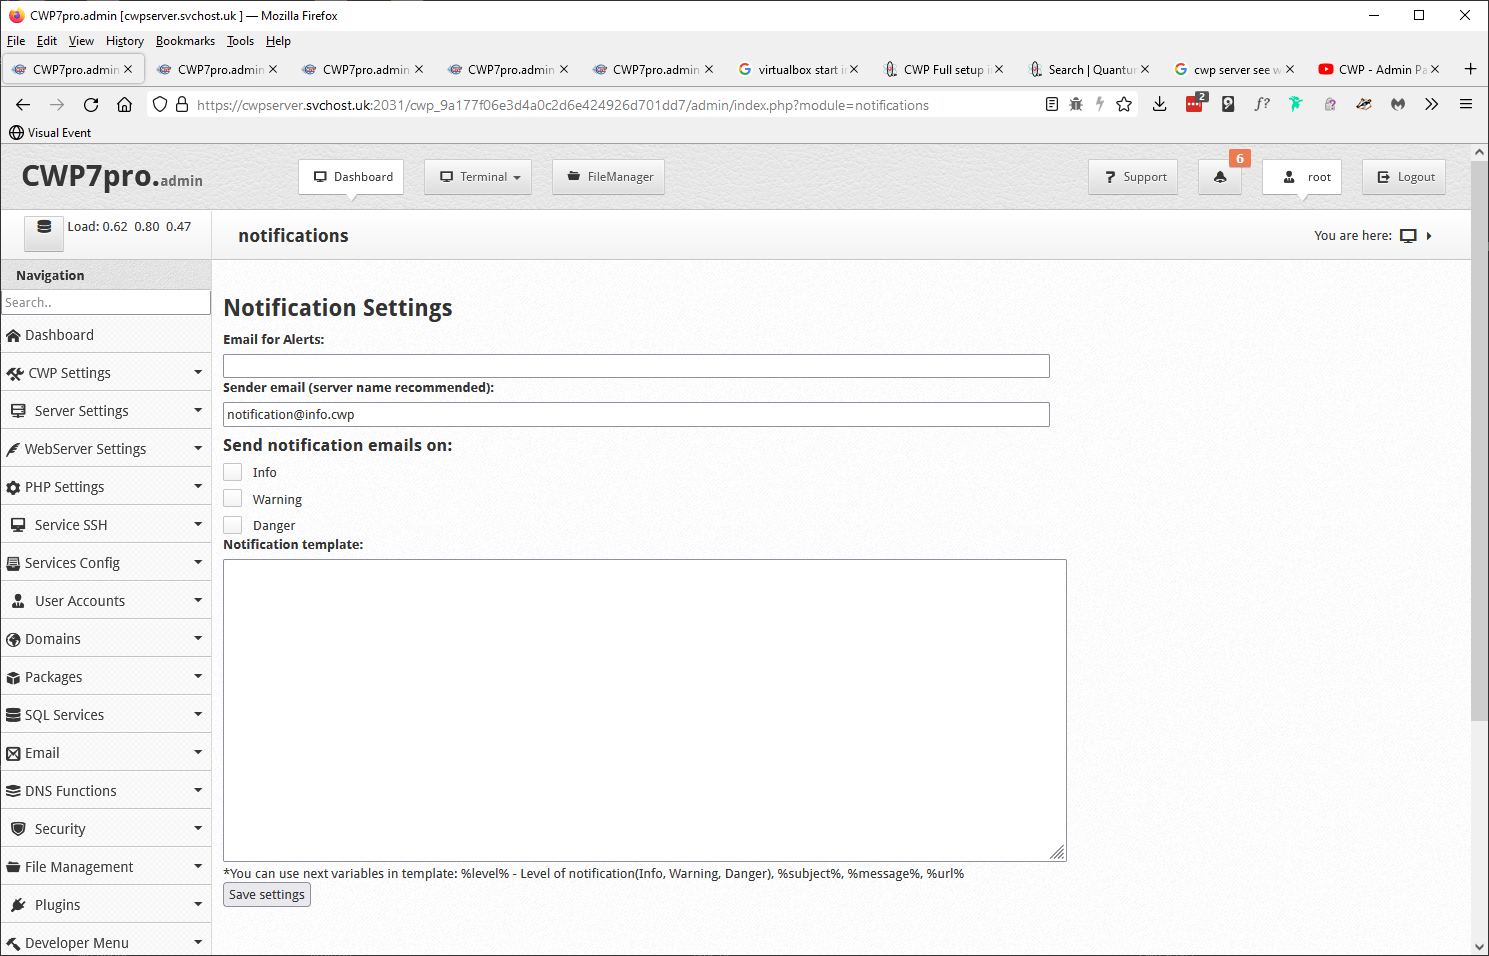
- Configure and save the following settings
- Email for Alerts = send@theemailhere.com
- Sender email (server name recommended) = notification@server.mydomain.com
- Info = Checked
- Warning = Checked
- Danger = Checked
- Notification Template =
You've received a new %level% notification: %subject%

Here are the details:

%message%

%url%
- Now we get to the messages that you saw just before.
- The blue ones are just notifcation messages pointing you to look at the logs and unless you really want to just click on the cross for each of them and dismiss the message.
- The orange messages
- are warnings and you should read each message, click on the link and correct the error as advised. Once you have corrected the error, dismiss the message.
- Depending on when you process these messages you might find that you have more messages to process or for each warning you have already corrected but just not yet dimissed the message which you can do now.
- The default orange error messages shown above should all of been corrected during this tutorial.
Client Backups
It should be noted that currently CWP does not manage backup retentions (i.e. it does not delete any backups so they will keep growing in number). See the notes below for solution.
- Disable the Old Backup system
- This is now a legacy script but is stable. It appears only to do User Accounts.
- CWP Settings --> Backup Confifguration --> Manage Backups --> Enable Backup: No
- Click `Save Changes`
- Delete files and folders in /backup
- Enable the new backup System (You can setup multiple backup jobs all with different options.)
- CWP Settings --> NEW Backup (beta)
- Start filling in the settings below to create new Backup job.
- User Accounts
- Packages: Select all of the packages (easier to manage)
- Features and settings
- Select all options
- Destination:
- I recommend you set up an external SFTP/FTP/SSH File server to deposit the backups on. It must be a seperate computer/NAS/Device otherwise it is pointless.
- FTP Server or SSH server
- Fill the details in of you remote server (this assumes you have built one, but is not covered here)
- Select Compress Backup
- Local file or directory
- Will only be good for restoring individual client data and not disaster recovery.
- Backup Destination: /newbackup/
- Temporary Directory: /home/tmp_bak/
- Backup Level: Compressed
- Frequency and Execution
- Execution Schedule: Daily Backup
- Frequency Details: Everyday
- Notifications: When you finish homework, To the Server Administrator
- These are my initial settings so you know that the server backup is working correctly. Reduce/change the frequency later if you wish.
- Set the backup schedule
- CWP Settings --> NEW Backup (beta) --> Scheduled --> Scheduling the Execution of your Backup --> Hour: 02, Minutes: 00
- Most of the servers crons will of finished by now and the traffic and load on the server will be low.
- Enable the backup jobs
- CWP Settings --> NEW Backup (beta) -->Backup Settings
- Click on the `Off` button to enable each backup job you want
Notes
- Old Backup System / Backup Configuration / Manage Backups
- it backs up all of the user account's public html and settings in one folder /backup/daily/[username]/
- All MySQL (not sure about MongoDB and PostgreSQL) are dumped to /backup/mysql/daily/
- These (I think) are replaced by the next run of the backup script.
- The backups are just of the user account Home directory and all MySQL databases on the server.
- Backing up Locally
- only good if a user breaks their site. if the server fails thene these local backusp will be usefless
- increased wear on your SSD
- fills up your HDD on the server quick
- You need to monitor it
- New Backup / New Backup (beta) Backup Tool
- Full Server Backup
- Occasionally you should shut the server down and do a full backup of the VM. You cannot just backup the server when it is on because of the live services within it might get corrupted (Virtual Machine Quintencence)
- I use Veeam Agent to do a full host server backup. All VM machines must be powered down when running this
- New and Old Backup system do not have backup retention management
- Deleting old backups automatically - Problem explained and discussed.
- Custom Backup Script - A CentOS forum thread where a user has submitted a script to manage retention of backups. (I have not implemented this currently)
- Backup and Restore | Control-WebPanel Documentation
- Create/restore backups in CentOS Web Panel - PlotHost - For end users
Cron / Anacron / Cronjobs
This is Linux's version of scheduled tasks (for us Windows users) and there are 2 pages that currently allow you to configure them throught the GUI. They both work on the same dataset which is confusing and hopefully these pages will get merged.
- (CWP Admin --> Server Settings --> Crontab for root)
- (CWP Admin --> Server Settings --> Crontab for users)
Check the time they run
I would have my crons run late at night probably after my backups. You check the time fit in with how you run your server and if you ar enot sure just leave themas they are for now.
You dont want you SSL certificates to be getting updated while your backups are running. You server wont die, but why cross the streams :) when you dont have too.
Silence is Golden (optional)
I prefer to make all of the cronjobs quite, they will email me if there is an issue but generally you dont need an email saying they have been run. To fix this you add > /dev/null at the end which sends the output to a null device where it dies.
/usr/local/cwp/php71/bin/php -d max_execution_time=18000 -q /usr/local/cwpsrv/htdocs/resources/admin/include/cron_autossl_all_domains.php

to

/usr/local/cwp/php71/bin/php -d max_execution_time=18000 -q /usr/local/cwpsrv/htdocs/resources/admin/include/cron_autossl_all_domains.php  > /dev/null
Do this for all of the cron jobs yopu want to be quiet. This will not them stop them sending emails if that is what the script does, just the notfication of them running.
Editing Default Cronjobs (in the GUI)
After setting up the server these should be the only cronjobs present. You will find that sometimes after an upgrade or installing a plugin you will get more cronjobs, sometimes duplicates and in which case you should remove the appropriate one.
Notes
- Cron
- The user created cron commands created in the GUI for root and users are located at /var/spool/cron/ but you should avoid editing them manually so the GUI can always parse them correctly for future editing.
- /etc/cron.d/
- System crons that are not configurable in the GUI but are run in the same fashion.
- How are files under /etc/cron.d used? - Unix & Linux Stack Exchange
- How to List, Display, & View all Current Cron Jobs in Linux
- Difference between cron, crontab, and cronjob? - Stack Overflow
- Cron Jobs and Crontab on Linux Explained – devconnected
- The 5 places cron jobs are saved | Cronitor
- >/dev/null 2>&1 explained
- Anacron
- CentOS / RHEL : anacron basics (What is anacron and how to configure it) – The Geek Diary
- Anacron is used to execute commands periodically, with a frequency specified in days. Unlike cron, it does not assume that the machine is running continuously. Hence, it can be used on machines that are not running 24 hours a day to control regular jobs as daily, weekly, and monthly jobs. Anacron tries to run the scheduled jobs as close as the system uptime permits.
- Cron Vs Anacron: How to Schedule Jobs Using Anacron on Linux
- The main config file is /etc/anacrontab
- Cron task are defined in these folders
- /etc/cron.hourly/
- /etc/cron.daily/
- /etc/cron.weekly/
- /etc/cron.monthly/
- CentOS / RHEL : anacron basics (What is anacron and how to configure it) – The Geek Diary
Backup Server Settings
CWP does not have a specific mechanisim for backing up the server settings so I will add what I find here and wil post a feature request with CWP.
Please note this section is not complete.
- Custom Account Templates
- /usr/local/cwpsrv/htdocs/resources/admin/tpl/
- Company Logo
- CWP Databases:
- (CWP Admin --> SQL Services --> phpMyAdmin)
- root_cpmigrations
- root_cwp databases
- DNS Zone Templates
- /usr/local/cwpsrv/htdocs/resources/conf/dns/bind/zones/default.tpl
- /usr/local/cwpsrv/htdocs/resources/conf/dns/bind/zones/custom.tpl
- /usr/local/cwpsrv/htdocs/resources/conf/dns/bind/zones/
- DNS Zone File Backups (these are created manually and are not the live ones)
- /usr/local/cwp/.conf/backups/var/named/
- php.ini (all versions)
- my.cnf
- Doevecot/Postfix/Spam assassin and other email stuff
- Crons (only custom crons)
- /var/spool/cron/
- /var/spool/cron/root These are in the CWP GUI.
- /var/spool/cron/[other users] ? Are they stored in the clients accounts when they backup? These are in the CWP GUI.
- /etc/crons.d/
- /etc/cron.hourly/
- /etc/cron.daily/
- /etc/cron.weekly/
- /etc/cron.monthly/
- CentOS Web Panel Mailserver Installer
- SSL Cert file location /etc/pki/tls/ private¦certs
Backup the Virtual Machine
This is an additional step I do and is one of the reasons I like windows.
- Get an external USB HDD (you can use a network location if you want)
- Shutdown all running VMs
- Install Veeam Agent for Microsoft Windows FREE
- Create/Edit a backup job (I will leave the exact options to you)
- Run the backup.
Notes
- This backup method will not work correctly if the VMs are running
- Only changes are backed up so the process can be quite fix after the initial run.
- If using a USN drive I highly recommend you look at the settings
- When backup target is connected
- Eject removable storage once backup is completed
- The Veeam software is great for doing a backup of your Windows computer.
Create a Test VM
Create another VM with the exact same settings except different name, different credentials, different NAT IP and use a Dynamic Disk as you dont need performance. You can then use this for testing and playing with settings that you dont understand (like me) without harming you main server.
- Power down your Production/Live CWP server VM.
- Do a Full Clone of the VM
- Clone the virtual machine in the Oracle VM VirtualBox - Appuals.com
- How to Create Clones and Snapshots of Virtual Machines in VirtualBox
- Use these settings
- Name: Test Server
- Path: leave as is
- Mac Address Policy: 'Generate new Mac addresses for all network adapters'
- Keep Disk Names: Unchecked
- Keep Hardware UUIDs: Unchecked
- Do Full Clone
- Boot the new development VM
- Change the IP address
- Follow the instructions above, search for 'Change Server NAT Local IP after the initial installation'
- If you dont this will cause conflicts with your real CWP server (see change NAT ip after ... above)
- Change the server's hostname
- (Server Settings --> Change Hostname) = testserver.mydomain.com
- Delete the old servers DNS zone which is probably = server.mydomain.com.db
- (DNS Functions --> List DNS Zones --> Delete Zone)
- Change the password of the root account
- (Server Settings --> Change Root Password)
- Change the MySQL root password
- Open up the CWPpro terminal and run the following command
sh /scripts/mysql_pwd_reset
- Open up the CWPpro terminal and run the following command
- Change any Emergency user accounts you have created.
- From the terminal as root, run the command for each account (these are not the website accounts)
passwd <username>
- From the terminal as root, run the command for each account (these are not the website accounts)
- Delete any client accounts in this development site as you dont need to be running these except on the live site.
- Except the leave the user account that has your domain 'mydomain.com' as you might need this for testing.
- Change name servers to 192.168.1.11 your NAT Local IP
- (DNS Functions --> Edit Nameservers IPs)
- Not sure this is right but the server cannot talk to the outside world anyway.
- Power down the testserver
- (optionaly) Convert the VDI to a Dynamic Disk to save space.
- I am running 2 x 480GB SSDs in RAID so I dont need 50GB of space taken out of use increasing my SSD wear rate by a test server.
- If you have a large traditional HDD or SSD this might not matter to you.
- How to Convert Between Fixed and Dynamic Disks in VirtualBox
- You can now power up both VMs up at the same time.
- In testing, Snapshots are your friend and prevent hours of work trying to fix something you broke. On a test server I would always use these to test changes but I am not sure if they are safe on a Production/Live server.
- Dynamic disks will continue to grow over time but can easily have the space recovered by running a VirtualBox command.
- Changing passwords so they dont match the old server is to prevent you from accidentally logging in to the wrong account on the wrong server.
- You might want to turn off all the admin emails off if you are leaving the test VM on for a while
Final Thoughts
The initial configuration is completeand I wish you well. As I learn more I will update this article. Keep reading to the bottom as you might find answer to common issues.
These instructions have taken me a long time to put together and I am not a Linux professional so pleases bear that in mind when reading this. If you notice any issues or mistakes please let me know and at some point I will tidy it up.
Other Configurations
These settings, configurations and notes have not made it into the main tutorial but are worth a read.
Things not installed or started
- Team Speak 3 Manager
- It is no longer supported.
- It is removed from the menu system.
- NodeJs
- An open-source, cross-platform, back-end JavaScript runtime environment that runs on the V8 engine and executes JavaScript code outside a web browser
- WebServer Settings --> Node.js Manager
- Apache Tomcat
- A free and open-source implementation of the Java Servlet, JavaServer Pages, Java Expression Language and WebSocket technologies. Tomcat provides a "pure Java" HTTP web server environment in which Java code can run.
- WebServer Settings --> Tomcat Manager
- Ioncube
- This is for the user account facing Apache, not CWP.
- PHP Settings --> PHP Addons --> Install IonCube Loader --> Install
- PHP PECL extensions
- PECL stands for PHP Extension Community Library, it has extensions written in C, that can be loaded into PHP to provide additional functionality.
- PHP Settings --> PHP PECL extensions
- FFMPEG
- For Video streaming websites. A free and open-source software project consisting of a large suite of libraries and programs for handling video, audio, and other multimedia files and streams.
- PHP Settings --> FFMPEG Installer
- PostgreSQL
- A free and open-source relational database management system emphasizing extensibility and SQL compliance.
- SQL Services --> PosgreSQL Installer
- MongoDB
- A source-available cross-platform document-oriented database program. Classified as a NoSQL database program, MongoDB uses JSON-like documents with optional schemas.
- SQL Services --> MongoDB Manager
- ShoutCast Manager
- By installing Shoutcast server you will create a linux shoutcast user which will be used to run shoutcast servers.
- Plugins --> ShoutCast Manager
- Site.pro
- A Paid for website builder.
- Plugins --> Site.pro
- Softaculous
- A commercial script library that automates the installation of commercial and open source web applications to a website.
- Script Installers --> Scripts Manager
- Sitepad
- A drag and drop website builder (from Softaculous)
- Script Installers --> Scripts Manager
- WHMCS Integration
- A leading web host billing automation platform powering tens of thousands of web hosting companies.
- whmcs module for cwp api - Control WebPanel Wiki - This has links to other compatible billing software.
- Billing --> WHMCS
User Email Accounts
When setting up an email account in an app uses these settings (Based/Tested in Outlook 2019)
- My outgoing server (SMTP) requires authentication: ticked
- Use same settings as my incoming mail server: selected
You should always use a secure port for your SMTP. Each port has different options it will accept
- 465 (Preferred)
- None = Does not work
- SSL/TLS = Works
- STARTTLS = Does not work
- Auto: Does not work
- 25, 587
- None = Works
- SSL/TLS = Does not work
- STARTTLS = Works
- Auto: Works
- 26
- Not enabled by default but should be the same as (25, 587)
cPanel Account Import / Migration
- cPanel Compatibility - Control WebPanel Wiki - This has links to everything you need to know from using the new CWP and migrastion cPanel accounts.
- cPanel Account import
- Single cPanel account import
- How To Migrate a User From cPanel To Centos Web Panel - Worth a look.
- Created a full backup on my cPanel server which I downloaded to my desktop.
- I uploaded the cPanel backup to my CWP server /home using SFTP over SSH
- User Accounts --> cPanel Account Restore
- Account Import: The file you just uploaded
- Associated Package: Choose something relevant
- Tick all boxes (except the fast import one if on a slow server)
- Click `Import`
- The password is maintained.
- Why my sites did not work after importing from a cPanel backup or I a warning, Forbidden: You don't have permission to access this resource.

- Cause(s)
- Mod Security need to be configured correctly.
- Name Servers are wrong
- DNS Zones need to be setup correctly.
- SSL Issue
- My demo sites on cPanel had the HSTS header added by the W3 Total Cache which is then cached by the browser.
- CWP did not automatically create the SSL certificates
- Google chrome will not allow you to load sites with mis-configured SSL certificates and there is no override option.
- php.ini and .user.ini issues
- CWP or something else got mixed up.
- Solution(s)
- Mod Security
- Check you are using Comodo rules (not OWASP)
- Check the Mod Security logs for blocks.
- Mod Security (per domain logs, replace DOMAIN.COM)
/usr/local/apache/domlogs/DOMAIN.COM.error.log
- I found the lack of a favicon.ico was causing things to get blocked.
- Mod Security (per domain logs, replace DOMAIN.COM)
- Name Servers
- Check they are pointed to server.mydomain.com (You don't have to do this if you change the A records properly)
- Check the DNS zones for the account
- DNS Functions --> List DNS Zones --> Check All Zones
- CWP wiil then show the relevant IP which the zone point to.
- The domains zones must be pointing at your server correctly.
- Manually install the SSL certificates from Letsencrypt
- WebServer Settings --> SSL Certificates
- Add CWP service subdomains onto the primary domain
- Do the other domains/subdomains
- WebServer Settings --> SSL Certificates
- Run the permissions tool:
- User Accounts --> Fix Permissions
- Select the imported cPanel account
- Tick the following
- Fix Permissions
- Internal Server Error
- Remove AddHandler
- Click `Fix Selected Issues`
- php.ini and .user.ini
- You might have erroneous php.ini and .user.ini files from the old server that have not been modified or deleted as needed that need deleting or editing in the user account's files.
- Mod Security
- Cause(s)
How to use the PHP selector
- add notes here
- Cane be done either in the user panel or admin
- if default is it using the seerver default with no-fpm,
- how do i remove the selection, just delete the htaccess
Notes
- PHP-FPM
- PHP-FPM selector changes it for the whole domain/subdomain
- PHP handler is not set in htaccess file (only for php-fpm and default cgi)
- PHP-CGI (standard)
- is on a per folder basis unless not specified and the server default version is used
- AddHandler (in htacces) is for PHP-CGI only
- default option is shown perhaps becasue I do not have a php-cgi verion installed and I have not forced php-fpm (see video)
- Default Version
- once you have selected a PHP version you cannot go back to server default
- If you have lots of clients I dont think forcing PHP-FPM is the best. Only choose this option if you are doing your own stuff. You can always manually PHP-FPM for specific user accounts.
- PHP Selector | Control-WebPanel Documentation - Instructions for users and their control panel.
- How many php versions I can run on the single server - Control WebPanel Wiki - The admin side of the selector. This includes setting options and rebuilding.
Configure Network Devices to be on the same Local Domain (OpenWRT) (optional)
I want all of my local devices to be registered on the same local domain (mydomain.com) as my CWP server (server.mydomain.com) so I can ping and connect to devices on my network using FQDN (eg: device.mydomain.com). This can make my network administration a lot easier and I can pretend that my network is a full domain of computers on the internet. This is not the same as Microsoft Active Directory / Windows Domain but will do for me.
My Choice
Because I am running a webserver which controls DNS zones it is best to leave it doing that role. This setup will prevent duplicate entries in the mydomain.com DNS zone and the OpenWRT hosts file.
- Change the Local domain to mydomain.com
- Leave Local server as /lan/ which allows OpenWRT to poll my mydomain.com DNS zone.
- I will add my public facing servers and devices into the mydomain.com DNS zone so they can be access via a FQDN both remotely and locally.
- For devices I need to access via a FQDN locally(private) I will use the Hostnames feature in OpenWRT.
Configure the Device Domain Suffix (Local domain)
I am running OpenWRT on my router and it currently adds the configured DNS suffix (.lan) on to the end of each registered device's hostname (device.lan). Device hostnames are automatically registered with DHCP in the Active DHCP Leases and can be manually added via Static Leases. Both these lists combine to make single list of FQDN that the router uses for routing traffic.
The instructions below will change the registered hostnames to belong to .mydomain.com giving the format device.mydomain.com when registered instead of device.lan
- Login to your OpenWRT router
- (Network --> DHCP and DNS --> General Settings --> Local domain) = mydomain.com
- Restart your router
Notes
- Local domain = suffix appended to DHCP names and hosts file entries
- default = lan
- This does not make any changes on the device such as the device's name and is purely for OpenWRT and it's routing.
- When you ping a device by FQDN you request the IP of the FQDN from the configured DNS server, in this case OpenWRT, which will send back the registred IP address of the device just as if you were looking up www.bbc.co.uk and doing an external DNS lookup to a remote DNS server.
- You can use Static Leases to manually assign a DHCP address but for what I am doing, this is not needed and I prefer all of my static devices to have an IP so when they are away from my network I can still access them over temporary networks etc.. for diagnostics and other such things.
- You will notice in the lists only the hostname is shown which is normal.
- A fully qualified domain name (FQDN) is the complete domain name for a specific computer, or host, on the internet. The FQDN consists of two parts: the hostname and the domain name. For example, an FQDN for a server might be device.mydomain.com , The hostname is device and the host is located within the domain mydomain.com.
- When a device does a DHCP request it only sends it's hostname unless the FDQN option is specified which is probably never going to be enabled in a default setup.
- Difference between Hostnames and DHCP hostnames - Installing and Using OpenWrt - OpenWrt Forum
- IPv4 and IPv6 Advanced DNS Tab - This explains all the options in the Windows Network Adapter IPv4 and IPv6 Advanced DNS Tab.
- Don't put local IP address in you mydomain.com DNS Zone as this could be a security risk.
Devices with Static IPs need adding to OpenWRT hosts
OpenWRT has no information or interaction with devices that have static IP addresses because it simple does not know about them.
To remedy this there are 2 ways of doing this:
Hostnames (preferred)
- Goto (Network --> Hostnames)
- Add a Hostname
- Hostname = device (hostname) or device.mydomain.com (FQDN)
- If there is not domain, only a hostname then OpenWRT will append the DNS Suffix .mydomain.com
- IP address = 192.168.1.x (Local IP address)
- You can also use public IP addresses and they will also route as appropriate.
- If you pick your WAN IP (and assuming the forwarding rules are inplace as shown above) then that traffic will be subject to NAT lookback and be forwarded to your webserver.
- OpenWRT will not append a DNS Suffix to these entries.
- Hostnames are stored in /etc/config/dhcp and look like:
config domain
	option name 'device'
	option ip '192.168.1.99'
orconfig domain option name 'device.mydomain.com' option ip '192.168.1.99'
- Hostname = device (hostname) or device.mydomain.com (FQDN)
Static Leases
Static Leases are the ability to use the DHCP system to give the same IP address to the same machine which effectively makes them statics with less configuration at the clients end and more control by the admin, however it does requires some setup work.
- Goto (Network --> DHCP and DNS --> Static Leases)
- Click Add
- Fill in these fields only

- Hostname = device
- IPv4 = 192.168.1.x
- We only use the devices hostname (device) not it's FQDN (device.mydomain.com) because OpenWRT will append the domain suffix for us.
Some of you will be saying how does OpenWRT know which device to assign the IP too because I have not set it, well it doesn't. What I have here is just created a host entry that will allow the correct routing but the IP will never be dished out over DHCP. This is more of a hack I discovered. You can use the Static Lease as it was intended by just adding in the following further information (assuming IPv4 only) into the entry.
- MAC-Address
- Lease time
Route all traffic locally (Local server) (optional)
This option tells OpenWRT that hostnames belonging to this domain (.lan) are never forwarded and are resolved from DHCP or hosts files only. So this means unless your device is on DHCP, has a Static Lease configured or an entry in OpenWRT Hostnames then no traffic will be routed to it because OpenWRT will not do any external DNS requests and when I say external I mean outside of the router itself, it will purley use these 3 sources for lookups.
The purpose of this option is to prevent unnecessary traffic going upstream and reduce the load on your infrastructure.
These instructions will change the Local server from .lan to .mydomain.com
- (Network --> DHCP and DNS --> General Settings --> Local server) = /mydomain.com/
- Restart your router
Notes
- Local domain = Names matching this domain are never forwarded and are resolved from DHCP or hosts files only.
- default = /lan/
- If server.mydomain.com stops resolving after changing this option, it is probably because you only had the device/server configured in the mydomain.com DNS zone which is no longer queried when the domain DNS lookup matches mydomain.com
- Add a static Lease for server.mydomain.com
- Revert the option back to /lan/ so your domain traffic it handled by NAT Loopback which is part of the CWP (All Ports / LAN Only) rule.
- If you are running your own webserver that handles the .mydomain.com DNS zone such as CWP server then you should not use this feature. If you do use this you will have to manually enter all hostnames found in your CWP .mydomain.com DNS zone (mail.mydomain.com/cpanel.mydomain.com/www.mydomain.com/etc...) into the OpenWRT Hostnames which is duplication and extra hassle. The NAT Loopback rules employed earlier on will stop the traffic going upstream anyway (it will go into the WAN zone and straight back for you nerds out there).
Change a Windows PC's 'Primary DNS Suffix' (optional)
Do not do this on laptops etc.. if you are going to move above between sites.
As mention above OpenWRT will add DNS suffixes on to the DNS Hostnames to give a FQDN but will not change the computers actual name.
What we are going to do here is a add a Primary Domain Suffix to our Windows PC but this is also not changing the PCs name. Windows has a normal computer name (NetBIOS) that we can add a domain suffix onto it. If you want to change the computer name on your Windows PC it is just as normal (not discussed here)
I cannot think of a reason why I would want to do this on a Windows PC except so SSL/TLS certificates could be issued and then when you use Remote Desktop the computer names match. However for reference I am going to add the instructions here just incase I change my mind.
- On your Windows PC goto (Control Panel --> System --> Advanced System Settings --> Computer Name --> Change --> More)
- 'Primary DNS suffix of this computer' = mydomain.com
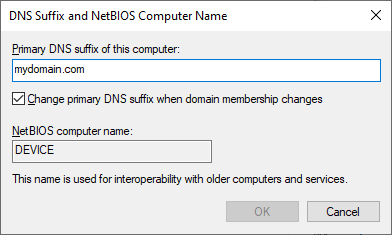
- 'Change primary DNS suffix when domain membership changes' - This is already checked and I think it is more to do with Active Directory so can be left as is.
- Adding a suffix here does not break DHCP registration. OpenWRT still sees this device as device.mydomain.com because only the hostname is sent with the DHCP request.
- If you choose a different suffix on the Windows PC to that of your OpenWRT/CWP domain (mydomain.com) then the Windows PC will seen 2 FQDN. One defined by OpenWRT and one defined manually on th Windows PC, so my advice is don't bother doing this, keep the domains the same.
- Windows original just ran on NETBIOS and so a lot of its stuff is based around that. This is why you have to add 'Primary DNS Suffix' in this way rather than just changing the computer name whereas as in linux your computer name can just be a hostname or a FQDN.
Change Linux computer name (optional)
Do not do this on laptops etc.. if you are going to move above between sites.
I am not an expert on linux but you when you sent the computers name you can either set device or device.mydomain.com and I assume that it will only send the host name in a DHCP request as Windows does above. So you again have the option to set just a hostname or a full FQDN.
Same FQDN for Local and Internet Access (optional)
One of the major benefits of this is that I can use the same FQDN to connect to my devices on my local network as I can when I am in the office at work. Great for CCTV and media servers.
Do NOT add non-public devices to DNS zone for security. Only use Static Leases.
You need to do the following for this to work:
- Add an A record in to your domain (mydomain.com) pointing to your public IP (13.13.13.13).
- Configure port forwarding to send the traffic from the WAN to the selected local device's IP address (192.168.1.x).
Default URLs
- CWP Admin Panel Link (by hostname)
- CWP Admin Panel Link: http://server.mydomain.com:2030 (redirects to https)
- CWP Admin Panel Link: http://server.mydomain.com:2086 (redirects to https)
- CWP Admin Panel SSL Link: https://server.mydomain.com:2031
- CWP Admin Panel SSL Link: https://server.mydomain.com:2087
- CWP User Panel Link (by hostname)
- CWP User Panel Link: http://server.mydomain.com:2082 (redirects to https)
- CWP User Panel SSL Link: https://server.mydomain.com:2083
- http://cpanel.test.acc/
- http://test.acc/cwp (redirects to https IP)
- http://test.acc/cpanel (redirects to https IP)
- CWP User Webmail (by hostname)
Useful Notes
- CWP Blogs
- CWP Archives | Mystery Data - This blog is by one of the developers of CWP. It will have cutting edge articles.
- CentOS Web Panel Blog Category - PlotHost - Blog post about CWP. Some useful information.
- CentOS web panel Blog Category | bobcares - Blog posts on CWP
- CentOS Web Panel Tutorials | SaadHost - Really good articles.
- CWP Archives » TutoBlog - Not many articles.
- The Curious Website Designer - Really well written articles. Not all CWP but very useful
- Official Sites
- Control-WebPanel [CWP] – Free Linux Web Hosting Control Panel
- Centos-webpanel Facebook page - Product updates and news
- The CentOS Project - CentOS Official Website
- Control Web Panel Forum - Official CWP forum
- Control-WebPanel Documentation - This is the new wiki
- Control WebPanel Wiki - Old Wiki
- centos-webpanel - YouTube - Official CWP Channel
- Demo – Control-WebPanel [CWP] - Offical Demos from CWP
- Changelog – Control-WebPanel [CWP] (find your version at the bottom of the Dashboard)
- CWP License Server IP: 37.187.72.216
- Log Locations Service log paths - Control WebPanel Wiki
- Configuration files - Control WebPanel Wiki
- WebDAV on CWP
- This is not a native CWP plugin
- How to Set up WebDAV with Apache on CentOS 7 | IONOS DevOps Central
- Enable WebDAV Per User Basis - Control WebPanel Wiki
- NextCloud on CWP
- This is not a native CWP plugin
- Nextcloud 16 installation on CWP7 Pro | Unixish.org
- SSH with PuTTY
- Remote control / RDP / Remtoe Desktop / VRDP
- Virtualbox as a Remote Desktop Server - An excellent article and should be a first read.
- Chapter 7. Remote Virtual Machines
- Find Text in Files on Linux (using the GREP Command)
- GREP is a text search only command. it will not write anything to files. You can pipe it's output to file if you want. It is primarily uses to find single libes of text as most Linux settings and log files all work on this basis.
- What does the 'grep' command do? - Ask Ubuntu
- I would like to learn how to use it so I can start to use the terminal more.
- print lines matching a pattern
- This has a dump of the commands switches
- Grep Command in Linux/UNIX | DigitalOcean
- This is a great tutorial and is easy to follow
- Grep command can be used to find or search a regular expression or a string in a text file. To demonstrate this, let’s create a text file welcome.txt and add some content as shown.
- Find Text in Files on Linux using grep | devconnected
- Finding a File Containing a Particular Text String In Linux Server - nixCraft
- How to search entire Linux server files containing specific text? - Stack Overflow
- The CWP admin control panel login is persistent across server reboots.
- Cannot connect to CWP with FTP even though I did a couple of hours ago
- This is caused by a stale session which usual;ly happens if you just let your FTP connection timeoue at your end by leaving your FTP client open.
- To fix this you need to delete this session to allow reconnection.
- Goto (CWP Admin --> File Management --> FTP Manager v2)
- Delete the relevant session
- Correct FTP connection settings (Just so you know they are right)
- Connection type: FTP using explicit SSL (Auth TLS) - TLSv1.2
- Address: qwdemos.com
- Port: 21
- Username: yourusername
- Password: xxxxxx
- In the client panel when you go to the backup page there are no options
- This is because it has not been enabled in the features list for the group this client belongs to.
- Goto (CWP Admin --> User Accounts --> Features,Themes,Languages --> Feature Manager)
- Select Internal/Client (as required)
- Mark 'Backup Manager', 'Automatic Backup' (i did thiese just incase i need to update my instructions). 'Account backups' should already be ticked.
- If it was working before an update and then not, I think this is becasue the permissions control has been updated in CWP
- This is because it has not been enabled in the features list for the group this client belongs to.
- Service States
- Services states are persistent through server reboots.
- They can be turned on by the systemd monitoring service
- Using PHP-FPM probably uses more RAM that normal.
- CWP Server DNS
- File Backups
- Files that are created when you click the 'Create File Backup' button in some config pages
- are stored at /usr/local/cwp/.conf/backups/file_editor_backups/
- High RAM usage
- read this to explain why it is not always true: Help! Linux ate my RAM!
- free -m in the terminal willalso show you real RAM usage.
- On the CWP dashboard the Memory RAM (NO Cache): as the indicator you should look at for real RAM usage.
- read this to explain why it is not always true: Help! Linux ate my RAM!
- Apache wont start
- This was caused by me kiling my VM during CWP boot up.
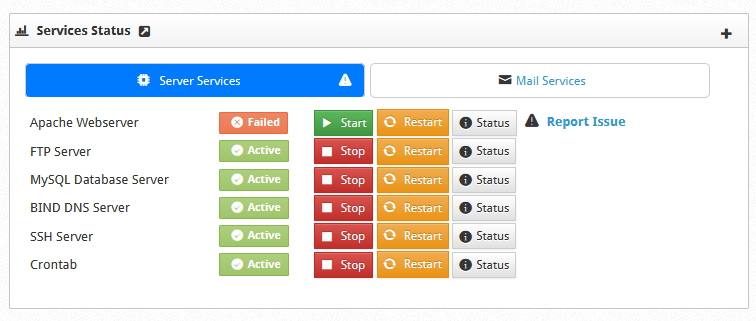
- When you try and start the Apache service from the panel you get this error
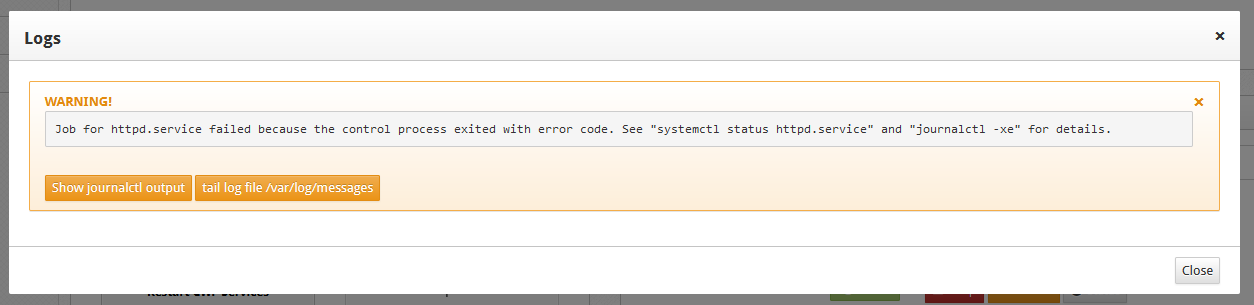
- Click on the 'Show journalctl output' button and read the log and look at the end of the log you will see something similiar to
Dec 25 11:10:05 cwpserver systemd: Unit httpd.service cannot be reloaded because it is inactive.
Dec 25 11:12:20 cwpserver systemd: Unit httpd.service cannot be reloaded because it is inactive.
Dec 25 11:13:23 cwpserver systemd: Starting Web server Apache...
Dec 25 11:13:23 cwpserver apachectl: (20014)Internal error (specific information not available): AH00058: Error retrieving pid file logs/httpd.pid
Dec 25 11:13:23 cwpserver apachectl: AH00059: Remove it before continuing if it is corrupted.
Dec 25 11:13:23 cwpserver systemd: httpd.service: control process exited, code=exited status=1
Dec 25 11:13:23 cwpserver systemd: Failed to start Web server Apache.
Dec 25 11:13:23 cwpserver systemd: Unit httpd.service entered failed state.
Dec 25 11:13:23 cwpserver systemd: httpd.service failed.
- From the log above and my research
- Delete or rrname : /usr/local/apache/logs/httpd.pid
- you will probably find it is zero-legth but is should have a PID number in it.
- Apache error "Error retrieving pid file logs/httpd.pid" - Raafat Mohamed
- Internal error: Error retrieving pid file logs/httpd.pid | Tricks For Linux
- Is the shutdown command graceful?
- This was caused by me kiling my VM during CWP boot up.
- CWPpro Terminal not working
- Does "CWPpro Terminal" work for you? | CWP Forum
- "For CWP pro terminal you need to have valid Hostname with A record DNS and ssl."
- "For the use of the terminal you need to have a valid SSL Hostname for the secure connection."
- Rsync
- Migrate OS
- General
- How to migrate from CentOS 8 to AlmaLinux (conversion) - nixCraft - Learn how to migrate from CentOS 8 existing VM/bare metal installation to AlmaLinux 8 to get updates & keep using community enterprise Linux.
- How to migrate from CentOS 8 to CentOS stream conversion - nixCraft - Describes how to migrate from CentOS 8 existing installation to CentOS Stream to get updates and keep using community enterprise Linux.
- How to migrate from CentOS 8 to Rocky Linux (conversion) - nixCraft - Describes how to migrate from CentOS 8 existing installation to Rocky Linux 8 to get updates and keep using community enterprise Linux.
- ELevate
- ELevate Quickstart Guide | AlmaLinux Wiki - This guide contains steps on how to upgrade your RHEL-based operating system to the next major version. There is also a walkthrough video.
- AlmaLinux ELevate - ELevate your distro to 8.x - YouTube | Learn Linux TV - AlmaLinux ELevate is a brand-new tool that makes it easy to move from RHEL 7.x and its derivatives, to any version 8.x related distribution of your choice (AlmaLinux, CentOS, Rocky Linux and etc). This tool is being developed with the open-source mindset at its core, and in this video, Jay chats with Jack from AlmaLinux about this awesome project.
- migrate2rocky - Conversion Script
- Migrating To Rocky Linux - Documentation - In this guide, you will learn how to convert all the above OSes to fully functional Rocky Linux installs. This is probably one of the most roundabout ways of installing Rocky Linux, but it will come in handy for people in a variety of situations.
- migrate2rocky | GitHub - Contribute to rocky-linux/rocky-tools development by creating an account on GitHub.
- Running this script will convert an existing CentOS 8 system to Rocky Linux 8.
- General
Questions/Bugs/Features for the Forum
Links
- CentOS-WebPanel Bugs - Bug Reports
- Suggestions - Feature requests
Questions
- what is the CWP subdomain for? is this a fault?
- WebServerSettings --> Apache Redirects
- Redirects info: http://any-domain.com/cwp will be redirected to the CWP control panel login.
- The CWP forum does not have a HTTPS cert
- Do other subdomains (not mail, cpanel, mail, webmail)?
- centos cwp shows a swap file monitor but this system does not have one. do i need one or is it all in ram becasue it shows 4GB?
- how do i change the PHP version on mass for all user accounts?
- how can i edit eveyones zone template to make changes (GREP ?)
- a script to edit everyones htaccess file (GREP ?)
- did i need to create the user 'user' when setting up CentOS, should I have just left root? delete the shoulders account if not needed.
- When you click on CWPPro terminal for the first time it installs the terminal. I dont know what the difference is between the terminals. the pro one might have Root privilages and be just like a normal terminal.
I need a description - is cgroups still faulty? (asked here Cgroup In Package Creation Question)
- does port 26 need to be opend up. = nope
- how to force https on cpanel and webmail
- Enforce SSL/HTPPS/TLS for all postfix connections, how to?
- Enforce SSL/HTPPS/TLS for all Dovecot connections, how to?
- in the CentOS install wizard, should i keep KDUMP enabled?
- how do i add aditional SANS to my sub domains SSL?
- how do i change my primary domain on a client account?
- how do i update centOS? is this needed?
- is cwp multicore aware? - i think i looked into this and it is because of centOS
- how do i configure amavis + clamav? where are the configuration files, they are not accessible via the GUI.
- my CWP server has many different boot options in the boot loader when it turns on. they seem to be different versions.
- how do i get rid of them?
- is this a bug? in CWP or CentOS?
- my.cnf is empty? is this a bug?
- ClamnAV
- Does the ClamAV Database get updated automatically? = yes via anacron
- Email --> MailServer Manager --> Update ClamAV Database
- CLAM-AV cheat sheet: How to Install, update database, scan and test for infected file in Ubuntu - YouTube
- How to Install ClamAV on CentOS 7
- SELinux
- (CWP Settings --> SELinux)
- What is SELinux?
- is it for normal users or is the usage scope very slim?
- why is it not on by deefault? is this becasue it has to learn stuff first?
- What is SELinux? | RedHat
- Security-Enhanced Linux - Wikipedia
- Monit
- I need more information on what tasks/actions should be installed and what they do.
- Is there a list of what these scripts do somewhere? documentation?
- i need to update my notes when i find out more info
- feature: in the configuration files the ability to read the script files that have not been installed. i appreciate they have to be readonly until installed
- the configuration files included with cwp should have some documentation about what they do
- recommendations on what configuration files to install
- InnoDB/Database
- Do I have to run Mysql Tuner to get best settings? What is this.
- Configure InnoDB as default engine but my.cnf is empty - My InnoDB question with blank my.cnf
- Cannot enforce HTTPS on cpanel.mydomain.com - this should be done in the GUI
- i dont always have to put in the root/password in the CWPPro terminal. Where is it storing the root info? is this safe? this should not be persistent between server reboots or Browser sessions. Can this be clarified as safe or bug?
- Cron
- Are CRONs stored in the clients accounts when they backup?
- Where is the cron for the freshclam update? probably in anacron
- Why are the autossl crons in the GUI and not in a file in /etc/cron.d/ do you want these to be user editable?
- freshclam is still updating when clamav is disabled, these should be linked?
- Duplicate CWP root CRONs - My quetion abput the duplicate crons I have
- Where dos the (MySQL Manager --> Settings) store these configurations because it is not in the my.cnf file? Are they persistent or just stored in RAM?
Feature Requests - CWP Suggestions (Forum)
- SPF and DMARC should have an edit tool (feature request)
- MySQL terminal
- How to Connect to a Remote MySQL Server Using SSH - excellent article for both windows and Linux.
- easier way to reset MySQL root password becasue the default password is too short.
- is this doen by script?
- have monday as the first day in the week
- be able to add a custom name to backup jobs (in the new manager)
- in the file manager I would like to freetype the file location to speed navigation up
- currently the default setting for letsencrypt renewal time is 28 days, letsecyrpt recommends 60 days
- filemanager on copy files, folders and files should have separate icons or a way of knowing what the asset is, currently you cannot tell the difference between files and folders
- filemanager - no refresh button - useful when working with ftp aswell
- download account backups, i should be able to download the backup by clicking the link like cpanel.
- easy button to backup CWP server settings
- Cannot remove ClamAV, Amavis & Spamassassin individually. should be able to select these seperately
- ClamAV is used as the account sanner in the 'sEcurity Center'
- ClamAV does the mail and the home directory. However if you uninstall it in the postfix rebuild then ClamAV is not available to scan client home directories.
- ClamAV: this should not be an option in Postfix becasue it scans homedir aswell
- the virus scan page is still avaiable in the client panel but just causes an error
- How to free space like uninstall ClamAV, AMaViS, etc.
- also you can check more detailed your disk usage by using cwp disk_details module, it has per folder usage.
IP:2030/admin/index.php?module=disk_details
- also you can check more detailed your disk usage by using cwp disk_details module, it has per folder usage.
- 'ClamAV, Amavis & Spamassassin, Requires 2Gb+ RAM'
- It installs ClamAV and AmaVis if not present and will possibly update them aswell.
- This option stops/starts the related servicesthem on install/uninstall
- I am sure does some PostFix configurations.
- This script does not uninstall ClamAV or Amavis.
- If this option is enabled then the services amavisd.service, clamd.service, spamassassin.service are started when the server boots and if you manually stop them they will restart irrespective of their configuration in systemd. So they must be defined dependicies of some process this option invokes.
- CWP changelog feed in the cwp control panel
- All Admin pages should have a breadcrumb. This allows people to use shortcuts and newbies to find the same area at a later date easier.
- Cannot edit root crons only add and delete via the GUI. Editing these should be allowed
- RAM usage does not update like the cpu and diskl i/o only on a page refesh.
- need a nice utility to look at memory usage easily
- i have seen TOP
- i.e AmaVis is using 200mb
- ClamAV is using 500MB
- an indicator after the reboot button has bee pressed so you know you have clicked it. like cpanel with a spinning thing and then when the server has reloaded the page can refresh seeing as CWP Admin session are persistent through reboots.
- No easy backup method to backup the server settings i.e:
- Skeleton Templates: /usr/local/cwpsrv/htdocs/resources/admin/tpl/
- CWP Databases:
- (CWP Admin --> SQL Services --> phpMyAdmin)
- root_cpmigrations
- root_cwp databases
- This should be added to the Backups 2
- account backups should have the account name in it like cpanel
- cpanel database backups, remove the word dump from the file name
- root_cpmigrations and root_cwp databases are using latin1_swedish_ci for their collations, this should be changed to utf8_unicode_ci or even better utf8mb4_unicode_ci.
- My question on how to backup: No way to backup CWP settings?
- CWP should have the ability to back the server settings up using the backup jobs.
- enable HTTP2 by default
- enable TLSv13 by default
- Logo preview should show both light and dark previews for contect
- (User Accounts --> Features,Themes,Languages --> Branding)
- Remove 'cwp' subdomain from the Default DNS Zone (section above)
- This has to be done here so all of your new accounts dont get this vestigial subdomain.
- GreyListing feature, where is it? is it part of Postfix?
- Ability to edit default DNS Zone templates from the GUI
- /usr/local/cwpsrv/htdocs/resources/conf/dns/bind/zones/default.tpl
- /usr/local/cwpsrv/htdocs/resources/conf/dns/bind/zones/custom.tpl
- On the article Custom Account Templates - Control WebPanel Wiki
- the templates need explaining when they will be called on i.e. when you create new account
- At the top left what is the load monitoring becasue there is no units and why can it be toggled?
- When you change the hostname of the server CWP should handle the deleting of the old hostname in all appropriate records (DKIM, DNS Zones) and give a summary of the changes plud do backups of these file where needed.
- Add a link on all pages to a proper wiki page. these could all be place holders for now
- put the server name / domain name in big letters at the top of the dashboard so I know which server i am working on.
- Random password generator passwords are too short and dont have any special characters in them. A way to set the parameters of the generator would be great.
Bugs - CWP Bug Tracking / CentOS-WebPanel Bugs (Forum, old?)
- They says setup port26 but it is not open by default in the firewall - add this when i do email server
- AutoSSL is not renewing CWP subdomain, bug?
- once you have selected a PHP version you cannot go back to server default?
- the menu collapse is inconsitent - when you click on some items the whole menu collapses which is annoying
- The MySQL Root password changing script is broken
- Bug: New account create and Rebuild Zone use different templates
- New Account Zone(test.acc.db)
; Generated by CWP
; Zone file for test.acc
$TTL 14400
@    86400        IN      SOA     ns1.mydomain.com. postmaster.test.acc. (
				2021070154 ; serial, todays date+todays
				3600            ; refresh, seconds
				7200            ; retry, seconds
				1209600         ; expire, seconds
				86400 )         ; minimum, seconds

@	86400	IN	NS		ns1.mydomain.com.
@	86400	IN	NS		ns2.mydomain.com.
@ IN A 13.13.13.13
localhost.test.acc. IN A 127.0.0.1
@ IN MX 0 test.acc.
mail 14400 IN CNAME test.acc.
smtp 14400 IN CNAME test.acc.
pop  14400 IN CNAME test.acc.
pop3 14400 IN CNAME test.acc.
imap 14400 IN CNAME test.acc.
webmail 14400 IN A 13.13.13.13
cpanel 14400 IN A 13.13.13.13
cwp 14400 IN A 13.13.13.13
www 14400 IN CNAME test.acc.
ftp 14400 IN CNAME test.acc.
_dmarc	14400	IN	TXT	"v=DMARC1; p=none"
@	14400	IN	TXT	"v=spf1 +a +mx +ip4:13.13.13.13 -all"
default._domainkey 14400 IN TXT "v=DKIM1; k=rsa; p=MIGfMA0GCSqGSIb3DQEBAQUAA4GNADCBiQKBgQCviXG9SqprOjF3qvN+Xo2KpXp54Fgx6CX42wLxxxxxxxxxxxxxxxxxxxxxxxxxxxxxxxxxxxxxxxxxxxxxxxxxxxxxxxxxxxxxxxxxxxxxxxxxxxxxxxxxxxxxxxxxxxxxxxxxxxxxxxxxxxxxxxxxxxxxxxxxxxxxxxxxxxxxxxxxxxxx"
- Rebuilt Account Zone (test.acc.db)
; Generated by CWP
; Zone file for test.acc
$TTL 14400
test.acc.      86400        IN      SOA     ns1.mydomain.com. noreply.quantumwarp.com. (
				2013071600      ; serial, todays date+todays
				86400           ; refresh, seconds
				7200            ; retry, seconds
				3600000         ; expire, seconds
				86400 )         ; minimum, seconds

test.acc. 86400 IN NS ns1.mydomain.com.
test.acc. 86400 IN NS ns2.mydomain.com.

test.acc. IN A 13.13.13.13

localhost.test.acc. IN A 127.0.0.1

test.acc. IN MX 0 test.acc.

mail IN CNAME test.acc.
www IN CNAME test.acc.
ftp IN CNAME test.acc.
; Add additional settings below this line
_dmarc	14400	IN	TXT	"v=DMARC1; p=none"
- Bug: Zone creation is inconsitent. There appears to be many templates but are out of sync to which data they use to build their templates with, in particular the email address that is declared on them in the SOA.
- New Account Zone(test.acc.db)
- why is my usage in my cpanel not working. it alswyas shows 0.00 MB / 5000 MB - do i need to start something for htis?
- another time it showed 36mb used and the account backup was 200mb+ on its own
- client account: disk usage is not updated
- sometimes if you let a ftp session expire, you cannot reconnect with FTP until you have killed the session via CWP
- cannot kill session in cpanel (could be i need to add permissions)
- view trash does not work. see themes.qwdemos.com , certainly not in firefox - double check this, i think it just shows the .trash folder but htis cannot be accessed normally and might be temproary during the filemamanger session.
make a note of this + is there an article on trash. - (Email --> rDNS Checker) checks the NAT IP not the public IP
- Every new user account creates a mysql user, even if there are no databases. this seems pointless.
- The intial setup for cwp does not create the DNS zone for the server, it only happens after you have refreshed the server hostname. This is either a bug or by design.
- when i logged into my secure https://cpanel.mydomain.com/ it redirected to non-secure http://cpanel.mydomain.com/
- The only way to removed 'Admin services' from a domains SSL is to delete the certificate. You can add additional 'Admin services' easy by clicking on the button, selecting the additional options and clicking 'Apply changes'
- The SSL handling is a bit flaky, it is not easy to re-configure an SSL. you can add additional SAN but not seem to remove them except delete the whole thing admin services
- Cannot delete some MySQL users via the CWP GUI but there is not issue deleting them via the SSH or phpMyAdmin
- Must be a checking routine that says it is not good to delete that user.
- Can't add databses from migrated user from another CWP server
- breadcrumbs dont work 'you are here' looks like whwere is should be at the top right but it does not work
- Menu
- Most pages titles on the pages do not match up with their menu name and this is confusing. give one example and say i will do the rest if it is of use
- menus collapse inconsisten -eg: (SQL Services --> MySQL Configuration) is a great example, the mnu just collapses aafter you click, it does not stay on the same 'menu'
- Bug/Question: do the developers look at these bugs here or is it just ofr us end users?
- (WebServer Settigns --> SSL Certificates) the multiple actions dropdown has pre-expanded and the options below have leaked (do picture)
- Custom Account Templates - Control WebPanel Wiki (branding)
- This is not well written
- The english does not make sense.
- what does rsync -av do?
- The logo preview does not work.
- (User Accounts --> Features,Themes,Languages --> Branding)
- http://wiki.centos-webpanel.com/ - needs to have https enforced but currently the https version just redirects to the http version (crazy)
- Cron
- The following pages need to be merge becasue it is confusing, almost like one page is a half finished project. They both load the same data. This is more a bug than a feature becasue of how confusing it is.
- (CWP Admin --> Server Settings --> Crontab for root)
- (CWP Admin --> Server Settings --> Crontab for users)
- /etc/cron.d/clamav-update has MAILTO=root rather than a proper email address that I can set in the GUI
- error: 'PHP Notice: Undefined index: O in /usr/local/cwpsrv/htdocs/resources/admin/include/alertandautorenewssl.php on line 0'
- The following pages need to be merge becasue it is confusing, almost like one page is a half finished project. They both load the same data. This is more a bug than a feature becasue of how confusing it is.
- on the dashboard the RAM usage never seems to refresh unless I refresh the page
- the rkhunter daily cronjob does not send the email to the correct address and you need to
- edit Daily cronjob /etc/cron.daily/rkhunter or /etc/sysconfig/rkhunter
- MAILTO=root@localhost --> MAILTO=root
- nameservers do not have TrustedHosts or KeyTable
- they do get DKIM and SPF records
- This might be normal because they will never be required to send emails
- Add this note somewhere above in the relevant email section
- (Email --> DKIM & SPF Manager) always shows v=DKIM1 and v=spf1 present even if they are not.
- There is a file that should not be in the default apache template /usr/local/apache/htdocs/autoconfig.php - there should be no PHP in this place.
My Joomla Modern Router Notes
During my quest to understand the new Joomla Modern Router present in Joomla 3.8+ and Joomla 4.0 I found some good information and figured out the rest. These are the notes from that battle.
I will be using my reference component QWPeople which is based on com_contact from Joomla 3.9.22, my version has all of the class renamed to the latest standard so is a better place to learn from.
List of different routers available in Joomla (dont worry I will go through these later, it just makes it easier to write this document)
- Original Joomla 3.x (dont use if making a new component)
- Modern Router (Class Based)
- RouterViewBase
- RouterView
- RouterView + Legacy Rule
Notes:
- Variables can end up in the $query from $_GET requests, $_POST requests or just being put in there by Joomla itself.
- These is a typical example of variables pass in the query used for routing
option=com_qwpeople
task=mytask or view=myview
language=en-GB
Itemid=101
view=category
layout=blog
id=9
lang=en
Modern Router
The router entry file is still present as [component]/router.php i.e. com_qwpeople/router.php
So how does this new router work. What is a class based router. Well I am not 100% but hopefully my notes will fill in the blanks that this Joomla doc creates: J3.x:Supporting SEF URLs in your component - Joomla! Documentation. Please read this Joomla Document before reading my article as it will make more sense. One other thing the component name part of the router class name should be in PascalCase and not all lowercase like it says, it does not affect operation but PascalCase follows the Joomla syntax rules.
The basic idea of the new router is to do most of the heavy lifting for the normal developer but allow for expansion when needed unlike the old router where you only had one parse() and build() and everything had to be done within this. The new router has definitely expanded on this. The router is broken down into 2 parts (as far as I am concerned)
The following instructions are utilising the RouterViews class.
Registering the Routes
Look at the following code:
// Categories route
$categories = new RouterViewConfiguration('categories');
$categories->setKey('id');
$this->registerView($categories);

// Category route
$category = new RouterViewConfiguration('category');
$category->setKey('id')->setParent($categories, 'catid')->setNestable();
$this->registerView($category);

// Contact route
$contact = new RouterViewConfiguration('contact');
$contact->setKey('id')->setParent($category, 'catid');
$this->registerView($contact);

// Featured route
$this->registerView(new RouterViewConfiguration('featured'));
What is happening here is that you are building a route (ultimately to your content) by using Joomla component views.
We will deal with featured first because this is the simple one. featured is not a category, is not in a category and therefore is a standalone page so it is very simple to route to this all that needs to be done is have the view set to featured which has already been set by the menu item so really there is no component routing required.
Now if we look at the contact view route because this is at the bottom of the tree, if we wanted the categories or category view they we we would just start earlier up the tree and ignore the rest.
- Categories route
- The routing key of categories is `id`
- I don't think it is really necessary to have this route section but I think it just made it easier for the developers to implement a categories view. (I could be wrong)
- Category route
- The routing key of category is `id`
- It has a parent route of categories, whose routing key `id` is the same as category `catid` and these have now been associated together.
- The category has a `id` which will match a categories with the same `catid`
- setNestable() = that this routing section could be made of many segments because it is nestable
- Contact route
- The routing key of contact is `id`
- It has a parent route of category, whose routing key `id` is the same as contact `catid` and these have now been associated together.
- The contact has a `catid` which will match with a category with the same `id`
- Now the connection is made to the category we can move up to the category route
Notes:
- You should note that these rules work in both directions, building and parsing SEF URLs. For now I am concentrating on parsing the URLs as this is harder.
- You can start a request any where in the view tree `Categories route/Category route/Contact route`, you do not have to start at either end.
Routing Rules
The best bit of the new router is the ability to use rules and Joomla comes with some premade ones that perform very common tasks, so again have a look at this code:
// Router rules
$this->attachRule(new MenuRules($this));
if ($params->get('sef_advanced', 0))
{
    // Modern routing
    $this->attachRule(new StandardRules($this));
    $this->attachRule(new NomenuRules($this));
}
else
{
    // Legacy routing
    JLoader::register('QwpeopleRouterRulesLegacy', __DIR__ . '/helpers/legacyrouter.php');
    $this->attachRule(new QwpeopleRouterRulesLegacy($this));
}
Joomla Inbuilt Rules
This is a very brief explanation of the Joomla premade rules which should help:
- MenuRules - Looks to see if the URL matches a known menu item, and ensures in multilingual sites that a language tag is present. This also strips the sgements that make up the path to the menu before passing them on but also adds the ItemId into the Query.
- StandardRules - Uses your view configuration to build up a menu path. Including utilising the RouterViewConfiguration configurations, utilises segment and ID functions in the router for the particular view it is working on such as getCategoriesSegment() or getCategoriesId().
- NomenuRules - Provides a fallback when there is no good match found for building or parsing the URL.
You will find all of these rules at /libraries/src/Component/Router/.
Custom Rules
Using a custom rule to allows the use of a legacy router:
- which is a file containg a class called class QwupdateserverRouterRulesLegacy implements RulesInterface
- This is a old style router build(), parse() and preprocess() functions wrapped in a class that implements the Joomla\CMS\Component\Router\Rules\RulesInterface interface.
- So the legacy router can just be moved into a custom rule.
- For those of you that are not upto date with these terms you will find it easier just to look at the file in QWPeople component and all shall be revealed.
Making your own custom rule
It is as simple as:
- Copy the RulesInterface class file and use as a template
- Rename the class name to something like
class QwpeopleRouterRulesLegacy implements RulesInterface { } - Insert your code in the build(), parse() and preprocess() functions as required
- Register the rule in your router. You will probably need to use JLoader to register the rule class you have just made. After it is registered, you should then attach the rule. The process is outlined below but I would recommend putting your custom rules after the main Joomla ones unless you have a need to change the order and which case you probably know why.
// Legacy routing
JLoader::register('QwpeopleRouterRulesLegacy', __DIR__ . '/helpers/legacyrouter.php');
$this->attachRule(new QwpeopleRouterRulesLegacy($this));
Remember you can make as many rules as you want to handle different aspects of your router.
A little trick for custom rules you can use
You can just use return statement in the beginning of a function if you want this code only to work on a particular view or thing. This trick allows you to separate complex routing code into different rules if required.
public function parse(&$segments, &$vars)
{
    // Skip this functions code if not 'categories' view
    if(!isset($vars['view']) || $vars['view'] !== 'categories') { return; }
}
But how do the rules work
- All rules extend the class Joomla\CMS\Component\Router\Rules\RulesInterface which means they must all have at least the functions parse(), build() and preprocess() even if they don't have any code in them.
- parse() - If called it will process the segments to see if it can extract any information and then add that to the $query
- build() - If called it will aid in building the SEF link from the query variables. when this function adds a SEF segment to $segment it will unset the related $query variables so Joomla does not get upset.
- preprocess() - This function is run irrespective of whether Joomla is in SEF mode.
- Each registered rule is cycled through in order they are registered so in my example just using modern routing.
The next rule is only run if there are segments that have not been processed or the view has not been set.
- MenuRules
- This grabs the menu item ID, language settings and of course any other parameters configured in the menu item which it then loads into the $query.
- This rule also removes the segments from the SEF leading upto and including the menu item.
- This rule uses all of the getXxxSegment() functions in the router.php, I would also assume it uses all of the getXxxId() functions.
- For every menu URL to be built from the joomla internal links (i.e. inde_.php?view=categories) each getXxxSegment() for a registered view is cycled through; looking for a match, this is my best guess.
- Does not set any thing in to the $vars (The variables that result from the segments) but does set variables in the $query, like all of the parameters from the menu item.
- StandardRules
- Parses the remaining segments in the SEF using the `get ID` functions for the matching views in the in the router.php.
- By now all the require variables should be in the $query and Joomla will know the correct view to load and in which case no further rule processing will happen and the page will be loaded.
- This rule uses all of the getXxxSegment() functions in the router.php, I would also assume it uses all of the getXxxId() functions.
- For every URL to be built from the joomla internal links (i.e. inde_.php?view=categories) each getXxxSegment() for a registered view is cycled through; looking for a match, this is my best guess.
- sets the option='com_qwpeople' and view='catgories' into the $vars (The variables that result from the segments)
- NoMenuRules
- This is only triggered if no matching menu item has been found. A minimal cleanup of assets happens.
- This does not run any getXxxSegment() functions in the router.php
- Custom Rules
- These would get activated now if we had one configured. We would have a custom rule here if we needed to do some complex work on the SEF to complete the routing like I have in QWUpdateServer.
- MenuRules
Notes
- if you add a blank custom rule and then use a debugger you can easily see what each of the rules set by adding a breakpoint in the relevant functions.
What are the different classes for
So of the keen people amongst you might of noticed the different class types that extended by the router. I will outline what they do.
- class QwpeopleRouter extends RouterBase
- This class is very much like the original router in Joomla 3.x which allows you to use 1 of each of the following functions parse(), build() and preprocess() only.
- parse(), build() and preprocess() will be present in the router class QwpeopleRouter.
- It does not use rules
- The developer will need to write all of the routing logic instead of being able to use what Joomla provides for you. However this might be beneficial in some large projects.
- You could add your legacy router code in the corresponding functions quite easily with maybe a few changes depending which version of Joomla 3.x they were written for.
- class QwpeopleRouter extends RouterView
- This allows rules to be registered and used.
- parse(), build() and preprocess() will be present in each of the rules files.
- Most of the hardwork of routing has been done by Joomla in the pre-written Rules (MenuRules/StandardRules/NoMenuRules).
- You can write and add your own custom rules.
- By using a custom rule you can add your legacy router code in.
- Rules can be turned on and off programmatically (see my trick above), this is especially useful if you only want a custom rule to run on a particular rule.
Conclusion
This is an easy one, use your router in the RouterView mode (by extending your component router with this class) and use custom rules to add any required extra routing logic.
If you have used all of the modern class names like in QWPeople, this router should also be ready for Joomla 4.x.
Links
- J3.x:Supporting SEF URLs in your component - Joomla! Documentation
- How To Create Router For Joomla Component - Tech Fry - This covers both the old and new router and is very easy to follow.
- Simple Custom Router Documentation - Might be useful for some developers.
- php - Joomla component router - Stack Overflow - A worked example on the old router. Helpful for trying to figure out the routing logic.
- J2.5:Creating a System Plugin to augment JRouter - Joomla! Documentation - The Joomla! Router can be modified with additional rules by using the attatchBuildRules and attatchParseRules methods. Ideally, this can be done from a system plugin so these rules will apply globally. I am not sure if this is still the case and why you need these.
- Joomla! Issue Tracker | Joomla! CMS #8986 - Parse preprocess rules from component routers - Not sure 100% what this means, i think it just means that preprocess() is removed from the router.php class but is still present in the rules.
How to extract installed extensions from Joomla
I found the need to extract extensions from Joomla and these are my notes that I built up while doing that. You can also extract core extensions aswell with a little more effort with some compromises. The reasons for extraction:
- Build a reference extension for future projects.
- You no longer have the installation sources but need a copy of the extension.
It is far easier to use com_contacts for a reference extension if you are going to use one from the core. com_content is spread across Joomla becasue it is an integral part rather than a seperate component, this maybe better in joomla 4.
Some Notes
- This will use com_content as an example which use en-GB
- I am using Joomla 3.9.21 (using Joomla_3.9.21-Stable-Full_Package.zip)
- I am only doing MySQL
- The manifest file is in /joomla/administrator/components/com_content/content.xml
- The manifest file tells you where all of the files are.
- [zip] = the new extension location
- [joomla] = Joomla Full installation zip package (makes surte files a virgin)
- adding license and readme are optional and can be done as part of your own project
- i will write an extension extractor (extracting the SQL data from the database might need to be done manually)
- com_content and com_contact have
- custom fields (via com_fields)
- Versioning/History (via com_contenthistory which is a seperate component and shared across other components) - https://docs.joomla.org/Using_Content_History_in_your_Component
- com_content (j3) is missing:
- SQL files
- SQL Manifest reference
- Menu definitions in the manifiest
- com_contact (j3) has everything present like a normal component
- Use com_contact is a better extension to use for a reference component as not using dynamic menus like com_content and its manifest is complete.
- Most core components have a reduced manfest and will need manual correction.
- com_content admin menu items are programatically controlled and are set by presets in these files:
- [joomla]/administrator/components/com_menus/presets/joomla.xml
- [joomla]/administrator/components/com_menus/presets/modern.xml
- About `Fields` and `Field Groups` menu items:
- In com_content when you disable custom fields in `Articles --> Options --> Integration --> Select Yes in "Enable Custom Fields" option.`, these menus get disabled in both the main menu and the side menu of the component. the same also happens if you disable the com_fields component.
- JDownloads has these menus and when i disable com_fields they disappear from the components side menu but not the JDownloads component menu. When i click on them while com_fields is off I get an error becasue the link no longer works correctly. This means that the componnent menus defined in the manifest are not dynamic but the ones defined in the presets (joomla.xml and modern.xml) are.
- com_content side menus are controlled here:
[joomla]/administrator/components/com_content/helpers/content.php -->function addSubmenu()
- You can only have 1 level of <submenu> when adding via manifest i.w. `Components --> QWDemoBar --> Products' (`Components --> <menu> --> <submenu>`)
Instructions for component extraction
These will work for Joomla core (with some issues) and 3rd party components with no issues.
- Create a target folder structure for extension
[zip]/com_content/
[zip]/com_content/admin/
[zip]/com_content/admin/language/
[zip]/com_content/admin/language/en-GB/
[zip]/com_content/media/
[zip]/com_content/site/
[zip]/com_content/site/language/
[zip]/com_content/site/language/en-GB/
- Grab Files
- copy [joomla]/administrator/language/en-GB/en-GB.com_content.ini to [zip]/com_content/admin/language/
- copy [joomla]/administrator/language/en-GB/en-GB.com_content.sys.ini to [zip]/com_content/admin/language/
- copy [joomla]/administrator/components/com_content/ to [zip]/com_content/admin/
- copy [joomla]/media/com_content/ to [zip]/com_content/media/
- copy [joomla]/language/en-GB/en-GB.com_content.ini to [zip]/com_content/site/language/
- copy [joomla]/components/com_content/ to [zip]/com_content/site/
- Correct File Structure
- move [zip]/com_content/admin/content.xml to [zip]/com_content/
- Add Database Files and manifest references if missing (This section applies only to some core components where they are missing)
- create [zip]/com_content/admin/sql/
- create [zip]/com_content/admin/sql/install.mysql.utf8.sql
- create [zip]/com_content/admin/sql/uninstall.mysql.utf8.sql
- create [zip]/com_content/admin/sql/updates/
- create [zip]/com_content/admin/sql/1.0.0.sql with the content:
# Placeholder file for database changes for version 1.0.0
- extract the installation SQL from [joomla]/installation/sql/mysql/joomla.sql
- You will have to make a best guess about which SQL code to get and looking at the database with phpmyadmin will help.
- Search for all #__content and this should show you all of the required tables, this should go in the install.mysql.utf8.sql
- com_content the code you need is at lines 318 - 449
- In the uninstall.mysql.utf8.sql add a drop statement for each of the tables you have just added to the install SQL code. (i.e. DROP TABLE IF EXISTS `#__content_categories`; )
- Add the SQL references into the manifest file for install/uninstall
[zip]/com_content/admin/content.xml
- Add Menu Links to the manifest (This section applies only to some core components where they are missing)
- If you are extracting com_content add the following code immdiately after the <administration> tag or look at com_contact manifest file for examples of how to set your menu out:
NB: the menu links below do not have index.php
<menu link="option=com_com_content">MOD_MENU_COM_CONTENT</menu> <submenu> <menu link="option=com_content">MOD_MENU_COM_CONTENT_ARTICLE_MANAGER</menu> <menu link="option=com_categories&extension=com_content">MOD_MENU_COM_CONTENT_CATEGORY_MANAGER</menu> <menu link="option=com_content&view=featured">MOD_MENU_COM_CONTENT_FEATURED</menu> <menu link="option=com_fields&context=com_content.article">MOD_MENU_FIELDS</menu> <menu link="option=com_fields&view=groups&context=com_content.article">MOD_MENU_FIELDS_GROUP</menu> </submenu> - Notes
- `Add New Article` and `Add New Category` submenus cannot be re-created via the manifest menu creation. These are only shortcuts anyway so no functionality is lost.
- The new <menu> and first <submenu> are the same. In the MOD_MENU the primary menu item is not a link
- if you want to convert to a full separate extension you need to take the translations from the joomla.xml and add them in to your extension natively
- If you are extracting com_content add the following code immdiately after the <administration> tag or look at com_contact manifest file for examples of how to set your menu out:
- Correct Manifest File (You dont have to move the file for the installer to work - i dont thing, but you should for correctness)
- After moving the manifest file you have to modify it to match new file/folder structure, in particular,
- The manifest file itself does not need to be added in the <file> copy list because it will be copied automatically so remove it if the reference is present.
- For com_content in <files folder="admin"> I removed <folder>elements</folder> because there was no matching folder in the admin filesystem. This must be a Joomla bug.
- The method I would use is
- Just open up for new component folder
- Go into the site folder
- and one by one make sure that the relevant commands to copy the files and folders in the site folder are present in the manifest.
- Remember language files are dealt with seperately but the sql folder in admin must be copied.
- Once done do the admin fodler
- Lastly check the media folder reference
- Backup
- You should backup your work before continuing
- An example filename is: com_content - Extracted from J3.9.21 (All Native).zip
- Convert to normal extension (Some remedial work to finish up)
- if you have extracted com_content you will need to rename the menu translations in the manifest as outlined below
MOD_MENU_COM_CONTENT --> COM_CONTENT : Ignore this line as COM_CONTENT already exists
MOD_MENU_COM_CONTENT_ARTICLE_MANAGER --> COM_CONTENT_ARTICLE_MANAGER
MOD_MENU_COM_CONTENT_CATEGORY_MANAGER --> COM_CONTENT_CATEGORY_MANAGER
MOD_MENU_COM_CONTENT_FEATURED --> COM_CONTENT_FEATURED_ARTICLES
MOD_MENU_FIELDS --> COM_CONTENT_FIELDS
MOD_MENU_FIELDS_GROUP --> COM_CONTENT_FIELD_GROUPS
and then add the same translations as a block into the admin translations file [zip]/admin/language/en-GB/en-GB.com_content.sys.ini as show below.;Menu (previously handled by com_admin presets) COM_CONTENT_ARTICLE_MANAGER="Articles" COM_CONTENT_CATEGORY_MANAGER="Categories" COM_CONTENT_FEATURED_ARTICLES="Featured Articles" COM_CONTENT_FIELDS="Fields" COM_CONTENT_FIELD_GROUPS="Field Groups"
This is required to make the component a standalone verion of the core component. - (optional) add all missing information as per my boilerplate i.e. update server - The current manifest file will work but is not 100% complete
- upgrade manifest file to my format (see boiler plate)
- Add the following missing translations to admin/languages/en-GB/eb-GB.com_content.sys.ini
;install/update/uninstall system
COM_CONTENT_NAME="Content (Component)" ;This might not be needed
COM_CONTENT_DESCRIPTION="A standalone verion of the Joomla core component, content."
- (optional)(recommended) Install/Update/Uninstall Script File
- Add manifest reference. This will also copy it into the admin section when installing the component or the root folder of the extention if not a component.
- create file [zip]/com_content/script.php (core apps dont have this as it is not required for them) - this is just to make it like a normal extension
<!-- Script: Install, Update, Uninstall -->
<scriptfile>script.php</scriptfile>
- add the following translations to admin/languages/en-GB/eb-GB.com_content.sys.ini
; script.php (install/update/uninstall)
COM_CONTENT_INSTALL_TEXT="The component has been installed."
COM_CONTENT_UNINSTALL_TEXT="The component has been uninstalled."
COM_CONTENT_UPDATE_TEXT="The component has now been updated to version %s."

; script.php - Before Actions
COM_CONTENT_PREFLIGHT_DISCOVER_INSTALL_TEXT="Content preflight discover install script."
COM_CONTENT_PREFLIGHT_INSTALL_TEXT="Content preflight install script."
COM_CONTENT_PREFLIGHT_UNINSTALL_TEXT="Content preflight uninstall script."
COM_CONTENT_PREFLIGHT_UPDATE_TEXT="Content preflight update script."

; script.php - After Actions
COM_CONTENT_POSTFLIGHT_DISCOVER_INSTALL_TEXT="Content postflight discover install script."
COM_CONTENT_POSTFLIGHT_INSTALL_TEXT="Content postflight install script."
COM_CONTENT_POSTFLIGHT_UNINSTALL_TEXT="Content postflight uninstall script."
COM_CONTENT_POSTFLIGHT_UPDATE_TEXT="Content postflight update script."
- (optional) add dummy css file
- (optional) grab corresponding modules and plugins and make a package
- zip/compress contents of [zip]/com_content/ to com_content - Extracted from J3.9.21 (Native Modified).zip
- if you have extracted com_content you will need to rename the menu translations in the manifest as outlined below
Renaming Extension / Refactoring Component
You cannot install the extension you have just made because it will break your joomla installation, so you must refector it to a new name such as com_qwhelloworld.
Make sure you have made another backup before proceededing example file name = com_content - Extracted from J3.9.21 (Native with manifest, script and translations upgraded).zip
Again these instructions will outlione how to refactor com_content to com_qwhelloworld.
I did an article Rename a Joomla plugin or create a second instance of it that might be of use.
Rename the following files:
You can also search for `content` with your favorite file search tool.
- [zip]/content.xml --> qwhelloworld.xml + manifest reference
- [zip]/admin/content.php --> qwhelloworld.php + manifest reference
- [zip]/admin/en-GB/en-GB.com_content.sys --> en-GB.com_qwhelloworld.sys + manifest reference
- [zip]/admin/en-GB/en-GB.com_content.ini -> en-GB.com_qwhelloworld.ini + manifest reference
- [zip]/admin/helpers/content.php --> qwhelloworld.php
- [zip]/admin/helpers/html/contentadministrator.php --> qwhelloworldadministrator.php
- [zip]/site/content.php --> qwhelloworld.php + manifest reference
- [zip]/site/en-GB/en-GB.com_content.ini -> en-GB.com_qwhelloworld.ini
Text Replacing
You have 2 ways of perfoming text replacing in your extension:
- Use an IDE of your choice (Netbeans etc..)
- Open all files with Notepad++
What i did
I did not just rename `Content -> QWHelloWorld`, because of the name of the component (com_content) there are a lot of similiar name functions using the word Content and those should not be changed.
Normally if you are doing a uniquely name extension this should not be an issue i.e. com_contact.
- com_contact --> com_qwhelloworld
- COM_CONTACT --> COM_QWHELLOWORLD
- Contact --> Qwhelloworld (Just ignore translations)
So I worked through the list below until I got too `Content -> QWHelloWorld`, again used the Find and replace option in Netbeans but this time I inspected every line/match that was found for issues and made notes of these, then now i performed `Content -> QWHelloWorld`so when the unwanted changed were made I could go through and correct only the errors becasue I had built up a list of changes to revert, This is how I got my corrections section.
Perform the following text renames
Now perform the following renames in the order they appear and they are case sensitive
- Rename Extension
- COM_QWHELLOWORLD="Articles" --> COM_QWHELLOWORLD="Qwhelloworld (Component)"
- Database
- #__content --> #__com_qwhelloworld
- Functions
- function content --> function qwhelloworld
- Classes
- JHelperQwhelloworld --> JHelperContent
- File Reference
- content.php --> qwhelloworld.php
- Misc
- contentadministrator --> qwhelloworldadministrator ??? not sure about this one, this might be a native joomla thing
- General
- com_content --> com_qwhelloworld
- COM_CONTENT --> COM_QWHELLOWORLD
- Content -> Qwhelloworld
Corrections
Now because of the name com_content which gives Content which in turn is not unique, you will find you need to do some corrections which I have outlined below. Please be aware this is not exhaustive as I might of missed stuff
- Event Statements
- onQWHelloWorldAfterSave --> onContentAfterSave
- onQWHelloWorldPrepare --> onContentPrepare
- onQWHelloWorldAfterTitle --> onContentAfterTitle
- onQWHelloWorldBeforeDisplay --> onContentBeforeDisplay
- onQWHelloWorldAfterDisplay --> onContentAfterDisplay
- beforeDisplayQWHelloWorld --> beforeDisplayContent
- afterDisplayQWHelloWorld --> afterDisplayContent
- Joomla 4 only
- onQWHelloWorldBeforeChangeFeatured --> onContentBeforeChangeFeatured
- onQWHelloWorldAfterChangeFeatured --> onContentAfterChangeFeatured
- Functions
- getQwhelloworldLanguages( --> getContentLanguages(
- getQuickiconQwhelloworld( --> getQuickiconContent(
- _buildQwhelloworldOrderBy( --> _buildContentOrderBy( ??? not sure about this one, maybe it needs leaving
- Variable Names
- JS
- DOMQWHelloWorld --> DOMContent
- Headers
- Code Comments
- // QWHelloWorld is generated --> // Content is generated
- Joomla 4 only
- Joomla! QWHelloWorld Management System --> Joomla! Content Management System
- DB Data
- "type":"QWHelloWorld" --> "type":"Content" ??? not sure about this one
- Translations
- COM_QWHELLOWORLD_ARTICLE_CONTENT="QWHelloWorld" --> COM_QWHELLOWORLD_ARTICLE_CONTENT="Content"
- QWHelloWorld Item Associations --> Content Item Associations
- Table of QWHelloWorld --> Table of Contents
- QWHelloWorld Settings -> Content Settings ??? not corrected this as I am not sure it needs changing
- QWHelloWorld Dashboard --> Content Dashboard ??? not corrected this as I am not sure it needs changing
- QWHelloWorld Filter Search --> Content Filter Search ??? not corrected this as I am not sure it needs changing
Corrections - com_content Table Management (JTable)
Because com_content is blended into the core we need to correct a few things so the correct table is found and used. This section should only be neded for com_content but this procedure can be adapted if needed.
Consider this code:
// I think calls the table instance for the component
$contentTable = JTable::getInstance('Qwhelloworld', 'JTable');

// controlling the Feature artciles which will help you work out what to change
// [zip]/admin/models/article.php
$table = $this->getTable('Featured', 'QwhelloworldTable');

// [zip]/admin/models/feature.php
public function getTable($type = 'Featured', $prefix = 'QwhelloworldTable', $config = array())
Instructions
- Create missing JTable file
- copy [zip]/admin/tables/featured.php --> [zip]/admin/tables/content.php
- rename Featured to Content
- alter '#__com_qwhelloworld_frontpage' --> '#__com_qwhelloworld'
- alter 'content_id' is renamed to 'id'
- in constructor rename alter com_content --> com_qwhelloworld
- examine [joomla]/libraries/src/Table/Content.php and you will see the construct class for Content
- i do not know if i need all of this file, all of what is in the contructor here.
- I will use all of what is in the constructor modified to the database style as shown in featured. i can always alter the remaing files ie.e com_conent to com_qwhelloworld later
- the main thing to take from here is to see that 'content_id' is renamed to 'id'
- We now have our table file created so now need to correct the JTable references
NB: This is where I got upto and not further
- These are examples of what you can try. Rememebr it is 'Qwhelloworld' that is the last text change to fix.
JTable::getInstance('Qwhelloworld', 'JTable'); --> JTable::getInstance('QwhelloworldContent', 'JTable') getTable($type = 'Qwhelloworld', --> getTable($type = 'QwhelloworldContent', - https://docs.joomla.org/Using_the_JTable_class
- https://docs.joomla.org/Creating_content_using_JTableContent
- I dont think the class should be prefixed with JTable like in the core
- I think 'Qwhelloworld' for JTable should be converted to 'QwhelloworldContent'
- These are examples of what you can try. Rememebr it is 'Qwhelloworld' that is the last text change to fix.
Install the Extension
Once you have done these changed you can see if you extension works and make any corrections as required. If there any unforseen issues try an fix them or you can just start again with your backup.
Most erros casued during the installation are probably caused by the manifest or files with the wrong names.
Joomla Debug is your friend
View the extension in site and admin for different errors to those during installation but this time with Joomla Debug on and you can then go through and fix the errors. I would also recommend making notes.
Make it reference extension (com_content)
This is for me really.
- Add Files (referenced as needed in the manifest)
- CSS file
- CHANGELOG.md
- LICENSE
- README.md
Plugin, Module and Template Extraction
This is far simpler, just go to the relevant folder and zip the contents. You have now extracted your choosen extension.
Here are some example locations:
- Plugin: [joomla]/plugins/content/qwhelloworld/
- Module: [joomla]/modules/mod_qwhelloworld/
- Template: [joomla]/templates/qwhelloworld/