Items filtered by date: December 2014
My GitHub Notes
This will be a collection of GitHub specific, Git and how to layout your project's Repository.
TL;DR
I have put my real quick overview of accounts plans and who should use what here.
- Public repositories
- Host open source projects in public GitHub repositories, accessible via web or command line.
- Public repositories are accessible to anyone at GitHub.com.
- Collaborators and members for public repositories are always unlimited irrespective of your personal plan (e.g. free, Pro) or your organization's plan (e.g. Free, teams, Enterprise)
- Private repositories
- Host code in private GitHub repositories, accessible via appliance, web, and command line.
- Private repositories are only accessible to you and people you share them with.
- Collaborators and members for private repositories:
- On a GitHub personal account (Free, Pro), collaborators and members are unlimited.
- On a GitHub Free Organization, collaborators and members are unlimited.
- Although collaborators and organization members serve different purposes within GitHub, for organizations subscribed to GitHub Team collaborators must occupy a paid seat in order to access private repositories. Organization members always require a paid seat.
- If you decide to upgrade your organization from GitHub Free to GitHub Team, you must add a paid seat for each organization member as well as each collaborator for them to keep access.
- No data will be lost, just access for those who do not have a seat.
- You only need to buy seats for those users that you want to have access to the organizations repositories going forward, not for everybody who has every made a change or contribution to any of the organization's repositories.
- Upgrading your account's plan - GitHub Docs - If you'd like additional users to have access to your GitHub Team organization's private repositories, you can purchase more seats anytime.
- Pricing Plans
- All pricing @ GitHub is done on a per-user basis.
- Personal accounts and organization seats are classed as separate Billing entities.
- If you upgrade your personal account from GitHub Free to the GitHub Pro plan then you can:
- get additional features for your personal Private repositories such as Pages and Wikis
- you will also get more Git features and various Code workflow enhancements for both your Public and Private repositories.
- If you use GitHub Team for your organization you will also get enhancements for your Public and Private repositories as-well as improved organization management better granular user role control.
- User Accounts
- A user account is for one person and some times is referred to as a `Personal Account`.
A person only needs one user account.You only need one Facebook account right!- This account can be used to host all of a user's project and also be used to login in to organizations.
- There are currently 2 pricing plans for an `personal` account, Free and Pro.
- If you are an individual developers with no commercial angle, then you should just use a personal/single account for all of your repositories.
- If you need more actions, features and that other stuff then you can upgrade your account to Pro.
- I would use my personal account where I need to fork a repo to push some fixes to someone else's code.
- A user can own more than one organization.
- Organizations
- Organizations are shared accounts where businesses and open-source projects can collaborate across many projects at once, with sophisticated security and administrative features.
- GitHub Free allows you to add as many members and collaborators to your organization as you’d like at no charge.
- There are currently 3 pricing plans for an account, Free, Team and Enterprise.
- Having an organization for your company ensures that the assets are not controlled by single member of staff under their personal account.
You should use an organization for your code if:
- If you are a company and you are making software.
- If you are a individual developer or a company that is going to sell software.
- You will need to collaborate with team members or other entities.
- Your software project(s) will be large.
- Features:
- Allow for collaboration between team members and other entities.
- Allows more granular permissions for repositories that belong to the organization.
- An organisation can have public and private members. Public members do not count towards your organizations seats.
- Allow for for organising repositories by groups such as; Company, Code Language, Software Type, etc.....
- You can convert your personal account into an organization (but this is not best practice).
- You can identify an organization easily because thy have a people tab.
- Organizations can have more than one organization owner to avoid lapses in ownership.
- Teams
- The concept of Teams in GitHub allows for greater flexibility for collaboration and integration, as well as separation of repositories and permissions.
- Enterprise accounts
- Are for very large companies, or those teams that need to manage multiple organisations but all under the same company banner.
- Pricing is done per member, each member requires a seat/license, I am assuming there will always be at leats one member.
- Discounts
- Discounted plans for GitHub accounts - GitHub Docs - GitHub provides discounts to students, educators, educational institutions, nonprofits, and libraries.
GitHub Official Sites
- GitHub - Join the world's most widely adopted, AI-powered developer platform where millions of developers, businesses, and the largest open source community build software that advances humanity.
- Marketplace · Tools to improve your workflow | GitHub - Find the tools that help your team build better, together.
- GitHub Skills | GitHub - Learn how to use GitHub with interactive courses designed for beginners and experts.
- GitHub Resources | GitHub - From setup to optimization, learn how to use GitHub to get the job done.
- Choose a License - Non-judgmental guidance on choosing a license for your open source project.
- Licensing a repository - GitHub Docs - Public repositories on GitHub are often used to share open source software. For your repository to truly be open source, you'll need to license it so that others are free to use, change, and distribute the software.
- GitHub - YouTube - Official YouTube channel
- GitHub Sponsors · GitHub - Invest in the open source projects you depend on with GitHub Sponsors.
- Software Support and Product Help - GitHub Support - Access your support options and sign in to your account for GitHub software support and product assistance. Get the help you need from our dedicated support team.
- The GitHub Blog - Updates, ideas, and inspiration from GitHub to help developers build and design software.
- GitHub Gists | GitHub - Instantly share code, notes, and snippets.
- GitHub Classroom | GitHub - GitHub Classroom automates repository creation and access control, making it easy for teachers to distribute starter code and collect assignments on GitHub.
- GitHub - github/dev | GitHub
- Press the . key on any repo. Contribute to github/dev development by creating an account on GitHub.
- The github.dev web-based editor is a lightweight editing experience that runs entirely in your browser. You can navigate files and source code repositories from GitHub, and make and commit code changes.
- Press the . key on any repository or pull request.
- Swap
.comwith.devin the URL. For example, this repo https://github.com/github/dev becomes http://github.dev/github/dev - It’s a quick way to edit and navigate code. It's especially useful if you want to edit multiple files at a time or take advantage of all the powerful code editing features of Visual Studio Code when making a quick change. For more information, see our documentation.
- GitHub Docs - Get started, troubleshoot, and make the most of GitHub. Documentation for new users, developers, administrators, and all of GitHub's products.
- GitHub Learn
- GitHub Learn is the all-in-one learning experience platform that unifies GitHub’s official learning and enablement resources into personalized journeys.
- Whether you're pursuing certification or want to learn about one of our new features, GitHub Learn helps you set goals, track progress, and build the skills that matter — all from one trusted source.
- GitHub Skills · GitHub - Learn how to use GitHub with interactive courses designed for beginners and experts. - GitHub Skills
- GitHub - skills/introduction-to-github - Get started using GitHub in less than an hour.
- GitHub Community · GitHub - Ask questions, get answers, share expertise.
- GitHub Training Kit - GitHub Cheatsheets - Github Git Cheat Sheets Training Kit
- Expert Services | GitHub · GitHub - From idea to implementation, our experts are ready to help your team get wherever you want to go. Start a conversation with us about how we can bring your goals to life.
- GitHub School · GitHub - A repo used for training.
- Schools - GitHub Education · GitHub - Teach with industry-standard tools. Get free access with training for students and faculty.
- GitHub Classroom - GitHub Classroom automates repository creation and access control, making it easy for teachers to distribute starter code and collect assignments on GitHub.
- GitHub Status - Welcome to GitHub's home for real-time and historical data on system performance.
- GitHub Status - Incident History - GitHub's Incident and Scheduled Maintenance History.
- Contact - Software Support and Product Help - GitHub Support - Access your support options and sign in to your account for GitHub software support and product assistance. Get the help you need from our dedicated support team
- The GitHub Training Team · GitHub - Teaching the world how to effectively use the GitHub collaboration platform - The GitHub Training Team
- GitHub Training Manual - The Official GitHub Training Manual
- GitHub Next - GitHub Next investigates the future of software development
- GitHub Support
- GitHub software support and product assistance. Get the help you need from our dedicated support team.
- A lot of topics are available to personal accounts, some might redirect to the `Virtual Assistant` or GitHub Community discussions.
- Contacting GitHub Support - GitHub Docs - You can use the GitHub Support portal to contact GitHub Support for help troubleshooting issues you encounter while using GitHub.
- Creating a support ticket - GitHub Docs
- If your account uses a paid GitHub plan, Copilot Business, or Copilot Enterprise, you can directly contact GitHub Support.
- If your account uses GitHub Free, you can speak to GitHub users and staff on the GitHub Community discussions for most issues, and you can contact GitHub Support to report account, security, and abuse issues.
Markdown Cheatsheets
- Basic writing and formatting syntax - GitHub Docs - Create sophisticated formatting for your prose and code on GitHub with simple syntax.
- Markdown_Cheatsheet - arcanecode/VSCode_User_Snippets · GitHub - This document is a Markdown quick reference. It is by no means a comprehensive tutorial on Markdown, but rather just some of the most common Markdown tags to serve as a reminder.
Misc Sites
- gitmoji | An emoji guide for your commit messages - An emoji guide for your commit messages.
- The Missing GitHub Status Page
- Historical GitHub uptime reconstructed from archived status data.
- This mirror reconstructs service health from the public status feed.
- It was built as a sanity-keeping exercise with a bunch of agents by Marek Šuppa (@mareksuppa), and the project lives on GitHub.
Software for GitHub
- GitHub - refined-github/refined-github
- Browser extension that simplifies the GitHub interface and adds useful features.
- Avaiable for Firefox, Chromium browsers and Safari.
- GitHub - refined-github/github-url-detection
- Which GitHub page are you on? Is it an issue? Is it a list? Perfect for your WebExtension or userscript.
- I think it is TypeScript.
Using GitHub
Tutorials
- GitHub Foundations Course - YouTube | ExamPro
- Master the essentials of GitHub with this comprehensive GitHub Foundations Course.
- Whether you're new to version control or want to enhance your GitHub skills, this playlist covers everything from repository creation, issues management, GitHub Flow, and working with pull requests to leveraging advanced features like GitHub Projects and Discussions.
- Follow along with hands-on examples to gain practical experience. Perfect for developers, DevOps professionals, and anyone looking to improve their GitHub proficiency.
- Filtering and searching issues and pull requests - GitHub Docs - To find detailed information about a repository on GitHub, you can filter, sort, and search issues and pull requests that are relevant to the repository.
- Searching issues and pull requests - GitHub Docs - You can search for issues and pull requests on GitHub and narrow the results using these search qualifiers in any combination.
- How to maintain two repositories internal/private and one open-source · GitHub | igorcosta - Managing multiple repositories that serve distinct but interconnected purposes can be a challenging task. This scenario is common when an organization wishes to contribute to an open-source project while also maintaining an internal space for private collaboration.
- Showing an overview of your activity on your profile - GitHub Docs - You can enable the activity overview section on your profile to give viewers more context about the types of contributions you make.
- Viewing contributions on your profile - GitHub Docs - Your profile shows off your pinned repositories, Achievements, and a graph of your repository contributions over the past year.
View Forks
Repository --> Insights --> Forks
- Filters:
- By default the list will only show forks with activity within the last 2 years, so make sure you set the filters accordingly.
- There are many filters.
- The filter
Repository Type = Network (Forks of other forks)can be quite useful.
- Switch to tree view: This is useful as it lets you see more repositories on the page at the same time. I think this is how it use to look on GitHub.
- Compare different Branches / Versions
https://github.com/Open-Shell/Open-Shell-Menu/compare/v4.4.190...v4.4.191
- View everyone who has starred a specific repository
- add
/stargazersto the end of the repositories URL. - For example, to view stargazers for the github/docs repository, visit https://github.com/github/docs/stargazers or https://github.com/shoulders/qwcrm/stargazers
- How can I list people who have starred my GitHub repository? - Web Applications Stack Exchange
- I'm curious as to who has starred a GitHub repo of mine, so I'd like a list of users who have starred it. Is this possible to get?
- Same URL answer as above but also adds a Python script that you can use which leverages the GitHub API.
- add
Pull Requests
The idea behind git is that there are many independent copies of repositories that occasionally communicate. This makes it easy for people to independently work out changes, then work together to synchronize things. Pull requests are one of those mechanisms allowing that.
A pull request `is not a feature of git` but a workflow. Services like GitHub can automate the Pull Request workflow.
Tutorials
What these videos before doing your first PR as they will explain everything.
- GitHub Pull Request: How to contribute to Open Source. - YouTube | 7urtle JavaScript
- How to contribute to open-source projects using GitHub pull requests.
- Starts with a simple diagram, easy to follow and does actually explain how to do a PR.
- This method does not use branches
- How to make a pull request on an open source project - YouTube | Web dev Cody
- I'm just walking you through how you could use git to fork an upstream branch, make a new branch, add changes to your git stage, commit your changes, and then push those changes to your branch, make a pull request (PR) to the upstream github repo, and then also how to update your master branch to match the upstream branch by using git fetch and
git reset --hard. - This is more indepth and uses branches for his PRs.
- I'm just walking you through how you could use git to fork an upstream branch, make a new branch, add changes to your git stage, commit your changes, and then push those changes to your branch, make a pull request (PR) to the upstream github repo, and then also how to update your master branch to match the upstream branch by using git fetch and
- GitHub Pull Requests Explained for Beginners - GitHub Foundations - YouTube | ExamPro
- Learn how GitHub Pull Requests work and why they are an important part of collaboration, code review, and project workflows.
- In this GitHub Foundations lesson, we explain how pull requests help you propose changes, review code, discuss updates, compare branches, and merge work safely into a repository.
- A pull request `is not a feature of git` but a workflow. Services like GitHub can automate the Pull Request workflow.
- This is not for beginners, but does gove a good overview pnce you have the basics.
How to do a Pull Request (PR) on GitHub
This is the mechanism that you use to contribute code fixes to another project on GitHub.
- Fork the target Project
- This is done on GitHub via the
Forkbutton at the top right of the repositories homepage.
- This is done on GitHub via the
- Create a Local Repo by Cloning your fork
- Goto the project's GitHub homepage.
- Click on the
Codebutton - You will now see the code you needed for cloning the repo
- Open your IDE (VSCode/Netbeans/etc...) and perform the clone (e.g.
> Git: Clonein VSCode)
- Create a new branch
- The branch name should be related to the code/fix you are going to submit (e.g. fixing-colour-scheme)
- Switch to the new branch
- This might sound obvious, but just in-case here is a little reminder.
- Make your Changes
- Fix and test your code as you normally would.
- Commit the Changes
- Commit the changes, making sure you are coming to your new branch and not the master.
- The commit message should contain the numbers of the issues you are fixing.
- You can do as many commits as needed, this is especially useful if you are fixing multiple issues.
- Push Commits
- Push the changes to your fork on GitHub
- Create a Pull Request (PR)
- Goto to your fork's homepage on GitHub
- You should now see a button called
Compare & pull request MIGHTsay COMBINE, cehck this as based on a old video - Set the PR merge parameters
- base repository: the target repo
- base: master or main
- head repository: your fork
- compare: your branch with the code changes
- Fill in a title for the PR (AI might prefill for you)
- Fill in a description.
- Click
Create pull request
- The Project now processes you PR
- If the project accepts your PC, it will merge it with their code.
- A project can refuse or send your code back for further revisions, but this is out of scope for this tutorial.
- Delete the Fork's branch you used for the PR
- Now the branch has done its job it should be deleted to keep things tidy.
- You don't need to delete your branch, but you might want to so that you're not confused. It's not a problem if you don't delete it.
- Delete the Fork and your Local Repo (optional)
- I would consider if you really need to do this, but I have included it here for completeness.
- If you're likely to make further contributions, I wouldn't delete the forked repo. When you want to make a further change, you should synchronize your copy so it's updated to mine, then make another branch.
Notes
- You do not have to create a local repo to make changes
- You can create the branch on GitHub.
- Edit the raw files via GitHub or use github.dev by clicking the period button (
.) on the homepage of your fork. - Save and commit your changes on GitHub.
- You do not have to create a new branch, but you should
- The benefits of creating a branch on your fork is as follows:
- It allows you to resync your fork's master branch with the project's master branch without affecting your code, which is good if the project gets an update and prevents code loss in your fork.
- Keeps your code separate.
- Easier to submit the changes to the project.
- You can work on multiple issues separately which is useful for teams.
- It allows you to keep the fork of the project in your account for re-use later, perhaps you might want to make more contributions in the future.
- Not using a branch, but just your fork's master branch is probably only useful for quick submissions and where you are likely to delete the fork afterwards.
- The benefits of creating a branch on your fork is as follows:
- A Pull Request can have many commits. The PR message and the commit messages are different.
- Put issue closing or reference (e.g.
ref #114orcloses #114) short codes in the PR description. You can put these in the commits that form the PR but I am not sure if they get parsed.
GitHub Structure
Account Plans / Pricing
- Pricing
- Pricing · Plans for every developer · GitHub - Whether you're starting an open source project or choosing new tools for your team, we’ve got you covered.
- GitHub’s plans - GitHub Docs - An overview of GitHub's pricing plans.
- GitHub offers free and paid plans for storing and collaborating on code. Some plans are available only to personal accounts, while other plans are available only to organization and enterprise accounts.
- The plans
- GitHub Made All Its Core Features Free For Everyone - Here‘s Why You Should Care - ExpertBeacon - For years, some of GitHub’s most helpful features required users to upgrade from the free tier to a paid subscription ranging from $4 to $21 per user/month. However, GitHub recently announced that all of its core features are now included for free for all users.. In this post, I’ll summarize what changed, analyze why GitHub likely made this move, and explain why it matters so much for developers.
- Q&A from GitHub Sales Deelopment Representative
- Do I pay per user in the organization?
- Yes. All GitHub plans (Team or Enterprise) are billed per user, regardless of how many repositories they access.
- Do I have to pay a fee for the organization and then per user?
- No. There is no separate base fee. You only pay per active user in the organization. One user = one seat.
- Is a paid user in GitHub like a seat I can assign to any user I want?
- Yes. Each paid seat is tied to an individual GitHub account in your organization. You can invite/remove users, and the billing updates accordingly.
- What happens if I have more users than seats?
- You will automatically be billed for any additional users beyond your current seat count. GitHub tracks active users monthly for billing purposes.
- Are limitations applied to the users or the organization?
- It depends:
- Features like SSO, audit logs, and role-based access are tied to the organization’s plan (e.g., Team or Enterprise).
- Billing is per user.
- Storage limits, repository insights, and access controls also depend on the organization plan, not the user’s individual plan.
- It depends:
- If I have a Pro personal account, do my features carry over into the organization?
- No. Features from a personal Pro account apply only to your personal account and repositories, not to the organization. The organization will need its own paid plan (Team or Enterprise) to unlock advanced features.
- Do you have anymore information
- For a breakdown of GitHub’s per-user pricing model, this page is a helpful reference: About per-user pricing
- And to compare GitHub Free, Team, and Enterprise features, you can use this overview: GitHub Plans Comparison (scroll down).
- Do I pay per user in the organization?
- Upgrading / Downgrading Account Plan
- Downgrading your account's plan - GitHub Docs
- You can downgrade the plan for any type of account on GitHub at any time.
- After an organization's plan is downgraded, the organization will lose access to any functionality that is not included in the new plan. If an advanced feature, such as GitHub Pages, is not available for private repositories in your new plan, consider whether you'd like to retain access to the feature by making affected repositories public.
- Removing paid seats from your organization: To reduce the number of paid seats your organization uses, you can remove members from your organization or convert members to outside collaborators and give them access to only public repositories.
- Upgrading your account's plan - GitHub Docs
- You can upgrade the plan for any type of account on GitHub at any time.
- About upgrades
- Each account on GitHub is billed separately.
- Upgrading an organization account enables paid features for the organization's repositories only and does not affect the features available in repositories owned by any associated personal accounts.
- Similarly, upgrading a personal account enables paid features for the personal account's repositories only and does not affect the repositories of any organization accounts.
- Upgrading your personal account's plan
- You can upgrade your personal account from GitHub Free to GitHub Pro to get advanced code review tools on private repositories owned by your personal account.
- Upgrading your personal account does not affect any organizations you may manage or repositories owned by those organizations.
- Managing your organization's plan
- You can upgrade your organization's plan, add seats to your existing plan, or switch from per-repository to per-user pricing.
- Upgrading an organization does not affect your personal account or repositories owned by your personal account.
- If your organization is using a legacy per-repository billing plan, you can switch to per-user pricing at any time. You will not be able to switch back to repository pricing once you've upgraded to per-user pricing.
- If you'd like additional users to have access to your GitHub Team organization's private repositories, you can purchase more seats anytime.
- Downgrading your account's plan - GitHub Docs
- Organizations
- Github team users vs collaborators pricing. · community · Discussion #22012 · GitHub
- GitHub Free allows you to add as many members and collaborators to your organization as you’d like at no charge.
- If you decide to upgrade to GitHub Team, however, you must add a paid seat for each organization member as well as each collaborator. In your example, upgrading an 10-user organization from GitHub Free to GitHub Team would require 10 paid seats at $4 per month each, for a total charge of $40 per month.
- Although collaborators and organization members serve different purposes within GitHub, for organizations subscribed to GitHub Team collaborators must occupy a paid seat in order to access private repositories. Organization members always require a paid seat.
- If you have an existing subscription to GitHub Team with 10 users, then add another seat during the billing cycle, you’ll be charged a prorated amount of $4 to cover the period between when you added the seat and when the subscription typically renews.
- About per-user pricing - GitHub Docs - Learn about per-user pricing for organizations.
- People that consume a license:
- Organization members, including owners
- Outside collaborators on private repositories owned by your organization, excluding forks
- Anyone with a pending invitation to become an outside collaborator on private or internal repositories owned by your organization, excluding forks
- Dormant users
- People that consume a license:
- Github team users vs collaborators pricing. · community · Discussion #22012 · GitHub
- GitHub Pro
- GitHub Pro feature comparison is hidden
- You would expect these details to be available on the pricing page , but they are not. To find out the difference between
GitHub FreeandGitHub Profollow the instructions below:- Login --> Profile --> Settings --> Billings and plans --> Plans and usage --> Upgrade
- You can now see a side by side comparison on the 2 account plans.
- Upgrading your account's plan - GitHub Docs
- You can upgrade your personal account from GitHub Free to GitHub Pro to get advanced code review tools on private repositories owned by your personal account.
- Upgrading your personal account does not affect any organizations you may manage or repositories owned by those organizations.
- This has detailed instructions on upgrading to Pro
- Pricing on the home page is for organizations.
- Pro and a single Team user is $4 (which cannot be a coincidence)
- You would expect these details to be available on the pricing page , but they are not. To find out the difference between
- Is Github Pro free for students? · community · Discussion #158175 · GitHub - Yes, eligible students can get GitHub Pro for free through the GitHub Student Developer Pack.
- What happens to my repositories once the Pro membership expires? · community · Discussion #129354 · GitHub
- When a GitHub Pro subscription expires, the account transitions back to the free tier.
- This change primarily impacts features and limits but does not affect the availability or integrity of the repositories.
- Public repositories remain public and fully accessible, ensuring continued visibility and collaboration.
- Private repositories created during the Pro period retain their privacy, but the number of collaborators may be restricted to the limits of the free plan, typically capped at three.
- Advanced features exclusive to GitHub Pro, such as enhanced code review tools, repository insights, and additional CI/CD minutes and storage, become unavailable.
- Users may experience limitations if their usage exceeds the free plan’s data transfer and storage limits, potentially leading to restricted repository actions until usage is reduced or additional resources are purchased.
- Pro-specific support and advanced security features, like code scanning and secret scanning, are also discontinued.
- Despite these changes, all existing repositories remain intact and functional, ensuring no loss of data or accessibility.
- GitHub pro · community · Discussion #67993 · GitHub - Can someone please explain how the GitHub pro version works. I thought it works like having a Team organization account?
- GitHub Pro is a subscription plan for individual users on GitHub and is distinct from GitHub Team, which is designed for organizations. Here's how GitHub Pro works:
- Individual Subscription: GitHub Pro is meant for individual developers who want enhanced features and capabilities beyond what's available in the free GitHub plan. It's not associated with an organization or team account.
- Enhanced Features: GitHub Pro provides several benefits over the free GitHub account.
- In summary, GitHub Pro is a paid subscription plan for individual developers who want enhanced features and unlimited private repositories. It is not the same as a GitHub Team organization account, which is designed for collaborative work within teams or organizations and includes more extensive management and collaboration features.
- GitHub Pro is a subscription plan for individual users on GitHub and is distinct from GitHub Team, which is designed for organizations. Here's how GitHub Pro works:
- GitHub Pro feature comparison is hidden
GitHub Account Types
- General
- Types of GitHub accounts - GitHub Docs
- Accounts on GitHub allow you to organize and control access to code.
- User accounts - Every person who uses GitHub signs in to a user account.
- Organization accounts - An organization account enhances collaboration between multiple users, and an enterprise account allows central management of multiple organizations.
- Enterprise accounts - These allow administrators to centrally manage policy and billing for multiple organizations and enable innersourcing between the organizations.
- Accounts on GitHub allow you to organize and control access to code.
- GitHub: Everything you need to know about accounts and plans (Part I) - Accounts | Sogeti Labs - In this article, we will explore the different types of GitHub accounts and in a second one we will explain the different plans and billing.
- GitHub: Everything you need to know about accounts and plans (Part II) - Plans and Billing |Sogeti Labs - If you are considering using GitHub as a source code hosting and collaboration platform for your new projects, as well as for migrating projects from other DevOps platforms, one of the most important parts you should be familiar with is the offering and pricing model.
- Types of GitHub accounts - GitHub Docs
- Should I create separate work and personal GitHub accounts?
- why do I have a separate github account for work? - YouTube | anthonywritescode - I walk through why I keep my github accounts separate!
- Can keep work and personal stuff separate in particular notifications.
- Makes attribution clear
- Can show work done in works time.
- = edge case
- NB: If you work for yourself, this is definitely of no use to you. I also could not be bothered with 2 accounts.
- Should I create separate work and personal GitHub accounts? - Software Engineering Stack Exchange
- I say you can eat the cake in have it too! Introducing GitHub Organizations.
- Use your GitHub account for your personal projects, and create an organization for your professional projects. The organization's homepage will show the professional projects you want to introduce, and it'll have a link to your personal account that shows all the things you have done in GitHub.
- = use 1 account
- why do I have a separate github account for work? - YouTube | anthonywritescode - I walk through why I keep my github accounts separate!
- User Accounts
- Enhanced billing platform is now available for personal accounts - GitHub Changelog - As of February 13, 2025, new GitHub Free and Pro plan customers now have access to the enhanced billing platform—a suite of features designed to help users manage and understand their GitHub spending. All new users, regardless of plan type, are onboarded to this new experience.
- Organizations
- Organizations are billed per user.
- GitHub for teams · Build like the best teams on the planet · GitHub - Compare side by side, free and paid for organizations (Github Free and GitHub Team)
Organizations
Overview
- About organizations - GitHub Docs
- Organizations are shared accounts where businesses and open-source projects can collaborate across many projects at once, with sophisticated security and administrative features.
- Your team can collaborate on GitHub by using an organization account, which serves as a container for your shared work and gives the work a unique name and brand.
- Each person that uses GitHub always signs into a personal account, and multiple personal accounts can collaborate on shared projects by joining the same organization account.
- You can use organizations for free, with GitHub Free, which includes limited features on private repositories. To get the full feature set on private repositories and additional features at the organization level, including SAML single sign-on and improved support coverage, you can upgrade to GitHub Team or GitHub Enterprise Cloud. For more information, see GitHub’s plans.
- Enterprise accounts are a feature of GitHub Enterprise Cloud that allow owners to centrally manage policy and billing for multiple organizations.
- github organization plans | Bing Search
- GitHub organization plans are options for teams and businesses to use GitHub features and services. Organizations can use GitHub for free, with limited features on private repositories, or upgrade to GitHub Team or GitHub Enterprise Cloud for more features and support. GitHub Free for organizations includes private repositories for unlimited users, and GitHub Free for individual developers includes unlimited collaborators. To create an organization, you need to follow the prompts on the GitHub website.
- What Are GitHub Organizations, and Should You Use One? | How-To Geek
- GitHub Organizations is a feature of GitHub that allows you to create a central place where team members can access and manage repositories and other resources.
- Grouping them all under one name on a non-personal account is a great organizational tool. Repositories made under organizations will use the organization name instead of your personal account as the prefix, which can look more professional.
- Beyond that, Organizations also provide many features for teams, such as centralized user and permission management.
- Maintaining ownership continuity for your organization - GitHub Docs - Organizations can have more than one organization owner to avoid lapses in ownership.
- Limit on Write Collaborators | Github Organization (Free) · community · Discussion #140992 · GitHub
- Q:
- I want to create a Free Github Organization account, where I would have several private repositories.
- Are there any limits on the number of (free) members that can join the private repositories with write permissions? (I am mostly concerned about organization members; not external collaborators).
- I am being told that there is , but I can't seem to find anything in Github's documentation that says so...
- A:
- Great question! For a free GitHub Organization account, you can have unlimited private repositories, and there's no limit on the number of members within the organization. However, the distinction comes with permissions—free organization accounts can add as many members as they want, but those members all receive the same default permissions.
- If you're adding members to your organization, they will all get read or write permissions for private repositories depending on how you set up access. GitHub doesn’t explicitly limit the number of these organization members, but you might run into practical management issues if the group gets too large without paid features for more granular control.
- Q:
Setup / Configure
- nothing here yet
Creating a new Organization
- Creating a new organization from scratch - GitHub Docs - Create an organization to apply fine-grained access permissions to repositories.
- Make sure you have a personal account setup with 2FA, recovery emails and you have downloaded and printed your OTP codes out.
Converting an Account to an Organization
- It is best to setup a organization from scratch and convert only if needed.
- Converting a user into an organization - GitHub Docs
- You can convert your personal account into an organization. This allows more granular permissions for repositories that belong to the organization.
- An organization cannot be converted back to a user.
- Any commits made with the converted personal account will no longer be linked to that account. The commits themselves will remain intact.
- The personal account you want to convert cannot be a member of any organizations.
- How To Transform And Switch Your Account To Organization on Github - YouTube | How to Media
- Why is there an option to convert an account into an organization?
- It’s because organizations didn’t always exist.
- You aren’t supposed to create an account only to then turn it into an organization.
- How to turn a personal account into an org account · GitHub | baldwindavid
- Excellent explanation of the messages and terms when converting an account into an organization.
- This organization belongs to - Confused about converting account to organization..?? · community · Discussion #23263 · GitHub
- This organization belongs to:
- That option determines ownership of the organization with respect to our Terms of Service.
- If you select the " My personal account" option, the organization is bound to our Standard Terms of Service with you as the owner. Selecting the “A business or institution” option places the organization on our Corporate Terms of Service instead, with ownership held by an entity such as a company, non-profit, or group. Corporate Terms provide greater flexibility with regard to account ownership disputes and transfers, which can be beneficial in cases where an organization owner leaves a business or otherwise becomes unresponsive.
- Q:
- So if I select to set this up as corporate, because my company is indeed an S-Corp, would it still be showing up under /angelleye or does that get changed? That’s the part that’s confusing me, because it says the company “not angelleye” would control it.
- A:
- Your personal account will still have owner permissions for the organization, so the way in which you access the organization’s content remains the same, regardless of who owns the organization from a Terms of Service perspective.
- This organization belongs to:
- Convert Your Personal GitHub Account into an Organization | Step-by-Step Guide - YouTube - In this video, I’ll show you how to convert your personal GitHub account into an organization. Learn the step-by-step process, benefits, and why you might need to make this switch. Perfect for developers, teams, and project managers!
Transfer a repository to an Organization
- Expert guide: Transfer Github to Organization step-by-step - YouTube | TechTimeFly - This video will guide you through the process of transferring one or more repositories into an organization.
Personal Account or Organization
- Why you should create a GitHub Organization for your side project | by Adam Lehechka | Medium - There’s many amazing benefits that a GitHub organization can provide. And if you’re planning on your project being open source in a public repository then you can get all the great benefits completely free!
Roles
- About organization membership - GitHub Docs - You can become a member of an organization to collaborate with coworkers or open-source contributors across many repositories at once.
- Roles in an organization - GitHub Docs
- Organization owners can assign roles to individuals and teams giving them different sets of permissions in the organization.
- Outside collaborator, To keep your organization's data secure while allowing access to repositories, you can add outside collaborators. An outside collaborator is a person who has access to one or more organization repositories but is not explicitly a member of the organization, such as a consultant or temporary employee.
- Repository roles for an organization - GitHub Docs - You can customize access to each repository in your organization by assigning granular roles, giving people access to the features and tasks they need.
- Converting an organization member to an outside collaborator - GitHub Docs - If a current member of your organization only needs access to certain repositories, such as consultants or temporary employees, you can convert them to an outside collaborator.
Benefits of an Organization
- Can put all of a companies repos in one place
- Can be a separate assets that can be attached to the company rather than a personal account.
- It is not a personal account. a personal account should belong to a single person and not a company.
- Permissions can be more fine grained
- Organizations can be part of an enterprise account
How can I tell if a repository belongs to an organization?
- Click on the owner (eg: getk2)
- If there is a People tab, then it is an organization (eg: https://github.com/orgs/getk2/people)
Contributors / Collaborators / Members
- What is the difference between contributor, member and collaborator? - Open Source Stack Exchange
- Contributors - When a user's set of email addresses is found in the commit history of a github repo, github marks that user as a contributor.
- Collaborators - A user that has defined permissions in a github repo is marked as a collaborator. These permissions can vary and do not need to be the commit bit.
- Members - When a github repo belongs to an organization, users that have membership in that organization are marked "Member" in the same space used for "Contributor" and "Collaborator".
- Adding outside collaborators to repositories in your organization - GitHub Docs
- You can allow people who aren't members of your organization to access repositories that your organization owns.
- An outside collaborator is a person who is not a member of your organization, but has access to one or more of your organization's repositories.
- You can choose the level of access to grant for each outside collaborator.
- Unless you are on a free plan, adding an outside collaborator to a private repository will use one of your paid licenses. For more information, see "About per-user pricing."
Public vs Private
- Setting repository visibility - GitHub Docs - You can choose who can view your repository.
- Making a repository private
- Making a repository public
- Consequences of changing a repository's visibility
- Organization Members, Commits, Pull requests, Discussions and Wiki - What happens to them when changing repository visibility · Issue #38012 · github/docs · GitHub
- A feature request to update this document to include the missing items when changing visibility.
- Public repositories:
- Host open source projects in public GitHub repositories, accessible via web or command line. Public repositories are accessible to anyone at GitHub.com.
- + copy to the top ???
- Private repositories:
- Host code in private GitHub repositories, accessible via appliance, web, and command line. Private repositories are only accessible to you and people you share them with.
- + copy to the top ???
How to structure your Github Organization, Repositories and Users
This section will deal with configuring GitHub for your developing and company needs.
- The hierarchy of GitHub is as follows:
- Enterprise Account --> Organization --> Repository --> Users
- Orgs and Teams Best Practices · GitHub | joshjohanning - Orgs and Teams Best Practices. GitHub Gist: instantly share code, notes, and snippets.
- The intention of this document is to provide some guidance and suggestions to customers who are wondering how they should structure organizations and teams in their GitHub Enterprise environment. The idea isn't to give hard and fast rules on which approach is better than the other, but to give examples of when one approach might be preferable to another depending on the use case.
- The concept of Teams in GitHub allows for greater flexibility for collaboration and integration, as well as separation of repositories and permissions.
- Excellent article
- How should you structure your GitHub Organizations? - YouTube
- There are a lot of different ways to structure your GitHub Organizations. One organization to rule them all, multiple organizations, even LOTS of organizations. There are some pros and cons you need to consider with any method that you choose.
- Very chilled out video
- Enterprise account --> Organizations --> Repositories
- How many Organizations do we need?
- Strategies for using organizations in GitHub Enterprise Cloud - GitHub Resources
- Within GitHub Enterprise Cloud (GHEC), organizations are shared accounts where your users collaborate across many projects at once, with sophisticated security and administrative features. It’s important to plan your structure in advance to avoid creating unnecessary silos and increase administrative overhead. A good structure will facilitate collaboration and discovery while reducing administrative overhead.
- In general, we recommend creating the fewest possible organizations within your enterprise to accommodate your business needs.
- Model 1: Single Organization
- In this model, a single organization is used for all or the vast majority of repositories. Many small- to medium-sized organizations (less than 5,000 developers) use this approach to manage their GitHub environment.
- Model 2: Red-green-sandbox-archive
- Model 3: Portfolio company
- GitHub Organization Best Practices - A concise guide on best practices for managing single vs multiple GitHub Enterprise Organizations
- Note: Distinct organizations are NOT needed to limit repository access. Repository access can be limited via base user permissions and Teams.
- Individual organizations are intended for users who work together, i.e., whole engineering teams and their cross-functional counterparts.
- When does it make sense to create more than one organization?
- Expert guide: Transfer Github to Organization step-by-step - YouTube | TechTimeFly
- This guy uses repositories to separate his code by language.
- The video is just for context
GitHub Account Management
Does setting up a SSH key and PAT allow me to use them to recover my account with my email address when locked out of my account???
Account Setup
- Password
- Use a strong password
- Store the password in a secure password manager.
- Recovery codes
- Download them
- print them out
- install them into a secure password manager
- Enable 2FA
- with as many methods as possible except maybe SMS as this not classed as secure
- Use passeys?
- Create an SSH key
- Can this be used for account recovery
- Create a Personal Access Token
- Can this be used for account recovery
- Setup your profile
- Fill in your information and make sure only what you want is shown publicaly.
Account Recovery
Read this article, it is very clear and calming.
- How to Recover Your GitHub Account
- Regain access to your GitHub account with a step-by-step guide on using 2FA codes, email verification, and support requests for account recovery.
- Best Practices to Prevent Account Lockout
- Setting Up Multiple 2FA Methods for Backup
- Downloading and Securely Storing Recovery Codes
- Ensuring Access to Verified Devices and Email Addresses
- Recovery options are as follows (not all might be available to you):
- Recovery codes.
- Previously verified device
- SSH key
- Personal access token
- Additional Emails for recovery
- This is only useful if you do not have 2FA enabled on your account.
- Profile --> Settings --> Emails --> Add email address
- https://github.com/settings/emails --> Add email address
- If you do not have more than one verified email setup you will be prompted with this message:
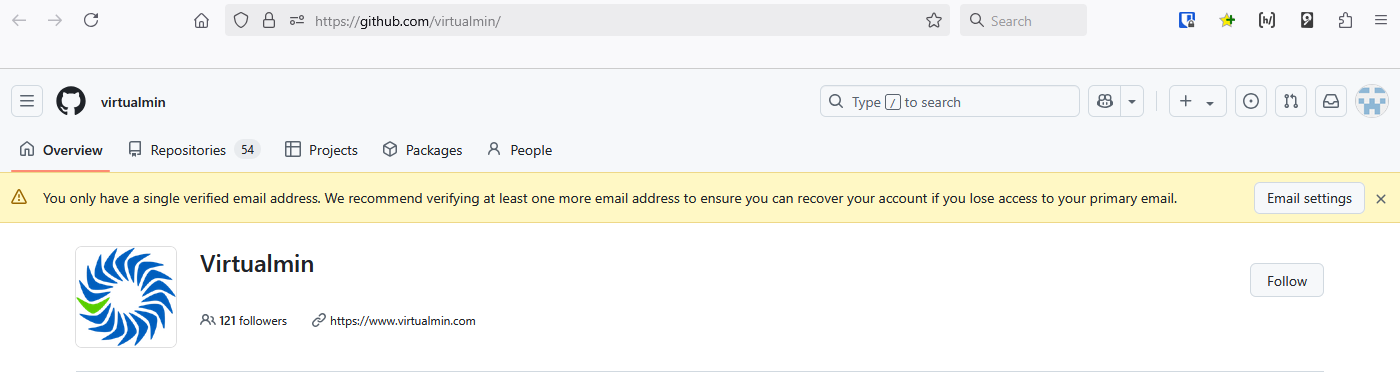
- Recovering your account if you lose your 2FA credentials - GitHub Docs
- If you lose access to your two-factor authentication credentials, you can use your recovery codes, or another recovery option, to regain access to your account.
- For security reasons, GitHub Support will not be able to restore access to accounts with two-factor authentication enabled if you lose your two-factor authentication credentials or lose access to your account recovery methods.
- If you cannot use any recovery methods, you have permanently lost access to your account. However, you can unlink an email address tied to the locked account. The unlinked email address can then be linked to a new or existing account. For more information, see Unlinking your email address from a locked account.
- Recovering your account if you lose your 2FA credentials - GitHub Docs
- If you lose access to your two-factor authentication credentials, you can use your recovery codes, or another recovery option, to regain access to your account.
- Follow Instructions here and will need at least one of the following alternative authentication factors:
- Previously verified device
- SSH key
- Personal access token
- A member of GitHub Support will review your request and email you within three business days. If your request is approved, you'll receive a link to complete your account recovery process. If your request is denied, the email will include a way to contact support with any additional questions.
- GitHub Account Recovery Policy - GitHub Docs
- Get started, troubleshoot, and make the most of GitHub. Documentation for new users, developers, administrators, and all of GitHub's products.
- GitHub provides a number of account recovery methods including an automated recovery process if you have lost access to your GitHub.com account. If you cannot use any of the provided recovery methods, you have permanently lost access to your account.
- For security reasons, GitHub Support will not restore access to accounts with two-factor authentication enabled if you lose your two-factor authentication credentials or lose access to your account recovery methods. You must use existing account recovery methods.
- GitHub does not support any other means of account recovery, including social or ID verification, by members of GitHub’s staff. This policy is in place to protect your account from unauthorized access through social engineering.
- How to Recover Your GitHub Account - Regain access to your GitHub account with a step-by-step guide on using 2FA codes, email verification, and support requests for account recovery.
- GitHub Account Recovery Policy - GitHub Docs - Get started, troubleshoot, and make the most of GitHub. Documentation for new users, developers, administrators, and all of GitHub's products.
- New 2FA account recovery options via password reset flow - GitHub Changelog
- Users with two-factor authentication enabled can now begin the account recovery process from the password reset flow.
- With this change, a user can recover their account as long as they can perform email verification and provide a recovery factor, such as an SSH key, PAT (Personal Access Token), or previously signed in device.
- Unlinking your email address from a locked account - GitHub Docs - If you have lost your two-factor authentication (2FA) credentials and are unable to recover access, you can remove the connection between your email address and a 2FA locked account. The email address is then available for you to link it to a new or existing account, maintaining your commit history.
Authentication
- General
- About authentication to GitHub - GitHub Docs - You can securely access your account's resources by authenticating to GitHub, using different credentials depending on where you authenticate.
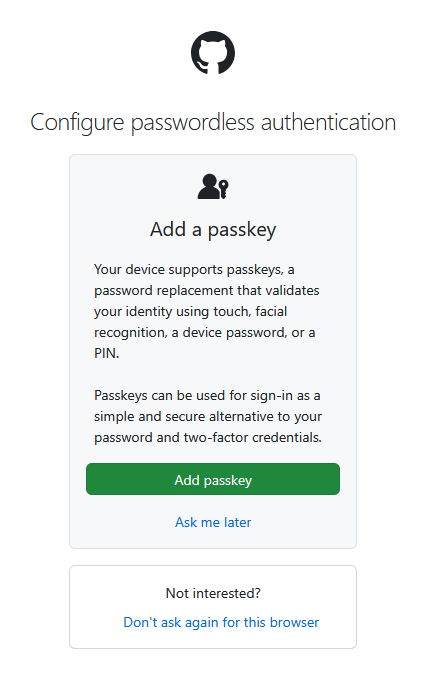
- Passkeys
- Passkeys are a password replacement that validates your identity using touch, facial recognition, a device password, or a PIN.
- Passkeys can be used for sign-in as a simple and secure alternative to your password and two-factor credentials.
- About passkeys - GitHub Docs
- Passkeys allow you to sign in safely and easily, without requiring a password and two-factor authentication.
- Passkeys are webauthn credentials that validate your identity using touch, facial recognition, a device password, or a PIN. They can be used as a password replacement or as a 2FA method. Passkeys can be used for sign-in as a simple and secure alternative to your password and two-factor credentials.
- Managing your passkeys - GitHub Docs - You may be prompted to register a passkey during sign-in, or you can choose to register a new passkey in your account settings. For 2FA users, you can upgrade existing eligible security keys into passkeys.
- Personal Access Token (PAT)
- Personal access tokens were initially introduced to replace passwords for authentication to GitHub's API and command-line interface. Over time, their functionality has expanded, including their use in account recovery scenarios.
- Managing your personal access tokens - GitHub Docs - You can use a personal access token in place of a password when authenticating to GitHub in the command line or with the API.
2FA
This is covering the use of 2FA on GitHub.
- If you loose your 2FA methods and your Recovery codes then you will be locked out of your account permanently, this is to protect GitHub and users from social engineering.
- You can use any 2FA method you have configured to login which is useful if you loose access to one.
- Make sure you set up as many recovery methods as possible.
- Having multiple 2FA methods reduces the risk of users getting locked out of their accounts
- 2FA does not just mean TOTP, you can also add SMS, Github Mobile.
- SMS is not really secure, but easy to setup and can prevent lockout.
- Download and print out your Recovery codes
- When you change your password your Recovery Codes will be revoked and new ones issued which you should download immediately.
- Download 2FA Recovery codes here:
Profile --> Settings --> Access --> Password and authentication --> Recovery options --> Recovery codes --> View
- General
- 2FA methods available
- Authenticator app
- Uses TOTP
- Use 2FAS as your OTP manager.
- SMS/Text message
- This is a code sent your mobile phone.
- It is better than nothing.
- Security keys
- This means physical keys such as YubiKeys.
- Uses WebAuthn
- Configuring two-factor authentication - Configuring two-factor authentication using a security key - GitHub Docs
- Not all FIDO authenticators can be used as passkeys, but you can still register those authenticators as security keys.
- Security keys are also WebAuthn credentials, but unlike passkeys they don't require user validation.
- Since security keys only need to verify user presence, they only count as a second factor and must be used in conjunction with your password.
- GitHub Mobile
- Install the GitHub app and use this as an authenticator.
- Easy to use and I recommend using this.
- Authenticator app
- 2FA methods available
- Official Docs
- Securing your account with two-factor authentication (2FA) - GitHub Docs - You can set up your account on GitHub to require an authentication code in addition to your password when you sign in.
- Configuring two-factor authentication recovery methods - GitHub Docs
- You can set up a variety of recovery methods to access your account if you lose your two-factor authentication credentials.
- Print your codes on paper and store securely in a password manager.
- If you enable/disable 2FA then your current codes will become invalid.
- Configuring two-factor authentication - GitHub Docs
- You can choose among multiple options to add a second source of authentication to your account.
- We strongly recommend using a time-based one-time password (TOTP) application to configure 2FA, and security keys as backup methods instead of SMS. TOTP applications are more reliable than SMS, especially for locations outside the United States. Many TOTP apps support the secure backup of your authentication codes in the cloud and can be restored if you lose access to your device.
- After you configure 2FA, your account will enter a 28-day check up period. You can leave the check up period by successfully performing 2FA in those 28 days. Otherwise, you will be prompted to perform 2FA in an existing GitHub.com session on the 28th day. If you cannot perform 2FA to pass the checkup, you must use the provided shortcut to reconfigure your 2FA settings and retain access to GitHub.com.
- Git Good at Securing your Code - How to enable 2FA on GitHub - YouTube | GitHub
- If you don't already have two-factor authentication setup, check out how to enable this feature now.
- This is an easy to follow video
- What was discovered when we enforced 2FA for millions of users - YouTube | GitHub
- GitHub product designer Hemant Kumar discusses implementing two-factor authentication (2FA) at scale, driven by empathy for our users and a commitment to software security.
- The project showcases cross-functional collaboration, user-centered design, and strategic communication, resulting in improved user experience while reducing support requests and account lockouts.
- This explains the process and what this means to a user.
- What I did
- Added 2x recovery emails
- Added a mobile phone for SMS recovery
- Added GitHub Mobile as a 2FA (installed and logged in on my phone)
- * (not done yet) Added TOTP using 2FAS (Android)
- Saved my recovery codes to my password manager (Bitwarden)
- Printed my recovery codes on paper
GitHub Services
Search
The search feature on GitHub is very powerful and is underused by a lot of people.
- Search Box
- Search in title
in:title findme
- Use of the
ANDkeywordis:issue state:open in:title issue AND reporter
- Search in title
- Filter issues to show those I have posted or had activity on
Filter          Shows
author:@me      Issues you opened
commenter:@me   Issues you commented on
mentions:@me    Issues where you were mentioned
assignee:@me    Issues assigned to you
involves:@me    All of the above combined
- Using the API
- REST API endpoints for search - GitHub Docs - Use the REST API to search for specific items on GitHub.
- GitHub REST API: Get issue based only on title - Stack Overflow
GET /search/issues?q=text+to+search+in:title+repo:some/repo
- Documentation
- Searching issues and pull requests - GitHub Docs - You can search for issues and pull requests on GitHub and narrow the results using these search qualifiers in any combination.
- Understanding the search syntax - GitHub Docs - When searching GitHub, you can construct queries that match specific numbers and words.
- Other
- Github search cheatsheet from official docs. · GitHub - GitHub’s search supports a variety of different operations. Here’s a quick cheat sheet for some of the common searches.
- Understanding GitHub Code Search syntax - GitHub Docs - You can build search queries for the results you want with specialized code qualifiers, regular expressions, and boolean operations.
- How to search on GitHub with OR/AND operators - Stack Overflow
- How can I search an issue on GitHub that contains keywords "java" AND ("python" OR "C++")? Is it possible to represent a search with these logical operators like OR/AND?
- From the repository issues page, you can build advanced searches using the AND and OR keywords and parentheses for nested searches. This allows you to build more complex filters to find the exact set of issues you’re looking for.
Pages
- This free feature allows you to run websites directly from GitHub, even with your own custom domain name. Useful for small developers who are bandwidth constrained.
- GitHub pages host only static HTML pages. No server side technology is supported, so Node.js applications won't run on GitHub pages.
- GitHub pages does support the Jekyll template system.
- TL;DR
- Settings --> Code and Automation --> Pages
- You get one main website per account https://shoulders.github.io/ and one per project https://shoulders.github.io/mysql-slow-query-log-visualizer/
- You can select a branch and then a folder. You can free type a folder name.
- The site is regenerated automatically when you commit a change via github
- The regeneration is handled internally with a GitHub action.
- Setting branch back to none, then back to the selected branch will set off a build.
- Look in the actions tab to see the site getting built.
- Websites
- Jekyll • Simple, blog-aware, static sites | Transform your plain text into static websites and blogs - Transform your plain text into static websites and blogs
- Octocat.github.io
- If you prefer to not use the automatic generator, push a branch named gh-pages to your repository to create a page manually.
- In addition to supporting regular HTML content, GitHub Pages support Jekyll, a simple, blog aware static site generator written by our own Tom Preston-Werner.
- https://github.com/octocat/octocat.github.io - This is an example of the repo that controls a users main profile website, in this case Octocat.github.io.
- Documentation
- GitHub Pages | GitHub - Websites for you and your projects, hosted directly from your GitHub repository. Just edit, push, and your changes are live.
- Creating a GitHub Pages site - GitHub Docs
- You can create a GitHub Pages site in a new or existing repository.
- Create the entry file for your site. GitHub Pages will look for an index.html, index.md, or README.md file as the entry file for your site.
- It can take up to 10 minutes for changes to your site to publish after you push the changes to GitHub.
- Unpublishing a GitHub Pages site - GitHub Docs
- You can unpublish your GitHub Pages site so that your current deployment is removed and the site is no longer available. This is different from deleting the site.
- When you unpublish your site, your current deployment is removed and the site will no longer be available. Any existing repository settings or content will not be affected.
- Unpublishing a site does not permanently delete the site. For information on deleting a site, see Deleting a GitHub Pages site.
- Managing a custom domain for your GitHub Pages site - GitHub Docs - You can set up or update certain DNS records and your repository settings to point the default domain for your GitHub Pages site to a custom domain.
- Tutorials
- How to Use GitHub Pages in 2025! (Beginner's Guide) - YouTube | The Common Coder
- In this video, we'll guide you through the steps to set up and use GitHub Pages. We'll cover everything you need to know including an introduction to GitHub Pages, the difference between user sites and project sites, how to configure your repository to use GitHub Pages, and how to re-deploy your projects automatically whenever changes are made.
- Setting branch back to none, then back to the selected branch will set off a build.
- Look in the actions tab to see the site getting built.
- Excellent video.
- How to Host a Website on GitHub Pages Free (Custom Domain Setup Included) - YouTube - Master the art of hosting your website on GitHub Pages with a custom domain for that extra professional polish! In this comprehensive guide, we'll walk you through the entire process, from setting up your GitHub repository to configuring DNS records and seamlessly integrating your personalized domain. Elevate your online presence and impress visitors with your own custom domain on GitHub Pages.
- GitHub’s plans - GitHub Docs
- To publish a GitHub Pages site privately, you need to have an organization account. Additionally, your organization must use GitHub Enterprise Cloud.
- Deploy to `gh-pages` from a `dist` folder on the master branch - GitHub | cobyism
- Sometimes you want to have a subdirectory on the
masterbranch be the root directory of a repository’sgh-pagesbranch. This is useful for things like sites developed with Yeoman, or if you have a Jekyll site contained in themasterbranch alongside the rest of your code.
- Sometimes you want to have a subdirectory on the
- GitHub Pages for a repo with multiple subfolders · community · Discussion #58276 · GitHub
- Yes, it is possible to configure a single repository with multiple subfolders to be enabled for GitHub Pages, and each subfolder can have its own unique URL.
- Here's how you can achieve this:
- A GitHub Pages tutorial on how to host personal websites | TheServerSide
- GitHub Pages offers a free way to host a personal website and allows for the website to be indexed by Google. Follow this GitHub Pages tutorial to create a personal website that gets found in Google search.
- Has a YouTube video
- Step-by-Step Guide: Launching Your Website with GitHub Pages | by Shirley Berchel | Medium - This step-by-step tutorial will guide you through the process of setting up your very own website on GitHub Pages.
- How to Use GitHub Pages in 2025! (Beginner's Guide) - YouTube | The Common Coder
Gists
What are they and how to do you create, edit and share them.
- GitHub Gist — Crash Course - Neutron Dev - Learn everything about GitHub Gist in this FREE crash course. By the end of it you'll know how to create a gist, common use cases & best practices.
Apps
in the marketplace, how do i use them + put examples here.
GitHub Repositories
General
- About repositories - GitHub Docs
- A repository contains all of your code, your files, and each file's revision history. You can discuss and manage your work within the repository.
- When you create a repository, you can choose to make the repository public or private. Repositories in organizations that use GitHub Enterprise Cloud and are owned by an enterprise account can also be created with internal visibility.
- Public repositories are accessible to everyone on the internet.
- Private repositories are only accessible to you, people you explicitly share access with, and, for organization repositories, certain organization members.
- Branch Default Name
- Why GitHub renamed its master branch to main | TheServerSide - GitHub renamed the master branch to main for any Git repository, as it addresses cultural change like so many organizations that have nixed master-slave terminology in a time of social unrest.
- You can set the default branch name in your profile
Settings --> Code, planning and automation --> Repositories --> Repository default branch: master/main
Naming
- TL;DR
- kebab-case
- Lowercase letters
- Hyphens for word separation
- No spaces
- No numbers
- No emojies
- Say what the repo is about in 3–5 words max
- If you are company or team consider using a format such as:
- [prefix]-[project-name]-[suffix]
- [team-name]-[service-name]-[environment]
Links
- Naming Conventions for Git Repositories: A Quick Guide
- Discover essential naming conventions for git repositories to enhance organization and collaboration. Master the art of clear, impactful project titles.
- lowercase letters with hyphens for word separation to ensure consistency and ease of access.
- GitHub Repository Best Practices - DEV Community
- Top 10 tips for managing GitHub repositories effectively, covering naming conventions, branch protection, code reviews, and streamlined collaboration.
- Not just naming convention.
- GitHub Naming Conventions: Best Practices for Clean and Professional Repos | Medium | Towards Dev
- Whether you’re launching your next open-source library or just tidying up personal projects, consistent naming conventions on GitHub go a long way. Repos are the front doors to your code — so make them readable, discoverable, and professional.
- Use hypens not underscores
- Why hypens?
- Avoid CamelCase and Spaces
- Lowercase Is the Norm
- TL;DR
- Be descriptive but concise: Say what the repo is about in 3–5 words max.
- Use hyphens for word separation.
- Stick to lowercase for consistency.
- Avoid version numbers in the repo name — use Git tags or releases instead.
- A Guide to Git Repository Naming Convention
- Master the git repository naming convention with our definitive guide. Learn best practices, see examples, and enforce standards to boost team productivity.
- kebab-case:
- all lowercase letters, with words separated by hyphens.
- It’s the go-to choice for a reason—it’s clean, easy to read, and avoids compatibility headaches across different operating systems.
- Includes notes on prefixes and suffix (while using kebab-case)
- [prefix]-[project-name]-[suffix]
- [team-name]-[service-name]-[environment]
- GitHub - GoldenbergLab/naming-and-documentation-conventions
- Naming conventions are helpful practices that teams follow to write code together. - GoldenbergLab/naming-and-documentation-conventions
- github - Is there a naming convention for git repositories? - Stack Overflow
- If you plan to create a PHP package you most likely want to put in on Packagist to make it available for other with composer. Composer has the as naming-convention to use vendorname/package-name-is-lowercase-with-hyphens.
- 10 GitHub Repository Naming Best Practices - CLIMB
- When creating a GitHub repository, there are a few best practices to follow in order to make it easier for others to find and use.
- Repository Naming Conventions | Medium | Nurhidayat
- Establishing clear and consistent naming conventions for repositories is essential for maintaining organization, enhancing collaboration, and improving code discoverability across development teams.
- This article outlines best practices for naming repositories, categorized by project type, to ensure a structured and understandable system.
- slug-case (words separated by hyphens) = this is kebab-case
- {project}-{general|service}-{service-name}-{type}
- GitHub Repository Naming Guide | AD GitHub Usage Guide
- This guide is designed to support you in effectively utilizing GitHub within the Fermi-AD Organization
- Here are a few things to consider when naming your repo:
- We want repos to be easily findable. Consistency is key to making it easy for someone to find your repo.
- Because GitHub provides many of it’s functions via generated URLs and REST APIs we should also consider what characters are used in repo names. Some characters are automatically replaced by GitHub, like spaces are turned into hyphens.
- hyphens and lower case
- Why we use hyphens for spaces in URLs | AD GitHub Usage Guide
- URL Structure Best Practices for Google Search | Google Search Central | Documentation | Google for Developers - It's a good idea to keep your site's URL structure as simple as possible. Learn more about the URL format recommended by Google, such as the use of hyphens, underscores, and domain structure.
- Duck.Ai
- GitHub Repository Naming Best Practices
- GitHub doesn't enforce strict naming rules, but following conventions makes your repositories more professional, discoverable, and easier to navigate. Here are the recommended practices:
- General Guidelines
- Character Restrictions
- Use only lowercase letters, numbers, hyphens, and underscores. GitHub automatically converts uppercase letters to lowercase, and special characters (except hyphens and underscores) aren't allowed. Avoid starting or ending with hyphens or underscores.
- Length and Clarity
- Keep names concise but descriptive — ideally under 50 characters. The name should immediately convey what the project does. Avoid generic names like "project," "code," or "my-repo."
- Character Restrictions
- Naming Patterns by Project Type
Project Type Naming Pattern Example Language/framework library language-nameorframework-namepython-requests,react-routerTool or CLI application action-verbortool-purposegit-flow,docker-composeWebsite or service service-nameordomain-nameblog-nextjs,api-gatewayLearning/tutorial project learn-topicortopic-tutoriallearn-golang,javascript-fundamentalsFork or variation original-forkorvariant-descriptionlodash-es, prettier-plugin-vueFork or variation dotfilesorconfig-purposedotfiles,eslint-config - Additional Recommendations
- Use Hyphens Over Underscores
- Prefer hyphens (my-project) over underscores (my_project) because they're more readable in URLs and more commonly used in the JavaScript/web ecosystem.
- Avoid Redundant Information
- Don't include file extensions (.js, .py) or common prefixes like "the-" unless they're essential to the name.
- Industry Conventions
- Many organizations follow specific patterns:
- npm packages: lowercase with hyphens (eslint-plugin-react)
- Docker images: lowercase with hyphens or underscores (node-server)
- GitHub Actions: action-verb format (setup-node, publish-release)
- Many organizations follow specific patterns:
- What to avoid
- Mixed case — MyProject (GitHub converts it anyway)
- Spaces or special characters — `my project!
- Overly long names — my-incredibly-detailed-project-description-for-learning
- Ambiguous abbreviations — proj-x or `temp-code
- Dates or versions in the name — project-2024 (use tags and releases instead)
- Reserved keywords — names that conflict with GitHub or popular tools
- Use Hyphens Over Underscores
- Following these conventions makes your repositories more professional and helps users quickly understand what your project does.
- GitHub Repository Naming Best Practices
- GitHub - naming-convention/naming-convention-guides
- Collection of naming guides for writing more consistent and readable codes.
- Covers Git and package names.
- The Naming Convention Project - The websitge to the GitHub repo.
Setup
Once your organizational structure (or not) is configured you then actually need to create your repos. In this section we will deal with how to setup a nice looking repository to ge the best out of it.
- GitHub - KatherineMichel/setting-up-an-open-source-project - Setting Up An Open Source Project.
- Organization accounts are for code owned by groups (companies, OSS projects).
- Teams make permission management easier. A developer added to a team now has access to repos based on team access.
- Repository Access
- Public repo - anyone can access
- Private repo - only designated members can access
- Setting up your project for healthy contributions - GitHub Docs - Repository maintainers can set contributing guidelines to help collaborators make meaningful, useful contributions to a project.
- Always add tags ?
joomla
joomla-component
joomla-extensions
app-server
app-site
Github Logos and their Usage
- Official Docs
- GitHub Logos and Usage · GitHub - We’ve put together some guidelines for those times when you want to use our logos to show off your GitHub integration or link back to us. Happy coding!
- GitHub Logo Policy - GitHub Docs
- GitHub Trademark Policy - GitHub Docs
- Usage of the Combined logo and changing the colours.
- The combined GitHub logo (Octocat + wordmark together) and the SVG version you’re referring to are not part of the assets GitHub makes available for general public use.
- Per the GitHub Logo Policy, you may use the logos provided on the official GitHub Logos and Usage page in the specific scenarios described there, but other logo variations — including the combined lockup — are not offered for download or authorized for general use unless you have explicit written permission from GitHub.
- On your specific points:
- Use of the combined logo – Not permitted without explicit permission from GitHub. Only the individual logos provided on the official page are approved for use.
- Use of the SVG variant – Same as above; if it’s not one of the downloadable assets on the official page, it’s not approved for general use.
- Black and white variants – You can only use the color variations that are officially provided in the downloadable assets. If both black and white versions are included in the official logo pack, you may use them as-is (without altering proportions or colors). If they are not included, you would need explicit permission to use them.
- If you need to use the combined logo, the SVG version, or any color variant not included in the official assets, the next step would be to request permission directly from GitHub’s brand team.
GitHub Errors, Issues and their solutions
- Permalinks are not rendered into code blocks
- Issue
- When i am copying permalinks and then pasting them into a GitHub editor they are not getting parsed into code blocks.
- Cause
- If you look at the end of the faulty links you can see there is a alphanumeric code after the line definition eg: C1,C6 in the example below.
Bad: https://github.com/webmin/authentic-theme/blob/0ca0f9e215fdad49e028158f1f0d5096295a8595/tconfig-lib.pl#L201C1-L204C6
- If I remove C1 and C6 respectively at the end of the permalink, the permalink is rendered into a code block.
Good: https://github.com/webmin/authentic-theme/blob/0ca0f9e215fdad49e028158f1f0d5096295a8595/tconfig-lib.pl#L201-L204
- When you select by the code, the characters where you started and finished your selection from are added on the end in the form of C1,C2 and it is this new format blocking the rendering of this into a code block.
- If you look at the end of the faulty links you can see there is a alphanumeric code after the line definition eg: C1,C6 in the example below.
- Solution
- Select directly on the line numbers rather than selecting the code.
- Links
- Creating a permanent link to a code snippet - GitHub Docs - You can create a permanent link to a specific line or range of lines of code in a specific version of a file or pull request.
- Notes
- This should work cross repository but some people say it does not. I have not verified this either way.
- Issue
- "git-receive-pack not permitted"
- Might be because the git repootpry is archived.
- git-receive-pack not permitted - Bing Search
- The "git-receive-pack not permitted" error typically indicates a permissions issue when trying to push changes to a remote Git repository.
- ^M characters being shown in a GitHub Diff
- Issue
- As you can see there are these red ^M control characters and the text file does not have correct formatting because the line endings are not working as they should.

- As you can see there are these red ^M control characters and the text file does not have correct formatting because the line endings are not working as they should.
- Cause
- The line endings are not being handled correctly between Windows and GitHub
- Solutions
- Set your editor to work with
LF(Unix/Linux)locally - Set Git to automatically alter line from
CRLF(Windows)toLF(Linux/Unix)endings before submission and vice-versa upon checkout.
- Set your editor to work with
- Links
- What is the meaning of ^M in 'git diff'? - Stack Overflow
^Mrepresents carriage return (CR). This diff means something removed a Unicode BOM from the beginning of the line and added aCRat the end.- If
^Mis in the new-changes side (right/green side), then that means the file's line-endings were changed fromLFtoCRLF, otherwise, file wasCRLFand is now changed toLF. - The
^symbol stands for Control, so^Mmeans Ctrl+M. - To get from that to the actual ASCII character code, you take the base character and flip bit 6 (i.e. XOR with 64). For letters, that just means subtract 64. So e.g.
^Ais character code 1 (becauseAis 65).^Mis 77 - 64 = 13 (becauseMis 77), which corresponds to carriage return in ASCII. ^Lrepresents the form-feed character (FFis the abbreviation, not hexadecimal), and has ASCII value12or0x0C.Trygit config core.whitespace cr-at-eolto hide it from the diffgit config --global core.autocrlf true
- Difference Between Carriage Return (CR) and Line Feed (LF) ? How it is used in Different Operating System? | GeeksforGeeks - This article will explain their History, Usage in Different Operating Systems, Related Issues, what they are, when they were introduced, and how one can use them to address various issues arising from the e of CR, and LF.
- Why does Windows use CR LF? - Stack Overflow
- Historically when using teletypes
CRwould return the carriage to the first position of the line whileLFwould feed to the next line. - Using
CR+LFin the file themselves made it possible to send a file directly to the printer, without any kind of printer driver.
- Historically when using teletypes
- Why is the line terminator CR+LF? - The Old New Thing - This shows the practical difference between the
CRandLFwhen they were first used.
- What is the meaning of ^M in 'git diff'? - Stack Overflow
- Issue
Tools
A collection of useful gitHub tools.
Statistics
- GitHub Release Stats - Get the latest release stats like download counts, release dates, author on any GitHub project
GitHub URL Conversions
Get a Real Page URL from a Blob URL
I have found recently a lot of Google searches takes me to the repo/blob page for that particular GitHub asset, so I made these scripts.
The logic rule to convert a repo link to the rendered pages URL
Here I show you how you can manually convert the URLs which can be useful to also explain the process
## Formula for Converting
https://github.com/<owner>/<repo>/blob/<branch>/<content-path>/<file>.md
-->
https://<site-domain>/<lang>/<content-path>/<file>


## Example
https://github.com/github/docs/blob/main/content/search-github/searching-on-github/searching-issues-and-pull-requests.md
-->
https://docs.github.com/en/search-github/searching-on-github/searching-issues-and-pull-requests
Method 1 - Simple Javascript
javascript:(async function(){
  try {
    const repoUrl = window.location.href;

    if(!repoUrl.includes("/blob/")){
      alert("This does not appear to be a GitHub file URL.");
      return;
    }

    // Extract owner, repo, branch, and path
    const match = repoUrl.match(/github\.com\/([^\/]+)\/([^\/]+)\/blob\/([^\/]+)\/(.+)/);
    if(!match){
      alert("Failed to parse repo URL.");
      return;
    }
    const owner = match[1];
    const repo = match[2];
    const branch = match[3];
    let path = match[4];

    // Remove .md extension if present
    if(path.endsWith(".md")) path = path.slice(0,-3);

    // Try to get homepage from GitHub API
    const apiUrl = `https://api.github.com/repos/${owner}/${repo}`;
    const response = await fetch(apiUrl);
    const repoData = await response.json();

    let siteDomain = repoData.homepage || `https://${owner}.github.io/${repo}`;

    // Optional: detect /content/ folder like GitHub Docs
    if(path.startsWith("content/")){
      path = path.replace(/^content\//,'');
    }

    // Assume English for GitHub Docs style
    const lang = (owner === "github" && repo === "docs") ? "/en" : "";

    // Build final URL
    const finalUrl = `${siteDomain}${lang}/${path}`;
    window.location.href = finalUrl;

  } catch(e){
    alert("Error converting URL: " + e);
    console.error(e);
  }
})();
- This works if you paste it in to the console via DevTools.
- How it Works
- You click the bookmarklet while on a GitHub repo file.
- It parses the URL to get owner/repo/branch/path.
- Uses GitHub API to see if the repo has a homepage (common for Pages sites).
- If not, defaults to https://<owner>.github.io/<repo>.
- Removes content/ and .md if present (GitHub Docs style).
- Adds /en for GitHub Docs.
- Redirects your browser automatically.
Method 2 - Complex Javascript
Console Version
javascript: (async function(){
  try{
    const repoUrl = window.location.href;
    const blobMatch = repoUrl.match(/^https?:\/\/github\.com\/([^\/]+)\/([^\/]+)\/blob\/([^\/]+)\/(.+)$/);
    if(!blobMatch){
      alert("This doesn't look like a GitHub file URL (must be a /blob/ file page).");
      return;
    }

    const owner = blobMatch[1];
    const repo  = blobMatch[2];
    // const branch = blobMatch[3]; // branch not used but could be
    let path = blobMatch[4]; // e.g. content/search-github/....

    // If path contains a 'content' like folder used by many doc repos, strip known prefixes
    const prefixes = ["content/", "docs/content/", "docs/", "website/content/", "src/content/", "site/content/"];
    for(const p of prefixes){
      if(path.startsWith(p)){
        path = path.slice(p.length);
        break;
      }
    }

    // Remove .md if present
    if(path.endsWith(".md")) path = path.slice(0,-3);

    // Convert index/README to directory root
    path = path.replace(/(?:\/|^)(index|README)$/i, "");
    path = path.replace(/\/+$/,""); // trim trailing slashes

    // Special-case for official github/docs repo (friendly mapping)
    if(owner === "github" && repo === "docs"){
      const base = "https://docs.github.com";
      const langSegment = "/en"; // adjust if you need another language
      const final = base + langSegment + (path ? "/" + path : "");
      window.location.href = final;
      return;
    }

    // Try Pages API (gives correct html_url for Pages, including custom CNAME)
    let siteBase = null;
    try{
      const pagesResp = await fetch(`https://api.github.com/repos/${owner}/${repo}/pages`);
      if(pagesResp.ok){
        const pagesData = await pagesResp.json();
        if(pagesData && pagesData.html_url){
          siteBase = pagesData.html_url.replace(/\/+$/,"");
        }
      }
    } catch(e){
      // ignore and try fallback
    }

    // Fallback: repo homepage field
    if(!siteBase){
      try{
        const repoResp = await fetch(`https://api.github.com/repos/${owner}/${repo}`);
        if(repoResp.ok){
          const repoData = await repoResp.json();
          if(repoData && repoData.homepage){
            siteBase = repoData.homepage.replace(/\/+$/,"");
          }
        }
      } catch(e){}
    }

    // Final fallback: standard GitHub Pages pattern
    if(!siteBase){
      siteBase = `https://${owner}.github.io/${repo}`;
    }

    // Build final URL, avoid duplicate slashes
    const finalUrl = siteBase + (path ? (siteBase.endsWith("/") ? "" : "/") + path : "");
    window.location.href = finalUrl;
  } catch(err){
    alert("Conversion failed: " + err);
    console.error(err);
  }
})();
- This works if you paste it in the console via Dev Tools.
Bookmarklet Version
javascript:(async function(){try{const repoUrl=window.location.href;const m=repoUrl.match(/^https?:\/\/github\.com\/([^\/]+)\/([^\/]+)\/blob\/([^\/]+)\/(.+)$/);if(!m){alert("Not a GitHub /blob/ file URL.");return;}const owner=m[1],repo=m[2];let path=m[4];const prefixes=["content/","docs/content/","docs/","website/content/","src/content/","site/content/"];for(const p of prefixes)if(path.startsWith(p)){path=path.slice(p.length);break;}if(path.endsWith(".md"))path=path.slice(0,-3);path=path.replace(/(?:\/|^)(index|README)$/i,"");path=path.replace(/\/+$/,"");if(owner==="github"&&repo==="docs"){const final="https://docs.github.com/en"+(path?"/"+path:"");window.location.href=final;return;}let siteBase=null;try{const r=await fetch(`https://api.github.com/repos/${owner}/${repo}/pages`);if(r.ok){const d=await r.json();if(d&&d.html_url)siteBase=d.html_url.replace(/\/+$/,"");}}catch(e){}if(!siteBase){try{const r2=await fetch(`https://api.github.com/repos/${owner}/${repo}`);if(r2.ok){const rd=await r2.json();if(rd&&rd.homepage)siteBase=rd.homepage.replace(/\/+$/,"");}}catch(e){} }if(!siteBase)siteBase=`https://${owner}.github.io/${repo}`;const finalUrl=siteBase+(path? (siteBase.endsWith("/")?"" : "/")+path:"");window.location.href=finalUrl;}catch(e){alert("Error: "+e);console.error(e);} })();
- Not tries this version, but because it has no spaces, so it might not work as a bookmarklet.
Notes
- The bookmarklet uses GitHub's public API (no auth). Unauthenticated requests are rate-limited (60/hr per IP). If you hit rate limits, the script will fallback to
https://<owner>.github.io/<repo>or the repo homepage if present. - It expects you're on a
/blob/file page. It will alert if you're not. - It tries to be safe for many docs repo layouts (removes content/, docs/, index.md, README.md). If your repo uses a different structure, edit the prefixes array in the readable version.
- For
github/docsit forceshttps://docs.github.com/en/...which matches their site structure.
How do I see the Markdown for a Profile page
So you have come across a nice profile and want to know how they did certain badges or layouts on their profile page using Markdown, then these are the instructions for you.
Important Note
- Not all GitHub profiles have custom README files. The profile README feature is relatively new, so many users haven't created one yet.
- If the USERNAME/USERNAME repository doesn't exist or there's no README.md file, that user simply hasn't set up a custom profile.
Method 1 - View a GitHub Profile's Markdown
The README markdown, for a profile, is stored in a special repository. To see the markdown source code for any GitHub user's profile:
- Go to their profile repository: Visit https://github.com/USERNAME/USERNAME (replace USERNAME with the actual username). For example, if you want to see Elon Musk's profile markdown, you'd go to https://github.com/shoulders/shoulders.
- View the README file: Look for the README.md file in that repository. This is the file that displays on their profile.
- Click "Raw" to see the markdown: On the GitHub page for the README.md file, click the Raw button in the top-right corner of the file preview. This will show you the plain markdown source code without any GitHub formatting applied.
Method 2 - Direct URL
Alternatively, you can navigate directly to the raw markdown by following the URL logic below:
https://github.com/shoulders
-->
https://github.com/shoulders/shoulders/raw/main/README.md
-->
https://raw.github.com/shoulders/shoulders/raw/main/README.md
Get the GitHub Repository URL from the GitHub Page URL
Convert the URL by following the URL logic below:
## Logic
https://<USERNAME>.github.io/<REPOSITORY>/
-->
https://github.com/<USERNAME>/<REPOSITORY>

## Example
https://shoulders.github.io/mysql-slow-query-log-visualizer/
-->
https://github.com/shoulders/mysql-slow-query-log-visualizer
Repository Content
This content is not all specific to GitHub but deserves to be separate section.
General
- Camo Cache
- Purge GitHubusercontent Camo Cache with this GitHub Action | by pulkit kathuria | web-developer | Medium
- GitHub badges from services like shields.io are often cached by GitHub using camo. While this caching can improve performance, it can also lead to outdated badge information displayed in your README.md file.
- To ensure that your badges always show the latest data, you need to periodically purge the cache. This is where the “GitHub Action to Purge githubusercontent Camo Cache” is used by Github.
- Purge GitHubusercontent Camo Cache with this GitHub Action | by pulkit kathuria | web-developer | Medium
Donation Services
- Membership and One-Time Donation services
- GitHub Sponsors · GitHub - Invest in the open source projects you depend on with GitHub Sponsors.
- Patreon
- Patreon is the best place to build community with your biggest fans, share exclusive work, and turn your passion into a lasting creative business.
- This has button inside my personal GitHub account to link to a Patreon account.
- Ko-fi | Make money doing what you love - Join 1,000,000+ creators! Set up your free page to get tips, sell products, offer memberships, and grow your community.
- Open Collective
- Raise, manage and disburse money with full transparency.
- We make it easy to raise, manage, and disburse money with full transparency. Start your open collective, apply to a Fiscal Host, and unlock funding for your community—free from red tape. The future is collective.
- Open Collective is a legal and financial toolbox for groups. It’s a fundraising + legal status + money management platform for your community. What do you want to do?
- Buy Me a Coffee - Buy Me a Coffee is the best way for creators and artists to accept support and membership from their fans.
- Liberapay
- Liberapay is a recurrent donations platform. We help you fund the creators and projects you appreciate.
- Liberapay's recurrent donations system is designed to provide a stable crowdfunded basic income to creators, enabling them to keep doing great work that benefits everyone.
- One-Time Donations from Payment Processors
- PayPal Account | Mobile Wallet and More | PayPal UK - Use your PayPal account to spend, send, and manage your money. Or, create a merchant account for your business. And so much more. Discover the details here.
- Stripe | Financial Infrastructure to Grow Your Revenue - Stripe is a financial services platform that helps all types of businesses accept payments, build flexible billing models and manage money movement.
- Wishlists and Credits
- Steam
- Steam is the ultimate destination for playing, discussing, and creating games.
- Create a wishlist and allow users to purchase Games or Credits.
- Welcome to GOG.com | best PC games DRM-free
- Download the best classic and new games on Windows, Mac & Linux. A vast selection of titles, DRM-free, with free goodies and 30-day money-back guarantee.
- Create a wishlist and allow users to purchase Games for you.
- Amazon
- Online retail giant.
- Create a wishlist and allow users to purchase stuff for you.
- Steam
Profile Achievements and Badges
- GitHub - gomzyakov/github-achievements - Complete list of all GitHub profile Badges and Achievements.
- 100% Guide to Get Github Achievements in 2025 - Make your Github profile look PRO with a list of all achievements. Find everything you need to boost your GitHub badges, highlights and achievements.
- GitHub - iamAntimPal/GitHub-Achievements - A complete collection of GitHub profile badges and achievement icons to boost your profile. Dynamic, customizable assets with guidelines to showcase your contributions, stats, and milestones.
- GitHub - gomzyakov/github-achievements - Complete list of all GitHub profile Badges and Achievements (20+ languages)
README.md Content
Things like flags and badges. I will add the code and tutorials for them here.
Badges
- I cannot find an article listing all of the GitHub badge commands:
[github-downloads-uri][![Version][github-version-img]][github-version-uri][![Downloads][github-downloads-img]][github-downloads-uri][![Size][github-size-img]][github-size-img]- etc...
You will see these badges all over the place and they can be very useful to provide feedback to you userbase. Essentiall they are dynamically created images which can also be clickable.
These badges are small visual labels that show project stats such as version, downloads, file size, commit activity, or contributors.
They can be used in your Profile or on a project's README.
Examples
- Open-Shell-Menu/index.md at gh-pages · Open-Shell/Open-Shell-Menu · GitHub
- clipboard_copy/README.md at main · Augeaz/clipboard_copy · GitHub

- README.md code
[![Version][github-version-img]][github-version-uri]
[![Downloads][github-downloads-img]][github-downloads-uri]
- kefir500 (Alexander Gorishnyak) · GitHub
## ? Projects [](https://github.com/shoulders/dns-hijacking-inspector) [](https://qwertycube.com/dns-hijacking-inspector/)  ## ?️ Tech Stack ### Languages     ### Frontend    ### Backend   ### Desktop   ### Mobile  ### Deployment   
- Quick Badge Template
[](https://github.com/USERNAME/REPO/releases) [](https://github.com/USERNAME/REPO/releases) [](https://github.com/USERNAME/REPO/commits) [](https://github.com/USERNAME/REPO/graphs/contributors) [](LICENSE)
- An example from (Aetherinox / csf-firewall)
<img src="/docs/images/logos/csf.png" height="230"> <!-- prettier-ignore-start --> [![Version][github-version-img]][github-version-uri] [![Downloads][github-downloads-img]][github-downloads-uri] [![Size][github-size-img]][github-size-img] [![Last Commit][github-commit-img]][github-commit-img] [![Contributors][contribs-all-img]](#contributors-) [](https://docs.configserver.dev) <!-- prettier-ignore-end --> <div align="center"> [](https://discord.configserver.dev)[](https://discord.configserver.dev)
Combined Badge Generators
- GitHub - Naereen/badges
- Markdown code for lots of small badges (shields.io, forthebadge.com etc).
- Contributions are welcome! Please add yours!
- GitHub - Ileriayo/markdown-badges
- Badges for your personal developer branding, profile, and projects.
- A massive list of badges and their codes.
- GitHub - alexandresanlim/Badges4-README.md-Profile
- Improve your README.md profile with these amazing badges.
- A massive list of badges and their codes.
- GitHub - cssho/VSMarketplaceBadges
- Version, installs and rating badges for Visual Studio Marketplace.
- Old and not 100% working, but this is a HTML version that could be forked.
- VSMarketplaceBadges.dev
Specific Service Providers Badge Generators
- Build your app badge - Microsoft Apps - The Microsoft Store app badge is the best way for you to display, direct, and track traffic from your assets to the Microsoft Store listing.
- Microsoft Store Badge Generator (GitHub - jasonwei512) - Generate a rating badge for your Microsoft Store app.
- Flathub Official Badges | Flathub - Official badges to promote your app on Flathub
- DeepWiki Badge Maker - Generate a badge linking to DeepWiki documentation for your GitHub repository.
- Example
Documentation [](https://deepwiki.com/michen00/invisible-squiggles)
- Example
- Best Practices Badge Program | OpenSSF - Show your Open Source Software (FLOSS) projects follow best practices by showing a badge from the OpenSSF.
Tutorials
- How to Use GitHub Badges to Stop Feeling Like a Noob – TheLinuxCode - This guide will share insider tips on effectively using badges to skill up with confidence.
- GitHub Markdown Badges Explained - Learn about GitHub Markdown badges, how to add them to your project, types of badges, customizing tips, best practices, and resources. Get started with GitHub badges today!
- Adding a workflow status badge - GitHub Docs - You can display a status badge in your repository to indicate the status of your workflows.
Providers
- GitHub - badges/awesome-badge
- A curated collection of awesome things related to status badges.
- While this list is maintained by members of the Shields core team, it includes Shields-related and non-Shields-related resources.
- Shields.io
- Concise, consistent, and legible badges
- Shields.io is the official universal badge generator.
- You can customize color, style, and text for any metric or service.
- Simple Icons
- SVG icons for popular brands
- You can combine Shields.io + Simple Icons for almost any logo.
- Home of the bulk of the icons used by both Shields and Badgen.
GitHub Actions
- badge-generator · Actions · GitHub Marketplace
- Generate and save custom Shields.io badges directly from your GitHub Actions workflow
- badge-generator is a GitHub Action that creates dynamic, customizable badges using Shields.io.
- Perfect for displaying code coverage, build status, quality metrics, or any custom label and value in your repository.
README.md generators
- RepoLaunch - GitHub README Generator - Create stunning GitHub README files with our easy-to-use templates. Showcase your work and projects professionally!
- GitHub - KasRoudra/repository-readme-generator - Repository readme generator is a website/web-application to generate beautiful README.md for your repository. You can copy or download that. Enjoy!
Contributors Grid / Table / Picture
- Scripts (Repositories)
- Contributors - vscode-material-icon-theme/README.md at main · material-extensions/vscode-material-icon-theme · GitHub
- Builds a single page with images, creates a screenshot with Puppeteer, then uploads and inserts tot he README.md
- This is not a standalone script, but if license allows should be useable.
- [idea] Adding Github icons of contributors in the README · Issue #448 · material-extensions/vscode-material-icon-theme · GitHub
- Adding Github icons of contributors in the README by PKief · Pull Request #480 · material-extensions/vscode-material-icon-theme · GitHub - Closes #448.
- Current script - vscode-material-icon-theme/src/scripts/contributors at main · material-extensions/vscode-material-icon-theme · GitHub
- GitHub - all-contributors/all-contributors - Recognize all contributors, not just the ones who push code.
- GitHub - ngryman/contributor-faces - Put your contributors faces in your readme.
- GitHub - sallar/github-contributions-chart - Generate an image of all your Github contributions
- Contributors - vscode-material-icon-theme/README.md at main · material-extensions/vscode-material-icon-theme · GitHub
- Scripts (User)
- How to Display Contributor Profile Pictures in Your GitHub README | by Basavaraja V | Medium
- Are you looking for a way to show your contributors’ profile opictures in your GitHub README file? While GitHub provides an API to retrieve contributors’ information, it can be a hassle to set up. Luckily, there’s an easy way to display profile pictures without using the API.
- In this article, we’ll show you how to display contributor profile pictures using a simple code snippet.
- How to Display Contributor Profile Pictures in Your GitHub README | by Basavaraja V | Medium
- GitHub Actions (Repositories)
- Contribute List · Actions · GitHub Marketplace · GitHub - Automation of contributors list in README.md
- Websites (Repositories)
- contrib.rocks - To Keep in sync your contributors list without any pain, ENTER repository name and GENERATE an dynamic image URL for displaying it!sssssss
- contrib.rocks: Generate an Image of GitHub Repositories Top Contributors | Open {re}Source - contrib.rocks generates an image of GitHub repositories top contributors.
- Example code
<!-- Copy-paste in your Readme.md file -->

<a href = "https://github.com/open-reSource/openresource.dev/graphs/contributors">
  <img src = "https://contrib.rocks/image?repo=open-reSource/openresource.dev"/>
</a>

Made with [contributors-img](https://contrib.rocks).
- Example code
- Display GitHub contributors in README | remarkablemark - How to display GitHub contributors in README with Open Collective which has an embed for displaying contributors.
- Websites (User)
- GitHub Contributions Chart Generator - See all of your GitHub contributions in one image!
- GitHub Contribution Chart Generator API - PublicAPI - GitHub Contribution Chart Generator API provides Create an image of your GitHub contributions
- Gitchart - GitHub Contribution Graph Generator - Transform your GitHub contribution history into beautiful, customizable SVG graphs. Perfect for adding to your portfolio, README, or anywhere you want to showcase them.
Markdown (Guides, Examples, Snippets and Templates)
- Guides
- Markdown style guide | styleguide - Style guides for Google-originated open-source projects
- Basic Syntax | Markdown Guide - The Markdown elements outlined in the original design document.
- Markdown Code Blocks - Supported Languages · GitHub
- Tutorials
- Creating diagrams - GitHub Docs - Create diagrams to convey information through charts and graphs
- How to set an image size in Markdown
- There is no native way in markdown, you need to use the
<img>tag. - image resize in github flavored markdown. · GitHub | uupaa - image resize in GitHub flavoured markdown.
- How to set image size in Markdown - Markdown does not have a standard way to change the size of an image, common way to change image size in Markdown is to use some HTML code instead of Markdown syntax.
- Changing image size in Markdown - Stack Overflow - How can I change the size of an image using Markdown?
- Discourse Format

- There is no native way in markdown, you need to use the
- Add images to the README.md
- How to Add Images to README.md on GitHub? - GeeksforGeeks - In this article, we will learn how to add images to README.md in GitHub and the different ways to do so.
- 4 Ways to Add Images to GitHub README + 1 Bonus Method | Cloudinary - GitHub is a popular platform for storing, managing, and sharing source code. README.md is your Github repository's welcome mat.
- How to add images to README.md on GitHub? - This tutorial covers adding images or screenshots to the GitHub markdown README.md file and resizing images using syntax HTML image tags and examples.
- Hidden Details Blocks
## Closed by default (Standard)
<details>
<summary>Always visible</summary>
Content is hidden by default
</details>

## Open by default
<details open>
<summary>Always visible</summary>
Content is visible by default
</details>

## Nestable
<details>
<summary>Parent Section</summary>
<details>
<summary>Child Section</summary>
Nested content here
</details>
</details>
Repository Layouts
- Generate a new repository using an existing repository as a tempalte using this command:
https://github.com/<user>/<repo>/generate
- Best Practices
- Best Practices for Organizing Git Repositories | by Tosin Akinosho | Medium
- Git has become an essential tool for version control and collaboration in modern software development. However, as projects grow in complexity and teams expand, maintaining a clean and organized Git repository structure becomes increasingly crucial.
- In this article, we’ll delve into the best practices for organizing Git repositories, highlighting the importance of clear directory structures, effective Git command usage, repository cleanliness strategies, and collaboration tips for teams.
- GitHub Repository Structure Best Practices | by Soulaiman Ghanem | Code Factory Berlin | Medium
- Whether we start a new project for private or for open source, we can follow some best practices to organize the repository for better team contribution and more elegant project structure.
- We have created a repo that contains all the mentioned files and folders, please feel free to use it as a starting template.
- Please note that you can also use the repo as template.
- GitHub is full of open source projects. However, I can recommend the followings 2 projects as a starting point to watch and learn the repo structure as well as contributing best practices:
- This article describes the structure.
- ideal github repo layout | Google Search - The AI description is quite useful
- How to Structure Files and Folder in your Project? - GeeksforGeeks
- Maintaining a clean, organized file and folder structure can significantly impact a project’s success in the fast-paced web development world.
- This article will go through the best practices and show you how to improve your project's file layout.
- Managing Projects in VSCode: Workspaces and Folder Structures - DEV Community
- Managing projects efficiently is crucial for any developer, and Visual Studio Code (VSCode) offers a variety of features to streamline this process. Among these, workspaces and folder structures stand out as essential tools for organizing and handling multiple projects.
- This article will delve into the best practices for using VSCode workspaces and optimizing folder structures to enhance your productivity and project management.
- Lots of different project structure examples.
- Best Practices for Organizing Git Repositories | by Tosin Akinosho | Medium
- Skeleton Repositories
- GitHub - CodeFactoryBerlin/OpenSourceRepoTemplate - Example repository template for opensource projects.
- GitHub - thephpleague/skeleton - A skeleton repository for League Packages.
- Example Repositories
- rssguard/.github at master · martinrotter/rssguard · GitHub
- docs/.github at main · github/docs · GitHub
- Kunena-Forum/.github at K6.2 · Kunena/Kunena-Forum · GitHub
- GitHub - pytorch/pytorch · GitHub
- Tensors and Dynamic neural networks in Python with strong GPU acceleration
- has extensive Claude stuff
File and Templates
- .gitignore
- GitHub - groda/the_ultimate_gitignore_guide
- Everything you never knew you needed to know about .gitignore! This beginner-friendly guide offers practical tips to keep your Git repos clean and your workflow efficient, with clear examples to help you master the basics and best practices of managing ignored files.
- How to format a .gitignore file?
- What happens to tracked files after being added to .gitignore?
- gitignore.io - Create Useful .gitignore Files For Your Project - Create useful .gitignore files for your project
- GitHub - github/gitignore - A collection of useful .gitignore templates.
- Git - gitignore Documentation - gitignore - Specifies intentionally untracked files to ignore
- Git Ignore and .gitignore | W3Schools - The
.gitignorefile tells Git which files and folders to ignore (not track). - Git Ignore and .gitignore | GeeksforGeeks
- When working with Git, you often have files and directories that you don't want to be tracked in your repository. These could be sensitive data files, temporary files, or even operating system-specific files.
- Managing these untracked files is where the .gitignore file comes into play. In this article, we'll explore the importance of Git Ignore, its purpose, and practical examples of how to use it effectively in your projects.
- .gitignore file - ignoring files in Git | Atlassian Git Tutorial - Git ignore patterns are used to exclude certain files in your working directory from your Git history. They can be local, global, or shared with your team.
- GitHub - groda/the_ultimate_gitignore_guide
- .gitattributes
- What Is The .gitattributes File? - Ken Muse - You've seen the file, but do you understand it's purpose? Git has the ability to customize how it handles the files you edit. Today we explore how that works.
- .gitkeep
- .gitkeep vs .keep
- Both are conventions for keeping otherwise-empty directories in Git (since Git doesn't track empty directories), but neither is an official Git feature.
- .gitkeep is more widely used and has become the de facto standard. The
.gitprefix makes its purpose self-documenting — it's clearly a Git-specific placeholder. You'll see it in most modern projects and it's what many scaffolding tools generate. - .keep is older and simpler, but the lack of a .git prefix means it's slightly less obvious what it's for, and it could theoretically collide with other tools that use .keep for their own purposes.
- Verdict: go with .gitkeep. It's more widely recognized, self-explanatory, and unlikely to conflict with anything else. The only caveat: if your team or framework already uses .keep consistently, just stay consistent with that
- Understanding .keep and .gitkeep Files: A Guide | DeployHQ
- Git can't track empty directories — .gitkeep is a community convention that works around this. Learn why it exists, how it differs from .gitignore placeholders, and when to use each approach in your projects.
- Git Lesson: How to Use .gitignore and .gitkeep? - DEV Community
- If you work with Git and have your repositories on platforms like Github, Gitlab, Bitbucket, etc., you probably come across "dot files" such as .gitignore or .gitkeep. What are they and how do they differ from each other? I'll try to explain briefly.
- .gitkeep vs .keep
- Code of Conduct
- code-of-conduct - IndieWeb - A CC0 code of conduct that you can use.
- .github/CODE_OF_CONDUCT.md at master · google/.github · GitHub
- Default configuration for @google repos.
- This document was adapted from the IndieWeb Code of Conduct and can also be found at https://opensource.google/conduct/.
- CODEOWNERS
- About code owners - GitHub Docs - You can use a CODEOWNERS file to define individuals or teams that are responsible for code in a repository.
Git
General
I will include how to use Git in VSCode tips and tricks.
- Official Sites
- Git for windows - Discussions | GitHub - Explore the GitHub Discussions forum for git-for-windows git. Discuss code, ask questions & collaborate with the developer community.
- Working Tree
- Git – Working Tree | GeeksforGeeks - When we work with Git we mainly deal with the files and folders but one should not just relate Git with this, but Git provides us just more than that with Git Working Tree being one of them.
- The Git working tree, index and commit history explained by example | TheServerSide - The Git working tree serves as the most important part of the inner workings of the DVCS tool. A developer must have a firm grasp of what the working tree tracks, and how the status command keeps tabs on any file system changes.
- History
- How to view the Git History in Visual Studio Code | bobbyhadz - A step-by-step guide on how to view the Git History in Visual Studio code, using native functionality or extensions.
- GitLens, Git History (Don Jayamanne)
- How to view the Git History in Visual Studio Code | bobbyhadz - A step-by-step guide on how to view the Git History in Visual Studio code, using native functionality or extensions.
- Committing
- How to Undo the last Git Commit in Visual Studio Code | bobbyhadz - A step-by-step guide on how to undo the last git commit or reset to a previous commit in Visual Studio Code.
- .gitconfig (Git Global Configuration)
- Using VS Code as default Git editor, difftool and mergetool | bobbyhadz - A step-by-step guide on how to use VS Code as the default Git editor, difftool and mergetool.
- What is Gitconfig File: A Beginner's Guide to Understanding Git Configuration - BlinksAndButtons
- The Gitconfig file is a crucial aspect of the Git version control system that allows users to configure various settings and personalize their Git experience.
- Gitconfig, also known as the Git configuration file, is a text file that resides on your local system and contains configuration options for your Git setup. It enables you to customize various aspects of Git, such as user information, aliases, color settings, and more.
- How to use the git .gitconfig file for a more efficient workflow | TechRepublic - Jack Wallen shows how to use the .gitconfig file for global git configurations and a more efficient developer setup.
- config - Where is the global Git configuration data stored? - Stack Overflow
- .gitattributes (Repository Configurations)
- Git Attributes | Git
- Using attributes, you can do things like specify separate merge strategies for individual files or directories in your project, tell Git how to diff non-text files, or have Git filter content before you check it into or out of Git.
- In this section, you’ll learn about some of the attributes you can set on your paths in your Git project and see a few examples of using this feature in practice.
- Git Attributes | Git
What Git stores
- Git tracks:
- Source code and project files
- Commits
- Branches
- Tags
- References
- Git objects (blobs, trees, etc.)
- Git does not track:
- Issues
- Pull Requests
- Wikis
- Project boards
- Discussions
Issues
- Issues in GitHub - GeeksforGeeks
- GitHub is more than just a platform for hosting code; it’s a powerful tool for managing projects and collaborating with teams. One of the key features that provides this is the Issues system. GitHub Issues helps developers track bugs, enhancements, and tasks, ensuring that projects stay organized and on track. In this article, we'll see what GitHub Issues are, how to use them effectively, and best practices for managing them.
- Issues are Bolt Ons and are not transferred with forks.
Working with Forks
- Git Fork vs Git Clone - YouTube | Boot dev
- Okay, you forked a repo and made your changes, now what? In this video we explain what you can do to contribute to the original repository and become a good contributor!
- When he says clone the repo in this context, he is creating a local repo of his fork.
- Fork a repository - GitHub Docs - A fork is a new repository that shares code and visibility settings with the original “upstream” repository.
- You can now fork a repo and copy only the default branch - GitHub Changelog
- Previously, when creating a fork all branches from the parent repository were copied to the new fork repository. There are several scenarios where this is unneeded, such as contributing to open-source projects. When all branches are copied, it could result in slow repo cloning and unnecessary disk usage. With this new feature, only the default branch is copied; no other branches or tags. This may result in faster clones because only reachable objects will be pulled down.
- Forking a repository versus duplicating a repository - About forks - GitHub Docs - If you want to create a new repository from the contents of an existing repository but don't want to merge your changes to the upstream in the future, you can duplicate the repository or, if the repository is a template, you can use the repository as a template.
- When forking a repository on GitHub, you have the option to select "Copy the default branch only."
- If you leave this option unchecked, GitHub will copy all branches from the source repository into your fork.
- This means your fork will include every branch present in the original repository, not just the default branch (commonly named main or master). This can be beneficial if you need access to multiple branches for development or reference purposes.
- For more details, you can refer to GitHub's official documentation on forking repositories here.
- When I fork a repository are the issues copied as well?
- No, when you fork a repository on GitHub, the issues from the original repository are not copied to your fork.
- Forking creates a new repository that includes the code, commit history, branches, and tags, but it does not include issues, pull requests, or other metadata.
- This design ensures that discussions and issue tracking remain centralized in the original repository, preventing fragmentation across multiple forks.
- If you need to reference or track issues in your forked repository, GitHub provides the ability to transfer individual issues between repositories. This process must be done manually for each issue. For detailed steps, see Transferring an issue to another repository.
- Alternatively, if you're looking to duplicate a repository along with its issues, you might consider using third-party tools or scripts that utilize GitHub's API to export and import issues. However, these methods require additional setup and permissions.
- Issues are not part of Git — they are a feature provided by GitHub (and other Git hosting platforms like GitLab or Bitbucket).
- Issues are not stored in the Git repository itself. They live on the GitHub platform, as part of its web-based features for project management, collaboration, and discussion.
Branches
- Git Branches Tutorial - YouTube | freeCodeCamp.org - Branches are one of Git's most important concepts. And to master Git, it's essential to have a thorough understanding of how branches work. In this course, we'll look at the many actions you can perform around branches - from creating and deleting them all the way to publishing, renaming, and comparing them.
Git GUIs and Apps
These are just here for reference, you should only use VSCode with the relevant extensions. It should be noted most IDE also have visual GUIs for handling Git.
- GitHub Desktop (by GitHub)
- Whether you're new to Git or a seasoned user, GitHub Desktop simplifies your development workflow.
- Looks lke VSCode, probably is the same codebase.
- Git, GitHub, & GitHub Desktop for beginners - YouTube | Coder Coder - In this video we'll be going through the basics of Git, GitHub, and GitHub Desktop app-- how to set them up and use them to track your code changes.
- Git GUI Clients | git-sc.com
- Git comes with built-in GUI tools for committing (git-gui) and browsing (gitk), but there are several third-party tools for users looking for platform-specific experience.
- GitHub Desktop | Simple collaboration from your desktop · GitHub - Whether you're new to Git or a seasoned user, GitHub Desktop simplifies your development workflow.
Tutorials
- Patch software on Linux, using GitHub (from virtualmin)
- With inux you can get code straight from GitHub and apply it to your Linux files as shown in this example below:
## CentOS / Alma / Rocky / RHEL
cd /usr/libexec/webmin/virtual-server

## Ubuntu
cd /usr/share/webmin/virtual-server

## Common (the actual patch command)
curl https://github.com/virtualmin/virtualmin-gpl/commit/7037f778b30eda80bb9a8a3a1bd4065377763b1c.patch | git apply --reject --whitespace=fix
curl https://github.com/virtualmin/virtualmin-gpl/commit/85f803eb05e1fe8db0b59bd5a44fec8590034e88.patch | git apply --reject --whitespace=fix
This is from https://github.com/virtualmin/virtualmin-gpl/issues/747
- With inux you can get code straight from GitHub and apply it to your Linux files as shown in this example below:
- Uploading a Project to GitHub and Collaborating with Others | CodeThePixel.com (CTP)
- In this tutorial, we will explore the process of uploading your project to GitHub, ensuring your code is secure and accessible.
- This shows of how to use the commands in context and has a small list of them at the bottom.
- Git Tutorial For Dummies - YouTube | Nick White - A very simple introduction.
Cheatsheets
- Git Cheat Sheet | GeeksforGeeks
- Git Cheat Sheet is a comprehensive quick guide for learning Git concepts, from very basic to advanced levels. By this Git Cheat Sheet, our aim is to provide a handy reference tool for both beginners and experienced developers/DevOps engineers.
- This Git Cheat Sheet not only makes it easier for newcomers to get started but also serves as a refresher for experienced professionals.
- Git commands: A comprehensive cheat sheet (with examples) - Sling Academy - This comprehensive cheat sheet will take you through the basic to advanced Git commands with examples and expected outputs, helping you navigate and use Git more effectively.
- Git Cheat Sheet - GeeksforGeeks
- A concise, well-structured guide for developers and DevOps engineers ideal for both beginners and experienced users.
- It covers everything from Git installation (Linux, Windows, macOS) to configuration, core commands, branching, merging, history management, and collaboration.
- Perfect for quick reference during development and deployment.
Commands
- revert vs rest vs rebase
- Git Revert vs Git Reset - YouTube | Boot dev / ThePrimeTimeagen - Revert and reset sound similar, so it might induce you into thinking they are doing the same thing, but no! They are quite different and unique in their applications and in this video we'll explain the difference between them!
- Git Reset vs Revert vs Rebase - Fix Your Mistakes the Right Way - YouTube - In this video, I’ll show you the difference between git reset, git revert, and git rebase — and how knowing these commands can give you more confidence in your development workflow. Because if you make a mistake, you can undo it cleanly.
- revert
- git revert | Git Documentation - Revert some existing commits
- Use this if you don't want to break anything when working as part of a team.
- reset
- git reset | Git Documentation
- Git Tutorial #34: How to Use Git Reset Soft, Mixed, and Hard | Learn Git - YouTube | GitKraken - Need to undo local changes or rewrite commit history? Git reset gives you that power and then some.
- Git Reset: What's the Difference Between --mixed, --soft, and --hard? (Explained for Splitting Commits + Staging Area Basics) — codegenes.net
- Working Directory: The folder where you edit files (what you see in your code editor).
- Staging Area (Index): A "preview" of your next commit. Files here are marked to be included in the next commit.
- HEAD: A pointer to the latest commit in your current branch (the "tip" of the branch).
- 3.1 git reset --soft: Rewind History, Keep Changes Staged
- 3.2 git reset --mixed (Default): Rewind History, Unstage Changes
- 3.3 git reset --hard: Rewind History, Discard All Changes
- What's The Difference Between git reset --mixed, --soft, and --hard? - GeeksforGeeks
- This article explains these options, their syntax, features, and uses, and provides practical examples to help you understand their differences and use cases.
- git reset is a command that undoes changes by moving the HEAD (the current branch reference) to a specified commit.
- It can affect the staging area (index), the working directory, or both, depending on the option used.
- The three primary modes of git reset—--mixed, --soft, and --hard—determine how the reset operation impacts these areas.
- Git Reset Explained (Soft vs Mixed vs Hard) with Examples | GoLinuxCloud
- Learn Git reset with practical examples including soft, mixed, and hard reset. Understand the differences, use cases, and how git reset affects the working directory, staging area, and commit history. Fix common errors and master git reset commands step by step.
- Has diagram.
- What's the difference between git reset --mixed, --soft, and --hard? - Stack Overflow - I was looking at the page In plain English, what does "git reset" do?, but I realized I don't really understand what the git index or staging area is and thus the explanations didn't help.
Repository Files and Folders
There are all of these files and folders that everyone seems to use so I am going to try and get a full list.
- .github/
- GitHub settings folder which holds things like issue templates.
- .vscode/
- VSCode workspace settings folder
- Workspace settings are specific to a project and can be shared with other developers on your team.
- .vscode/extensions.json
- Recommended extension settings that should be followed by the entire team.
- .vscode/launch.json
- Debug configurations, usually shared between a team.
- .vscode/tasks.json
- tasks and build commands, usually shared between a team.
- Integrate with External Tools via Tasks - Expand your development workflow with task integration in Visual Studio Code.
- .vscode/settings.json
- Used to enforce project-specific settings and overrides global user settings, e.g. specific formatting rules.
- .phan/...
- .editorconfig
- .env
- .gitattributes
- .gitignore
- GitHub - github/gitignore - A collection of useful .gitignore templates.
- .git-blame-ignore-revs
- .gitmodules
- .prettierrc
- prettier config file
- .prettierignore
- file to say which files/folders should be ignored by prettier
- .php_cs.cache
- .vscodeignore
- It’s a file used when packaging VS Code extensions.
- It tells the VS Code extension packaging tool (e.g.,
vsce) which files/folders to exclude from your.vsixpackage.
- .travis.yml
- .php-cs-fixer.dist.php
- .drone.yml
- .appveyor.yml
- .eslintrc
- ESLint config file.
- As off ESLint v9.0.0 it is deprecated.
- .eslintrc.js
- ESLint config file.
- As off ESLint v9.0.0 it is deprecated.
- .eslintrc.json
- ESLint config file
- As off ESLint v9.0.0 it is deprecated.
- .eslintignore
- Files to be ignored by the ESLint processor
- eslint.config.js
- ESlint V9.0.0+ config file ???
- Use Case: CommonJS module system.
- Default Behaviour: If your project uses Node.js with CommonJS (default for older Node.js versions or projects not explicitly using ES modules), this is the standard choice.
- eslint.config.mjs
- ESlint V9.0.0+ config file
- Use Case: ES module system.
- Default Behaviour: If your project uses ES modules (e.g., "type": "module" in package.json), you should use .mjs for compatibility.
- When I
initeslint in vscode vianpmthen aeslint.config.mjsis created.
- .tsconfig.json
- webpack.config.js
- yarn.lock
- package.json
- package.yaml
- package-json-schema.json
- package-lock.json
- package.nls.json
- checkstyle.json
- composer.json
- composer.lock
- web.configruleset.xml
- renovate.json
- phpunit.xml.dist
- phpunit-pgsql.xml.dist
- phpstan.neon
- cypress.config.dist.mjs
- build.xml
- CODE_OF_CONDUCT.md
- LICENSE
- LICENSE-CODE
- README.md
- SECURITY.md
- SUPPORT.md
My Lenovo ThinkPad Laptop Notes
these are my notes
Windows Power Configuration Commands
This is a collection of Windows power commands to help diagnose and change power and sleep settings.
- Reports the sleep states available on the system.
powercfg /a
- Your firmware might not support the S3 mode. Support for the various sleep modes will be shown when you run the command above.
- Reports information about what woke the system from the last sleep transition.
powercfg /lastwake
- List devices that are currently configured to wake the system from any sleep state.
powercfg /DEVICEQUERY wake_armed
- ......
Lenovo keeps waking up from sleep
The solution might be one or a combination of the following solutions, but I have put them in the order I think you should try them in.
- Potential Solutions
- Disable "wake up computer" on devices
- Disable S0 Modern Standby
- Disable always on USB power in the BIOS.
- ?? is it becasue I am sing a keybaord and mouse on a powered hub? where as on my dell I was not they were directly into the docking station.
- My USB keyboard and mouse are on my power USB hub, this allows power to be supplied to these devices even when USB always on is disabled. It might mean the USB bus is still accepting data packets.
- Disable Windows Fastboot ???
- Hibernate your system rather than sleep
NB: The laptops trackpad, nipple/Pointers and keyboard will not wake the system up.
Links
- What is USB Selective Suspend Setting? Should You Turn It On or Off - Tech News Today
- You might have come across the USB Selective Suspend setting while looking through the advanced power plan settings. In this article, we have explained this feature in detail to help you decide if you should turn it on or off by yourself.
- This is in the Windows power plan. You should just leave this alone.
- This feature just allow Windows to turn of individual devices on a USB hub rather than the whole hub.
Disable S0 Modern Standby / Change from S0 to S3 sleep mode
Options
- Change sleep state in the BIOS
- Not all laptops will have this option.
- Check your BIOS as some have an option to switch between S0 and S3
- In My Lenovo you can change the sleep state in the BIOS
- They have called them different names with a warning to try and encourage you to use S0.
- You should just ignore the warning set as required. However (once), I did have S3 enabled and Windows 11 would not wake up, would not even respond to my keyboard or power button.
- The settings are as follows:
- "Windows and Linux" = S0
- "Linux Only" = S3
- Disable S0 Modern Standby via Windows
- If you have the ability to change the sleep state in the BIOS (as shown above) then this hack is not going to change anything.
- If you PC/laptop presents both S0 and S3 methods at the same time, Window will always pick S0 and so to prevent and use S3 we can use a registry hack to override this behaviour.
Notes
- Changing from S0 to S3 only changes what is shut down for the sleep.
- S0 allows a lot of background tasks to run, I assume they have a specific flag to allow this and that the OS controls this.
- In S3 everything is shutdown except for RAM maintenance and wake up calls (i think). S3 will get better power savings and less risk of data corruptions.
- standby - What is the difference between (these four) sleep states? - Super User
- S0 - On / Working
- The computer is powered up. If supported, power conservation is handled by each device.
- S1 - Sleep
- CPU is stopped. RAM maintains power. Everything else is off, or in low power mode.
- S2 - Sleep
- CPU has no power. RAM maintains power. Everything else is off, or in low power mode.
- S3 - Standby
- CPU has no power. RAM maintains power, refreshes slowly. Power supply reduces power. This level might be referred to as “Save to RAM.” Windows enters this level when in standby.
- S4 - Hibernate
- Power to most hardware is shut off. Any files in memory are saved to the hard disk in a temporary file. If configured, the NIC will remain on for WOL or AoL. This level is also known as “Save to disk.”
- S5 - Off
- Everything is off. No files are saved. If configured, the NIC will maintain power to listen for WOL (magic) packets. This is known as a shutdown.
- S0 - On / Working
- System Sleep States: S0, S1, S2, S3, S4 & S5 | CrazyEngineers - Fellow engineers, in this article I am going to discuss the system sleep states: S0, S1, S2, S3, S4 and S5 in detail.
- Modern Standby vs S3 | Microsoft Learn
- Outlines the primary differences between S3 and Modern Standby system power models.
- On any Modern Standby system, the system remains in S0 while in standby, allowing the following scenarios to work: Background activity, Faster resume from a low power state.
- Modern Standby comprises Screen Off and Sleep states, where the Screen Off state encompasses active behaviours to quiesce the system to sleep, and the Sleep state is equivalent to S3 sleep with the added benefit that explicitly-allowed, value-adding software activity can run.
Disable USB always on
- Yoga 310 - how to turn off Always-on USB ? | English Community-Lenovo Community
- Old Codger
- I know of only 3 factors that may affect whether the USB is powered or not:
- Always-on option in the BIOS
- Always-on option from within the Lenovo Vantage app
- Whether attached to mains or running on battery
- I have tested all combinations of the above, and there is no change - this appears to be almost 'hard wired' into the hardware.
- I have also disabled fast start-up and wake-on-LAN, as someone indicated that these would allow some parts of the machine to be 'active', consuming power and cause USB's to be on as well.
- I know of only 3 factors that may affect whether the USB is powered or not:
- Old Codger
- After spending months trying to find the problem (including 4 hours re-searching and re-booting today) I have managed to find a solution that works for me - this involves making sure that anything within the PC that might require the USB port(s) or other sections of hardware to be powered up when the machine is shut down is disabled. So far as I know, this covers:
- Disabling Always-on USB in the BIOS (if applicable on your machine)
- Disabling Always-On USB in Lenovo Vantage
- Disabling 'Fast start-up' in the power options
- Disable 'Wake On LAN' in the settings for the Ethernet Card
- NOTE: the Wake On LAN change may not be required, I figured I'd post the solution before wasting anyone else's time !.
- Disable 'Boot from USB' in the BIOS
- It is this one that finally did the trick for me. Why the USB has to be powered to allow booting from USB is a mystery .....
- Also, please note: This works only if the machine is 'shut down', not in the sleep modes. It may also be necessary to change the 'what the power button does' and 'what closing the lid does' options in Windows to make sure that they are acting appropriately. If they send the machine to sleep, then the USB may still remain on.
- After spending months trying to find the problem (including 4 hours re-searching and re-booting today) I have managed to find a solution that works for me - this involves making sure that anything within the PC that might require the USB port(s) or other sections of hardware to be powered up when the machine is shut down is disabled. So far as I know, this covers:
- Old Codger
Overview
Below are the actions I did to prevent my system waking up on it sown, but it was being caused for me by the Mouse.
Restore Windows 10 GUI functionality
Open-Shell + RetroBar (with Dark themes from Tek Syndicate) + EarTrumpet + Winaero (context menu and Ribbon fixes) + WindHawk (Taskbar tray system icon tweaks - to hode unwanted system icons)
--------------
I finally upgraded to Windows 11 and discovered a lot of functionality had been removed and Microsoft was making restoring it difficult. In Windows 11 24H2 it is even worse.
I will be outlining my solutions I have found on the internet to restore my desktop to how it was. I will be using 3rd party tools as I did on Windows 10. Not all changes might be required or wanted by you so just do the ones you need.
As I find more solutions I will add them here.
Start Menu
- Install and use Open-Shell.
- Move the start menu to the left1-Click Quick Launch Toolbar · valinet/ExplorerPatcher · Discussion #3774 · GitHub
- Personalisation --> Taskbar -> Taskbar behaviours --> Taskbar alignment: Left
Taskbar Replacement
This is optional at the minute as I have not test it, however the Quick Launch step would not be needed if this works.
- Install GitHub - dremin/RetroBar (use the installer, not the portable version)
- Set the quick launch folder to:
%SystemDrive%\Users\%username%\AppData\Roaming\Microsoft\Internet Explorer\Quick Launch
- Set the quick launch folder to:
Quick Launch
You can employ more than one of the solutions below to get the work enviroment you need.
The Quick Launch folder
This is just for reference.
%SystemDrive%\Users\%username%\AppData\Roaming\Microsoft\Internet Explorer\Quick Launch
Methods / Workarounds
- Pinning Applications to the Taskbar
- How to Pin Almost Anything to the Windows 11 Taskbar | makeuseof.com - Windows 11 now lets you pin folders, files, websites, and even drives to the taskbar for quick access. Here's how.
- How to pin a folder to the taskbar in Windows - Digital Citizen - How do I pin a folder (like OneDrive) to the taskbar in Windows 10 or Windows 11? How many folders can you pin to the taskbar in Windows?
- Creating Folders for Quick Access
- Using the Start Menu for Quick Access
- Open-Shell --> Settings --> Customize Start Menu
- From thw `Available Commands`, add a `Custom` item at the top of the menu below the `COLUMN PADDING` item with the following values:
- Link:
%SystemDrive%\Users\%username%\AppData\Roaming\Microsoft\Internet Explorer\Quick Launch - Label: Quick Launch
- Icon: shell32.dll, 290 (or whatever icon you wnat)
- Link:
- ExplorerPatcher - Add a real Quick Launch
- settings to be added when I have used this, i am waiting for a stable version to be released for Windows 24H2
- 1-Click Quick Launch Toolbar #3774
- Right-Click Taskbar--> Toolbars --> New Toolbar
%SystemDrive%\Users\%username%\AppData\Roaming\Microsoft\Internet Explorer\Quick Launch
- Right-Click Taskbar
- Lock all toolbars
- Show Text
- Show title
- Drag to left
- Drag divider
- Right-Click Taskbar--> Toolbars --> New Toolbar
- The latest pre-release (22621.3880.66.7) works fine for me on 24H2. You just need to choose "Windows 10 (ExplorerPatcher)" instead of "Windows 10" as the taskbar style.
- To move a toolbar to the area between the Start button and the Pinned area, you have to "snap" it there, i.e., drag it with your mouse by moving your mouse much faster than normal. (Snap is a UI feature that was introduced by Microsoft with the release of Windows 7.)
- How to Add Quick Launch Toolbar to Taskbar in Windows 11 | The Geek Page - In this article, we have discussed in the detail the steps to add a quick launch custom toolbar to the taskbar by installing ExplorerPatcher in Windows 11.
- Old Method (Pre Windows 11 24H2)
- Turn off unwanted icons in the taskbar
- Right click on taskbar: Toolbars --> New toolbar
- Paste this into the address bar:
%SystemDrive%\Users\%username%\AppData\Roaming\Microsoft\Internet Explorer\Quick Launch - Select folder
- Hide title + Hide text
- Drag into the correct place.
Links
- How to Use Quick Launch Toolbar in Windows 11 - MEFMobile
- Mastering the Quick Launch Toolbar in Windows 11.
- Many options such as:
- Pinning Applications to the Taskbar
- Creating Folders for Quick Access
- Using the Start Menu for Quick Access
- Creating a Quick Access Toolbar with Explorer (not in Win 11 24H2)
- Software suggestions
- RocketDock
- XWindows Dock
- Wox Launcher
- Launchy
- Many options such as:
- Mastering the Quick Launch Toolbar in Windows 11.
- Enable Toolbars on Windows 11, Add Toolbars on the Taskbar - BounceGeek - If you’ve recently updated to Windows 11 and are worried about Toolbars missing from Taskbar. Then, this article will help you to enable and add Toolbars on the Windows 11 Taskbar.
System Tray
- Unhide System Tray Icons
- Personalisation --> Taskbar --> Other system tray icons
- Now unhide the ones you want to show all of the time
- Always show icons
- Use GitHub - Aemony/NotifyIconPromote application to automatically promotes all newly registered and unconfigured notification icons to be visible by default in the Windows 11 notification area.
- Simplified Audio Controls/ Better Audio Flyout
- Install EarTrumpet | Microsoft Store
- Unhide the EarTrumpet System Tray icon.
- Hide the standard volume control System Tray icon. (see below)
- Hide unwanted System Tray icons
- How do I hide the volume icon in Windows 11? - Super User
- You can use the Taskbar tray system icon tweaks Windhawk mod.
- How do I hide the volume icon in Windows 11? - Super User
Links
- How to Show or Hide System Tray Icons and the Hidden Icons Menu on Windows 11 - Customize your system tray icons with these tips for Windows 11.
- "Show all icons in system tray" option in windows11 | Microsoft Community Hub
- Powershell as admin:
$RegistryPath = 'HKCU:\Control Panel\NotifyIconSettings' $Name = 'IsPromoted' $Value = '1' Get-ChildItem -path $RegistryPath -Recurse | ForEach-Object {New-ItemProperty -Path $_.PSPath -Name $Name -Value $Value -PropertyType DWORD -Force } - All system tray icons now showing, even after restart, enjoy ..
- I think this needs to be run when there are new icons available as it is a one time deal.
- Powershell as admin:
- How to Show All Icons in System Tray on Windows 11 | How-To Geek - Do you find it inconvenient having to click an up-arrow icon to see all your system tray icons? Do you want your Windows 11 system tray to always display all the available icons? If so, you have two easy ways to achieve that, and we’ll show you what those ways are.
Taskbar ????
Links
- Fully Customize Your Windows 11 Taskbar - Complete Guide | GeekFlare
- If you are having trouble customizing the new Windows 11 taskbar, then we’ve got you covered. We will show you how to adjust the Window 11 taskbar to your liking and also share some hacks to access features that are no longer officially available in Windows 11.
- Great article
- Pin to Taskbar
- Make the taskbar bigger/smaller via the registry
File Explorer
- Restore the ribbon in File Explorer
- Use Winaero
- Restore straight edge Windows
- Get rid of the weird 3D font on icons
Context Menu (might move this above and rename to explorer again)
- Restore full right click menu (context menu)
- Winaero --> Windows 11 --> Classic Full Context Menus --> Enable classic full context menus: ticked
Links
- How to Get the Old Context Menus Back in Windows 11 | How-To-Geek
- Begone, weird new context menu!
- You can access the old context menu in Windows 11 by right-clicking something, then selecting "Show More Options" or by holding Shift while you right click. Otherwise, you'll need to tweak the Registry to make the old context menu the default option.
- Restore old Right-click Context menu in Windows 11 | Microsoft Community - Starting with Windows 11, the context menu in the File Explorer is refreshed, which is compact and is based on Modern design. However, the refreshed context menu shows fewer items compared to the Legacy Context menu. This article discusses how to restore the Legacy Context menu in Windows 11, showing up by default.
- How to 'Show More Options' By Default in Windows 11 File Explorer | All Things how - Tired of clicking "Show more options" in Windows 11? Learn how to show the full context menu by default in File Explorer like Windows 10.
Notepad
- Each file I open gets its own instance
- Settings --> Opening Notepad --> Opening files: Open in a new window
- When I close a file, I want to be prompted to save rather than silently storing the session
- Settings --> Opening Notepad --> When Notepad starts: Start new session and discard unsaved changed
- This setting's options are not the best description of their function.
- Settings --> Opening Notepad --> When Notepad starts: Start new session and discard unsaved changed
Other Useful Settings (Non-Win 10 --> Win 11)
- Personalisation --> Taskbar --> Combine taskbar buttons and hide labels: Never
- Personalisation --> Taskbar --> Combine taskbar buttons and hide labels on other taskbars: Never
- Make Taskbar icons smaller
- There is no longer an inbuilt option for this.
- Enable long file paths
- Missing ‘Open with’ option in right-click context menu on Windows 11 / 10 | The Geek Page
- NB: for me it only seems to be on zip files on the desktop
- The right-click context menu in the File Explorer contains the ‘Open with’ which optimizes the right-click context menu in Windows 11. But, some users are complaining about a peculiar bug where the entire ‘Open with’ section is missing from the right-click context menu. If you are also witnessing this bug, you can easily solve the issue with a registry tweak.
- Enable S3 Sleep.... see other notes
- Make sure system restore is on. It might not be on by default.
Software
- Start Menus
- Open-Shell | Classic Shell Reborn
- A collection of utilities bringing back classic features to Windows.
- StartIsBack
- Returns Windows 10 and Windows 8 a real fully featured start menu and start button, behaving exactly like the ones in Windows 7. It's totally awesome and easy solution for your new Windows woes.
- Paid for but cheap.
- StartAllBack
- Restores taskbar, start menu, context menus, explorer, sanity, style and order!
- Windows 11 only
- Paid for, but cheap.
- Open-Shell | Classic Shell Reborn
- Tweakers
- GitHub - valinet/ExplorerPatcher
- This project aims to enhance the working environment on Windows.
- With changes to Windows 11 24H2 it is important that you do not install it on a work or mission critical machine as the new framework has bugs. This will change in time.
- This program currently gets flagged as being a virus because Microsoft does not want you to use it. it is important that you setup the antivirus exceptions as noted here
- You must uninstall ExplorerPatcher when upgrading windows to prevent issues and file corruption. You settings will be maintained. The same applies when downgrading.
- Open up EP Properties application, go to taskbar, and set taskbar style to Windows 10 (ExplorerPatcher), not Windows 10. We no longer offer more support on the stock Windows 10 taskbar.
- Support for Windows 11 24H2 · Issue #3398 · valinet/ExplorerPatcher · GitHub
- The following methods work for uninstalling it:
- Run
ep_setup.exe /uninstall. - Rename
ep_setup.exetoep_uninstall.exeand execute that. - also, try to delete dxgi.dll in C:\Windows after you uninstall EP and reboot.
- Run
- The following methods work for uninstalling it:
- Quick Launch with 24H2? | Page 2 | Windows 11 Forum
- There's just one registry setting that I use to eliminate the potential risk of an endless loop in which the explorer process keeps crashing and automatically being restarted (and that could potentially happen regardless of whether you have installed EP). This will prevent the explorer process from automatically being restarted after it crashes:
reg add "HKLM\SOFTWARE\Microsoft\Windows NT\CurrentVersion\Winlogon" /v AutoRestartShell /t REG_DWORD /d 0 /f
- There's just one registry setting that I use to eliminate the potential risk of an endless loop in which the explorer process keeps crashing and automatically being restarted (and that could potentially happen regardless of whether you have installed EP). This will prevent the explorer process from automatically being restarted after it crashes:
- How to Restore Classic Start Menu in Windows 11 with Classic Taskbar - If you have just updated Windows 10 to Windows 11 and are not impressed by all the new changes to the taskbar, here is how to restore the old classic Start menu in Windows 11.
- How to Use Explorer Patcher to Bring Back Many Windows 10 Styles on Windows 11 - While Windows 11 introduces a fresh design, some users prefer the familiarity of the Windows 10 interface. If you're one of them, Explorer Patcher is a lightweight tool developed by Valentin-Gabriel Radu that lets you restore many Windows 10 styles without downgrading your operating system. This software is safe, straightforward to use, and immediately transforms your Taskbar to the Windows 10 style upon installation.
- A free app for all versions of Windows that lets you adjust (i.e. tweak) hidden secret settings that Microsoft does not let you adjust from the user interface. In addition, it allows you to add extra value to existing Windows apps and tools with advanced context menus, options, and handy commands.
- Windhawk
- The customization marketplace for Windows and programs. Customize your programs with available code snippets or create your own customizations.
- Many plugins are available.
- GitHub - ramensoftware/windhawk
- There is a plugin to disable taskbar grouping
- Design Your Own Windows 11 Start Menu - YouTube | Britec09 - Design Your Own Windows 11 Start Menu. Today we take a look at how to Mod Windows 11 Start Menu Styler
- 7+ Taskbar Tweaker
- Customize the Windows taskbar with dozens of exclusive options. Adapt the taskbar to your workflow, not the other way around.
- GitHub - valinet/ExplorerPatcher
- Taskbar Replacements
- GitHub - dremin/RetroBar
- Classic Windows 95, 98, Me, 2000, XP, Vista taskbar for modern versions of Windows
- RetroBar: Retro Taskbar Replacemet Tutorial (Windows 7-11) - YouTube | Tek Syndicate
- Excellent video, watch all of it for some inspiration and solutions
- RetroBar is a Windows taskbar replacement that works on Windows 7, Windows 8, Windows 10, and Windows 11. It works like the old taskbars on Vista (it was optional on 7) going all the way back to Windows 98 (or maybe 95).
- The key difference here is the placement of the QuickLaunch area. It's on the left, then the tabs are on the taskbar to the right. See the video for a full demonstration.
- I didn't realize how much I missed this layout. I currently use RetroBar on Windows and I use Plasma 6 on Fedora with a layout that is basically the same. It's awesome. Let me know what you think.
- This guy made a load of dark themes
- Uses EarTrumpet to give a better audio flyout.
- This does not replace the start menu and works with Open-Shell
- If you like Launchy, you should install microsoft PowerToys
- Themes
- Dark Themes (from Tek Syndicate)
- The links are in the description.
- The video will also tell you how to install them
- Longhorn Jade M7 (4042-4093) for RetroBar by longhornfusion on DeviantArt
- This is a theme for RetroBar that's based off Windows Longhorn M7 Builds 4042-4093.
- Dark Themes (from Tek Syndicate)
- GitHub - dremin/RetroBar
- Quick Launch
- True Launch Bar
- True Launch Bar is the superior replacement for standard Quick Launch
- On Windows prior to 24H2 Windows 11 their was Taskbar integration but now only the floating dock works.
- Installer and portable version are available.
- It has a plugin feature with many available.
- There is a `Standard Quick Launch Mode` which uses the `Quick Launch` folder for its root and straight out of the box they look like the classic quick launch icons but with the extra features you get with pinned icons.
- You can enjoy all the advantages of True Launch Bar not only on the taskbar, but also as a side panel. The side panel can be snapped to any edge of the screen on any monitor.
- The floating docking (or side panel)can be put on any monitor at the specified edge (Top, Bottom, Right, Left) except if the taskbar is present it will sit on top of it.
- GitHub - brondavies/TrayToolbar
- Provides a replacement for the custom toolbar functionality that was removed in Windows 11 by creating a System Tray item which then pops up a single column vertical menu when clicked.
- Currently the options are basic but it is responsive.
- You cannot re-order the icons.
- GitHub - Hofknecht/SystemTrayMenu
- Browse and open your files easily
- A completely free flowing dock that ruins as a normal windows application.
- The dock is a vertical list (icons and text) of the folder you have selected and I don't think this can be changed to icons only in a vertical mode.
- You can pick a hot key to open and close the program.
- It is portable and is available in the Microsoft store.
- GitHub - Bastians-Bits/TrayTool
- This programme makes it possible to create shortcuts within the System Tray (the little icon area in the bottom right).
- This is old and not developed currently.
- GitHub - rojarsmith/TrayToolbar
- Provide the replacement of add new toolbar function that was cancelled in windows 11
- Provides a replacement for the custom toolbar functionality that was removed in Windows 11 by creating a System Tray item which then pops up a single column vertical menu when clicked.
- Currently the options are basic but it is responsive.
- You cannot re-order the icons.
- Will not parse system variables in the folder path.
- True Launch Bar
- Floating Docks
- RocketDock
- RocketDock is our classic app launcher loved by millions of people for almost 20 years. It lets you zoom through your shortcuts like a rocket with its buttery smooth interface. You can drag your favourite apps, files, and folders onto the dock to have quick access to them, then personalize with different skins, icons, and effects to match your desktop.
- Puts icons at the top of your screen like MACs.
- XWindows Dock - Wikipedia
- XWindows Dock was a clone of the dock in Mac OS X Leopard for Windows. It is freely available under Creative Commons license.
- Not developed since 2011
- Stardock
- Stardock is a cutting-edge innovator specializing in desktop utility software and PC entertainment.
- Stardock Start11
- The ultimate Start menu replacement for Windows 10 and 11. Restore the classic look and add new functionality.
- Paid for, but cheap.
- RocketDock
- Launchers
- GitHub - Wox-launcher/Wox A cross-platform launcher that simply works. It's an alternative to Alfred and Launchy
- Alfred - Productivity App for macOS
- MacOS only
- Alfred is a productivity application for macOS, which boosts your efficiency with hotkeys, keywords and text expansion. Search your Mac and the web, and control your Mac using custom actions with the Powerpack.
- Launchy: The Open Source Keystroke Launcher
- A free cross-platform utility designed to help you forget about your start menu, the icons on your desktop, and even your file manager.
- Launchy indexes the programs in your start menu and can launch your documents, project files, folders, and bookmarks with just a few keystrokes!
- Not actively developed.
- System Tray
- GitHub - Aemony/NotifyIconPromote
- Notification Icon Promoter for Windows 11.
- This is a background application that auto-promotes all newly registered and unconfigured notification icons to be visible by default in the Windows 11 notification area.
- This somewhat emulates the behavior of
Always show all icons and notifications on the taskbarfrom prior Windows versions, but also allows for individual apps to be toggled if so desired.
- GitHub - File-New-Project/EarTrumpet
- EarTrumpet is a powerful volume control app for Windows
- Simplified Volume Control and better audio flyout.
- EarTrumpet | Microsoft Store
- GitHub - Aemony/NotifyIconPromote
- Shell Replacement
- Cairo Desktop Environment - Enjoy a brand new Windows desktop experience with Cairo. With a dynamic desktop, folder stacks, and new ways to interact with your apps, Cairo is fast, productive, and easy to use.
Lenovo Desktop, Laptop and Charger model numbers explained
ThinkPad
Lenovo ThinkPad series laptops are categorised by their target audience and features, with the E series being entry-level, the L series a step up, and the T series the flagship for professionals, while the X and P series focus on portability and high-performance respectively.
Here's a breakdown of the ThinkPad series (some from Google Search AI):
- E Series
- The most budget-friendly option, aimed at small businesses and consumers, offering basic performance and features.
- L Series
- A step up from the E series, targeting small to medium businesses and enterprises, with improved durability and security features.
- T Series
- The flagship ThinkPad series, designed for professionals and enterprise users, featuring premium materials, higher performance, and advanced security features.
- X Series
- The ultraportable line, known for its thin and light design, with a focus on portability and premium build quality.
- X1 Carbon
- The flagship ultraportable line, offering a balance of portability and performance, with excellent build quality in a 14-inch form factor.
- P Series
- Workstation/desktop replacement line, featuring powerful CPUs and GPUs for demanding tasks, often larger and heavier than other ThinkPad models.
- Z Series
- An AMD-powered version of the X1 Carbon line, discontinued and merged with the standard P1, focused towards creators and media consumption.
- Yoga
- A 2-in-1 series that combines the renowned power and reliability of ThinkPad laptops with the amazing versatility our Lenovo Yoga line with it's unique 360-degree hinge. A ThinkPad Yoga system works as a traditional laptop at home and in business meetings, or you can flip the screen around to use it as a tablet for casual web surfing, on-the-go note-taking, and more.
Explained
- Lenovo ThinkPad T15 Gen 2 Laptop I5-1135G7
- T15
- T Series with a 15" screen
- Gen 2/G2
- Generation 2
- G2/G7: If you see these on their own, it probably is the generation, but make sure it is not part of the CPU number
- check with other links just to see if this was one mistake.
- I5-1135G7
- Intel 11th Gen CPU
Docking Stations
- ThinkPad Ultra Docking Station - Overview and Service Parts - Lenovo Support GB
- Type: 40AJ
- Model: 40AJ0135UK
- Lenovo Only, Custom connector
- ThinkPad® Ultra Docking Station (40AJ) provides a docking experience for Large Enterprise ThinkPad customers. The innovative side connector, designed exclusively for ThinkPad notebooks, provides a driver-free way to connect conveniently and securely to a range of USB accessories and external displays, while rapid charging support and a mirrored power button make going mobile even easier. Dock without LAN chip, can support Wake on LAN, PXE Boot, vPro or DASH, which rely on System design.
- Lenovo ThinkPad Ultra Docking Station Unboxing and Review - YouTube | BsianTech - Unboxing and review of the Lenovo Thinkpad Ultra Docking Station.
- Lenovo #ThinkPad Ultra Docking Station USB-C (4K) - YouTube | techgurl - Unboxing, lose up and usage with no narration.
- ThinkPad Thunderbolt 3 Workstation Dock (230W/170W) - Overview and Service Parts - Lenovo Support GB
- Type = 40AN
- Model = DK1841
- Lenovo Only ??? , Thunderbolt connection
- Comes with either a 170W or a 230W charger which will charge the laptop when using the proprietary combined connection cable.
- Lenovo 03X7538 - ThinkPad Thunderbolt 3 Workstation Dock - US
- Has monitor output specs
- Lenovo Universal USB-C Dock Review and Demonstration - YouTube | Zip Tie Ninja - This is a comprehensive review of the Lenovo ThinkPad Universal USB-C Dock using a ThinkPad E15 Gen3 Laptop.
- ThinkPad USB-C Dock - Overview and Service Parts - Lenovo Support GB
- Type: 40A9
- Model: DK1633
- There are at least 2 generations of this Dock, see this YouTube video to make sure you get the new one. The USB-C on the back is recessed on the newer pone.
- Universal, Thunderbolt/USB-C
- Ports
- 1 x VGA
- 2 x DisplayPort Dual-Mode (DP++)
- Dual-Mode DisplayPort, is a standard which allows DisplayPort sources to use simple passive adapters to connect to HDMI or DVI displays, and allows DisplayPort displays to use simple passive adapters to connect HDMI or DVI sources.
- 1 x Gigabit Ethernet (10/1000)
- One USB-C (Data only, Upstream connector)
- has two on the pictures
- 2 x USB 2.0
- 3 x USB 3.0 (1 provide always-on mobile device charging)
- Stereo/Mic Combo Audio Port
- Features
- Monitor ports can both output 1080p
- Rapid charging capabilities (up to 100W for most USB-C notebooks and devices)
- 90W charger
- Nice cheap docking station
- ThinkPad Models Explained
- ThinkPad Models Comparison | Lenovo UK - If you want to know more about the ThinkPad laptop line-up, you've come to the right place.
- ThinkPad - Wikipedia - ThinkPad is a line of business-oriented laptop and tablet computers produced since 1992.
- ThinkBook Vs ThinkPad
- ThinkBook vs ThinkPad Laptops FAQ | Lenovo UK - Learn the differences between Lenovo Thinkbook vs ThinkPad laptops and which one is right for you.
- Yoga vs IdeaPad
- Lenovo Yoga vs IdeaPad: Difference and Comparison - An article explaining the differences between the line ups.
- Lenovo Yoga vs Lenovo IdeaPad - Lenovo is known for its laptops, although it can be hard to know which range is right for you, the Lenovo Yoga, or the Lenovo IdeaPad.
- Lenovo's clash of the titans: ideapad vs yoga – which laptop reigns supreme? - Jonas Tech Knowhow
Other Lenovo Laptop Models
- ThinkPad
- Flagship, made for business and capable of heavy processing.
- Lenovo ThinkBook
- Budget
Home and Office
ThinkBook is built with the casual user in mind and is historically more affordable, it doesn’t feature the same hardware we see in the ThinkPad.
- Budget
- Lenovo IdeaPad
- Everyday laptops for first-time users.
- High-performance laptops for serious gamers.
- Convertible PCs for those who like their entertainment on the go.
- The IdeaPad line includes various models, including clamshell laptops and convertible 2-in-1s, while the Yoga series focuses on hybrid designs. They also do `Slim` models
- The IdeaPad is better for those looking for a traditional laptop at a more affordable price.
- Lenovo Yoga
- A line of 2-in-1 laptops that can be used as both a laptop and a tablet, featuring a hinge that allows the screen to rotate 360 degrees.
- For the home user
- Focuses on hybrid designs
- Yoga is more expensive than IdeaPad but offers more versatility and flexibility in terms of usage.
- Lenovo Legion
- Gaming laptops and other devices.
- Designed for gamers who demand high performance and stunning graphics.
Misc Links
- General
- Why is Lenovo moving to soldered RAM? This just makes me both mad and dissapointed... | Reddit
- It’s fairly common on AMD laptops because the Ryzen APUs require a lot of memory bandwidth to perform well on graphics stuff. Many laptops just solder it to the board so that they can take advantage of LPDDR (stands for low-power DDR, and must be soldered as per spec) and also guarantees that they can run it in dual channel without having to worry about space for RAM slots.
- The Lenovo T14 Gen 5 will have Sodimm ram, user replaceable.
- Lenovo worked with Ifixit to improve the repairability of the laptop.
- People siding with Lenovo are ridiculous. For example LPDDR5 are in abundance because of smartphones so basically Lenovo's using them to lessen manufacturing costs for more profit. LPDDR has higher speed than SoDIMM but in OP's post, they use the base LPDDR5 which is 4800, so no advantage in this case.
- Lenovo's opting for soldered RAM is not about making the laptop price lower, it is to maintain or increase their profit margin. There is 0 benefit for the user in OP's case by going to soldered LPDDR5-4800.
- Why is Lenovo moving to soldered RAM? This just makes me both mad and dissapointed... | Reddit
- Hardware Compatibility
- For the latest updates on the compatible systems, refer to one of the following:
- Accessories Lookup - Find Accessories by system serial number or machine type
- SmartFind web - Find compatible Services and Accessories
- Battery and Power Adapter Finder - Find a compatible battery or power adapter
- Accessories and Options Compatibility Matrix (OCM) - Lenovo Support GB
- The Lenovo OCM are Microsoft Excel files that have compatibility information for Lenovo accessories.
- To quickly share this page, use this url: www.lenovo.com/accessoriesguide
- For the latest updates on the compatible systems, refer to one of the following:
Divi Slider Module
Convert to a Image Carousel / Full Width Image Slider
When trying to do an edge to edge fullwidth image slider in Divi so you can use it as an Image carousel, you might run across some simple problems and below are some solutions to this issue.
The Fullwidth slider and normal slider module behave in the same way and the following methods will work on both of them.
Styling and settings common to all methods
This styles the slider how I want it, which is quite standard.
- Put an instance of the Divi `Slider`module where you want it
- Configure these settings as follows:
- Content --> Elements --> Show Arrows: No
- Content --> Elements --> Show Controls: No
- Design --> Spacing --> Padding: 0px 0px 0px 0px;
- Design --> Animation --> Automatic Animation: On
- Design --> Animation --> Automatic Animation speed: 7000 (default 7000)
- Design --> Animation --> Continue Automatic Slide on Hover: Yes
- Slide --> Content --> Text --> Title: rename to `Slide 1`
- You can also use a name like `Slide 1 - White House` if you need descriptions for your many slides.
- We will use CSS to disable this so we can keep the slides title for easier management
- Slide --> Content --> Text --> Button: remove text
- can use CSS to disable
- Slide --> Content --> Text --> Body: remove text
- can use CSS to disable
- Slide --> Content --> Background --> Colour: none
- Save the module
- Delete all slides but one
Using the Background (Lenoi's Method)
This is the simplest method and easy to do. This whole module is designed for this.
- Follow the section above called `Styling and settings common to all methods`.
- Remove the custom gutters, width + max width to 100% - and this might on be needed on the normal slider module
- Slide 1
- Put the image as the background: Slide --> Content --> Background --> Background Image
- Edit `Slide 1` as follows:
- Slide --> Content --> Background --> Background Image
- Add and additional Slide (repeat as required)
- Duplicate `Slide 1`
- Change the Title
- Slide --> Content --> Text --> Title
- Give the slide a proper name (i.e. `Slide 2` or `Slide 2 - Buckingham Palace`).
- Change the slider image
- Slide --> Content --> Background --> Background Image
- Disable Title and Content with CSS
- Only the Title needs to be disabled here as the other fields should be empty, but if not this code will hide them.
- Advanced --> Custom CSS --> Free-Form CSS --> CSS:
/* Disable Title and Content */
selector .et_pb_slide_description .et_pb_slide_title,
selector .et_pb_slide_description .et_pb_slide_content {
    display: none;
}
- Save the module
Using `Image & Video` (Divi Sensei method)
This allows you to use the slider's `Image and Video`in a full width mode using CSS code to do the magic and works for both fullwidth and the normal slider module and is based on Create a Fullwidth Image Slider using the Divi Slider Module | Divi Sensei
- Follow the section above called `Styling and settings common to all methods`.
- Edit `Slide 1`
- Set the slide image: Slide --> Content --> Image & Video --> Image
- Add an additional Slide (repeat as required)
- Duplicate `Slide 1`
- Change the Title
- Slide --> Content --> Text --> Title
- Give the slide a proper name (i.e. `Slide 2` or `Slide 2 - Buckingham Palace`).
- Change the slider image
- Slide --> Content --> Image & Video --> Image
- Apply the required CSS
- Method 1 - Global CSS
- Add this CSS to: Divi --> Theme Options --> General --> Custom CSS
/* Convert Slider module into an Image Carousel (Divi Sensei, Cleaned) - Just add .full-image-slider to your slider - Original */ .full-image-slider .et_pb_slide { padding-left: 0 !important; padding-right: 0 !important; } .full-image-slider .et_pb_slide:first-child .et_pb_slide_image img.active { animation: unset !important; } .full-image-slider .et_pb_container { max-width: 100% !important; width: 100% !important; height: auto !important; min-height: 0 !important; } .full-image-slider .et_pb_slide_image img { max-height: none !important; width: 100% !important; } .full-image-slider .et_pb_slide_image { margin: 0 !important; padding: 0 !important; top: 0 !important; position: relative !important; width: 100% !important; display: block !important; -webkit-animation-name: fade !important; -moz-animation-name: fade !important; -ms-animation-name: fade !important; -o-animation-name: fade !important; animation-name: fade !important; } .full-image-slider .et_pb_slider_container_inner { position: relative; } .full-image-slider .et_pb_slide_description { position: absolute !important; top: 0 !important; bottom: 0 !important; left: 0 !important; right: 0 !important; padding: 0 !important; margin: 0 !important; width: auto !important; height: auto !important; } .full-image-slider .et_pb_slide_description .et_pb_button_wrapper, .full-image-slider .et_pb_slide_description .et_pb_button_wrapper a, .full-image-slider .et_pb_slide_description .et_pb_button_wrapper a:hover { width: 100% !important; height: 100% !important; padding: 0 !important; margin: 0 !important; color: rgba(0, 0, 0, 0) !important; border: none !important; background: none !important; } .et_pb_column.et_pb_slider_fullwidth_off.full-image-slider .et_pb_slide_description .et_pb_slide_title, .et_pb_column.et_pb_slider_fullwidth_off.full-image-slider .et_pb_slide_description .et_pb_slide_content, .full-image-slider .et_pb_slide_description .et_pb_slide_title, .full-image-slider .et_pb_slide_description .et_pb_slide_content { display: none; } - Add the following CSS class to each slider you want to transform
full-image-slider
- Add this CSS to: Divi --> Theme Options --> General --> Custom CSS
- Method 2 - Selector
- Add the following CSS to each slider module you want to transform to: Advanced --> Custom CSS --> Free-Form CSS --> CSS
/* Convert Slider module into an Image Carousel (Divi Sensei) - Adapted to use Free-Form CSS */

selector .et_pb_slide {
    padding-left: 0 !important;
    padding-right: 0 !important;
}

selector .et_pb_slide:first-child .et_pb_slide_image img.active {
    animation: unset !important;
}

selector .et_pb_container {
    max-width: 100% !important;
    width: 100% !important;
    height: auto !important;
    min-height: 0 !important;
}

selector .et_pb_slide_image img {
    max-height: none !important;
    width: 100% !important;
}

selector .et_pb_slide_image {
    margin: 0 !important;
    padding: 0 !important;
    top: 0 !important;
    position: relative !important;
    width: 100% !important;
    display: block !important;
    -webkit-animation-name: fade !important;
    -moz-animation-name: fade !important;
    -ms-animation-name: fade !important;
    -o-animation-name: fade !important;
    animation-name: fade !important;
}

selector .et_pb_slider_container_inner {
    position: relative;
}

selector .et_pb_slide_description {
    position: absolute !important;
    top: 0 !important;
    bottom: 0 !important;
    left: 0 !important;
    right:  0 !important;
    padding: 0 !important;
    margin: 0 !important;
    width: auto !important;
    height: auto !important;
}

selector .et_pb_slide_description .et_pb_button_wrapper,
selector .et_pb_slide_description .et_pb_button_wrapper a,
selector .et_pb_slide_description .et_pb_button_wrapper a:hover {
    width: 100% !important;
    height: 100% !important;
    padding: 0 !important;
    margin: 0 !important;
    color: rgba(0, 0, 0, 0) !important;
    border: none !important;
    background: none !important;
}

selector .et_pb_slide_description .et_pb_slide_title,
selector .et_pb_slide_description .et_pb_slide_content {
    display: none;
}
- Add the following CSS to each slider module you want to transform to: Advanced --> Custom CSS --> Free-Form CSS --> CSS
- Method 1 - Global CSS
- Disable Title and Content with CSS
- This is done with the CSS code above. Edit as required
- Save the module
Notes
- Make sure you remove the background colour on each slide to stop it flashing up between images and page load. I choose transparent (i.e. none) when getting the blue background.
- My fullwidth image slider is only a thin line instead of a proper image.
- This is caused by unwanted or incorrect padding
- Fullwidth Slider --> Design --> Spacing --> padding
- Below is the default CSS for the description which is also the padding parameter of the Fullwidth slide module.
.et_pb_slide_description, .et_pb_slider_fullwidth_off .et_pb_slide_description { padding: 16% 8%; width: auto; margin: auto; } - It is the description defaults that give the image slider its height and therefore the background and the corresponding image.
- Don't use `Padding: 0px 0px 0px 0px` as this will give you the thin line issue.
- I think this code is controlled with the slide DIV
- Below is the default CSS for the description which is also the padding parameter of the Fullwidth slide module.
- Fullwidth Slider --> Design --> Spacing --> Margin
- The is no margins by default and therefore no corresponding CSS code by default.
- When you add a margin to the slider moduel you get the following CSS code added.
.et_pb_fullwidth_slider_0_tb_header { margin-top: 471px !important; } - This CSS code is added to the modules boubdry DIV
Code
Constant Image Size
It is best to use images of the same dimensions when making a slider but if you cannot for some reason then use the following code to make images with different sizes all display with a constant dimensions:
Advanced --> Free-Form CSS --> CSS
/* set the height of the slide image*/
selector .et_pb_slide_image img {
    width: auto;
    height: 600px;
    object-fit: cover;
}
- Based on How To Force The Divi Gallery Slider To A Fixed Height - by Pee-Aye Creative - The Divi Gallery Slider layout can be very frustrating, but I'm here to solve that and show you how to force the Divi Gallery Slider to a fixed height!
- For aspect ratio see CSS object-fit Property | W3Schools
Custom Gallery Arrows
/* Custom Gallery Arrows */
.et-pb-arrow-prev::before {
    content: "4";
    background-color: #24bca4;
    border: 1px solid #fff;
    border-radius: 50%;
    color: #fff;
}

.et-pb-arrow-next::before {
    content: "5";
    background-color: #24bca4;
    border: 1px solid #fff;
    border-radius: 50%;
    color: #fff;
}
Links
- General
- The Divi Slider Module | Elegant Themes Documentation - How to add, configure and customize the Divi slider module.
- The Divi Fullwidth Slider Module | Elegant Themes Documentation - How to add, configure and customize the Divi fullwidth slider module.
- How to Customize Your Divi Slider to Change Specific Elements with Each Slide | Elegant Themes - In this tutorial, I’m going to show you how to customize your Divi slider to change only specific elements with each slide transition. This allows you to keep the core content and design components of your slider consistent while you change only a specific element (like a single word or button) with each slide.
- Tutorials
- Create a Fullwidth Image Slider using the Divi Slider Module | divi-sensei.com - Divi is a great theme, no doubt. But sometimes the standard modules are a little bit limited in the way how you can use them. In this tutorial, we will show you how to create a fullwidth image slider in Divi.
- How to Set Up and Style Slider Module in Divi: A Step-by-Step Guide • Divi Cake Blog - In this article, I’ll walk you through all the functionalities the Divi slider offers, so you know every possible feature within the Divi Slider Module to build interactive sliders.
- How to Create a Custom Photo Gallery Slider in Divi | Elegant Themes - In this tutorial, I’m going to show you an easy way to embed Divi image galleries into your slides to create a completely custom photo gallery slider in Divi. The trick is to create a WordPress image gallery in the content area of your slider.
- How to Create a Fullscreen Slider with Divi | Elegant Themes - Creating a fullscreen slider with Divi is surprisingly easy to do. The key is to give your slider a height that is relative to the browser height and then get rid of any extra padding and width restrictions on the parent row or section. In just a few minutes, you can create a fullscreen slider that expands to fill the entire screen on page load and look great on all devices.
- How to Create a Full-Width Slider on Divi Builder - WPPagebuilders - In this article, we will show you how to create a full-width slider with Divi Builder.
- Navigation Arrows
- How to Make the Slider's Module Navigation Arrows Always Visible | Elegant Themes Help Center - Learn how to make navigation arrows in Divi’s Slider Module always visible for improved user interaction and seamless navigation.
- Trick to make Divi Slider navigation arrows always visible | TechGlimpse - This article will show you the trick of how to make the Divi slider navigation arrows visible always.
- How to change the Divi slider arrows to any icon or text - Divided Rocks - In this tutorial you will learn how to change the divi slider icon to any icon or to plain text. Without the need of a plugin, just some CSS code.
- How to change Divi slider arrows to 'Next' and 'Prev' | divibuilderaddons - In one of my Divi child themes, I wanted to change the default Divi slider arrows to something unique. So I decided to change them to text instead of arrows, to ‘Next’ and ‘Prev’. It is not possible to do it on the dashboard. So I had to find a custom solution for that. Let me show you how I achieve the result.
- DIVI Slider TUTORIAL | How to style divi slider arrow - YouTube - DIVI Slider TUTORIAL :How to style divi slider arrow. If you looking for How to style divi slider arrow? Then This video tutorial for you.
- Divi Quick Tip 11: How to Style Divi's Dot Navigation - YouTube - In this Divi Quick Tip we show you how to style the dot navigation on Divi pages and Divi sliders.
Setting up a WordPress Blog for a Client using Divi
Below are the basic instructions pon setting up a blog for you client (or yourself). Once you have set up your blog you can always change the look and feel afterwards.
Create a page, and call it Blog
- make sure you have not defined the 'blog' page for displaying [posts as this will prevent you from editing it with Divi, unless you use the blog template in theme builder)
- Settings --> Reading --> Your homepage displays --> Posts page: `– Select –`
- if you have I think you need to add another template in theme builder?? or it just uses the default global, see what it foes `blog template`
- or design a template and do your styling there, but i prefer the blog page, but does this cause issues?
Design your Blog page
There are 2 places you can design your `Blog` page:
- A standard page
- Using the `Blog` template in `Theme Builder`
I prefer creating a `Blog` page as it is easy and more logical for me to manage, especially for small sites.
Using the `Blog` template to override the posts page as defined in static pages is a not really needed unless you have a specific reason such as overriding the `Global` Header and Footer or even just adding a featured image.
You can mix and max the styles below by having blocks with a Sidebar but you might find you run out of real estate on your page quickly.
Layout 1 - Blocks (Divi Default)
Follow the instructions below, styling as required, and you will get a layout similar to the Divi Blog that utilises blocks.
- Top Section (Regular) = n/a
- Middle Section (Regular)
- 1st Row (3 Column: 1/5, 3/5, 1/5)
- 1st Column
- Empty
- 2nd Column
- Module(s):
- Text
- Use the text
- <h1>: QuantumWarp Blog
- <p>: Stay up to date with our most recent news and updates
- I use a custom header with the title and other text in it instead of this module as this fits with my site. So this section is not needed for my page.
- Use the text
- Search
- Input Placeholder: Search Our Blog
- Show Button: No
- Exclude Pages: Yes
- Save as a Global module calling it `Blog - Search`.
- Text
- Module(s):
- 3rd Column
- Empty
- 1st Column
- 2nd Row (1 Column)
- 1st Column
- Module(s)
- Blog
- Post Type: Posts
- Post Count: 9
- Content Length: Show Excerpt
- Use Post Excerpts: Yes
- Show Featured Image: Yes
- Show read More Button: Yes
- Show Author: No
- Show Date: Yes
- Show Categories: Yes
- Show Comment Count: Yes
- Show Pagination Yes
- Save as a Global module calling it `Blog - Posts`.
- Blog
- Module(s)
- 1st Column
- 1st Row (3 Column: 1/5, 3/5, 1/5)
- Bottom Section = n/a
Layout - Standard Article List (with Sidebar)
Follow the instructions below, style as required and you will get a standard post list layout with a sidebar.
- Top Section (Regular)
- 1st Row (1 column)
- 1st Column
- Module(s):
- `Post Title`
- I use a custom header with the title and other text in it instead of this module as this fits with my site. So this section is not needed for my page.
- `Post Title`
- Module(s):
- 1st Column
- 1st Row (1 column)
- Middle Section (Regular)
- 1st Row (2 columns: 2/3, 1/3)
- 1st Column
- Module(s):
- `Post Content`
- .....add setting notes here.............
- `Post Content`
- Module(s):
- 2nd Column
- Module(s):
- Sidebar
- Add relevant widgets to the sidebar such as `search`
- `Widget Area` set to `Sidebar`
- (Optional) Remove the grey separator bar
- Save as a Global module calling it `Blog - Sidebar`.
- Sidebar
- Module(s):
- 1st Column
- 1st Row (2 columns: 2/3, 1/3)
- Bottom Section = n/a
Design your Post Page
Follow the instructions below, style as required and you will get a standard post list layout with a sidebar.
If you don't want a sidebar, set the middle section row to have only 1 column and remove the `Sidebar` module and configuration from the following instructions, the rest will be the same.
If you don't want comments, just don't add the bottom section.
Create the Template
- Divi --> Theme Builder --> Add New Template --> Build New Template --> Use On: `All Posts` --> Create Template
- Divi --> Theme Builder --> `All Posts` --> Add Global Body --> Build Custom Body
Build your Layout
Create the layout as shown below:
- Top Section (Regular)
- 1st Row (1 column)
- 1st Column
- Module(s):
- `Post Title`
- Show Title: Yes
- Show Meta: No
- Show Author: Yes
- Show Date: Yes
- Show Posts Categories: Yes
- Show Comments Count: No
- Show Featured Image: No
- I use a custom header with the title and other text in it instead of this module as this fits with my site. I would therefore insert the dynamic `Post title` in there. So this section is not needed for my page.
- `Post Title`
- Module(s):
- 1st Column
- 1st Row (1 column)
- Middle Section (Regular)
- 1st Row (2 columns: 2/3, 1/3)
- 1st Column
- Module(s):
- `Post Content`
- .....add setting notes here.............
- `Post Content`
- Module(s):
- 2nd Column
- Module(s):
- Sidebar
- Use the Global module `Blog Sidebar`.
- `Widget Area` set to `Sidebar`
- (Optional) Remove the grey separator bar
- Add relevant widgets to the sidebar such as `search`
- Sidebar
- Module(s):
- 1st Column
- 1st Row (2 columns: 2/3, 1/3)
- Bottom Section
- 1st Row (1 Column)
- 1st Column
- Module(s):
- `Comments`
- .....add setting notes here.............
- `Comments`
- Module(s):
- 1st Column
- 1st Row (1 Column)
Design your Search Results page
After someone has used the blog search feature you need to make sure the search results they are offered are styled correctly.
You can use either either of the `Blog` page layouts, but it you want to use your `Blog` page design you used above then this is very simple,
Instructions
- Make sure any modules you want to be in sync between this page and the `Blog` page are made global.
- Divi --> Theme Builder --> Add New Template --> Build New Template --> Use On: `Search Results` --> Create Template
- Divi --> Theme Builder --> `Search Results` --> Add Global Body --> Build Custom Body
- Copy your `Blog` page layout and paste into
- Divi --> Theme Builder --> `Search Results`--> Custom Body
- Make the following changes:
- Change the Page Title to be `Search Results`.
Allow the `ms-windows-store` protocol to be used in a `Custom Links` menu item URL
I want to use a `ms-windows-store://`link which will open the `Quick Assist` app in the `Microsoft Windows Store`on the local PC and not the website. This link will make it easier for allowing me to remotely access a client's PC when required rather that telling them on how to install software or press certain keys on the keyboard.
By using the local `Windows Store`, the product page for the app benefits from:
- Being able to recognise if the app is installed on the PC
- The blue action button changes accordingly, so instead of seeing always seeing a `Download` button (as you would on the Microsoft Windows Store website) you will see an `Open` button if the app is installed or a `Get` button if not.
- With either option you click the big blue action button and follow the steps.
- Some browsers will ask if you are allowed to open `ms-windows-store` links, but this is a very easy message for the user to click and thwe finish the procedure.
- The user is more likely logged in locally
- This might be advantages for many apps not discussed here.
`Quick Assist` Store links
- Local PC: ms-windows-store://pdp?&productid=9p7bp5vnwkx5
- Website: https://apps.microsoft.com/detail/9p7bp5vnwkx5
Issue
You can easily add links to the Microsoft Store website as these are normal URLs, however, when I use a `ms-windows-store` URLs in a custom link menu item, it is always removed.
Cause
- WordPress is filtering all URLs and if the protocol is not allowed it is wiping them so the new custom link will save with an empty URL field.
- WordPress has a list of allowed protocols it uses for filtering URLs and `ms-windows-store` is not in it.
Solution
Add `ms-windows-store` as an allowed protocol, steps of which are now outlined below.
I found how to add a protocol to the `Allowed Protocols` list with information in this article, Using WordPress ‘kses_allowed_protocols’ PHP filter | IT Support Guides and is in 2 parts, the code, and then where to put it.
You can also craft a custom menu item type using the plugin Menu Item Types – WordPress plugin | WordPress.org but this requires sometime to extract the code from WordPress and build a custom menu item type which can be used by this plugin. Most of the relevant code links are in the research section at the end.
The Code
I modified the code from the article to add/allow the `ms-windows-store` protocol.
// Add a Custom Protocol (ms-windows-store)
add_filter('kses_allowed_protocols', 'add_myprotocol');
function add_myprotocol($protocols)
{
	$protocols[] = 'ms-windows-store';
	return $protocols;
}
Where to put the code?
TL;DR - Use Code Snippets and have the code snippet run everywhere. The URL is filtered when submitted and then when displayed.
Now you have the relevant code, where do you put it? There are several ways to add these filters in to WordPress, pick which one is best for you. Your different options are below:
- Code Snippets plugin
- Code Snippets – WordPress plugin | WordPress.org - An easy, clean and simple way to enhance your site with code snippets.
- This plugin allows for code to be added from within the WordPress admin area.
- It is a very completed plugin with such features as apply the code only to the admin area.
- There is an option to allow code to stay present even if the plugin is removed.
- Custom plugin
- Create a blank plugin and add your code in the main file of the plugin
- You can use the WordPress file editor to add/remove code.
- If you update your plugin, the code might change, but this will be human error.
- you can use `is_admin()` to define the code to run just for the admin area.
- Theme functions.php
- this will get overridden on a theme update.
- Child Theme functions.php
- This file will not get overridden when the theme is updated
Research
These are some of the relevant code locations I found.
Functions (in order of how I found the solution)
- print_post_type_container()
- wp-includes/class-wp-customize-nav-menus.php : ~1221
- This has the HTML for the `Custom Links` blade in the `Add menu items` accordion on the left hand side of the `Menus` page.
- content_template()
- wp-includes/customize/class-wp-customize-nav-menu-item-control.php : 64
- This has the HTML for the `Custom Link` menu item in the current menu shown under `Menu Structure` on the right hand side of the `Menus` page.
- Javascript/Ajax is heavily used to fill in the variables.
- This might be for the frontend???
- wp_update_nav_menu_item()
- wp-includes/nav-menu.php : ~315
- Saves the properties of a menu item or create a new one.
- Includes the use of esc_html()
- esc_html()
- wp-includes/formatting.php : ~4654
- Escaping for HTML blocks.
- esc_url_raw()
- wp-includes/formatting.php : ~4574
- Sanitizes a URL for database or redirect usage.
- wp_allowed_protocols()
- wp-includes\functions.php : ~7158
- Retrieves a list of protocols to allow in HTML attributes.
- The default protocols are hardcoded in this function but can be overridden/appended/deleted with kses_allowed_protocols()
Links
- Using WordPress ‘kses_allowed_protocols’ PHP filter | IT Support Guides
- How to Use the WordPress `kses_allowed_protocols` PHP Filter for Modifying Allowed Protocols.
- This article explains how to use the `kses_allowed_protocols` WordPress PHP filter to modify the list of protocols allowed in HTML attributes.
- wp_allowed_protocols() – Function | Developer.WordPress.org
- Retrieves a list of protocols to allow in HTML attributes.
- Mentions the hook using `kses_allowed_protocols`.
Dell Desktop, Laptop and Charger model numbers explained
The Dell model number system is hard to understand so I have put together some notes to explain these numbers.
Names
Latitude, Inspiron, Vostro (discontinued), OptiPlex, Precision
- Solved: Vostro vs Latitude-Difference Between Dell vostro vs latitude. - Dicy Trends - Vostro vs Latitude- What is the difference between Dell Vostro and Latitude Laptops? Which one should you choose? Dell has one of the most extensive laptop
Type
Desktops
These naming convention is based on OptiPlex but some of it is valid for other desktops.
- Example: OptiPlex 3070 Micro
- Explanation:
- A business class desktop PC
- in the 3000 series
- first manufactured in June 2019
- Micro format
- OptiPlex = Target Market
- OptiPlex = Corporate enterprises, healthcare, government, and education markets.
- Inspiron = Consumer oriented / Home user.
- 3 = Line
- 3xxx = Entry
- 5xxx = Mainstream
- 7xxx = High-tier
- 0 = ???
- 7 = ???
- 0 = ???
- Micro = Form Factor
Links
- Dell OptiPlex - Wikipedia
- A line of business-oriented desktop and all-in-one computers made for corporate enterprises, healthcare, the government, and education markets.
- This article gives a timeline of these desktop PCs.
- Dell Inspiron - Wikipedia - No meta description
Laptops
I have used information found for the Latitude range of Dell laptops but the rules should be the same for the other laptop ranges such as XPS and Inspiron.
- Example: Latitude 7390 2-in-1
- Explanation:
- A business class laptop
- in the 7000 series
- with a 13" screen
- first manufactured in 2018
- which can be folded and used as a tablet by using it's touchscreen
- Latitude = Target Market
- Latitude = Corporate enterprises, healthcare, government, and education markets.
- Vostro = Small Business (Discontinued)
- Inspiron = Consumer oriented / Home user
- XPS = Gaming / Consumer oriented / Home user
- 7 = Series
- 3xxx series = Budget models intended for education and small businesses
- 5xxx series = Mainstream line.
- 7xxx series = Premium Ultrabooks.
- 9xxx series = Ultra-premium laptops and 2-in-1s.
- 3 = Screen Size
- x1xx = 11.6"
- x2xx = 12.3"
- x3xx = 13" / 13.3"
- x4xx = 14.0"
- x5xx = 15.6
- 9 = Year of 1st Manufacture
- xx5x Models (2024)
- xx4x Models (2023)
- xx3x Models (2022)
- xx2x Models (2021)
- xx1x Models (2020)
- xx0x Models (2019)
- xx9x Models (2018)
- xx8x Models (2017)
- Dell used the "E-series" name up through the 2016 models, and new 2017 models drop the "E."
- 0 = Model Revisions
- This gives an additional parameter when two models have the same grade, screen size and generation of processor.
- By default 0 is taken as the standard configuration and 1 if there is a later variant.
- Some product ranges like the XPS like to use 0 as the standard laptop configuration and 5 as the `2 in 1` device while 4 is used in the Latitude range of products for rugged devices.
- 2-in-1 = Additional feature
- 2-in-1
- Ultralight
- Detachable
- A laptop with the same model number can have a better CPU, Motherboard RAM and other features as the laptops are redeveloped over time but not necessary reflected with a new model number, perhaps because it uses the same chassis.
- These different laptops will have a different Dell Part number.
Classification
I am not sure they are classified like this any more.
The laptops can be targeted at different markets so have an arbitrary description assigned to them which is not reflected in the model number.
- Convertible
- Education
- Essential
- High-Performance
- Mainstream
- Ultraportable
Links
- Dell Latitude - Wikipedia
- Dell Latitude was a line of laptop computers manufactured and sold by American company Dell Technologies. It was a business-oriented line, aimed at corporate enterprises, healthcare, government, and education markets; unlike the Inspiron and XPS series, which are aimed at individual customers, and the Vostro series, which is aimed at smaller businesses.
- Gives the MFG Date by model number
Laptop Chargers
- Example:
- Model: LA45NM150
- DP / N: 0HDCY5
- Explanation:
- Manufactured by LiteOn
- with a 45w power rating
- .......
- LA = Manufacturer
- DA = Delta Electronics
- HA = Chicony Power Technology
- LA = LiteOn
- 45 = Power Rating
- 45 = 45w
- 65 = 65w
- 100 = 100w
- etc...
- NM1 = ???
- NM1
- PM1
- PM2
- 50 = ???
Chargers can be made by different manufacturers but they will share the same Dell Part Number.
Links
- Dell Model Years — Purdue IT | Research and Health Technology Services | STEM - This table shows the approximate calendar year during which select Dell computer models were originally released.
- Solved: Vostro vs Latitude-Difference Between Dell vostro vs latitude. - Dicy Trends - Vostro vs Latitude- What is the difference between Dell Vostro and Latitude Laptops? Which one should you choose?
My Fujitsu fi-6130Z Scanner Notes
Official Sites
- Drivers
- Product Pages
- Manual
- Software
NB: Newer models of the scanner might have newer versions of software on their download pages. But you will need a serial and part number for the relevant scanner.
Installing
- Power the scanner on but do not connect the USB to your PC
- If you have already plugged the scanner in your will find it listed as an "Unknown Device"
- Download the drivers FUJITSU TWAIN32 Version 10.21.700 (or the latest available)
- Unless you are doing network scanning you can use the one with the "Scanner Central Admin Agent"
- The version number for this file is for the Scanner Utility rather than using the driver version.
- Run the
FtaljgX1.exedriver file you have just downloaded- it will extract files to a folder called
Disk1 - I ran this EXE as administrator just to make sure it installs correctly.
- it will extract files to a folder called
- Navigate the the
Disk1folder and runsetup.exe - Follow the wizard through leaving both these options on:
- Scanner Utility for Microsoft Windows (10.21.700) = This installs the TWAIN apps and Windows drivers.
Software Operations Panel (3.7.16.0) = The Scanners control panel and installs as an APP.
- Scanner Utility for Microsoft Windows (10.21.700) = This installs the TWAIN apps and Windows drivers.
- Restart the PC when requested
- Uninstall "FUJITSU Scanner USB Hotfix" (optional)
- I am not sure what this does but might not be needed any more.
- Connect the scanner to you PC with the USB cable and check it is recognised as follows:
- Once installed, the driver is as follows:
- The driver name is: fi-6130Zdj
- Driver Provider: FUJITSU
- Driver Date: 04/02/2025
- Driver version: 9.25.17.0
- Driver Signer: Microsoft Windows Hardware Compatibility Publisher
Notes
- Alternatively once you have installed the drivers onto your Windows PC, you can use a driver extraction tool to grab just the required drivers files for your scanner because the installer install a lot of useless junk that is only used for TWAIN.
- I think you can uninstall the "FUJITSU USB Hot fix" as this will of been for an old operating system, but I do not know what this does.
Misc
- Software
- NAPS2 - Scan documents to PDF and more - NAPS2 is free scanner software made easy. Scan to PDF, edit your documents, and use advanced features like OCR. Available on Windows, Mac, and Linux.
- Fujitsu fi-6130Z Scanner Driver & Software | VueScan Scanner Softwar
- Want to keep using your Fujitsu fi-6130Z on macOS Sonoma, Windows 10, and more? VueScan has a built in Fujitsu Scanner Driver - so it works even without a driver.
- Has specs for the scanner.
- Tutorials
- How to Install your Fujitsu fi-6130z Desktop Scanner - YouTube - You've purchased a new Fujitsu fi-6130z desktop scanner, which is Intuit's recommended scanner for accounting professionals. Now you're ready to install! This informative video walks you through all the steps involved, from installing the software to connecting the scanner to the computer. It also discusses default configurations.
- How to install, configure, and use Fujitsu Scanner - YouTube
- I show how to download the TWAIN32 drivers, extract the files and run the setup exe, and use the Fujitsu fi 6130 scanner on a Windows 10 machine to scan documents and pictures. This process is the same for Windows 7 PCs.
- This is for the fi-6130 and is using a slightly older driver installer.
- Scanner Utility for Microsoft Windows (10.21.700) is installed at:
- Scanner Utility for Microsoft Windows V10L21 by PFU LIMITED - Should I Remove It?
C:\windows\twain_32\fjscan32\
- Scanner Utility for Microsoft Windows V10L21 by PFU LIMITED - Should I Remove It?
Troubleshooting
- General
- Apps will not see the scanner but it is shown in my device manager
- This is probably because the APPs will only talk via TWAIN and there is some incompatibility.
- This is my guess.
- Apps will not see the scanner but it is shown in my device manager
- Installing on Windows
- Fujitsu Scanner not recognizing - Hardware - Spiceworks Community
- A couple of potential solutions mentioned here.
- You will need to download the software (full suite) or use the disk that came with the scanner. Once you have that (leave the scanner disconnected), install the twain and isis drivers. Also go ahead and install the scandall pro software (it’s pretty good). Once all of that is installed, reboot and connect the scanner. It will then show up under devices and printers.
- Install Paper Stream IP Driver for Windows 10 for fi-6130Z. TWAIN driver is not compatible any more for this scanner with Windows 10.
- New to Fujitsu fi-6130 : r/Fujitsu | Reddit
- Downloaded the fi-6130 setup CD from here.
- I'm not certain if the TWAIN driver works in Windows 10/11, so in ScandALL you may need to go into Tool -> Preferences -> Scan and change it from TWAIN to ISIS.
- Use NAPS2
- Fujitsu Scanner not recognizing - Hardware - Spiceworks Community
- Installing on Windows 11
- Important Notice - the Use of Scanners in in Windows 11, version 24H2 | Global | Ricoh
- Regarding the Use of RICOH fi and SP Series Scanners in Windows 11, version 24H2
- A new workaround is now available. Please refer to the FAQ for more details.
- No scanner can be found on Windows 11, version 24H2 (SX03047E) – fi Series & SP Series FAQ | Ricoh Global - The following issues may occur on Windows 11, version 24H2 as of December 25, 2024.
- Scanner Twain driver for Windows 11 - or how to make Windows 11 allow - Microsoft Community
- Pete Schliebner
- It's not just Fujitsu scanners that are affected. I am pretty sure that it is all scanners, and twain drivers, in general. None of the OEM's have a clue how to fix it. This seems like a typical Microcrap decision to force everyone to use the very limited Microsoft WSD drivers for scanners and printers and then only use the apps that MS "approves". Doesn't cause as many problems with printers, but it severely limits the scanner functions.
- M.O.118
- In Dec 2024, we transitioned from Windows 10 to Windows 11 (24H2) on a new PC at work. Connection problem with Fujitsu fi-6130dj scanner which worked in Windows 10. Installation of Windows 11 TWAIN driver from manufacturer was successful. The scanner was listed working in Device Manager but the scanner either did not show or showed as "WIA No Friendly Name" in any application. After some searching, I found the following instruction:
- At the step: "{Select the device driver you want to install for this hardware] window and click [Next]", 2 entries of fi-6130dj showed. I chose the 2nd one and voila, the TWAIN driver AND WIA driver for the Fujitsu scanner were restored. Now both TWAIN and WIA show in all applications. Hopefully, the same process will fix scanners/multifunction machines of other brands. If you have only one driver listed in the last step, it's an easy choice. If you have 2 listings like mine, try one or the other to see which works. Good luck.
- Pete Schliebner
- Use NAPS2 if you are having connetion problems.
- Important Notice - the Use of Scanners in in Windows 11, version 24H2 | Global | Ricoh
My Amazon Fire TV Stick Notes
These are a collection of useful tips and tricks for using the Amazon Fire TV Stick (aka Firestick)
Casting Issue with AirScreen
Issue
I connected once to my Firestick all good with airscreen, I then could not reconnect whatever i did. This was after i changed the name of the airscreen.
Cause
The reason for this fault is most likely some sort of cache that is not getting cleared with the name and device id etc..
Solution
- Turn the screen sharing app off on the Firestick
- Scan for casting devices with your phone and it should find one.
- Whilst the scanning is continuing on the phone turn airscreen on
- The new device will show up and you can connect to it.
USB Pendrive will not work with a OTG cable
TL;DR
- The pendrive (or another USB device) needs to be inserted into the USB socket on the OTG cable when you power on the Firestick to enable OTG, after this it will work as expected, inserting and removing the pendrive and other devices, because OTG is enabled.
- The pendrive must be formatted to FAT32.
- You could use a OTG cable with a USB hub buily-in which would keep the OTG live at all times and not required a USB device to be plugged in to activate it leaving you free to insert pendrives when you want rather than having to remember to have a USB device plugged in at boot time. This might get fixed in later software updates and might not be present on all Firestick versions.
This can be very frustrating but here is a simple procedure that will getyour pendrive to work in most cases.
Instructions
- Install the OTG cable into the Firestick and power up the Firestick to make sure the cable works.
- Unplug OTG cable from the Firestick, which turns it off.
- Plug your USB Pendrive into the USB socket on the OTG cable.
- The Pendrive must be formatted to FAT32 (and preferably blank)
- FAT32 has a filesize limit of 4GB
- Plug the power end of the OTG cable into the Firestick which will power it up.
- The Firestick will transfer over relevant folders (i.e. DCIM, Documents, etc...) to the pendrive
- The drive is treated like External Storage?
- It will not delete any files that are already present on the drive.
- I would like to know what file/folder is used as a Boolean check for whether or not to copy over files and folders to the USB drive.
- If the pendrive is not formatted to FAT32: You will get a "Unable to Read USB Device" error message and the options to Format to External Storage, Format to Device Storage or Do Nothing.
- The USB drive will now appear as an available storage on your Firestick and in your Apps.
Notes
- Everything you need to know about USB Storage with the Amazon Fire TV | AFTVnews
- Any OTG cable will work
- When booted you can remove the pendrive, put into your PC to copy files and then put back into the Firestick and it will reflect with the new files. When re-inserted the Firestick recognises the pendrive has just been inserted rather than the system thinking it never has been removed.
- You do not have to use a pendrive to enable OTG, you could use a wireless keyboard dongle just the same (having it installed before powering on) allowing you to use a pendrive after boot preventing it getting populated with unwanted files and folders.
- When OTG is enabled and there is a pendrive installed you have the extra menu options:
- Settings --> My Fire TV --> USB Drive --> Eject USB Drive
- Settings --> My Fire TV --> USB Drive --> Format to Internal Storage
- When removing a pendrive you should eject it to prevent getting warning messages although these will not break anything and are just annoying.
- If your pendrive is not recognised even when using this method
- Just rename the volume of the pendrive in Windows to something else and then plug it back into your Firestick following the insertion instructions above
- ES Explorer might be intercepting the drive blocking it from other apps so you could also try removing ES Explorer App if you are having issues.
- Not all phones and devices support more than 2x devices being plugged in at the same time so this limitation might apply to Firesticks, but this explains why the OTG adapters from AliExpress do not come with more than 2 USB A sockets.
- Do not buy the OTG adapters with a switch for OTG and Charge as you will only be able to do either or with these adapters. They are the old generation where you could not charge and use USB devices at the same time.
Play movies from a NTFS formatted Pendrive
Access NTFS Drives On Firestick (No Root!) | TechDoctorUK
This tutorial has a really easy video to follow to setup your Firestick to use NTFS formatted drives using ES File explorer.
ES File explorer allows you to mount NTFS drives and then open files on them with your chosen media player. I am not sure if the mounted drives are available outside of the ES File explorer.
Quick Instructions
- Ensure you have a suitable media player such as VLC Player or Kodi installed.
- Install "ES File Explorer" (You can do this from the normal Amazon App store).
- Make sure OTG is enabled and insert your NTFS pendrive.
- Open "ES File Explorer" and you will see you internal storage and the USB drive but it will not be recognised.
- On the left hand side scroll down to "Local" and find the USB drive.
- Click on the USB drive and allow any permissions it asks for.
- Select Open
- Browse to your movie file and select "Open As Video"
- Select your media player and your movie will start to play.
Putting an movie file which is larger than 4GB onto a USB Pendrive formatted with FAT32
Firesticks will only read USB pendrives that are formatted in FAT32 and this filesystem has a file size limit of 4GB. Normally this would not be an issue but if you have a movie that is larger than 4GB you cannot put it on your pendrive but I hear people say just put it on a network drive which is great if your network is capable of the required speed.
The instructions below will show you how to work around this limit by creating an archive of your movie file that is split up into files that are smaller than the 4GB filesize limit of FAT32 and then playing them in a capable player.
Install and Configure KODI to Play Archives
Kodi is capable of playing movies that are encapsulated in archive files (using addons) as if they were one file. Currently VLC player cannot play archive files on the Firestick.
- Install Kodi following this tutorial
- How to Install Kodi on Your Firestick (March 2024 Update) - YouTube | Bodhi Wire
- Installer the Downloader app and install the latest version of KODI found here
https://mirrors.kodi.tv/releases/android/arm/
- Installer the Downloader app and install the latest version of KODI found here
- If you install over an older version it will be upgraded safely keeping your settings.
- How to Install Kodi on Your Firestick (March 2024 Update) - YouTube | Bodhi Wire
- Install these virtual-filesystems Addons
- Config --> Addons --> Virtual filesystems --> Archive support
- I could not get this Addon to recognise my movie archive, maybe because it is a multi-part zip.
- Config --> Addons --> Virtual filesystems --> RAR archive support
- The RAR addon only allows direct reading of uncompressed RAR files. Other types of rar (i.e. compressed) will be temporarily extracted
- Config --> Addons --> Virtual filesystems --> Archive support
- RAR and ZIP files are not media files so you need to make sure Kodi can see these archive types.
- Settings --> Applications --> Manage Installed Applications --> Kodi --> Permissions --> Files and media: All Files
- This setting would also apply to VLC player if this ever starts playing archive files.
Prepare the Movie Archive
In this section we will break the movie into smaller files so these can be put onto the FAT32 pendrive.
- On a PC, using WinRAR, compress the movie file using the following settings:
- Archive format: RAR
- Compression method: Store
- No actual compression is done. You cannot really compress a movie file anyway.
- Split into volumes, size: (4,095 MB (FAT32)
- This makes makes sure the segments are smaller than 4GB and can fit on FAT32.
- You can select your own filesizes as long as they are smaller than this.
- Put the RAR archive files onto the pendrive and insert into the Firestick.
Open Kodi and Play the Movie
Insert your pendrive so it is visible in the Firestick and Kodi will now show the movie as normal with thumbnails, and can be played as such.
As mentioned above I could not get multi-part zip files to work but this might change with updates to the software, however the RAR option works well so you should just use that file type.
Other
- How to use the System Picker Files app in Fire OS 8 on the 2nd-gen Fire TV Stick 4K & 4K Max to grant access to External USB Storage Drive Folders | AFTVnews - This guide walks you through the specific steps to take to use the Files app on a Fire TV running Fire OS 8 to grant an app access to external USB storage.
- How to play videos from external microSD or USB drives on the Amazon Fire TV and Fire TV Stick | AFTVnews - Here is a breakdown of everything you need to know to play video files from an attached external microSD card or USB drive.
- How to Pair Your Amazon Fire TV Stick Remote : HelloTech How - Learn how to pair your Amazon fire stick remote, a replacement one, or third party devices.