Items filtered by date: December 2015
My Two Factor Authentication (2FA) Notes
Picking a suitable 2FA app is more important then ever but you should know that there are pitfalls if you pick the wrong one, such as loosing all of your 2FA tokens and getting locked out of the accounts that you have enabled 2FA on.
2FA can also be referred to as MFA (Multi-factor Authentication).
My Recommendation
For all for those who have not got time to go through all of the apps to decide which is best for you, there is a clear winner and is the one I use.
2FAS
- It is not part of the main suppliers of services such as Amazon, Google and Microsoft, so will not have any weird integrations/actions you don't know about.
- You control your data.
- You can export and backup your 2FA tokens as an encrypted backup and store it in a place of your choosing.
- It can sync between devices allowing you to have your 2FA tokens on more than one device but with one single database.
- Well supported and updated often.
- Supported on Android, iOS and Browsers.
- It is free and licensed under the GPLv3.
- This is the only App that I found support all of the following: Cloud Backup, Sync across Devices, Import / Export a backup, Import from other apps.
- The website is very polished
Because 2FAS depends on donations, after you have used it for a while and find it really useful (which you will) consider a small donation every year, even £5/$5 will help.
2FA Explained
Two-Factor Authentication (2FA) also called two-step verification, is a security process in which a user has to pass two different authentication methods to gain access to an account or a computer system. First factor is the basic thing you know: username and password, and the second factor is what you might have as unique as a (Smartphone, security token, biometric) to approve authentication requests.
Important Information
Before we go any further and look at the Apps, it is helpful to point out some of the things I found out as they deserve a special mention:
- Some Apps only store the 2FA tokens on the one device and if you loose this device you will loose all of your 2FA information locking you out of all of your 2FA protected accounts. This means that App selection is very important.
- Don't store you 2FA in your password manager otherwise you are not really implementing 2FA. If someone gets access to your Password Manager accopunt (Bitwarden/LastPass/1Password/....) they have both authorisation methods.
- Don't use an authenticator App for that companies services. This prevents unwanted integrations or actions these large companies can do without telling you. Some examples are:
- Google Authenticator for Google services.
- Microsoft Authenticator for Microsoft service.
- You should not hand over any personal information like phone numbers. Authy asks for a mobile phone number, this can be used to retrieve your 2FA tokens if you loose access.
- Before enabling 2FA make sure you have setup all of your recovery information on that account.
- When you enable 2FA on an account, you are sometimes given some emergency access codes, you should make a copy of these and put them somewhere safe. I am not sure if you should store these in your password manager as this defeats the purpose of 2FA due to the fact both authentication credentials are in the same place. If it is an important account you could print them off and put paper copies in your safe.
- Most Apps require you to enable Cloud backup and Sync options as they are turned off for privacy. This should be one of the first things you do, turning these options on, otherwise if you loose your phone you will loose access to your 2FA enabled accounts.
Notes
- General
- Recovering your account if you lose your 2FA credentials - GitHub Docs
- If you lose access to your two-factor authentication credentials, you can use your recovery codes, or another recovery option, to regain access to your account.
- This is a good example of being careful and backing your tokens up. For GitHub, I would probably print them off and put them in my safe.
- Basics of two-factor authentication with Bitwarden | Bitwarden Blog - Using two-factor authentication helps increase user security for websites and applications. The name refers to requiring users to utilize two separate methods of verifying their identity in order to access an account.
- Recovering your account if you lose your 2FA credentials - GitHub Docs
- Swap from one authenticator to another (Manually)
- A lot of apps do not have any automatic processes for this procedure, so you have to do it manually.
- Migrating From Authy to Bitwarden for 2FA Codes - I've used Authy for several years to generate my time-based one-time passwords (TOTP) for two-factor authentication (2FA). For various reasons, I recently migrated to using Bitwarden instead. This is my migration story.
- How Do I Switch From One 2FA Authentication App to Another?
- Login to your service with your current 2FA App.
- Disable 2FA.
- Re-enable 2FA but using the new 2FA authenticator.
- The Protocols
- TOTP
- time-based one-time passwords
- Time-based one-time password - Wikipedia
- RFC 6238 - TOTP: Time-Based One-Time Password Algorithm - This document describes an extension of the One-Time Password (OTP) algorithm, namely the HMAC-based One-Time Password (HOTP) algorithm, as defined in RFC 4226, to support the time-based moving factor.
- TOTP is the replacement for HOTP.
- HOTP
- HMAC-based one-time passwords
- Counter Based
- HMAC-based one-time password - Wikipedia
- RFC 4226 - HOTP: An HMAC-Based One-Time Password Algorithm - This document describes an algorithm to generate one-time password values, based on Hashed Message Authentication Code (HMAC). A security analysis of the algorithm is presented, and important parameters related to the secure deployment of the algorithm are discussed.
- U2F / FIDO U2F
- Fast Identity Online Universal Second Factor
- This uses a physical security key such as a YubiKey
- Universal 2nd Factor - Wikipedia
- WebAuthn
- Web Authentication
- WebAuthn - Wikipedia
- mOTP
- Steam
- Steam's own system?
- Yandex
- Yandex's own system?
- TOTP
- Protocol General Information
- HOTP vs TOTP: Differences and advantages - Arengu Blog - Learn the differences between HOTP (hash-based) and OTP (time-based) and see which one-time password suits your auth process better.
- 2FA with FIDO U2F / OTP / HOTP / TOTP - DEV Community - Two-factor authentication (2FA) is an authentication method where the user is granted access only.
- An In-depth Guide to FIDO Protocols: U2F, UAF, and WebAuthn (FIDO2) - FIDO consists of 3 protocols for strong web app authentication: Universal 2nd Factor (U2F), Universal Authentication Framework (UAF), and WebAuthn (FIDO 2).
- u2f - FIDO and FIDO2 differences - Information Security Stack Exchange - A concise descriptions of the various protocols mentioned.
- HOTP vs TOTP - what are the differences? Which one is better? - YouTube | 2FAS - Ever wonder what TOTP and HOTP stands for? What is taht? How does it work?
- OTP Tools
- Online Authenticator Checker | Verifyr
- Generate one-time passwords online for time-based (TOTP) and counter-based (HOTP) codes and passwords.
- This has advanced options.
- Check 2FA token | 2FAS
- Check that Your 2FAS Auth App Is working properly.
- Simple to use.
- QR Code Generator | FreeOTP
- Online Authenticator Checker | Verifyr
- Joomla
- New to Joomla 4.2, Multi-factor Authentication (MFA) - The Joomla Community Magazine - With 4.2, we now have a new way to authenticate our sites. Two-factor Authentication has grown outdated with many new authentication methods arriving, so along comes Multi-factor Authentication (MFA).
- Enable Jooma 2FA using Google Authenticator - TechLabs - How to enable Jooma Two-factor Authentication (2FA) using Google Authenticator. Enable Joomla MFA Verification code system plugin, install Google Authenticator app and register for MFA by scanning the QR code on your mobile phone.
- You do not need to use Google authenticator. Most 2FA Apps use the TOTP protocol. So it might say `Google Authenticator`in the settings but most 2FA apps will work fine.
- Recover Joomla If You Lost Google Authenticator Device
- Did you lose Google Authenticator Device or uninstalled?
- This article outlines how to fix this issue but should only be done when you loose your admin access as a last resort.
- Two-factor-authentication-2fa-mfa-using-lastpass-authenticator - Joomla! Documentation - This will require the use of the miniOrange 2-Factor authentication (2FA/MFA) plugin.
A Table of 2FA Apps
This is my research into the various apps that I found on the internet.
| Name | Author | Free / Paid |
License | Platform | Protocols Supported |
Cloud |
Sync across Devices |
Import / |
Import |
Pros / Cons |
| 2FAS | 2FAS | Free | GPLv3 | Android, iOS, Browsers | TOTP, HOTP | √ | √ | √ | √ |
Pros
Cons
|
| Authy | Twilio | Free | Proprietary | Android, iOS, Windows, macOS, Linux | TOTP | √ | √ | × | × |
Pros
Cons
|
| Aegis Authenticator | Beem Development |
Free | GPLv3 | Android | TOTP, HOTP | √ | × | √ | √ |
Pros
Cons
|
| FreeOTP Authenticator | RedHat | Free | Apache v2 | Android, iOS | TOTP, HOTP | √ | × | √ | × |
Pros
Cons
|
| FreeOTP+ | Haowen Ning | Free | Apache v2 | Android | TOTP, HOTP | √ | × | √ | × |
Pros
Cons
|
| Raivo OTP | Tijme Gommers | Free | Proprietary | iOS, MacOS | TOTP, HOTP | √ | √ | √ | × |
Pros
Cons
|
| Duo Mobile | Cisco | Free | Proprietary | Android | TOTP, HOTP | √ | √ | ? | ? |
Pros
Cons
|
| Authenticator Pro | jamie-mh | Free | GPLv3 | Android | TOTP, HOTP, mOTP, Steam, Yandex | √ | × | √ | √ |
Pros
Cons
|
| WinAuth | WinAuth | Free | GPLv3 | Windows | TOTP, HOTP | ? | ? | ? | ? |
Pros
Cons
|
| andOTP | Jakob Nixdorf | Free | MIT | Android | TOTP, HOTP | √ | × | √ | × |
Pros
Cons
|
| Authenticator Plus | Mufri | Paid (£2.49) |
Proprietary | Android, iOS | ? | √ | √ | √ | × |
Pros
Cons
|
| Microsoft Authenticator | Microsoft | Free | Proprietary | Android, iOS | TOTP, HOTP | √ | × | × | × |
Pros
Cons
|
| Google Authenticator | Free | Proprietary | Android, iOS | TOTP, HOTP | √ | × | × | × |
Pros
Cons
|
|
| LastPass Authenticator | LastPass | Both | Proprietary | Android, iOS | TOTP, Yubikey | √ | ? | × | × |
Pros
Cons
|
| Bitwarden Authenticator | Bitwarden | Paid | Proprietary | Android, iOS, Windows, macOS, Linux, Browsers |
TOTP, WebAuthn, YubiKey |
√ | √ | √ | × |
Pros
Cons
|
| 1Password | 1Password | Paid | Proprietary | Android, iOS, Windows, macOS, Linux, Browsers | TOTP, WebAuthn | √ | √ | √ | × |
Pros
Cons
|
| Blank | Company | Free, Paid, Both | GPLv3, MIT, Proprietary |
Android, iOS, Windows, macOS, Linux, Browsers |
TOTP, HOTP, mOTP, U2F, WebAuthn, YubiKeySteam, Yandex | √ | √ | × | × |
Pros
Cons
|
Notes
General
- The Best Authenticator Apps for 2023 - Mobile authenticator apps make logging in to online accounts and websites more secure with multi-factor authentication. These are the top MFA apps we've tested.
- The Best 2FA Apps 2023: Authy vs Google Authenticator & More - Using 2FA is the best way to maintain the security of your online accounts. Here are our top picks for the best 2FA apps and hardware.
- Android Keystore system | Android Developers - When an App says the tokens are stored in the Keystore this means it is stored on your Google Drive in a hidden folder that can only be accessed by the same app that created the folder.
2FAS
- Some or all of your tokens are not syncing.
- Cause: You added some tokens before you enabled 'Google Drive sync`. This issue might only be present on fresh 2FAS installations where the Google user has never had this App on their account or devices before.
- Solution:
- On your primary device (the one you use the most or has the most tokens on) export a backup and store safely.
- Turn off 'Google Drive sync` on all of your devices.
- Wait 30 seconds.
- Turn on 'Google Drive sync` on your primary device.
- Wait 30 seconds.
- Turn on 'Google Drive sync` on all of your other devices.
- Done. Tokens should now be syncing properly.
Authy
- Welcome to Authy! – Authy
- Gives some basic information about Authy
- You must use a phone number to create an Authy account.
- Why Is The Authy 2FA App Free For Users? - Authy - Free 2FA? How does that work? Ever ask yourself “Why Is Authy free?” Find out How the Authy 2FA app is paid for, and why is there no charge to use it.
- Phone Number Change Process for Authy and How Long it Takes – Authy
- Export or Import Tokens in the Authy app – Authy
- In order to maintain security for our users, the Authy application does not allow importing or exporting 2FA account tokens.
- Users who want to import or export their tokens can follow this process, which is a workaround and will work for all 2FA Apps.
- Backups and Sync in Authy – Authy - Authy allows you to backup and sync your 2FA account tokens across multiple device and device types - phones, tablets and computers. This guide explains how Authy Backups work, and how to enable or disable them.
- How Authy 2FA Backups Work - Authy - A few years ago Google Authenticator released an update for their iPhone App that wiped users 2FA tokens when installed. That prompted a lot of users to switch to Authy in order to take advantage of our backup feature. We occasionally get questions about this particular feature from both users and developers, so this post will explain how the backup feature works in order to assuage any security or privacy concerns.
- Migrating one-time passwords from Authy to Raivo OTP
- Authy doesn't allow you to migrate your one-time passwords to other OTP apps. However, the Authy Chrome extension allows everyone to extract the tokens by using the Chrome developer console.
- This method can be used to migrate to other Apps if needed. It is from 2019 so I do not know if it still works.
Microsoft Authenticator
- If you loose your authenticator app, do you everything.
- Moving
- How to Move Microsoft Authenticator to a New Phone - Using an authenticator app for two-factor authentication (2FA) is more secure than SMS messages, but what if you switch phones? Here’s how to move your 2FA accounts if you use Microsoft Authenticator.
- Backup and Recover
- How it works: Backup and restore for Microsoft Authenticator - Microsoft Community Hub - A deep dive into the backup and restore mechanisms.
- Back up account credentials in Microsoft Authenticator - Microsoft Support
- Microsoft Authenticator backs up your account credentials and related app settings, such as the order of your accounts, to the cloud. You can then use the app to recover your information on a new device, potentially avoiding getting locked out or having to recreate accounts.
- You can back up multiple accounts, but only one of each type for example, a Microsoft personal account, a work or school account, and a non-Microsoft account such as Amazon or Google.
- If you loose your 2FA tokens and have not recovery information setup on an account you will get stuck in an authentication loop.
- How to recover Microsoft authenticator - Microsoft Q&A
- Q: Can I recover Microsoft authenticator accounts if they weren’t backed up to the cloud? Had an issue where my phone was broken and had to get a new phone. Lost all my authenticator accounts
- A: You can restore from backup (assuming there was one) but make sure no accounts have been added to the newly install app. Then sign on with recovery account to do the restore.
- Authenticator Stuck in Loop
- You will probably need to contact Microsoft and/or perform a recovery on your account. This is definitely true for Microsoft Office.
- Some UK phone numbers (Office 365)
- 0800 032 6417
- 0203 450 6455
- Billing support hours (English): Monday through Friday, 9 AM-5 PM
- Technical support hours (English): 24 hours a day, 7 days a week
- Authenticator Stuck in Loop - Microsoft Q&A
- Q:
- My Authenticator recently stopped working properly. This happened after I switched to a new phone. iPhone 12 to iPhone 14. When I try to log into my work email, it says I need to use Authenticator to authenticate. When Authenticator pops up…it also asks me to authenticate via Authenticator.
- A:
- You can restore from backup (assuming there was one) but make sure no accounts have been added to the newly install app. Then sign on with recovery account to do the restore.
- You can recover your account credentials from your cloud account, but you must first make sure that the account you're recovering doesn't exist in the Microsoft Authenticator app. For example, if you're recovering your personal Microsoft account, you must make sure you don't have a personal Microsoft account already set up in the authenticator app. This check is important so we can be sure we're not overwriting or erasing an existing account by mistake.
- Back up and recover account credentials in the Authenticator app - Microsoft Support
- Q:
- Stuck in a Loop in Microsoft Authenticator - Microsoft Community
- Q:
- I recently headed into my outlook account security settings and was asked to verify myself with my Microsoft Authenticator app.
- I headed into the app and found that my account has been greyed out, and that I can't click on it.
- I then received a message saying "Unable to process notifications from your work or school account. If this account has been removed from the app, please also remove it from the MFA registration page. Otherwise, remove the account and re-add it".
- Since I can't click on the account, as it has been greyed out, I can't delete the account from the app.
- So I headed into my phone settings, deleted the cache and data of Microsoft Authenticator. Once I recovered my other accounts on Microsoft Authenticator, I tried to add my outlook account, but was asked to provide my Microsoft Authenticator code.
- I obviously don't have the code because the outlook account hasn't yet been added to Microsoft Authenticator, and so I'm stuck in a loop.
- Does anyone know how to fix this?
- A:
- Open a web browser and go to https://verify.live.com/
- Log in with your Outlook.com account and go through the verification process.
- Once done add your Outlook.com account again to Microsoft Authenticator app.
- Q:
Google Authenticator
- How to transfer Google Authenticator to a new phone | TechRadar - A big problem for some.
- How to Backup Google Authenticator or Transfer It to a New Phone - How to backup Google Authenticator in case you lose the smartphone? How to transfer Google Authenticator to a new phone? Here are the detailed answers.
- How to retrieve your Google 2FA backup codes (and make more) | TechRepublic - Jack Wallen shows you how to retrieve your Google 2FA backup codes and how best to use them.
- If you didn’t print out those codes, upon setting up 2FA, the first thing you’ll need to do is retrieve them. To do that, you must log into your Google account, and then go to the Google 2FA site, where you’ll be prompted to log in once again. Upon successful authentication, you’ll see an entry for Backup codes.
My Linux Notes
These are my general Linux notes.
- General
- 10 Things I Wish I Knew When I First Started With Linux - YouTube | Learn Linux TV - Working with Linux servers is a fun and rewarding career. But for those getting started, the learning process can be a bit of a challenge to navigate. In this video, Jay goes over ten things he wish he knew about Linux when he first started.
- Two main branches of Linux
- RHEL = RHEL, AlmaLinux, Rocky Linux, CentOS, CentOS Stream
- Debian = Debian, Unbuntu, Linux Mint
- Linux Mint is based on Ubuntu and is set to be a Windows replacement with emphasive on the GUI.
- Apache (and associated)
- Restart apache
- Simple as
systemctl restart apache2

or

service apache2 restart

or

service httpd restart
- Simple as
- How to enable php modules
- How To Enable/Disable PHP Modules In Ubuntu - TecAdmin - How do I Enable/Disable PHP Modules on Ubuntu 22.04, 20.04 & 18.04 systems? Enable or disable a PHP module for specific PHP versions.
phpenmod MODULE_NAME
phpenmod gd
apt-get install php-gd
apt install php8.1-gd
- Installing PHP modules on Linux | UKFast Documentation - A guide to installing PHP modules on Linux
yum install php-soap
- How to install PHP GD in Ubuntu - Stack Overflow
Common
sudo apt-get update

For 5.6 PHP:
sudo apt-get install php5.6-gd

For 7.0 PHP:
sudo apt-get install php7.0-gd

For 8.0 PHP:
sudo apt-get install php8.0-gd

All versions ?
apt-get install php-gd
- How To Enable/Disable PHP Modules In Ubuntu - TecAdmin - How do I Enable/Disable PHP Modules on Ubuntu 22.04, 20.04 & 18.04 systems? Enable or disable a PHP module for specific PHP versions.
- List Apache modules
- Restart apache
- Text Editors
- Command-line text editors in Linux
- There are two command-line text editors in Linux®: vim and nano.
- This article covers the basics of each editing tool and how they differ including shortcuts.
- Command-line text editors in Linux
- Server Management
- Permission denied during updates
- 13: Permission Denied During Updates | Linode Questions
- You need sudo for each command:
sudo apt-get update && sudo apt-get upgrade -y
- You need sudo for each command:
- 13: Permission Denied During Updates | Linode Questions
- Reboot Linux System Command - nixCraft - Explains how to reboot a Linux server / desktop computer from a shell prompt including remote system over ssh based session.
reboot
- Shut down your server
poweroff
shutdown
- How to Run Cron Job Every Minute - A Complete Guide - Learn to set up a cron job every minute with this comprehensive guide, offering detailed steps and explanations. Perfect for beginners and experienced users alike.
- Permission denied during updates
- File Locations
- Nameserver
/etc/resolv.conf
- Nameserver
- SSH
- How to Use SSH to Connect to a Remote Server in Linux or Windows - In this tutorial, you will learn How To Use SSH to Connect to a Remote Server in Linux or Windows. Get started with an SSH connection to a Server Today!
- How to Enable, Install, & Configure SSH on CentOS 7 | PhoenixNAP KB - Tutorial on how to Enable, Install, & Configure SSH on CentOS 7. Enabling secure shell allows a secure connection to your remote server. Get started!
sudo yum –y install openssh-server openssh-clients
- File Management
- How to Compress a File in Linux (tar, gzip, bzip2) - Learn how to compress files in Linux using tar, gzip, and bzip2 commands. This tutorial provides easy steps for data compression, saving storage space effectively.
- How to delete and remove files on Ubuntu Linux - nixCraft - This page shows how to delete and remove files on Ubuntu Linux and other Unix-like operating systems using rm and unlink command.
- How To Find a File In Linux From the Command Line - Plesk Tips - The Linux Find command can filter objects recursively using a simple conditional mechanism, and if you use the -exec flag, you’ll also be able to find a file in Linux straightaway and process it without needing to use another command.
- Networking
- See your IP in terminal
- How to get your Linux IP address - IONOS - You have several options when it comes to finding your Linux IP address. Our article shows you the most practical way to get it using commands or settings
ip addr
ip a
- How to get your Linux IP address - IONOS - You have several options when it comes to finding your Linux IP address. Our article shows you the most practical way to get it using commands or settings
- Configuring a Static IP Address in CentOS - Learn how to configure a static IP address in CentOS with this easy-to-follow tutorial. This guide offers step-by-step instructions for beginners and experts alike.
- Loopback Device
- This is what provides 127.0.0.1 but can be used for real IP addresses.
- linux - How does the loopback interface work - Unix & Linux Stack Exchange
- The loopback interface is a virtual interface. The only purpose of the loopback interface is to return the packets sent to it, i.e. whatever you send to it is received on the interface. It makes little sense to put a default route on the loopback interface, because the only place it can send packets to is the imaginary piece of wire that is looped from the output of the interface to the input. There is nothing that can change this behaviour of the loopback interface, that's what it is coded to d
- A real world example how this works (excellent)
- lo = loopback interface
- networking - What is the loopback device and how do I use it? - Ask Ubuntu
- What are loopback and localhost? Why do they exist, what are they used for, and how would I use them?
- The Purpose of Loopback..... a great explanation
- For IPv4, the loopback interface is assigned all the IPs in the 127.0.0.0/8 address block. That is, 127.0.0.1 through 127.255.255.254 all represent your computer. For most purposes, though, it is only necessary to use one IP address, and that is 127.0.0.1. This IP has the hostname of localhost mapped to it.
- Does NOT show how to assign a real IP
- The Loopback Interface | The Linux Documentation Project
- networking - How can I create Logical Loopback on Ubuntu? - Ask Ubuntu - How can I create a logical local loopback like the procedure here for a Juniper router. (Not talking about 127.0.0.1).
- Loopback Adapter on Ubuntu 18.04 (Like on Cisco) – Question Computer
- In any case, I’ve been using a method to create loopback adapters on Ubuntu Server and Desktop well before Netplan came along, simply because it’s the way I learned and it seems to work no matter what distribution or version I’m using.
- Loopback adapters are useful for all sorts of stuff in networking. You can create one, give it an IP address and advertise it in a routing protocol like OSPF, for example. Unlike physical interfaces, loopback adapters are much, much less likely to “go down”.
- On Ubuntu 18.04, you can add a “dummy” adapter with a single command like this......Then turn it on and give it an IP address.
- networking - How can I create Local Loopback on Linux? - Unix & Linux Stack Exchange - I need to create local loopback as shown herein: Performing Loopback Testing for Fast Ethernet and Gigabit Ethernet Interfaces.Excerpt
- 12.04 - How to add a loopback interface? - Ask Ubuntu - I want to add two more loopback interfaces.
- linux - How to add a second local loop_back address? - Super User
- I already have a loopback address at 127.0.0.1, which corresponds to a host in the local loopback network 127.0.0.0/8. How could I create a second local loopback host with an address of 127.0.0.2? Does anyone knows the exact command?
- Can add it temporary using below command.....
- Add them permanently to /etc/network/interfaces
- Is it possible to put a real IP on a loopback device? - Unix & Linux Stack Exchange - Is it possible to put a real IP (not in the 127.x.x.x) range on a loopback device?
- networking - How to configure IPVS loopback address with netplan in Ubuntu 18.04? - Ask Ubuntu - Previously, I configured IPVS loopback addresses in /etc/network/interfaces like this........
- See your IP in terminal
- Installing (Packages)
- How to Install Bind DNS on Ubuntu 20.04 Server (Setup / Configure)
- How to Install Bind DNS on Ubuntu 20.04 Server (Setup / Configure). BIND server is the most popular Domain Name System (DNS) server in use today. BIND is used to run a caching DNS server or an authoritative name server and some features are: load balancing, dynamic update, notify, split DNS, DNSSEC, IPv6.
- We will walk you through the topic what is DNS Server and how does it work and introduce Bind DNS server with its pros and move onto install phase on Ubuntu 20.04. Let’s start!
- This outlines BIND's features
- How to install curl command on Ubuntu Linux - nixCraft - Explains how to install the curl command on a Ubuntu Linux system using apt or apt-get command to transfer data from or to a server.
$ sudo apt update               - this populates the local packages index
$ sudo apt upgrade              - this upgrades your system  (optional, you can do this in the panel later)
$ sudo apt install curl         - this installes the curl package
- ssh - How can I check the version of BIND on Debian - Unix & Linux Stack Exchange
You can ask dpkg for the packages's version:
dpkg -l bind9

or

directly to BIND's binary:
sudo named -v
- Install and configure Postfix and Dovecot | Linuxize - Postfix is an open-source mail transfer agent (MTA), a service used to send and receive emails. Dovecot is an IMAP/POP3 server and in our setup it will also handle local delivery and user authentication.
- [Dovecot] How Can I Tell How Dovecot Was Installed?
dovecot --version
- How to Install Bind DNS on Ubuntu 20.04 Server (Setup / Configure)
- The Repos
- Ubuntu – Ubuntu Packages Search
- Packages for Linux and Unix
- OpenSUSE Application Data Review
- Arch Linux - Package Search
- AlmaLinux OS RPM package sources
- packages.microsoft.com
- EPEL
- Extra Packages for Enterprise Linux (EPEL) :: Fedora Docs - Learn more about Fedora Linux, the Fedora Project & the Fedora Community.
- What's EPEL, and how do I use it? - Most people know that Fedora is the upstream for major releases of Red Hat Enterprise Linux (RHEL). You might also notice that Red Hat ships a smaller package set for RHEL than you'll find with Fedora, for a number of reasons. What if you're a Fedora user who also wants ImageMagick or Chromium on your RHEL workstation? You may want to take a look at EPEL.
- RHEL ships with only a subset of packages that you'll find in Fedora Linux. This makes sense, because there's a lot of software in Fedora that isn't needed in an enterprise environment or falls outside the scope of RHEL. Red Hat maintains and supports the packages in RHEL far longer than the lifespan of a Fedora release, and we select the software we feel is necessary for our customers to be successful in deploying and using RHEL to run their workloads.
- What's inside an RPM .repo file? | Red Hat Developer - The previous article in this series, How does RPM package discovery work?, described how the RPM package management technology discovers and installs an .rpm
- Package Management
- The repo commands are one of the main differences between Linux distros along with pre-installed packages and desktop environments. The kernel is the same, but different flavours might have a different revision depending what point in the release cycle the distros are.
- 3 Options to List All Installed Packages in CentOS {Easiest Way} - Updated tutorial walks you thru How to List all Installed Packages on CentOS (RHEL and Fedora) with Yum, RPM, or yum-utils. Get started now!
- How to use apt or apt-get for CentOS/RHEL - GetPageSpeed
- Here's how to use apt-get to install and remove packages in CentOS. If you know Ubuntu, you can easily jump on board CentOS/RedHat with this simple guide.
- lists different update manage commands
- apt Command Examples for Ubuntu/Debian Linux - nixCraft - 19 examples of apt command on Debian/Ubuntu Linux server to install/remove packages and update the system for Linux users/sysadmins/developers.
- Ubuntu Manpage: apt - command-line interface
- Automatic yes to prompts; assume "yes" as answer to all prompts and run non-interactively.
- Difference Between YUM and DNF | Difference Between - As RPM based applications including Red Hat Linux grew in popularity, it became more important than ever to make package installation less challenging. The answer was YUM. But it ran into some problems after a while, so it was replaced by a faster and better DNF package manager.
- Package Managers in Linux and Windows - Package managers allow you to quickly install, manage, and delete programs (or apps, applications) from your operating system within a command-line interface. Different distros provide a variety of package managers, but all are straightforward.
- GitHub - sigoden/upt - Universal Package-management Tool for Windows, macOS and Linux.
- debian - what is the function of /etc/apt/sources.list.d? - Stack Overflow
- Using the directory, you can easily add new repositories without the need to edit the central /etc/apt/sources.list file. I.e. you can just put a file with a unique name and the same format as /etc/apt/sources.list into this folder and it is used by apt.
- This is why the repos do not show up in the package updater thing, but it also does not affect them working.
- Ubuntu Manpage: sources.list - List of configured APT data sources
- How To Add Apt Repository In Ubuntu | Linuxize - In this tutorial, we will show you two ways to add apt repository on Ubuntu and Debian systems. The first method is by using the add-apt-repository command and the second one is to manually add the repository using a text editor.
- APT Deprecated
- apt-key Is Deprecated. How To Add OpenPGP Repository Signing Keys Without It On Debian, Ubuntu, Linux Mint, Pop!_OS, Etc. - Linux Uprising Blog - This article explains how to securely add OpenPGP keys and third-party APT repositories on Debian, Ubuntu, and Linux distributions based on these, like Linux Mint, Pop!_OS, Elementary OS and so on, to replace the deprecated apt-key.
- The repos should on be https:
- This has some in depth instructions.
-
curl https://updates.signal.org/desktop/apt/keys.asc | gpg --dearmor > /usr/share/keyrings/signal-archive-keyring.gpg
- [Fixed] apt-key is deprecated. Manage keyring files in trusted.gpg.d - The apt-key is being deprecated and your system knows that. But do you know what you should do to get packages from external repositories?
- repository - What commands (exactly) should replace the deprecated apt-key? - Ask Ubuntu
- All of the answers so far work around the symptom ("Don't use apt-key add") but fail to address the actual problem that led to apt-key add being deprecated. The problem is not a question of appending a key to one big keyring file etc/apt/trusted.gpg vs manually putting single-key keyring files into the directory /etc/apt/trusted.gpg.d/. These two things are equivalent, and doing either one is a huge security risk.
- Fix the apt-key deprecation error in Linux | Opensource.com - Follow these steps and you can run apt update with no warnings or errors related to deprecated key configurations.
- How to fix the apt-key deprecated warning in Ubuntu - Jack Wallen shows you how to fix a common apt-key warning when trying to update/upgrade Ubuntu Server or Desktop.
- apt-key(8) — apt — Debian testing — Debian Manpages - Deprecated APT key management utility.
- Solve: Legacy trusted.gpg keyring - ‘apt-key’ Deprecation on Ubuntu - Solve APT key warning on Ubuntu 22.04 or in other latest versions: Key is stored in legacy trusted.gpg keyring (/etc/apt/trusted.gpg), see the DEPRECATION section in apt-key(8) for details.
- (Resolved) Key is stored in legacy trusted.gpg Keyring – TecAdmin
- I recently created a new Ubuntu 22.04 LTS Linux virtual machine. When I attempted to set up the PostgreSQL server on it, I saw a warning message like the one shown below on the screen:
- The steps below will help you to move the key to a new location.
- apt - Key is stored in legacy trusted.gpg keyring after Ubuntu 22.04 update - Ask Ubuntu
- Fixing "Key is stored in legacy trusted.gpg keyring" Issue in Ubuntu - There are two ways; the proper way and the quick and dirty way. Read both methods and see which one you feel comfortable with.
- apt-key Is Deprecated. How To Add OpenPGP Repository Signing Keys Without It On Debian, Ubuntu, Linux Mint, Pop!_OS, Etc. - Linux Uprising Blog - This article explains how to securely add OpenPGP keys and third-party APT repositories on Debian, Ubuntu, and Linux distributions based on these, like Linux Mint, Pop!_OS, Elementary OS and so on, to replace the deprecated apt-key.
- List Services, their ports and Reporting
- Use from the CLI
- htop = improved version of top, shows each CPU usage and more.
- top
- ssh - How can I determine which ftp server is running on my ubuntu box - Server Fault
- run this: netstat -tanp
- This article has a few different solutions.
- Ubuntu 20.04 list services - Linux Tutorials - Learn Linux Configuration - In this article you will learn how to list and change state for systemd services and unit files on Ubuntu 20.04 Focal Fossa Linux Server/Desktop.
- Use from the CLI
- What version of Linux am I running?
- Linux version | How to check your Linux version - IONOS - Knowing your Linux version is important when it comes to updates and troubleshooting. We explain how to check your version of Linux.
- How to check your Ubuntu version: a guide - IONOS - You want to find out which Ubuntu version you’re running? We show you three simple ways to check your Ubuntu version.
- Misc
- FTP Servers
- Choosing the Right FTP Server - Linux Power Tools - FTP is an old protocol, and numerous implementations of it have sprung up over the years. These servers vary in many details however, they all serve the same purpose.
- Evaluating FTP Servers: ProFTPd vs PureFTPd vs vsftpd – systemBash
- FTP/SFTP
- How to Set Up SFTP Chroot Jail | Linuxize - If you are a system administrator managing Linux server chances are that you may need to grant SFTP access to some users to upload files to their home directories. In this tutorial we will explain how to setup up a SFTP Chroot Jail environment that will restrict users to their home directories.
- How to Check Which Linux You Are Running? - Logged in on a Linux system via SSH and wondering which Linux distribution is it? Here's how to check the Linux version.
- FTP Servers
- BASH and CLI
- Bash General
- Bash is also a command programming languages like sh.
- Bash is now the default user logon shells on Linux-based operating systems.
- Bash is an extended version of the sh command line interpreter for the GNU alternatives for the Bourne sh shell.
- Bash is not sh
- Bash is a superset of sh. This means bash supports the functions of sh and adds additional functionality.
- What Is Bash? Features, Concepts, Commands And More! // Unstop (formerly Dare2Compete) - What is Bash? A shell & scripting language for UNIX-based systems, developed by Brian Fox under GNU Project. Learn more about Bash script, commands, etc.
- bash(1) - Linux manual page - bash - GNU Bourne-Again SHell
- Bash Reference Manual | GNU.org - Bash Reference Manual
- Adding arguments and options to your Bash scripts | Enable Sysadmin - Exploring methods for getting data into scripts and controlling the script's execution path for better automation and script management.
- Bash Scripts - Part 3 - Command-Line Options and Switches | by Mikhail Raevskiy | Introduction into BASH | Medium - Having mastered the previous parts of this series, you learned about what bash scripts are, how to write them, how to control the flow ofâ¦
- Bash Scripts
- Output to a log file
- linux - Send bash -x output to logfile without interrupting standard output - Server Fault - Is there a way to send the information displayed by running a bash script with the -x option to a file, while not changing the standard output seen by a user running the script?
- linux - How to log output in bash and see it in the terminal at the same time? - Stack Overflow - I have some scripts where I need to see the output and log the result to a file.
- Bash Scripting - Write Output of Bash Command into Log File - GeeksforGeeks - Let see how to write the output of the bash command into a log file.
- Bash script to log the output of the script to a separate log file - Unix & Linux Stack Exchange - Having mastered the previous parts of this series, you learned about what bash scripts are, how to write them, how to control the flow of a program, how to work with files. Today we will talk about how to add interactivity to scripts, equipping them with capabilities to receive data from the user and to process this data.
- Output to a log file
- Differences between Bash and sh, su and 'su -'
- Difference Between sh and Bash in Linux? - Difference Between sh and Bash in Linux - Bash is a BourNeSh (Bourne Again ShEl) which is an improved variant oF thE origiNal Bourne shEll.It is used to run programs in the Bash programming language, and is often referred to as the default shell for Linux distributions. Sh is a simple commandinterpreter for the UNIX System V Release 4.0.
- Difference Between `su` and `su -` Commands in Linux | TecAdmin - This article explains the differences.
- Commands
- Swaps the command line to the root user until session is exited, root temp and stops the need for sudo on every command. Sudo stans for 'Super User Do'.
sudo -s
sudo su
- Swaps the command line to the root user until session is exited, root temp and stops the need for sudo on every command. Sudo stans for 'Super User Do'.
- Bash General
- Time commands
- How can I display the current time & date setting? - Ask Ubuntu
# Shows All time and Dates
timedatectl

## Show Timezone
cat /etc/timezone

## Show Time and Date
date

# Show Hardware Clock (with high precision)
sudo hwclock --show
- How can I display the current time & date setting? - Ask Ubuntu
- Graceful Shutdown / ACPI Shutdown
- Sending an "ACPI power down command" / "poweroff ACPI call" from either the Host OS, via a power button, or by running the `poweroff` command from within the Guest OS will cause the OS to shutdown gracefully.
- The commands (halt|poweroff|reboot|shutdown) all have all have equivalent functions (via switches) but their default function can be different.
- Pressing the physical button on the computer briefly sends an "ACPI power down command"
- Running the command
poweroffsends an "ACPI power down command" - The OS shutdowns gracefully when it receives a "ACPI power down command"
- The
poweroffandrebootcommands are part of the systemd system and service manager. These are the ones you should use. - Ways to Stop and Restart a Linux System or the Difference Between halt, poweroff, shutdown -H, and shutdown -P | Baeldung on Linux
- Explore usual commands for stopping and restarting a Linux system, some of their history, and their current status quo.
- This explains very simply the difference or indeed the parity of the different commands.
- The halt command simply stops the OS without consideration for the hardware state after that.
- Indeed, the poweroff command was initially just an ACPI call to directly power off the machine without any shutdown procedure. In other words, it was the equivalent of holding down the power button or pulling the plug. However, due to the aforementioned repercussions of simply switching off a complex system of hardware and software, this theoretical complement to halt came to include it. Similarly, contemporary versions of halt include the poweroff ACPI call, if supported.
- Because of the merge between halt and poweroff, as well as the fact that reboot combines them, all three commands are commonly symbolic links to the same binary.
- Since, in the past, halt, poweroff, and reboot were distinct options for stopping, shutdown was meant to further combine maintenance, termination, and restarts into one:
- In conclusion, while there were historical differences between halt, poweroff, and shutdown based on technicalities, their contemporary codebase is much more unified, if not equivalent, depending on the system.
- NB: shutdown has a default delay timer of 60 seconds.
- How to Run poweroff and reboot as a Normal User | Baeldung on Linux
- We may wish to provide non administrator users of our Linux systems with the permissions to power off and restart the host. We look at a few ways to achieve this.
- The poweroff command sends an ACPI signal to the hardware. This instructs the system to power down completely.
- How to boot, shut down, and suspend your system from the Linux command line | Enable Sysadmin
- Learn how to schedule timed shutdowns and reboots with systemd and to hibernate your system with systemctl.
- When Red Hat Enterprise Linux (RHEL) adopted systemd with RHEL 7, what happened to the venerable Linux shutdown command? It remains—but now it maps to systemd's shutdown functions.
- Linux Halt, Poweroff, and Reboot Command Help
- Linux and UNIX halt, reboot, and poweroff command help, examples, and information.
- poweroff sends an ACPI signal which instructs the system to power down.
- Understanding Shutdown, Poweroff, Halt and Reboot Commands in Linux - In this article, we will explain to you the difference between shutdown, poweroff, halt and reboot Linux commands.
- How to handle ACPI events on Linux - Linux Tutorials - Learn Linux Configuration - In this tutorial we see how to handle ACPI events on Linux with the acpid daemon.
- acpi Command Examples in Linux – The Geek Diary - ACPI stands for Advanced Configuration and Power Interface. It is a power management specification developed by Intel, Microsoft, and Toshiba that defines a common interface for operating systems to use in order to control the power management and configuration of a computer.
- halt, poweroff and reboot Commands in Linux - GeeksforGeeks
- poweroff Sends an ACPI signal which instructs the system to power down.
- linux - What is the mechanism behind shutdown on long-hold off power button, as opposed to quick press? - Unix & Linux Stack Exchange
- The power button is handled by the system firmware; typical configurations are as follows:
- when the button is pressed and then released, the firmware sends a power even to the operating system, triggering either an orderly shutdown or a suspend;
- when the button is pressed and not released for a number of seconds, the firmware powers the system down without informing the operating system.
- Power Button
- The firmware of your motherboard handles the signal from the button. Based on how long your press the button, the firmware will decide what to do.
- A single quick press of the power button will send a power button signal, the firmware will then send an ACPI signal to the operating system.
- Holding the power button will cause the firmware to cut power to the system without sending any signal to the operating system, which doesn't give the OS time to shut down in an orderly manner. In other words, all the scripts and triggers that normally fire on shutdown will not fire, because the firmware never sent a signal to the OS.
- Pressing the reset button will send the reset signal.
- The power button is handled by the system firmware; typical configurations are as follows:
- Using the Linux Shutdown Command – a Step-by-Step Guide + Examples - Rebooting and powering down your system is essential for its health. Here's how you can do it with the Linux shutdown command.
- SSD TRIM / UNMAP
- Terms
- TRIM = ATA = Virtio-blk driver
- UNMAP = SCSI = Virtio-scsi driver
- REQ_DISCARD = Linux Kernel block operation
- Info
- TRIM and UNMAP both do the same feature for their relevant technologies and in the end cause
REQ_DISCARDin the Linux Kernel to be called. - TRIM/UMAP marks unused the block as unused, it does not zero them or wipe them.
- TRIM and UNMAP both do the same feature for their relevant technologies and in the end cause
- How can I tell if a Linux block device is trimmable or not? - Unix & Linux Stack Exchange
- partitioning - How to TRIM/DISCARD a whole SSD partition on Linux? - Super User
- ssd - Can I emulate TRIM by writing all zeros? - Super User
- How To Configure Periodic TRIM for SSD Storage on Linux Servers | DigitalOcean
- In this tutorial, you will learn how SSDs and TRIM work and then enable periodic TRIM on a variety of Linux distributions.
- Ubuntu 22.04 ships with a script that is run weekly by cron. This means that enabling the systemd method described in the following section is unnecessary for Ubuntu 22.04.
- SSD TRIM on CentOS 7 - Admin’s Corner - If you have SSD in your Linux server, and you have no idea what SSD TRIM is, then chances are that you are probably using your SSD the wrong way all along. You should probably pause and read below.
- linux - How do I check if my ssd supports fstrim? - Unix & Linux Stack Exchange
- ssd - Is TRIM enabled on my Ubuntu 18.04 installation? - Ask Ubuntu
- many useful commands here
- How to Enable TRIM For SSD in Ubuntu - Make Tech Easier - An SSD is one of the best investments that you will make when upgrading your PC. Learn how you can prolong it using TRIM in Ubuntu.
- Why TRIM is Important to Solid State Hard Drives? [Technology Explained] - Before you can properly understand why tech websites talk so much about TRIM. you need to beef up your knowledge about how solid state hard drives work.
- Terms
cPanel Alternatives and Linux Web Interfaces
Linux is hard to setup via the command line and most people coming from Windows would like a familiar interface to ease them into Linux. With the ever escalating price of cPanel I am putting together a list of cPanel alternatives that cover a range of functionality. This list is mainly for my research so I can pick the best GUI. I currently use CWP as it is the most comprehensive replacement for cPanel and is great for hobbyists.
My Reviews / Research
A lot of these panels are wrappers and read the configurations straight from the disk.
I will be using Ubuntu Server LTS (Minimal) with no extra packages except for OpenSSH. You can also use AlmaLinux Server (Minimal). Ubuntu has far more support across different software so is my preferred OS and unless specified use the real root account and not sudo.
Always use the Long Term Support (LTS) version of the OS you are going to use because you want stability and support for the software, bleeding edge shinies (features) are not needed.
It should be noted that while I assess what the software comes with natively if you understand Linux a lot of these panels can be extended manually with features they do not have or to turn on things that do not have a button in the panel.
Table of Contents
The Panels (in no particular order)
- The Shortlist (TL;DR)
- Hosting Company
- Small Hosting Company
- Websites and Email
- Web Applications
- Cloud Management Platform
- Server Admin
- Personal Server
- Dead
- Blank Template
Other Stuff
The Shortlist (TL;DR)
This is my personal selection of panels that I would look at first. The other might suit you better so might still be worth looking at. The liss is roughly ordered to be Business+Paid first, down to Hobbyist+Free and you will pick the one that suits you best by starting at the top.
- Webuzo
- Cost: Paid
- Suitable for: Hosting Company, Small Hosting Company
- Notes:
- Ideal cPanel/Plesk replacement for business.
- From the company that makes Softaculous, a very nice looking panel, how cPanel should be.
- The price is great for hosting companies if you take out the unlimited package.
- My20i / StackCP
- Cost: Free (can only be used with 20i.com or their resellers)
- Suitable for: Hosting Company, Small Hosting Company
- Notes:
- Ideal cPanel/Plesk replacement for business.
- The price is great for hosting companies.
- Althought not a separate panel, this British SaaS offering should be considered.
- DirectAdmin
- Cost: Paid
- Suitable for: Hosting Company, Small Hosting Company
- Notes:
- Ideal cPanel/Plesk replacement for business.
- The price is great for hosting companies if you take out the unlimited package.
- Also check your requirements because of the paid add-ons model.
- Control Web Panel (CWP)
- Cost: Free + Paid
- Suitable for: Hosting Company, Small Hosting Company, Hobbyists
- Notes:
- just announced there will be a new version out in a couple of days, hmm
- Feature rich and well priced but information from the developers is limited.
- Ideal cPanel/Plesk replacement for business, but great for hobbyists aswell.
- KeyHelp
- Cost: Free + Paid
- Suitable for: Small Hosting Company, Hobbyists
- Notes:
- Extremely nicely style theme and a panel which is easy to use.
- Doesn't work behind a NAT Router so this is no good for home users and I quote "NAT never was and never will be part of KeyHelp." so because of this I cannot recommend this panel, shame.
- Virtualmin
- Cost: Free + Paid
- Suitable for: Small Hosting Company, Hobbyists
- Notes:
- The most Feature rich of the Free and some of the Paid panels.
- Because of the theme, the layout, the number of options and features, this is not suitable for the casual user or clients.
- myVesta
- Cost: Free
- Suitable for: Hobbyists
- Notes:
- This panel will get the job done and is actively being developed.
- HestiaCP
- Cost: Free
- Suitable for: Hobbyists
- Notes:
- This panel will get the job done and is actively being developed.
- Nice dark theme
- You can't use 'Apache only' mode any more with this panel.
Hosting Company
These panels are designed for companies selling hosting of any size, but can be used for hobbyists or techies running their own servers from home. These panels have all of the features required to sell hosting to end users. One key feature of these panels is that they have reseller accounts.
cPanel / WHM

| Features | Status |
| Primarily Designed For | Hosting Company |
| Free/Paid | Paid |
| License | Proprietary |
| Supported OS | CentOS 7 / RHEL 7 / CloudLinux 6,7,8 / AlmaLinux 8 / Rocky Linux 8 / Ubuntu (on cPanel/WHM version 102 and higher) |
| Supported Cloud Providers | × |
| Install Method(s) | Script |
| Web Console |
|
| Virtualization | × |
| Web Server | Apache / NGINX |
| TLS 1.3 | √ |
| HTTP/2 | √ |
| HTTP/3 & QUIC | × |
| AutoSSL | LetsEncrypt / Sectigo |
| DNS Server | BIND / PowerDNS |
| DNS Zone Manager | √ |
| DNSSEC | √ |
| Multi-PHP | √ |
| Database Server | MariaDB / PostgreSQL |
| Database Admin | phpMyAdmin / phpPgAdmin |
| Email Server | Exim / Dovecot |
| Webmail | Horde |
| FTP Server | Pure-FTPd / ProFTPD |
| Caching | OPcache / Memcached |
| Email Validation | SPF / DKIM / DMARC |
| Spam Protection | SpamAssassin / Greylisting |
| Firewall | iptables / CSF / cPHulkd |
| WAF | ModSecurity / OWASP |
| Virus / Malware Scanning | ClamAV / ImunifyAV / Imunify360 |
| Reseller Accounts | √ |
| User Accounts | √ |
| Separate Panels (Admin / Users) | √ |
| Hosting Packages | √ |
| Quotas | Disk / Bandwidth |
| Traffic Statistics | AWStats / Webalizer |
| Cron Jobs | √ |
| Local Backup | √ |
| External Backup | FTP / AWS S3 |
| File Manager | √ |
| Extendable by Plugins | √ |
| API | √ |
| WHMCS Support | √ |
| Panel Account Restrictions | Tiers based on number of accounts |
| Server and Package Updates | GUI / CLI |
| Automatic Updates | √ |
| Can be Uninstalled | × |
cPanel is an industry leader and has everything you need for hosting and reselling. It is a web hosting control panel with a user-friendly interface and many features.
- Pros
- Complete hosting package.
- Auto updating.
- All features you will need for a modern hosting server.
- Cons
- Expensive.
- The more accounts, the more you pay.
Notes
- Sites
- General
- Settings
- Plugins
- File Locations / Repo Locations / Key Locations
- Install
- Update / Upgrade
- Uninstall
- Installation Instructions
- Misc
Plesk

| Features | Status |
| Primarily Designed For | Hosting Company |
| Free/Paid | Paid |
| License | Proprietary |
| Supported OS | Debian / Ubuntu / CentOS 7 / RHEL / CloudLinux / AlmaLinux / Rocky Linux / Virtuozzo Linux 7 / Windows / Windows Server |
| Supported Cloud Providers | × |
| Install Method(s) | Script |
| Web Console |
|
| Virtualization | × |
| Web Server | Apache / NGINX / IIS |
| TLS 1.3 | √ |
| HTTP/2 | √ |
| HTTP/3 & QUIC | × |
| AutoSSL | LetsEncrypt / Sectigo |
| DNS Server | PowerDNS / BIND |
| DNS Zone Manager | √ |
| DNSSEC | √ |
| Multi-PHP | √ |
| Database Server | MariaDB / PostgreSQL |
| Database Admin | phpMyAdmin / phpPgAdmin |
| Email Server | Exim / Dovecot |
| Webmail | Horde |
| FTP Server | Pure-FTPd / ProFTPD |
| Caching | OPcache / Memcached |
| Email Validation | SPF / DKIM / DMARC |
| Spam Protection | SpamAssassin / Greylisting |
| Firewall | Plesk Firewall / Firewalld |
| WAF | Fail2Ban / ModSecurity / Atomic / OWASP / CWAF (Comodo) |
| Virus / Malware Scanning | ClamAV / ImunifyAV / Imunify360 |
| Reseller Accounts | √ |
| User Accounts | √ |
| Separate Panels (Admin / Users) | × |
| Hosting Packages | √ |
| Quotas | Disk / Bandwidth |
| Traffic Statistics | AWStats / Webalizer |
| Cron Jobs | √ |
| Local Backup | √ |
| External Backup | FTP / AWS S3 |
| File Manager | √ |
| Extendable by Plugins | √ |
| API | √ |
| WHMCS Support | √ |
| Panel Account Restrictions | 3 Tiers, Top one is unlimited |
| Server and Package Updates | GUI / CLI |
| Automatic Updates | √ |
| Can be Uninstalled | × |
Plesk is an industry leader and has everything you need for hosting and reselling. It is a web hosting control panel with a user-friendly interface with many features.
- Pros
- Complete hosting package.
- Auto updating.
- All features you will need for a modern hosting server.
- Can run on Windows.
- Cons
- Expensive
Notes
- Sites
- General
- Software Requirements for Plesk Obsidian
- Read all about the software requirements, specifications and other important details to take full advantage of Plesk Obsidian.
- Full technology lists.
- Plesk Web Admin SE (Free Version) is only available on Vultr, DigitalOcean, AWS and Alibaba cloud platforms.
- Software Requirements for Plesk Obsidian
- Settings
- Plugins
- File Locations
- Install
- Update / Upgrade
- Uninstall
- Installation Instructions
- Misc
Control Web Panel (CWP)

| Features | Status |
| Primarily Designed For | Hosting Company |
| Free/Paid | Both |
| License | Proprietary |
| Supported OS | CentOS / CentOS 8 Stream / Rocky Linux / AlmaLinux / Oracle Linux |
| Supported Cloud Providers | × |
| Install Method(s) | Script |
| Web Console |
|
| Virtualization | × |
| Web Server | Apache / NGINX / LiteSpeed Enterprise / Varnish |
| TLS 1.3 | √ |
| HTTP/2 | √ |
| HTTP/3 & QUIC | × |
| AutoSSL | LetsEncrypt |
| DNS Server | BIND |
| DNS Zone Manager | √ |
| DNSSEC | × |
| Multi-PHP | √ |
| Database Server | MariaDB / PostgreSQL / MongoDB |
| Database Admin | phpMyAdmin / PostgreSQL Database Manager / Mongo Database Manager |
| Email Server | Postfix / Dovecot |
| Webmail | Roundcube |
| FTP Server | Pure-FTPd |
| Caching | OPcache / Varnish |
| Email Validation | SPF / DKIM |
| Spam Protection | SpamAssassin / SpamHause / SpamExperts / Amavis |
| Firewall | CSF |
| WAF | ModSecurity / CWAF (Comodo) / OWASP |
| Virus / Malware Scanning | ClamAV / Maldet / RKHunter / Lynis / Snuffleupagus |
| Reseller Accounts | √ |
| User Accounts | √ |
| Separate Panels (Admin / Users) | √ |
| Hosting Packages | √ |
| Quotas | Disk / Bandwidth |
| Traffic Statistics | GoAccess |
| Cron Jobs | √ |
| Local Backup | √ |
| External Backup | FTP |
| File Manager | √ |
| Extendable by Plugins | × |
| API | √ |
| WHMCS Support | √ |
| Panel Account Restrictions | × |
| Server and Package Updates | GUI / CLI |
| Automatic Updates | Panel Only |
| Can be Uninstalled | × |
Control Web Panel (CWP) is a free modern and intuitive control panel for servers and VPS that enables the day to day management and their security easy. Considerations were taken into account through the development of the web panel in terms of security functionalities and the interface.
- Pros
- Complete hosting package.
- All features you will need for a modern hosting server.
- It has great potential.
- The Pro version is so cheap it should be considered a donation and I would recommend to go straight for the Pro version
- Ideal cPanel/Plesk replacement for business, but great for hobbyists aswell.
- Cons
- Some bugs and are not fixed quickly.
- The Admin panel is dated.
- There needs to be a better road map for this software for it to live in the commercial world.
- Does require some work to setup and keep running.
Notes
- Sites
- General
- Settings
- Plugins
- File Locations / Repo Locations / Key Locations
- Install
- Update / Upgrade
- Installation Instructions
- Misc
DirectAdmin

| Features | Status |
| Primarily Designed For | Hosting Company |
| Free/Paid | Paid |
| License | Proprietary |
| Supported OS | RHEL / CentOS / AlmaLinux / Rocky Linux / Debian / Ubuntu |
| Supported Cloud Providers | × |
| Install Method(s) | Script |
| Web Console |
|
| Virtualization | × |
| Web Server | Apache / Nginx / OpenLiteSpeed / LiteSpeed Enterprise |
| TLS 1.3 | √ |
| HTTP/2 | √ |
| HTTP/3 & QUIC | × |
| AutoSSL | LetsEncrypt |
| DNS Server | BIND |
| DNS Zone Manager | √ |
| DNSSEC | √ |
| Multi-PHP | √ |
| Database Server | MySQL / MariaDB |
| Database Admin | phpMyAdmin |
| Email Server | Exim / Dovecot |
| Webmail | Roundcube / SquirrelMail |
| FTP Server | ProFTPD / Pure-FTPd |
| Caching | Redis |
| Email Validation | SPF / DKIM / DMARC |
| Spam Protection | SpamAssassin / Rspamd / RBL / Easy Spam Fighter / BlockCracking / Pigeonhole |
| Firewall | iptables / CSF / Firewalld |
| WAF | ModSecurity / Comodo WAF (CWAF) / Snuffleupagus |
| Virus / Malware Scanning | ClamAV / Imunify360 (Paid Addon) |
| Reseller Accounts | √ |
| User Accounts | √ |
| Separate Panels (Admin / Users) | × |
| Hosting Packages | √ |
| Quotas | Disk / Bandwidth |
| Traffic Statistics | AWStats / Webalizer |
| Cron Jobs | √ |
| Local Backup | √ |
| External Backup | JetBackup (Paid Addon) / Acronis (Paid Addon) |
| File Manager | √ |
| Extendable by Plugins | √ |
| API | √ |
| WHMCS Support | √ |
| Panel Account Restrictions | Number of domains (not subdomains) depends on your tier |
| Server and Package Updates | CLI / GUI |
| Automatic Updates | √ |
| Can be Uninstalled | × |
DirectAdmin is modern web hosting control panel with regular updates. I found its control panel to be uncomfortable to use because of the hidden menus and low contrast ultra-bright theme, ultraclean gone to far. The menu can be stickied which helps a lot and if I ever find where to enable the dark theme that would probably fix the theme. This panel is definately feature rich and for the price is ideal for hosting your own websites at home if you are willing to pay it, and for the hosting companies out there this is definately a good replacement for Plesk or cPanel.
- Pros
- Subdomains do not count toward the domain limit, so you could theoretically have unlimited subdomains.
- Updated often.
- DirectAdmin is widely supported like cPanel and Plesk.
- Integrated Ticketing System
- Modern and responsive UI
- Feature rich
- Has a GIT server option
- Reseller features
- Ideal cPanel/Plesk replacement for business.
- Cons
- They removed the `Personal Tier` so is a bit expensive to run at home.
- Not sure how much control over the Apache setup you have.
- The demo is crippled so you cannot look at most features.
- The default theme and menu settings are bad.
- Pricey unless you go for the unlimited plan which is only suitable for business.
- There seems to be a lot of paids add-ons that should be included, such as server level backup (JetBackup / Acronis). This might point to a business model that we have seen before.
Notes
- Sites
- General
- What is DirectAdmin? | TechRadar - Everything you need to know about this alternative web hosting control panel
- Settings
- How to set up DKIM and SPF records in DirectAdmin – Tilaa Supportdesk - DKIM and SPF are both free email authentication methods that your organization can use. These technologies can be quite beneficial to your company and domains in the cybersecurity industry.
- Reducing sending spamscore | Directadmin Docs - Adding a DMARC record.
- Plugins
- The Comodo WAF has an inbuilt DirectAdmin plugin. This package need to be installed manually but the instructions from Comodo are great.
- How to Install ConfigServer Firewall (CSF) and Brute Force Monitor (BFM) with DirectAdmin | VPSBasics - Once you have installed DirectAdmin you will want to setup some firewall protection for your server. DirectAdmin as standard does not include a firewall but utilises Brute Force Monitor (BFM) to…
- File Locations / Repo Locations / Key Locations
- Install
- Installation Overview | Directadmin Docs
- Support OS
- EOL table
- Basic installation notes
- Installation Overview | Directadmin Docs
- Update / Upgrade
- Uninstall
- Installation Instructions
- Misc
Geek Panel

| Features | Status |
| Primarily Designed For | Hosting Company |
| Free/Paid | Free |
| License | Proprietary |
| Supported OS | CentOS / AlmaLinux / Rocky Linux / Debian / Ubuntu / Fedora |
| Supported Cloud Providers | × |
| Install Method(s) | Script |
| Web Console |
|
| Virtualization | √ |
| Web Server | Apache |
| TLS 1.3 | √ |
| HTTP/2 | √ |
| HTTP/3 & QUIC | × |
| AutoSSL | LetsEncrypt |
| DNS Server | BIND |
| DNS Zone Manager | √ |
| DNSSEC | × |
| Multi-PHP | √ |
| Database Server | MariaDB / SQLite / PostgreSQL |
| Database Admin | phpMyAdmin |
| Email Server | Postfix / Dovecot |
| Webmail | Roundcube |
| FTP Server | VsFTPd |
| Caching | Memcached |
| Email Validation | SPF / DKIM |
| Spam Protection | Sending rate restriction |
| Firewall | × |
| WAF | × |
| Virus / Malware Scanning | ClamAV |
| Reseller Accounts | √ |
| User Accounts | √ |
| Separate Panels (Admin / Users) | √ |
| Hosting Packages | √ |
| Quotas | Disk / Bandwidth |
| Traffic Statistics | Bandwidth |
| Cron Jobs | √ |
| Local Backup | √ |
| External Backup | FTP / SCP |
| File Manager | √ |
| Extendable by Plugins | √ (seems to be planned) |
| API | √ |
| WHMCS Support | ? |
| Panel Account Restrictions | × |
| Server and Package Updates | CLI |
| Automatic Updates | ? |
| Can be Uninstalled | × |
Geek Panel (a.k.a. bbPanel) is a new control panel and this shows because although it looks very close to cPanel it still has bugs, is not feature complete, has no community or issue tracker. Too confuse things, there are several websites for this one product and they are all slightly different.
GeekPanel is built with security in mind, to meet everyone needs from Beginners to top Admin Professionals for web hosting control panel management. A smart scalable and secure hosting control panel a comprehensive Linux system for server admins, and a broad toolset for customers to manage shared web hosting, VPS, Cloud, and Dedicated Servers with their domains emails websites, with a ton of rich features.
- Pros
- It does have a small bank of installable platforms such as Joomla and WordPress.
- Has grest potential as a cPanel clone.
- Ideal cPanel/Plesk replacement for business.
- Cons
- Many bugs.
- Not feature complete.
- Confusing websites.
- You cannot raw edit the php.ini file in the GUI or a lot of other settings which are hidden from the admin.
Notes
- Sites
- Homepage
- https://geekpanel.net/ - I think this will be the homepage
- https://www.geekpanel.com/ - Old Site
- https://www.bbpanel.com/ - Use to be called BBPanel
- Demo
- Demo Server - taken from the old site
- Demo links on new site - that dont work
- Changelog
- Code Repository
- Forum
- Docs
- Plugins
- Homepage
- General
- Geek Panel Ltd - Company Profile - Endole - Geek Panel Ltd is a dormant company located in Harrow, Greater London. View Geek Panel Ltd profile, shareholders, contacts, financials, industry and description.
- linux - Why does /etc/resolv.conf point at 127.0.0.53? - Unix & Linux Stack Exchange
- Settings
- Plugins
- File Locations / Repo Locations / Key Locations
- The panel files /geekpanel/
- Install
- Update / Upgrade
- Uninstall
- Installation Instructions
- Login as root
- You must install as the root account, you cannot use sudo.
- Run the following commands
apt update && apt upgrade
apt install curl
curl -o latest -L https://download.geekpanel.com && chmod +x latest && ./latest
- Login as root
- Misc
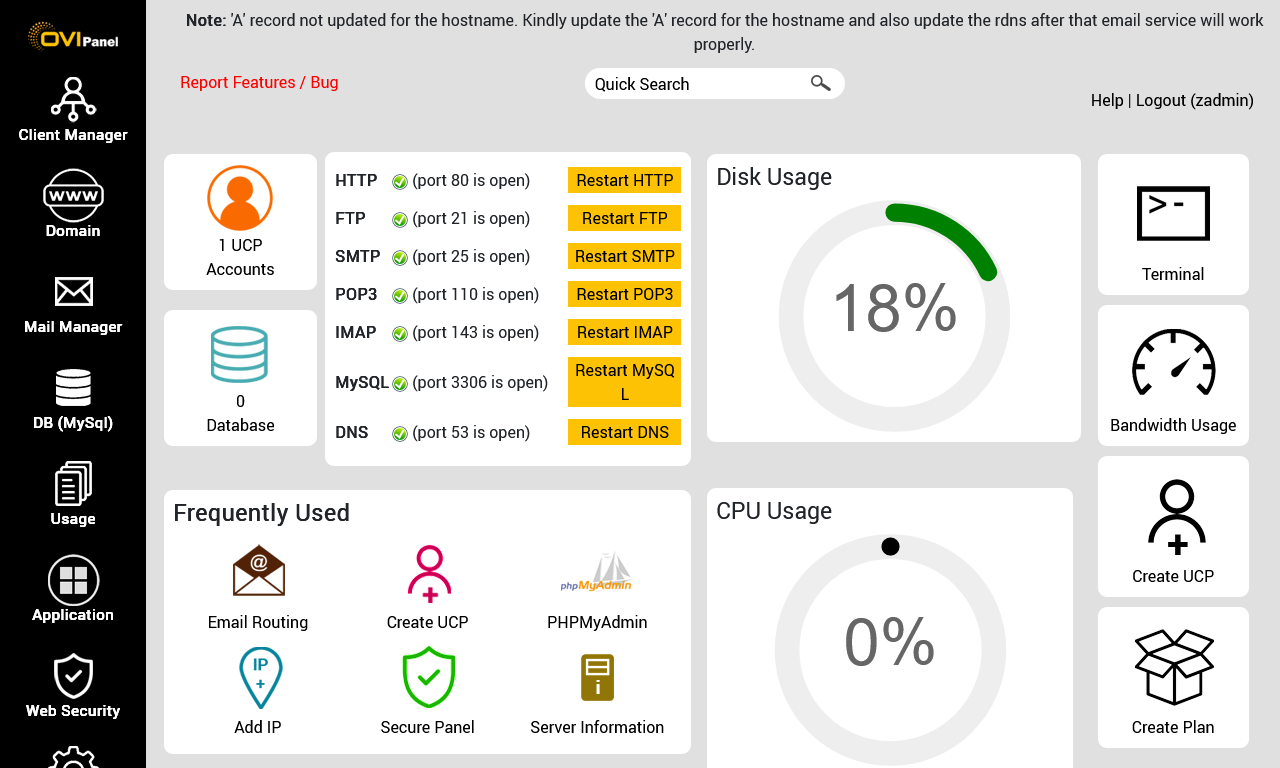
OVIPanel
| Features | Status |
| Primarily Designed For | Hosting Company |
| Free/Paid | Free |
| License | Proprietary / GPLv3 / MIT / Apache |
| Supported OS | CentOS / AlmaLinux / Cloud Linux |
| Supported Cloud Providers | ? |
| Install Method(s) | Script |
| Web Console |
|
| Virtualization | × |
| Web Server | Apache / Nginx / OpenLiteSpeed |
| TLS 1.3 | √ |
| HTTP/2 | √ |
| HTTP/3 & QUIC | × |
| AutoSSL | LetsEncrypt |
| DNS Server | BIND |
| DNS Zone Manager | √ |
| DNSSEC | × |
| Multi-PHP | √ |
| Database Server | MySQL / PostgreSQL / MongoDB |
| Database Admin | phpMyAdmin / phpPgAdmin |
| Email Server | Postfix / Dovecot |
| Webmail | Roundcube / RainLoop |
| FTP Server | ProFTPD |
| Caching | Varnish |
| Email Validation | SPF / DKIM |
| Spam Protection | SpamAssassin |
| Firewall | CSF |
| WAF | ModSecurity |
| Virus / Malware Scanning | Imunify360 / Linux Malware Detect (LMD) |
| Reseller Accounts | √ |
| User Accounts | √ |
| Separate Panels (Admin / Users) | √ |
| Hosting Packages | √ |
| Quotas | Disk / Bandwidth |
| Traffic Statistics | Webalizer |
| Cron Jobs | √ |
| Local Backup | √ |
| External Backup | ? |
| File Manager | √ |
| Extendable by Plugins | √ |
| API | √ |
| WHMCS Support | √ |
| Panel Account Restrictions | × |
| Server and Package Updates | CLI / GUI |
| Automatic Updates | × |
| Can be Uninstalled | × |
OVIPanel is web hosting control panel (based on Sentora) that has a modern UI with separate panels for users and the admin. The admin GUI does need some work on the UI and additional features adding because a lot of features that you expect to be in the GUI are absent. The free panel has massive potential and a growing community. This panel does have regular updates and is developed by a large hosting company in India.
There is a paid version which adds support but no extra features. The paid tiers are very reasonable and can give you some reassurance that you can get technical questions answered within 4-6 hours.
- Pros
- One Click cPanel to OVIPanel Migration.
- Cons
- Some of the documentation is out of date.
- The UI needs some tidying up
- Apache modules can be configured from the GUI but not all modules are availabe.
Notes
- Sites
- General
- Settings
- Plugins
- File Locations / Repo Locations / Key Locations
- Install
- Update / Upgrade
- Uninstall
- Installation Instructions
- Misc
Webuzo

| Features | Status |
| Primarily Designed For | Hosting Company |
| Free/Paid | Paid |
| License | Proprietary |
| Supported OS | RHEL / CentOS / AlmaLinux / Rocky Linux / Ubuntu / CloudLinux / Scientific Linux |
| Supported Cloud Providers | Amazon Web Services (AWS) / DigitalOcean / Google Cloud Platform (GCP) / Microsoft Azure / Akamai (formerly Linode) |
| Install Method(s) | Script / Cloud Quick Launch |
| Web Console |
|
| Virtualization | × |
| Web Server | Apache / Nginx / OpenLiteSpeed / LiteSpeed Enterprise / Lighttpd / NodeJS |
| TLS 1.3 | √ |
| HTTP/2 | √ |
| HTTP/3 & QUIC | √ |
| AutoSSL | LetsEncrypt |
| DNS Server | BIND |
| DNS Zone Manager | √ |
| DNSSEC | × |
| Multi-PHP | √ |
| Database Server | MySQL / MariaDB / PostgreSQL / SQLite / MongoDB |
| Database Admin | phpMyAdmin / phpPgAdmin |
| Email Server | Exim / Dovecot |
| Webmail | Roundcube / RainLoop / WebMail Lite |
| FTP Server | Pure-FTPd |
| Caching | Redis / Memcached / Varnish |
| Email Validation | SPF / DKIM / DMARC |
| Spam Protection | SpamAssassin / RBL / MailChannels |
| Firewall | CSF / CXF |
| WAF | ModSecurity / OWASP / Brute Force Detection |
| Virus / Malware Scanning | ClamAV / ImunifyAV / ImunifyAV+ / Imunify360 / Linux Malware Detect (LMD) / Linux Environment Security (LES) |
| Reseller Accounts | √ |
| User Accounts | √ |
| Separate Panels (Admin / Users) | √ |
| Hosting Packages | √ |
| Quotas | Disk / Bandwidth |
| Traffic Statistics | AWStats |
| Cron Jobs | √ |
| Local Backup | √ |
| External Backup | FTP / SFTP / AWS S3 / Google Drive |
| File Manager | √ |
| Extendable by Plugins | √ |
| API | √ |
| WHMCS Support | √ |
| Panel Account Restrictions | Tiers based on number of accounts |
| Server and Package Updates | CLI / GUI |
| Automatic Updates | √ |
| Can be Uninstalled | × |
Webuzo is a Multi User Control Panel built for Hosting Providers, Resellers and Website Owners designed and built by Softaculous. Its a powerful and easy to use Web Hosting Control Panel used by users around the world which helps you manage your cloud or dedicated server.
This panel can be installed on dedicated servers, cloud servers and virtual private servers. You can launch Webuzo instances in various clouds like Amazon Web Services, Google Cloud Platform (GCP), Microsoft Azure, Linode, DigitalOcean, etc. You can automate various admin tasks with the API and SDK.
Webuzo now has reseller capabilites and is definately a candidate for a cPanel replacement. The top tier is a fair price which includes unlimited domains, unlimited accounts and free support but the lower tiers also allow the hobbyist to run this platform on their kit at home. The killer feature is that Webuzo offers and inplace conversion of your cPanel and WHMCS to use their platform with no losss of data and no need to performa migration to another IP address.
- Pros
- An excellent cPanel replacement.
- Has a tool to convert your cPanel server into a Webuzo server rather than doing a migration.
- Has a tool to convert your WHMCS (cPanel) to WHMCS (Webuzo).
- The 'Personal Cloud' tier has Softaculous included for free.
- The GUI's are a modern design and feels relaxing to use. Nice to look at, nice to use.
- Lots of plugins
- This is how cPanel should look.
- Ideal cPanel/Plesk replacement for business.
- Cons
- The pricing and plans need their descriptions making better.
- The demo is only for the client's section and not everything is available (i.e. email section is missing).
- Putting together the list of technologies this panel uses was hard.
- Need to sort the VPS/Dedicated pricing. Why should the price be different because of the platfrom when it is already limited by accounts.
- Pricey unless you go for the unlimited plan which is only suitable for business.
Notes
- Sites
- General
- Settings
- Plugins
- File Locations / Repo Locations / Key Locations
- Install
- Update / Upgrade
- Uninstall
- Installation Instructions
- Misc
SPanel
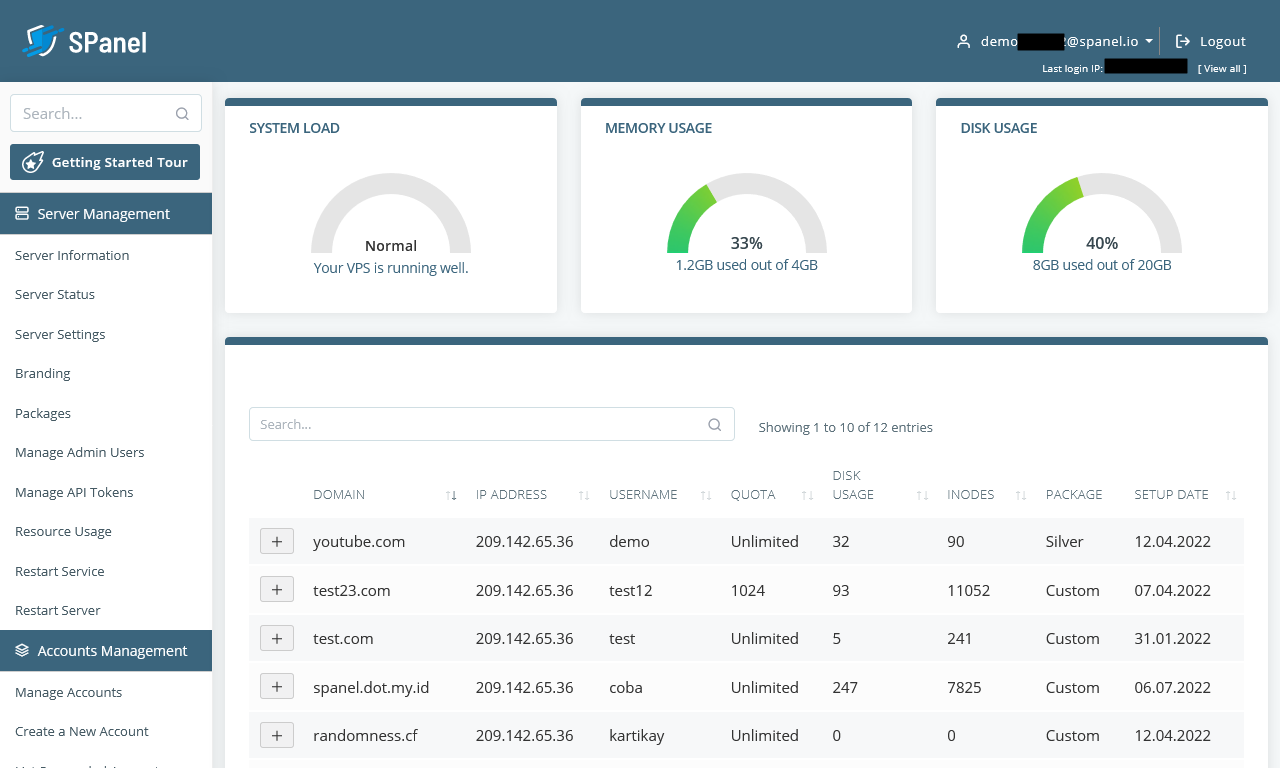
| Features | Status |
| Primarily Designed For | Hosting Company |
| Free/Paid | Paid |
| License | Proprietary |
| Supported OS | Rocky Linux |
| Supported Cloud Providers | Amazon Web Services (AWS) / DigitalOcean / Hetzner Cloud / Google Compute Engine (GCE) / Google Cloud Platform (GCP) / Microsoft Azure / Vultr / Akamai (formerly Linode) / Alibaba Cloud / Contabo / OVH |
| Install Method(s) | SaaS |
| Web Console |
|
| Virtualization | × |
| Web Server | Apache / Nginx / OpenLiteSpeed / LiteSpeed Enterprise |
| TLS 1.3 | √ |
| HTTP/2 | √ |
| HTTP/3 & QUIC | √ |
| AutoSSL | LetsEncrypt |
| DNS Server | BIND |
| DNS Zone Manager | √ |
| DNSSEC | × |
| Multi-PHP | √ |
| Database Server | MariaDB |
| Database Admin | phpMyAdmin |
| Email Server | Exim / Dovecot |
| Webmail | Roundcube / RainLoop |
| FTP Server | Pure-FTPd |
| Caching | Memcached |
| Email Validation | SPF / DKIM / DMARC |
| Spam Protection | SpamAssassin |
| Firewall | CSF |
| WAF | ModSecurity |
| Virus / Malware Scanning | SShield |
| Reseller Accounts | √ |
| User Accounts | √ |
| Separate Panels (Admin / Users) | √ |
| Hosting Packages | √ |
| Quotas | Disk / Bandwidth |
| Traffic Statistics | GoAccess |
| Cron Jobs | √ |
| Local Backup | SBackups |
| External Backup | ? |
| File Manager | √ |
| Extendable by Plugins | × |
| API | √ |
| WHMCS Support | √ |
| Panel Account Restrictions | √ |
| Server and Package Updates | CLI / GUI |
| Automatic Updates | √ |
| Can be Uninstalled | × |
SPanel is web hosting control panel developed by Scala Hosting and was developed because of the ever increasing cost of cPanel. The next generation cloud management platform, allowing every website owner to easily manage their server in a secure environment. This panel is an ALL-IN-ONE cloud hosting platform allowing every site owner to host multiple websites on their own fully managed cloud VPS and as such is not designed for your own local servers, you must use a cloud based provider that this software supports.
SShield is the all-in-one security solution of SPanel and is unique because it doesn’t just rely on the existing virus and malware databases. Instead, it follows advanced algorithms for predictive analysis and cyber threat prevention. A predictive AI for detecting and removing cyber threats.
SPanel is available for free with any Scala Hosting VPS plan.
- Pros
- A good cPanel clone with professional support
- SShield
- A feature request site where votes turn into features getting implemented
- Cons
- No demo unless you sign up
- No forum
- Expensive
- The documentation is terrible, there is hardly any information.
Notes
- Sites
- General
- Managed = They will remotely dial into your server and fix things
- Self Managed = The software only. This should be renamed software only
- Settings
- Plugins
- File Locations / Repo Locations / Key Locations
- Install
- Update / Upgrade
- Uninstall
- Installation Instructions
- Misc
My20i / StackCP
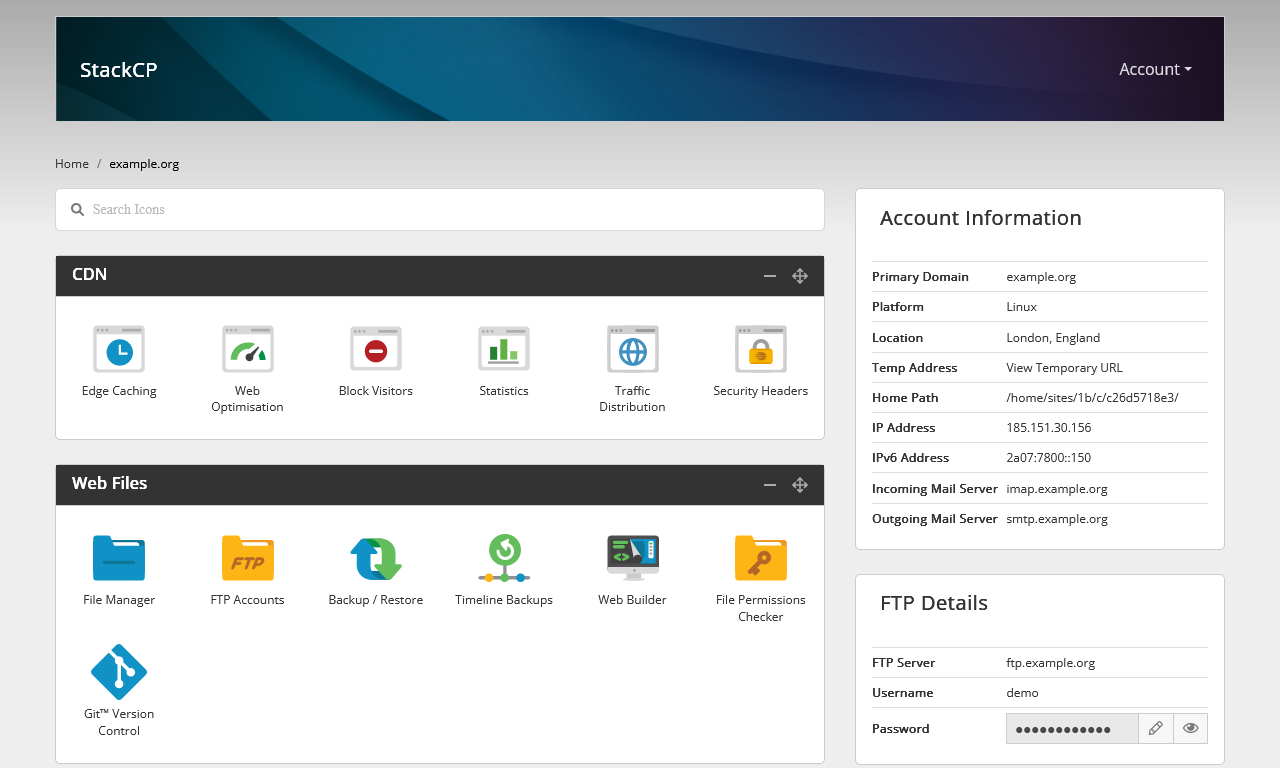
| Features | Status |
| Primarily Designed For | Hosting Company |
| Free/Paid | Free (can only be used with 20i.com or their resellers) |
| License | Apache |
| Supported OS | CentOS / Windows Server |
| Supported Cloud Providers |
in-house / Amazon Web Services (AWS) / Google Cloud Platform (GCP) *Reseller hosting platform has been built in-house. AWS and Google Cloud are available as Managed Hosting products. |
| Install Method(s) | SaaS |
| Web Console |
|
| Virtualization | × |
| Web Server | Apache |
| TLS 1.3 | √ |
| HTTP/2 | √ |
| HTTP/3 & QUIC | × |
| AutoSSL | LetsEncrypt |
| DNS Server | Google DNS |
| DNS Zone Manager | √ |
| DNSSEC | √ |
| Multi-PHP | √ |
| Database Server | MariaDB / MSSQL (extra cost for license) |
| Database Admin | phpMyAdmin |
| Email Server | Exim / Dovecot |
| Webmail | Roundcube (Stackmail) |
| FTP Server | ProFTPD |
| Caching | OPCache / CDN (in-house) / in-house WordPress cache plugin (StackCache) |
| Email Validation | SPF / DKIM |
| Spam Protection | Rspamd |
| Firewall | iptables / Firewalld / Voxility / DDOS protection (via Voxility) |
| WAF | ModSecurity / Brute Force Detection |
| Virus / Malware Scanning | ClamAV |
| Reseller Accounts | × |
| User Accounts | √ |
| Separate Panels (Admin / Users) | √ |
| Hosting Packages | × |
| Quotas | Disk / Bandwidth |
| Traffic Statistics | AWStats / Webalizer |
| Cron Jobs | √ |
| Local Backup | √ |
| External Backup | √ (only 20i.com can access, disaster recovery only) |
| File Manager | √ |
| Extendable by Plugins | × |
| API | √ |
| WHMCS Support | √ |
| Panel Account Restrictions | × |
| Server and Package Updates | CLI / GUI |
| Automatic Updates | √ |
| Can be Uninstalled | × |
My20i and StackCP form a hosting platform from 20i.com and is a direct rival to cPanel except that you need to take out hjosting from 20i.com to use this panel, and best of all it is free with no account limits.
20i.com develops My20i amd StackCP in-house which their resellers can use for free. They refer to their platform as My20i.
The free version works ....................
- Pros
- You change all of the login domains (my20i.com, stackcp.com, stackmail.com) to those of your choosing with CNAMEs if you require.
- All support is based in the UK
- The SaaS hosting model is truley unlimited.
- Hostshop the in-house billing software is free.
- Reseller Hosting comes with a free WHMCS module and get can a discount on their WHMCS license.
- High load sites will be hived off to a fast server when a peak load occurs.
- Free migrations
- Free CDN
- No restrictions on accounts, bandwidth, space with the following exceptions:
- MySQL dB max size 1024mb (might be overall or a single DB, not sure)
- Cannot use more than 10% of the 20i.com server resources
- Email mailboxes are max 10GB
- What limits are place on the individual user accounts? Is there a link to the specs ie: indoes, processor, RAM, entry points….
- With regards to your query, there are not any inode limits in place and resources are scaled based on demand.
- when a website receives a large number of hits it is quickly isolated and moved to it’s own dedicated backend - this is raw hardware with no overhead at all - Multiple, 48 cores machines for the site that is busy. Power that would quite literally costs hundreds per month to buy for a site otherwise. Once the “busy period” is over, your site is moved back to the normal infrastructure.
- 1TBps DDOS protection (via Voxility).
- Documentation is excellent.
- Cons
- You have to use 20i.com hosting to use this panel (but the hosting is actually good)
- MSSQL = additional £10.00 /pm (but this is for the license so not 20i.com fault)
- 20i.com only does wildcard LetsEncrypt certificates for each account which means the platform does not support A record forwarding from remote DNS servers. This is because LetsEncrypt requires that the requester has full control over their DNS (i.e. their nameservers point to 20i.com servers).
Notes
- Sites
- Homepage
- Demo
- Changelog
- Code Repository
- Forum
- Docs
- Plugins
- Service Status
- General
- 20i's acceptable use policy for its web and vps hosting | 20i - Everything you need to know about 20i’s Acceptable Use Policy, including spam, abuse, reselling, and content standards.
- Our web hosting platform: Truly unlimited and scalable | 20i
- Take a look at the Autoscaling, Load balancing and Optimised PHP aspects
- 20i Review - How Reliable is This Hosting Provider [2023]
- In our expert 20i review, you'll find all you need to know about this hosting service. Check out its pros, cons, plans, and more!
- Includes a lot of notes on the platforms technologies.
- 20i.com use the Kopage Website Builder which can pull images from Pixabay.
- Email
- Stackmail is the email platform, not just the webmails platform (i.e. roundcube)
- What are my email sending limits? | 20i
- Can I add SPF records for my domain name? | 20i
-
v=spf1 include:spf.stackmail.com a mx -all
-
- How do I add a DKIM record? | 20i
- I think this is on by default for new accounts.
- I also would need to double check if this is applied to imported cPanel accounts.
- SSL (LetsEncrypt)
- How to auto-activate SSLs for websites | 20i
- With this feature you, as a hosting reseller, can provide an extra service to your customers. With SSL certificates being installed automatically your customer has not to worry about this security feature for the website.
- Please note that for 20i Resellers, this option is turned on by default.
- Can I use the free SSL if my site doesn’t use the 20i nameservers? | 20i
- Let’s Encrypt require the authoritative nameservers are set to our own to issue their Wildcard Certificates under the ACME DNS verification method - That is not something we control.
- this means you can only install the free SSL if the nameservers of the website point to 20 and not external point A records to the 20i platform and get SSL certificates automatically installed from LetsEncrypt.
- Q:
- We have a lot of accounts that only have the A records pointed to our server, cPanel manges ok. How can this be got around as this is a very common practice?
- Can you not revert to using SAN? Perhaps share this as a feature request?
- A: ??? No solutution yet.
- Does Let’s Encrypt issue wildcard certificates? | Let's Encrypt
- Yes. Wildcard issuance must be done via ACMEv2 using the DNS-01 challenge. See this post for more technical information.
- How to auto-activate SSLs for websites | 20i
- Questions to Sales Rep
- Fair usage explained
- There is no fair usage policy for number of hosting accounts, space and bandwidth but there is a max size of 1024mb/1GB for a database.
- is .htaccess supported?
- Yes .htaccess is supported
- is mail() allowed?
- Yes
- Is deactivate same as suspend (i.e. for 50 days then it is terminated)?
- Yes this is the same as suspended where the website is not accessible via the internet but the data and web space are still in your 20i account.
- Can we do remote backups of our client accounts to Wasabi/ASW S3?
- We do not have a feature where you can remotely store backups. However, you can take a back up of all your websites and databases using the backup/restore tool.
- You can do a bulk backup with this and this will create a .zip file for you to download.
- You will also have access to FTP for individual hosting control panels and Master FTP for all websites and remote MySQL for individual control panels.
- Do you get choice of Linux or Windows on which My20i/StackCP sits on?
- Yes, when you create a webspace for a domain, you will be given the option to host on Linux, WordPress or Windows.
- Can we move away if needed ie. cPanel compatible transfer sort of thing?
- You can move away if you need to do so, however we do not have an automated transfer out tool available.
- You can download a copy of your website files and database into a zip file and then upload the data into your new host.
- Do you offer an API (i.e. cPanel/WHM compatible) that external/alternative hosting providers can use to transfer out my accounts from your servers to theirs?
- We unfortunately don't have a API or other kind of tool that can be used to migrate hosting packages off of our Platform I'm afraid. Apologies about that.
- Q: So once we are on your servers, we are stuck unless we want move everything manually?
- A: I'm afraid you would have to manually backup the sites in order to move off our platform yes.
- Are StackCP.com and www.20i.com only for 20i.com and their resellers?
- Yes, stackcp.com and my.20i.com are only available for Resellers and 20i.com
- Do we get access to a command line (CLI), jailed or otherwise?
- Yes, you can setup SSH access for each hosting control panel. -> https://docs.20i.com/reseller-hosting/connect-via-ssh
- Fair usage explained
- Settings
- How to change PHP configuration settings manually for addon domains at StackCP dashboard - HostMaria - YouTube - This is a short video for all HostMaria users and other users who use #stackcp hosting dashboard on the topic of How to change PHP configuration settings manually at StackCP.
- Plugins
- File Locations / Repo Locations / Key Locations
- Install
- Update / Upgrade
- Uninstall
- Installation Instructions
- Misc
Small Hosting Company
These panels can be used for selling hosting but are aimed towards small hosting companies becasue they generally need more admin input to keep going or do not have all of the required features as the ones above. Hobbyists or techies running can use these to run their own servers from home.
KeyHelp

| Features | Status |
| Primarily Designed For | Small Hosting Company |
| Free/Paid | Both |
| License | Proprietary |
| Supported OS | Debian / Ubuntu |
| Supported Cloud Providers | × |
| Install Method(s) | Script |
| Web Console |
|
| Virtualization | × |
| Web Server | Apache |
| TLS 1.3 | √ |
| HTTP/2 | √ |
| HTTP/3 & QUIC | × |
| AutoSSL | LetsEncrypt |
| DNS Server | BIND |
| DNS Zone Manager | √ |
| DNSSEC | × |
| Multi-PHP | √ |
| Database Server | MySQL / MariaDB |
| Database Admin | phpMyAdmin |
| Email Server | Postfix / Dovecot |
| Webmail | Roundcube / RainLoop / SnappyMail |
| FTP Server | ProFTPD |
| Caching | × |
| Email Validation | SPF / DKIM / DMARC |
| Spam Protection | SpamAssassin / Amavis / Greylisting (in Debian version only) |
| Firewall | iptables |
| WAF | Fail2Ban |
| Virus / Malware Scanning | ClamAV |
| Reseller Accounts | × |
| User Accounts | √ |
| Separate Panels (Admin / Users) | × |
| Hosting Packages | × - Limits are set by the admin on the User's account |
| Quotas | Disk / Bandwidth |
| Traffic Statistics | AWStats |
| Cron Jobs | √ |
| Local Backup |
Backups with Snapshots feature |
| External Backup |
FTP / SFTP / WebDAV / KeyDisc / Dropbox / Custom with Restic / Rclone |
| File Manager | √ |
| Extendable by Plugins | × |
| API | √ |
| WHMCS Support | √ |
| Panel Account Restrictions | × |
| Server and Package Updates | GUI |
| Automatic Updates | √ |
| Can be Uninstalled | × |
KeyHelp is a Control Panel for Users and Server Administrators. Regardless of whether you are a user of a web hosting plan or an administrator of a server – an easy-to-use management interface with many functions and options is appreciated by everyone equally. The Server Hosting Panel KeyHelp is aimed at administrators, resellers and users. The KeyHelp server hosting panel is developed by the Thuringian (German) hosting provider Keyweb and made available to the public free of charge.
The free version is not crippled and the UI is ultra modern and responsive. If you plan to use this to sell web hosting be aware that it does not have a reseller component and you realistically will need to buy the Pro version for those little extras it gives you. Great for the inexperienced Linux convert who wants to do web hosting.
This responsive and stylish panel is not as mature as cPanel but has a passionate team behind it's development and is one to watch. This should be in your shortlist becasue of how easy it is to use and setup.
- Pros
- The client panel is very nice.
- Can Export/Import server settings
- Linux knowledge will be required for some features and maintenance.
- There is an easy login link to phpMyAdmin
- 2FA is available
- Specialist SSH connection for KeyHelp staff (enabled by default) similair to Divi's Help system.
- Settings --> Configuration --> Miscellaneous --> Support Access
- Active community (German and English)
- Developed in Germany.
- Service Monitor (via port monitoring)
- Allows remote database access
- Clients can change their PHP version
- Available in 19 different languages.
- Easy to swap/add additional versions of PHP
- Can import and export KeyHelp settings
- Backup can support many different endpoints using Restic and Rclone
- For business, the paid plan is very acceptable.
- Cons
- Doesn't not work behind a NAT Router
- So this is no good for home users and I quote "NAT never was and never will be part of KeyHelp."
- I have made a workaround, see notes below.
- Linux knowledge is required for some tasks.
- No CSF firewall
- There is a user workaround below, but it is not official.
- No GUI option to install ModSec
- Can not advance tune Apache in the GUI.
- No Reseller accounts
- Resources and permissions are set per user, there are no packages.
- No DNSSEC
- Cannot change the Panel's port, but it is a planned feature.
- SPAM control limited
- No GUI to edit PHP.ini
- No Client GUI to control PHP settings
- No Package manager
- File Manager has some limitations including not being able to zip up the root www directory.
- No root filemanager (this was mentioned as security measure)
- No Terminal in the GUI
- No Integrated phpMyAdmin Session (Developer says he choose not do do this by design)
- Doesn't not work behind a NAT Router
- My Wishlist
- Native Config Service Firewall (CSF) support
- Email Filtering (might be in Debian version)
- Restrict access to phpmyAdmin and Webmail to local IP only
- Change panel port number
- NAT network support
- will 31.31.31.31/32 work as an alias on the NIC?
- ModSec
Notes
- Sites
- General
- ConfigServer Security & Firewall (CSF) on KeyHelp - GUIDE: PART 1 - KeyHelp Community - An unofficial guide to install CSF.
- User Accounts
- All KeyHelp admin accounts (keyadmin, and all the ones you might create) are just virtual users, which only exists within the database of KeyHelp. They have no system-user counter part.
- All regular KeyHelp user accounts exists on the system with the same username (have a look into /etc/passwd for example).
- If you would like to have an additional system user account with root/sudo privileges, you have to create it manually via the command line.
- User accounts dont generate a standardLinux home directory, but their KeyHelp files are stored here
/home/users/
- CLI Utiltities
# keyhelp
# keyhelp-toolbox - If you can no longer log in due to a changed IP, you can also disable access restrictions from console by calling this program
# keyhelp login - Command to generate URLs that will immediately log you into the KeyHelp interface.
- Ubunutu or Debian
- For KeyHelp it does not matter if it runs on a Debian or Ubuntu system. It runs fine on both.
- Resource Management
- Resources and permissions are set per user, there are no packages.
- Templates are pre-configured settings that can be applied to a user's account.
- Once the user has been created, any further changes to the user's resources has to be done manually.
- There is a tool that will propagate templates to selected user accounts which will overwrite that user's account settings with them.
- There is no sync between users and templates.
- This is not like packages as defined on cpenl which are automatic
- PHP
- The PHP configuration settings are also configured here.
- The user can only change the PHP version using in the GUI.
- They might be able to manually create .user.ini and php.ini as required to changfe settings.
- This is clearly to get around the fact there is no php configuration option in the client area
- Account Template Overview - KeyHelp Knowledge Base
- With the help of account templates, you can create customized tariff packages tailored to your needs and assign them to your users. This eliminates the manual allocation of individual resources for each user.
- There is currently no synchronization between account templates and user accounts. If you assign an account template to a user, only the values of the template are transferred to the user's settings. If you edit the template at a later time, the changes are not transferred to the users.
- File Manager
- It cannot work outside of the User's root
- Block access to KeyHelp, phpMyAdmin and Webmail - But allow locally
- Things I looked at
- You can block access to admin accounts via: Settings --> Configuration --> Security --> Login & Session --> Access restriction to administrator accounts, However this is limited to admin credentials.
- I looked at Settings --> Configuration --> System --> Web Server --> Global web server directives , this will be a rule that will be included in the virtual host container of each domain. I only want to add restrictions to the KeyHelp primary domain.
- I considered a .htaccess file and would place it in /home/keyhelp/www/ but this will probably get wiped out on a KeyHelp update so i dont want to rely on this one.
- I can disable both webmail and phpMyAdmin from the KeyHelp admin but I want them to be available locally.
- Solution'ish
- .htaccess file and would place it in /home/keyhelp/www/ or /home/ and hopefully will not get wiped
- There is a general folder restriction by .htaccess at the bottom of this article
- Restriction are very limited on this platform.
- .htaccess file and would place it in /home/keyhelp/www/ or /home/ and hopefully will not get wiped
- Things I looked at
- Settings
- Changing a user's PHP settings
- The are controled by editing the users profile in the admin panel.
- post_max_size and upload_max_filesize - KeyHelp Community
- If you change the template afterwards it does not affect existing customers. You must change the user php settings.
- or re-apply the account template in the user management of the corresponding users.
- Email
- Email functionality is not enabled immediately, maybe dependent on a CRON?
- Forwarding email without a mailbox
- Email forwarding without a mailbox - KeyHelp Community
- As long as you do not activate the checkbox "Store forwarded emails in the mailbox as well", there is no mailbox.
- Email forwarding without a mailbox - KeyHelp Community
- Features are missing in the client area
- Edit their resoucres in the admin area. If there is a 0, this means none rather than the usual unlimited.
- API
- KeyHelp RESTful API | SwaggerHub - Join thousands of developers who use SwaggerHub to build and design great APIs. Signup or login today.
- Database
- By default Database names and usernames are automaitcally generated but this can be turned off:
- Settings --> Configuration --> System --> Database Server --> Rules for assignment of database / usernames
- By default Database names and usernames are automaitcally generated but this can be turned off:
- Session Timeout
- Configuration --> Security --> Login & Session --> Session idle time:
- Default = 24mins
- php.ini
- This has to be set manually unless the settings in the 'user reources'/'Account Templates' is enough
- Changing a user's PHP settings
- Allow the use of NAT network (workaround 1 - tested)
- Edit the network interface and add your external IP as an alias to the real adapter (not the loopback).
sudo nano /etc/network/interfaces
- Identify your network card's ID, in my case eth0
- Add the following code after your network card's definition making sure you update the eth0:0 to match your card (eth0 = your network card, :0 = alias definition.), and update the external IP to match the one you want.
#Secondary IP Address
auto eth0:0
iface eth0:0 inet static
address 31.31.31.31
netmask 255.255.255.255
- Retart the network service
sudo systemctl restart networking
- Goto KeyHelp --> Settings --> Configuration --> System --> IP Addresses

- You now can see your local IP ticked, and your external IP is present but unticked. Swap them over and save.
- KeyHelp --> Miscellaneous --> Bulk Operations --> Rewriting user configuration files
- You only need to redo 'DNS server configurations'
- This will add a job to the system to run when the systen CROn is next triggered (usually every minute)
- All your domains should now have there A records updated to your external IP address.
- Edit the network interface and remove the alias.
- Retart the network service
sudo systemctl restart networking
- Done
- All your DNS records should now have your external IP for their A record.
- As long as the external IP (in ...System --> IP Addresses) stays selected it will remain as it is stored in the database.
- If this workaround is removed upon an update, repeat the procedure and re-apply.
- I think this should be permanent but I cannot gurantee what is changed during an update, but I am sure it can be re-applied.
- The IP addresses that you are changing takes a minute or two to update.
- alias - How do I add an additional IP address to an interface in Ubuntu 14 - Ask Ubuntu - This will work for Debian as well.
- Edit the network interface and add your external IP as an alias to the real adapter (not the loopback).
- Allow the use of NAT network (workaround 2 - untested)
- Goto KeyHelp --> Settings --> Configuration --> System --> IP Addresses
- Edit the DOM and change the local IP to the external IP and then submit.
- This might take a bit of fiddling to get write, but you get the idea
- Plugins
- Rspamd (Fast, free and open-source spam filtering system.)
- General --> System Status --> Email --> Rspamd Web Interface
- Official Rspamd documentation
- Filtering out spam with rspamd workaround.org - You have come a long way in this guide and your mail server is already fully functional. Now it's time to deal with the dark side: spam.
- Rspamd (Fast, free and open-source spam filtering system.)
- File Locations / Repo Locations / Key Locations
- Configuration Files & Storage Paths - KeyHelp Knowledge Base
- Panel, phpMyAdmin, webmail and other web apps
/home/keyhelp/www/
- The .htpasswd created by KeyHelp, is stored at:
/etc/apache2/keyhelp/htpasswd/.htpasswd_superadmin_xxxxx52984ec401ebedf74286a243e4e
- Settings, Templates and Domain zones backup - KeyHelp Community
- KeyHelp stores all mentioned items in its database, which is always part of a backup (server backup).
- Additionally, the KeyHelp related databases (`keyhelp`, `roundcube`, `rainloop`, `phpmyadmin`) are backed up daily to /home/keyhelp/keyhelp.backup/dumps/.
- Apache Configs
/etc/apache2/keyhelp/
This has invisible redirects as shown in this example# Rspamd RewriteEngine on RewriteRule ^/rspamd$ /rspamd/ [R] ProxyPreserveHost On ProxyPass /rspamd http://localhost:11334/ ProxyPassReverse /rspamd http://localhost:11334/
- phpMyAdmin
- /home/keyhelp/www/phpmyadmin/config.inc.php
- Changes to phpMyAdmin confic will get wiped out upon KeyHelp updates
- Apps are all access from the root accounts domain even if instigated from the client account, ie:
- Install
- After you have created a user's account and domain, you need to go back into the account and correctly configure the resources it is allowed.
- OS upgrades are taken care of by custom scripts the KeyHelp team write.
- No GUI to add and remove PHP extensions, this has to be done by apt?
- Update / Upgrade
- Uninstall
- Installation Instructions
- Setup your ubuntu LTS minimal server (As shown below)
- Setup your Debian minimal server (As shown below).
- Debian gets new features first.
- Follow this simple instructions on the website
- Once you are done delete the 2 following files for security:
/root/keyhelp_login_data_2023-10-25_15-56-06
/root/install_keyhelp.sh
- Possibly leave root enabled (not sure) but definately remove it from SSH.
- Configure these important settings in the panel, go through the rest and also set as required.
- Configuration --> Security --> Login & Session --> Session idle time
- Settings --> Configuration --> System --> Database Server --> Rules for assignment of database / usernames: Restricted choice of names
- When creating a new Client account, always untick Create system domain
- Put .htaccess in /home/keyhelp/www/ to block access to the panel and apps (as required) from the outside world. Might get wiped on update
- Once you have installed you primary domain (the one you will use for reselling) change the nameservers used for new accounts
Settings --> Configuration --> DNS Server --> Name Server
- Misc
- Backup
- Restore from backup - KeyHelp Community - Martin created a great manual in how to restore a server from a backup. Here the english version.
- Ubuntu vs Debian
- KeyHelp adds new Debian version first when they depned on the underlying technology and package avaiablily, i.e. the new SPAM system.
- Ubuntu is always 6 months behind Debain updates
- Ubuntu or Debian? Which One is good for KeyHelp? - KeyHelp Community
- Ubuntu isn't as good as Debian as it's not always free of upgrade/update bugs.
- My advise, Servers is Debian, no question about it.
- Also Debian has a far longer lifespan in support then any other distro.
- Data Collector Script for Community Support - KeyHelp Community - Jolinar along with some community members has developed a shell script that gathers essential system information on a KeyHelp Server and provides it in a text file. This allows them to offer proper support in the forum without having to painstakingly request and compile all the necessary information each time.
- Backup
Froxlor

| Features | Status |
| Primarily Designed For | Small Hosting Company |
| Free/Paid | Free |
| License | GPLv2 |
| Supported OS | Debian / Ubuntu |
| Supported Cloud Providers | × |
| Install Method(s) | Script |
| Web Console |
|
| Virtualization | × |
| Web Server | Apache / NGINX / LigHTTPd (for backend) |
| TLS 1.3 | √ |
| HTTP/2 | √ |
| HTTP/3 & QUIC | × |
| AutoSSL | LetsEncrypt |
| DNS Server | BIND / PowerDNS |
| DNS Zone Manager | √ |
| DNSSEC | × |
| Multi-PHP | √ |
| Database Server | MariaDB |
| Database Admin | × |
| Email Server | Postfix / Dovecot |
| Webmail | × |
| FTP Server | Pure-FTPd |
| Caching | OPcache |
| Email Validation | SPF / DKIM |
| Spam Protection | × |
| Firewall | × |
| WAF | × |
| Virus / Malware Scanning | × |
| Reseller Accounts | √ |
| User Accounts | √ |
| Separate Panels (Admin / Users) | × |
| Hosting Packages | √ |
| Quotas | Disk / Bandwidth |
| Traffic Statistics | √ |
| Cron Jobs | √ |
| Local Backup | × |
| External Backup | × |
| File Manager | × |
| Extendable by Plugins | × |
| API | √ |
| WHMCS Support | √ |
| Panel Account Restrictions | × |
| Server and Package Updates | CLI |
| Automatic Updates | × |
| Can be Uninstalled | √ |
Froxlor is the lightweight server management software for your needs. Developed by experienced server administrators, this open source (GPL) panel simplifies the effort of managing your hosting platform. Froxlor is ideal for a hobbiest due to the fact a lot of stuff needs to be setup manually and requires knowledge of Linux but also has no dedicated reseller system. This system calls resellers, admins, and customers can be assigned to them. Developed by experienced server administrators, this open source (GPL) panel simplifies the effort of managing your hosting platform.
The panel will generate scripts for you for some actions and you will need to run these as root in the terminal manually, but this is not hard, just an extra step. Froxlor will need to have all of its settings checked upon first installation but this task is not hard and only needs to be done once.
- Pros
- The GUI is really modern and clean and is easy to navigate around.
- OPcache is setup from the start with a nice statistics page showing you various metrics.
- There is an active community and developers working on this project. I found it very easy to setup and use.
- Froxlor could be used with a more in-depth apache config panel such as Cockpit or other webservers panel as it reads all settings from the config files.
- Can be uninstalled.
- Uses the raw config files on the system rather than it's own.
- Cons
- Linux experience needed for some features and changes.
- You will need to use the command line to do certain tasks.
- phpMyAdmin is not installed.
- You will need Linux knowledge becasue not everything is performed through the panel.
- Very Stable
Notes
- Sites
- General
- Admin / Resellers
- Admins / Resellers | Froxlor Documentation
- Admin and reseller accounts in froxlor are administrative users. This means they can not have a website, email-accounts or similar for themselves. Both of the administrative users are only separated by permissions given from the parent administrative user. So an admin with fewer permissions might be considered a reseller
- Not all settings are exposed in the panel
- Changes can take up to 5 minutes when the cron is run
- it has a cron system
- PHP settings are stored in froxlor and then i guess merged opn to the real php.ini which is probably a good thing, allows settings to survive updates.
- Supports perl
- The Froxlor frontend itself uses the Froxlor API backend too.
- Froxlor is the fork of Syscp.
- Froxlor has been going since at least 2012 which means it is very stable.
- Admin / Resellers
- Settings
- Change the panels port
- Resources --> IPs and Ports
- Edit both the 80 and 443 as follows
- 80 --> 2082 + make sure 'Create Listen statement' is on, change nothing else
- 443 --> 2083 + make sure 'Create Listen statement' is on, change nothing else
- Add a new on on mapping
- Port 80 and your server IP. this will get rid off the ubunt/apachge default landing page
- Custom docroot = ? | If this is not set then Froxlor will load once again on port 80
- Wait up to 5 minutes for the changes to be applied
- You should replace this file (located at /var/www/html/index.html) before continuing to operate your HTTP server. when you remove the froxlor of port 80, you need to replace this
- Force Froxlor control panel to be HTTPS
- System --> Settings --> Froxlor VirtualHost settings --> Enable SSL-redirect for the froxlor vhost
- Reset admin password
SSH to your server

root@froxlor:~# mysql -u root -p
Enter in the SQL root password   (should be the same as your `froxroot`)

MariaDB [(none)]> USE froxlor;

MariaDB [(froxlor)]> UPDATE `panel_admins` SET `password` = MD5('my-secret-password') WHERE `adminid` = '1';
or
MariaDB [(froxlor)]> UPDATE `panel_admins` SET `password` = MD5('my-secret-password') WHERE `loginname` = 'admin';

Query OK, 1 row affected (0.020 sec)
Rows matched: 1  Changed: 1  Warnings: 0

Done
- Change the panels port
- Plugins
- File Locations / Repo Locations / Key Locations
- Froxlor control panel files: /var/www/html/froxlor/
- Default Skeleton File: /var/www/html/froxlor/templates/misc/standardcustomer/index.html
- Customer data: /var/customers/
- Add your own template in Froxlor
- Miscellaneous --> Add file template
- Email & file templates | Froxlor Documentation
- Install
- Install froxlor on Debian/Ubuntu using apt | Froxlor Documentation - Very easy to install. These instructions start when you have Ubuntu already installed.
- Froxlor 2.0 installation with Apache2 & PHP-FPM on Ubuntu 22.04 LTS - YouTube - We are excited to announce the release of froxlor 2.0! Our new version features a sleek new UI/UX design. The easy installer makes setup a breeze, and enhanced security measures keep your data safe. Upgrade to froxlor 2.0 today!
- How to install and configure Froxlor on Ubuntu 20.04 - Diogo Martino Blog - Tutorial on how to install and configure Froxlor on Ubuntu 20.04 using SSL and Let's Encrypt. This old tutorail also tells you how to install phpMyAdmin.
- Update / Upgrade
- Uninstall
- Uninstall Froxlor - General Discussion - Froxlor Forum
- Uninstall tutorial? What more then "rm -rf /var/www/froxlor/" and possibly the auto-generated vhost-configs in the corresponding directory do you need? Froxlor does not bind itself deep to the system like others...there's not more to it then just remove our files (and database if you like, doesnt matter).
- Uninstall Froxlor - General Discussion - Froxlor Forum
- Installation Instructions
- Always use your external IP when setting Froxlor up
- These are my notes to help me quickly install. However the Froxlor installation notes are excellent and this section might get removed.
- Login as root
- Run these commands
apt-get -y install apt-transport-https lsb-release ca-certificates gnupg
curl -sSLo /usr/share/keyrings/deb.froxlor.org-froxlor.gpg https://deb.froxlor.org/froxlor.gpg
sh -c 'echo "deb [signed-by=/usr/share/keyrings/deb.froxlor.org-froxlor.gpg] https://deb.froxlor.org/ubuntu $(lsb_release -sc) main" > /etc/apt/sources.list.d/froxlor.list'
apt-get update && apt-get upgrade
apt-get install froxlor
- Which services should be restarted?
- Just press enter
- General mail configuration type:
- Option 2 if you don't know
- Enter the MySQL daemon
mysql -u root
- Run these MySQL commands to create a privileged user. Swap CHANGEM3 for a password of your choice.
CREATE USER 'froxroot'@'localhost' IDENTIFIED BY 'CHANGEM3';
GRANT ALL PRIVILEGES ON *.* TO 'froxroot'@'localhost' WITH GRANT OPTION;
FLUSH PRIVILEGES;
EXIT;
- Run these commands
- Run this command (this prevents a PHP module issue in the WebInstaller)
service apache2 restart
- Now go to the webinstaller:
http://{your-ip-address}/froxlor - Follow the wizard
- Done
- Misc
CyberPanel
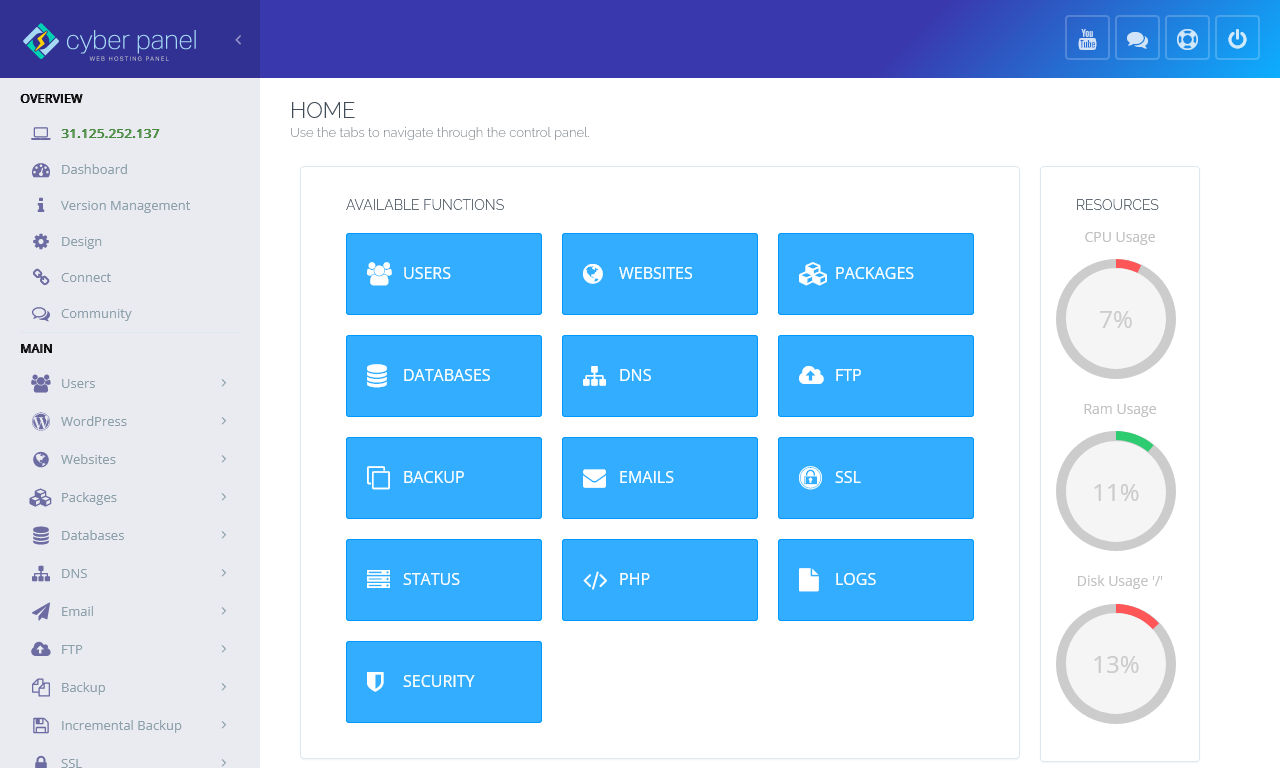
| Features | Status |
| Primarily Designed For | Small Hosting Company |
| Free/Paid | Both |
| License | Proprietary / GPLv3 |
| Supported OS | AlmaLinux / CentOS / Ubuntu |
| Supported Cloud Providers | × |
| Install Method(s) | Script |
| Web Console |
|
| Virtualization | Docker |
| Web Server | OpenLiteSpeed / LiteSpeed Enterprise |
| TLS 1.3 | √ |
| HTTP/2 | √ |
| HTTP/3 & QUIC | √ |
| AutoSSL | LetsEncrypt |
| DNS Server | PowerDNS |
| DNS Zone Manager | √ |
| DNSSEC | × |
| Multi-PHP | √ |
| Database Server | MariaDB |
| Database Admin | phpMyAdmin |
| Email Server | Postfix / Dovecot |
| Webmail | SnappyMail |
| FTP Server | Pure-FTPd |
| Caching | Memcached / Redis / LiteSpeed Cache (LSCache) |
| Email Validation | SPF / DKIM |
| Spam Protection | SpamAssassin / MailScanner / Rspamd (Paid Addon) |
| Firewall | iptables / CSF / Firewalld |
| WAF | ModSecurity / OWASP |
| Virus / Malware Scanning | ClamAV / MailScanner / ImunifyAV / Imunify360 |
| Reseller Accounts | √ |
| User Accounts | √ |
| Separate Panels (Admin / Users) | × |
| Hosting Packages | √ |
| Quotas | Disk / Bandwidth |
| Traffic Statistics | × |
| Cron Jobs | √ |
| Local Backup | √ |
| External Backup | SFTP / AWS S3 |
| File Manager | √ |
| Extendable by Plugins | √ |
| API | √ |
| WHMCS Support | √ |
| Panel Account Restrictions | × |
| Server and Package Updates | CLI / GUI |
| Automatic Updates | × |
| Can be Uninstalled | × |
CyberPanel is web hosting control panel which is based on OpenLitespeed. Comes with built-in support for DNS, FTP, Email, File Manager and automatic SSL.
The free version works well but the webserver is crippled so could not be used for professional webhosting. Ideal for running your multiple website on a budget. LiteSpeed Enterprise is a powerful webserver and is ideally suited for professional webhosting but it does come at a cost. OpenLightSpeed does not support all Apache .htaccess commands where as LiteSpeed Enterprise as is a complete Apache drop-in replacement and does.
To use the full power of this panel it can get quite expensive and the free version does have some other crippled stuff like no root file manager. A one time payment for all the addons is not too bad and if you like this panel I encourage you to purchase as a one time payment rather that pay every month. I do not know if this covers all future versions of the panel and plugins.
CyberPanel with OpenLiteSpeed allows you to host unlimited domains at no cost. However, with LiteSpeed Enterprise you can host 1 domain for free, for further domains/details visit the pricing page.
- Pros
- Uses OpenLitespeed/LightSpeed Enterprise Web Server.
- Docker manager.
- Can be extended by plugins.
- HTTP/3 and QUIC support.
- LiteSpeed introduces for end users is the LSCache module. This allows users to enable the LSCache plugins on a number of content management systems such as WordPress, Joomla, and Magento.
- Cons
- Linux experience needed for some features and changes.
- Free version is crippled and the paid version can get expensive.
- Free version does not have a root file manager
Notes
- Sites
- General
- default username and password are: admin / 1234567
- CyberPanel v Plesk - Which is Best for Running WordPress? - YouTube - Using a control panel for your VPS can make running it a easier and more user friendly. Two options we tested are Plesk and Cyberpanel. Let's look at the pros and cons.
- CyberPanel - Change/Reset Admin Password - Virtual Machine and VPS Tutorials - We can Change CyberPanel admin password from the Dashboard Modify User. If you have forgotten password, then reset it using adminPass command as root user.
- CyberPanel as a cPanel Alternative - Docs - CyberPanel Community - CyberPanel and cPanel are both hosting control panels, and they help you manage your websites. With one command you get a fully functional LAMP stack that is ready to serve your web applications. Let see how CyberPanel is a feasible cPanel alternative.
- [Tutorial] How to setup and login to OpenLiteSpeed webadmin console - Blog Posts - CyberPanel Community - in Cyberpanel, some advanced configuration needs to be done in OLS webadmin console.
- Enable QUIC (HTTP/3) On OpenLitespeed With 3 Steps - Enable QUIC (HTTP/3) on OpenLitespeed.
- Is CyberPanel even viable in 2022? Having insane issues | Reddit
- CyberPanel has been completely audited by Rack911 and they are best in business for this sort of audits.
- Since CyberPanel it-self is free and open-source we don't have cPanel or Plesk level of support. One needs to have certain level of sysadmin skills to use CyberPanel.
- How to Create CyberPanel Backups | InMotion Hosting - CyberPanel free and enterprise editions have the ability to manage website and system backups. The CyberPanel backup features also allow sysadmins to automatically create and transfer archives.
- Settings
- Plugins
- File Locations / Repo Locations / Key Locations
- panel files: /usr/local/CyberCP/
- Install
- 01 - Installing CyberPanel - 01 - Install/Upgrade - CyberPanel Community
- How to Install CyberPanel | InMotion Hosting
- Configure CyberPanel DNS and Secure Email Server: Part 3 of 4 - YouTube - If you have ever wanted to host your own websites and e-mail, but didn't want to pay for alternative hosting control panels such as CPanel or Plesk, then learn how to get started with CyberPanel in this 4-part series. CyberPanel is a free Hosting Management Panel that you install on your own server.
- Discover CyberPanel and Install it to Control your Web Host - Discover CyberPanel and install it to create a website and take control of your web host (step by step tutorial).
- How to Install CyberPanel | InMotion Hosting - CyberPanel is a web hosting panel built on the LiteSpeed web server. Officially supporting Ubuntu and CentOS / Enterprise-based Linux distributions.
- How to install CyberPanel on Ubuntu 20.04 LTS Server - Steps and commands to install open source CyberPanel on Ubuntu 20.04 LTS Server web control panel to host & manage websites.
- Update / Upgrade
- Uninstall
- Installation Instructions
- [BUG] Cannot install on Ubuntu Server LTS 22.04.2 (Minimal) · Issue #1056 - At time of writing this article there are a few issues on installing CyberPanel on Ubuntu Server 22.04.2 LTS (Minimal)
- Follow these instructions to install without error:
# Log in as root (not sudo)
# Disable any DNS-Hijacking on your network
apt update && apt upgrade -y
apt install iputils-ping
apt install cron
sh <(curl https://cyberpanel.net/install.sh || wget -O - https://cyberpanel.net/install.sh)
- Misc
Virtualmin
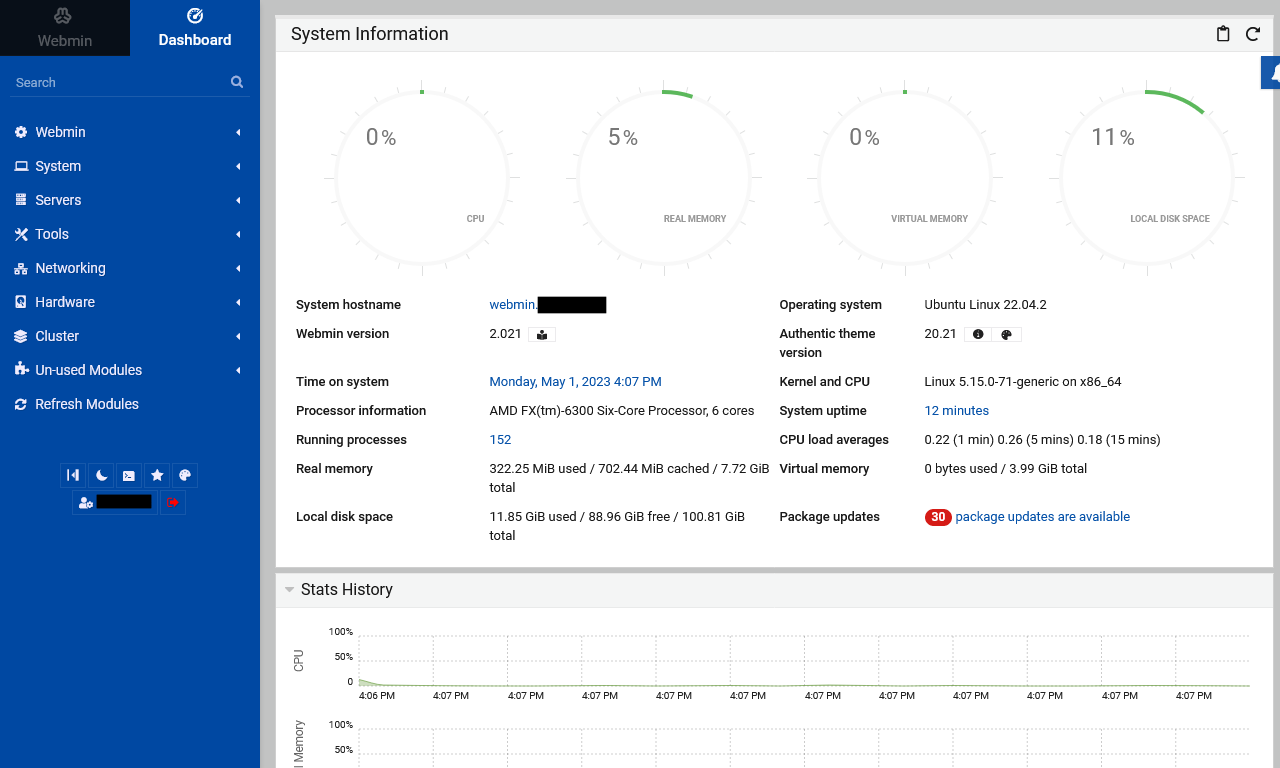
| Features | Status |
| Primarily Designed For | Small Hosting Company |
| Free/Paid | Both |
| License | Virtualmin Professional / GPLv3 |
| Supported OS | RHEL / AlmaLinux / Rocky Linux / Oracle Linux / CentOS / Debian / Ubuntu |
| Supported Cloud Providers | × |
| Install Method(s) | Script |
| Web Console |
|
| Virtualization |
Via Cloudmin (Free/Pro) |
| Web Server | Apache / Nginx |
| TLS 1.3 | √ |
| HTTP/2 | √ |
| HTTP/3 & QUIC | × |
| AutoSSL | LetsEncrypt |
| DNS Server | BIND |
| DNS Zone Manager | √ |
| DNSSEC | √ |
| Multi-PHP | √ |
| Database Server | MariaDB / PostgreSQL / SQLite |
| Database Admin | phpMyAdmin / phpPgAdmin |
| Email Server | Postfix / Dovecot / QMail / Sendmail |
| Webmail | Usermin / Roundcube / SquirrelMail |
| FTP Server | ProFTPD / WU-FTP / VsFTPd |
| Caching | ? |
| Email Validation | SPF / DKIM / DMARC / DANE (TLSA) |
| Spam Protection | SpamAssassin / Greylisting |
| Firewall | CSF / Linux Firewall / Shorewall / Firewalld |
| WAF | Fail2Ban / Comodo WAF (CWAF) |
| Virus / Malware Scanning | ClamAV |
| Reseller Accounts | √ |
| User Accounts | √ |
| Separate Panels (Admin / Users) | √ |
| Hosting Packages | √ |
| Quotas | Disk / Bandwidth |
| Traffic Statistics | Webalizer |
| Cron Jobs | √ |
| Local Backup | √ |
| External Backup | FTP / SSH / AWS S3 / Dropbox (Pro only) / Azure Blob Storage (Pro only) / Google Cloud Platform (GCP) (Pro only) / Backblaze (Pro only) / Rackspace Cloud Files / Bacula |
| File Manager | √ |
| Extendable by Plugins | √ |
| API | √ |
| WHMCS Support | √ |
| Panel Account Restrictions |
Unlimited number of accounts for Free tier. The Pro version has more features such as 100+ install scripts, Reseller Accounts, User limits (Bandwidth, CPU, Memory...), More Stats and other features aimed at people who run businesses with Virtualmin. Pro customers can also file support tickets. The Pro tiers are limited by the number of domains you want. Domains and Sub-Domains count towards this total. |
| Server and Package Updates | CLI / GUI |
| Automatic Updates | √ |
| Can be Uninstalled | √ |
Virtualmin is a Webmin module for managing multiple virtual hosts through a single interface, like Plesk or cPanel. It supports the creation and management of Apache or Nginx virtual hosts, BIND DNS domains, MariaDB databases, and mailboxes and aliases with Postfix or Sendmail. It makes use of the existing Webmin modules for these servers, and so should work with any existing system configuration, rather than needing it’s own mail server, web server and so on.
Virtualmin can also create a Webmin user for each virtual server, who is restricted to managing just his domain and its files. Webmin’s existing module access control features are used, and are set up automatically to limit the user appropriately. These server administrators can also manage the mailboxes and mail aliases in their domain, via a web interface that is part of the module.
Virtualmin is a powerful and flexible web hosting control panel for Linux and BSD systems. Available in an Open Source community-supported version, and a more feature-filled version with premium support, Virtualmin is the cost-effective and comprehensive solution to virtual web hosting management. And, Virtualmin is the most popular and most comprehensive Open Source control panel with over 150,000 installations worldwide.
- Pros
- Very easy to install
- Updated often
- Very Stable
- Feature rich
- Covers all aspects of Linux server
- Can send push messages through your browser
- Can configure Apache modules in the GUI
- Can backup configuration
- Can backup files
- Can be expanded with plugins
- Heavily tested
- The most Feature rich of the Free and some of the Paid panels
- Email Greylisting
- Support Multi-PHP
- Supports Apache and Nginx out of the box.
- phpMyAdmin can be installed by a script (per account)
- Lots of documentation and is well written
- Very active community
- This has much more control over the server than any of the other panels.
- The interface and all of its CLI commands are Perl.
- Making it hard to kill your server.
- It is not relient on any of the services it controls.
- Each domain gets it's own separate resources.
- Extremely active and passionate development team.
- Cons
- You need some Linux experience to use this.
- You cannot select the version of MariaDB installed. The latest is installed. This is a Linux distro issue and can be changed manually.
- phpMyAdmin can only be installed on a per account basis using the install script. This leaves it open to the internet. It should run on a different port or be protected using the session ID.
- The Pro tiers are limited by the number of domains you want. Domains and Sub-Domains (Sub-Servers) count towards this total.
- Because of the theme and the layout, this is not for the casual user, many options all over the place and you should not let your end-client login.
- This is being improved constantly.
Notes
A lot of Webmin tutorials and information will apply to Virtualmin because Virtualmin is a plugin/module of Webmin so you should also check the Webmin section for information.
- Sites
- Homepage
- Demo
- Changelog
- Code Repository
- Forum
- Docs
- Plugins
- General
- Virtualmin is probably best when run with Apache.
- Virtualmin Professional – Virtualmin - The difference between Pro and GPL versions.
- Differences between free and paid virtualmin? - Virtualmin - Virtualmin Community - I am curious. I do have a paid license but am curious what features differentiate it from free other than the unlimited premium support?
- Virtualmin UI overview 2021 - YouTube - This official video give you a great overview of he software.
- How to Install and Use Virtualmin (and Webmin) on Debian (with multiple domains) - YouTube - Learn how to install Virtualmin and Webmin on Debian. Additionally, we will configure multiple domain names and install a WordPress server.
- Add new Website (Virtual Server) to Virtualmin – Adnan Halilovic Blog - Adding a new website to Virtualmin is an easy process, as Virtualmin allows us to create more than one virtual server (website/hosting) on our VPS machine.
- How to Setup a New Account Plan in Virtualmin | Hostwinds - What is an Account Plan in Virtualmin? Like packages in cPanel, Account Plans allow you to customize specific settings a user has access to based on their assigned plan.
- Multiple PHP Versions – Virtualmin - Managing and installing multiple PHP versions.
- To change between GPL and Pro use the "virtualmin change-license" command. Will this not just change the license to allow for more Domains?
- Virtualmin doesn't support Mysql any more? - Virtualmin - Virtualmin Community - why MySQL is not longer supported and has been repaled with MariaDB.
- The Virtualmin Pro install scripts also upgrade like softaculous and can perform upgrades.
- A problem was found with your Postfix virtual maps : No map sources were found in the Postfix configuration - Help! (Home for newbies) - Virtualmin Community
- Run the copmmand `virtualmin virtualmin-config-system -i Postfix`
- CLI
- Command Line API – Virtualmin
- Using the command-line scripts included with Virtualmin to manage users, aliases, servers, databases and resellers.
- Virtualmin includes a script named virtualmin that can be run from the Unix shell to perform actions that are usually done from the web interface.
- config-system – Virtualmin - The config-system command configures a system and its services for use by Virtualmin. It is invoked during Virtualmin installation, but may be invoked later to either configure a new service (assuming the relevant packages have been installed) that was not enabled during installation, or to correct installer issues after they've been fixed by a new version of the virtualmin-config package.
- Command Line API – Virtualmin
- bash: virtualmin: command not found
- Virtualmin API command not found - #6 by stefan1959 - Virtualmin - Virtualmin Community
- To solve this, simply remove /usr/sbin/virtualmin file by running rm -f /usr/sbin/virtualmin command, then go to Virtualmin UI and re-check configuration (by clicking on System Settings --> Re-Check Configuration link) to regenerate Virtualmin API helper command.
- For me it might of been caused by a failed Virtualmin install.
- Virtualmin API command not found - #6 by stefan1959 - Virtualmin - Virtualmin Community
- How to re-run the `Post-Installation Wizard`
- Virtualmin --> System Settings --> Re-Run Install Wizard
- How To Edit Apache Conf Files In Virtualmin | Hostwinds
- Webmin --> Servers --> Apache Webserver --> Global configurations --> Configure Apache Modules
- The files are all in /etc/apache2/
- Settings
- Greylisting
- Greylisting using Postgrey can now be setup using Virtualmin, via the new Email Greylisting page. In addition, whitelists for SMTP servers and email recipents can be managed.
- This feature was ported from the Pro version.
- VIrtualmin --> Email Messages --> Email Greylisting
- Greylisting
- Plugins
- Spam and Anti-Virus Scanning – Virtualmin
- The WHMCS Install Script does install ionCube automatically as it is required.
- phpMyAdmin
- You can install phpMyadmin on each Virtual Host with a script.
- Installing phpMyAdmin on Webmin-Virtualmin | Full Circuit - How to install a central copy of phpMyAdmin on a VPS running Webmin-Virtualmin for hosting (root) user. Plus enabling https for extra security.
- #9 Install PHPMyadmin in Virtualmin and import a database - LEMP stack - Virtualmin Tutorial Debian - YouTube
- Get it like cPanel
- CWP also does it similiar to cPanel.
- mysql - Install phpMyAdmin on hostname in Webmin/Virtualmin for all accounts (on hostname) automatically like cPanel does? - Unix & Linux Stack Exchange - no answers
- Server-wide phpMyAdmin, RoundCube or SquirrelMail - Virtualmin - Virtualmin Community
- How to set up phpMyAdmin with Virtualmin/vhosts? | Virtualmin
- How to set up phpMyAdmin with Virtualmin/vhosts? - Help! (Home for newbies) - Virtualmin Community
- System-wide phpmyadmin works fine, but it’s definitely easiest to put in on one domain rather than all of them
- You could setup another virtual host that is on a different port and put phpMyAdmin on that. This would stop it being available on the internet outside of your nat'ted network.
- 16.04 - How to secure phpmyadmin - Ask Ubuntu
- File Locations / Repo Locations / Key Locations
- Virtualmin - Shared!
- https://software.virtualmin.com/lib/ - Not 100% what this is for but it hold stuff that needs to be public.
- Virtualmin Professional
- https://software.virtualmin.com/vm/7/wbm - wbm format modules
- https://software.virtualmin.com/vm/7/pro/rpm - RPM format modules
- https://software.virtualmin.com/vm/7/pro/apt - Debian and Ubuntu module packages
- You will need to make a note of your serial number and license key, found on your Account page at Virtualmin.com, so that you can login using the serial number as the username and the license key as the password.
- Virtualmin GPL
- https://software.virtualmin.com/vm/7/gpl/wbm - wbm format modules
- https://software.virtualmin.com/vm/7/gpl/rpm - RPM format modules
- https://software.virtualmin.com/vm/7/gpl/apt - Debian and Ubuntu module packages
- https://software.virtualmin.com/vm/7/gpl/apt/dists/virtualmin/ - Virtualmin files
- GPG Keys
- https://software.virtualmin.com/lib/RPM-GPG-KEY-virtualmin-7 - New key, not the -7 on the end denoting it's version
- https://software.virtualmin.com/lib/RPM-GPG-KEY-virtualmin - Old key
- Virtualmin - Shared!
- Install
- Install CSF (ConfigServerFirewall)
- https://download.configserver.com/csf/install.txt
==================================
Webmin Module Installation/Upgrade
==================================

To install or upgrade the csf webmin module:

Install csf as above
Install the csf webmin module in:
  Webmin --> Webmin Configuration --> Webmin Modules --> From local file --> /usr/local/csf/csfwebmin.tgz --> Install Module
- https://download.configserver.com/csf/install.txt
- If you have an administrative user with sudo ALL privileges, commonly the first user on an Ubuntu system, you can use that user to login to Virtualmin.
- Downloading and Installing Virtualmin – Virtualmin | Official method)
- Note: For Virtualmin Professional, use the command suggested on My Account → Software Licenses page.
- Virtualmin Professional – Virtualmin - Virtualmin GPL is already an extremely powerful and flexible virtual hosting control panel, so we're frequently asked about the differences between Virtualmin GPL and Virtualmin Professional. So, if you were wondering whether you should upgrade, you've come to the right place.
- Once you hve downloaded the install script you can run the script with a help switch`install.sh --help` and it will give you help information and will not install anyting or modify your system.
- Automated Virtualmin Installation – Virtualmin
- There are two methods for installing Virtualmin. The first is a fully automated script described in this document, and the other is a manual installation documented in the Manual Virtualmin Installation page.
- This is the recommended method.
- Manual Installation – Virtualmin
- Unlike the Automated Virtualmin Installation, to make use of this installation type, your OS does not need to be freshly installed, nor does it need to be a supported operating system.
- This method, however, requires significantly more knowledge on the part of the person doing the installation, and a much larger time investment to insure that all necessary configuration is performed and all Virtualmin managed services are working correctly.
- The install will appear to get stuck but it is just slowly downloading assets. In total the installation took about 20mins.
- Should put certificates in the /etc/ rather than the custoemrs home directory?
- The MySQL module installs MariaDB
- Install CSF (ConfigServerFirewall)
- Update / Upgrade
- Troubleshooting Update Repositories – Virtualmin - It is important to have Virtualmin repositories configured correctly to make sure the latest packages are installed.
- Uninstall
- Uninstalling Virtualmin – Virtualmin
- There are many levels of uninstalling Virtualmin.
- Uninstalling / Downgrading Virtualmin Professional to GPL, both are covered here.
- Uninstalling Virtualmin – Virtualmin
- Installation Instructions
- Misc
- Convert from Apache to Nginx
- How do I add Nginx to Features and Plugins - Virtualmin - Virtualmin Community - This thread dispite its name explains how to swap from Apache to Nginx.
- Install Virtualmin + Nginx
- Nginx with Virtualmin – Virtualmin - Official install instructions
wget https://software.virtualmin.com/gpl/scripts/virtualmin-install.sh
sh virtualmin-install.sh --bundle LEMP
- Install Virtualmin, Nginx v1.20, PHP v8, MySQL v8 on Ubuntu 20.04 Server | vpsfix.com - This tutorial includes newbie proof step-by-step commands.
- [TUT] How to install Virtualmin with Nginx and MariaDB latest version in Ubuntu 20.04 LTS - General Discussion - Virtualmin Community
- Hi guys, I am new to Virtualmin, here I would like to share how I installed Virtualmin together with Nginx (latest version) and MariaDB (latest version). After many failed installs, I finally made it!
- This is a manual method
- Nginx with Virtualmin – Virtualmin - Official install instructions
- HTTP/2
- HTTP/2 is enabled by default in Virtualmin
- The HTTP protocols are:
Defined here: /etc/apache2/mods-available/http2.conf
Defined as: Protocols h2 h2c http/1.1
- Webmin --> Servers --> Apache Webserver --> Global configurations --> Configure Apache Modules --> http2 = enabled
- Vitualmin --> <your domain> --> Server Configuration --> Website Options --> Enable HTTP2 protocol support = Default (Yes)
- Virtualmin, Webmin and Usermin do not run under Apache or Nginx, They use miniserv.pl and this does not have HTTP/2 support.
- HTTP/2 (Nginx)
- To edit virtual host
- Webmin --> Servers --> Nginx Webserver --> Virtual Hosts --> <your domain> - The HTTP2 option is here
- Apply settings
- This edits: /etc/nginx/sites-enabled/virtualmin.mydomain.com.conf
- Create http2 nginx virtual server - Help! (Home for newbies) - Virtualmin Community
- Virtualmin Nginx module configuration page (button with cog icon on the top left) has an option for it to be enabled by default.
- To edit virtual host
- SPF / DKIM / DMARC
- DomainKeys Identified Mail – Virtualmin - Official documentation.
- Proper way to add SPF for new Servers - Virtualmin - Virtualmin Community
- Add to the DNS zone template
- Virtualmin --> System Settings --> Server Templates --> BIND DNS Domai
- Email going to spam. Dmarc, dkim, spf settings to improve delivery rate? [#68798] | Virtualmin
- Webmin --> Servers --> Bind DNS Server --> Choose domain --> Choose type DMARC and finally i created the record adding 100 to percentage of messages to apply policy
- Virtualmin --> Email Settings --> DomainKeys Identified mail and save.
- If this is a proper way to create a DMARC record. = Not exactly. You should rather go to Server Configuration/DNS Options and use DMARC record enabled option.
- Should i do it manually for every virtual server (DMARC)? = For DMARC records, you would have to edit Server Templates and its BIND DNS Domain and enable Add DMARC DNS record.
- What else i can do in order to improve mail deliverability? = I would set DMARC policy to "reject". SPF record should still and also be enabled on mentioned DNS Options page above.
- here is no a global option in order DMARC is enabled by default after a new virtual server created or migrated right = However, in case you have hundreds of domains and doing it manually is difficult, you could use Virtualmin CLI to run mass update:
virtualmin modify-dns --domain name | --all-domains | --all-nonvirt-domains
- Virtualmin check SPF records? - #6 by uinfor - Virtualmin - Virtualmin Community
- add your own score in local.cf or elsewhere, eg score SPF_FAIL 3
- How to delete SPAM emails (Virtualmin --> Server Configuration --> Spam and Virus Delivery)
- Convert from Apache to Nginx
- Docker (via Cloudmin)
- Setting Up Docker Virtualization – Virtualmin
- Docker is not a true virtualization type like KVM, Xen or even LXC - instead it is a very lightweight container system that is typically used to run server processes in an environment that includes all their dependencies. Docker images normally contain a very basic Linux distribution and the files needed to run a single server like Apache, Nginx or MySQL.
- Webmin Docker module - An easy way to deploy containers - Webmin Docker module allows to create and manage Docker containers easily. It involves setting up a Docker Host, adding docker images, etc.
- Setting Up Docker Virtualization – Virtualmin
ISPConfig
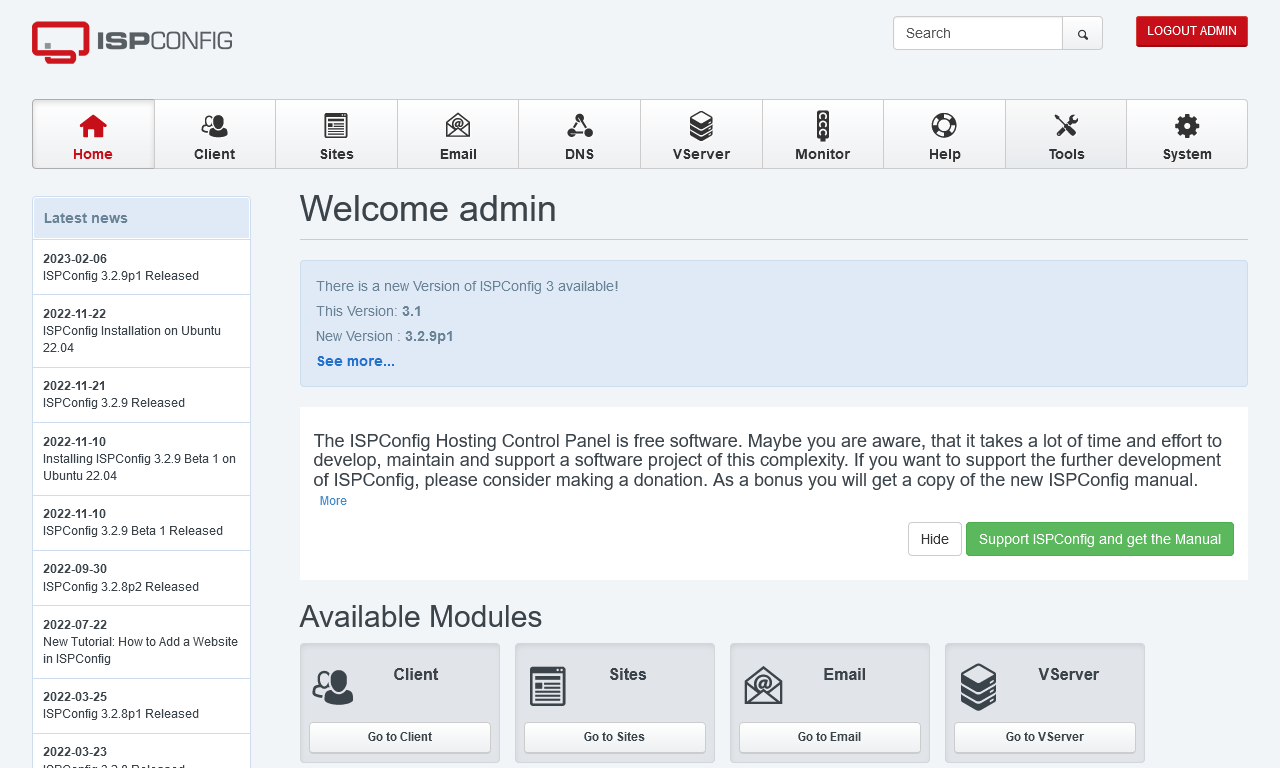
| Features | Status |
| Primarily Designed For | Small Hosting Company |
| Free/Paid | Free |
| License | BSD 3-Clause |
| Supported OS | CentOS / Debian / Ubuntu |
| Supported Cloud Providers | × |
| Install Method(s) | Script |
| Web Console |
|
| Virtualization | OpenVZ |
| Web Server | Apache / Nginx |
| TLS 1.3 | √ |
| HTTP/2 | √ |
| HTTP/3 & QUIC | × |
| AutoSSL | LetsEncrypt |
| DNS Server | BIND / PowerDNS |
| DNS Zone Manager | √ |
| DNSSEC | √ |
| Multi-PHP | √ |
| Database Server | MySQL / MariaDB |
| Database Admin | phpMyAdmin (not native) |
| Email Server | Postfix / Dovecot |
| Webmail | Roundcube / SquirrelMail / Exchange |
| FTP Server | Pure-FTPd |
| Caching | ? |
| Email Validation | SPF / DKIM / DMARC |
| Spam Protection | SpamAssassin / Rspamd / Amavis / Greylisting |
| Firewall | √ |
| WAF | × |
| Virus / Malware Scanning | ClamAV / RKHunter / ISPProtect (Paid Addon) |
| Reseller Accounts | √ |
| User Accounts | √ |
| Separate Panels (Admin / Users) | × |
| Hosting Packages | √ |
| Quotas | Disk / Bandwidth |
| Traffic Statistics | AWStats / Webalizer / GoAccess |
| Cron Jobs | √ |
| Local Backup | √ |
| External Backup | ? |
| File Manager | × |
| Extendable by Plugins | √ |
| API | √ |
| WHMCS Support | √ |
| Panel Account Restrictions | × |
| Server and Package Updates | GUI |
| Automatic Updates | √ |
| Can be Uninstalled | × |
ISPConfig is an open source hosting control panel for Linux which allows website owners to easily administer their sites, similar to cPanel and Plesk. It also allows resellers to manage multiple accounts on multiple physical or virtual servers from one control panel. This panel has a lot of potential when it removes the need for manually installing the basics such as phpMyAdmin and a filemanager.
- Pros
- Can grab email from a remote email mailbox.
- Manage multiple servers from one control panel.
- Single server, multiserver and mirrored clusters.
- Virtualization
- This panel has a lot of technology added.
- The layout is very staright forward and easy to use.
- OpenVZ – allows virtual machines for client sites.
- Cons
- Some things have to be installed manually.
- The plugin system needs to be inproved (not verified this)
- The panel theme is a bit dated.
Notes
- Sites
- General
- howtoforge.com seems to be owned by ISPConfig.
- What Is ISPConfig Hosting & What Should You Look For - Learn about the features in ISPConfig so you can compare it to cPanel or Plesk.
- Settings
- The SPF/DKIM/DMARC settings tabs in the DNS zone are really easy to use.
- phpMyAdmin
- Install phpMyAdmin (Instructions below not verified)
- Login as admin in ISPConfig, go to Management -> Update Manager -> Update
- install the phpMyAdmin package from www.ispconfig.org ( http://www.ispconfig.org/downloads/phpmyadmin-2.6.4-pl3.pkg ) using Management -> Update Manager -> Update.
- Opening phpMyAdmin directly from ISPConfig - Set the URL to your phpmyadmin installation under (System --> Interface config)
- Protect phpMyAdmin On An ISPConfig 3 Server (Debian) - With this small howto I explain how to protect your phpmyadmin installation on your Debian server with ISPConfig3 against hack attempts as much as possible.
- Install phpMyAdmin (Instructions below not verified)
- HTTP/2
- Enable HTTP/2 on ISPConfig3 • lorenzo milesi - Tutorial covers Nginx and Apache.
- Plugins
- File Locations / Repo Locations / Key Locations
- Install
- Perfect Server Automated ISPConfig 3 Installation on Debian 10, Debian 11, Ubuntu 20.04 and Ubuntu 22.04 - This tutorial shows you how to easily set up a web, email and DNS server with ISPConfig 3 using the ISPConfig auto-installation script.
- How To Install ISPConfig on Ubuntu 20.04 LTS | Hetzner Community - Complete tutorial for how to install ISPConfig on Ubuntu 20.04 LTS
- Update / Upgrade
- Uninstall
- Installation Instructions
- Misc
FASTPANEL

| Features | Status |
| Primarily Designed For | Small Hosting Company |
| Free/Paid | Both |
| License | Proprietary |
| Supported OS | AlmaLinux / Rocky Linux / CentOS / Debian / Ubuntu |
| Supported Cloud Providers | × |
| Install Method(s) | Script |
| Web Console |
|
| Virtualization | × |
| Web Server | Apache / Nginx |
| TLS 1.3 | × |
| HTTP/2 | √ |
| HTTP/3 & QUIC | × |
| AutoSSL | LetsEncrypt |
| DNS Server | BIND |
| DNS Zone Manager | √ |
| DNSSEC | × |
| Multi-PHP | √ |
| Database Server | MySQL / PostgreSQL |
| Database Admin | phpMyAdmin / phpPgAdmin |
| Email Server | Exim / Dovecot |
| Webmail | Roundcube |
| FTP Server | ProFTPD |
| Caching | Redis / Memcached |
| Email Validation | SPF / DKIM / DMARC |
| Spam Protection | SpamAssassin |
| Firewall | iptables |
| WAF | Fail2Ban |
| Virus / Malware Scanning | AI-Bolit |
| Reseller Accounts | √ |
| User Accounts | √ |
| Separate Panels (Admin / Users) | × |
| Hosting Packages | × |
| Quotas | Disk |
| Traffic Statistics | AWStats |
| Cron Jobs | √ |
| Local Backup | √ |
| External Backup | FTP / SCP / Dropbox / Google Drive |
| File Manager | ? |
| Extendable by Plugins | √ |
| API | ? |
| WHMCS Support | ? |
| Panel Account Restrictions | × |
| Server and Package Updates | × |
| Automatic Updates | √ |
| Can be Uninstalled | × |
FASTPANEL is a simple and functional server management panel. Create sites in a few clicks, manage mail, databases, backups; plan tasks, and analyze traffic. Set and configure access rights as you like: each site can be assigned to a single user. To improve the security of your account, enable two-factor authentication. Dynamic notifications allow you to be aware of the server and sites' status. Moreover, FASTPANEL includes a Web SSH client, site preview, and a favicon editor.
The free version is for most people and is not crippled in anyway. FASTPANEL only becomes a 'paid for' platform when you start selling it or supplying it to your clients for a fee. The relevant license is available on their website and you should check this license yourself to make sure you can follow the terms because I am not a lawyer. FASTPANEL seems to be made by the company FASTVPS. The code is 'Closed Source' but is updated regularly.
I found the panel to be designed in such a way that it hides all of the techincal stuff and just leaves options that you would need to resell and manage hosting. It is aimed at hosters and not techies who like to play, and this is a good thing because I dont think an admin could easily break this panel. It also features automatic updates which is one less thing to think about. The Apache/Nginx Reverse proxy setup (by default) gives excellent speed and requires no technical input to get working other than enabling a website. You need to make sure you setup the BIND DNS server before creating your website accoutns to make sute they get their DNS zone up automatically.
- Pros
- The GUI is beautiful and only has what the admins and users needs, everything else is hidden and taken care of.
- Very easy to setup and use.
- Documentation is brilliant.
- If you use Apache it has an option to use Nginx for static files (Reverse Proxy)
- Can create wildcard SSL certificates with lets encrypt.
- Can do self-signed SSL.
- Cons
- There is no community forum.
- Closed Source
- After installation you will need to install BIND (Local DNS Server) from the Applications page (but this is not hard) to allow you to configure DNS zones for your websites.
- The DNS can be a bit fiddly to setup.
- The default SPF record has `~all`
- Can only enable HTTP/2 if you have a cert installed
- phpMyAdmin has a not default theme applied.
Notes
- Sites
- General
- How to reset password in FastPanel? - Top Host Coupon
- In some cases, you forgot the password of FastPanel but don't know how to reset it? In this article, I will guide you to reseting the FASTPANEL admin password.
- The default username of FASTPANEL is `fastuser`
- How to reset password in FastPanel? - Top Host Coupon
- Settings
- Plugins
- File Locations / Repo Locations / Key Locations
- Install
- Update / Upgrade
- Uninstall
- Installation Instructions
- Misc
Sentora

| Features | Status |
| Primarily Designed For | Small Hosting Company |
| Free/Paid | Free |
| License | GPLv3 |
| Supported OS | CentOS / Ubuntu |
| Supported Cloud Providers | × |
| Install Method(s) | Script |
| Web Console |
|
| Virtualization | × |
| Web Server | Apache |
| TLS 1.3 | × |
| HTTP/2 | × |
| HTTP/3 & QUIC | × |
| AutoSSL | × |
| DNS Server | BIND |
| DNS Zone Manager | √ |
| DNSSEC | × |
| Multi-PHP | × |
| Database Server | MySQL / MariaDB |
| Database Admin | phpMyAdmin |
| Email Server | Postfix / Dovecot |
| Webmail | Roundcube |
| FTP Server | ProFTPD |
| Caching | × |
| Email Validation | SPF |
| Spam Protection | × |
| Firewall | × |
| WAF | × |
| Virus / Malware Scanning | × |
| Reseller Accounts | √ |
| User Accounts | √ |
| Separate Panels (Admin / Users) | × |
| Hosting Packages | √ |
| Quotas | Disk / Bandwidth |
| Traffic Statistics | Webalizer |
| Cron Jobs | √ |
| Local Backup | √ |
| External Backup | × |
| File Manager | × |
| Extendable by Plugins | √ |
| API | √ |
| WHMCS Support | × |
| Panel Account Restrictions | × |
| Server and Package Updates | × |
| Automatic Updates | × |
| Can be Uninstalled | × |
Sentora is based on an original fork of ZPanelCP and is an open-source web hosting control panel written in PHP and is designed to work with with Linux, UNIX and BSD based servers or computers. The Sentora software can turn a domestic or commercial server into a fully fledged, easy to use and manage web hosting server. In reality the panel needs a lot of development at the time or writing this article.
- Pros
- Very nice UI
- Has a lot of potential.
- Has an interactive installer.
- Cons
- The panel is on port 80.
- You MUST have setup DNS for the sub-domain that will be assigned to Sentora panel PRIOR to install. It is helpful but not mandatory.
- The installer ask for daft information like your timezone, address and email. If these are needed then they should be asked for in the GUI.
- Post Install: All passwords are saved in file /root/passwords.txt = Dangerous. Some users might not remove this file.
- A lot of required features are missing.
- Not everything is managed in the GUI.
- Cannot configure Apache from the GUI.
Notes
- Sites
- Homepage
- Demo
- Changelog
- Code Repository
- Forum
- Docs
- Plugins
- General
- Sentora - zadmin password lost
- How to rese the admin account's password
- The admin account is always called `zadmin`
-
setzadmin --set new-password
- Sentora - zadmin password lost
- Settings
- How to change Sentora Login Port | Change Sentora Login Port - YouTube - In this tutorial we will show you how to change sentora port and keep control panel more safe.
- Plugins
- File Locations / Repo Locations / Key Locations
- Install
- Update / Upgrade
- Uninstall
- Installation Instructions
- Misc
Hepsia

| Features | Status |
| Primarily Designed For | Small Hosting Company |
| Free/Paid | n/a |
| License | Proprietary / GPLv3 |
| Supported OS | Debian |
| Supported Cloud Providers | × |
| Install Method(s) | ? |
| Web Console |
|
| Virtualization | × |
| Web Server | Apache / Nginx / OpenLiteSpeed / LiteSpeed Enterprise |
| TLS 1.3 | √ |
| HTTP/2 | √ |
| HTTP/3 & QUIC | × |
| AutoSSL | LetsEncrypt |
| DNS Server | ? |
| DNS Zone Manager | √ |
| DNSSEC | √ |
| Multi-PHP | √ |
| Database Server | MySQL / PostgreSQL |
| Database Admin | phpMyAdmin / phpPgAdmin |
| Email Server | √ (has email but i cannot identify the server) |
| Webmail | Roundcube |
| FTP Server | Pure-FTPd |
| Caching | Memcached / Redis / Varnish |
| Email Validation | SPF |
| Spam Protection | SpamAssassin |
| Firewall | × |
| WAF | ModSecurity |
| Virus / Malware Scanning | × |
| Reseller Accounts | √ |
| User Accounts | √ |
| Separate Panels (Admin / Users) | × |
| Hosting Packages | √ |
| Quotas | Disk / Bandwidth |
| Traffic Statistics | AWStats / Webalizer |
| Cron Jobs | √ |
| Local Backup | √ |
| External Backup | Dropbox / Google Drive |
| File Manager | √ |
| Extendable by Plugins | × |
| API | ? |
| WHMCS Support | ? |
| Panel Account Restrictions | × |
| Server and Package Updates | ? |
| Automatic Updates | ? |
| Can be Uninstalled | × |
Hepsia is a proprietary control panel only available through LiquidNet Ltd. resellers.
LiquidNet Ltd. is a UK-based company, headquartered in London, which was established in February 2003. Since then, our company has been offering a large number of professional services in the fields of web hosting, reseller hosting and domain registration.
- Pros
- Very clean UI.
- Cons
- Not open source.
- Only availabe as part of reseller package from authorised various companies.
- Not all modern security features are present, eg DKIM, DMARC, AV file scanning.
Notes
- Sites
- General
- Hepsia Control Panel - Become a hosting reseller with no deposits & no reseller charges. Sell cloud web hosting at low prices with the help of our private-label reseller hosting program.
- Settings
- Plugins
- File Locations / Repo Locations / Key Locations
- Install
- Update / Upgrade
- Uninstall
- Installation Instructions
- Misc
SolidCP
![]()
| Features | Status |
| Primarily Designed For | Small Hosting Company |
| Free/Paid | Free |
| License | CC BY-SA 4.0 |
| Supported OS |
Windows Server |
| Supported Cloud Providers | × |
| Install Method(s) | Installer |
| Web Console |
Admin (HTTP) - http://<server-ip>:9001 |
| Virtualization | Hyper-V / Proxmox Virtualization |
| Web Server | IIS |
| TLS 1.3 | √ |
| HTTP/2 | √ |
| HTTP/3 & QUIC | √ |
| AutoSSL | ? |
| DNS Server | BIND / PowerDNS / Microsoft / SimpleDNS Plus |
| DNS Zone Manager | ? |
| DNSSEC | √ |
| Multi-PHP | √ |
| Database Server | MySQL / MariaDB / MSSQL / ColdFusion / ODBC (Access/Excel) |
| Database Admin | × |
| Email Server | Exchange / Ability / ArGoSoft / hMailServer / IceWarp / MailEnable / MDaemon / Merak / SmarterMail |
| Webmail | OWA |
| FTP Server | Microsoft / Filezilla / Gene6 / Serv-U |
| Caching | ? |
| Email Validation | SPF / DKIM / DMARC |
| Spam Protection | Mailcleaner / Spam Experts |
| Firewall | Microsoft |
| WAF | × |
| Virus / Malware Scanning | Mailcleaner |
| Reseller Accounts | √ |
| User Accounts | √ |
| Separate Panels (Admin / Users) | × |
| Hosting Packages | √ |
| Quotas | Disk / Bandwidth |
| Traffic Statistics | AWStats / SmarterStats |
| Cron Jobs | ? |
| Local Backup | × |
| External Backup | × |
| File Manager | ? |
| Extendable by Plugins | × |
| API | √ |
| WHMCS Support | √ |
| Panel Account Restrictions | × |
| Server and Package Updates | ? |
| Automatic Updates | √ |
| Can be Uninstalled | √ |
SolidCP is a complete management portal for Cloud Computing Companies and IT Providers to automate the provisioning of a full suite of Multi-Tenant services on servers. The powerful, flexible and fully open source SolidCP platform gives users simple point-and-click control over Server applications including IIS 10, Microsoft SQL Server 2022, MySQL, MariaDB, Active Directory, Microsoft Exchange 2019, Microsoft Sharepoint 2019, Microsoft RemoteApp/ RDS, Hyper-v and Proxmox Deployments.
We now make your system admin job a lot easier to freshly deploy a new server, and to keep them all up to date without much hassle! Setup all the software you need automatically from a Single Web server up to an Active directory based setup with Microsoft Exchange while having the system optimized for security.
SolidCP is a fork of WebsitePanel.
- Pros
- Sits on top of Microsoft Server and IIS.
- Cons
- This panel is not developed enough to be used in a commercial environment yet but is fine for running your own server at home if you want to use IIS and Microsoft Server.
- No plugins support.
Notes
- Sites
- Homepage
- Demo
- Changelog
- Code Repository
- Forum
- Docs
- Plugins
- General
- SolidCP - YouTube - Official Channel
- Screenshots - SolidCP - Useful to have a look around.
- Settings
- Plugins
- File Locations / Repo Locations / Key Locations
- Install
- Update / Upgrade
- Uninstall
- Installation Instructions
- Misc
ZesleCP

| Features | Status |
| Primarily Designed For | Small Hosting Company |
| Free/Paid | Both |
| License | Proprietary |
| Supported OS | CentOS / AlmaLinux / Rocky Linux / Ubuntu |
| Supported Cloud Providers | DigitalOcean |
| Install Method(s) | Script |
| Web Console |
|
| Virtualization | × |
| Web Server | Apache / Nginx / OpenLiteSpeed |
| TLS 1.3 | √ |
| HTTP/2 | √ |
| HTTP/3 & QUIC | √ |
| AutoSSL | LetsEncrypt |
| DNS Server | BIND |
| DNS Zone Manager | √ |
| DNSSEC | × |
| Multi-PHP | √ |
| Database Server | MySQL |
| Database Admin | phpMyAdmin |
| Email Server | Exim / Dovecot |
| Webmail | Roundcube |
| FTP Server | Pure-FTPd |
| Caching | Redis |
| Email Validation | SPF / DKIM / DMARC |
| Spam Protection | × |
| Firewall | × |
| WAF | × |
| Virus / Malware Scanning | × |
| Reseller Accounts | √ |
| User Accounts | √ |
| Separate Panels (Admin / Users) | × |
| Hosting Packages | √ |
| Quotas | Disk / Bandwidth |
| Traffic Statistics | × |
| Cron Jobs | √ |
| Local Backup | √ |
| External Backup | × |
| File Manager | √ |
| Extendable by Plugins | √ |
| API | √ |
| WHMCS Support | √ |
| Panel Account Restrictions | × |
| Server and Package Updates | CLI |
| Automatic Updates | × |
| Can be Uninstalled | × |
ZesleCP is light-weight Web Hosting Control Platform. DigitalOcean's ZesleCP image provides a One-Click installer to automatically install Apache/Nginx, PHP, MySQL database server, Email servers with auto-configured SPF/MX/DKIM records, FTP server, One-click WordPress App, and many more useful features. The panel is beautifully designed panel with a lot of emphasis on easy of use, however is not very mature so a lot of things are missing or not implemented. I think this panel will become a lot better in the near future as it develops.
The Roadmap for this product is can easily be access from the website or from within the panel so the devlopers do want you to know what is going on with the software.
There are many different tiers and packages you can choose from to usit your needs from lifetime (check the LTS for the `lifetime of the product`) to free. I feel there are too many tiers of license but cost the top version for a business is quite acceptable.
- Pros
- The licensing tiers are well priced for businesses.
- There is a free tier.
- There is a lifetime license option.
- Beautifully designed and easy to navigate.
- No external backup.
- Public Roadmap
- The documentation is easy to follow.
- Cons
- The lower tiers do not allow you to have packages whichs means you cannot set a quota for these accounts which can be a bad thign just for security of your own personal sites.
- To use the free version you still need to create a license but this is easy to create.
- A lot of features you expect are missing or not implmented yet.
Notes
- Sites
- Homepage
- Demo
- Changelog
- Code Repository
- Forum
- Docs
- Plugins
- General
- You can reset ZesleCP password by following command from the CLi:
zesle passwd root '<new password here>'
- You can reset ZesleCP password by following command from the CLi:
- Settings
- Plugins
- File Locations / Repo Locations / Key Locations
- Install
- Update / Upgrade
- Uninstall
- Installation Instructions
- Misc
InterWorx
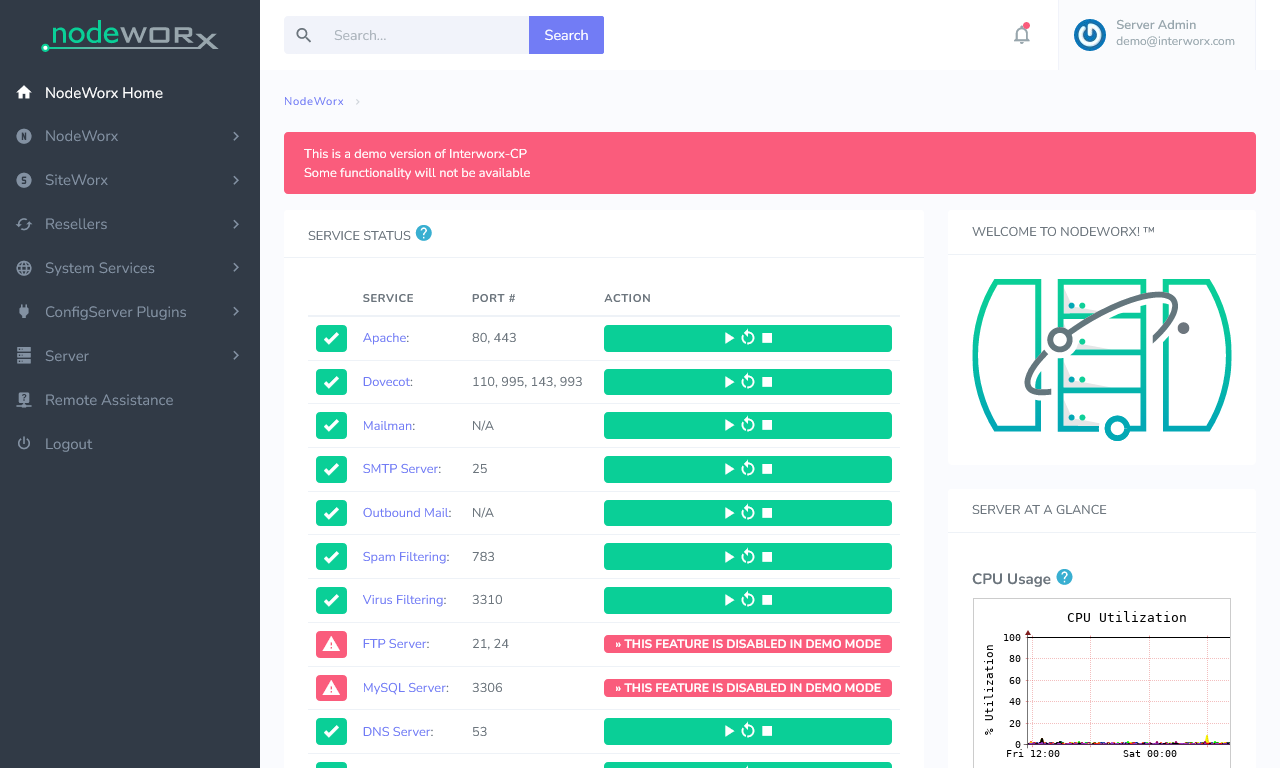
| Features | Status |
| Primarily Designed For | Small Hosting Company |
| Free/Paid | Free |
| License | Proprietary |
| Supported OS | RHEL / CentOS / AlmaLinux / Rocky Linux / CloudLinux |
| Supported Cloud Providers | × |
| Install Method(s) | Script |
| Web Console |
|
| Virtualization | × |
| Web Server | Apache / LiteSpeed Enterprise |
| TLS 1.3 | √ |
| HTTP/2 | √ |
| HTTP/3 & QUIC | √ |
| AutoSSL | LetsEncrypt |
| DNS Server | djbdns |
| DNS Zone Manager | √ |
| DNSSEC | × |
| Multi-PHP | √ |
| Database Server | MySQL / MariaDB |
| Database Admin | phpMyAdmin |
| Email Server | Dovecot / Mailman / QMail |
| Webmail | Roundcube / Horde |
| FTP Server | ProFTPD |
| Caching | x |
| Email Validation | SPF / DKIM / DMARC |
| Spam Protection | SpamAssassin |
| Firewall | CSF / InterWorx-native APF firewall |
| WAF | Fail2Ban / ModSecurity |
| Virus / Malware Scanning | ClamAV / ImunifyAV / ImunifyAV+ / Imunify360 |
| Reseller Accounts | √ |
| User Accounts | √ |
| Separate Panels (Admin / Users) | × |
| Hosting Packages | √ |
| Quotas | Disk / Bandwidth |
| Traffic Statistics | AWStats / Webalizer / Analog |
| Cron Jobs | √ |
| Local Backup | √ |
| External Backup | FTP / SFTP / SCP / JetBackup / Acronis |
| File Manager | √ |
| Extendable by Plugins | √ |
| API | √ |
| WHMCS Support | √ |
| Panel Account Restrictions | √ The VPS tier restricts you to 4 vCPUs |
| Server and Package Updates | CLI / GUI |
| Automatic Updates | √ |
| Can be Uninstalled | × |
InterWorx is web hosting control panel which is made of 2 panels, NodeWorx for the admin (similar to WHM) and SiteWorx for the end-user (similar to cPanel).
It is not as feature rich as cPanel and has a long way to go, but for the price it is not expensive. The UI is easy to use but is sparse and not always friendly and because the demo is crippled I struggled to get a feel for it as at every turn I just kept on getting told this feature has been turned ofd due to demo mode. The target market is larger hosting companies but even if the platform is stable, it is not ready (for me anyway) to be used for one of these companies but could be ok for a smaller hoster who likes hands on with Linux.
- Pros
- Not expensive.
- The different tiers are based on your server specs and not the number of accounts.
- The install script has a lot of caveats.
- Cons
- Activating an InterWorx license, either via the web browser or the command line, can only be attempted once on a server.
- If the license fails to activate you have to re-install the whole server. This on it's own stops me from using this panel.
- Port 2443 has to be open to the public internet to be able to use this panel becasue of the license server.
- The demo is crippled and most stuff you cannot see.
- The whole setup process is a pain.
- Website does not give much information on the technologies used.
- Missing lots of modern technologies.
- You will probably have to use the CLi for a lot fo things.
- The documentation and it's search could be better.
- Activating an InterWorx license, either via the web browser or the command line, can only be attempted once on a server.
Notes
- Sites
- General
- Settings
- Plugins
- File Locations / Repo Locations / Key Locations
- Install
- Update / Upgrade
- Uninstall
- Installation Instructions
- Setup Information — InterWorx documentation - Installation instructions are here.
- How to: Install InterWorx Control Panel — InterWorx documentation
- How to: Activate InterWorx Control Panel License — InterWorx documentation
- How to: Fix the Invalid License Error — InterWorx documentation
- InterWorx must have at least one IP that is publicly available with port 2443 OPEN to all connections. You can install InterWorx on an internal IP, but you will have to make appropriate changes to firewalls/routers to make that port accessible to the Internet on at least one IP. The InterWorx software contacts our licensing server four times a day to verify the license. If it fails to make contact, there is an approximately 24-hour grace period, after which it suspends the software until such time as it can make contact.
- Misc
LiveConfig

| Features | Status |
| Primarily Designed For | Small Hosting Company |
| Free/Paid | Paid |
| License | Proprietary |
| Supported OS | CentOS / Debian / Ubuntu / CloudLinux / openSUSE |
| Supported Cloud Providers | × |
| Install Method(s) | Script |
| Web Console |
|
| Virtualization | × |
| Web Server | Apache / Nginx |
| TLS 1.3 | × |
| HTTP/2 | √ |
| HTTP/3 & QUIC | × |
| AutoSSL | LetsEncrypt |
| DNS Server | BIND |
| DNS Zone Manager | √ |
| DNSSEC | √ |
| Multi-PHP | √ |
| Database Server | MySQL / MariaDB |
| Database Admin | phpMyAdmin / phpPgAdmin |
| Email Server | Postfix / Dovecot |
| Webmail | Roundcube |
| FTP Server | ProFTPD |
| Caching | × |
| Email Validation | SPF / DKIM / DANE (TLSA) |
| Spam Protection | SpamAssassin / Greylisting / DNSBL |
| Firewall | × |
| WAF | × |
| Virus / Malware Scanning | ClamAV |
| Reseller Accounts | √ |
| User Accounts | √ |
| Separate Panels (Admin / Users) | × |
| Hosting Packages | √ |
| Quotas | Disk / Bandwidth |
| Traffic Statistics | AWStats / Webalizer |
| Cron Jobs | √ |
| Local Backup | √ |
| External Backup | Restic / Borg |
| File Manager | √ |
| Extendable by Plugins | × |
| API | √ |
| WHMCS Support | √ |
| Panel Account Restrictions | × |
| Server and Package Updates | CLI |
| Automatic Updates | √ |
| Can be Uninstalled | × |
LiveConfig is a lightweight control panel software which has been developed by German programmers. It simplifies server configuration and cares for reliable and safe operation.
The simple licensing jas only three different editions, very competitive pricing but the lower tier with DNSSEC or SSL certificates should be avoided at all cost.
After having a look through this panel I feel it has a lot of work required to bring it anywhere near useable for a commercial client. I am sure it is stable but the distinct lack of features and the old style of GUI rules it out for me to use it or recommend it at this time.
You definately need to be familiar with the Linux CLI to use this panel.
- Pros
- Cost
- Cons
- Old style GUI
- The lower price tier should not even be an option. DNSSEC and SSL certificates and an absolute must nowadays.
- Not updated oftern considering the lack of features.
Notes
- Sites
- General
- Settings
- Plugins
- File Locations / Repo Locations / Key Locations
- Install
- Update / Upgrade
- Uninstall
- Installation Instructions
- Misc
Websites and Email
These will typically be used for hobbyists or techies running their own servers from home but are not suitable to use in a commercial enviroment where you are selling hosting as they are missing a lot of the required features.
These can usually do a lot of the functions for your server via a GUI but are not suitable for hosting companies because they lack packages, resource restrictions, required features or do not offer a full range of services.
BlueOnyx

| Features | Status |
| Primarily Designed For | Websites + Email |
| Free/Paid | Free with Paid Addons |
| License | Sun modified BSD license |
| Supported OS | AlmaLinux / Rocky Linux / CentOS / RHEL |
| Supported Cloud Providers | × |
| Install Method(s) | ISO / Script / VirtualBox Image / VMware Image |
| Web Console |
|
| Virtualization | × |
| Web Server | Apache / Nginx |
| TLS 1.3 | √ |
| HTTP/2 | √ |
| HTTP/3 & QUIC | × |
| AutoSSL | LetsEncrypt |
| DNS Server | BIND |
| DNS Zone Manager | √ |
| DNSSEC | × |
| Multi-PHP | √ |
| Database Server | MariaDB |
| Database Admin | phpMyAdmin |
| Email Server | Postfix / Dovecot / Sendmail |
| Webmail | Openwebmail (Paid Addon) / Roundcube (Paid Addon) |
| FTP Server | ProFTPD |
| Caching | × |
| Email Validation | SPF / DKIM |
| Spam Protection | AV-SPAM (Paid Addon) / Greylisting |
| Firewall | iptables / APF (Paid Addon) / Firewalld |
| WAF | Fail2Ban (Paid Addon) |
| Virus / Malware Scanning | AV-Spam (Paid Addon) |
| Reseller Accounts | × |
| User Accounts | × |
| Separate Panels (Admin / Users) | × |
| Hosting Packages | × |
| Quotas | Disk |
| Traffic Statistics | Webalizer |
| Cron Jobs | × |
| Local Backup | Automated Backup (Paid Addon) |
| External Backup | ? |
| File Manager | × |
| Extendable by Plugins | √ |
| API | √ |
| WHMCS Support | √ |
| Panel Account Restrictions | × |
| Server and Package Updates | CLI / GUI |
| Automatic Updates | × |
| Can be Uninstalled | × |
BlueOnyx is designed to be installed using the official ISOs (which contains the OS) so the disk is laid out correctly. There are VirtualBox and VMware images that you can use instead but for the keen Linux admins you can install manually using a script.
It is the mission of BlueOnyx to provide a fully-integrated Internet hosting platform that includes web, e-mail, DNS and file transfer services from a simple, user-friendly web-based interface that is easily installed on commodity hardware or virtual private server.
I found the software to be buggy. I had trouble installing BlueOnyx so I had to install it again and even then I was still getting warnings about PHP and email services not running. When you try and connect in to the web console by using the server IP it will sometimes redirect you to the hostname you configured earlier. After the installation is complete the console will give you 2 IP addresses and only one of them will work, it looks like the script is not reading the IP correctly or some sort of issue caused by Cockpit being installed aswell. I would like the links to not be hardcoded to use the domain name, this is especially useful for testing on local networks.
Once I logged you will find the web console is very dated which isn't a blocker but the lack of features is. A lot of expected features are via paid addons (AV-Spam and Webmail) via the shop which are not all cheap. The addons in the shop are dated and might not come with updates, meaning they are buy each time you need them updating. I don't mind paying for stuff but I think their revenue model is broken. They should have 2 versions, free and paid. The paid one should have all the apps in it, I hate having to roll my own and that is why I want a panel to do it all for me.
If the developers stopped building all of the ISO and VM images and just concentrated on the script install I think they would have more time to work on the project itself. The version I used is the end product of months of work and the developers said there might be issues so hopefully these will all get sorted out.
- Pros
- Comes does with Cockpit pre-installed (not activated) allowing server a management via a web console.
- You can submit bug reports through BlueOnyx itself which is useful
- BlueOnyx now has a GUI interface to easily manage usage of Docker images and containers via the GUI interface.
- Software is Buggy.
- Most required software is by addons and these are paid for.
- It supports HTTP/2 and TLSv1.3 out of the box for all relevant services and provides a better FTP integration, true SFTP and Chrooted Jails for siteAdmin's and Users.
- Server Management via Cockpit.
- Cons
- You need to manually enable suPHP on each account. This should really be on by default.
- There is no forum or community support which is a big issue for me, even if the devlopers don't respond on there the community can flag up issues that are found.
- Software repos are from BlueOnyx which means the software packages might not be updated as quickly as other repos.
- The free version needs to be expanded by expensive addons to make useable.
Notes
- Sites
- General
- Settings
- File Locations / Repo Locations / Key Locations
- Install
- BlueOnyx 5211R manual install - BlueOnyx
- ISO is the recommended method.
- BlueOnyx 5211R manual install - BlueOnyx
- Update / Upgrade
- Uninstall
- Installation Instructions
-
Boot of the ISO/DVD
Follow the wizard
Login as Root
    When you log in as root for the first time it will runs some stuff and you will not get chance to run the cockpit command.
    You must setup at least IPv4
Exit
Login in as root again and activate Cockpit by running the command 'systemctl enable --now cockpit.socket'
Run 'ip addr' to get the correct IP because the one displayed is not correct
Log in to the Web Console
Complete the Setup-Wizard
-
- Misc
aaPanel
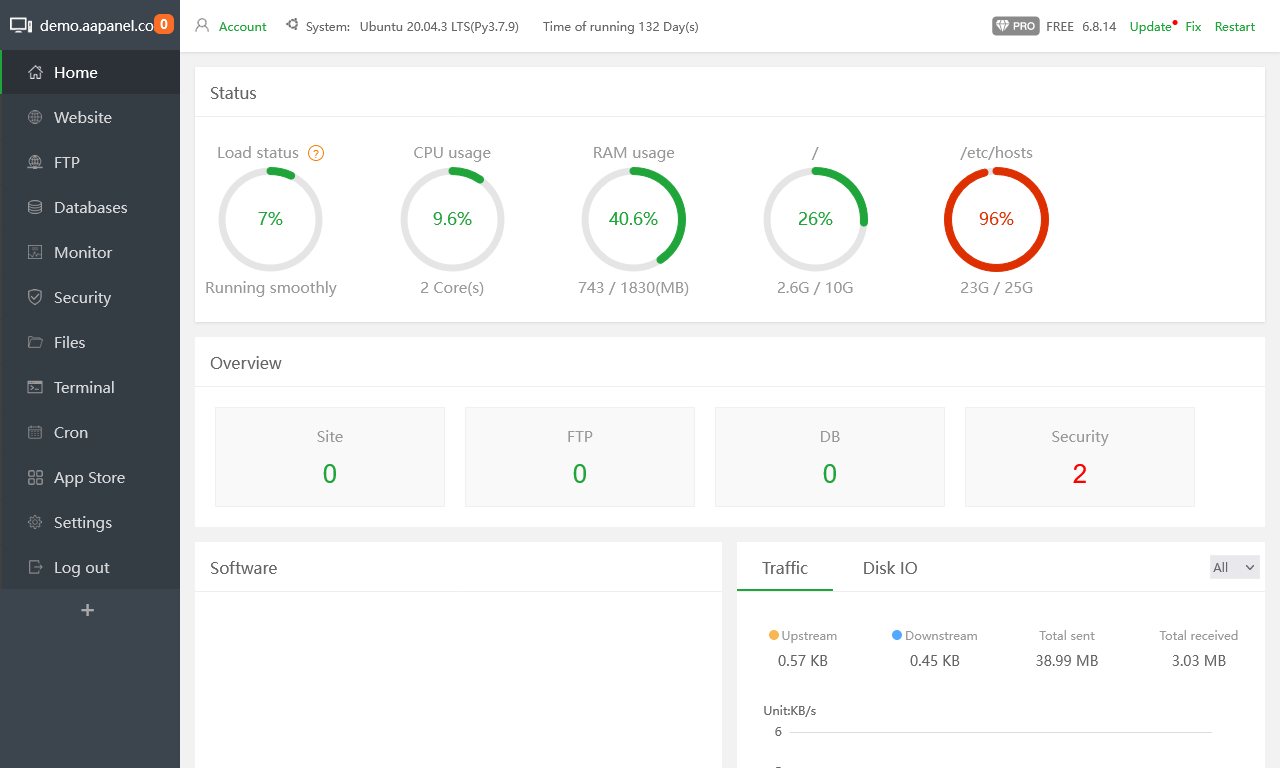
| Features | Status |
| Primarily Designed For | Websites + Email |
| Free/Paid | Both |
| License | Pagoda Open Source License Agreement |
| Supported OS | CentOS / Ubuntu / Deepin / Debian |
| Supported Cloud Providers | × |
| Install Method(s) | Script |
| Web Console |
|
| Virtualization | Docker (Paid Addon) |
| Web Server | Apache / Nginx / OpenLightSpeed / NodeJS |
| TLS 1.3 | √ |
| HTTP/2 | √ |
| HTTP/3 & QUIC | × |
| AutoSSL | LetsEncrypt |
| DNS Server | PowerDNS |
| DNS Zone Manager | √ |
| DNSSEC | × |
| Multi-PHP | √ |
| Database Server | MySQL / MariaDB / MongoDB / PostgreSQL |
| Database Admin | phpMyAdmin |
| Email Server | Postfix / Dovecot / Sendmail |
| Webmail | Roundcube |
| FTP Server | Pure-FTPd |
| Caching | Redis / Memcached |
| Email Validation | SPF / DKIM |
| Spam Protection | Anti-Spam Gateway (Amavis / SpamAssassin / ClamAV) / Rspamd / Greylisting |
| Firewall | SYS Firewall / Firewalld / Nginx free firewall |
| WAF | Fail2Ban / Apache WAF (Paid Addon) / Nginx WAF (Paid Addon) / Website Tamper-proof (Paid Addon) |
| Virus / Malware Scanning | × |
| Reseller Accounts | × |
| User Accounts | × |
| Separate Panels (Admin / Users) | × |
| Hosting Packages | × |
| Quotas | × |
| Traffic Statistics | Website Statistics (Paid Addon) |
| Cron Jobs | √ |
| Local Backup | √ |
| External Backup | AWS S3 |
| File Manager | √ |
| Extendable by Plugins | √ |
| API | √ |
| WHMCS Support | √ (Paid Addon from WHMCS) |
| Panel Account Restrictions | × |
| Server and Package Updates | GUI |
| Automatic Updates | × |
| Can be Uninstalled | √ |
aaPanel is a software that improves the efficiency of managing servers supports more than 100 functions such as one-click LEMP/LNMP/monitor/FTP/database. After more than 80 iterations, it is fully functional and safe, and has been approved and installed by millions of users around the world. aaPanel is the International version for BAOTA panel (www.bt.cn).
Free version is great for hobbyists but has no security. The paid version is not for hosting companys because it is single user admin Panel. So I am not sure who the paid version is targeted at.
aaPanel is a simple but powerful control panel for linux server with one-click install LNMP/LAMP/OpenLiteSpeed developing environment and software.
- Pros
- The paid version for the price is quite good value for money which includes all paid and free plugins in the store. Don't purchase plugins seperately.
- The panel is easy to use and has a very modern feel.
- A widely used panel.
- Docker support.
- Can be extended by plugins.
- Python support.
- Web Terminal
- Admin Access key - After setting, you can ONLY log in to the panel through the specified URL.
- Cons
- Free version has no security.
- Support is in China.
- Single user admin Panel.
- Security plugins are paid for.
- Installation depenmds on a hardcoded nameserver of 8.8.8.8
- No reseller functionality - It's not designed to work as a reseller platform.
- File manager does not show hidden dot files.
- Relies on assets in China.
Notes
- Sites
- Homepage
- Demo
- Changelog
- Code Repository
- Forum
- Docs
- Plugins
- General
- How to change your webserver to OpenLiteSpeed(beta)
- 'bt' - This is command not in the docs that brings up a menu on the termninal with some really useful commands.
- Paid for version
- If you want any of the paid plugins, go for the yearly subscription becasue it is not tha expensive.
- pro advantages - aaPanel - Hosting control panel
- 1 License per server
- Pro will enable you to access all of the items in the App Store that are paid, as long as your subscription is active.
- You can disconnect your previous server and connect your pro to another server, the stipulation is that you can only have one license per server at a time. I would recommend PRO over buying the App Store items individually.
- PRO can use all plugins.
- The difference between the free and professional version is whether you can use paid plugins, which can be viewed in the app store.
- Each VPS can only have one license. If the old VPS is no longer used, it can be replaced with a new VPS.
- Settings
- Plugins
- Linux Tools - Will allow you to change the nameservers
- Mail Server - After it is installed. Add the button to the home page, then go to the home page and click on 'Mail Server' button to configure.
- DNS Manager - This resets the nameserver back to 8.8.8.8
- MySQL/MariaDB
- phpMyAdmin
- one-click deployment - Quickly deploy common programs. These programs are not in the 'App Store'. Icludes Roundcube.
- File Locations / Repo Locations / Key Locations
- Install aaPanel - All file locations shown here.
- Install
- aaPanel Linux panel 6.8.12 installation tutorial - aaPanel - Detailed installation tutorials
- Install aaPanel
- This page has install instructions and a collection of terminal commands to configure the panel after installation.
- Run script as root.
- After you have selected your initial setup you need to wait for a while for it to finsih especially if it has to compile. You can watch the tasks complete in the 'Message Box' (Top-Left and click the orange ball)
- aaPanel wants port 888 open for some reason, don't open this unless you know what it is for.
- Issues with installing
- Nameserver is hardcoded to 8.8.8.8
- pfBlockerNG
- GEO-IP blocking China
- These errors are caused by timeouts to the aaPanel server. This can caused by my firewall GEO-Blocking blocking China or by pfBlockerNG getting triggered. aaPanel is using 8.8.8.8 as a DNS server and I block this on purpose.
###### IP is getting blocked by Firewall/pfblockerNG ######

sort: cannot read: ping.pl: No such file or directory
--2023-05-01 10:05:35--  https://node.aapanel.com/install/4/php.sh


###### When I bypassed pfblockerNG ######

sort: cannot read: ping.pl: No such file or directory
--2023-05-01 10:41:36--  https://node.aapanel.com/install/4/mysql.sh
Resolving node.aapanel.com (node.aapanel.com)... failed: Temporary failure in name resolution.
wget: unable to resolve host address ‘node.aapanel.com’
- How to Install aaPanel and Make a Basic Website (Ubuntu, Debian, CentOS) - YouTube - Learn how to install aaPanel on Linux in this tutorial. This video includes instructions for Ubuntu, Debian, and CentOS operating systems.
- Update / Upgrade
- Uninstall
- Installation Instructions
- Disable all DNSBL / IP Blocklists / GEO-IP / DNS-Hijacking before you start installation.
- You can alter the /etc/resolv.conf and use your own DNS server.
- Misc
VestaCP (might be dead)
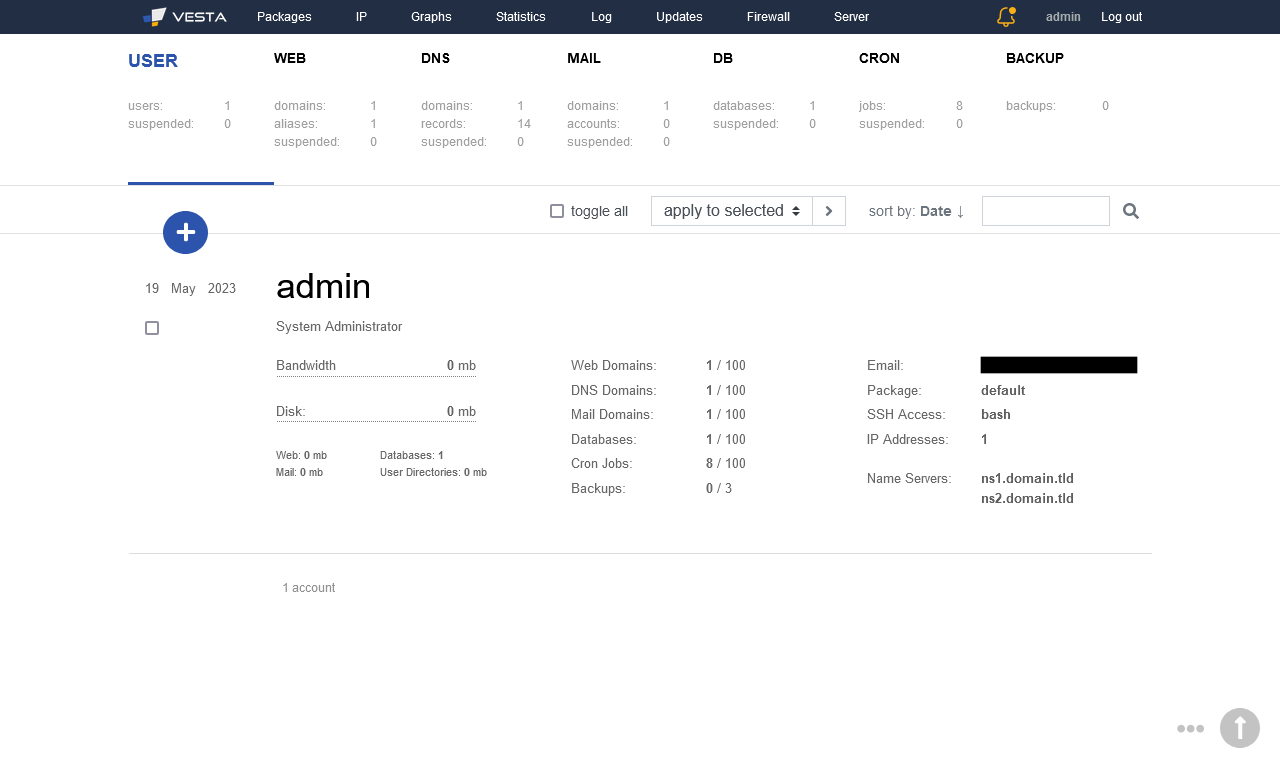
| Features | Status |
| Primarily Designed For | Websites + Email |
| Free/Paid | Free |
| License | GPLv3 |
| Supported OS | RHEL / CentOS / Ubuntu |
| Supported Cloud Providers | × |
| Install Method(s) | Script |
| Web Console |
|
| Virtualization | × |
| Web Server | Apache / Nginx |
| TLS 1.3 | × |
| HTTP/2 | × |
| HTTP/3 & QUIC | × |
| AutoSSL | LetsEncrypt |
| DNS Server | BIND |
| DNS Zone Manager | √ |
| DNSSEC | × |
| Multi-PHP | √ |
| Database Server | MariaDB / PostgreSQL |
| Database Admin | phpMyAdmin (via URL) / phpPgAdmin (via URL) |
| Email Server | Exim / Dovecot |
| Webmail | Roundcube |
| FTP Server | ProFTPD / VsFTPd |
| Caching | × |
| Email Validation | SPF / DKIM / DMARC |
| Spam Protection | SpamAssassin / ClamAV |
| Firewall | iptables |
| WAF | Fail2Ban |
| Virus / Malware Scanning | × |
| Reseller Accounts | × |
| User Accounts | √ |
| Separate Panels (Admin / Users) | × |
| Hosting Packages | √ |
| Quotas | Disk / Bandwidth |
| Traffic Statistics | AWStats / Webalizer |
| Cron Jobs | √ |
| Local Backup | √ |
| External Backup | ? |
| File Manager | √ (Paid Addon) |
| Extendable by Plugins | √ |
| API | √ |
| WHMCS Support | √ |
| Panel Account Restrictions | × |
| Server and Package Updates | CLI / GUI |
| Automatic Updates | √ |
| Can be Uninstalled | √ |
VestaCP is web hosting control panel which has given brith to many forks. It is a simple panel that allows some one to manage their multiple websites. Vesta is an open source hosting control panel with a clean and focused interface without the clutter.
- Pros
- Has an advanced install wizard on the website where you can configure your install script to fit your requirements.
- Has a massive 381 command line commands that you can use.
- Supports Ioncube
- Softaculous plugin
- can add a secret key for the admin panel (called password on the installer configurator)
- Customer install script configurator available on the website with many options.
- Nice usage graphs.
- Cons
- Linux experience needed for some features
- You need to purchase a plugin called SFTP CHROOT that "Restrict user so that they cannot use SSH and access only their home directory."
- It is lacking many features that required today.
- Cannot manage the server from the panel.
- No Web Terminal
- Mulitple PHP is only avaiable with the `Apache only` setup and must be configured in the hosting package.
- File Manager is a paid for plugin.
Notes
- Sites
- General
- Settings
- Enable the file manager (Workaround)
- How to enable file manager vestacp - Learn how to enable File Manager vestaCP with a simple tweak to the code.
- How To Enable/Install VestaCP File Manager! - ATLA Solutions - VestaCP has a file manager which you can enable at no charge. You can enable and use file manager for free in VestaCP, but this Free License automatically reset every 24 hours. This means you need repeat the process below every 24 hours, if you want to keep use the VestaCP File Manager.
- Change a user's password
- If you have root ssh access, you can change password via the command:
v-change-user-password admin newpassword
- If you have root ssh access, you can change password via the command:
- Multiple-PHP
- How to install multiple PHP versions on VestaCP - Trying to install multiple PHP versions on VestaCP? Read what our experienced Support Engineers have to say on the matter.
- Enable the file manager (Workaround)
- Plugins
- File Locations / Repo Locations / Key Locations
- Control Panel: /usr/local/vesta/
- Commands: /usr/local/vesta/bin/
- Install
- use wget and not curl for the install script.
- Update / Upgrade
- Uninstall
- Installation Instructions
- Misc
myVesta

| Features | Status |
| Primarily Designed For | Websites + Email |
| Free/Paid | Free |
| License | GPLv3 |
| Supported OS | Debian |
| Supported Cloud Providers | × |
| Install Method(s) | Script |
| Web Console |
|
| Virtualization | × |
| Web Server | Apache / Nginx |
| TLS 1.3 | × |
| HTTP/2 | × |
| HTTP/3 & QUIC | × |
| AutoSSL | LetsEncrypt |
| DNS Server | BIND |
| DNS Zone Manager | √ |
| DNSSEC | × |
| Multi-PHP | √ |
| Database Server | MySQL / MariaDB / PostgreSQL |
| Database Admin | phpMyAdmin (via URL) / phpPgAdmin (via URL) |
| Email Server | Exim / Dovecot |
| Webmail | Roundcube |
| FTP Server | ProFTPD / VsFTPd |
| Caching | OPCache |
| Email Validation | SPF / DKIM / DMARC |
| Spam Protection | SpamAssassin / ClamAV |
| Firewall | iptables |
| WAF | Fail2Ban |
| Virus / Malware Scanning | × |
| Reseller Accounts | × |
| User Accounts | √ |
| Separate Panels (Admin / Users) | × |
| Hosting Packages | √ |
| Quotas | Disk / Bandwidth |
| Traffic Statistics | AWStats / Webalizer |
| Cron Jobs | √ |
| Local Backup | √ |
| External Backup | ? |
| File Manager | √ |
| Extendable by Plugins | √ |
| API | √ |
| WHMCS Support | √ |
| Panel Account Restrictions | × |
| Server and Package Updates | CLI / GUI |
| Automatic Updates | √ |
| Can be Uninstalled | × |
myVesta is a security and stability-focused fork of VestaCP, exclusively supporting Debian in order to maintain a streamlined ecosystem. Boasting a clean, clutter-free interface and the latest innovative technologies, our project is committed to staying synchronized with official VestaCP commits. We work independently to enhance security and develop new features, driven by our passion for contributing to the open-source community rather than monetary gain. As such, we will offer all features built for myVesta to the official VestaCP project through pull requests, without interfering with their development milestones.
This panel is Debian fork of VestaCP that is under development by one of the VestaCP developers. Focused on security and stability, with a lot of security improvements and because only Debian is supported this allowa myVesta to focus on only one eco-system and not wasting energy on compatibility with other Linux distributions.
- Pros
- Has an advanced install wizard on the website where you can configure your install script to fit your requirements.
- Has a massive 381 command line commands that you can use.
- Supports Ioncube
- Softaculous plugin
- can add a secret key for the admin panel (called password on the installer configurator)
- Customer install script configurator available on the website with many options.
- Nice usage graphs.
- Security focused.
- Active community
- Has some one click installers
- You can host NodeJS apps
- Can handle Laravel
- Cons
- No apache only mode, it has been removed
- Linux experience needed for some features
- You need to purchase a plugin called SFTP CHROOT that "Restrict user so that they cannot use SSH and access only their home directory."
- It is lacking many features that required today.
- Cannot manage the server from the panel.
- No Web Terminal
- Mulitple PHP is only avaiable with the `Apache only` setup and must be configured in the hosting package.
- Can only use on Debian which can be difficult to use.
- Mulit-PHP can be enabled on installation.
- No terminal in the GUI.
Notes
- Sites
- Homepage
- Demo
- Changelog
- Code Repository
- Forum
- Docs
- Plugins
- General
- PHP7.4-fpm -> configure-> Page not found - myVesta
- The solution is to run these commands
a2enmod proxy_fcgi setenvif
a2enconf php7.4-fpm
systemctl reload apache2
- The solution is to run these commands
- 1. HestiaCP Tutorial Ubuntu 22.04 - Introduction - YouTube - This is a full HestiaCP Tutorial Playlist. In this full series, you will learn to use HestiaCP to host multiple websites. You can host WordPress or any other PHP or static based websites.
- HestiaCP Hestia Control Panel Full Tutorial - Installation, Users, DNS, WordPress, Backup, DB, Mail - YouTube
- Learn to use Hestia Control Panel. Hestia is a web hosting control panel that can be used as an alternative to paid panels such as : Plesk, CPanel, etc.
- This tutorial is almost 2 hours long
- PHP7.4-fpm -> configure-> Page not found - myVesta
- Settings
- If you have root ssh access, you can change password via the command:
v-change-user-password admin newpassword
- Multi-PHP
- How to install multiple PHP versions on VestaCP | bobcares
- Trying to install multiple PHP versions on VestaCP? Read what our experienced Support Engineers have to say on the matter.
- These instructions tell you how to install different php version upon installion
- If you installed nginx+php-fpm variant of myVesta (without Apache), and in that case myVesta don't have multi-PHP support.
- To add or reemove php versions you need to use the commandline
- How to install multi PHP versions - myVesta
- This script runs the relevant apt commands and configures myVesta
- As it said, you probably installed nginx+php-fpm variant of myVesta (without Apache), and in that case we don't have multi-PHP support.
- Has PHP version removal instructions.
- MyVestaCP: How to install multiple PHP versions in MyVesta Control Panel - BitsDiscover - Here are steps that you can follow to install multiple PHP versions in myVesta Control Panel.
- How to install multiple PHP versions on VestaCP | bobcares
- What is the difference between `PHP FPM` and `PHP FPM Public`
- What is PHP-FPM-7x-public template - myVesta
- PHP-FPM-7x-public is template for Laravel projects, difference is just docroot folder, it's /public_html/public/ instead of /public_html/ (which is default).
- If you are using this template, you should also use hosting-public or force-https-public template for "Proxy template".
- vps - What is the difference between PHP FPM and PHP FPM Public? - Stack Overflow
- What is PHP-FPM-7x-public template - myVesta
- Enable the file manager (Workaround)
- How to enable file manager vestacp (and myVesta) - Learn how to enable File Manager vestaCP with a simple tweak to the code.
- How To Enable/Install VestaCP File Manager! - ATLA Solutions - VestaCP has a file manager which you can enable at no charge. You can enable and use file manager for free in VestaCP, but this Free License automatically reset every 24 hours. This means you need repeat the process below every 24 hours, if you want to keep use the VestaCP File Manager.
- If you have root ssh access, you can change password via the command:
- Plugins
- File Locations / Repo Locations / Key Locations
- Control Panel: /usr/local/vesta/
- Commands: /usr/local/vesta/bin/
- Install
- use wget and not curl for the install script.
- Make sure the is no system account called 'admin' preset as this is created during the install.
- "Hestia must be installed on top of a fresh operating system installation to ensure proper functionality. If on a VPS/KVM, and there is already an admin account, either delete that default admin ID, or use --force to continue with the installation. See custom installation below for further details." and this software is from the same roots, so this applies here.
- Patching php.ini error
=== Patching php.ini for php8.2
2023-10-28 16:52:31 URL:https://c.myvestacp.com/tools/patches/php8.2.patch [2970/2970] -> "/root/php8.2.patch" [1]
patching file /etc/php/8.2/fpm/php.ini
Reversed (or previously applied) patch detected!  Assume -R? [n]
- During the install you might get this error, but don't worry it is not as bad as you thing.
- What the bits mean:
- -R = probably means allow overwrite.
- [n] = if you press enter it will assume, no.
- What causes this:
- It was caused because PHP 8.2 was already installed, and php.ini was already patched.
- My selections:
- Reversed (or previously applied) patch detected! Assume -R? [n] = n
- Apply anyway? [n] = n
- I got no errors, so probably this is the right call.
- Update / Upgrade
- Uninstall
- Installation Instructions
- Misc
HestiaCP

| Features | Status |
| Primarily Designed For | Websites + Email |
| Free/Paid | Free |
| License | GPLv3 |
| Supported OS | Debian / Ubuntu |
| Supported Cloud Providers | × |
| Install Method(s) | Script |
| Web Console |
|
| Virtualization | × |
| Web Server | Apache / Nginx |
| TLS 1.3 | √ |
| HTTP/2 | √ |
| HTTP/3 & QUIC | × |
| AutoSSL | LetsEncrypt |
| DNS Server | BIND |
| DNS Zone Manager | √ |
| DNSSEC | √ |
| Multi-PHP | √ |
| Database Server | MySQL / MariaDB / PostgreSQL |
| Database Admin | phpMyAdmin (via URL) / phpPgAdmin (via URL) |
| Email Server | Exim / Dovecot |
| Webmail | Roundcube / RainLoop |
| FTP Server | ProFTPD / VsFTPd |
| Caching | × |
| Email Validation | SPF / DKIM / DMARC |
| Spam Protection | SpamAssassin / ClamAV |
| Firewall | iptables |
| WAF | Fail2Ban |
| Virus / Malware Scanning | × |
| Reseller Accounts | × |
| User Accounts | √ |
| Separate Panels (Admin / Users) | × |
| Hosting Packages | √ |
| Quotas | Disk / Bandwidth |
| Traffic Statistics | AWStats |
| Cron Jobs | √ |
| Local Backup | √ |
| External Backup | FTP / SFTP / Rclone |
| File Manager | √ |
| Extendable by Plugins | √ |
| API | √ |
| WHMCS Support | √ |
| Panel Account Restrictions | × |
| Server and Package Updates | CLI / GUI |
| Automatic Updates | √ |
| Can be Uninstalled | × |
HestiaCP is designed to provide administrators an easy to use web and command line interface, enabling them to quickly deploy and manage web domains, mail accounts, DNS zones, and databases from one central dashboard without the hassle of manually deploying and configuring individual components or services.
The goal of each panel might be different, especially as HestiaCP does not neccessarily aim at the things cPanel, Plesk or Directadmin do, instead it strives to be something that a system admin likes to use to make his tasks more easy or compact - while keeping as many options as possible to still manually change things in the system whereas I think most of the so called “competitors” want to be a replacement for a system admin at all. HestiaCP are not interested in competing in that area at all, but rather find what’s helping people who manage servers on a daily basis and for us it is very important that people see that from the beginning to have their expectations set correctly.
The project is a fork of VestaCP and is currently in active development.
- Pros
- Has an advanced install wizard on the website where you can configure your install script to fit your requirements.
- Has a massive 381 command line commands that you can use.
- Supports Ioncube
- Softaculous plugin
- Has its own one click installer for some apps.
- can add a secret key for the admin panel (called password on the installer configurator)
- Customer install script configurator available on the website with many options.
- Nice usage graphs.
- Security focused.
- Automated backups to SFTP, FTP and via Rclone with 50+ Cloud storage providers
- Excellent documentation
- A multi-member development team
- Has a new file manger with the normal features.
- Nice dark theme which is easy to navigate
- Active Community
- Cons
- Linux experience needed for some features
- You need to purchase a plugin called SFTP CHROOT that "Restrict user so that they cannot use SSH and access only their home directory."
- It is lacking many features that required today.
- Cannot manage the server from the panel.
- No Web Terminal
- You can't use 'Apache only' mode anymore with this panel.
- Can only use on Debian which can be difficult to use.
Notes
- Sites
- General
- Comparison between HestiaCP and other panels - Hestia Control Panel - Hestia Control Panel - Discourse
- It would be interesting to read some comparisons between HestiaCP and other panels, particularly the 3 biggest commercial CPs (cPanel, Plesk and Directadmin) and the popular FOSS CPs (e.g. Virtualmin/Webmin and ISPconfig). We might discuss aspects like performance, features, security, ease of use, integration with third party software (e.g. WHMCS, CSF firewall, Softaculous commercial script library etc).
- The goal of each panel might be different, especially HestiaCP does not neccessarily aim at the things cPanel, Plesk or Directadmin do, instead it strives to be something that a system admin likes to use to make his tasks more easy or compact - while keeping as much options as possible to still manually change things in the system. whereas I think most of the so called “competitors” want to be a replacement for a system admin at all. We are not interested in competing in that area at all, but rather find what’s helping people who manage servers on a daily basis. and for us it is very important that people see that from the beginning to have their expectations set correctly.
- Comparison between HestiaCP and other panels - Hestia Control Panel - Hestia Control Panel - Discourse
- Settings
- How to enable file manager vestacp (and myVesta) - Learn how to enable File Manager vestaCP with a simple tweak to the code.
- If you have root ssh access, you can change password via the command:
v-change-user-password admin newpassword
- How to install multiple PHP versions on VestaCP - Trying to install multiple PHP versions on VestaCP? Read what our experienced Support Engineers have to say on the matter.
- Plugins
- CSF
- [How-to] CSF Support in Hestia CP - Hestia Control Panel - Hestia Control Panel - Discourse - CSF is a firewall bundle. An alternative to firewallD & Fail2Ban (part of stock Hestia CP install). For those who prefer the former above the latter - here is a simple tutorial how to enable the CSF & Hestia CP integration.-xzf csf.tgz cd csf sh install.sh Execute the below snippet sh install.hestia...
- as of today (09-feb-2023), HestiaTeam is not providing any supporting yet for CSF, due to strong reasons behind there…
- But there are ways to have it working within hestia UI…: How to install CSF on Hestiacp web ui [config firewall] | Guest Blog Posting - How to install CSF on Hestiacp web ui [config firewall] How To Install HestiaCP Free Panel
- [How-to] CSF Support in Hestia CP - Hestia Control Panel - Hestia Control Panel - Discourse - CSF is a firewall bundle. An alternative to firewallD & Fail2Ban (part of stock Hestia CP install). For those who prefer the former above the latter - here is a simple tutorial how to enable the CSF & Hestia CP integration.-xzf csf.tgz cd csf sh install.sh Execute the below snippet sh install.hestia...
- CSF
- File Locations / Repo Locations / Key Locations
- Control Panel: /usr/local/vesta/
- Commands: /usr/local/vesta/bin/
- Install
- Make sure the is no system account called 'admin' preset as this is created during the install.
- "Hestia must be installed on top of a fresh operating system installation to ensure proper functionality. If on a VPS/KVM, and there is already an admin account, either delete that default admin ID, or use --force to continue with the installation. See custom installation below for further details."
- Install HestiaCP without installing Nginx - Install & Set-Up - Hestia Control Panel - Discourse
- I want to use Apache alone without using Nginx reverse proxy. Is there a way to install HestiaCP without installing Nginx? If it’s not possible, I’d like to disable Nginx and only use Apache.
- Cannot disable Nginx anymore.
- Make sure the is no system account called 'admin' preset as this is created during the install.
- Update / Upgrade
- Uninstall
- Installation Instructions
- Misc
TinyCP
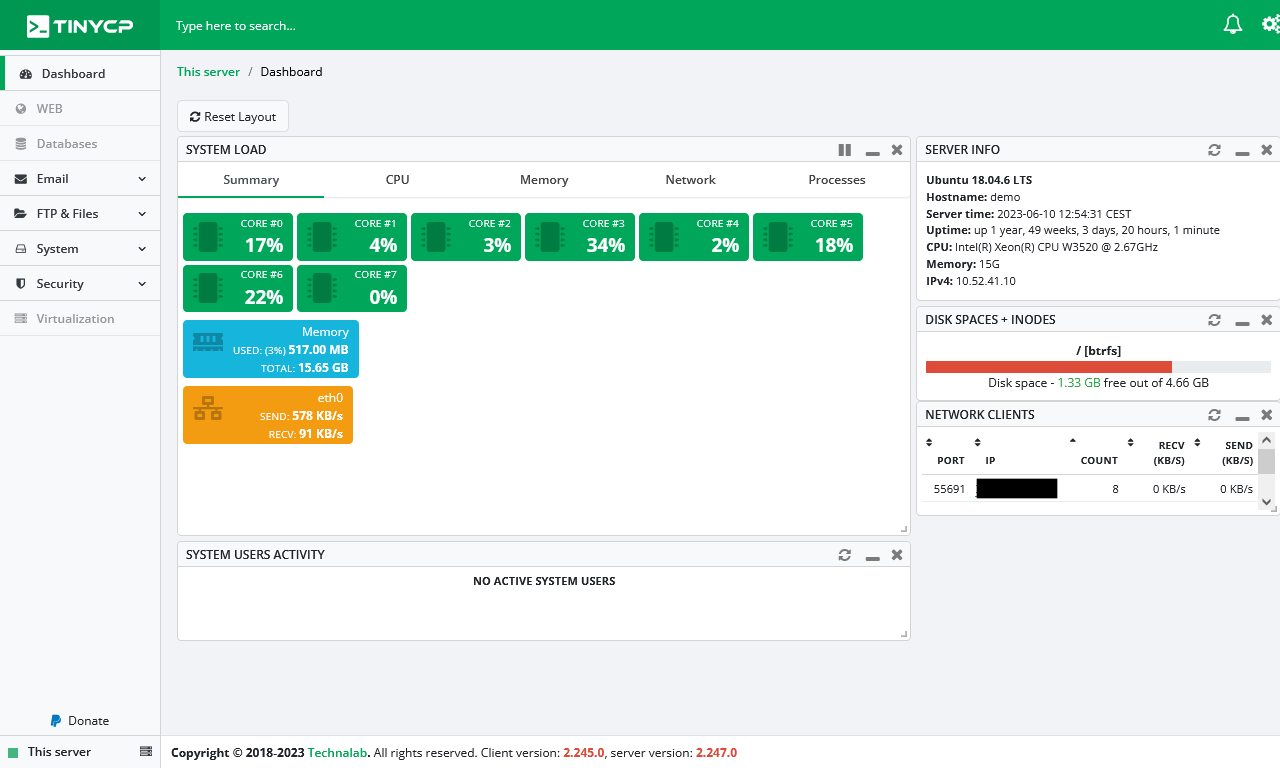
| Features | Status |
| Primarily Designed For | Small Hosting Company |
| Free/Paid | Free |
| License | Proprietary / GPLv3 / MIT / Apache |
| Supported OS | Debian / Ubuntu |
| Supported Cloud Providers | × |
| Install Method(s) | Script |
| Web Console |
|
| Virtualization | × |
| Web Server | Apache / Nginx |
| TLS 1.3 | √ |
| HTTP/2 | √ |
| HTTP/3 & QUIC | × |
| AutoSSL | LetsEncrypt |
| DNS Server | ? |
| DNS Zone Manager | √ |
| DNSSEC | × |
| Multi-PHP | √ |
| Database Server | MySQL / MariaDB |
| Database Admin | phpMyAdmin / phpPgAdmin |
| Email Server | Exim / Dovecot |
| Webmail | × |
| FTP Server | VsFTPd |
| Caching | × |
| Email Validation | SPF / DKIM |
| Spam Protection | × |
| Firewall | iptables |
| WAF | Guard (Alternative to Fail2Ban) |
| Virus / Malware Scanning | × |
| Reseller Accounts | × |
| User Accounts | × |
| Separate Panels (Admin / Users) | × |
| Hosting Packages | × |
| Quotas | × |
| Traffic Statistics | × |
| Cron Jobs | √ |
| Local Backup | × |
| External Backup | × |
| File Manager | √ |
| Extendable by Plugins | × |
| API | × |
| WHMCS Support | × |
| Panel Account Restrictions | × |
| Server and Package Updates | GUI |
| Automatic Updates | × |
| Can be Uninstalled | √ |
TinyCP is originally designed for the company behind it Technalab. They made it free to use so its easier to catch bugs. Beside that they truly listen to the community. The way this control panel has been created is the best available compared to any other control panel! TinyCP doesn't have its own php,nginx,apache libraries and so when you do not want it anymore or experience issues you can easily just remove TinyCP and reinstall it without having the troubles of making a complete new install on your server.
This control panel is extremely easy to use and has a lot of potential. It needs to have some more features added and a few edges smoothed of but definately one to watch. Syle and ease of use over more features is definately the motto.
- Pros
- To keep your system clean and healthy, TinyCP does not install system packages by default.
If you need this functionality, just install required packages. This could also be a con if they were not so easy to install when prompted. - Can add and remove Apache modules from the GUI.
- Can add and remove PHP modules from the GUI.
- To keep your system clean and healthy, TinyCP does not install system packages by default.
- Cons
- Not as feature rich as some panels.
- Technical information is not easy to find.
Notes
- Sites
- General
- Settings
- Plugins
- File Locations / Repo Locations / Key Locations
- Install
- Update / Upgrade
- Uninstall
- Installation Instructions
- Misc
ISPmanager

| Features | Status |
| Primarily Designed For | Websites + Email |
| Free/Paid | Paid |
| License | Proprietary |
| Supported OS | CentOS / AlmaLinux / Rocky Linux / Debian / Ubuntu / VzLinux |
| Supported Cloud Providers | × |
| Install Method(s) | Script |
| Web Console |
|
| Virtualization | Docker |
| Web Server | Apache / Nginx / OpenLiteSpeed / NodeJS / ihttpd (for backend) |
| TLS 1.3 | √ |
| HTTP/2 | √ |
| HTTP/3 & QUIC | × |
| AutoSSL | LetsEncrypt |
| DNS Server | BIND |
| DNS Zone Manager | √ |
| DNSSEC | √ |
| Multi-PHP | √ |
| Database Server | MySQL / MariaDB / Percona / PostgreSQL |
| Database Admin | phpMyAdmin / phpPgAdmin |
| Email Server | Exim / Dovecot |
| Webmail | Roundcube / Custom |
| FTP Server | ProFTPD |
| Caching | × |
| Email Validation | SPF |
| Spam Protection | SpamAssassin / DNSBL |
| Firewall | iptables |
| WAF | × |
| Virus / Malware Scanning | ImunifyAV (paid) / Dr.Web (paid) |
| Reseller Accounts | × |
| User Accounts | √ |
| Separate Panels (Admin / Users) | × |
| Hosting Packages | × |
| Quotas | × |
| Traffic Statistics | Custom |
| Cron Jobs | √ |
| Local Backup | √ |
| External Backup | × |
| File Manager | √ |
| Extendable by Plugins | √ |
| API | √ |
| WHMCS Support | √ |
| Panel Account Restrictions | Each Tiers has domain limits |
| Server and Package Updates | CLI / GUI |
| Automatic Updates | √ |
| Can be Uninstalled | × |
ISPmanager is a Linux-based control panel for managing dedicated and game and VPS web servers, as well as selling shared hosting. This panel is not really developed for reselling hosting although it does it. There are many expected features missing which would make managing more than a few customers tiresome. This panel might have its place but I am not sure where. Over the coming years ISPmanager might be worth revisiting.
ISPmanager uses Docker to support alternate versions of the database servers. Each MySQL-server is deployed in a separate container, and this eliminates the conflict of libraries. ihttpd is used as a lightweight web-server for the admin GUI.
- Pros
- WireGuard VPN server
- Actively developed
- Cons
- Limited features
- The website is chaotic and feels like several softwares bolted together
- No live demo, but you can get one on request.
Notes
- Sites
- General
- Settings
- Plugins
- File Locations / Repo Locations / Key Locations
- Install
- Update / Upgrade
- Uninstall
- Installation Instructions
- Misc
Web Applications
These stacks are primarily for developing and hosting your apps and not traditional websites, but some may have the option to create a website. These 'Panels' are usually hosted in the Cloud but can be hosted on your own server with the same effect.
If you only need to Web Applications, this category is for you. If you need to host email these platforms are not a good solution for you. In that case, you should consider standard control panels. The apps created with these platforms usually send emails.
Wordpress websites are Apps and this is why some of these platforms refer to Web Hosting for clients. these platforms deploy 1 server for each website.
These platforms usual have some type of remote server monitoring as this goes hand in hand in deploying software to remote servers.
CloudPanel
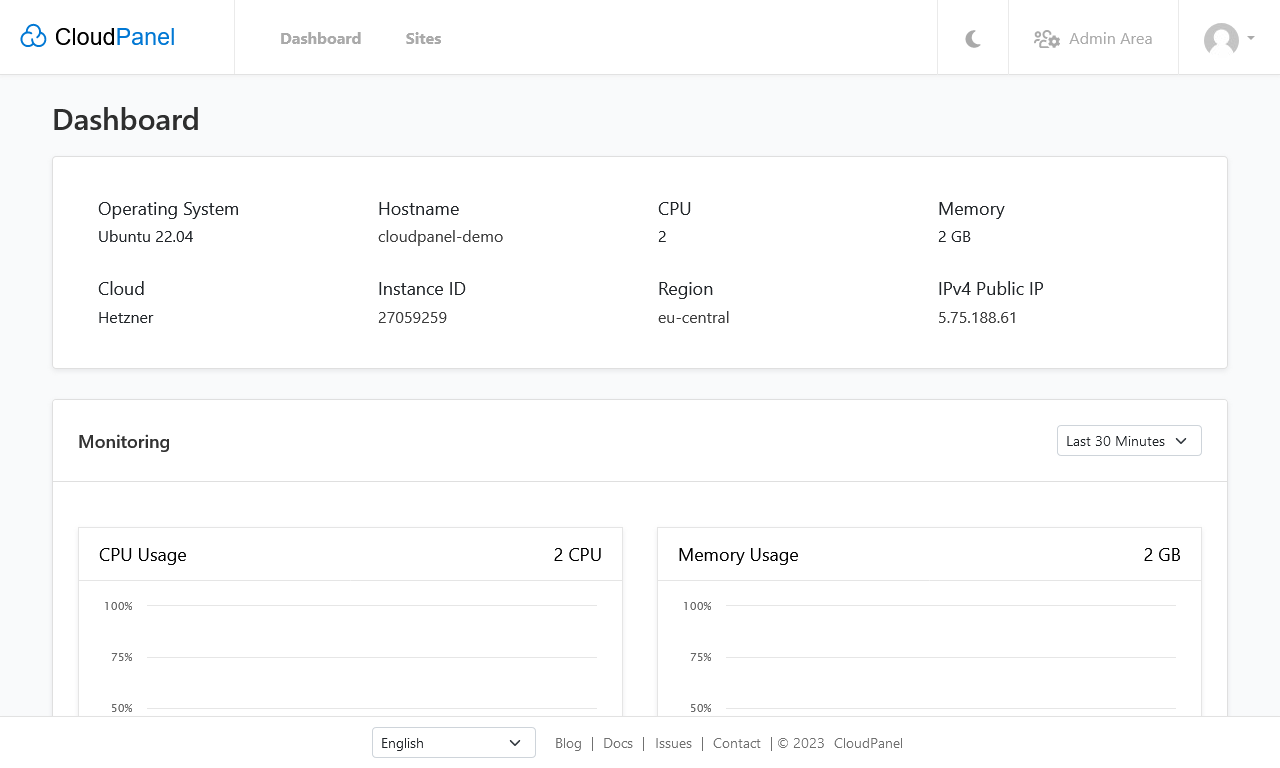
| Features | Status |
| Primarily Designed For | Web Applications |
| Free/Paid | Free |
| License | Proprietary |
| Supported OS | Debian / Ubuntu |
| Supported Cloud Providers | Amazon Web Services (AWS) / DigitalOcean / Hetzner Cloud / Google Compute Engine (GCE) / Microsoft Azure / Vultr |
| Install Method(s) | Script / Cloud Quick Launch |
| Web Console |
|
| Virtualization | × |
| Web Server | Nginx |
| TLS 1.3 | √ |
| HTTP/2 | √ |
| HTTP/3 & QUIC | × |
| AutoSSL | LetsEncrypt |
| DNS Server | × |
| DNS Zone Manager | × |
| DNSSEC | × |
| Multi-PHP | √ |
| Database Server | MySQL / MariaDB |
| Database Admin | × |
| Email Server | × |
| Webmail | × |
| FTP Server | ProFTPD |
| Caching | Redis / Varnish |
| Email Validation | × |
| Spam Protection | × |
| Firewall | iptables / Uncomplicated Firewall (UFW) |
| WAF | Fail2Ban |
| Virus / Malware Scanning | × |
| Reseller Accounts | × |
| User Accounts | √ |
| Separate Panels (Admin / Users) | × |
| Hosting Packages | × |
| Quotas | × |
| Traffic Statistics | × |
| Cron Jobs | √ |
| Local Backup | √ |
| External Backup | AWS S3 |
| File Manager | × |
| Extendable by Plugins | × |
| API | × |
| WHMCS Support | × |
| Panel Account Restrictions | × |
| Server and Package Updates | × |
| Automatic Updates | × |
| Can be Uninstalled | √ |
CloudPanel is a free and modern server control panel to configure and manage a server with an obsessive focus on simplicity. Run PHP, NodeJS, Static Websites, Reverse Proxies and Python applications in no time on a High-Performance Technology Stack.
CloudPanel is a free web hosting control panel with advanced features for server management. It offers a fast technology stack built with lightweight components for maximum performance. The control panel provides a suite of tools to strengthen security at the server level.
This panel supports all big cloud providers such as AWS, DigitalOcean, and Google Cloud Platform (GCP) and it comes with advanced cloud functionalities. The control panel provides a suite of tools to strengthen security at the server level. You can also install this panel on Debian or Ubuntu. I would recommend the administrator having Linux knowlege when using this panel as it seems very basic.
- Pros
- Free (No contract or hidden costs)
- Supports ALL PHP Apps.
- Easy to use interface
- Up and running within 60 seconds
- Maximum performance & security
- Advanced cloud functionalities
- Supports Multiple PHP Versions & all PHP Apps
- Specific PHP configuration for each domain
- NGINX Support
- Free SSL Certificates
- No restrictions
- Supports > 10 languages
- Actively developed and supported
- 30+ configured vHost templates for various apps (see here)
- Cons
- No File Manager
- Niche audience
- Very basic
- Assumes you are already behind a firewall/WAF already becasue it is designed for the cloud.
Notes
- Sites
- Homepage
- Demo
- Changelog
- Code Repository
- Forum
- Docs
- Plugins
- General
- What is CloudPanel? Features and Overview of CloudPanel - CloudPanel is a free ? & modern server control panel with advanced cloud functionalities. Get more insight into its features.
- CloudPanel vs. Virtualmin -Free VPS Hosting Control Panel ?â? - CloudPanel vs. Virtualmin are popular free VPS hosting control panels for easy server management. See their comparison guide in this article.
- Settings
- Plugins
- File Locations / Repo Locations / Key Locations
- Install
- Update / Upgrade
- Uninstall
- Installation Instructions
- Misc
ApisCP

| Features | Status |
| Primarily Designed For | Web Applications |
| Free/Paid | Both |
| License | Proprietary |
| Supported OS | RHEL / CentOS |
| Supported Cloud Providers | × |
| Install Method(s) | Script |
| Web Console |
|
| Virtualization | Docker (not directly supported yet) |
| Web Server | Apache |
| TLS 1.3 | √ |
| HTTP/2 | √ |
| HTTP/3 & QUIC | × |
| AutoSSL | LetsEncrypt |
| DNS Server | BIND / PowerDNS / Cloud via API |
| DNS Zone Manager | √ |
| DNSSEC | × |
| Multi-PHP | √ |
| Database Server | MySQL / PostgreSQL |
| Database Admin | phpMyAdmin / phpPgAdmin |
| Email Server | Postfix / Dovecot |
| Webmail | × |
| FTP Server | VsFTPd |
| Caching | Redis |
| Email Validation | SPF / DKIM / DMARC |
| Spam Protection | SpamAssassin / Rspamd / Pigeonhole |
| Firewall | iptables / Rampart |
| WAF | Fail2Ban / ModSecurity / Evasive / Fortification |
| Virus / Malware Scanning | ClamAV |
| Reseller Accounts | × |
| User Accounts | √ |
| Separate Panels (Admin / Users) | × |
| Hosting Packages | × |
| Quotas | Disk |
| Traffic Statistics | Google Analytics / Bandwidth |
| Cron Jobs | × |
| Local Backup | √ |
| External Backup | Git (for Snapshots) / Bacula / Duplicity / JetBackup (under consideration) |
| File Manager | √ |
| Extendable by Plugins | √ |
| API | √ |
| WHMCS Support | × |
| Panel Account Restrictions | × |
| Server and Package Updates | CLI / GUI |
| Automatic Updates | √ |
| Can be Uninstalled | √ |
ApisCP is an open-source hosting platform for your PHP, Ruby, Node, Python, and Go projects. Set-it-and-forget-it SSL with 1-click, automatically update web apps, securely isolate and clone WordPress sites, block threats real-time, fix OS configuration drifts, resolve service defects, and keep your site operating at peak performance.
ApisCP is built by a hosting company for hosting. It's the only hosting platform built for its original audience by its intended audience. ApisCP integrates a wealth of knowledge rolled up into best practices that achieves higher throughput, lower TTFB, fewer burnt CPU cycles, and denser servers than any other product on the market.
ApisCP automatically configures services, tunes on demand, and provides defect monitoring including monthly integrity checks through Bootstrapper.
- Pros
- Modern interface.
- Affordable and fair pricing for the panel.
- Mail server.
- Access to free DNS-only & development licenses.
- Lifetime licenses are available.
- Cons
- You need to be a devloper to take advantage of this software.
- No webmail.
Notes
- Sites
- General
- Client-level backups
- Files are only backed up when requested by the user and they are downloaded to the local machine.
- Snapshots are uploaded to a Git provider and can be automatic.
- Database files are backedup automatically every night.
- Client-level backups
- Settings
- Plugins
- File Locations / Repo Locations / Key Locations
- Install
- Update / Upgrade
- Uninstall
- Installation Instructions
- Misc
Moss (Dead)
![]()
| Features | Status |
| Primarily Designed For | Web Applications |
| Free/Paid | Both |
| License | Proprietary |
| Supported OS | Ubuntu |
| Supported Cloud Providers | Custom Server (via SSH) |
| Install Method(s) | PaaS |
| Web Console |
|
| Virtualization | Docker / OpenVZ / Hyper-V / Proxmox Virtualization |
| Web Server | Apache / Nginx / NodeJS |
| TLS 1.3 | ? |
| HTTP/2 | ? |
| HTTP/3 & QUIC | × |
| AutoSSL | -LetsEncrypt |
| DNS Server | × |
| DNS Zone Manager | × |
| DNSSEC | × |
| Multi-PHP | × |
| Database Server | MySQL / MongoDB |
| Database Admin | phpMyAdmin / phpPgAdmin |
| Email Server | Postfix |
| Webmail | × |
| FTP Server | ? |
| Caching | Redis / Memcached |
| Email Validation | ? |
| Spam Protection | × |
| Firewall | iptables |
| WAF | Fail2Ban |
| Virus / Malware Scanning | × |
| Reseller Accounts | × |
| User Accounts | × |
| Separate Panels (Admin / Users) | × |
| Hosting Packages | × |
| Quotas | × |
| Traffic Statistics | ? |
| Cron Jobs | × |
| Local Backup | ? |
| External Backup | ? |
| File Manager | × |
| Extendable by Plugins | × |
| API | × |
| WHMCS Support | × |
| Panel Account Restrictions | × |
| Server and Package Updates | GUI |
| Automatic Updates | ? |
| Can be Uninstalled | √ |
Moss is SaaS control panel aimed at App developers. After a lot of reading of their website and guessing, I think I figured out how works.
After everything is setup, you develop your App on your Git repo as normal and then Moss can automatically provision the code directly onto a webserver. This means changes and updates can be pushed very quickly without having to setup servers or push code.
Moss concentrates on apps that use the web technoloigies : PHP, NodeJS NodeJS, PHP, or static (Javascript + HTML + CSS),Laravel, Symfony and WordPress, but is not limited to them.
The Workflow:
- Link Moss.sh with yur Git provider
- Link moss.sh with your fresh Ubuntu LTS server.
- SSH is used here so there are no restrictions on server location, but you must use Ubuntu LTS.
- Build your App on your Git repository.
- Deploy a pre-configured web stack on your Ubuntu server using Moss.
- This deploys and configures the web and database server for your web app – either NodeJS, PHP, or static (Javascript + HTML + CSS) sites. In addition, Moss natively supports web development frameworks like Laravel, Symfony and WordPress, but is not limited to just them.
- Use Moss to take the code from the Git repository and deploy it straight to the webserver either manually or setup an automated task based on code pushes.
- Further code updates will just repeat the last task and the rest of the configuration is already done.
- Moss.sh can also monitor servers for issues that might occur.
- Pros
- Automates App development
- Can actively monitor servers for issues.
- Cons
- Only supports Ubuntu LTS for the server OS.
- Limited technologies supported.
- Website documentation is limited.
Notes
- Sites
- General
- What is Moss? - Moss - What Moss can do and what makes it unique Moss may be different things to different people. Moss may be different things to different people. Some users think of it as a modern, cloud-based control panel for their servers. Others see it as a kind of PaaS they can use on their own infrastructure. To us, Moss is a virtual sysadmin that helps you deploy, manage, and monitor your servers and websites easily and securely.
- Basic concepts - Moss - Users, resources, actions, and operations: everything you need to know to get started with Moss.
- Create sites vs deploy sites - Moss - What's the difference between creating a site in a server, and actually deploying it?
- How to deploy your WordPress site with Bedrock and Moss - Moss - Create and deploy WordPress sites using Bedrock and the Free Plan of Moss. Follow a typical PHP development workflow and deploy without downtime.
- Settings
- Plugins
- File Locations / Repo Locations / Key Locations
- Install
- Update / Upgrade
- Uninstall
- Installation Instructions
- Misc
ClusterCS

| Features | Status |
| Primarily Designed For | Hosting Company |
| Free/Paid | Both |
| License | Proprietary |
| Supported OS | RHEL / CentOS / Amazon Linux 2 |
| Supported Cloud Providers | Amazon Web Services (AWS) / DigitalOcean / Microsoft Azure / Vultr / UpCloud |
| Install Method(s) | SaaS |
| Web Console |
|
| Virtualization | × |
| Web Server | Apache / Nginx / Lighttpd / NodeJS |
| TLS 1.3 | √ |
| HTTP/2 | √ |
| HTTP/3 & QUIC | × |
| AutoSSL | LetsEncrypt |
| DNS Server | × |
| DNS Zone Manager | √ |
| DNSSEC | × |
| Multi-PHP | × |
| Database Server | MySQL / MariaDB |
| Database Admin | phpMyAdmin |
| Email Server | Postfix / Dovecot |
| Webmail | Roundcube |
| FTP Server | ProFTPD |
| Caching | Redis / Memcached / Varnish |
| Email Validation | SPF / DKIM / DMARC / DANE (TLSA) |
| Spam Protection | SpamAssassin |
| Firewall | iptables |
| WAF | Fail2Ban |
| Virus / Malware Scanning | ClamAV |
| Reseller Accounts | √ |
| User Accounts | √ |
| Separate Panels (Admin / Users) | × |
| Hosting Packages | √ |
| Quotas | √ |
| Traffic Statistics | × |
| Cron Jobs | √ |
| Local Backup | × |
| External Backup | FTP / AWS S3 |
| File Manager | × |
| Extendable by Plugins | × |
| API | √ |
| WHMCS Support | × |
| Panel Account Restrictions | Different amount of servers and domains on each tier |
| Server and Package Updates | GUI |
| Automatic Updates | √ |
| Can be Uninstalled | √ |
ClusterCS is a SaaS cloud based control panel. It deploys an agent that communicates between your server and the management engine through SSH, and does not require any server pre-install, making it easy to manage and monitor your web server. All the configurations are done using standard configuration files without any vendor lock in options. With ClusterCS, you have a platform that unifies all your servers and instances into a single location, making it easy for you to manage them. Management of your servers, such as creating domains and databases, will be done via SSH.
This panel has a unique selling point that you can configure server clusters for things like HA (High Availability) configurations. The GUI is located on the companies servers so is a true SaaS platform whereas the servers are where you put them. High availability is indeed a unique selling point, but you can also manage multiple servers from the same panel interface.
ClusterCS is a SaaS platform. The entire logic runs on our systems which stay connected to your servers to issue configuration commands so the actual install of ClusterCS is on your servers, it is a cloud mangement platform? Your servers and data is completely independant, ClusterCS only issue linux command to reflect the changes you request via the panel. You can think of ClusterCS just as any other panel, the only difference being that it configures your servers via SSH commands instead of running them locally.
Reselling is an important part of ClusterCS and it contains a wide range of features. Currently it doesn't support integration with WHMCS but that will be available fairly soon and ClusterCS are actually releasing a major new version of ClusterCS that has been under development for about a year. There are many new features and there is a new interface for the panel in the upcoming release. When released ClusterCS will support API integrations with major Cloud providers to create servers from within our interface but until then currently commands are only supported by SSH.
- Pros
- Free personal account (No CC needed, Free forever, for 1 server and 5 domains max).
- The GUI is very clean and easy to use.
- Build and manage HA clusters with ease.
- Cons
- Limited configurations (Recipes) due to a small set of options.
Notes
- Sites
- General
- Settings
- Plugins
- File Locations / Repo Locations / Key Locations
- Install
- How to setup and manage your AWS EC2 instance (AWS Free Tier) with ClusterCS - Setting up a control panel on a vps is a time consuming job that requires a knowledgeable sysadmin or developer. ClusterCS automates the setup, installing the required packages and securing the server at a push of a button.
- Recipes is what they called server setup configurations
- ClusterCS - Hosting Control Panel Overview - YouTube - A walk through of how to get started.
- How to setup and manage your VirtualBox instance with ClusterCS? - How to setup a VirtualBox installation for testing.
- Update / Upgrade
- Uninstall
- Installation Instructions
- Misc
RunCloud
![]()
| Features | Status |
| Primarily Designed For | Web Applications |
| Free/Paid | Paid |
| License | Proprietary |
| Supported OS | Ubuntu |
| Supported Cloud Providers | Amazon Web Services (AWS) / DigitalOcean / Google Cloud Platform (GCP) / Vultr / Akamai (formerly Linode) / Webdock.io |
| Install Method(s) | SaaS |
| Web Console |
|
| Virtualization | Docker |
| Web Server | Apache / Nginx / OpenLiteSpeed / NodeJS |
| TLS 1.3 | √ |
| HTTP/2 | √ |
| HTTP/3 & QUIC | √ |
| AutoSSL | LetsEncrypt |
| DNS Server | × |
| DNS Zone Manager | × |
| DNSSEC | × |
| Multi-PHP | √ |
| Database Server | MySQL / MariaDB |
| Database Admin | phpMyAdmin |
| Email Server | Postfix |
| Webmail | × |
| FTP Server | × |
| Caching | Redis / Memcached |
| Email Validation | ? |
| Spam Protection | × |
| Firewall | iptables / Firewalld |
| WAF | Fail2Ban |
| Virus / Malware Scanning | × |
| Reseller Accounts | × |
| User Accounts | × |
| Separate Panels (Admin / Users) | × |
| Hosting Packages | × |
| Quotas | × |
| Traffic Statistics | × |
| Cron Jobs | √ |
| Local Backup | × |
| External Backup | Custom |
| File Manager | √ |
| Extendable by Plugins | × |
| API | √ |
| WHMCS Support | √ |
| Panel Account Restrictions | Different Tiers, Different Options |
| Server and Package Updates | GUI |
| Automatic Updates | × |
| Can be Uninstalled | √ |
Runcloud is SaaS panel that will allow you to quickly deploy websites as Web Applications.
RunCloud is basically a server management panel, a step towards autonomy and control over your own servers, giving you access to install multiple websites, easy database setup, enhanced security measures, and automatic updates.
RunCloud serves as a control panel that offers one-click solutions to common tasks including web deployment with Git, script installation to install common Content Management Systems, and provides the most optimized server stack including Nginx, Apache, Redis, MariaDB, Memcached, and more.
They don't have a specific fully-managed subscription for now, But we'll help you with any issues regarding RunCloud services.
- Pros
- No manual deployment is needed since RunCloud lets you push your code to GitHub, BitBucket or even custom Git repository and then automatically deploys them into your staging or production server.
- Cons
- Not used it
Notes
- Sites
- General
- Settings
- Plugins
- File Locations / Repo Locations / Key Locations
- Install
- Update / Upgrade
- Uninstall
- Installation Instructions
- Getting Started – Welcome to RunCloud | RunCloud Docs - Here is a quick tutorial to help you get started with RunCloud.
- Misc
ServerPilot
![]()
| Features | Status |
| Primarily Designed For | Web Applications |
| Free/Paid | Paid |
| License | Proprietary |
| Supported OS | Ubuntu |
| Supported Cloud Providers | Amazon Web Services (AWS) / DigitalOcean / Google Cloud Platform (GCP) / Microsoft Azure |
| Install Method(s) | SaaS |
| Web Console |
|
| Virtualization | Docker / OpenVZ / Hyper-V / Proxmox Virtualization |
| Web Server | Apache / Nginx |
| TLS 1.3 | √ |
| HTTP/2 | √ |
| HTTP/3 & QUIC | × |
| AutoSSL | LetsEncrypt |
| DNS Server | × |
| DNS Zone Manager | × |
| DNSSEC | × |
| Multi-PHP | √ |
| Database Server | MySQL |
| Database Admin | × |
| Email Server | Postfix |
| Webmail | × |
| FTP Server | × |
| Caching | × |
| Email Validation | × |
| Spam Protection | × |
| Firewall | iptables |
| WAF | × |
| Virus / Malware Scanning | × |
| Reseller Accounts | × |
| User Accounts | × |
| Separate Panels (Admin / Users) | × |
| Hosting Packages | × |
| Quotas | × |
| Traffic Statistics | Custom |
| Cron Jobs | × |
| Local Backup | × |
| External Backup | × |
| File Manager | × |
| Extendable by Plugins | × |
| API | √ |
| WHMCS Support | √ |
| Panel Account Restrictions | No. of Servers and No. Apps |
| Server and Package Updates | GUI |
| Automatic Updates | √ |
| Can be Uninstalled | √ |
ServerPilot is a cloud service for hosting WordPress and other PHP websites on servers at DigitalOcean, Amazon, Google, or any other server provider. You can think of ServerPilot as a modern, centralized hosting control panel.
If security is critical to your business and you only need to run fast PHP applications, you should use ServerPilot. If you need to host email, ServerPilot is not a good solution for you. In that case, you should consider cPanel or other control panels. However, you might want to consider other options for hosting mail.
- Pros
- .........
- Cons
- You have to do a lot of things manually.
Notes
- Sites
- General
- What Is ServerPilot? - ServerPilot - ServerPilot is a cloud service for hosting WordPress and other PHP websites on servers at DigitalOcean, Amazon, Google, or any other server provider.
- Settings
- Plugins
- File Locations / Repo Locations / Key Locations
- Install
- How to Install WordPress on DigitalOcean - ServerPilot - If you have connected your server to ServerPilot, you can install WordPress with one click when you create an app.
- Update / Upgrade
- Uninstall
- Installation Instructions
- Misc
Ploi
![]()
| Features | Status |
| Primarily Designed For | Web Applications |
| Free/Paid | Both |
| License | Proprietary |
| Supported OS | Ubuntu |
| Supported Cloud Providers | Amazon Web Services (AWS) / DigitalOcean / Hetzner Cloud / Vultr / Akamai (formerly Linode) / Custom Server (via SSH) |
| Install Method(s) | SaaS |
| Web Console |
|
| Virtualization | Docker |
| Web Server | Nginx / NodeJS |
| TLS 1.3 | √ |
| HTTP/2 | √ |
| HTTP/3 & QUIC | × |
| AutoSSL | LetsEncrypt |
| DNS Server | × |
| DNS Zone Manager | √ |
| DNSSEC | × |
| Multi-PHP | × |
| Database Server | MySQL / MariaDB / PostgreSQL |
| Database Admin | phpMyAdmin / phpPgAdmin |
| Email Server | WildDuck |
| Webmail | × |
| FTP Server | × |
| Caching | Redis |
| Email Validation | × |
| Spam Protection | × |
| Firewall | iptables / Uncomplicated Firewall (UFW) |
| WAF | Fail2Ban |
| Virus / Malware Scanning | × |
| Reseller Accounts | × |
| User Accounts | × |
| Separate Panels (Admin / Users) | × |
| Hosting Packages | × |
| Quotas | × |
| Traffic Statistics | × |
| Cron Jobs | √ |
| Local Backup | √ |
| External Backup | FTP / SFTP / AWS S3 / Dropbox / Google Drive / DigitalOcean Spaces |
| File Manager | √ |
| Extendable by Plugins | × |
| API | √ |
| WHMCS Support | × |
| Panel Account Restrictions | × |
| Server and Package Updates | CLI / GUI |
| Automatic Updates | √ |
| Can be Uninstalled | √ |
Ploi is a modern looking SaaS platform which has a lot of features and a free tier, however the deploy security options are very weak and lacking.
- Pros
- Can install an email server
- Tehre is a free tier
- Cons
- Limited security options
- No forum.
Notes
- Sites
- Homepage
- Demo
- Changelog
- Code Repository
- Forum
- Docs
- Plugins
- General
- Settings
- Plugins
- File Locations / Repo Locations / Key Locations
- Install
- Update / Upgrade
- Uninstall
- Installation Instructions
- Misc
GridPane
![]()
| Features | Status |
| Primarily Designed For | Web Applications (WordPress only) |
| Free/Paid | Both |
| License | Proprietary |
| Supported OS | Ubuntu |
| Supported Cloud Providers | Amazon Web Services (AWS) / DigitalOcean / Hetzner Cloud / Google Compute Engine (GCE) / Vultr / Akamai (formerly Linode) / OVH / UpCloud / Custom Server (via SSH) |
| Install Method(s) | SaaS |
| Web Console |
|
| Virtualization | × |
| Web Server | Nginx / OpenLiteSpeed |
| TLS 1.3 | √ |
| HTTP/2 | √ |
| HTTP/3 & QUIC | √ |
| AutoSSL | LetsEncrypt |
| DNS Server | × |
| DNS Zone Manager | √ |
| DNSSEC | × |
| Multi-PHP | × |
| Database Server | MariaDB / Percona |
| Database Admin | × |
| Email Server | × |
| Webmail | × |
| FTP Server | × |
| Caching | Redis |
| Email Validation | × |
| Spam Protection | × |
| Firewall | iptables / Uncomplicated Firewall (UFW) |
| WAF | Fail2Ban / ModSecurity / OWASP / 7G |
| Virus / Malware Scanning | ClamAV / Maldet |
| Reseller Accounts | × |
| User Accounts | × |
| Separate Panels (Admin / Users) | × |
| Hosting Packages | × |
| Quotas | × |
| Traffic Statistics | × |
| Cron Jobs | √ |
| Local Backup | √ |
| External Backup | AWS S3 / Wasabi / Backblaze |
| File Manager | × |
| Extendable by Plugins | × |
| API | × |
| WHMCS Support | × |
| Panel Account Restrictions | Different tiers, different options |
| Server and Package Updates | GUI |
| Automatic Updates | √ |
| Can be Uninstalled | √ |
GridPane is a SaaS that has a modern feel. While offering a free tier the first paid level is quite high and is definately aimed at small developers and agencies.
- Pros
- Public Roadmap
- App development on your Git repo that can be pushed to live sites
- Snapshot Failover™ is a proprietary high availability setup that allows you to clone all of the sites on one server over to another server and set a syncing schedule for those paired servers of as little as one hour.
- Documentation is well written.
- The website is modern and easy to navigate
- Cons
- Only works for WordPress Apps.
- No Apache
- No .htaccess support
Notes
- Sites
- General
- Settings
- Plugins
- File Locations / Repo Locations / Key Locations
- Install
- Update / Upgrade
- Uninstall
- Installation Instructions
- Misc
Cleavr
![]()
| Features | Status |
| Primarily Designed For | Web Applications |
| Free/Paid | Paid |
| License | Proprietary |
| Supported OS | Ubuntu |
| Supported Cloud Providers | Amazon Web Services (AWS) / DigitalOcean / Hetzner Cloud / Vultr / Akamai (formerly Linode) / Oracle Cloud / UpCloud / Custom Server (via SSH) |
| Install Method(s) | SaaS |
| Web Console |
|
| Virtualization | Docker |
| Web Server | Nginx / NodeJS |
| TLS 1.3 | √ |
| HTTP/2 | √ |
| HTTP/3 & QUIC | × |
| AutoSSL | LetsEncrypt |
| DNS Server | × |
| DNS Zone Manager | √ |
| DNSSEC | × |
| Multi-PHP | × |
| Database Server | MySQL / MariaDB / PostgreSQL |
| Database Admin | × |
| Email Server | × |
| Webmail | × |
| FTP Server | × |
| Caching | Redis / Memcached |
| Email Validation | × |
| Spam Protection | × |
| Firewall | iptables / Uncomplicated Firewall (UFW) |
| WAF | Fail2Ban |
| Virus / Malware Scanning | × |
| Reseller Accounts | × |
| User Accounts | × |
| Separate Panels (Admin / Users) | × |
| Hosting Packages | × |
| Quotas | × |
| Traffic Statistics | × |
| Cron Jobs | √ |
| Local Backup | √ |
| External Backup | AWS S3 / DigitalOcean Spaces / Wasabi / Backblaze |
| File Manager | × |
| Extendable by Plugins | × |
| API | × |
| WHMCS Support | × |
| Panel Account Restrictions | × |
| Server and Package Updates | CLI / GUI |
| Automatic Updates | × |
| Can be Uninstalled | √ |
Cleavr is Saas that has quite a few options but is not exhaustive and does not use Apache. The spread of Apps that can be deployed is better than some other providers and with the price is goog value for money.
The cleavr website is modern, not cluttered so is eay to navigate.
- Pros
- Push-to-deploy : Automatically deploy your apps when you push updates to GitHub, GitLab, or Bitbucket.
- Many different Apps that can be deployed.
- Pricing is excellent.
- Cons
- Documentation is limited and the search is broken.
- Limited security options.
- Only uses Nginx as the webserver.
Notes
- Sites
- General
- Settings
- Plugins
- File Locations / Repo Locations / Key Locations
- Install
- Update / Upgrade
- Uninstall
- Installation Instructions
- Misc
SpinupWP
![]()
| Features | Status |
| Primarily Designed For | Web Applications (WordPress only) |
| Free/Paid | Paid |
| License | Proprietary |
| Supported OS | Ubuntu |
| Supported Cloud Providers | -Amazon Web Services (AWS) / -DigitalOcean / Hetzner Cloud / -Google Compute Engine (GCE) / Google Cloud Platform (GCP) / Microsoft Azure / -Vultr / -Akamai (formerly Linode) / Oracle Cloud / Webdock.io / Alibaba Cloud / Contabo / OVH / UpCloud / Webdock.io / -Custom Server (via SSH) |
| Install Method(s) | SaaS |
| Web Console |
|
| Virtualization | × |
| Web Server | Nginx |
| TLS 1.3 | √ |
| HTTP/2 | √ |
| HTTP/3 & QUIC | × |
| AutoSSL | LetsEncrypt |
| DNS Server | × |
| DNS Zone Manager | × |
| DNSSEC | × |
| Multi-PHP | √ |
| Database Server | MySQL |
| Database Admin | × |
| Email Server | × |
| Webmail | × |
| FTP Server | × |
| Caching | Redis |
| Email Validation | × |
| Spam Protection | × |
| Firewall | iptables / Uncomplicated Firewall (UFW) |
| WAF | Fail2Ban |
| Virus / Malware Scanning | × |
| Reseller Accounts | × |
| User Accounts | × |
| Separate Panels (Admin / Users) | × |
| Hosting Packages | × |
| Quotas | × |
| Traffic Statistics | × |
| Cron Jobs | √ |
| Local Backup | × |
| External Backup | AWS S3 / Google Cloud Platform (GCP) / DigitalOcean Spaces / Wasabi / Backblaze |
| File Manager | × |
| Extendable by Plugins | × |
| API | √ |
| WHMCS Support | × |
| Panel Account Restrictions | Number of servers |
| Server and Package Updates | CLI / GUI |
| Automatic Updates | √ |
| Can be Uninstalled | √ |
SpinupWP is a SaaS product aimed at App developers utilising WordPress. It is not for hoster reselling. The price point and limited fuctionality makes the personal tier pointless as you might aswell setup your own WordPress server.
If you are an experienced developer and need a cloud platform to automat WordPress deploys you might as well look at this to see if it gives you the features you need. One interesting thiing is that theya re developing their own aPI whic is currently in Beta.
- Pros
- Push-to-deploy
- WordPress focussed
- API (in beta)
- Cons
- Limited security options.
- No Apache
Notes
- Sites
- General
- Settings
- Plugins
- File Locations / Repo Locations / Key Locations
- Install
- Update / Upgrade
- Uninstall
- Installation Instructions
- Misc
Cloudways
![]()
| Features | Status |
| Primarily Designed For | Web Applications |
| Free/Paid | Paid |
| License | Proprietary |
| Supported OS | Ubuntu |
| Supported Cloud Providers | in-house / Amazon Web Services (AWS) / Google Cloud Platform (GCP) |
| Install Method(s) | PaaS |
| Web Console |
|
| Virtualization | × |
| Web Server | Apache / Nginx |
| TLS 1.3 | √ |
| HTTP/2 | √ |
| HTTP/3 & QUIC | √ |
| AutoSSL | LetsEncrypt |
| DNS Server | × |
| DNS Zone Manager | √ |
| DNSSEC | × |
| Multi-PHP | √ |
| Database Server | MySQL / MariaDB |
| Database Admin | × |
| Email Server | × |
| Webmail | × |
| FTP Server | × |
| Caching | Redis / Memcached / Varnish / Cloudflare CDN (paid) / in-house WordPress cache plugin (Breeze) |
| Email Validation | × |
| Spam Protection | × |
| Firewall | DigitalOcean Cloud Firewall |
| WAF | Cloudflare WAF |
| Virus / Malware Scanning | × |
| Reseller Accounts | × |
| User Accounts | × |
| Separate Panels (Admin / Users) | × |
| Hosting Packages | × |
| Quotas | × |
| Traffic Statistics | × |
| Cron Jobs | × |
| Local Backup | Droplet Backups (paid) |
| External Backup | × |
| File Manager | × |
| Extendable by Plugins | √ |
| API | √ |
| WHMCS Support | × |
| Panel Account Restrictions | More money, more server resources |
| Server and Package Updates | CLI / GUI |
| Automatic Updates | √ |
| Can be Uninstalled | √ |
Cloudways is PaaS (from DigitalOcean) and actually runs on top of AWS and Digital Ocean (and a bunch of other IaaS platforms as well). When you buy infrastructure on Cloudways, you can specify the underlying infrastructure provider. They’ll automatically do the configuration, set up your servers, and customize (usually, with a single click) your applications on those servers. Plus, they offer actual humans 24-7-365 that can provide you with support.
The Cloudways platform features >99.9% uptime, super fast page load time, pro-active app monitoring, dedicated workflows, leading security including add ons from Cloudflare and 24/7 premium support.
- Pros
- Widely supported
- Their infrastructure is large.
- Backed by DigitalOcean
- Staging environment
- Cons
- Backups are not easy and are an additional cost.
- No outward going backups. you have to use an external 3rd part (i.e. BackupSheep or SnapShooter).
- Only for advanced users or hobbyiest to have a play.
- The stack offered has no security.
Notes
- Sites
- General
- What is DigitalOcean used for? - WebsiteBuilderInsider.com - DigitalOcean is a cloud hosting company that allows customers to deploy and manage applications online. It offers a wide range of cloud services, including compute, storage, and networking, as well as platform-as-a-service offerings.
- Settings
- Plugins
- How To Set Up a Firewall with UFW on Ubuntu 20.04 | DigitalOcean - This tutorial will show you how to set up a firewall with UFW on Ubuntu 20.04.
- How To Install and Secure phpMyAdmin on Ubuntu 20.04 | DigitalOcean - phpMyAdmin is an application that allows users to interact with MySQL databases through a web interface.
- How to Protect SSH with Fail2Ban | DigitalOcean | DigitalOcean - Fail2ban is a service that can be run on your server to dynamically block clients that repeatedly fail to authenticate correctly with your services.
- How To Protect SSH with Fail2Ban on Ubuntu 22.04 | DigitalOcean - Fail2ban is a service that can be run on your server to dynamically block clients that repeatedly fail to authenticate correctly with your services.
- How to Use DigitalOcean Backups and Snapshots - How's your backup strategy? You can protect your cloud assets from disaster by making regular backups.
- File Locations / Repo Locations / Key Locations
- Install
- Update / Upgrade
- Uninstall
- Installation Instructions
- Misc
ZoomAdmin (might be dead)
![]()
| Features | Status |
| Primarily Designed For | Web Applications |
| Free/Paid | Paid |
| License | Proprietary |
| Supported OS | Ubuntu |
| Supported Cloud Providers | Amazon Web Services (AWS) / DigitalOcean / Microsoft Azure / Custom Server (via SSH) |
| Install Method(s) | SaaS |
| Web Console |
|
| Virtualization | Docker |
| Web Server | ? |
| TLS 1.3 | × |
| HTTP/2 | √ |
| HTTP/3 & QUIC | × |
| AutoSSL | LetsEncrypt |
| DNS Server | × |
| DNS Zone Manager | × |
| DNSSEC | × |
| Multi-PHP | × |
| Database Server | MySQL / PostgreSQL |
| Database Admin | phpMyAdmin / pgAdmin |
| Email Server | × |
| Webmail | × |
| FTP Server | × |
| Caching | Redis |
| Email Validation | × |
| Spam Protection | × |
| Firewall | × |
| WAF | × |
| Virus / Malware Scanning | × |
| Reseller Accounts | × |
| User Accounts | × |
| Separate Panels (Admin / Users) | × |
| Hosting Packages | × |
| Quotas | × |
| Traffic Statistics | Disk |
| Cron Jobs | √ |
| Local Backup | × |
| External Backup | × |
| File Manager | × |
| Extendable by Plugins | × |
| API | × |
| WHMCS Support | × |
| Panel Account Restrictions | × |
| Server and Package Updates | CLI / GUI |
| Automatic Updates | × |
| Can be Uninstalled | × |
ZoomAdmin is web hosting control panel which provides a cloud-based platform to easily manage and maintain your servers and apps, using intuitive web interface and modern technology.
This platform utilises Docker containers for all of its apps rather than seperate servers.
- Pros
- Many different programming languages supported.
- Quickly create/deploy apps in your favorite tech, e support Ruby, Ruby and Rails, ASP.NET Core, PHP, Python, NodeJS, Go, JAVA, PostgreSQL, and many more.
- Host multiple apps on your Servers
- 1-Click Deployments of many of the popular apps, i.e. WordPress, Jenkins, Redis, nopCommerce and many more.
- Pre-configured app containers make it super easy for anyone to start creating container apps with default settings without deep knowledge of containers.
- Advanced Docker settings, including having your own Dockerfile.
- All apps are run in a separate Docker container.
- Cons
- Website is looking old.
- You have to do a lot of things manually.
Notes
- Sites
- Homepage
- Demo
- Changelog
- Code Repository
- Forum
- Docs
- Plugins
- General
- Settings
- Plugins
- File Locations / Repo Locations / Key Locations
- Install
- Update / Upgrade
- Uninstall
- Installation Instructions
- Misc
HC - Website Hosting Module
![]()
| Features | Status |
| Primarily Designed For | Hosting Company / Small Hosting Company / Websites + Email / Web Applications / Web Applications (WordPress only) / Personal Server |
| Free/Paid | Paid |
| License | Proprietary |
| Supported OS | Windows / Linux |
| Supported Cloud Providers | ? |
| Install Method(s) | SaaS |
| Web Console | ? |
| Virtualization | ? |
| Web Server | ? |
| TLS 1.3 | ? |
| HTTP/2 | ? |
| HTTP/3 & QUIC | ? |
| AutoSSL | ? |
| DNS Server | ? |
| DNS Zone Manager | ? |
| DNSSEC | ? |
| Multi-PHP | ? |
| Database Server | ? |
| Database Admin | ? |
| Email Server | ? |
| Webmail | ? |
| FTP Server | ? |
| Caching | ? |
| Email Validation | ? |
| Spam Protection | ? |
| Firewall | ? |
| WAF | ? |
| Virus / Malware Scanning | ? |
| Reseller Accounts | √ |
| User Accounts | √ |
| Separate Panels (Admin / Users) | ? |
| Hosting Packages | √ |
| Quotas | ? |
| Traffic Statistics | ? |
| Cron Jobs | ? |
| Local Backup | ? |
| External Backup | ? |
| File Manager | ? |
| Extendable by Plugins | ? |
| API | √ |
| WHMCS Support | ? |
| Panel Account Restrictions | ? |
| Server and Package Updates | ? |
| Automatic Updates | ? |
| Can be Uninstalled | × |
HC - Website Hosting Module integrates into the Hosting Controller Cloud Automation Platform and is not a standalone panel. This software is aimed at corporate entities with a substancial amount of technical staff and a company that wants a wide reach without running out of resources.
- Pros
- ?
- Cons
- ?
Notes
- Sites
- Homepage
- Demo
- Changelog
- Code Repository
- Forum
- Docs
- Plugins
- General
- Settings
- Plugins
- File Locations / Repo Locations / Key Locations
- Install
- Update / Upgrade
- Uninstall
- Installation Instructions
- Misc
Cloud Management Platform (Apps?)
These panels are designed for deploying and managing remote servers in the cloud, usually from the larger providers. They provide such things as turnkey installations, cloud service configuration, package updates and other server related things but without requiring serious indepth configuration of the underlying hardware. These platforms allow easy deployment and a more efficient use of server resources as you only pay for what you use in most cases. `Web Development Agencies` and `Software Design Houses` will benefit greatly from using this setup.
You also find there are a few different types of these platforms aimed at different areas: Web Hosting, Apps and General Server deployments.
Cipi

| Features | Status |
| Primarily Designed For | Server Management / Cloud Management.........?????? |
| Free/Paid | Free |
| License | MIT |
| Supported OS | Ubuntu |
| Supported Cloud Providers | Amazon Web Services (AWS) / DigitalOcean / Google Cloud Platform (GCP) / Microsoft Azure / Vultr / Akamai (formerly Linode) |
| Install Method(s) | Script / Cloud Quick Launch |
| Web Console |
|
| Virtualization | × |
| Web Server | Nginx |
| TLS 1.3 | √ |
| HTTP/2 | √ |
| HTTP/3 & QUIC | × |
| AutoSSL | LetsEncrypt |
| DNS Server | × |
| DNS Zone Manager | × |
| DNSSEC | × |
| Multi-PHP | √ |
| Database Server | MySQL |
| Database Admin | phpMyAdmin |
| Email Server | × |
| Webmail | × |
| FTP Server | × |
| Caching | Redis |
| Email Validation | × |
| Spam Protection | × |
| Firewall | iptables / Firewalld / Uncomplicated Firewall (UFW) |
| WAF | Fail2Ban |
| Virus / Malware Scanning | × |
| Reseller Accounts | × |
| User Accounts | × |
| Separate Panels (Admin / Users) | × |
| Hosting Packages | × |
| Quotas | × |
| Traffic Statistics | × |
| Cron Jobs | × |
| Local Backup | × |
| External Backup | × |
| File Manager | × |
| Extendable by Plugins | × |
| API | √ |
| WHMCS Support | × |
| Panel Account Restrictions | × |
| Server and Package Updates | CLI / GUI |
| Automatic Updates | √ |
| Can be Uninstalled | × |
Cipi is a Laravel based cloud server control panel that supports DigitalOcean, AWS, Linode, Azure, Vultr, Google Cloud Platform (GCP) and other VPS. It comes with nginx, Mysql, multi PHP-FPM versions, multi-users, Supervisor, Composer, npm, free Let's Encrypt certificates, Git deployment, Fail2Ban, Redis, API and with a simple graphical interface useful to manage Laravel, Codeigniter, Symfony, WordPress or other PHP sites.
Cipi is easy, stable, powerful and free for any personal and commercial use and it's a perfect alternative to Runcloud, Ploi.io, Serverpilot, Forge, Moss.sh and similar software.
Install and manage your server like a pro! With Cipi you don’t need to be a Sysadmin to deploy and manage websites and PHP applications powered by cloud VPS. Cipi monitors itself and remote servers for issues.
- Pros
- There is an semi-official Android Mobile App
- Cons
- Limited options
- No forum or community
Notes
- Sites
- Homepage
- Demo
- Changelog
- Code Repository
- Forum
- Docs
- Plugins
- General
- Settings
- Plugins
- File Locations / Repo Locations / Key Locations
- Install
- Update / Upgrade
- Uninstall
- Installation Instructions
- Misc
ServerAuth
![]()
| Features | Status |
| Primarily Designed For | Server Management / Cloud Management.........?????? |
| Free/Paid | Paid |
| License | Proprietary |
| Supported OS | CentOS / Debian / Ubuntu / Fedora |
| Supported Cloud Providers | DigitalOcean / Hetzner Cloud / Vultr / Akamai (formerly Linode) / Custom Server (via SSH) |
| Install Method(s) | SaaS |
| Web Console |
|
| Virtualization | × |
| Web Server | × |
| TLS 1.3 | × |
| HTTP/2 | × |
| HTTP/3 & QUIC | × |
| AutoSSL | × |
| DNS Server | × |
| DNS Zone Manager | × |
| DNSSEC | × |
| Multi-PHP | × |
| Database Server | MySQL |
| Database Admin | × |
| Email Server | × |
| Webmail | × |
| FTP Server | × |
| Caching | × |
| Email Validation | × |
| Spam Protection | × |
| Firewall | Uncomplicated Firewall (UFW) |
| WAF | × |
| Virus / Malware Scanning | × |
| Reseller Accounts | × |
| User Accounts | × |
| Separate Panels (Admin / Users) | × |
| Hosting Packages | × |
| Quotas | × |
| Traffic Statistics | Custom |
| Cron Jobs | √ |
| Local Backup | × |
| External Backup | × |
| File Manager | × |
| Extendable by Plugins | × |
| API | √ |
| WHMCS Support | × |
| Panel Account Restrictions | × |
| Server and Package Updates | GUI |
| Automatic Updates | × |
| Can be Uninstalled | √ |
ServerAuth is web-based server management panel with limited functionality. On the website it says that `Website Management` and `1-click package installers` are coming soon.
ServerAuth provides a whole host of management tools, from controlling who can access your server, to adding cron jobs, securing your servers and installing packages. And with an ever growing suite of tools you'll always be one step ahead!
This platform works by asking you to install their open source agent on your server which in turn calls back to our system to retrieve the public SSH keys that should have access to that server and system account.
I suspect this SaaS will develop from `Server Management` only to being focused on `Web applications` and it might be that this is a new company and development is on the way. The website does certainly have some out of date information on it.
- Pros
- Server monitoring
- API
- Cons
- Not many features
- No forum
- Webiste has some out of date information.
Notes
- Sites
- General
- Settings
- Plugins
- File Locations / Repo Locations / Key Locations
- Install
- Update / Upgrade
- Uninstall
- Installation Instructions
- Misc
Server Management - local server admin - Cloud Server Admin - Local Server admin - Server Admin (Cloud) - Server Admin (Local)
These panels are used to directly change settings on a single server on which they are installed and because of this they usually are feature rich and allow you to do most of the configuration through the panel and not the command line.
Cockpit
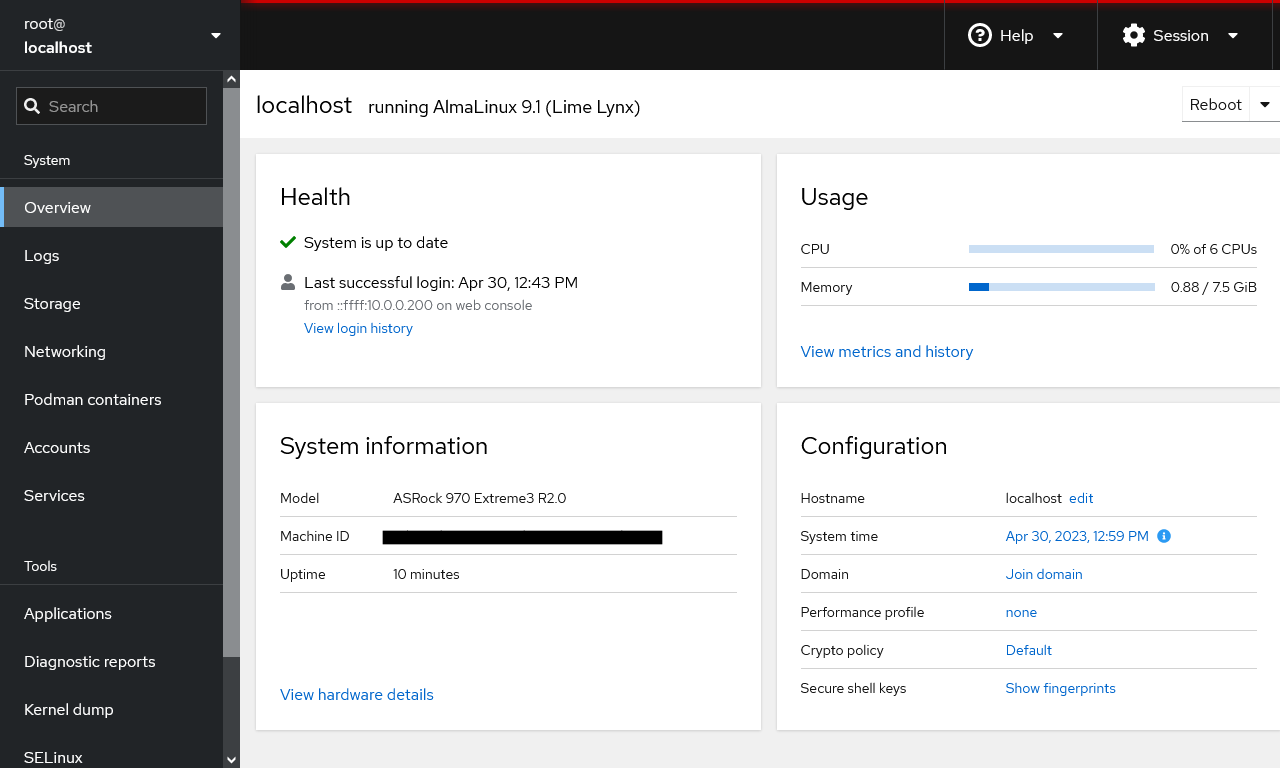
| Features | Status |
| Primarily Designed For | Server Management |
| Free/Paid | Free |
| License | LGPLv2.1+ |
| Supported OS | Fedora / RHEL / Fedora CoreOS / CentOS / Debian / Ubuntu / Clear Linux / Archlinux / Tumbleweed / SUSE |
| Supported Cloud Providers | × |
| Install Method(s) | Script |
| Web Console |
|
| Virtualization | KVM / Docker / Podman (this replaces Docker) |
| Web Server | × |
| TLS 1.3 | √ |
| HTTP/2 | × |
| HTTP/3 & QUIC | × |
| AutoSSL | × |
| DNS Server | × |
| DNS Zone Manager | × |
| DNSSEC | × |
| Multi-PHP | × |
| Database Server | × |
| Database Admin | × |
| Email Server | × |
| Webmail | × |
| FTP Server | × |
| Caching | × |
| Email Validation | × |
| Spam Protection | × |
| Firewall | Firewalld |
| WAF | × |
| Virus / Malware Scanning | × |
| Reseller Accounts | × |
| User Accounts | × |
| Separate Panels (Admin / Users) | × |
| Hosting Packages | × |
| Quotas | × |
| Traffic Statistics | √ |
| Cron Jobs | × |
| Local Backup | Automated Backup (Paid Addon) |
| External Backup | ? |
| File Manager | √ |
| Extendable by Plugins | √ |
| API | √ |
| WHMCS Support | × |
| Panel Account Restrictions | × |
| Server and Package Updates | CLI / GUI |
| Automatic Updates | √ |
| Can be Uninstalled | × |
Cockpit is a server manager that makes it easy to administer your Linux servers via a web browser. Jumping between the terminal and the web tool is no problem. A service started via Cockpit can be stopped via the terminal. Likewise, if an error occurs in the terminal, it can be seen in the Cockpit journal interface.
Cockpit is perfect for new sysadmins, allowing them to easily perform simple tasks such as storage administration, inspecting journals and starting and stopping services. You can monitor and administer several servers at the same time. Just add them with a single click and your machines will look after its buddies.
The Cockpit Web Console enables users to administer GNU/Linux servers using a web browser. It offers network configuration, log inspection, diagnostic reports, SELinux troubleshooting, interactive command-line sessions, and more.
Once Cockpit is installed, enable it with "systemctl enable --now cockpit.socket".
- Pros
- Basic Server management.
- Works on many distros.
- Can manage Virtual Machines and Podman Containers.
- Can be extended by plugins.
- The console is very clean and modern.
- Web Based Terminal.
- Cockpit comes pre-installed in a lot of Linux distros, but not activated (usually not on the Minimal installations).
- Widely used
- Cons
- Cannot install packages from the GUI (but you can use the web based terminal)
- Not all packages can be installed with a click of a button.
- No Cron support
Notes
- Sites
- Homepage
- Demo
- Changelog
- Code Repository
- Forum
- Docs
- Plugins
- General
- Manage Your Servers with Cockpit Linux - Learn how to simplify the management of your server, from networking to containers, with the Cockpit Linux web console!
- Using the Cockpit Web Console | Oracle - Oracle Linux includes a web console you can use for system administration. The web console is called Cockpit. For non-minimal installations, Cockpit is automatically installed, although not automatically enabled. Cockpit provides a web browser interface for performing system configuration and administration tasks, either locally or remotely on multiple servers.
- How I use Cockpit for my home's Linux server management | Opensource.com - Cockpit is a service for Linux that provides a web-based interface for managing and monitoring hosts. It can be deployed in any size organization, even a small office, and it's a great way for home users to maintain the family IT infrastructure. I use it to manage and monitor all of the computers in my house—including Raspberry Pi.
- SSL/TLS Usage - Cockpit usually requires that web browsers communicate with it using HTTPS, for security reasons.
- How to Manage Linux Servers with the Cockpit Web Interface - You can easily monitor and manage multiple Linux computers with Cockpit, a browser-based administration and dashboard tool. It’s self-contained, simple to set up, and easy to use. We’ll show you how to get started.
- Cockpit - A Web Interface for your Linux servers » EasyCode - In this tutorial, we’ll be learning how to set Cockpit. Cockpit offers an easy to use Web Interface for your Linux servers
- Cockpit | An Easy to Use Web GUI for Your Linux Servers | Linode, now Akamai - Cockpit is a free and open source application that gives you a GUI for your server, which can be accessed via a web browser.
- GitHub - 45Drives/cockpit-navigator - A Featurefull File Browser for Cockpit. This can be install on any cockpit install not just 45drives stuff.
- An introduction to Cockpit, a browser-based administration tool for Linux | Enable Sysadmin - Need to monitor or administer a server remotely via the web? Look no further than Cockpit.
- How to Monitor and Administer a Server with Cockpit | Linode (with YouTube Video) - This guide explains how to install and configure Cockpit, a system monitoring and administration tool.
- Linux Cockpit File Manager Version 0.5.8 | InMotion Hosting - Cockpit Navigator is a third party application for the Cockpit Linux server control panel. The Cockpit file manager app lets you use the web interface to easily: Modify files Edit file ownership and permissions Create symbolic links Upload and download files Using the Cockpit File Manager (Navigator) Log into the Cockpit terminal or SSH.
- Linux Server Web GUI - management with cockpit - YouTube
- In this video, I will show you how to install a Web GUI for your Linux server with cockpit. I will show you the features of cockpit and how to use it to manage virtual machines and install custom plugins.
- Covers fixing the network manager when using Ubuntu
- Virtual machines
- Community plugin for ZFS (not for production environments).
- Best on RHEL or CentOS but works on Ubuntu and other flavours of Linux.
- These issues might be fixed already.
- Manage Your Virtual Machines With Cockpit - YouTube - Manage your virtual machines locally or remotely using Cockpit, which is the successor to Virt-Manager (now deprecated). You access your VMs in Cockpit via a web interface using your web browser. The interface is friendly and it has most of the features that I would expect to be there.
- How to Use Cockpit to Setup a Web Interface for Your Linux Server - YouTube
- In this video, I will show you how to access and manage your Linux servers with Cockpit. Cockpit is a GUI tool that helps you to manage your Linux servers and other infrastructure.
- Covers fixing the network manager when using Ubuntu
- Settings
- Change hostname: Overview --> Configuration --> Hostname --> edit
- Plugins (of note and not bundled with Cockpit. Not all will be available on all OS or have to be built from source... Mostly available for Ubuntu)
- 389 Directory Server
- A web-based interface to the enterprise-class Open Source LDAP server for Linux.
- Package: cockpit-389-ds
- Homepage: https://directory.fedoraproject.org/docs/389ds/download.html
- ZFS Manager
- An interactive ZFS on Linux admin package for Cockpit.
- Package: cockpit-zfs
- Homepage: https://github.com/45Drives/cockpit-zfs-manager/issues
- File Sharing
- A Cockpit plugin to easily manage Samba and NFS file sharing.
- Package: none yet
- Homepage: https://github.com/45Drives/cockpit-file-sharing
- Cockpit makes creating Samba shares remarkably simple | TechRepublic
- If you're looking for the easiest method for creating Samba shares, Jack Wallen has just what you're looking for via Cockpit.
- Howe to install on AlmaLinux
- Linux Cockpit File Manager Version 0.5.8 | InMotion Hosting - Install instructions
- Navigator
- A Featureful File Browser for Cockpit.
- Package: none yet
- Homepage: https://github.com/45Drives/cockpit-navigator
- Benchmark
- A Visual Benchmarking Utility for Cockpit. Test how fast your storage is, easily.
- Package: none yet
- Homepage: https://github.com/45Drives/cockpit-benchmark
- We Built a Visual Benchmarking Module for Cockpit - Brett Kelly shows off a visual benchmarking module that quickly and easily gives you performance stats for your storage system.
- Sensors
- List all available sensors on the machine provided by lm-sensors.
- Package: cockpit-sensors
- Homepage: https://github.com/ocristopfer/cockpit-sensors
- 389 Directory Server
- File Locations / Repo Locations / Key Locations
- Install
- How to Install or Enable Cockpit on AlmaLinux 8 - Linux Shout - Install and Enable Cockpit web-based Server management software on AlmaLinux 8 to manage your Linux server remotely.
- Update / Upgrade
- Uninstall
- Installation Instructions
- Misc
Webmin
| Features | Status |
| Primarily Designed For | Server Management |
| Free/Paid | Free |
| License | BSD 3-Clause |
| Supported OS | RHEL / CentOS / AlmaLinux / Rocky Linux / Oracle Linux / Debian / Ubuntu / Fedora / Kali |
| Supported Cloud Providers | × |
| Install Method(s) | Script |
| Web Console |
|
| Virtualization |
Xen / KVM / OpenVZ / Vservers / Amazon EC2 / Solaris Zones / Google Compute Engine (GCE) Via Cloudmin (Free/Pro) |
| Web Server | Apache |
| TLS 1.3 | √ |
| HTTP/2 | √ |
| HTTP/3 & QUIC | × |
| AutoSSL | × |
| DNS Server | BIND |
| DNS Zone Manager | √ |
| DNSSEC | √ |
| Multi-PHP | × |
| Database Server | MariaDB / PostgreSQL |
| Database Admin | × |
| Email Server | Postfix / Dovecot / Sendmail / QMail |
| Webmail | Usermin |
| FTP Server | ProFTPD / WU-FTPD |
| Caching | × |
| Email Validation | × |
| Spam Protection | SpamAssassin |
| Firewall | iptables / CSF / Linux Firewall / Shorewall / Firewalld |
| WAF | Fail2Ban / Comodo WAF (CWAF) |
| Virus / Malware Scanning | × |
| Reseller Accounts | × |
| User Accounts | √ |
| Separate Panels (Admin / Users) | √ |
| Hosting Packages | × |
| Quotas | Disk / Bandwidth |
| Traffic Statistics | Webalizer |
| Cron Jobs | × |
| Local Backup | √ |
| External Backup | RSH / SSH / FTP / Bacula |
| File Manager | √ |
| Extendable by Plugins | √ |
| API | √ |
| WHMCS Support | × |
| Panel Account Restrictions | × |
| Server and Package Updates | CLI / GUI |
| Automatic Updates | √ |
| Can be Uninstalled | √ |
Webmin is a web-based system administration tool for Unix-like servers, and services with about 1,000,000 yearly installations worldwide. Using it, it is possible to configure operating system internals, such as users, disk quotas, services or configuration files, as well as modify, and control open-source apps, such as BIND DNS Server, Apache HTTP Server, PHP, MySQL, and many more.
- Software Roles
- Webmin - Your server manager administrator. Hardware, software packages, server configuration, software configuration.
- Virtualmin - Something like WHM of cPanel. Your client accounts, domains, hosting packages, e-mail configurations.
- Usermin - Is a webmail client with some other stuff. It is not for administrative tasks.
- Cloudmin - Is a UI built on top of Webmin for managing virtual systems, such as Xen, KVM and OpenVZ instances.
Webmin is the base platform that Virtualmin and Usermin use. It is Webmin that is extended by plugins/modules. Virtualmin is Webmin plugin/module and therefore requires Webmin to be installed. Usermin is a standalone package but has a Webmin plugin/module but I feel it's role outsite of Webmin is limited and I would not install it as a standalone package.
Usermin is a web-based interface for webmail, password changing, mail filters, fetchmail and much more. It is designed for use by regular non-root users on a Unix system, and limits them to tasks that they would be able to perform if logged in via SSH or at the console. Most users of Usermin are sysadmins looking for a simple webmail interface to offer their customers. Unlike most other webmail solutions, it can be used to change passwords, read email with no additional servers installed (like IMAP or POP3), and setup users’ configurations for forwarding, spam filtering and autoreponders. Usermin also provides web interfaces for viewing and managing data in MySQL and PostgreSQL databases, editing Apache .htaccess configuration files, running commands on the server, and full featured File Manager. The administrator has full control over which of these modules are available to users.
If you want to install Webmin, you might aswell install Virtualmin.
- Pros
- Very easy to install
- Covers all aspects of Linux server
- Can send push messages through your browser
- Can configure Apache modules in the GUI
- Can backup configuration
- Can backup files
- Can be expanded with plugins
- Heavily tested
- Lots of features
- Lots of documentation and is well written
- Forum is very active
- Cons
- You need Linux experience to use this
- Doesn't natively support Multi-PHP
- Only covers Apache out of the box
- No phpMyAdmin. You can manage the server and some settings from the GUI.
- You cannot select the version of MariaDB installed. The latest is installed.
Notes
- Sites
- General
- The MySQL module installs MariaDB
- Add a normal repo in the GUI
- System --> Software Package Updates --> Package Repositories --> Create
- Repository base URL: https://software.virtualmin.com/vm/7/gpl/apt
- Distribution path components: virtualmin/main
- System --> Software Package Updates --> Package Repositories --> Create
- Cannot do DNS lookups after installation
- For me this was caused by DNS Hijacking preventing DNS lookup, even to root servers.
- Solution is to add another DNS server to BIND (Servers --> BIND DNS Server --> Other DNS Servers --> IP Address = 10.0.0.1 --> Save
- Backups
- These are filesystem backups only, but Linux is all file based anyway.
- Create Webmin Backups Fast (3 Options) | InMotion Hosting - Gain a better understanding of how to use Webmin backups before needing them for disaster recovery or if cyber attacks breach your data.
- Filesystem Backups - Webmin Documentation
- Settings
- Plugins
- Software Packages - Webmin Documentation
- Installing, upgrading and uninstalling.
- This chapter covers the installation and management of software on your system using packages. It also covers the differences between the various Unix package formats, such as RPM, DPKG and Solaris.
- Re-install apache module / Other core module
- This is useful if you accedenally delete a pre-installed module.
- Webmin --> Webmin Configuration --> Webmin Modules --> Install from `From HTTP or FTP UR` --> https://download.webmin.com/download/modules/apache.wbm.gz --> Install Module
- Refresh modules (to see the changes
- Install or Reinstall AWstats on Webmin or Virtualmin – Adnan Halilovic Blog - If you may have experienced issues with AWStats after installing Virtualmin on your server, or if you uninstalled it from Virtualmin, you should review this post to learn how to restore it.
- Uninstall a plugin
- System --> Software Packagges --> Package Tree --> [find package and selecte i.e. apache2]
- Usermin
- Usermin is a standalone package but has a Webmin plugin/module.
- How to Install Usermin on Ubuntu 20.04
- Usermin is a web-based interface mainly for webmail designed for non-root users to perform routine tasks including, reading mail, changing passwords, setting up databases and a web-basedSSH terminal. It is a stripped-down version of Webmin intended for regular users without always system administrators. It provides a rich set of features.
- These instructions will show you how to install webmin as a standalone package.
- Adding Webmin & Usermin to your Ubuntu Server 16.04 LTS - YouTube - This shows you Usermin, albeit an older version.
- Comodo WAF
- This is install by using Comodos package and it supports cPanel/Plesk/DirectAdmin/Webmin via their own plugins and those in turn support Apache/LiteSpeed/Nginx/IIS
- Comodo Web Application Firewall Quick Start Guide | Comodo (PDF) - This tutorial briefly explains how an administrator can setup and configure Comodo Web Application Firewall (CWAF) - the customizable rules based traffic control system that protects your web based applications.
- Install mod_security and add comodo rule set (WAF) | Support Host - Some old instructions on how to install Comodo WAF and the prerequisite of mod_security. Not all parts of the instructions are now required.
- Web-based Application Firewall (WAF) - Documentation | RockyLinux - This tutorial show you how to insta CWAF using an official script, shown below. This can be used when you have Webmin installed.
wget https://waf.comodo.com/cpanel/cwaf_client_install.sh
- CSF Firewall
- ConfigServer Security and Firewall (csf) – ConfigServer Services - A Stateful Packet Inspection (SPI) firewall, Login/Intrusion Detection and Security application for Linux servers.
- Mod_security and/or firewall for new setup - Virtualmin - Virtualmin Community - A discussion of using CSF over other security configurations including ModSec.
- ConfigServer Security & Firewall (csf) - Third Party News - Virtualmin Community
- Has anyone used Config Server Firewall (CSF) with Virtualmin. It was recommended to me and on its website it says it has a module for Webmin. Is it worth using? What are the pros and cons? Is it more or less effective than the controls in VM? Would be grateful for +ve and -ve experiences. Thanks
- A discussion of using CSF over other security configurations including ModSec.
- Installation instructions
- [CSF] ConfigServer Security & Firewall installation on Webmin
- Learn how to install a web and database server, email, FTP client or other applications. Discover and share information on server security or optimization recommendations.
- Very clean and complete tutorial.
- ConfigServer Security & Firewall - Webmin Documentation
- ConfigServer Security & Firewall is powerful set of Unix scripts which help properly configure iptables firewall as well as provide daemon checking for login authentication failures. Each option is extensively described and even default installation checking your current configuration and then gives you hints for improving security of your server.
- Csf provides module for Webmin included in its own installation package. After standard installing of csf+lfd on your server, you can choose:
Webmin > Webmin Configuration > Webmin Modules >From local file > /usr/local/csf/csfwebmin.tgz > Install Module
- ionCube
- How to Install ionCube Loader (Step by Step Tutorial) | Kingsta - Learn how to install ionCube Loader in your web hosting following this step-by-step tutorial.
- Ioncube Install - Nginx · GitHub - This guide will help with install ioncube loader on an Nginx web server.
- Installation of IonCube Installer (for WHMCS) - Help! (Home for newbies) - Virtualmin Community - Hello! I would like to install whmcs to virtualmin however it needs, Ioncube Loader. It would be great if you can give the exact commands I need to install ioncube loader.
- Software Packages - Webmin Documentation
- Repo Locations / Key Locations / Modules
- Webmin Modules
- Webmin GPL
- GPG Keys
- Local Repo Store
- Shared
- /etc/apt/trusted.gpg - I think the is file that the old apt-key stores the information in.
- /etc/apt/sources.list.d/ - This folder contains repo locations without them appearing in the main repo list in linux/ubuntu/virtualmin/webmin etc..
- Local Repo Store (Webmin)
- /etc/apt/sources.list.d/webmin.list
- This has || deb [signed-by=/usr/share/keyrings/debian-webmin.gpg] https://download.webmin.com/download/repository sarge contrib
- This defines the webmin repo
- /usr/share/keyrings/debian-webmin.gpg - this key is used to verify the Webmin repo is correct because all of the assets are signed
- /etc/apt/sources.list.d/webmin.list
- Local Repo Store (Virtualmin)
- /etc/apt/sources.list.d/virtualmin.list
- This has || deb [signed-by=/usr/share/keyrings/debian-virtualmin-7.gpg] https://software.virtualmin.com/vm/7/gpl/apt virtualmin main
- This defines teh virtualmin repo
- /usr/share/keyrings/debian-virtualmin-7.gpg - This key is used to verify the virtualmin repo is correct because all fo the assets are signed
- /etc/apt/sources.list.d/virtualmin.list
- Shared
- Installed Files
- /usr/share/webmin/
- Install Script
- Install
- How to Install Webmin with free Let's Encrypt SSL Certificate on Ubuntu 22.04 - Webmin is a web-based application for managing Linux-based operating systems. It is designed for beginner users who are not familiar with the command line interface. It helps users to edit the configuration file, set up a web server, FTP server, run commands, install packages or manage email forwarding and manage everything via a web browser. It offers a simple and web-based user interface to manage your remote Linux systems.
- Update / Upgrade
- Uninstall
- FAQs | Webmin - How to uninstall Webmin
- How to Remove Webmin from Linux CentOS/RHEL | Linux Tutorials for Beginners - This article covers the steps on how to uninstall or remove webmin software on linux CentOS and Redhat enterprise Linux (RHEL) and tested work well in any older or newer version such as CentOS 5, CentOS 6, CentOS 7, RHEL 5, RHEL 6, and RHEL 7.
- Installation Instructions
- Misc
- Adding Virtualmin repo into Webmin (reference only)
Don't do this.
- You should never mix Webmin and Virtualmin repos, this comes from the developers.
- This is my research I used to workout how to install Nginx onto Webmin, and is just for my reference.
- Install error - The repository 'https://software.virtualmin.com/vm/7/gpl/apt virtualmin Release' does not have a Release file - Virtualmin - Virtualmin Community
- Try running: apt install --reinstall ca-certificates
- If that doesn’t help, try fixing your Virtualmin repos by running:
- wget -O virtualmin-install.sh https://software.virtualmin.com/gpl/scripts/install.sh; /usr/bin/sudo /bin/sh virtualmin-install.sh --setup
- If that still doesn’t work, edit
- /etc/apt/sources.list.d/virtualmin.list (replacing https with http in the URL.)
- In-fact technically, it’s okay to download packages using http as we check for the package signature anyway.
- NO_PUBKEY E8DD3FA0A0BDBCF9
- This error is caused by the signing key not being present in the GPG store.
- To fix you need to add the Key. See notes below for using GPG and examples.
- apt-key is now depreceated and all commands for this are old and should not be used. It has been replaced by gpg.
- apt-key deprecated · Issue #1629 · webmin/webmin · GitHub - This shows the new repository update code (GPG) in the install script and has some explanations.
- Tried to fix `apt-key deprecated` · Issue #1741 · webmin/webmin · GitHub
- Trying update get this error - #3 by dimitrist - Webmin - Virtualmin Community
- Old (pre-Virtualmin 6) repositories deprecated - News - Virtualmin Community
- All new repos have the software version number in their URL.
- Install Nginx (reference only)
- First of all this was my research into doing this and I found it messy and was not without it's issues. If you want Nginx, use Virtualmin.
- You should never mix Webmin and Virtualmin repos.
- NginX Webmin Module 0.11 | Justin D Hoffman - This is an old Webmin module that people still use.
- How To Install Webmin And Secure With Nginx On Ubuntu 20.04 LTS | Tutorials24x7
- This tutorial provided the steps required to install and secure Webmin and access it over the primary domain, subdomain, and subdirectory by configuring the Nginx Web Server as a reverse proxy.
- Very manual
- Installing Nginx (reference only)
- These instructions do work but then it enables the Virtualmin code but because it is not a complete Virtualmin install there are issues.
# Download `Package sigining key for Virtualmin 7`
wget --quiet https://software.virtualmin.com/lib/RPM-GPG-KEY-virtualmin-7

# Process and import key into the security Store
gpg --import RPM-GPG-KEY-virtualmin-7 && cat RPM-GPG-KEY-virtualmin-7 | gpg --dearmor > /usr/share/keyrings/debian-virtualmin-7.gpg

# Delete the Key file
rm RPM-GPG-KEY-virtualmin-7

# Add the Repo
    ##(Option 1) Add repo into the hidden store where Webmin repo is configured (works)
    printf "deb [signed-by=/usr/share/keyrings/debian-virtualmin-7.gpg] https://software.virtualmin.com/vm/7/gpl/apt virtualmin main\\n" >>/etc/apt/sources.list.d/virtualmin.list

    ##(Option 2) Add the repo into the main repo store (Webmin does not give you the option of adding signing details from the GUI). Does work but does not get shown in the GUI.
    #printf "deb [signed-by=/usr/share/keyrings/debian-virtualmin-7.gpg] https://software.virtualmin.com/vm/7/gpl/apt virtualmin main\\n" >>/etc/apt/sources.list

# Remove Apache2
In CLI or GUI

# Add Nginx
System --> Software Packages --> Package from APT --> `nginx` --> Install
(apt-get install nginx-ssl)

# Add Virtualmin Nginx plugins
System --> Software Packages --> Package from APT --> `webmin-virtualmin-nginx` --> Install
System --> Software Packages --> Package from APT --> `webmin-virtualmin-nginx-ssl` --> Install
(apt-get install webmin-virtualmin-nginx webmin-virtualmin-nginx-ssl)

# Refresh modules to show the new module
Refresh Modules

# Enable the Nginx option and disable the Apache server option
Virtualmin --> System Settings --> Features and Plugins --> Nginx website | Nginx website SSL = Enabled
Virtualmin --> System Settings --> Features and Plugins --> apache website | Apache website SSL = Enabled

# Configure you Nginx server as required.
Servers --> Nginx Webserver
- These instructions do work but then it enables the Virtualmin code but because it is not a complete Virtualmin install there are issues.
- Adding Virtualmin repo into Webmin (reference only)
Ajenti

| Features | Status |
| Primarily Designed For | Server Management |
| Free/Paid | Free |
| License | MIT |
| Supported OS | RHEL / CentOS / Debian / Ubuntu / Gentoo |
| Supported Cloud Providers | × |
| Install Method(s) | Script |
| Web Console |
|
| Virtualization | Docker |
| Web Server | × |
| TLS 1.3 | × |
| HTTP/2 | × |
| HTTP/3 & QUIC | × |
| AutoSSL | × |
| DNS Server | × |
| DNS Zone Manager | × |
| DNSSEC | × |
| Multi-PHP | × |
| Database Server | × |
| Database Admin | × |
| Email Server | × |
| Webmail | × |
| FTP Server | × |
| Caching | × |
| Email Validation | × |
| Spam Protection | × |
| Firewall | × |
| WAF | × |
| Virus / Malware Scanning | × |
| Reseller Accounts | × |
| User Accounts | × |
| Separate Panels (Admin / Users) | × |
| Hosting Packages | × |
| Quotas | × |
| Traffic Statistics | × |
| Cron Jobs | × |
| Local Backup | × |
| External Backup | × |
| File Manager | √ |
| Extendable by Plugins | √ |
| API | √ |
| WHMCS Support | × |
| Panel Account Restrictions | × |
| Server and Package Updates | GUI |
| Automatic Updates | × |
| Can be Uninstalled | √ |
Ajenti is a Linux & BSD modular server admin panel. Ajenti 2 provides a new interface and a better architecture, developed with Python3 and AngularJS.
Ajenti Project itself consists of Ajenti Core itself and a set of stock plugins forming the Ajenti Panel. Ajenti Core is a web interface development framework which includes a web server, IoC container, a simplistic web framework and set of core components aiding in client-server communications. Ajenti Panel consists of plugins developed for the Ajenti Core and a startup script, together providing a server administration panel experience. The Panel’s plugins include: file manager, terminal, notepad, etc.
This does not have enough features to be able to fully manage your servere or to run websites. It is actively being developed so will grow over time. So far the interface is nice and the ability to extend by plugins is a positive feature. The developer needs to remove the old version of the software from his homepage as I find this confusing.
- Pros
- Simple to use
- Free
- Extensible by plugins
- Activately being devloped
- Modern GUI
- Cons
- Not feature rich yet.
- No web hosting functionality
Notes
- Sites
- Homepage
- Demo
- Changelog
- Code Repository
- Forum
- Docs
- Plugins
- General
- What’s Ajenti and how it works — Ajenti 2.2.4 documentation
- Different Versions on the Homepage.
- I found the different versions listed on the homepage confusing so I will clarify them.
- Ajenti 2 (Panel)
- The new version of the panel and is still in development.
- Is a suite of essential plugins for the graphical interface including file, network, and system service management tools.
- This might not have all of the features or plugins as version 1.
- Lightweight admin panel.
- Ajenti v1.x (Panel)
- An old version of the panel and is not longer supported.
- Is a suite of essential plugins for the graphical interface including file, network, and system service management tools.
- Server admin panel.
- Ajenti Core
- is the actual platform with an HTTP server and plugin management capabilities.
- Exentensible Web-UI framework
- Ajenti V for v1.x
- is an optional plugin suite for Ajenti 1.x (not the latest version) with applications necessary for common web server hosting environments.
- There is no equivalent version of Ajenti 2.
- Ajenti V is a plugin suite for Ajenti 1.x, which adds fast, efficient and easy-to-setup web hosting capabilities
- Using Ajenti in Managing Linux Servers - Make your life as a system administrator easier and learn how to manage your Linux servers with Ajenti in this ATA Learning tutorial!
- Settings
- Plugins
- File Locations / Repo Locations / Key Locations
- Install
- How to Install Ajenti Server Admin Panel | InMotion Hosting - Ajenti is a powerful, lightweight control panel for Debian, Ubuntu, and Enterprise-based Linux servers like AlmaLinux. Ajenti developers state that the web panel may work on other *nix-based distributions but recommend using the manual installation method to do so (not covered in this tutorial).
- Using Ajenti in Managing Linux Servers - Make your life as a system administrator easier and learn how to manage your Linux servers with Ajenti in this ATA Learning tutorial!
- Update / Upgrade
- Uninstall
- uninstall / General / Ajenti - How do I uninstall Ajenti? Thank you.
- This is an old thread but might still be valid
Debian: apt-get remove ajenti

CentOS/RHEL: yum remove ajenti

FreeBSD: pip uninstall ajenti
- This is an old thread but might still be valid
- uninstall / General / Ajenti - How do I uninstall Ajenti? Thank you.
- Installation Instructions
- Installing — Ajenti 2.2.4 documentation
- How to Install Ajenti Server Admin Panel | InMotion Hosting - Ajenti is a powerful, lightweight control panel for Debian, Ubuntu, and Enterprise-based Linux servers like AlmaLinux. Ajenti developers state that the web panel may work on other *nix-based distributions but recommend using the manual installation method to do so (not covered in this tutorial).
- How to Install Ajenti Control Panel to Manage Linux Servers - Ajenti is an open-source web-based system management control panel for managing remote Linux system administration tasks from the web browser.
- Install Ajenti Admin Panel on Ubuntu 20.04 LTS Server - Manage your CLI server by installing Admin Panel Ajenti on your Ubuntu 20.04 LTS Focal Fossa server using the command terminal.
- Misc
Personal Server
Although these are not what I would class as `Control Panels` they are related and this category can also be known as `Sovereign Computing`.
These platforms can run on NAS, Cloud servers or your own hardware which you keep locally and they allow you run apps in your own mini cloud (SaaS) rather than deploying Apps to remote platforms (PaaS). `Personal Servers` usually have an App eco-system which allows the installation of a single instances of the App and they will be located on server itself rather than remotely deployed.
Extensibly `Personal Servers` are a preconfigured server platform with an App eco-systems, mainly GUI driven and designed for easy of use by the end user rather than directed at techies.
StartOS
- StartOS is an elegant, plug-and-play personal server for running self-hosted software, built by Start9 Labs.
- Start9 make their own hardware which you can buy.
- Formerly known as `embassyOS`
- Sites
- Homepage
- Demo
- Changelog
- Code Repository
- Forum
- Docs
- Plugins
- embassyos:fans - An unofficial feedback forum for StartOS, to crowd-source ideas for new services and features, and gauge interest.
- General
- Settings
- Plugins
- File Locations / Repo Locations / Key Locations
- Install
- Update / Upgrade
- Uninstall
- Installation Instructions
- Misc
YunoHost
- YunoHost is an operating system aiming for the simplest administration of a server, and therefore democratize self-hosting, while making sure it stays reliable, secure, ethical and lightweight. It is a copylefted libre software project maintained exclusively by volunteers. Technically, it can be seen as a distribution based on Debian GNU/Linux and can be installed on many kinds of hardware.
- Sites
- Homepage
- Demo
- Changelog
- Code Repository
- Forum
- Docs
- Plugins
- General
- Settings
- Plugins
- File Locations / Repo Locations / Key Locations
- Install
- Update / Upgrade
- Uninstall
- Installation Instructions
- Misc
- Umbrel
- A beautiful home server OS for self-hosting with an app store. Buy a pre-built Umbrel Home with umbrelOS, or install on a Raspberry Pi 4, any Ubuntu/Debian system, or a VPS.
- Umbrel make their own hardware which you can buy.
- Sites
- Homepage
- Demo
- Changelog
- Code Repository
- Forum
- Docs
- Plugins
- General
- Settings
- Plugins
- File Locations / Repo Locations / Key Locations
- Install
- Update / Upgrade
- Uninstall
- Installation Instructions
- Misc
Cloudron
- Cloudron is a complete solution for running apps on your server and keeping them up-to-date and secure.
- Free version (2 apps) and paid
- If you have 2 Wordpress websites, this is classed as 2 Apps I think.
- They say: Cloudron is the perfect platform for Web-hosters, Web Agencies and Content Managers. Manage WordPress, Analytics and Email marketing tools in one place(see here). I think it is basic support.
- Sites
- Homepage
- Demo
- cloudron / cloudron
- Changelog
- Code Repository
- Forum
- Docs
- Plugins
- General
- Settings
- Plugins
- File Locations / Repo Locations / Key Locations
- Install
- Update / Upgrade
- Uninstall
- Installation Instructions
- Misc
TrueNAS
- TrueNAS SCALE is the latest member of the TrueNAS family and provides Open Source HyperConverged Infrastructure (HCI) including Linux containers and VMs. TrueNAS SCALE includes the ability to cluster systems and provide scale-out storage with capacities of up to hundreds of Petabytes. This server also allows you to install apps of a wide variety so this platform is more than a NAS.
- iXsystems make their own hardware which you can buy.
- Sites
- Homepage
- Demo
- Changelog
- Code Repository
- Forum
- Docs
- Plugins
- General
- Settings
- Plugins
- File Locations / Repo Locations / Key Locations
- Install
- Methods: Script / Cloud Quick Launch
- Update / Upgrade
- Uninstall
- Installation Instructions
- Misc
Synology DSM
- Just mentioned here because a lot of people use these NAS for their personal server.
- Synology come with their own `Cloud type` software on that allow you install and run apps from their eco system.
- The heart of the device is its Synology operating system DSM (Disk Station Manager), which is used in all devices produced by Synology. It is a well-optimized Linux kernel, most of the changes which aims to work with hard disk drives and Raid arrays. As well it is composed of many Open source packages, details of which you will find just the manufacturer’s website.
- Sites
- Homepage
- Demo
- Changelog
- Code Repository
- Forum
- Docs
- Plugins
- SynoCommunity - Community Packages for Synology NAS
- General
- Settings
- Plugins
- File Locations / Repo Locations / Key Locations
- Install
- Update / Upgrade
- Uninstall
- Installation Instructions
- Misc
Xpenology
Running Xpenology is illegal, as you are accessing the Synology DSM for free instead of paying for it. It is also not guaranteed to be stable.
- Synology DSM on x86
- Sites
- Homepage
- Demo
- Changelog
- Code Repository
- Forum
- Docs
- Plugins
- General
- Settings
- Plugins
- File Locations / Repo Locations / Key Locations
- Install
- Xpenology – How to Install Synology DSM on your Custom Built NAS – NAS Compares - Synology do not let users buy their software separately from their hardware and this means that users have to make a choice between saving money on the NAS hardware or spending more on a Synology and getting the software. However what if there was another way? A way to install the Synology DSM software on your custom built PC? Thanks to Xpenology, this is now possible.
- How to Install Synology DSM on a QNAP NAS with Xpenology – NAS Compares - Synology DSM 6.2 on QNAP NAS - How to do it and Should You Bother?
- Update / Upgrade
- Uninstall
- Installation Instructions
- Step-by-Step Tutorial: Install Xpenology on Non-Synology Hardware - Learn how to install Xpenology through the comprehensive tutorial which walks you through the Synology DSM installation on non-synology hardware.
- Misc
Dead
These panels I have come across but the projects are dead or have not been updated in a while. I wanted to included them here so you know not to bother with them. If a project is revived, I can update this article if someone lets me know.
- TS Web Hosting Panel
- This project is inspired by DirectAdmin and developed for machines which are not supported and to create an open source, free solution, for Website Hosting on most Linux machines.
- Kloxo
- From Kloxo HostInaBox, a light and efficient webhosting platform, to Kloxo Enterprise, a truly distributed hosting platform. Kloxo is a fully scriptable, distributed and a 100% object oriented hosting platform.
- Kloxo-MR
- This is special edition (fork) of Kloxo with many features not existing on Kloxo official release (6.1.12+).
- This fork named as Kloxo-MR (meaning 'Kloxo fork by Mustafa Ramadhan').
- ZPanel
- A free and complete web hosting control panel for Microsoft® Windows™ and POSIX (Linux, UNIX and MacOSX) based servers.
- Replaced by Sentora.
- Virtual Hosting Control System (VHCS)
- VHFFS - Mass virtual hosting software
- Developped by TuxFamily.org admins, it can be used for massive hosting on several shared servers or for personal hosting on a single compute
- JavaMin
- JavaMin enables server administrators to monitor and manage regular server tasks with a web-based interface. JavaMin is still in a very early stage and more features will be added gradually.
- GNUPanel
- GNUPanel is a free and open source control panel with is developed to run on Debian based systems. It is written in PHP and uses PostgreSQL database to store its data
- Easy Hosting Control Panel (EHCP)
- Ehcp is a tool in a server to facilate the process of hosting domains, emails, adding domains, ftp users and so on.
- AlternC
- AlternC is a hosting control panel, a software suite which makes web and mail server management easier.
- i-MSCP
- internet Multi-Server Control Panel
- An open-source project aimed to build an impressive and powerful Multi-Server Control panel.
- MaestroPanel
- A Windows Server panel.
- Could of been a great product.
- WebsitePanel
- WebsitePanel is a complete portal for Cloud Computing Companies and IT Providers to automate the provisioning of a full suite of Multi-Tenant services on Windows servers. The powerful, flexible open source WebsitePanel platform gives users simple point-and-click control over Windows Server applications including IIS 8.5, SQL Server 2014, MySQL 5, Exchange 2013, Sharepoint 2013, Lync 2013, Webdav, Microsoft RemoteApp and Hyper-V2 Deployments.
- Sites
- License: BSD 3-Clause "New" or "Revised" License
- Windows Server
- IIS Webserver
- Ægir Hosting System
- A `Personal Server` that delivers Apps.
- The VHCS - Virtual Hosting Control System Open Source Project | on Open Hub
- VHCS provides complete hosting automation for Linux - Web, Mail (pop&imap), FTP, DNS , DBs, Quota, Traffic, graphic user interfaces for the administrators, resellers and users.
- Core-Admin
- Not just another server administration panel, Core-Admin is designed as a centralized and highly connected solution that provides instant access to all your servers with a single crendential over a secure connection (with additional IP-blocking features if you wish).
Blank Template
![]()
| Features | Status |
| Primarily Designed For | Hosting Company / Small Hosting Company / Websites + Email / Web Applications / Web Applications (WordPress only) / Personal Server |
| Free/Paid | Free / Paid / Both |
| License | Proprietary / GPLv3 / MIT / Apache / BSD 3-Clause / CC BY-SA 4.0 |
| Supported OS | RHEL / CentOS / AlmaLinux / Rocky Linux / Oracle Linux / Debian / Ubuntu / Fedora / CloudLinux / Clear Linux / Archlinux / Tumbleweed / SUSE / openSUSE / Amazon Linux 2 / Kali / Scientific Linux / Gentoo / VzLinux / Windows / Windows Server |
| Supported Cloud Providers | in-house / Amazon Web Services (AWS) / DigitalOcean / Hetzner Cloud / Google Compute Engine (GCE) / Google Cloud Platform (GCP) / Microsoft Azure / Vultr / Akamai (formerly Linode) / Oracle Cloud / Webdock.io / Alibaba Cloud / Contabo / OVH / UpCloud / Webdock.io / Custom Server (via SSH) |
| Install Method(s) | Script / Cloud Quick Launch / Installer / SaaS / PaaS / IaaS |
| Web Console |
|
| Virtualization | Docker / OpenVZ / Hyper-V / Proxmox Virtualization |
| Web Server | Apache / Nginx / OpenLiteSpeed / LiteSpeed Enterprise / IIS / Lighttpd / NodeJS / Caddy |
| TLS 1.3 | √ |
| HTTP/2 | √ |
| HTTP/3 & QUIC | × |
| AutoSSL | LetsEncrypt |
| DNS Server | BIND / PowerDNS / Microsoft / SimpleDNS Plus / djbdns / Cloud via API / Google DNS |
| DNS Zone Manager | √ |
| DNSSEC | × |
| Multi-PHP | √ |
| Database Server | MySQL / MariaDB / Percona / PostgreSQL / SQLite / MongoDB / MSSQL / ColdFusion / ODBC (Access/Excel) |
| Database Admin | phpMyAdmin / phpPgAdmin / pgAdmin |
| Email Server | Exim / Postfix / Dovecot / Sendmail / QMail / Mailman / WildDuck / Exchange / Gmail SMTP |
| Webmail | Roundcube / Horde / SquirrelMail / RainLoop / SnappyMail / OWA / WebMail Lite / Custom |
| FTP Server | ProFTPD / Pure-FTPd / WU-FTP / VsFTPd / Microsoft / Filezilla / Gene6 / Serv-U |
| Caching | Redis / Memcached / Varnish / OPCache / CDN (in-house) / Cloudflare CDN / in-house WordPress cache plugin (<name-here>) |
| Email Validation | SPF / DKIM / DMARC / DANE (TLSA) |
| Spam Protection | SpamAssassin / Amavis / Rspamd / Greylisting / RBL / DNSBL / Easy Spam Fighter / BlockCracking / Pigeonhole / Mailcleaner / Spam Experts / MailChannels |
| Firewall | iptables / nftables / CSF / CXF / Firewalld / Linux Firewall / Shorewall / Uncomplicated Firewall (UFW) / Rampart / Microsoft / DDos Protection |
| WAF | Fail2Ban / ModSecurity / Comodo WAF (CWAF) / OWASP / Snuffleupagus / Brute Force Detection / Evasive / Fortification / 7G / Cloudflare WAF |
| Virus / Malware Scanning | ClamAV / Maldet / MailScanner / ImunifyAV / ImunifyAV+ / Imunify360 / RKHunter / Linux Malware Detect (LMD) / Linux Environment Security (LES) / AI-Bolit / Dr.Web |
| Reseller Accounts | × |
| User Accounts | √ |
| Separate Panels (Admin / Users) | × |
| Hosting Packages | × |
| Quotas | Disk / Bandwidth |
| Traffic Statistics | Disk / Bandwidth / AWStats / Webalizer / GoAccess / SmarterStats / Analog / Google Analytics / Custom |
| Cron Jobs | √ |
| Local Backup | √ |
| External Backup | FTP / SFTP / SCP / SSH / RSH / WebDAV / Git / AWS S3 / Dropbox / Azure Blob Storage / Google Drive / Google Cloud Platform (GCP) / DigitalOcean Spaces / Wasabi / Backblaze / Rackspace Cloud Files / Rclone / R1Soft / Restic / Borg / Bacula / Duplicity / KeyDisc / JetBackup / Acronis / Custom |
| File Manager | √ |
| Extendable by Plugins | √ |
| API | √ |
| WHMCS Support | × |
| Panel Account Restrictions | × |
| Server and Package Updates | CLI / GUI |
| Automatic Updates | √ |
| Can be Uninstalled | × |
Blank Template is web hosting control panel which ...................
The free version works ....................
- Pros
- .........
- Cons
- ..........
Notes
- Sites
- Homepage
- Demo
- Changelog
- Code Repository
- Forum
- Docs
- Plugins
- General
- Settings
- Plugins
- File Locations / Repo Locations / Key Locations
- Install
- Update / Upgrade
- Uninstall
- Installation Instructions
- Misc
Notes
- General
- What is the difference between ImunifyAV, ImunifyAV+ and Imunify360?
- ImunifyAV provides only malware scanning.
- ImunifyAV+ provides malware scanning, cleanup and Reputation Management.
- Imunify360 provides complete web server protection that includes all ImunifyAV+ features as well as firewall, WAF, Proactive Defense, Hardened PHP, KernelCare and Backup integration.
- Iass vs Paas vs SaaS
- DigitalOcean, Cloudways and Google Compute Engine (GCE) are PaaS becasue they supply all of their own hardware and platform.
- IaaS vs. PaaS vs. SaaS | IBM - Understand the IaaS, PaaS and SaaS cloud service models and their benefits.
- What is PaaS (Platform-as-a-Service)? | IBM - PaaS is a cloud-based computing model that allows development teams to build, test, deploy, and scale applications faster and more cost-effectively.
- IaaS vs SaaS vs PaaS: A guide to Azure cloud service types | Nigel Frank - Don’t know your IaaS from your elbow? Find out the differences between SaaS, IaaS, PaaS and other cloud service types, and how you can utilize them with Microsoft Azure.
- What Is PaaS? | Google Cloud Platform (GCP) - Learn about Platform as a Service, how it works, and the benefits of using a complete development and deployment environment in the cloud.
- RunCloud vs. Cloudways: Quite similar with a few differences | Computan
- RunCloud and Cloudways do not have their cloud infrastructure but assist you in managing other cloud services. Both are cloud hosting technologies.
- PaaS is an acronym used for the Platform as a Service. The kit available in PaaS has both the Software and hardware required for hosting web applications. It is just another type of cloud computing model with modern functionalities.
- RunCloud is an example of SaaS, still, it is difficult for the new developers to understand the working. Again, Runcloud is not a managed service itself. It is a tool to manage your server in an easier way. You have to do everything else
- Cloudways is an example of a leading provider having all the PaaS-related service.
- What Is IaaS, PaaS, and SaaS? Examples and Definitions: A Cloud Report | Mindsight
- Are you using cloud computing effectively? Many ask what is IaaS, PaaS, and SaaS - and are already using all three models. Read for examples, definitions, and to find out the most common use cases.
- An excellent diagram
- iptables
- iptables is not a firewall, it is a WAF
- iptables - Wikipedia
- iptables is a user-space utility program that allows a system administrator to configure the IP packet filter rules of the Linux kernel firewall, implemented as different Netfilter modules.
- iptables - Unix, Linux Command | Tutorialspoint - iptables Unix Linux Command - Each chain is a list of rules which can match a set of packets. Each rule specifies what to do with a packet that matches. This is called a target, which may be a jump to a user-defined chain in the same table.
- Fail2Ban
- Protect Web Servers from DDoS Attacks using Fail2Ban - How to protect your website from DDoS Attacks using Open Source Software...? Fail2Ban works in a similar way to mitigate DDoS attacks, as it also bans traffic to your web server.
- 7G Firewall (WAF)
- 7G Firewall | Perishable Press - The 7G Firewall is here! 7G is now out of beta and ready for production sites. So you can benefit from the powerful protection of the latest nG Firewall.
- The “7-G” firewall is actually just a set of web-server rules (published by Perishable Press) to filter out some well-known bad traffic before the requests hits the WordPress site. The idea with this type of “firewall” is that traffic requesting PHP/WordPress resources is expensive. It’s much cheaper and faster to weed them out at the webserver level before it gets that far.
- Using the GridPane 7G Web Application Firewall on OpenLiteSpeed (OLS) | GridPane - The GridPane OpenLiteSpeed stack incorporates the 7G Web Application Firewall (the predecessor, 6G, is Nginx only). The 7G WAF was originally developed by Jeff Starr at Perishable Press for Apache…
- What is the difference between ImunifyAV, ImunifyAV+ and Imunify360?
Alternative Panels Research
Various Lists
- 18 popular web hosting control panels [List] - A list of the most popular web hosting control panels on the market; which make management and automation tasks easier for sysadmins & ISPs.
- Top 11 cPanel Alternatives to Help Manage Your Websites | Kingsta - cPanel is a popular and stable control panel. However, there are a lot of cPanel alternatives to choose from if you want something different.
- Best cPanel alternatives of 2023 | TechRadar - Discover the best cPanel alternatives available today.
- cPanel Alternatives: 10 Best Options for Managing Websites (2023) - Are you on the hunt for cPanel alternatives? cPanel is the web server control panel of choice for many shared hosts, but it's not the only option out
- 8 Alternatives to cPanel Web Hosting Control Panels - Free & Paid Options - WHSR
- There are many cPanel alike hosting control panel in the market, many of which are just as powerful and competent. In case you are tired of cPanel license price hikes and looking for an alternative - this article is for you.
- Nice list
- The 12 Best cPanel Alternatives In 2023
- If you’re looking for better cPanel alternatives, this article will help you make a better decision based on your needs and feature requirements.
- Nice list
- What are the best alternatives to cPanel? - VPSBG.eu
- This article will focus on the best and most viable alternatives to cPanel in relation to pricing, features and server compatibility.
- Nice list
- The Top 7 Free cPanel Alternatives - Control Your Server Your Way - Every web hosting service needs to include some kind of control panel and cPanel is the most popular by far, but are there any free cPanel alternatives you can use?
- 15 Best FREE cPanel Alternatives (2023 Update) | Guru99 - cPanel is one of the most famous web hosting control panel. It enables website owners to efficiently manage the website from a web-based interface in a single dashboard.
- 7 Free Alternatives to cPanel - cPanel is a very popular Web Hosting Control Panel (WHCP) but it isn’t the only one in the market. These powerful applications allow users to easily control and manage their web hosting accounts. Most WHCPs are Graphic User Interface-driven making them easy to use for many people.
- 5 Best cPanel Alternatives – 2 Are 100% FREE (2023 Update) - With cPanel's massive price increases, it's time to find a new hosting management solution. Our hosting expert reviews and compares the best alternatives.
- 10+ cPanel Alternatives (Free and Paid) With a Winner Solution - Magenticians - cPanel is a good solution for startups but not reliable for everyone Learn about paid free cPanel alternatives and a perfect solution for ecommerce hosting.
- cPanel Price Increase And Alternative Control Panels - Interserver Tips - In this tutorial, we can check alternative control panels for cPanel.
- Top 10 Free Open Source Web Hosting Control Panels – Ultimate Comparison - Top 10 Free Open Source Web Hosting Control Panels – Ultimate Comparison - HostNamaste1) ISPConfig | 2) Ajenti | 3) CWP (CentOS Web Panel) | 4) Virtualmin | 5) Webmin | 6) Sentora | 7) VestaCP | 8) Kloxo-Mr | 9) ZPanel | 10) Froxlor | 11) EHCP (Easy Hosting Control Panel)When you’re a blogger, you have to deal with lots of web hosting services. The same goes for any website owner. One has to have extensive technical knowledge regarding web hosting and its functions as the hosting market is exploding with competition in this day and age.
- 8 Best free Cloud Web hosting Control Panels for 2023 - Host your website on cloud using best free and open source Control panels for VPS hosting and cloud services such as AWS, Google and more...
- The 12 Best cPanel Alternatives (2020 Edition) | Serverwise - Still looking for a cPanel alternative? We've got you covered, in this article – we compare the best server control panels to help you make the right choice.
- Free alternative for cPanel, DirectAdmin or Plesk? - YouTube - Is there a free web hosting control panel with enough features, reliability and security to replace cPanel, DirectAdmin or Plesk and help you manage your dedicated, cloud or virtual private server?
- Best FREE CPanel Alternatives For 2023 | Itsubuntu.com - Best free cPanel alternatives for 2021. free web hosting software in 2021. Paid cPanel vs Free open source cPanel alternatives. Install free cPanel.
- Best Free CPanel Alternatives In 2023 [Test & Reviewed] - In this article, we will tell you about the top best free cPanel alternatives you can use to maintain and manage website's files.
- 10 Best Free CPanel Alternatives 2023 - Rigorous Themes
- 8 cPanel Open Source Alternatives - Looking into the top cPanel open-source alternatives? We tested the leading solutions and shortlisted the best.
- 8 Best cPanel Hosting Alternatives in 2023 (Compared) - Bored of cPanel or just don't fancy using it for your server? We've researched the best cPanel alternatives for your website's control panel.
- Plesk Alternative: Top 10 Free Open-source Web Hosting Panel - A detailed list of all the Plesk Alternative. Free Open-source Web Hosting Panel for quick and easy server management and control.
- Best cPanel Free Alternatives in 2023: Top Control Panels - Get free cPanel alternatives for cost-effective website administration. Compare features and choose the best control panel for you.
- 10 Best open source web hosting control panel (Cpanel) 2022 - H2S Media - Here are few well known free & open source Web hosting control panel also alternatives to WHM CPanel to install on Linux OS like CentOS & Ubuntu...
- 8 Top Ubuntu server Web GUI Management Panels - H2S Media - Few best Web GUI for Ubuntu server to control & manage different aspects such as Apache web server, database etc. from intuitive graphical user interface.
- cPanel Alternatives - BRS MEDIA TECHNOLOGIES - Aside from that, for most, cPanel just isn’t the best option available anymore. So – without further ado, let’s take a look at all of the best cPanel alternatives and help you make an informed decision.
- Best cPanel Alternatives 2023: Plesk, DirectAdmin and More - Web hosting control panels are one of the most important tools for hosting service providers and web administrators. Until recently, cPanel is by far the most popular panel. However, recent price hikes forced especially hosting service providers to look for alternatives.
- Best OpenSource cPanel alternative for linux | LinTut - cPanel is a Unix based web hosting control panel but is not free. In this article i will show you 6 Open Source cPanel alternatives (Kloxo, Webmin, ISPConfig, Ajenti, Zpanel, EHCP)
- 5 Best Free cPanel Alternatives in 2022 (And a Paid One) - For years, cPanel has been the best WHS on the web. However, There are other options. Here we will examine 5 best free cPanel alternatives
- Top 5 cPanel Alternative - eHostingServer - The control panel is a popular tool used to manage hosting server. Here is the list of top cPanel Alternatives which can be used to manage server.
- 7 Best cPanel Alternatives for Your WordPress Website - Qode Interactive - Looking for some cPanel alternatives to try out for website hosting control and management? There's quite a few of them - and we've chosen the best ones!
- 6 Great cPanel Alternatives - InMotion Hosting Blog - Learn which of these great cPanel alternatives best suits your needs on Cloud Server Hosting.
- 20 Best cPanel Alternative Control panel 2020 [Free/Paid] - 17 Best cPanel Alternative Management panel 2020. There isn't a doubt that cPanel is likely one of the most well-known website hosting management panel. It permits web site house owners to effectively handle the web site from a web-based interface in a single dashboard.
- 15 BEST cPanel Alternatives in 2020 [Free/Paid] - SaaSHub - A summary of recommendations.
- Top 7 Best cPanel Free Alternatives 2023 | cPanel Open Source Alternative - Web Blogging - In this, article, the Top 7 Best cPanel Free Alternatives, cPanel Open Source Alternative full reviews have been given to you.
- 5 Best Free cPanel Alternatives in 2022 (And a Paid One) - For years, cPanel has been the best WHS on the web. However, There are other options. Here we will examine 5 best free cPanel alternatives.
- 8 cPanel Open Source Alternatives | CloudPanel - Looking into the top cPanel open-source alternatives? We tested the leading solutions and shortlisted the best.
- cPanel vs. Plesk vs. Webmin vs. Other Web Panels (old)
- While each hosting control panel should offer the same fundamental features — management for domains, email, FTP, app installs, and so on — the actual feature sets, layout, and level of control offered can vary widely from panel to panel. Below, we discuss each of the top web hosting control panels independently.
- Shows some of the oldies and what they looked like.
- This article was definately not written in Nov 2023.
Comparison Sites (also gives lists)
- cPanel Alternatives: 25+ Server Management Tools and Web Hosting Services | AlternativeTo - The best cPanel alternatives are Vesta Control Panel, Webmin and ISPmanager. Our crowd-sourced lists contains more than 50 apps similar to cPanel for Linux.
- CentOS CWP alternatives and competitors 2023 | PeerSpot - Discover the top CentOS CWP alternatives and competitors. Read comparisons, reviews, and ratings from real users sharing their opinions.
- Top 15 Ajenti Alternatives & Similar Software - eBool - The Top Alternatives to Ajenti Includes cPanel, Vesta, Plesk, Webmin and 11 other products in Hosting Control Panel.
- Ajenti vs Webmin - compare differences and reviews? | LibHunt
- Compare: Cockpit Project vs cPanel (Which is better?) | Zeemly - This is a side by side comparison of Cockpit Project and cPanel. Two products that are similar in nature, yet provide unique feature-sets that are worth taking in to account before making a purchasing decision or start using the software. This page can help you broadly analyze the products and weigh pros and cons against one another. Allowing you scrutinize peoples opinions about Cockpit Project and cPanel, before making a decision if any of the products fit your use-case.
- cPanel VS Cockpit Project - compare differences & reviews? - Compare cPanel VS Cockpit Project and find out what's different, what people are saying, and what are their alternatives
- VestaCP Alternatives and Reviews (Jan 2023) - Which is the best alternative to VestaCP?
- CyberPanel Alternatives (12 Similar Tools as of April, 2023) | Zeemly - In total people have suggested 12 alternatives to CyberPanel that share similarities by use case and feature set.
Individual Reports
- Centos Web Panel Review - Slant - Top reasons why people like Centos Web Panel
- CyberPanel Overview (Details, Reviews, Pricing, & Features) - CyberPanel is a web hosting control panel that natively supports LiteSpeed Web Server, Email, DNS and FTP server and high performance, lightweight and a drop-in Apache replacement. The software free to use, but is also provided as CyberPanel Enterprise, with extended features for organizations with more requirements.
Misc
- Linux Users - Which Distro do you use? Any Webmin/Cpanel/Cockpit you prefer? | Reddit
- Which Method is Best? Cloud Server Setups Compared - YouTube - We've tried many ways of setting up webservers over the past year or so. We've tried different panels, different install scripts, and many different infrastructures and hardware. This is what we found!
- Best Web Interfaces For Linux - YouTube - A video by Lawrence Systems on Cockpit and Webmin.
- cPanel and DirectAdmin: The basics - KnownHost - Getting started guide with cPanel and DirectAdmin. Get to know the basic of each control panel and how to choose best option.
- What is an app? Apps are any PHP or static websites, including web applications such as WordPress and Laravel.
Web Servers
Just a quick list of the servers for my reference as they popped up during my research.
- Apache
- The Apache HTTP Server Project is an effort to develop and maintain an open-source HTTP server for modern operating systems including UNIX and Windows. The goal of this project is to provide a secure, efficient and extensible server that provides HTTP services in sync with the current HTTP standards.
- Nginx
- nginx [engine x] is an HTTP and reverse proxy server, a mail proxy server, and a generic TCP/UDP proxy server, originally written by Igor Sysoev.
- Nghttp2
- This is an implementation of the Hypertext Transfer Protocol version 2 in C.
- This can be used by apache instead of a module, to offer http/2 and via openssl1.1.1 TLS1.3 (i.e. CWP workaround)
- LiteSpeed
- LiteSpeed Web Server is an Apache alternative that conserves resources without sacrificing performance, security, or convenience. Double the capacity of your current Apache servers! Securely handle thousands of concurrent clients while consuming minimal memory and CPU. Compatible with your favorite control panel.
- MiniServ
- Used on Virtualmin.
- Caddy
- Sites
- Homepage
- GitHub - caddyserver/caddy
- Caddy Documentation
- Caddy Community (Forum) - Discussions about Caddy and the modern Web.
- General
- Caddy 2 is a powerful, enterprise-ready, open source web server with automatic HTTPS written in Go
- FreeBSD, OpenBSD, Windows, macOS, Linux
- HTTP2 http3 QUIC TLS1.3
- Yes, Caddy is free to use for personal and commercial purposes, both locally and in production, without limitations or warranty of any kind, subject to the terms in the standard Apache 2.0 open source license. Just like any other open source project.
- Fast and extensible multi-platform HTTP/1-2-3 web server with automatic HTTPS
- That means it’s totally free for you to use, including for live production servers, and in a commercial context. You may take this code, make any modifications you like, and use it for any purpose. You can even re-distribute it with your changes included and re-license those modifications (as long as you include the original license for the unmodified parts of the code and don’t include trademarked content).
- caddy/LICENSE at master · caddyserver/caddy | GitHub - Fast and extensible multi-platform HTTP/1-2-3 web server with automatic HTTPS - caddyserver/caddy
- Roll Your Own Static Site Host on VPS with Caddy Server - This blog post will teach you how to set up a static host on a virtual private server with Ubuntu, Caddy server, SSL, and SFTP access.
- How To Remotely Access GUI Applications Using Docker and Caddy | DigitalOcean - Even with the growing popularity of cloud services, the need for running native applications still exists. By using noVNC and TigerVNC, you can run native applications inside a Docker container and access them remotely using a web browser.
- Using Caddy as a reverse proxy in a home network - Wiki - Caddy Community - If you want to run a service inside a Local Area Network (LAN) such as your home or office – and especially if you want to be able to access it from outside that network – Caddy can help you accomplish this quite easily. This guide will show you how. It assumes you’ve never done this before, but that you have some technical proficiency and are somewhat knowledgable about your own network.
- What Is Caddy Web Server? - Are you unsure which web server to run WordPress on? Learn about Caddy Web Server to determine whether it's right for your specific needs!
- GUI
- So i've created a Web UI for Caddy - Showcase - Caddy Community - Hello all! So I started to build a webinterface for Caddy a few days ago and want to show you my progress. The idea behind it is completely based on the Nginx Proxy Managet from jc21. The webinterface itself writes Caddyfiles and then reloads Caddy.
- Is there a built-in web UI? - Help - Caddy Community - Hi, I’m looking for a dashboard/web UI for caddy server, is there an official web UI?
- Install
- Install — Caddy Documentation - This page describes various methods for installing Caddy on your system.
- Sites
- Cloudflare Server
- This is Cloudflare's custom web server.
- Microsoft IIS
- Microsoft's web server
- Node.js
- A server side Javascript execution engine, and web server.
Which Base OS to use?
Hosting or you are not sure:
- Ubuntu Server LTS (Minimal) (Pro flavour is optional)
- AlmaLinux (Minimal)
Testing or local hobby sites:
- Ubuntu Desktop LTS (Minimal/Normal) (Pro flavour is optional)
General
- Debian vs Ubuntu: What's the Difference? Which One to Use? - Debian and Ubuntu are two of the most popular distributions that are also similar. So, what's the difference and which one should you use?
- Rocky Linux vs. AlmaLinux {the Differences}
- This article presents two CentOS alternatives - Rocky Linux and AlmaLinux, and helps you choose the one for your business.
- Interesting read, says Rocky Linux has more money and support.
- Extra Packages for Enterprise Linux (EPEL) - done by fedora
AlmaLinux
- General
- This is the one cPanel are going to use as their base OS.
- It is support by Microsoft and is a valid OS to use in thw WSL emulation layer on your Windows computers.
- It is not dependant on RHEL so will not get pulled like CentOS has been.
- AlmaLinux seems to have more support that Rocky Linux.
- A lot of open source software is using AlmaLinux as a CentOS direct replacement.
- AlmaLinux OS - Forever-Free Enterprise-Grade Operating System - An Open Source, community owned and governed, forever-free enterprise Linux distribution.
- Test Driving AlmaLinux 9 Minimal: A Hands-On Review - Hands-on review of AlmaLinux 9 Minimal - exploring features, performance, stability, and compatibility. Find out how this community-driven distro stacks up in our comprehensive review.
- AlmaLinux 8 OpenSCAP Guide | AlmaLinux Wiki
- SCAP - The Security Content Automation Protocol - is an automated method that uses standards to enable vulnerability management, measurement, and policy compliance evaluation of systems. SCAP is a U.S. standard maintained by the National Institute of Standards and Technology.
- The AlmaLinux OpenSCAP Guide describes how to use OpenSCAP software to audit your AlmaLinux 8 system for security compliance.
- Install
- AlmaLinux Installation Guide | AlmaLinux Wiki
- AlmaLinux supports both firmware interfaces: BIOS and UEFI.
- AlmaLinux has 3 types of ISOs for each supported architecture:
- boot - a single network installation CD image that downloads packages over the Internet.
- minimal - a minimal self-containing DVD image that makes offline installation possible.
- dvd - a full installation DVD image that contains mostly all AlmaLinux packages.
- Almalinux large ISO has all the different version on it, including minimal.
- AlmaLinux Installation - Linux Tutorials - Learn Linux Configuration - In this tutorial, we show the step by step instructions to install AlmaLinux on a desktop or in a server environment.
- If you’re using the boot ISO, you’ll also need to configure an installation source (AlmaLinux’s repo), and your internet connection (just turning it on is usually enough). This is only necessary if you’re not using the DVD1 or minimal ISO media.
- Info about Base Environments and Software selection during install | Reddit
- You can find what each group means in the repodata on the iso - see comps.xml.gz
- These are the translation files.
- AlmaLinux Installation Guide | AlmaLinux Wiki
- ISOs
- Download AlmaLinux ISO | AlmaLinux Wiki - AlmaLinux OS Documentation
- AlmaLinux ISOs links - You can find the list of available AlmaLinux architectures and versions below.
- Update
- How to update AlmaLinux - Linux Tutorials - Learn Linux Configuration - In this tutorial, we show the step by step instructions to update AlmaLinux. This includes updating individual packages as well as the entire system.
- How to Check & Install Updates on Rocky Linux 8, Almalinux or centOS - Check out the command to update pacakges installed on rocky Linux, CentOS 8 and AlmaLinux based of RHEL distro.
- ELevate Your Distribution | AlmaLinux - ELevate enables migration between major versions of RHEL® derivatives. Move from CentOS 7.x to 8.x version of the RHEL derivative of your choice, or upgrade from 8.x to 9.x within the same derivative.
Ubuntu
- General
- Explained: Which Ubuntu Version Should I Use? - Confused about Ubuntu vs Xubuntu vs Lubuntu vs Kubuntu? Want to know which Ubuntu flavor you should use? This beginner's guide helps you decide which Ubuntu should you choose.
- Why You Should Prefer Ubuntu LTS Over Normal Releases - Ubuntu introduces a new LTS release of the distro every two years. Here are three reasons to install Ubuntu LTS on your PC.
- Ubuntu or Fedora: Which One Should You Use and Why
- Brief: Ubuntu or Fedora? What’s the difference? Which is better? Which one should you use? Read this comparison of Ubuntu and Fedora.Ubuntu and Fedora are one of the most popular Linux distributions out there. Making a decision to choose between using Ubuntu and Fedora is not an easy.
- Choose Ubuntu
- Server vs Desktop
- The main difference between Ubuntu Desktop and Server is the desktop environment. While Ubuntu Desktop includes a graphical user interface (GUI), Ubuntu Server does not and so the Server version has a much lesser resource footprint.
- The Server and the Desktop now share the same kernel.
- Both have all of the packages available to them from the Ubuntu repositry.
- Both installations medias are different. The Server one has much less on it because it does not need any of the GUI stuff.
- Both have different default package lists to better reflect their purpose.
- You could say the server is a different package configuration.
- The installation process is different on both flavours.
- What's the difference between desktop and server? | Ubuntu - This official page is very clear about the differences.
- Ubuntu Desktop vs. Ubuntu Server: What’s the Difference?
- Unsure whether to choose Ubuntu Desktop or Ubuntu Server? Here's what you need to know.
- Great explanation
- Ubuntu Desktop vs. Server: How Do They Compare? - History-Computer - Which is the best version of Ubuntu for you: Ubuntu Desktop or Server? Find out with comparisons, features, and benefits in this guide.
- Difference between Ubuntu Desktop and Ubuntu Server - Ubuntu has introduced various flavors in the software industry, including Ubuntu Server, Ubuntu Desktop, Cloud, Kylie, etc. These Ubuntu variants ensure that Ubuntu maintains its position and attracts new clients. If you want a reliable server with a command-line interface, go for the "Ubuntu Server." On the other hand, if you want to avail a desktop environment that comprises a great GUI and preinstalled utilities, "Ubuntu Desktop" is an excellent choice for you! The difference between Ubuntu Desktop and Ubuntu Server is explained in this article.
- Ubuntu Server vs Desktop: What's the Difference? - When you click on the download button on the Ubuntu website, it gives you a few options. Two of them are Ubuntu Desktop and Ubuntu Server.This could confuse new users. Why are there two (actually 4 of them)? Which one should be downloaded? Ubuntu desktop or server?
- Ubuntu Server vs Desktop - javatpoint - Ubuntu Server vs Desktop with examples on files, directories, permission, backup, ls, man, pwd, cd, linux, linux introduction, chmod, man, shell, pipes, filters, regex, vi etc.
- Ubuntu Desktop vs Ubuntu Server: What's the Main Difference - Ubuntu is one of the most popular operating systems of Linux. In this article, you will learn the differences between Ubuntu Desktop and Ubuntu Server. Follow this guide to review Ubuntu Desktop vs Ubuntu Server.
- Ubuntu Desktop vs Server: Differences, Similarities & More - Explore all the differences and similarities between Ubuntu Desktop vs Server. Learn more about Ubuntu Desktop and Ubuntu Server.
- Ubuntu Server Vs Ubuntu Desktop: Everything You Need to Know & More! - Ubuntu server vs Ubuntu desktop is a moot point if your OS is exposed to destructive cyber threats. Experience 100% security with Cloudzy's mega-quality VPS solutions.
- Installing
- Ubuntu 18.04 LTS Minimal Install Guide - The default Ubuntu desktop is heavy on resources. It requires a lot of RAM, hard disk space, good GPU and CPU to work perfectly. Ubuntu 18.04 LTS desktop installation image does have a new functionality called Minimal installation. With Minimal installation you can install only the basic components required for the operating system to function, no extras.
- Ubuntu 18.04 LTS Minimal Installation Option Review - In this article we will take a closer look at what exactly you get when you use minimal installation option so that you stay prepared and can be ready if the option is for you when Ubuntu 18.04 is available. Will you get faster booting time? Will it reduce RAM consumption? Let’s review!
- INSTALL UBUNTU - Server 20.04 LTS - Code Intrinsic - Simple Guide how to setup USB Installation Disk, followed by installation instruction step by step.
- Ubuntu Pro
- add some stuff here
Debian
- This is where Ubuntu comes from and is usually 6 months ahead of Ubuntu when it comes to new major technologies.
- People say Debain is more secure becasue it has less unwanted packages.
General Panel Setup Guide
This is just a collection of notes but might get more refined as I go along.
- Before installation
- Setup a static IP that you want to use on your server before installing the panel. The IP can usually be changed later but might not always be easy.
- When paritioning the drive, do NOT use LVM.
- Check that trim/unmap/Discard is running.
- This allows once used space to be returned to the disk and ultimately to the Virtual Machine host.
- Update your server and then reboot (this prevents connection issues)
sudo reboot
sudo apt update
sudo apt upgrade
sudo reboot

or

sudo apt update && sudo apt upgrade
sudo reboot
- Login
- Enforce admin HTTPS only.
- Disable root from the admin panel (if exposed on the web).
- Restrict admin access by IP.
- Restrict access to apps such as phpMyadmin and Webmail.
- This is usually needed when the panel just exposes them on port 80 from the websites/panel they are installed on. cPanel hides phpMyadmin with a session identifier and a dynamic Proxy rule.
- Using .htaccess is a quick and easy way.
- Option 1
# RESTRICT ACCESS TO DIRECTORY BY IP ADDRESS # Include in .htaccess of any directory <RequireAny> Require all denied Require ip 1.2.3.4 Require ip 5.6.7.8/12 # If local server access to the directory is required # add the following; include the server ip addresses (ipv4 & ipv6) Require local Require ip 9.10.11.12 Require ip 2001:0db8:85a3:0000:0000:8a2e:0370:7334 </RequireAny> - Option 2 - order deny,alllow
- I will add an example here when i do one
- Files
- Disable non-TLS FTP
- Restrict files from users (CHROOT) etc
- Email
- Enable DKIM/SPF/DMARC
- Set email filtering patterns
- Security
- Enable AV and scanning
- Database
- Make sure your phpMyAdmin and MySQL server use the DB collation utf8mb4_unicode_ci
- PHP
- Configure php.ini values
Setting up your Ubuntu Server (for a Panel)
This is an easy thing but I will just mention the key points.
Recommend Storage
- 50GB for Dev server.
- 100GB is a good size to start off with if you dont have many websites to host.
- 250GB will hold a lot of websites.
NB: You need to have enough space for making backups, especially if you do an all accounts backup which will require at least twice the currently used space on your server.
Install Base OS
- Download Ubuntu Server LTS
- Install Ubuntu with these options when requested:
- Use the 'Ubuntu Server (minimized)' option
- Do not use LVM for paritioning your disk.
- Don't use when creating Virtual machines.
- Snapshotting will be done above the VM if at all (i.e. TrueNAS), adding LVM adds an extra layer of complexity just for this reason alone.
- This is a dynamic disk that has to be online to be cloned.
- Install OpenSSH
- Enable the root account
sudo passwd root
Update OS
- Update your server and then reboot (this prevents connection issues)
sudo apt update && sudo apt upgrade
sudo reboot
Get your server's IP address
- Get your server's IP address
ip addr

or

ip a
Enable SSH
- Add root to SSH
Instead of using `sudo` you could run this command to swap to the `root account`: sudo -s

sudo apt-get install nano (you might not need to install this if part of your Ubuntu flavour)
sudo nano /etc/ssh/sshd_config

Add the following permit rule in the correct section as shown below:

# Authentication:
PermitRootLogin yes
- Restart the SSH daemon
systemctl restart ssh

or

service ssh restart
You can now connect in with SSH using the root account and the server's IP and I can copy and paste instructions via SSH using PuTTY from my Windows PC.
Additional Packages
I would recommend adding the following packages:
- nano
- This is an easy to text editor and is invaluable if you get issues that need fixing from the command line.
- dnsutils
- This add the ability to ping remote servers, adds the DNS utilities ping, dig, traceroute and others.
- It is perfectly safe to install these dnsutils on your live server as they are standalone binaries.
- iputils-ping
- This simple command can be very helpful in diagnostics
- network-manager (optional)
- This installs for nmtui allowing for easy management of the network and NICs.
- This is very useful if your dev Virtualmin is being moved about (i.e. IP changes).
Setup your selected Panel using their instructions
- Now follow the relevant instructions for you control panel.
- My Virtualmin Installation Instructions - My Virtualmin Notes | QuantumWarp
- This is an in-depth installation and configuration guide for Virtualmin.
Disable Root Account (optional)
Recommendations
- Don't disable the root account
- Use a sudo-capable account for administration
- Disable root logins in SSH
- Should I disabled the root account after I have installed Virtualmin - Help! (Home for newbies) - Virtualmin Community
- By default, after a fresh Ubuntu installation, I believe
rootuser will not have a password set. And, that’s been the case since around Xenial (16.06) or Trusty (14.04), maybe even earlier. Your first user will be configured withsudo ALLprivileges. You can, of course, set arootpassword, and many hosting providers do that with their Ubuntu image. - You do have to have a
rootuser (many processes start with UID 0), but you can disable direct logins as root in a variety of ways. Using the “lock” option inpasswd, as you mentioned above, is one (this sets the hashed password to start with!, which will never match a hash and thus prevent all authentication as this user). Disablingrootlogins in ssh is another (console root login still works). I tend to prefer the latter, as I like knowing I can get in on the console in the event everything else fails. But a sudo-capable user works for that, too, and you probably always still have single user mode, if you can get to the console.
- By default, after a fresh Ubuntu installation, I believe
- Disable the root account
sudo passwd -l root
- Disabling root login over SSH - Webmin Administrator's Cookbook - Allowing the root user to log in over SSH is a potential security vulnerability. An attacker may try to break into your system by trying every password for the root user. It's recommended to disallow the root user's access over SSH and to log in as another user with the
sudoprivileges to perform administrative tasks.
Setting up your Debian Server (for a Panel)
As with the Ubuntu server we will be doing a minimal installation, however Debian does not have a specific 'minimal' installation and there are a few other small differences in the setup.
Install Base OS
- Download Debian from here
- Install Debian with these options when requested:
- Do not use LVM for paritioning your disk.
- Don't use when creating Virtual machines.
- Snapshotting will be done above the VM if at all (i.e. TrueNAS), adding LVM adds an extra layer of complexity just for this reason alone.
- This is a dynamic disk that has to be online to be cloned.
- Configure a password for both the root and your user account. If you use simple passwords dont forget to change them later.
- Software Selection
- Only install 'SSH Server'

- Only install 'SSH Server'
- Configure the package manager
- Make sure this is enabled and if you don't know what repository to select then juts use: deb.debian.org
- Make sure this is enabled and if you don't know what repository to select then juts use: deb.debian.org
- Do not use LVM for paritioning your disk.
- Remove the CDROM Repository
- If you do not remove this, Debian will keep trying to get files from the DVD/ISO even if it is disconnected and will cause things to fail.
- Instructions
- Edit the sources config
nano /etc/apt/sources.list
- Comment out the line starting with deb cdrom as shown below

- Edit the sources config
- Instructions
- If you do not remove this, Debian will keep trying to get files from the DVD/ISO even if it is disconnected and will cause things to fail.
- Once Debian installation is completed, install wget
apt install wget
Follow the Ubuntu Instructions
Follow the Ubuntu instructions above, starting at "Update OS", as these are the same for Debian.
Links
Top 10 Things to Do After Installing Debian 12 (Bookworm) - In this guide, we will explain top 10 things to do after installing Debian 12 (Bookworm to make the most out of this powerful operating system.
My Divi Notes
These are a collection of my notes on how to use Divi to build websites.
General
- DIVI Changelog
- Easy To Read Divi Changelog - Free Resource Pee-Aye Creative - On this page, you can view an easy-to-read version of the Divi Theme changelog!
- Divi Changelog | Divi Notes - Full changelogs
- Divi Changelog - Divi Changelogs & Updates - A comprehensive and easy-to-understand list of all Divi theme update changelogs.
- Fonts
- How to add a Custom Font to your Divi website - Optimus Divi Modules - Divi now has now made it really easy to use custom fonts on your website – no code required! So make sure you’ve updated the to latest theme version and follow these instructions.
- How to Globally Change the Website Font in Divi - Optimus Divi Modules - Globally change the body font, heading font, header navigation font and button font in Divi. Use the Divi Theme Customizer - no code needed!
- How to add a Google Font to your Divi website - Optimus Divi Modules - Divi now has Google Fonts built in and you can choose from Google Fonts in your Theme Customizer. However this tutorial shows you the manual method that you needed to do in the past and might be useful if you want to add your own custom fonts.
- Anchor Links
- 3 ways to use anchor links in Divi - Brand & Build - Anchor links are used to navigate to specific content on a page rather than simply between pages themselves, and mastering anchor links in Divi is actually very simple. In this tutorial, I'm going to show you three ways to use anchor links.
- Section Dividers
- How to Recreate Elegant Theme's Section Divider Examples with Divi - YouTube
- Section dividers are part of a long-awaited Divi update that changes the entire look and feel of any website. Within the Divi update announcement blog post, a ton of design examples we’re included and they simply blew us away.
- To help you get started with these new section dividers, we’re going to show you how to recreate each one of these examples. Not only can you use them for your own website or next project, but they will also help you understand how section dividers within Divi work.
- How to Recreate Elegant Theme's Section Divider Examples with Divi - YouTube
- Blogging and Blog Layouts
- Divi Blog Post Template - Design your own Divi Blog Post Template - YouTube - In this tutorial, I am going to show you how to create a Divi Blog Post Template. This Blog Post Template is for videos blog posts, however, the principle can be applied to any post layout.
- Create a Blog with the WordPress Divi Theme - YouTube - In this step-by-step video tutorial, I walk you through the process of using the basic blogging features included with WordPress and the Divi theme. You will need to own the Divi theme and have a basic understanding of how it works to be able to follow along with everything in this tutorial.
- Style or disable Bullet Points
- Elegant Tweaks | Replacing bullet list squares and circles with arrows and symbols - This tutorial shows how to easily replace boring bullet list symbols with unique arrows, shapes and other symbols using ASCII character codes in your CSS.
- How to How To Change Bullet Lists Into Checkmarks Or Other Icons In Divi | PEE-AYE - Here is a quick Divi tutorial showing you how to easily change bullet lists into checklists and other icons with a few simple CSS snippets.
- Remove grey line and sidebar
- How To Remove Sidebars From Divi - Removing the sidebar from Divi’s default page template can easily be done when you are using the Divi Builder. However, since Divi’s default page templates (with the sidebar) still show on pages like 404’s and archives, you may want to take out the sidebar from your template altogether.
- Removing the Divi Theme Dividing Line - Divi Booster - By default the Divi Theme displays a dividing line between the main content and the sidebar. It's possible to remove this dividing line using CSS, like so:
- Text
- How to Wrap Text Around Images in Divi (3 ways) - Wrapping text around images is a common design technique most commonly found in print media like magazines and newspapers. But you can also find this being used on the web, especially for blog posts.
- How to style specific sections of text - Tutorial for Divi | Divi Soup - There are a number of ways to style specific sections of text, today I am going to show you my preferred way using the 'mark' tag.
- How to apply custom style to text links in Divi - Optimus Divi Modules - You can edit the colour of your text links in the Divi Theme Customizer. But what if you want more? The default link colour that you set might be generally great, but not work for every link. In addition, you may want to control more about the link style, but not have to touch any CSS. (Perhaps you want the old school look of the underlined text links.)
- Child Themes
- How to Create a Divi Child Theme [Free Download] - Creating a Divi child theme is a great way to customize your website. This free download will show you how it's done!
- Ultimate Guide to Creating a Divi Child Theme - Creating a Divi child theme allows you to add advanced customization to Divi without it being broken on future updates. Learn how here.
- The Ultimate Divi Child Theme Guide for 2023 | Divi Life - This in-depth post is all about the Divi Child Theme! The Ultimate Guide for 2020 on what Divi Child Themes are, why and when to create them (and when not to create one), as well as how to create them, and where to find them. Plus download a free gorgeous child theme in the post!
- Coding
- Adding PHP code to the Divi Theme - Divi Booster - Some of my fixes for the Divi theme require PHP code to be added to make the required change to the theme. This post briefly covers the various options and their various advantages.
- Template Hooks
- Divi Template Hooks | Elegant Themes Documentation - Learn about the hooks that are available in Divi's template files.
- How to Use Divi’s Hooks - Helping you advance your Divi development career, read our latest post where we explain what Divi's hooks are and share how you can use them.
- Using Divi Hooks with Conditional Logic ~ Divi Lover - Learn how to display different Divi layouts as your blog categories headers by editing your functions.php file!
- Using Divi Template Hooks to Add Custom Footer Layout ~ Divi Lover - Learn how to use the new Divi 3.2 template hooks in your functions.php file to display any layout saved in the library before the standard Divi footer.
- Global Modules and Sections
- The Power Of Divi's Global Modules And How To Use Them - The Divi team have added something even more special to the Divi Library called Global Library Items, and that’s where this story really begins. When an item is made “Global” within the library, it is mirrored across all of the pages you add it to. Whenever this global element is updated, the updates are automatically pushed to each instance of the global module! If you have a repeated module or section on your site, simply make it global.
- Divi Global Modules, Rows & Sections | Elegant Themes Documentation - Create a library item that syncs between all of the pages you use it on.
- Creating Global Sections in Divi - Optimus Divi Modules - You can create a global section in Divi by: A) Building it on a page – for the advantage of being able to preview as you go – and saving it to the Divi Library as a global section; OR B) Create it directly in the Divi Library.
- Custom Footer
- How to create a custom Divi footer | Markhendriksen.com - In this tutorial, we are going to build a custom Divi footer. You can fully customize this footer in the visual builder.
- Divi Builder Footer - How to create a footer in Divi visual builder - YouTube - how to create a footer in Divi visual builder. Divi Builder Footer. In this video, I will show you step by step how to design the Divi Builder Footer.
- Colour Schemes / Colour Replacement / Global Color System
- How to Use Divi to Create Different Color Scheme Mockups of your Pages
- Creating color scheme mockups for your clients is an important step in the web design process. Sometimes, the client may have a company brand colour palette already in place that you can use for the site. But a lot of times, you will need to offer a few suggested color schemes that you think will […]
- Includes using 'Find and Replace' to update your page colours
- Manage Your Entire Website's Color Scheme From Inside The Visual Builder - Today we are excited to release Global Colors for Divi, a new dynamic color system that allows you to create and control colors across your entire website. Now you can build your own dynamic color palette of global colors. When you change a global color, all elements using that color are updated. That means you can control your entire website’s color scheme from a single location while using the builder; adding and managing colors as you see fit.
- Find & Replace color schemes in Divi layout packs • Divi Theme Layouts - speed up your development time building Divi websites with the Find & replace feature that will search for any options and replace in 1 click.
- How to Use Divi to Create Different Color Scheme Mockups of your Pages - YouTube
- Creating color scheme mockups for your clients is an important step in the web design process. With Divi, you can easily change the color scheme of any given page layout using design features like Find & Replace and Color suggestions within the visual builder. And you can also create multiple versions of a page (with different color schemes) for your client.
- In this tutorial, I’m going to walk you through the process of using Divi to create new color scheme mockups for a home page. Hopefully, you will learn a few tricks along the way.
- How To Quickly And Easily Change The Color Scheme In Divi - Tutorial by Pee-Aye Creative - In this tutorial, I'm going to show you some of the built-in ways to quickly and easily change the color scheme of any Divi website!
- Divi Feature Sneak Peek: Find & Replace - Find & Replace:A New Way to Make Page-Wide Changes–Instantly! Today we are excited to announce a new game-changing feature for Divi that we’re hard at work on. It’s called “Find & Replace” and it will allow you to make edits across your entire page, row, or section by finding and replacing one design setting with another.
- Design Dozens Of Elements At Once And Transform Entire Pages In Seconds Using Find And Replace - Adjust Values Across Your Entire Page And Across All Modules Instantly! Find and replace is a really unique feature that allows you to quickly adjust the design of your entire page with a single click.
- How to Use Divi to Create Different Color Scheme Mockups of your Pages
- Main Element - Change Hyperlink Colour
- How to Customize Links in Divi By Changing Color and Effects - Learn how to create custom colored links in Divi for different colored backgrounds.
- Hyperlink Color and Hover Color Change in Divi Using CSS - After using the Wordpress theme DIVI on a few websites now, we've had to delve into some simple CSS to achieve certain tweaks to get things to look how we
- Misc
- How to Put a Widget into Divi Module - Divi Booster - You can use the Divi Sidebar Module to add widgets to the Divi Builder. This lets you position them on the page as though they were Divi modules. here's how to do it.
- How to Hide the Header and Footer in Divi | MarkHendriksen.com - In this tutorial I will teach you how you can hide the header and footer in Divi. This is very easy and simple to do we just need a little bit of CSS.
Modules (Native)
- Accordion
- Remove Spacing Between Accordion Items - Divi Booster - A question I get from time to time is how to remove the space between toggles in the Divi Theme's accordion module. Here's how to do it.
- Make Divi Accordions Closed by Default - Divi Booster - The default behaviour of the Divi Theme's accordion module is to show the first item of the accordion as open. If you'd like to have all accordion items to start in the closed state by default, you can do so by adding the following jQuery code to Divi.
- Menu
- Change the Divi Header Menu Link Hover Color - Divi Booster - A common question I get is how to change the hover / mouse over color of the main menu links in the Divi header. This post covers some of the options.
- Change the Divi Active Menu Item Colour - Tutorial for Divi | Divi Soup - You can change the Divi active menu item colour using the theme customiser settings, however this sometimes doesn't work so here's how to set it with CSS.
- Mobile Menu
- Change the mobile menu border in DIVI under the hamburger icon - Easily change the color of the mobile menu top border in DIVI. By default a blue line top border is shown and can be changed using some quick CSS.
- Hamburger
- Changing Your Hamburger Menu Colour in Divi WordPress - MRKWP - How can you manually control your Hamburger Menu Label in Divi? Using this free and simple snippet. Works with or without a child theme.
- Styling The Divi Mobile Menu - Two Blue Toucans - CSS code for styling the Divi mobile menu. Make the menu sticky, style the border, change the item and hamburger color and make the background transparent.
-
/* Hamburger Styling */
span.mobile_menu_bar:before {
  color:#ffffff;
  font-size: 50px;
}
- Blurb
- The Divi Blurb Module | Elegant Themes Documentation - How to add, configure and customize the Divi blurb module.
- Move the Divi Blurb Header Above The Image | Quiroz.co - Are you looking for a quick and easy way to swap the Divi Blurb Header and Image?
- Pricing Table
- The Divi Pricing Tables Module | Elegant Themes Documentation - How to add, configure and customize the Divi pricing table module.
- Hide Bullet Points on Divi Pricing Tables - Divi Booster - One of the Divi Theme's many modules is the pricing table module, which makes it easy to display the various purchase options for a product. By default, the features you add for each pricing option are listed along with a round bullet point. If you'd prefer not to have bullet points in the pricing table, there are several ways to remove them.
- How To Style Divi Theme Pricing Table Modules - Divi Den - This easy to follow and free to use tutorial on How to Style Divi Theme Pricing Table Modules is designed to save you time and money. Learn quickly.
- Equalize Pricing Tables Height | Elegant Themes Help Center - How to make the pricing table height the same.
- Slider
- this has it's own page now
- Vertically align content
- Vertically Center Any Content in Divi - Tutorial for Divi | Divi Soup - In this Divi Soup Quick Snack I'm going to show you how to vertically center any content without using padding, margin or media queries.
- How to Vertically Align Content in Divi - The ability to vertically align content when building a site with Divi can be a convenient addition to your design tool belt. Sometimes a certain layout calls for content to be vertically aligned in different ways (centered, bottom, top). The most common need is to have your content vertically centered.
- How to Vertically Align Content in Divi - JoshHall.co - In this tutorial, I show you How To Vertically Center Content in Divi. Ever tried "Equalize Column Heights" in Divi to no avail? Here's the solution!
- Solved - Center text vertically | Divi.Help - This uses CSS Flex to solve the issue.
- How to Vertically Align Content in Divi - JoshHall.co - In this tutorial, I show you How To Vertically Center Content in Divi. Ever tried "Equalize Column Heights" in Divi to no avail? Here's the solution!
Misc
Divi Plugins to look at
- Supreme Modules Lite – Divi Theme, Extra Theme and Divi Builder – WordPress plugin | WordPress.org - Divi Supreme lite plugin enhances the experience and features found on Divi and extend with custom creative modules to help you build amazing websites.
- A Surprising List of Free Divi Plugins and Their Features - Tutorial by Pee-Aye Creative - Here is a list of the best Divi plugins all found for FREE in the WordPress repository. Some of them may surprise you with their features!
Resource Sites
- Elegant Themes
- Elegant Themes Blog | Best WordPress & Divi Resources - Find the best resources and tutorials for WordPress and Divi on the Elegant Themes blog.
- Divi Resources Archives | Elegant Themes Blog
- Lists
- GitHub - andyhqtran/divi-resources: A curated list of awesome Divi resources - A curated list of awesome Divi resources.
- divi-resources/Divi 100 at master · andyhqtran/divi-resources · GitHub - Every single day, for 100 days in a row, we will be sharing a new and exciting free resource with the Divi community. These are links to all of the articles.
- Page Layouts
- Best 124 Free Divi Layouts 2020 - Divi Theme Layouts - Best 121 Free Divi Layouts! Awesome list of divi layouts that have been designed and built to work with the Divi Theme. Great choice if you use one or all of these today. Responsive of course. Use as many times as you wish. Free training video included with support. Grab yours now.
- Footer Layouts
- Free Divi Footer Layout Pack: 10 Unique Footer Designs to Give Your Site a Leg Up - Welcome to Day 28 of our Divi 100 Marathon. Keep tuning in for 100 days in a row of awesome Divi resources as we count down to the amazing release of Divi 3.0 on the final day of the series! When it comes to designing websites, one of the most neglected aspects is the footer. […]
- Child Themes
- 10 Best Free Divi Child Themes (Download Today) • Divi Cake - Many Divi designers provide free child themes that are great for just about any website. In this article we’ll take a look at 10 free child themes for Divi that you can download and start using today!
- 7 Free Divi Child Themes to Kickstart Your Next Web Design Project - Save time and money on your next site build, use one of these free Divi child themes to kickstart your next Divi website design project.
- Tools
- Divi and Extra Child Theme Generator Tool • Divi Cake - This free generator will create a custom child theme for your Divi or Extra website. Use This Free Tool to Create Your Own Divi or Extra Child Themes!
- Forums
- Divi.Help - Free Divi Support Community Forum - Join us today for Free & get Free Divi support from our Divi community. If you wish to show us some support, check out our premium Divi child themes & plugins.
My Concrete, Mortar, Cement and Aggregate Notes
All you need to know about concrete
- It will always go off
- It will always crack
- No-one will steal it
Mixes Table
| Mix Ratio (by volume) Cement/Sand/Aggregate |
Name | Generally used for | Notes |
| 1 : 2 : 4 | Concrete | Small slabs, Fence posts |
|
| 1 : 3 : 3 | Concrete | Slabs, Floors, Walls, footings (foundations) |
|
| 1 : 2 : 3 | Concrete | DIY projects |
|
| 1 : 3 : 0 | Concrete Mortar | Mortaring/Pointing Retaining walls and Chimneys. |
|
| 1 : 4 : 0 | Mortar | Bricklaying |
|
| 1 : 4 (with plasticiser) |
Scratch Coat (bottom coat) |
Rendering brick |
|
| 1: 5 (with waterproofer) |
Finish Coat (top coat) |
Rendering brick, Pebble dashing |
|
| 0 : 3 : 3 | Pre-mixed Ballast / All-In Ballast | Part of the mix for footings |
|
- This ratios are done by volume, i.e. 1 shovel of cement, 2 shovels of sand and 4 shovels of aggregate.
- The sand is always building/builders sand in mortar and concrete
- Not all concrete applications can you use building sand.
- There seems a lot of debate about this
- I always use building sand in my home projects
- What Is Sharp Sand? | Sharp Sand Uses | Avon Material Supplies - What is washed sharp sand and why use it? See why sharp sand (also known as grit) is ideal for mortar, concrete, paving and landscaping.
- Plasticiser should only be used with mortars.
- in the M5, M7.5....., M20 categorisation of the aggregate content seems to always be twice the sand content
Notes
These are my notes on concrete mixes and various project using concrete, mortar and cement.
- General
- Choosing the Right Cement for Your Needs - JTD Building Supplies - Choosing the right cement for your building project is the first step to success. Whether youâre trying some masonry work, repairing a driveway.
- Concrete vs Mortar
- 7 Differences Between Mortar and Concrete Everyone Should Know - YouTube - Mortar and Concrete are the two most important and widely used materials in the Construction industry. Knowledge of these both is important for everyone.
- Difference between concrete and mortar - YouTube - This video shows Difference between concrete and mortar. Mortar is a mixture of sand, cement and water while concrete is a mixture of cement , sand , water and coarse aggregate.
- Concrete vs Cement vs Mortar: Which One Should You Use When Building Or Remodeling Your Home? | Homebuilding / Remodeling Guide - Trying to decide between concrete vs cement? They have very specific uses. Cement is rarely used by itself. Concrete is used in most building projects.
- The Differences Between Cement, Concrete, and Mortar | The Spruce - The terms cement, concrete, and mortar are often used interchangeably, but they actually have different uses. Learn the definition of each.
- Mix Ratios / Mixing Ratios
- What are the Correct Concrete Mixing Ratios - Ratio Chart
- When making your own concrete it's important to use the correct concrete mixing ratios to produce a strong, durable concrete mix.
- Some basic mixing ratios for concrete are 1:2:3, 1:3:3, 1:2:4. These mixing ratios are based on the proportions of cement : sand : stone in that order. The ratio you use will depend on what psi strength you need.
- Has tables showing the different mixes
- Mortar Advice | Travis Perkins - Mixing mortar help and advice
- Complete Guide To Mortar Mixing & Ratios | Guides4Homeowners - Quick Answer: The most common mortar mixing ratio used is 1 part cement, 4 parts sand. It does however depend what job you are undertaking as it may need to be stronger. We’ve written a complete guide to get the best mortar mixing ratios for whatever task you you are undertaking.
- How to Mix Cement to Make Cement Mortar or Concrete | Marshalls - In this blog we will concentrate on the two types of mixes that utilise cement to bind other components together, to make a robust building material.
- Mortar Mix Ratio Guide | Homehow - Introduction to Mortar Mixing, Finding the ideal mortar mix ratio is a vital part of any construction or maintenance project in which mortar is being used.
- How to Mix Mortar for Paving | Simply Paving - Before you consider finding the right paving stone for your patio, you need to know how to mix mortar. Read on to see how to do it yourself.
- A Guide to Mortar Mix Ratios & Cement Mixing | Beesley & Fildes - Welcome to Beesley & Fildes builders merchants online store. Bricks, timber, plumbing, landscaping & building supplies at the lowest prices.
- How to Choose the Right Mortar Mix Type: N, O, S, or M
- Selecting mortar mix type N, O, S, or M for any masonry project is based on the performance characteristics of the mortar and the compressive strength.
- Has an excellent diagram.
- The Ultimate Guide to Mortar Mix Ratios [Updated 2022] - Discover the best mortar mixes for various projects including brickwork, blockwork, chimneys, roofing and flooring projects and many more.
- How to Mix Mortar for a Variety of Jobs | DIY Doctor - How to mix mortar for a variety of different jobs including house walls, chimneys, pointing, paving, render and floor screed
- What are the different types of mortar mixes? | Never Paint Again - One aspect of our work that defines us apart from your local painter and decorator is the fact we also do rendering, alteration and repairs to render as well as painting houses. We have to be very clued-up about the use of mortar and all it's permutations, so we thought today we would share some of that knowledge with yourselves.
- Concrete and Mortar Guide - Mix Ratios, Curing Times and More - How to mix Concrete and Mortar. A complete DIY guide to concrete and mortar. Use the best concrete mix for the task, learn how to mix mortar and more.
- What is meant by ratio of 1:4:4 in concrete mixture? And is it ok if I use this composition for building? - Quora
- Different Types of Concrete Grades and their uses | Base Concrete
- What are the different types of concrete grades and what are they used for?
- psi chart of the different mixes
- Understanding Concrete Mix Ratios | All Mixes for All Concrete Projects - Concrete Flooring Solutions delves into the different concrete mix ratios to help DIYers create effective mixes and provide contractors with a useful mixing reference.
- Mortar mix for retaining wall? | MIG Welding Forum - I've done a fair bit of lime plaster, gypsum plaster, concrete, stone walls... But zero block work. Need to build a very small retaining wall.
- Concrete Mix Ratio and How to Mix Concrete | DIY Doctor - We explain what concrete mix ratio you need and how to mix concrete, including a handy concrete mix ratio calculator for your materials
- What are the Correct Concrete Mixing Ratios - Ratio Chart
- Calculators / Calculations
- Calculators | Pavingexpert - A listing of the various calculators made available throughout the pavingexpert web site
- Concrete Mix on Site | Construction Calcs - This concrete calculator will estimate the quantity of sharp sand, cement and aggregate.
- The Quick & Easy - Mix Your Own Concrete Calculator - Builder HQ - This concrete estimator is for knocking up concrete on site. The results are in 25kg bags of cement and 850kg or 25kg of all-in ballast.
- Metric calculator for concrete - cement, sand, gravel etc - Concrete Materials Calculators - easy to use metric calculators for working out the cement, sand, gravel or all-in ballast required for concrete.
- Aggregate Quantity Calculator for Bulk Aggregate Orders - Use our handy quantity calculator to estimate how much of our bulk aggregates you need. Simply measure the area needed to cover and we will calculate roughly how many tonnes, bulk bags or mini bags required.
- How to Calculate Quantities of Cement, Sand and Aggregate for Nominal Concrete Mix (1:2:4)? - Happho - Happho
- A simple yet more accurate method (DLBD method) of calculating cement, sand and aggregate for Nominal Concrete mix M15, M20, M25 and M30 grade Concrete
- has a chart for the mixes M15, M20, M25, M30
- Aggregate is always twice the sand???
- Decorative Gravel Calculator - Estimate Material QTYs Fast Online | AWBS - Simple online Aggregate Calculator for accurately estimating quantities of sand, hardcore and gravel for your building or landscaping project.
- Retaining Wall
- Hard Landscape Features - Walls and Brickwork | Pavingexpert
- A brief guide to walls suitable for use in hard-landscaping projects
- Excellent diagrams
- Retaining Wall Drainage: How to Drain Water Properly - Pool Research - I walk you through how to design your retaining wall to properly drain water and maintain the integrity of your wall.
- Retaining wall design | Screwfix Community Forum
- Retaining Wall Drainage & Backfill Basics - Landscaping Network - Discover four retaining wall design basics – base, backfill, drainage & height – that will help ensure you get a quality wall when hiring a landscaping contractor.
- Sleeper Retaining Wall - Drainage & Best Practices | Renovate Forum
- How To Build A Garden Wall | Blog | Bradstone - Looking to build a wall, but not too sure where to start? Check out our simple to follow how to build a garden wall guide here.
- How to build a new extension from scratch part 1: The foundations - YouTube - In these videos we are building a new extension and will be going through the stages from the foundation to the superstructure
- Hard Landscape Features - Walls and Brickwork | Pavingexpert
- Retaining Wall Foundation
- Creating good concrete foundations for a garden wall - I have seen many a garden wall that has cracked or moved because of the builder cheating or miscalculating the quantity of materials for the construction of the wall foundations.
- Foundations for a 50 meter garden wall - YouTube - Hi everyone here I am working on a large project, a 50 meter wall. This video is in some detail and shows the many issues facing a job like this. In this video I show how I overcame them.
- How To Lay Foundations - YouTube - Digging the foundations for a wall is a physically hard job, and it could take you a couple of days, but its worth doing properly as the success of your wall building endeavours will depend on the quality of your footings. Here is how its done.
- How to cast a concrete footing for a timber summerhouse base - YouTube
- The HouseSpouse is back in the garden in the middle of winter to produce a concrete footing. Here is part 1 of the build, demonstrating how to mix your concrete.
- 1 Cement : 6 Ballast
- 1 Shovel of Cement : 6 Shovels of Ballast (might be callec `All In Ballast` ?)
- Foundations
- How We Pour Footings and set levels accurately - YouTube
- Pouring a footing using a spirit level and peg method. The aim is to give accuracy and keep the tools out the concrete after its poured. Its advised not to leave the roofing battens in the footings. This Technique is great for garden walls and and small projects. On larger sites a laser level can be used. Steels (reinforcing bar or mesh) in the footings are optional and not necessary unless specified in the project brief.
- A simple no-nonsense video that shows exactly what needs doing.
- How We Pour Footings and set levels accurately - YouTube
- Flags and Slabs
- Laying Courses and Bedding Materials for Flags and Slabs | Pavingexpert - A look at the types of materials used as bedding material when laying Paving Flags or Slabs
- Aggregates
- Choosing The Right Building Aggregate For You | JTD Building Supplies - Building and landscape aggregates are a versatile substance used in foundations, construction and gardens. Here's our complete guide.
- How to Choose The Right Aggregate for Your Project | AWBS - With many different types of aggregates available, for use in different applications, how do you know which is best for your particular task and how much you’re going to need?
- The Difference Between Building Sand & Ballast | UK Home Improvement - Starting a home improvement project and need to know the difference between building sand and ballast? Then this article is perfect for you
- All-in Ballast, Bulk Bag | DIY at B&Q - All-in Ballast, Bulk Bag - B&Q for all your home and garden supplies and advice on all the latest DIY trends
- Brick Laying
- Basic Bricklaying and Cement-Mixing Guide for Beginners - Dengarden - This simple guide will show you the basics of bricklaying and mixing cement mortar. I will also go over what tools you need, especially when you're just starting out.
- How i built my breeze block shed part 2 - YouTube - how i built my shed using a 'Bricky' tool.
- How to do a foundation for a small extension - YouTube - In this youtube video I take you through step by step in the setting out, digging, concreting, and laying the first courses of block work up to damp course.
- Curing Process
- What happens to concrete if it gets buried before it fully dries? - Quora
- How Long Does Concrete Take to Set? Expert Advice from Concrete Specialists - Concrete Flooring Solutions
- Expert Advice from Concrete Specialists How Long Does Concrete Take to Set?
- In most cases, standard concrete (or full strength concrete) has a setting time of around one day, sometimes two days depending on the environment in which it is set. However, concrete reaches its full strength after approximately 25-28 days. You should be able to walk and perform normal tasks on concrete one week after its application. However, the concrete will only be at around 70-70% of its full strength, so driving heavy machinery on it is not advised during this time.
- How Long Does Concrete Take to Dry? | Dynamic Concrete Pumping - Concrete typically takes 24 to 48 hours to dry, but concrete drying is a fluid event. Learn about concrete drying time from Dynamic Concrete Pumping today!
- How Long Does Concrete Take to Cure? What Factors Affect the Process? | The Concrete Network
- Concrete doesn’t reach its full strength instantly after hardening – it has to go through the curing process first. That means you have to wait a little longer before putting any weight on it – so if you’ve just laid a driveway, keep your car away from it for the time being and read this article to learn all about the concrete curing process.
- Technically, concrete never stops curing. In fact, concrete gets stronger and stronger as time goes on. But, as far as we’re concerned, to reach a practical strength, most industrial concrete mixes have a 28 day curing period.
- After 7 days, the concrete will have gained around three quarters of its compressive strength, but you should refrain from driving vehicles or heavy machinery over the surface until after the 28 day mark.
- How Long Does Mortar Take To Cure? - Powerblanket - As construction projects progress, it can be exciting to reach the final stages. Applying finishing touches to newly reconstructed or refurbished surfaces results in eye catching aesthetics. Mortaring tiles or other masonry, adds a final polish to all your hard work. Just like concrete, mortar requires careful planning and execution to make sure you achieve the ideal cure strength and a strong finish. Let’s take a closer look at what affects mortar cure time and the strengths of different mortars.
- Cement and Mortar Dyes
- Colour Matching Mortar and Cement Mixes | DIY Doctor - How to correctly colour match sand, cement and mortar mixes if you need them to match exactly to existing mortar, pointing or repairs
- Lime mortar mix with sand for beige/light colour pointing - MyBuilder - We use a 3.5 Hydraulic lime mix for pointing (ratios: 1 hydraulic lime, 2 soft sand, 1 sharp/grit sand), and for walling we use 5.0 Hydraulic
- Concrete Pigments | harristone - Here is a list of our most popular concrete dyes. Also referred to as cement dye the powdered pigment is packaged in 25kg bags and is used to colour precast concrete by adding it to the concrete as it is being mixed.
- Matching mortar for brickwork and blockwork joints - YouTube - Matching sand and cement mortar for brickwork joints and blockwork joints can be done to a pretty exact standard but it does take some patience and a bit of time. Using mortar toners and variations on the sand to cement ratio it can be seen from the video tutorial that most colours can be obtained.
- Mortars and Tools | matclad.co.uk - Various coloured mortars and some information about them.
- Coloured Mortar for Pointing | Marshalls - Marshalls provide only the strongest of mortars and with their range of Coloured Mortar brick and patio laying will become a breeze.
- Bostik Cementone Cement & Mortar Dye - Buff 1kg | Wickes.co.uk
- Bostik Cementone Cement & Mortar Dye - Buff 1kg
- Buff colour = Sandstone
- Rendering
- external render - MyBuilder - i'm thinking of rendering an external entry wall on my property.can you tell me the ideal mix/ratios of materials and also what type of sand do is best to use? also,what additives do i use? [i.e. plasticiser/waterproofer etc.......] and how much of this do i need to use?
- Rendering mixes/ratio for scratch and top coat - MyBuilder
- Strong mix ratio: 3 to 1 scratch coat, 4 to 1 top coat
- Standard mix ratio: 4 to 1 scratch coat, 5 to 1 top coat
- Ideal render mix and why? | Screwfix Community Forum
- 1st coat (scratch coat) 3:1 sharp sand with waterproofer and scratched. Is vital that the waterproofer is added in the correct amounts according the the manufactures instructions.
- 2nd coat (floating coat) 4:1 sharp sand with waterproofer as above etc. This coat should be applied while the first coat is still green to enable suction of the 2nd coat to take place.
- It is important to know that each coat should be weaker than the previous coat as this enables the render to cope with temperature variations and stops it cracking.
- Just make sure that they prep the walls properly before the render is applied otherwise it will fail. ie seal porous bricks etc and ideally most if not all the joints should be raked out to a depth of 20/25mm.
- Render Mix Ratio | What is the Best Mix for Rendering?
- Most renders are typically made up of sand, water, cement, and lime. A standard render mix ratio is 6 parts sand, 1 part cement, and 1 part lime (6:1:1).
- A simple rule is never to make the rendering mix stronger than the material to be rendered.
- What's The Best Mix For Rendering? Roger's Guide | Skill Builder
- What's the best mix for rendering? Roger helps you get the perfect ratio for your rendering mix.
- 6:1:1 which is six parts of sand, one part of cement and one part of hydrated lime
- Rendering A Wall (The Beginners Guide) - Plastering For Beginners
- One of the biggest areas of plastering is learning to render. Thats why we're going to provide you with a complete guide on rendering a wall aimed at beginners.
- This is an indepth tutorial.
- The Ultimate Guide to Mortar Mix Ratios [Updated 2022]
- Render Mortar Mixes (Modern Buildings)
- The first coat of render should ideally be slightly stronger than the second coat. While some tradespeople make the two mixes the same strength, the second coat should never be stronger than the first coat.
- A pure soft sand mix shouldn’t be used when rendering. It’s preferable to use either sharp sand, plasterer’s sand or a mixture of two. Soft sand can be added to the mix but we feel it shouldn’t comprise more than 25% of the entire mix.
- The first coat of render can be 2 parts plasterers sand and 2 parts sharp sand, 1 part cement and half part lime. Waterproofer can be applied to the first coat if the property is modern.
- The second coat must be slightly weaker than the first, so 3 parts plasterers sand, 2 parts sharp sand, 1 part cement and half lime. Plasticiser can be used in the second coat.
- For locations in the east and south of the country or any sheltered location that experiences less windswept rain, a slightly weaker mix can be used. For the first coat 4 parts sharp/plasterers and for the second coat 5 parts sharp/plasterers.
- Render Mortar Mixes (Modern Buildings)
- Pebble Dashing
- Preparing for Pebbledashing | Pebbledashing.com - Preparing for pebbledashing aggregates.
- So how do you pebbledash | Screwfix Community Forum - A forum thread from Screwfix.
- Everything You Need to Know About Pebble Dashing | Paul Atkins Plastering - Do you want to know what pebble dashing is and what it is used for? This article will tell you everything you should know about this rendering technique.
- How To Pebble Dash Rendered Walls - YouTube - James shows us how he likes to pebble-dash rendered walls in King Build Part 9.Our thanks go to James King for letting Roger film this extension project series.
- external plastering (pebble dashing) - YouTube - External plastering, Pebble dash method, with sand and cement Mortar, Dashed with Canterbury spar, or rose flint spar.
- Cracks in concrete
- General
- Has your ready-mixed concrete cracked? | Hanson UK - What causes cracks in concrete slabs?
- Why Does Concrete Crack? How to Stop Cracking - Concrete Network - Information on how to prevent concrete from cracking provided by the Concrete Network. This includes major reasons cracking occurs, including excess water in the mix, rapid drying of the concrete, improper strength, and lack of control joints.
- Is It OK if Concrete Cracks? When You Should Worry About It - Let’s crack the surface on this question
- Why Concrete Cracks | Concrete Crack Solutions | Ardex Ireland - Cracks in concrete are extremely common but often misunderstood. Learn how to diagnose 6 types of concrete cracks here.
- Repair Methods
- How to Repair Concrete Cracks - This guide will show you a step by step process of repairing cracked concrete using Resincoat Epoxy Crack Repair.
- How to Fix Cracked Concrete - Why does Concrete Crack? | Total Concrete - In this article, discover the most common causes of concrete cracks and the most effective ways to fix them. Learn more about why concrete cracks here.
- How To Fix Driveway Cracks For Good | Home Logic UK - Laying a new driveway is not something that a homeowner takes lightly. It can be an expensive investment, it can cause disruption and it can take a long time to find the best person to carry out the work.
- Concrete sealants: Say goodbye to unsightly cracks - Concrete sealants help you when you need to fix those pesky surface cracks in concrete areas. Please read our guide on how to fix this.
- How to Repair Wide Cracks in Concrete | The Spruce - Learn how to repair wide cracks in concrete, using a concrete patch material. Create the best seal by preparing and cleaning the crack first.
- Crack Injection for Concrete Basement Walls - Concrete Network - While concrete cracks appear to be typical, it is not recommended that they remain ignored.
- How to Handle Cracks in Concrete - Concrete Decor - This article details how to prepare your customers for potential issues by shedding light on how to handle cracks in concrete.
- Sealing and Waterproofing Cracks in Concrete | QUIKRETE: Cement and Concrete Products - Over time and exposure to the elements exterior concrete can develop cracks due to temperature changes, ground movement, improperly placed joints and excessive loads. Once a crack develops it is important to seal the crack from water to prevent further deterioration.
- Solved! What to Do About Cracks in a Concrete Driveway - Bob Vila - By analyzing the size and position of cracks in your concrete driveway you can determine what steps you can take to fix it. Here is what to do about those cracks.
- Fix Cracked Driveway Cement using Sika Flex Sealant - YouTube
- Fix Cracked Driveway Cement using Sika Flex fix and a caulking gun.
- I have several small to medium sized cracks about 1/4 inch wide. I wanted to seal them before the winter. If you do not seal them then the snow melt water gets in then over night freezes and moves makes the crack worse.
- I used a heavy duty caulking gun. About 8 tubes of Pro Select Crack Flex sealant. This stuff was again hard to find. I had to go to 3 different big box stores to find enough what I needed. Again hard to find and they only had a few in stock. These are kind of pricey at $11 a tube but it is good stuff.
- Buy Sika Crack Flex Sealant
- Sikaflex® Crack Flex Sealant - YouTube | Sika USA
- Sikaflex Crack Flex Sealant is a single component, textured, self-leveling, premium grade polyurethane sealant for permanently sealing horizontal cracks. Use: Sikaflex Crack Flex Sealant is used to seal horizontal cracks up to 1" wide in concrete and cementitious slabs, such as driveways, garages, sidewalks, balconies, pavements, terraces, decks, walkways, steps, and more.
- Shows how to apply it.
- Sika concrete crack sealer - YouTube
- DIY home repair, concrete crack repair, concrete sealer, 'Sika Pro Select, Self Leveling sealant'
- Shows how to apply it.
- YouTube search - 'sikaflex crack repair'
- How to Fill in Cracks in Concrete - YouTube - In this video I demonstrate how to prepare cracks in concrete to be filled and how to actually fill them so they are water tight.
- How to repair cracks in concrete with ARDEX P 10 SR - Rapid Hardening Crack Repair Resin Kit - YouTube
- ARDEX P 10 SR is ideal for the rapid repair and bonding of static, non-structural cracks and joints in concrete and sand/cement screeds.
- Sold as a complete kit, consisting of mixing bottles, stitching pins and gloves. ARDEX P 10 SR is easy to use and requires no special tools.
- It can also be used to bond carpet grippers, profiles and trims made of metal, plastic wood and other materials.
- How to repair cracks in Concrete with ARDEX P 10 SR Rapid Hardening Crack Repair Resin Kit - YouTube - In his third lockdown video, Steve Davies, our National Training Manager shows you how to repair cracks in concrete and sand/cement screeds with ARDEX P 10 SR Rapid Hardening Crack Repair Resin Kit.
- How to Fix a Crack in a Driveway - YouTube - This video is a review of Quikrete Concrete Crack Seal after 1 year. I will show you how the product looks a year after applying it to cracks.
- How to seal concrete control joints - YouTube - I am the owner/operator of Slab Rite Concrete Lifting in Draper, Utah. One of the services we offer is sealing the control joints and cracks in concrete slabs. This video shows the technique we use of sealing very wide joints up to 2 1/2" inches using non-sag sealant.
- SEAL / FILL / FIX / A CRACK IN CONCRETE DRIVEWAYS - YouTube
- This video explains the causes of cracks in concrete driveways.
- There are several types of cracks in concrete: Structural cracks, and shrinkage cracks. Structural concrete cracks should be sealed to prevent water from penetrating through the slabs. When water penetrates into the soil that supports the concrete, soil may settle, creating a bigger crack over time.
- Sealing a crack is not fixing a crack as most people think. Sealing a crack is the application of sealant (caulk) into the crack. The purpose of sealant or caulk in a crack is to just stop water leakage under the slabs and stop vegetation from growing in the crack.
- How To Fix Cracks In Concrete- And Blend In The Repair! - YouTube - Had a few cracks in my concrete driveway, wanted to fix them without the obvious difference in color that so many repairs end up with. Using some quikrete over the crack sealant makes it look much better.
- Concrete Driveway Crack Repair - YouTube
- To repair a crack in concrete you can use flexible caulking designed for concrete driveways or a concrete patch.
- I am using Slab to fill a wide and deep crack. If your crack is deeper than 1/2 inch fill the void with a filler rope to support the caulk.
- The stuff to use
- The Best Concrete Crack Filler Options of 2023 - Top Picks by Bob Vila - The best concrete filler will restore the look and weather resistance of any concrete surface. See top-rated options and shopping tips here.
- 5 Best Caulk for Concrete Cracks Reviews in 2023 - Top Selling & Popular Collections - YouTube - Are you thinking of buying the best Caulk for Concrete Cracks? Then the video will let you know what is the best Caulk for Concrete Cracks on the market right now.
- Epoxy Crack Repair | Concrete Crack Filler | Resincoat - Epoxy Crack Repair from Resincoat is a pourable, easy to mix and use concrete crack filler. Ideal for use on fine or hairline cracks up to 2cm deep.
- Repair cracks in concrete and tarmac - Smartseal - Easily repair cracks and holes in imprinted concrete and tarmac driveways with Crack Repair Compound.
- Parabond 600 Adhesive Mastic - PARABOND 600 is a fantastic adhesive mastic which is ideal for applications within the building and engineering industry.
- Sikaflex® Self-Leveling Sealant | SIKA
- A Self Leveling sealant with an accelerated curing capacity for sealing horizontal expansion joints in concrete.
- Chart showing this and other products usage
- Sikaflex® Crack Flex Sealant | SIKA
- A one-component textured self leveling sealant used for sealing horizontal cracks.
- Chart showing this and other products usage
- 250ml Concrete Crack Repair Epoxy - Sika | CPC
- A two part grey epoxy paste, mix in the tube adhesive for high strength repairs to concrete
- Can be injected into cracks
- Provides high strength repairs to concrete
- Can be used on damp concrete
- Resistant to water and most chemicals and solvents
- Colour: Grey
- Size: 250ml cartridge
- Everbuild Foam Sealant Joint Backer Rod 10mm x 10 Metre : Amazon.co.uk: DIY & Tools - Shop Everbuild Foam Sealant Joint Backer Rod 10mm x 10 Metre.
- CRL Closed Cell Backer Rod 15mm Ø - 30.5m - The Wholesale Glass Company
- CRL Closed Cell Backer Rod is a round, flexible, closed cell polyethylene foam with an exterior "skin" used as a backing and thickness control device for elastomeric and other cold-applied sealants. The Backer rod becomes an integral part of the joint into which it is installed
- The Backer rod limits the depth of the sealant, thereby preventing excessive use of the sealant, which promotes proper joint design. Because the sealant will not bond to the "skin" of the rod, it can stretch and recover with joint movement, with minimal stress being put on the points of adhesion to the substrate.
- Closed-cell backer rods should not be used with sealants that cure by reacting with moisture in the air because the closed cells will not allow air in from the back of the sealant bead, in turn retarding the cure.
- Fischer FIS V Hybrid Mortar Resin 360ml - Screwfix - Order Fischer FIS V Hybrid Mortar Resin 360ml at Screwfix.com.
- No Nonsense Mortar Repair Grey 310ml - Screwfix - Order No Nonsense Mortar Repair Grey 310ml at Screwfix.com.
- General
- Tools
- The New Bricky® Wall Building Tool. - The New Bricky® Adjustable Wall Building Tool.
- You Can Build It DVD - YouTube - Inventor of the Bricky Noel Marshall walks us through how he built his his home office.
- How To Build A Garage/ Workshop - Part 1 - YouTube - How To Build A Garage/ Workshop
- How To Build A Wall - YouTube - Check out http://bricky.com for more information.Marshall Building Profiles enable us to build walls with absolute precision & supreme efficiency.
- Building With Marshall Profiles & Bricky Pro - YouTube - Noel Marshall setting up at the recent Home Improvements Show, London. On display his Inventions Marshall Profiles & new adjustable Bricky. Walls can now be built faster & with mm precision.
- Bostik Mortar Plasticiser » www.matclad.co.uk - Mortar plasticiser helps brick slip pointing mortar to flow through the nozzles of pointing guns and bags. All our pointing mortars are graded with fine aggregates but sometimes just a drop of this can help it flow even better than it does already.
- The New Bricky® Wall Building Tool. - The New Bricky® Adjustable Wall Building Tool.
- Misc
- Lime and Plasticiser - Forum - Landscape Juice Network - I’m just wondering. How to people decide when use lime or plasticiser in mortar mixes and importantly when NOT to use them.
- A Guide To Pouring Concrete in the Rain (updated 2022) - A guide to pouring concrete in the rain.
- How to Sand Concrete with a Sander/Grinder or by Hand » The DIY Hammer - Read this comprehensive 6-step Guide and FAQs on How to Sand Concrete with a Sander / Grinder or by Hand with Sandpaper, incl. Concrete Finishes with Photos
- Timberlink Catalogue
- Full range of builders Aggregates- Building Sand, Concreting/Sharp Sand, Ballast, MOT, Decorative Gravel.. Bulk/ Loose, Dumpy Bags, 20Kg Bags in stock. Handy volume calculator.
- Nice pictures
- Huges Gray / Buildbase
- Nice pictures
- Buildbase Building & Timber Supplies work closely with leading manufacturers of Aggregates & Gravel to provide cost-effective solutions to all construction requirements.
- Odell Complete Concrete - YouTube
- Independent Contractor License Number CA. 620752 C-8, B. AZ. 337940Serving all of Orange County AND LA Ranked #1 In Both CountiesNo Job to large or too small, we do them all! My work Ranges from Home Remolding, Concrete work, drive ways, barbeque islands, Patios, Planters, Foundations, Block Walls, Tile, Stone Walls, And Much More just Contact me for details of any job you have in mind
- Absolute professional.
My Bed, Mattress and Duvet Notes
Bed
Your bed is linked to the mattress size you select.
My preference is for a Pine Wood bed with storage space underneath. I dont like Divans as I feel they are old.
Mattress
These are my notes for figuring out what bed and mattress I need.
- Considerations for bed size and matress selection
- What height are you?
- What weight are you?
- Do you sleep on your front/back or on your side?
- Do you have any back problems?
- Do you have a partner?
- Matress Size Guides - what size is right for you?
- Bed Size Guide - UK & European | Dreams - Choosing the right size mattress is an important decision when buying a bed to ensure a great sleep. Find more information online here!
- UK Bed Sizes: The Bed And Mattress Size Guide | mybedframes
- Learn everything you need to know about UK Bed and Mattress sizes. Dimensions are shown in both imperial and metric units. Single, Small Double, Double, King Size and Super King Size.
- Also includes Giant Bed sizes
- Mattress size guide - IKEA
- Choosing a size is step number one when shopping for a new mattress. And to make sure you’re comfortable at night, there are a few basic guidelines to look for when finding the perfect size.
- Europeans have bigger mattresses
- Bed Sizes UK: Bed and Mattress Size Guide - Bed Advice UK - There are so many things to consider when you’re buying a bed or mattress – not least what size you should opt for.
- Your Guide to UK Mattress Sizes | French Bedroom
- Find the right size mattress for your bed, we’ve put together this easy to understand guide for what size mattresses are in the UK, Europe and the US.
- Apparently there is an emporer size bed (7ft x 7ft).
- What Size Mattress & Bed Do I Need? | Dormeo UK - Not sure whether you need a double, queen, king or super king mattress? Find out the exact dimensions of each type of bed and learn which is best for you in our handy guide to mattress sizes.
- Beds for tall people - The Definitive Buying Guide | Bedstar - Choosing beds for tall people is a challenge; what is available? Read our Buying Guide on choosing the Best Bed of length is an issue.
- Which Mattress Type?
- Soft, Medium, Firm or Extra Firm – Which One Is Right For You? | Sleepeezee UK - Buying a bed or mattress can be daunting with so many different types and models. That’s why spending the right time researching and understanding the different options will ensure you choose the right mattress that best suits you!
- Buying a Mattress | Mattress Types & Sizes | John Lewis & Partners - Learn more about Buying a Mattress at John Lewis & Partners. Offering expert insight and advice, make informed product selections with our buying guides.
- Mattress buying guide 2023 How to choose the best one for you: Shopping tips | The Independent - Searching for a new mattress? Here we compile shopping tips and expert advice on how to choose the best mattress for you through our mattress buying guide
- Bed & Mattress Guide | Dreams - As Britain's leading beds and mattress specialist, our Bed & Mattress Guide is the only resource you need when buying your next bed and mattress.
- How to Choose a Mattress: Bed Buying Guide & Shopping Tips | goodhousekeeping.com - It all comes down to your body type, sleep position and any personal preferences.
- Mattress buying guide | Argos - Mattresses at Argos. From memory foam to firm mattresses, our guide will help you choose the best.
- How To Choose A New Mattress: Ultimate Bed Buying Guide - If you need help choosing a good mattress, then speak to the mattress experts at John Ryan. We have decades of experience and over 5000 useful articles!
- Bed Buyers' Guide - Bed Advice UK
- The Bed Buyers’ Guide to help you understand the factors in buying a bed and mattress, and helps you find your perfect bed and perfect night’s sleep.
- Many sections of realted infromation from caring from your bed to selecting a pillow.
- How to Choose a Mattress - Bed Advice UK
- Mattresses may look similar, but the differences within are vast - we look at some of the main options when deciding the best type of mattress for you.
- this gives the examples of the different types of springs you can get.
- Mattress Buying Guide Considerations - Furniture Village
- If you’re wondering how to choose a mattress, you’ve come to the right place. The Furniture Village mattress buying guide describes all the types of mattresses available, points you to the best mattress for your sleeping position and even answers top questions when buying a mattress.
- If your mattress is too firm, a mattress topper is a good way of adding an extra layer of softness without investing in a whole new mattress.
- Mattress Buying Guide | Choosing the Right Mattress | DFS - Struggling to find your dream mattress? DFS have created an extensive mattress buying guide highlighting mattress types, benefits and more.
- Mattresses | Dreams - Find the perfect mattress and achieve greater sleep with the Dreams collection. Expect a range of sizes, styles and exclusive brands all with free delivery.
- Suppliers
- Carpetright | Carpets, Flooring and Beds - Carpetright is the UK's largest retailer of carpets, flooring and beds. Carpetright has 350 UK stores and an extensive online range of carpets, vinyl, laminate, rugs and beds.
- DFS | Sofas, Sofa Beds, Corner Sofas and Furniture - DFS sofas come in fabric and leather. Choose from a great range of sofa beds, leather sofas, corner sofas, corner sofa beds and more household furniture
- Bensons for Beds - Your Sleep Experts | Beds, Mattresses & More - Find your best type of bed, your comfiest mattress, sofa beds for guests & bedroom furniture in your style. Brands including Slumberland, Silentnight & more
- Dreams | Beds from the UK's Leading Bed & Mattress Store - Shop online for beds, mattresses & more from leading brands with free delivery nationwide. All sizes. Comfort guarantee. We're never beaten on price!
- Dormeo | Memory Foam Mattress Specialists - Dormeo the UK memory foam and hybrid mattress specialists. Sleep better with our range of mattresses. Free UK delivery and 0% finance available
- John Ryan | Handmade Mattresses UK | Pocket Sprung Mattresses - John Ryan are the UK's most trusted bed retailer. Handmade, pocket sprung natural-fibre mattresses, made by experts for a perfect night's sleep.
- Sleepeezee | Buy Beds & Mattresses Online UK - Shop Beds & Mattresses Online at Sleepeezee.com. Design your own bespoke single, double and king sized luxury beds. Beds with storage, Ottoman beds and more. Every Sleepeezee product is made at our factory in Rochester, Kent, by over 300 expert craftspeople.
- EveSleep | Spring & Foam Mattresses - Free Delivery - Shop six award winning, gorgeously comfortable mattresses at eve sleep. Try for 365 days with free delivery and hassle free returns.
- Oak Furnitureland | Solid Wood Furniture and Sofas - Oak Furnitureland offers great value solid wood furniture and sofas, always made for life. Shop online with up to 50% off and transform your home today.
- Foam Only
- Emma Original Mattress | UK's Most Awarded Mattress
- Which? Best Buy Mattress ✓ Made in UK ✓ 200 Night Risk Free Trial ✓ Free delivery & Returns ✓ 10 Year Warranty ✓ ▷ Buy Emma online now!
- made in Britain, German company.
- Simba Sleep | Mattress In a Box Europe's Best Reviewed - One Mattress. Five Layers of Comfort. Tailored to Suit All. Bringing together experience & technology so that your mattress gives you the best night's sleep.
- Casper® | The Best Bed for Better Sleep - Get the sleep you've always dreamed of. Casper's award-winning mattresses, sheets & more are quality-crafted and ethically built in the USA. Free shipping & returns!
- Emma Original Mattress | UK's Most Awarded Mattress
- Travelodge (Dreamer Mattress by Sleepeezee)
- Dreamer mattress from Travelodge available to buy online - Get the best deal on the Travelodge Dreamer™ mattress available in single, double, kingsize and super king direct from the manufacturer Sleepeezzee.
- Travelodge Sleepezee Dreamer mattress - Hello I’m looking to purchase the mattress from travelodge which is the Sleepeeze dreamer but it only says 950 sprung. I need a double size for my husband and I. I would like to know more on what you think of it as I can’t find any reviews, we love the ones used in the Travelodge which are a luxury king size so will the double be equally as nice although smaller?
- Travelodge Mattress Review UK | October 2022 - A mattress that has grown in popularity lately is the Travelodge mattress. If you're reading this article, chances are also that you had a few good nights'
- Sleepeezee Reviews | Read Customer Service Reviews of sleepeezee.com - Do you agree with Sleepeezee's TrustScore? Voice your opinion today and hear what 985 customers have already said.
- Sleepeezee Travelodge Dreamer review - Which? - The Sleepeezee Travelodge Dreamer is a pocket-spring mattress which aims to replicate the comfort of a nightâs stay in a hotel. But is it up to the job and will you really feel like youâre in an uber-comfy hotel bed? Read our full test review to see how long this mattress will last and if your spine will get the support it deserves.
- Travelodge Dreamer™ | Buy Online | Travelodge | Sleepeezee - The Travelodge Dreamer™ mattress boasts over 950 individual pocket springs within each mattress. Partnered with a platform top divan it offers superior support. Each individual spring is designed to follow the natural contour of an individual’s body in order to provide the correct amount of support and comfort to ensure you receive a good quality night’s sleep. A comfortable night’s sleep is also good for the heart, with £20 from every sale donated to the British Heart Foundation. We also offer a mattress recycling service, giving you a cost-effective, hassle-free way of disposing of your old mattress and/or bed!
- Premier Inn (Hypnos Mattress - old)
- Premier Inn mattress review & alternatives - John Ryan by Design - How well does the Premier Inn Hypnos mattress compare to John Ryan By Design? Can you get a better bed for your money? We investigate for you.
- Premier Inn (Silentnight Mattress)
- Silentnight announced as Premier Inn bed supplier - Whitbread PLC - The UK’s biggest hotel company Premier Inn is delighted to confirm it has appointed Silentnight as its official bed supplier as it invests in its most technologically-advanced bed yet to the benefit of guest experience.
- Premier Inn switches bed supplier - Interiors Monthly Magazine! - Premier Inn, the UK’s biggest hotel company, has switched bed supplier. It has appointed Silentnight as its official bed supplier.
- The bed features a Geltex comfort layer and a zippable, removable topper. The chain says this supports its Force for Good sustainability agenda. Composite bed parts are 92% recyclable.
- Premier Inn bed | Sleep | Premier Inn - At Premier Inn, we’re all about comfort, quality and, a great night’s sleep. A big part of that is all thanks to our super comfy beds. Buy the beds here.
- Reviews
- Silentnight vs Hypnos Mattress Reviews | Updated 2021 - Find out if Silentnight or Hypnos is suitable for you! We have reviewed both and determined the firmness, composition, and customer satisfaction scores to determine the right mattress for you.
- Silentnight Mattress Reviews: 2023 Beds To Buy (or Avoid?) - Read eye-opening Silentnight mattress reviews from real customers that are proven and trusted. Our experts will share little-known and research-backed facts about the full Silentnight offering that you need to know now!
- Silentnight Mattress Reviews UK - Should You Buy? | 2023 - Silentnight is one of the UK’s largest mattress suppliers. But are these mattresses any good? Sleep Hero puts them to the test.
- Best mattress: 9 top-rated memory foam, hybrid, pocket-sprung | Express.co.uk - Hunting for the best mattress can be a headache, so we've done the hard work for you - testing a dizzying number of popular Bed In A Box brands and different mattress types to find the best mattress available in the UK today. In this guide, we've rounded up nine of the best mattresses, including memory foam, pocket sprung, and hybrid designs to accommodate all sleeping styles and budgets. Almost all of our top picks offer generous risk-free trial periods, taking the guesswork out of your next mattress purchase.
- Sleepeezee Reviews: 2023 Mattresses Ranked (Buy or Avoid?) - Read eye-opening Sleepeezee mattress reviews from real customers that are proven and trusted. Our experts will share little-known and research-backed facts about the full Sleepeezee offering that you need to know now!
- Best Mattress 2023: 17 Tried And Tested Mattresses | British GQ - Struggling to get comfortable? We’ve got you.
- Mattress brands Reviews, Ratings and more : What Mattress
- Compared: Simba vs. Emma ➡️ Which Mattress Is Best? (2023)
- DON'T get scammed, is the Simba or the Emma mattress best? Compare mattresses side-by-side with my unbiased versus review. 20% off coupon.
- There is a video.
- emma mattress unboxing - overview - compared to Simba UK foam | YouTube | Alan Ross Reviews
- Misc
- The no turn mattress scam - John Ryan by Design - Don't be tricked by the 'No Turn' mattress scam. Here we explain exactly what you need to know before buying a no turn mattress.
- Pillowtop = An additional layer on the top that looks like a permanent topper
- Foam only mattresses are not good, they do not last long.
- If you firm bed is too firm, you can use a topper to add a softer layer without replacing the mattress.
Mattress Dimensions
I have more notes in my XLSX....
| Type | Dimensions |
| Single | 3′ x 6’3″ (90cm x 190cm) |
| Double | 4’6″ x 6’3″ (135cm x 190cm) |
| King | 5′ x 6’6″ (150cm x 200cm) |
| Super king | 6′ x 6’6″ (180cm x 200cm) |
Duvet
Read through all of these articles to see what other people have done and give your more information
- How to choose your Duvet
- Buying Duvets & Pillows | Duvet Tog Guide | John Lewis & Partners - Learn more about Buying Duvets & Pillows at John Lewis & Partners. Offering expert insight, make informed product selections with our buying guides.
- Best Duvets 2023: Duvet Brands From Ikea To John Lewis Rated By Customers - Which? - We rate duvets from Ikea to John Lewis. Find out which brand came out on top inour survey, and the pros and cons of the main duvet types
- Best duvet filling 2022: Choose the right natural or synthetic filling for your needs | Expert Reviews - Anyone who has braved a British winter knows how crucial a warm, comfortable and high-quality duvet can be to getting a good night’s sleep. However, when replacing worn out items, duvets are often
- How To Choose The Best Duvet | Guide | scooms - Our best duvet buying guide covers the 10 most important things to think about when buying a duvet: tog rating, duvet filling, fill power & weight, how the duvet is made and the environmental impact. Plus, duvet sizes, anti-allergy bedding, accreditations to look for and how to care for your duvet.
- Duvet Size Guide | Soak&Sleep - Looking to buy a new duvet? Our handy size guide explains the differences between UK sizes and which duvet is the right size for your bed.
- Duvet Size Guide: Everything You Need To Know | Sleep Journal - There is much more to selecting the right duvet than simply choosing a single duvet for a single bed, a double duvet for a double bed, or perhaps a king size duvet for an extra-large bed. In this article, we are going to look at exactly how to find the right size duvet for your bed.
- Duvet Size Guide | What Size Duvet is Best for Your Bed? | Victorian Linen - We supply duvets and duvet sets for every size of bed so let us share our expertise when it comes to beds and the best duvets for each size.
- A Definitive Guide to Bed Sizes & Duvet Sizes – The Big Little Duvet Company - Helping you with beds sizes & duvet sizes. If you are lost in a minefield of bed sizes and duvet sizes and not sure which is right for you and the size of your bedroom then we are here to help you with impartial advice. Big Little Duvet Company don't sell beds but we understand how important it is to know the exact measurements of your bed before you can decide on your duvets. We've decided to give you all the information you need for bed sizes in the UK.
- Should I oversize my Duvet (i.e. Super King on a King size bed)
- Experts reveal that you should size up your duvet for a good night's sleep | Ideal Home
- Getting well-deserved rest is important, so you should make sure you're doing it right
- Sleep experts say your duvet should be one size bigger than your mattress
- Manchester Collection Blog Quilts Why Upsize To Super King Quilt For A King Mattress? - Why Upsize To Super King Quilt For A King Mattress? - Manchester Collection Blog Quilts Why Upsize To Super King Quilt For A King Mattress? - If you have a King mattress, then we highly recommend upsizing to a Super King quilt. It will help you enjoy a more comfortable sleep. Firstly what’s Super King? It’s the largest possible bedding size available in Australia.
- Has anyone got a super king duvet on a king size bed? | Mumsnet
- King Sized bed - which sized Duvet? in The AnswerBank: Home & Garden
- buying a lager duvet than bedsize - Page 1 - Homes, Gardens and DIY - PistonHeads UK
- Supersize your King Size Duvet Cover Sewing Tutorial UK size | YouTube | Sewjojo sewingandcrafts
- Experts reveal that you should size up your duvet for a good night's sleep | Ideal Home
- What is TOG
- TOG is the heat retention rating of the Duvet.
- Different manufacturers Duvets will have different physical dimensions and weights for the same TOG.
| BED SIZE | DUVETS (W x L) |
|---|---|
| Cot Bed | 120cm x 150cm 47" x 59" |
| Single | 135cm x 200cm 53" x 79" |
| Double | 200cm x 200cm 79" x 79" |
| King Size | 230cm x 220cm 91" x 87" |
| Super King | 260cm x 220cm 102" x 87" |
| Emperor | 290cm x 235cm 114" x 93" |
What I want
- Bed
- King Size Pine wood bed.
- Mattress
- King Size
- A mattress that I can turn over (last twice as long?)
- Firm
- Pocket Springs
- Traditional Tufting
- Edge Support
- This is so you can sit on the edge of the mattress without it deforming.
- No Memory Foam
- This stuff is nasty and wears out quite quickly.
- A mattress protector
- A mattress protector will stop sweat and other liquids damaging the mattress. Make sure it is a quality protector.
- Duvet
- Super King Duvet
- This is an oversized duvet for my bed.
- This will give me extra cover and make sure my feed will never be out in the cold.
- It will drape over the sides of the bed and hide storage underneath the bed whilst giving a more modern look.
- The weight keeps the Duvet down on your mattress better.
- More Duvet if your partner is a Duvet thief.
- More heat efficient as there are less gaps.
- More snuggly.
- Super King Duvet
My TL631 Pro Motherboard Diagnostic and Debug Card Notes
I bought this diagnostic card from AliExpress but the instructions were not the best but there is a lot of information in the product page. I am merging the information I find here.
- TL631 Pro Universal Laptop And PC PCI PCI E Mini PCI E LPC Motherboard Diagnostic Analyzer Tester Debug Cards|Instrument Parts & Accessories| - AliExpress
- Some examples of how users have used their debug cards
- Eakins Store are good to deal with
Other Notes
- If a motherboard has a PCI slot and PCIE slots. there is a good change the debug headers are in the PCI socket, it will not be in both.
- only one of the PCIE/PCI sockets might support debug. This is useful to know.
Another description
- TL631 PRO uses the new 130-nanometer Actel ProASIC3 flash memory series chip with a new pure system.
- Gemini drive module: BGA type driver module, part design.
TL631 Pro interface description:
- LPC1 shared high-speed channel = connect to the motherboard 2.0 small pin LPC interface, 2.0 module
(Module expansion LPC3 interface can connect notebook MINI PCIE conversion card, A-DEBUG conversion card, ASUS notebook DEBUG-CON. EC-DEBUG). - PCI high-speed channel = support all PCI slots.
- LPC2 shared high-speed channel = connect to the motherboard 2.54 large pin LPC interface, ASUS COM-DEBUG. ASRock UART1, MSI JDP, SuperMini SPl.
- PCIE X1 high-speed channel = support Gigabyte without PCI motherboard (other brands do not support).
- 3VSB power indicator, to detect whether the power is normal.
- RST reset indicator, to detect whether the motherboard reset is normal (only when PCI or PCIE is inserted)
- CPU indicator light, to detect whether the CPU module is normal.
- DRAM memory indicator, to detect whether the memory module is normal.
- VGA graphics indicator light, to detect whether the graphics card module is normal.
- PCH south bridge indicator light, to detect whether the south bridge module is normal.
- DP decimal point, CLK signal display.
- DP decimal point, FRAME frame signal display.
- threading hole
Package Contents:
1 * TL631 Pro Diagnostic Card
1 * MINI adapter board
1 set * cables
1 * 2.0 modules
2 * 2.54 modules
TL631 Pro interface description:
- LPC1 high-speed shared channel, connect to the motherboard 2.0 small pin header LPC interface, 2.0 module (module expansion LPC3 interface which can be connected to notebook MINI PCIE conversion card, A-DEBUG conversion card, notebook DEBUG-CON, EC-DEBUG)
- PCI high-speed channel, support all PCI slots.
- LPC2 shared high-speed channel, connect to the motherboard 2.54 large pin LPC interface, COM-DEBUG, ASRock UART1, MSI JDP, Supermicro SPl.
- PCIE X1 high-speed channel, support Gigabyte no PCI motherboard (other brands do not support).
- 3VSB power indicator to detect whether the power is normal.
- RST reset indicator to detect whether the motherboard reset is normal (only when PCI or PCIE is inserted)
- CPU indicator light to detect whether the CPU module is normal.
- DRAM memory indicator to detect whether the memory module is normal.
- VGA graphics indicator light to detect whether the graphics card module is normal.
- PCH indicator light to detect whether the southbridge module is normal.
- CLK signal display, FRAME frame signal display.
Specifications:
- Name: Diagnose Card
- Material: printed circuit board
- TTL631 PRO Full Set
- Item size: 78 * 52mm / 3.07 * 2.05in
- Package size: 150 * 100 * 100mm / 5.91 * 3.94 * 3.94in
- Package weight: 170g / 6.00ounce
Packing List (TL631 PRO Full Set):
- 1 * TL631 PRO Diagnose Card
- 1 * MINI PCIE Conversion Card
- 1 * A-DEBUG Conversion Card
- 4 * Wires
Overview
The Full Kit (get this one)

Warnings

Adapters


Supported Headers
The TL631 supports all the headers the TL611 did and the new ones.


Identification of Components

- LPC1 shared high-speed channel = connect to the motherboard 2.0 small pin LPC interface, 2.0 module
(Module expansion LPC3 interface can connect notebook MINI PCIE conversion card, A-DEBUG conversion card, ASUS notebook DEBUG-CON. EC-DEBUG). - PCI high-speed channel = support all PCI slots.
- LPC2 shared high-speed channel = connect to the motherboard 2.54 large pin LPC interface, ASUS COM-DEBUG. ASRock UART1, MSI JDP, Supermicro SPl.
- PCIE X1 high-speed channel = support Gigabyte without PCI motherboard (other brands do not support).
- 3VSB power indicator, to detect whether the power is normal.
- RST reset indicator, to detect whether the motherboard reset is normal (only when PCI or PCIE is inserted)
- CPU indicator light, to detect whether the CPU module is normal.
- DRAM memory indicator, to detect whether the memory module is normal.
- VGA graphics indicator light, to detect whether the graphics card module is normal.
- PCH south bridge indicator light, to detect whether the south bridge module is normal.
- DP decimal point, CLK signal display.
- DP decimal point, FRAME frame signal display.
- Threading hole
- This is possibly to attach a cord to be able to pull the card out easier.
LED Descriptions

Number 4 is obviously RAM
Debugging Examples
I believe are examples of how the device should be plugged in.

Manuals
This is the English manual for the TL611Pro but is very similar to the TL631Pro.
Page 1 of 2
Page 2 of 2
My Home Network Project
These are just some rough notes for my Home network project. There is more information on my PC.
Links
- Suppliers
- Next-Gen Cables - DTECH Cabling Systems
- Level-Up Your Cabling Infrastructure With DTECH Next-Generation Cables. A Leading Manufacturer of High-Performance Cables for AV and DATA Professionals.
- I will buy the XG 40BaseT system from these guys including the cable, keystones and panels.
- Excel Networking Solutions
- Excel Networking is a world-class premium performance end-to-end infrastructure solution – designed, manufactured, supported and delivered – without compromise.
- Made my large server cabinet
- British Based
- Suppliers all categories of cable
- Search results for Cat6a 500m
- Cannot buy from this company directely but their whole catalogue is online with their specs and SKU
- This company suppliers everything and is good quality.
- Data Cables & Network Components | DTTUK
- Data Termination Technology (DTTUK) are leading suppliers of networking cables, computer network cabling, structured cable, data and fibre optic connectors.
- Excel supplier
- Next-Gen Cables - DTECH Cabling Systems
- CAT6A Cable
- Next-Gen Cables - DTECH Cabling Systems - Level-Up Your Cabling Infrastructure With DTECH Next-Generation Cables. A Leading Manufacturer of High-Performance Cables for AV and DATA Professionals.
- CAT 6A F/FTP 600MHZ HDBASE-T DOUBLE SHIELDED 23 AWG ETL LSZH - BS6701 CE - 305M | eBay
- Note this cable is BS6701 compliant. Jacket Colour/Type : BLUE - LSZH (C Grade).
- DTECH Cabling Systems 600MHZ N-Link Plus Category 6A F/FTP S-FOIL. This cable is manufactured specifically to deal with high frequency applications and network tested to perform up to 600Mhz.
- I bought this
- Excel Networking Solutions - Search results for Cat6a 500m
- Connectix 001-003-003-34 CAT6a F/FTP Solid Ethernet Cable Reel, 305m, Black, LDPE (Boxed) - Buy the Connectix 001-003-003-34 CAT6a F/FTP Solid Ethernet Cable Reel, 305m, Black, LDPE (Boxed)
- Cat6A Cable F/FTP S-Foil Dca LS0H 500m Reel - Ice Blue | Comms Express - Excel Cat6A Cable F/FTP S-Foil Dca LS0H 500m Reel
- Bulk Network Cable | Patch Leads | Cat5e | Cat6 | Cat6a - Bulk Networking Cable | CAT 5e | CAT 6 | CAT 6a | Patch Leads | Network Cabinets
- BS6701 | Connectix Cabling Systems
- BS6701: Amendment 1 - 2017. Specification for installation, operation and maintenance
- This is a list of all of the different cable classifications such as low smoke and fire resistance.
- KeyStones
- 100-181-24 - Excel Cat6A FTP Screened Low Profile Keystone Jack Toolless Silver (Box 24) - 100-181-24 Excel Cat6a FTP Screened Low Profile Keystone Jack Toolless Silver, available as part of our range of excel cat6a keystone jacks for RJ45 network connections.
- Excel Butterfly Keystone Jack - Toolless | Comms Express - View our range of Excel Butterfly Keystone Jack - Toolless available at Comms Express, Networking Reseller - Free Delivery Available Buy Online Today
- 100-180-24 - Excel Cat6A FTP Screened Keystone Jack Toolless Silver (Box 24) - 100-180-24 Excel Cat6a FTP Screened Keystone Jack Toolless Silver, available as part of our range of excel cat6a keystone jacks for RJ45 network connections.
- Excel Cat5e/Cat6/Cat6A FTP Shielded/Un-Shielded RJ45 Keystone Jack Toolless | eBay - SKU: #EX-KS-TOOLLESS BRAND: EAN: No aplicable WEIGHT: 0.036.
- Excel Cat6A FTP Screened Low Profile Keystone Jack Toolless Silver Box - Excel Cat6A FTP Screened Low Profile Keystone Jack Toolless Silver (Box 24) 100-181-24
- Excel Cat6A FTP Screened Low Profile Keystone Jack Toolless Silver - Excel Cat6A FTP Screened Low Profile Keystone Jack Toolless Silver. 100-181
- Excel Category 6A Low Profile Screened Keystone Jack • OneStopCable.Shop - Excel Category 6A Low Profile Screened Keystone Jack, is a reduced size toolless termination RJ45 socket. Perfect for using with shutters.
- Excel Category 6A Screened Keystone Jack • OneStopCable.Shop - Excel Category 6A Screened Keystone Jack, is a toolless termination RJ45 socket suitable for mounting in range of housings.
- Excel Category 6A Screened Toolless Keystone Jack 34.3mm • OneStopCable.Shop - Excel Category 6A Screened Keystone Jack is a toolless RJ45 socket suitable for mounting in a range of housings
- Patch Panels
- Excel 24 port 1U Unloaded Black Keystone Frame - Supplied Unloaded - Excel 24 port 1U Unloaded Black Keystone Frame - Supplied Unloaded - Available at Comms Express, Networking Reseller - Free Delivery Available
- ETS 24-Port CAT6A FTP Shielded 1U Patch Panel 19-Inch Loaded w/Tool-Less Keystone Jacks Rackmount or Wallmount | Amazon
- Excel 24 port 1U Unloaded Black Keystone Frame P/No 100-026 - Excel 24 port 1U Unloaded Black Keystone Frame P/No 100-026
- HDBaseT
- HDBaseT | Home - The ProAV industry’s premier multimedia distribution technology up to 100m/328ft over a single, standard Category cable.
- About Technology - HDBaseT - Extend fully uncompressed Audio, Video, USB, Gigabit Ethernet, power, and control up to 100 meters/328 feet over a single, standard Category cable.
- 40GBASE-T in Data Center Networks - Softing IT Networks - Data center network infrastructure is witnessing a transformation, driven by growing bandwidth and network performance demand.
- Cat8 Cable for 25GBASE-T and 40GBASE-T Network | FS Community
- What is the Cat8 cable? What are 25GBASE-T & 40GBASE-T and why choose Cat8 cable for 25G/40GBASE-T network?
- As you know, with the increasing bandwidth demands, choosing the right cabling is significant in future-proofing data centers, server rooms or other places for requirements that lie ahead. Nowadays, Cat8 cable is regarded as a new option for emerging 25GBASE-T and 40GBASE-T networks. Then, what is Cat8 cable? What are 25G/40GBASE-T and why choose Cat8 Cable for 25G/40GBASE-T network? Read this post to find answers to these questions.
- HDBaseT through UniFi Switch | UniFi
- HDBaseT isn't Ethernet, it just uses the same cabling (and can fall back to Ethernet). If you plug HDBaseT into an Ethernet switch, it switches to Ethernet Fallback Mode, which disables all the HDBaseT signals. Where you need HDBaseT, you can't pass it through any Ethernet switch.
- SW41HDBT — Blustream - 4-Way HDBaseT™ / HDMI Input Switch - 4K 60Hz 4:4:4, Simultaneous HDMI / HDBaseT™ Output, Manual / Auto Source Switching, PoC to TX & RX, Audio Breakout, Web GUI with CEC Source & Display Control
- HDMI over IP
- What Is HDMI over Ethernet and How Does it Work - HDMI over Ethernet, also called HDMI over IP, uses an existing ethernet infrastructure to distribute HD video signals from one source to an unlimited number of screens.
- HDMI Over IP Receiver for ST12MHDLAN - HDMI® Extenders | StarTech.com - HDMI Video Over IP Gigabit Ethernet Receiver for ST12MHDLAN
- Misc
- kwmobile F-Type Keystone Modules (Pack of 12) - Snap-In Patch Panel, Patch Bay Keystone Jacks for DVB-S, DVB-S2 F-Type Coaxial Cables | Amazon
- Everything You Need To Know About Coaxial Cable | RS - Everything You Need To Know About Coaxial Cable | RS Components In our comprehensive guide, we look at what coaxial cable is and what it’s used for, the different types of coaxial cable that are available, and compare it to other types of cable for completing various tasks.
- TV Aerial + HDMI + CAT6 Socket - Clear White – Corston - A combi utility socket
- TV over Ethernet
- METRONIC TV Cable for RJ45 Wall Socket - Coaxial Male/Male 5 M white | Amazon - Ethernet to coax cable
- 1pcs Rj45 Male Plug To F Tv Female Jack Rf Adapter Connector Coaxial Barrel Coupler High Quanlity - Connectors - AliExpress - Smarter Shopping, Better Living! Aliexpress.com
- Digital Antenna over ethernet? : networking
- Can I run an amplified coaxial antenna signal from this antenna/amp over cat5? I want to put the amp in the basement on the other end of this cat5 and use some sort of converter to get cat5 to the coaxial (preferably without power) outside at the antenna.
- Coax Cat 5 Balun is the search term you probably want.
- A balun is going to be the easiest and cheapest solution. Effectively it is just an adapter so you can send the TV signal over the cat5.
- Shielded Cat5 Balun II, Twin Pack - 500306 - 2PK | CPC - The shielded CATV balun allows RG6 coaxial cable to be replaced by Cat 5e/6/7 STP or UTP cable in the terrestrial RF environment.
- Satellite over ethernet
- Question - Sky Coax over Ethernet | AVForums
- To be clear you wish to run satellite down feeds from the LNB over cat6?
- As I understand it there are whole load of technical reasons why you can’t, that people more knowledgeable than me can probably explain.
- LNB signal over cat5e is it possible??? — Digital Spy
- I have a customer who has a fully cat5e wired house and wants a freesat plasma installing in the bedroom but the only problem is getting the satelite feed to the screen, there are two cat5e sockets behind the tv as the house currently has a scion system running in it, it is not practical to run a coax, and i was wondering if there are any baluns out there( i have searched with no luck) that any one knows about that would carry the signal over cat5e?
- You can't run a satellite LNB feed over cat5e
- But you CAN run RGB video over cat5e, so could you locate the satellite box at the comms rack and get a coax feed there
- Question - Sky Coax over Ethernet | AVForums
My Atari ST Notes
These are my Atari ST notes
- Websites
- Atari-Forum - A forum about Atari 16/32 computers and their clones. This forum is in no way affiliated with Atari Interactive.
- General
- Skip Long Memory Test - On TOS 2.06 to bypass the long memory test, just press any button.
- Atari ST Documentation Written/Modified by DrCoolZic - This page groups most of the documents that I have written under the name DrCoolZic or Jean Louis-Guerin.
- Emulators
- Steem Engine
- The Steem Engine is a free Atari STE emulator made with ease of use in mind.
- This is not updated anymore
- STeem SSE download | SourceForge.net
- Steem SSE ('ST Enhanced Emulator Sensei Software Edition' in full) is an updated version of Steem. Features have been added and emulation has been improved.
- The menu is hidden, press Alt to unhide it.
- The keys you need to know:
- F1: help (when not running)
- F11: mouse control
- F12: start/stop
- Alt: classic menu (when not running)
- Page Up: ST Help
- Page Down: ST Undo
- The code execution cannot proceed because d3dx9_43.dll was not found.
- ReInstalling the program may fix this problem.
- How to Restore a Missing DirectX DLL File - Need to restore a DirectX DLL file? This is a common problem with games. Learn how to restore the file properly from the DirectX installation package.
- How to Fix D3dx9_43.dll Is Missing or Not Found Errors - D3dx9_43.dll Not Found errors usually indicate a DirectX problem. Don't download d3dx9_43.dll, fix the problem the right way.
- Download DirectX End-User Runtime Web Installer from Official Microsoft Download Center - The Microsoft DirectX® End-User Runtime installs a number of runtime libraries from the legacy DirectX SDK for some games that use D3DX9, D3DX10, D3DX11, XAudio 2.7, XInput 1.3, XACT, and/or Managed DirectX 1.1. Note that this package does not modify the DirectX Runtime installed on your Windows OS in any way.
- Missing d3dx9_43.dll | Microsoft Community - I downloaded World of Tanks, I hit play, it says "The code execution cannot proceed because d3dx9_43.dll is missing". Reinstalling the program may fix this problem. I tried that twice, didn't work. Looked in system 32 folder, there is no d3dx9_43.dll, it goes from d3dx9_24.dll to d3dx9_32.dll.
- How to Fix d3dx9_43.dll Missing Error for All Games & Apps in Windows | YouTube | MJ Tube - Fix d3dx9_43.dll Missing Error in Windows 10/8/7
- Hatari - An Atari ST emulator for Linux and other systems that are supported by the SDL library.
- Easy to use
- Hatari User's Manual - User's manual for the Atari ST emulator Hatari
- F12
- Brings up the menu
- Pauses emulation
- Releases the mouse
- Mouse going all over the place
- This is a typical problem if you don't use the full screen mode
- Press AltGR+m to lock the mouse pointer into Hatari's window. On Mac use the keyboard combination Command+m (Apple key + m)
- You can't click on your OS then but the emulated mouse for the ST will be fine.
- Press it again to release the mouse again to the host OS.
- Steem Engine
- TOS Sources
- EmuTOS
- EmuTOS is a Free operating system for Atari ST computers, and more.
- An open source TOS replacement
- TOS Images collection | avtandil.narod.ru - An extensive list of TOS in both bootdisk and IMG format along with descriptions and proper names, remember Rainbow TOS
- ROMs Atari ST - Atari ST - TOS - [IMG] - Planet Emulation - A large list of TOS
- TOS ROM › :: ATARIworld :: Do The Math :: - A large list of TOS
- Steem TOS - Download a limited set of TOS from here.
- The most compatible TOS is the TOS1.02(UK)
- EmuTOS
- How much RAM
- Use SYSINFO.PRG and this will show technical information of your Atari including TOS and RAM.
- SysInfo - Atari ST - Essential software (The List) - Atari ST - Essential software (The List)
- Atari ST Sysinfo | atarimania.com - Sysinfo for Atari ST
- Test RAM
- YAART - RAM testing program | Atari-Forum - It always bothered me that RAM test software for the Atari was mostly very simplistic in their test algorithms. There are much better ways to find (especially subtle) faults, which are for example used by Memtest86 on the PC. So I ported a selection of these tests to Atari. I humbly named it YAART, Yet Another Atari RAM Test, but I think it provides better test coverage that the usual RAM test software for Atari systems.
- ROM Sources
- Atari ST ROMs | Emuparadise
- TOSEC: Atari ST (2012-04-23) : Free Download, Borrow, and Streaming : Internet Archive - There is a single file you can obtain from the Internet Archives that seems to have every ST program made stored in it
- Atarimania's ST-section! - What you see here is the start of the biggest Atari ST / TT / Falcon030 software database in Atari history. So far we've been working hard on the games section, and work has already started on the utilities and the demos sections too. They do all the other old Atari machines aswell.
- Introduction to the Discovery Cartridge | Info-Coach
- Russ' files
- This is Russ' games and utilities database for the Atari Series of handhelds and computers, you will find many directories including one called Atari ST STX Files, plus lots more , everything that he has collected in the last 3 years is there both in zip files and in downloadable .ST files.
- from here
- exxos Atari Pages
- Magazines, PD and various hardware articles. All ST Format disks and their scans are present.
- Hardware forum aswell
- Other Software
- The LaST upgrade - PART 10 GemBench 6
- For many years GemBench has been one of the best benchmarking apps on the ST. Ofir Gal's last release was GB4 where he was kind enough to allow me to use his source code to update GemBench. After many weeks of work, GemBench5 was born and ultimately GB6.
- Can tell what TOS you are running.
- Might be able to see how much RAM you have.
- NeoBench
- The LaST upgrade - PART 10 GemBench 6
- Hardware
- Atari ST Memory Information - Memory for Atari ST/Falcon/TT computers
My Sweet Home 3D Notes
Thanks to Emmanuel Puybaret for this amazing and free software.
You can buy a version with more models and support the project, a paid version available on the Microsoft Store, automatically updated and bundled with 1500 pieces of furniture and 418 textures.
Sweet Home 3D is a free home design software. It is not developed to be be a full CAD system but aimed for people to do interior design which it does really well.
I had some issues when using this software dues to the feature set or how they are implemented.
These are my notes which will help people new to the software be able to use it and answer all of those question I had.
Getting Started
- Download
- Sweet Home 3D
- Official Model Libraries and import them.
- Official Texture Libraries and import them.
- Download and Install these plugins
- AdvancedEditing: Adds extra functionality to manipulate elements after their creation
- 3D Pan with middle mouse button: Adds 3D image panning and adds a Exponential mouse wheel option
- Wirings: Add wiring to your 3D image. Excellent for networks, central heating and basic electrics.
- ExportToSH3F: This will allow you to make your own Sweet Home 3D models in the native format.
- CopyAsNewFurniturePlugin: Copies the selected objects in plan as a new piece of furniture into the clipboard
- ExportPlanImage: Export plan to image to a to PNG or JPEG format at the size of your choice
- GenerateRoof: - Generate a roof with various slope angles from the shape of the selected room
Read this
- if you are going to do a precise plan
- Backup often, especially before big operations or resize (keep versions)
- Make use of dimension lines to record your true measurements
- When making or editing walls beware of the fact that a wall might be longer than you want so as to allow it to join, and consequently when you delete a wall it might have a different length than you initially expect.
- My Jigsaw method is better for precise plans when you are cobbling them together when going round your house getting random measurements
- Wall thickness is a one you have to be careful about (unless using Jigsaw method)
- Un-joined walls sometimes have a habit of moving or appearing to move, zoom in and out to make sure it is not just a drawing issue
- If you use the resize feature, sometimes assets locations and measurements get messed up. Backup before you use this in any complex scenario.
- When you have created a room sometimes the asset selection can get mixed up and you move something you did not want to.
- Install all the recommended plugins from the official plugin page
- Read the forum, many answers to many problems in easy to read responses
- YouTube has a lot of tutorial videos (many referenced on this page)
- This article has answers to many newbie questions, because i had them and then wrote the answers down.
Notes
These will help you understand home Sweet Home 3D works:
- Official Sites
- Sweet Home 3D / Feature Requests - Request Features here
- Sweet Home 3D / Bugs - Report bugs here
- Sweet Home 3D Blog - Sweet Home 3D Blog with many tutorials and useful articles.
- Sweet Home 3D : Tips - Tips taken from the blog and list for ease of use. Great articles.
- Overview (Sweet Home 3D 7.0 API) - All the functions and API are documented here.
- Sweet Home 3D : Exported homes manager - Based on the Export to HTML5 plug-in, this service lets you upload your Sweet Home 3D files on this web server,
to display their 3D view with any browser compatible with WebGL.
- I feel this that this software is well suited for making 3D models from scratch but has some issues when trying to recreate an already existing building. Once you know the software and the relevant workarounds Sweet home 3D can be quite powerful.
- Get your floor plans right before adding any furniture or adding rooms and also keep a copy of this vanilla floor plan so if you ever make mistakes you can go back.
- By default you can only edit dimensions when creating an object, after that you have to use the mouse
- When you start and finish your first boundary (or subsequent boundaries) of the object/room, i.e. after the second click, immediately press enter and this allows you to edit the dimensions, this one time only
- Select room, In (Plan --> Edit points) you can change the boundaries of the room by changing their points on a room – this is a bit fiddly but you can change things
- Connection of walls is done from their middle.
- This can potential change room areas depending where you join a wall.
- You need to make sure you account for the width of the wall.
- When you change the thickness of a wall, the expansion/shrikage is done from the middle of the wall.
- This can potential change room area.
- This can potentially change the length of attached walls.
- When you delete a wall from a joined wall section the original wall length in not restored.
- When a wall is joined the joining walls are stretched so the centres of the walls meet before the wall is merged.
- Newbies - don't use automatically joined walls as they will not work as you expect if you want rooms with exact areas.
- Read these notes and I would recommend the Jigsaw method
- Cannot pan the 3D view
- Sweet Home 3D / Plug-ins / #39 Pan with middle mouse button - This plugin will solve this issue
- Sweet Home 3D Forum - View Thread - Pan in aerial 3d view
- Panning the 3D view isn't possible.
- This thread has some workarounds
- Straight Lines
- Like most design software, if you hold down the shift key linear objects (i.e. lines) will snap to the perpendicular (right angles)
- Make labels or text smaller
- select whatever object you what it's text to go smaller
- press Ctrl + Shift + Alt + K
- I got this shortcut from the menu (Plan --> Modify text syle --> Decrease size)
- It does not matter if there is not a door that 100% matches yours, same for windows and other stuff. If it is, go on the internet and find one, or make one and then upload it for everyone to use.
- Measurements and accuracy
- The measurement lines must transect what you are measuring, that is why there are two lines indicating the spot
- The software suffers from rounding issues.
- It is not accurate to 1mm because I can have a room with 4 equal sides but with slightly difference lengths on the wall depending on how I measure them. They will only be out by +/-0.2 at worst.
- as some people saying because of the roundings but more like 1cm at best 5mm but with rounding this is reduces accuracy to 1cm
- Figures are not always re-calculated on the fly
- When you measure with the measuring tool, you are measuring the edge and not the middle of a wall.
- How to hide all measurement lines
- This is not currently an option but there is a workaround
- Sweet Home 3D / Feature Requests / #847 Hide text and dimensions
- Add them to a separated level at the same elevation as the level where you want them to appear. Then you can make that level viewable or not. If you already drew your texts and dimension lines, cut them and paste them in that level.
- If lines (or objects) are not level but should be, scroll in and out etc.. and they will be redrawn
- Sweet Home 3D : Translations
- Sweet Home 3D is available in 29 different languages.
- It uses the SH3L format.
- Sweet Home 3D file extensions - The list of file extensions associated with Sweet Home 3D - A free interior design program
- Zoom
- In the 2D plan, if you hold Ctrl and use the mouse wheel it will zoom in where the cursor i. This will be consistent with how AutoCad works
- File Locations (Windows 10 64-bit)
- Install Directory: C:\Program Files\Sweet Home 3D\
- Paid Version Install Directory
- The paid version 6.6.1 doesn't run online and is installed in the hidden folder
- C:\Program files\WindowsApps\eTeks.SweetHome3D_6.6.1.0_x64__y7v7etvrysvmm
- Plugins: C:\Users\username\Application Data\eTeks\Sweet Home 3D\plugins
- Default Furniture Library: C:\Program Files\Sweet Home 3D\lib\Furniture.jar
- Imported Furniture (SH3F): C:\Users\username\AppData\Roaming\eTeks\Sweet Home 3D\furniture
- Default Textures Library: C:\Program Files\Sweet Home 3D\lib\Textures.jar
- Imported Textures (SH3T + others?): C:\Users\username\AppData\Roaming\eTeks\Sweet Home 3D\textures
- Imported OBJ
- An imported 3D model and its icon are stored in .pref files in the folder C:\Users\username\AppData\Roaming\eTeks\Sweet Home 3D
- These files are then referenced in the file C:\Users\username\AppData\Roaming\eTeks\Sweet Home 3D\preferences.xml.
- Merging models in a SH3F file would lead to slower and slower operations when many models are imported.
- General - Under Windows Vista / 7 / 8 / 10, imported furniture, textures, plug-ins and user preferences are saved in the C:\Users\user\AppData\Roaming\eTeks\Sweet Home 3D folder and its subfolders ; user preferences handled with version 2.6 and previous versions are saved in the HKEY_CURRENT_USER\Software\JavaSoft\Prefs\com\eteks\sweethome3d folder of Windows registry.
- Cant Open SH3D file
- Sweet Home 3D Forum - View Thread - Can't open file
- If you use Sweet Home 3D under Windows, check in the subfolders of C:\Users\user\AppData\Roaming\eTeks\Sweet Home 3D\work (where user is your login) if there are some files starting by open and ending with .sweethome3d. If such files exist, copy the most recent one, change its extension by .sh3d and try to open it with Sweet Home 3D.
- If you're under Mac OS X, you should rather search in the subfolder Library/Application Support eTeks/Sweet Home 3D/work of your user folder
- and if you're under Linux, in the subfolder .eteks/sweethome3d/work of your user folder.
- Sweet Home 3D Forum - View Thread - Can't open file
- Opening Sweet Home 3D files for manually editing
- All the native Sweet Home 3D files are ZIP files with different file extensions. Within these files are text files and assets.
- You can open these files by dragging or opening them in WinZip or WinRAR etc.. (not by double clicking though)
- Make 2D plan grid bigger
- Just drag and drop what you want to move. When the mouse pointer is on the border of the plan, it will automatically enlarge.
- 3D View colours don't match those in the 2D view
- Sweet Home 3D / Bugs / #1122 Incorrect rendering of floor color in 3D plan
- Objects color may change in the 3D view according to their orientation towards the light sources and their brightness. You may adjust light brightness in the 3D view modification pane. The color/texture of the rooms is always lighter in the plan because they are displayed half transparent.
- To make the colours look correct you need to:
- Right click on the 3D view
- select Modify 3D view
- Under the 3D rendering section set Light brightness to 50%
- Sweet Home 3D / Bugs / #1122 Incorrect rendering of floor color in 3D plan
- Constant/regular backups as are a must
- The undo i think only has 5 steps. add this at the top
- Store the backups as version so you can go back further if you need to.
- You can set the position of the sun
- Base Plan
- Base plan is a term that includes lockable objects, includes walls and rooms. Anything labelled as windows, doors or staircases are also automatically included in base plan (not movable).
- Other furniture is by default not part of base plan. But you can control by checking/unchecking "Part of base plan" in the furniture dialogue
- When the base plan is locked, only movable furniture can be selected and moved in the plan.
- It's typically used for windows and sanitary.
- The reason for this feature is that you can make the house and then move all your furniture about as you want witout breaking all of your hardwork
- The plan can be locked/unlocked here (Plan --> Lock base plan)
- If you group your windows, doors, stairs or invisible boxes with an object that is not part of the base plan, the whole group can be unlocked from the base plan.
- Elevation, Levels and floors
- You cannot edit a plan's elevation until you have layers
- Walls from the layer below will appear as a greyed out background.
- Constructing the same walls on you new level
- Copy and paste method
- Copy the assets from below
- Create a new level
- Paste
- Delete the unwanted parts.
- Copy from below
- Trace the grey out walls from below.
- This might not be the most accurate especially for complex projects.
- A cross hair will appear when you are aligned with the wall below.
- Not sure how this works for basements
- Copy and paste method
- How to design a split-level house - Sweet Home 3D Blog
- This tip shows how to design a split-level house based on the "shop-house" example.
- A complex example of elevation and levels
- Select (Plan --> Levels --> Add level) to create a new level.
- Level 0 and Level 1 tabs now appear above the plan as show below.
- Level 0 contains what you drew until now in the default level and Level 1 is automatically selected and displayed in the plan
- How to increase ground floor height in sweet home 3d | Youtube | ABJECT SAGA CREATION
- Shows you a basic example of levels and how to change elevation of a floor.
- SH3D Lesson 6 - Basement & Second Floor Levels | Youtube | TJ FREE
- Sweet Home 3D Levels & Images | YouTube | Kingenuity Designs
- Multple Height Floor in Sweet Home 3D | YouTube | SBCODE
- How to do mezzanine floors or just different floor heights in the same room
- Sweet Home 3D Forum - View Thread - Ceiling on lower floor overridden with floor on upper floor
- Probably, elevation of upper level is not enough and equal to height of the lower level. Floor goes down and mixing with ceiling.
Check the elevation of second level, it should be Height of first level + floor thickness of second level
- Probably, elevation of upper level is not enough and equal to height of the lower level. Floor goes down and mixing with ceiling.
- Added a new level and there is space between them
- When you create new level, the default value used for elevation (start height) might not be the same as the value you set for you ground floors height (ie.e your wall heights)
- This default height is taken from (File --> Preferences --> New walls height) so make sure this is set correctly as this is used to figure out how height to place the new level. this can be changed afterwards i thought if you have forgot.
- Level 0 does not have a floor thickness beca\zsue it is the ground and that is about 32km thick.
- Sweet Home 3D Forum - View Thread - Space between levels?
- Most probably the open space is the thickness of the floor.
- Solutions: double-click the tab of the top level, then:
- decrease elevation of the top level, or
- insert a floor.
- If a wall protrudes up into the new level it will not show in the usual grey but will appear as a normal wall on that level, and if you delete it, it will be deleted from all floors.
- Floors will not go in until your create a room so they will appear transparent.
- Manually cut out a hole in the floor.
- Sweet Home 3D Forum - View Thread - Cut outs of the floor
- Q: I'm building a 3 floor building in sh3d and in the middle of the rooms I want to cut out a part of the floor so that you can look from the top floor all way down to the ground floor.
- Q: Is there an easy way to do this as I only found a PDF but this I did not understood. https://www.sweethome3d.com/SVGPathMiniManualForSweetHome3D.pdf
- A: Sorry about the SVG manual, but there is no need to do anything that drastic just for an opening.
- A: Two simpler options spring to mind:
- Draw the floor manually with the floor drawing tool, leaving a hole/cut-out where you want it.
- Import one (or more) boxes as staircases. The boxes should be invisible, which you can get by using an invisible texture (like invisible.png). If you size and lift the box(es) to the ceiling below, they can cut out the hole you need. The boxes are possibly faster to change later, but may be in the way when you work on the ground floor (in which case you can make an intermediate level just under the ceiling just for the cut-out boxes).
- Sweet Home 3D Forum - View Thread - Cut outs of the floor
- Sweet Home 3D Forum - View Thread - Adding a crawl space afterwards
- Q: I am trying to add a crawl space after I have designed the other levels (my mistake). So I added a new level with some walls, set elevation to 0 and added the height of the crawl space as elevation value to the other levels (3 levels). All elements, furniture etc. are now correctly elevated but the walls are not elevated. The walls of the ground floor are e.g. still on the ground (and therefore obscuring the crawl space). They should be on top of the crawl space. I have done houses with basements before (negative elevation) but then I have always started with the lowest level. Now I am trying to add it afterwards. What am I doing wrong?
- A: The height of a wall placed in a level is actually the height you set in its modification dialog box + the floor thickness of the level. May reduce the floor thickness or elevate the level above the crawl space a little more.
- Uninstalling or updating Sweet Home 3D
- Sweet Home 3D Forum - View Thread - furniture library copy
- Imported furniture, textures and plug-ins are not removed when you install a new version and when you uninstall Sweet Home 3D (if you want to delete them, see How can I uninstall Sweet Home 3D? in the FAQ).
- In the case of the portable version, imported stuff won't move automatically and you may have to copy or update some data as explained in the README.TXT of the portable version.
- In the case you are under Mac OS X and moved from the free version to the Mac App Store version, the folder where imported stuff is stored may have to be copied.
- Sweet Home 3D Forum - View Thread - furniture library copy
- How to generate a log
- from Sweet Home 3D Forum - View Thread - SH3D app will not open on Win 10
- type Windows + R keys, type cmd and <enter> (run a command prompt)
- drag and drop SweetHome3D.exe from an Explorer window (probably found in C:\Program Files\Sweet Home 3D or C:\Program Files (x86)\Sweet Home 3D folder) in the cmd window you opened in previous step
- type a space then 2>log.txt in cmd window to obtain a command like:
"C:\Program Files\Sweet Home 3D\SweetHome3D.exe" 2>log.txt
- type <enter>
- The program will fail but this time it will create a log.txt file in your home folder that could contain some useful information to understand your issue. Please copy paste its content here.
- from Sweet Home 3D Forum - View Thread - SH3D app will not open on Win 10
- 3D view
- You can store a point of view and then go to it at a later time. Useful if you get lost.
- Make the Aerial view centered on selection
- (File --> Preferences --> Aerial view centered on selection)
- How can I make the furniture catalogue searchable
- (File --> Preferences --> Furniture catalog view: Searchable list)
- Adding a spot lights
Plugins
- File Format
- SH3P - A native plugin file
- Instructions
- How to install plugins
- Download the plugin file which should have the extension .sh3p
- In windows, just double click the downloaded file
- Restart Sweet Home 3D
- The new options should appear under the edit menu or the feature will be enabled.
- How To uninstall a plug-in,
- Remove its SH3P file from the plug-ins folder of Sweet Home 3D, and restart the application.
- This folder is shown when you double click on any filename of a SH3P file listed in the Plug-ins section of the 'Libraries in use'.
- The latter pane is displayed by clicking on the Libraries... button shown at the bottom of Sweet Home 3D About dialog box.
- (Help --> About --> Libraries --> Libraries in use)
- C:\Users\username\Application Data\eTeks\Sweet Home 3D\plugins
- Get plugin version number
- Goto (Help --> About --> Libraries --> Libraries in use)
- Official Plugin User Guide | sweethome3d
- How to install plugins
- Sites
- Sweet Home 3D - Draw floor plans and arrange furniture freely
- Free interior design software. Draw the plan of your home or office, test furniture layouts and visit the results in 3D.
- Official Website
- This is an excellent resource with links to additional assets and plugins.
- Sweet Home 3D / Plug-ins | Sourceforge
- An offcial Sourceforge website for plugins. All plugins seem to be here.
- Sweet Home 3D : Plug-ins and tools
- This page lists the most interesting plug-ins developed by eTeks or by the developers who proposed them in Plug-ins Contributions Tracking System.
- Not as upto date as Sourceforge.
- Sweet Home 3D Forum - New Versions
- Look in the new version forum area for unofficial or new plugins
- Sweet Home 3D - Draw floor plans and arrange furniture freely
- The Plugins
- Sweet Home 3D Forum - View Thread - Wirings plugin
- This plugin brings to SH3D the capability to draw 3D polylines that will snap to floors, walls and ceilings, directly in the 3D view. This could be useful to draw electrical installations, plumbing, and simple decorations.
- Good for electrics, pipes and probably ethernet.
- Sweet Home 3D Forum - View Thread - Wirings plugin
- Sweet Home 3D / Plug-ins / #39 Pan with middle mouse button
- This plugin allows to pan both the home plan and the home 3D view using the middle mouse button. There are no settings, everything works out of the box!
- Exponential mouse wheel - This options speeds up the zomm in/out massively
- This allows you to use the middle wheel to pan on both the 2D and 3D
- AutoDimensioning
- Adds a menu item which allows to generate dimension lines for the whole plan. Available on the official plugin page.
- AdvancedEditing Plugin
- Resize selected objects, edit room points, connect walls that allow to modify the selected objects in plan.
- Adds the menu items Edit > Rotate, Edit > Move, Edit > Flip, Edit > Resize, Furniture > Elevate, Plan > Edit room points, Plan > Connect walls which allow to modify the selected objects in plan
- 3D dimension lines
- Sweet Home 3D / Plug-ins / #42 3D dimension lines - Download here from Sourceforge
- Sweet Home 3D Forum - View Thread - 3D dimension lines plugin - Forum thread
- This plugin brings to SH3D the capability to draw 3D dimension lines that will snap to floors, walls and ceilings, directly in the 3D view. This could be useful to give precise directives to installers.
- CopyAsNewFurniture
- The purpose of this is to select a group of objects and paste them back into the plan as a single object
- Copies a model as a OBJ so as a consequence strips Sweet Home 3d extra properties such as door and window archs, also it strips the window/door/stairs tags.
- Hot to USe
- Right click on copy the object in the 2D pane
- (Tools --> Copy as new furniture)
- Paste in the 2D pane
- You can now also export as a OBJ if you want.
- Sweet Home 3D Forum - View Thread - Wirings plugin
Walls
Walls are one of the building blocks of Sweet Home 3D. Learn how to use them well by seeing how they work before building your master project.
- Wall Joining functions
- Join walls
- (Plan --> Join walls)
- This allows you to freely make walls and then join them. This is not required if you use the Jigsaw method.
- The walls have to be touching
- The walls do not need to touch on the Center point
- The centre of one of the walls will shift to match therefore changing its length
- Walls might get cut at one end to allow the walls to join. There is always Ctrl+Z
- The order in which you select the wall might affect how the wall joins. All walls are treated as lines in the software.
- The direction of the wall will make a difference to how the wall is joined.
- It joins two walls, keeping the parts, but forming an elastic bond.
- Usage
- Make sure the walls are close together (obviously)
- Select both walls
- Use (Plan --> Join walls)
- If you use the wall join tool then you can have some of the following issues.
- There are some weird effect when using the join tool, such as if a wall is longer than your room then it will get truncated (cut down), which is easy to fix, just add another wall on to it. You would generally come across this while messing about but it is not a big thing.
- The other issue is if the wall direction is not compatible, so if you join 2 walls of your room and it goes wrong, undo the change, reverse the direction of one of your walls and re-join.
- Once you have connected all of your walls, you can then use the room tool to create a perfectly sized room. This them makes it easier to start to build the rest of your house as generally the wall builder will work as expected from now because you always have a wall to work from.
- If you have to ever replace a wall for instance because you made it thicker due to an earlier mistake, remember that joined walls join in the middle. So this is a good reason not to join the walls until later.
- Connect walls
- (Plan --> Connect walls)
- This is similar to how using create wall tool is and extensively will allow you to join the walls together so they behave in the same way
- The order in which you select the walls makes a difference, the first walls selected will move to connected to the second wall selected.
- The end of the first wall will connect to the beginning of the second wall
- First a rotation will occur to align the walls, then an elongation (possibly shrinkage) will occur so the walls can marry up
- It joins two walls, keeping the parts, but forming an elastic bond.
- The main difference between this and the Join walls tool is that this tool will move and alter the first wall to meet the second wall as required.
- Usage
- Select both walls in the correct order
- Use (Plan --> Connect walls)
- Join walls
- Cannot join walls – they always go funny / don't have smooth connections.
- Walls can be joined only at their ends.
- Zoom in to see what is going on
- Disable/Enable Magnetism might help
- The walls are probably not aligned with each other so that is why the join appears off.
- The directions of the walls might need to be in the same direction.
- Split the wall and re-join
- this might cause you to have more wall segments (not sure)
- Rooms can cause issues with walls connecting, so delete the rooms and see if this fixes things.
- How to edit a wall
- Select the pointer arrow/cursor from the menu
- Press Ctrl + Shift + E
- This brings up the modify wall.
- This in combination with multi-selecting walls allows you to edit many walls at a time i.e. setting exterior wall sizes
- Split Wall
- Sweet Home 3D Forum - View Thread - Join walls
- The easiest way to really split walls and remove the joint (in my view) is to split a wall in three, then delete the middle part, and reconnect the remaining parts. Then, by hand, you correct the coordinates to where the split/joint should be.
- Sweet Home 3D / Feature Requests / #848 Detach walls
- There is no detach wall option.
- The workaround for this feature isn't so difficult:
- Cut and paste the wall you want to detach
- then select with the Shift key pressed the wall you want to keep it attached to
- and... join them again.
- Sweet Home 3D Forum - View Thread - Join walls
- Stretching Walls
- Select the wall with the cursor tool and then move your mouse over the end of a wall where it should change into a cross hair, then click and hold and alter as required.
- If the wall is only anchored at one end it will lengthen or shorten against this anchor.
- If you resize a wall at a joint you will actually be altering 2 walls against their relative anchor points.
- When you stretch a wall, it will show you the real values of the wall. A lenght of a wall can be longer than its sides in a room, but this issue might only occur when using un-joined walls, I have not tested this aspect.
- Moving Walls
- Select the wall with the cursor tool and then move your mouse over the middle of a wall where it should change into a 4 way arrow icon, then click and hold and alter as required.
- This will keep the wall in the same orientation, Height and thickness but when you move it it will alter the parent (or connected wall) accordingly to allow you to move this wall with out changing its shape.
- Putting a curve in
- Select the wall with the cursor tool and then move your mouse over the single blue arrow icon in the middle of the wall where it should change into a 2 way arrow icon, then click and hold and alter as required.
- Tutorials
- Sweet Home 3D - How to Connect walls | YouTube | Vedran - You will see two methods to join walls in Sweet Home 3D and this tutorial shows you how to use them.
- Sweet Home 3D How to Join Walls | YouTube | SBCODE - A quick tutorial on how to join walls in Sweet Home 3d.
- Sweet Home 3D Create Walls and Rooms | YouTube | EdTech 536 - Tutorial on how to create walls and rooms in Sweet Home 3D.
- Glass Wall
- Sweet home 3D - Glass wall | YouTube | RedTop Learning
- How to make a part of the oval shaped wall entirely out of glass using Sweet home 3D.
- And how to save it for future re-use
- Sweet home 3D - Glass wall | YouTube | RedTop Learning
- Measurements and accuracy
- Draw lines with the cross hair tool and use this to help make your walls, all other measurements seem to be inaccurate. Also zoom in when you do this as the lines will not be precisely placed.
- The figures that appear when you stretch a wall or use cross hair dont seem to be accurate, actually draw a line with the cross hair tool to check the value of a walls length etc..
Rooms
- Create your rooms with double click after you have added all your walls, chimneys and weird shapes into your 2D plan.
- If you have created a room and then added doors and windows, you should recalculate all the rooms so the room flows under the door to prevent tearing in the 3D view and get more accurate square footage. Do this by
- Cut room
- Create room again with the room tool
- Paste style
- Add the room name in again
- When you hit an absolute corner of a wall, the cross hair will become highlighted in a blue circle, which is useful.
- Create a room
- Option 1 - Enclosed area already created
- The area must be enclosed.
- Selected the room tool
- Double click in this area and a room will be created
- NB: Note also that a room created with a double click will include the half doorstep of each door placed on its walls. This feature ensures rooms join each other correctly in the 3D view when the doors between rooms are opened.
- Option 2 - Draw a room
- Select the room tool and draw a room as required
- At each corner (or end of your room's wall) you should click to continue to the next point or you can press enter to add more precise measurements.
- To add walls just double click on the new room
- Select the room tool and draw a room as required
- Option 1 - Enclosed area already created
- Room tool general
- Automatically created walls will all be joined together
- If you try and make the walls thicker it will reduce the area within the room because the thickness is expanded/shrunk equally from the middle of the wall.
- Quickly put walls around a room
- Select wall tool
- Double click in the room
- Issues with creating a walled room with a set area
- Sweet Home 3D Forum - View Thread - Length of a wall
- Wall length is measured from middle of wall.
- For rectangular walls, the maths is straightforward:
Inner length = Wall length - wall thickness
Outer length = Wall length + wall thickness
- Sweet Home 3D Forum - View Thread - Problem with wall thikness and room surfaces.
- This describes an issue I had where i made a room, automatically created walls but then increased the thickness of a wall which reduces my room area which can be confusing. Look at my Jigsaw method to get around this limitation.
- This discussion is as old as SH3D. It has been going on in various ways with suggestions for all kinds of solutions. However, none solves all problems, none is as intuitive as the current procedure.
- Note that SH3D isn't meant to draw architectural plans of houses. There are other programs better suited for that kind of work.
- Sweet Home 3D Forum - View Thread - Set walls by interior dimensions?
- Brand new to this program but want to make a layout for my house. The question I have is, what's the best way to do a room layout. When I measure my walls, I'm obviously measuring the interior dimensions. When I draw a wall and drag to the length of wall I want, it seems to mark the middle of the wall at that point instead of the edge of the wall.
- Sweet Home 3D / Feature Requests / #1059 Demanding adjustment of wall thicknesses
- This is a feature request to allow the live editing of a wall thickness with the ability to select an anchor point for the expansion or shrinking of the girth.
- Sweet Home 3D Forum - View Thread - Length of a wall
- Rooms do not recalculate area when you add things like chimneys (walls) in or alter the wall configuration. So I would generate the rooms last or at worst delete and re-add but don't do complex styling and you will be fine either way
- Moving room labels
- Hover over the room blue manipulation arrows until the cursor to changes to a cross hair (cross in a square box), you can now drag and move the label.
- Recalculate Room areas
- There is currently not inbuilt option to do this.
- Sweet Home 3D Forum - View Thread - Recalculate Room Points
- Official workaround
- cut the room
- create the room with double click
- (Edit --> Paste style)
- You will need to add in the room name again
- If you do not use the auto room tool
- then where the doors are, the ground will be seen so if you use grass for the ground you will appear to have a green floor.
Create a room with a specific floor area and different wall thicknesses
Like most people I went around my house with a measuring gizmo and measured the rooms and walls because I do not have the blueprints but will use the rooms and their measurements to build a complete model of my house with correct dimensions for use with future projects, and yes, interior design. My house is old and has different thicknesses of walls.
These instructions are based on my rooms all having straight walls at 90 degrees. The methods will translate to odd shaped walls but that is outside the scopes of these instructions.
Using your floor plan as a background image can help when drawing your rooms but is optional. See this video How to design rooms from their inner dimensions | YouTube | SweetHome3D
These are the available methods below with their pros and cons.
Method 1 - Room Tool
Great for making a room with walls that are all the same. Can be used as a base for making rooms with different wall sizes but will require some extra work.
- Create a room with the create a room tool.
- Then select the wall tool and then double click on the room so it will add walls to that room.
- The walls are created using your default wall values set here (File --> Preferences)
- Once you have created your walls for this room, you might consider changing these values back to your preferred defaults.
- The room is now created with well placed walls all with the same thickness and height.
- Now because the room I have has different wall sizes, I need to edit the thickness of one wall to match the real values
- Altering the thickness of an attached wall
- The thickness is increased from the middle of the wall and you cannot control the anchor point, this means if you alter one wall's thickness as the room area will no longer be correct because the wall will expand into the room.
- You need the need the ability to set an anchor point before altering the wall's thickness.
- I have updated an issue at sourceforge for this. p.s. I would not use the word demand but did not want to create a duplicate issue.
- Delete a wall so you can put another wall in place with a larger thickness
- You will find that the remaing walls (where the deleted wall was attached) are longer than you expect because because they were joined in the middle rather than being side by side. This allows for angled joins.
- This is fine
- Reduce the protruding walls by half of the thickness of the wall you just deleted and the walls will then end where they should.
- Create a wall to match you specs elsewhere and then drag next to the protruding walls of your room.
- You will need to select this new wall and the 2 other walls and perform a join on them using (Plan --> Join walls)
- The walls must be placed next to each other.
- Remember that wall direction can affect how the walls connect.
- Inspect the wall lengths are correct and alter as required.
- Altering the thickness of an attached wall
Method 2 - Manually draw walls around the room
This method can be tricky to get the room dimensions right.
- Create a room with the create a room tool (optional but makes placement a lot easier)
- Manually draw the first wall against the bottom of the room making sure it is correctly placed.
- Setting the required thickness
- Press enter after drawing the line.
- Use the zoom function to make sure the placement is precise.
- Be aware that when you draw the wall your cursor is following the middle of the wall not an edge.
- Setting the required thickness
- Draw the second wall starting at the corner of the last and repeat this until you have done your wall.
- Follow the procedure as for drawing the first line (thickness and placement)
- When you get to the exact corner, the cursor will will show vertically and horizontal lines.
- There seems to be no way to stop walls snapping together so they can be altered before putting in place.
- Is there a way to disable walls automatically joining so they can be treat as separate entities allow thickness change until I want to join them? so they can be treated independently.
- Now because the room I have has different wall sizes, I need to edit the thickness of one wall to match the real values
- See Method 1 for reasons why you cannot use this to create a room with different wall sizes
Method 3 - Jigsaw (wall by wall)
This method allows you to build your house will all independent walls (or as required) giving you the most freedom to alter wall thickness without affecting any other wall. This is my preferred method because I did not know the thicknesses of my my house and had to change and alter them as a I went along.
This method prevents any distortions caused by changing thickness when building you room and also prevents automatic joining.
I currently have only ever used this to make my house which has all square rooms and is why I have included the methods above as-well just in-case one of those is a better fit. This method is a lot more fiddly because you constantly have to use the zoom to make sure walls are where they should be. I have found that wall measurements are not as precise as they should be but i don't know if that is because of using this non-standard way of joining walls.
- Make sure magnetism is disabled.
- Create a wall of your desired thickness, length and height, not on your floor plan where you are going to build your room but a temporary area.
- Move this wall to your the area you are building your room and place as appropriate
- Place a dimension line for the second wall
- I used dimension lines extensively during my build period. It allowed me to make an accurate plan and see any discrepancies I missed.
- Create your second wall
- Place the second wall next to the first wall which you are are connecting to
- Joining/Placing the wall
- Using the mouse move the wall over to your build area
- Use the cursor keys to move the wall in to it's final position which is when the walls appear to join
- When the walls are close but not touching you will see a single black line, but if you keep moving them closer the line will disappear and the walls will be joined.
- press cursor once, click off and see if joined, if not repeat
- You might need to add a small amount to each end of the wall to make internal walls join but keep their required length for the room.
- I recommend 0.1mm additional on the walls length to allow the overlap, however this is not always needed. 0.1mm is within the calculation tolerance of this software so is not always needed.
- If you have longer overlaps I don't this this will break anything as long as they are not too long.
- Don't worry this is not an elastic bond (permanent join)
- When the walls are close but not touching you will see a single black line, but if you keep moving them closer the line will disappear and the walls will be joined.
- Check the walls length
- Use the dimension line you drew earlier to check
- Sometimes due to this merging the wall will actually loose some of its length
- You can stretch the wall normally to make up the shortfall
- If the you are building a square room, 2 walls of the room will be longer to allow for the thickness fo the other 2 walls to maintain a correct internal area for your room.
- Only the dimension tool seems to be accurate, the rest of the figures move about because of rounding (and I am sure other mathematical calculations)
- Repeat and place your next wall
- When you have built your 4 walls (room), you can create a room by selecting the room tool and then double clicking in the middle of your 4 walls.
Notes
- This requires you to put a bit more maths in to your build and what I mean by that is that you need to take into account the thicknesses or not of other walls you are going to connect too.
- Because the walls don't snap together you need to check the joins are next to each other. I also would not be in a rush to join them if not needed.
- The walls are joined but do not sufferer any of issues when joined automatically.
- You can delete a wall and re-add a thicker wall and there is no shift of the join points.
- What I would say is to just check the actual XY coordinates in the wall properties
- I have founds sometimes after a save or moving around some of these walls move fractionally and then appear out of place. This is possibly because the on-screen rendering is not quite as accurate as what is stored. As you must appreciate we are not using the automatic tools here so this logic might not be as well looked after or needs work.
- I would always keep my external walls as separate, this allows for easy adjustments.
- Sometimes a room is sealed even thought it shows it isn't, this is because Sweet Home 3D works with a 1mm tolerance
- These thread helped me
- Sweet Home 3D Forum - View Thread - Some notes after first usage
- This outlines the problem I had and that still needs to be fixed programmatically once a method is figured out
- Sweet Home 3D / Feature Requests / #750 Draw wall by know dimensions from inside or outside room, alignment and capture
- Sweet Home 3D Forum - View Thread - How to draw precisely -mini tip
- This is similar to my method but not the same
- I struggled to follow the whole process here.
- The resize option is for the length of the wall and not the thickness
- Sweet Home 3D Forum - View Thread - Some notes after first usage
- Once your floor plan is complete use the join tool
- Walls can be joined only at their ends.
- you can probably use the join tool on all your walls which might help with automatic value calculations.
- joining walls once you are done prevents the plan walls breaking (If you use longer overlaps this is less likely)
- If you walls are now joined and you delete one you will still have context so replacing the wall is a lot easier.
- Make Walls transparent
- How to show interior parts hidden by walls - Sweet Home 3D Blog - You want to show the external structure as well as the interior parts of the beautiful home you designed? Or more simply, do you need to view inside a small room where walls hide its interior?
- Sweet Home 3D Forum - View Thread - cut holes in the floor for the image rendering
- Read the full thread for all of the information
- Q: I modeled a house. I would like to cut the model for the render. The invisible box is not working, playing with the walls is a little bit time consuming. Are there any other way to do that (like the invisible box was)?
- A: You could import and use one or more large invisible boxes to cut the walls they will intersect, as in the file attached to this post.
Don't forget to select the Door or window at the 3rd step of the import furniture wizard, and then disable magnetism when you move the box so the program doesn't try to place the moved box on the closest wall. Note that those boxes will cut only walls and not other doors and windows, and if you import an invisible box as a staircase it will similarly cut all the floors. - SweetHome3DExample3WithCutWalls.sh3d
Method 4 - Using Dimension lines
- How to make 3D Floor Plan in Sweet Home 3D Best method (Modeling) | YpuTube | SCIENCEMAN
- I found this video (not english) where the man draws his rooms out with dimension lines and then draws walls around them.
- This is an easy method but will have all the downfalls of elastic bonds.
- Will only work for rooms with straight walls
- This method is just put here for reference
Furniture / Objects
- Supported Formats
- SH3D - Project file
- SH3F - Native furniture/object library can have a single or multiple models in it.
- External formats supported - OBJ, DAE, KMZ, 3DS or ZIP containing said formats
- COLLADA files use the .dae extension, which stands for digital asset exchange. A COLLADA file can store a diverse range of content, including images, textures, and 3D models.
- Can export to SVG but I am not sure why you cannot import them
- Downloads
- SVG Path Mini Manual For SweetHome3D.pdf - Helps you with technical aspects on making your own objects.
- Sweet Home 3D : 3D models import
- Download and import models for Sweet Home 3D official download page
- Also a variety of external links to other resources.
- Sweet Home 3D / 3D Models - Official model collection on Sourceforge
- Sweet Home 3D Forum - List Attachments - Search the post attachments on the Sweet Home 3D forum for models.
- Sweet Home 3D : Search free 3D models - Search a 3D model among more than 1400 objects
- Articulated mannequin
- is in the 'Miscellaneous' category and is called 'Mannequin' and is already included in Sweet Home 3D.
- How to customize mannequins | YouTube | SweetHome3D
- Customization for the Forensic Police - Sweet Home 3D Blog
- Many extra assets that the French Police use for making their crime scenes
- Download them from this page however some of the assets are on the standard download page.
- Free 3D models for blender, sweethome3d and others | Blogscopia
- ArchiBit Generation s.r.l. - 3D models - Free 3D models but NOT for commercial use
- Importing
- This is a useful option
- Some things like windows and door opening arcs are only stored in teh Sweet Home 3D native formats.
- Sketchup previews look like pencil drawings, but when you import into sweet3D they look normal.
- Just make sure you use a compatible file type such as Collada (.dae)
- If you have the 2D pane selected then your import will go directly to the plan and will only be saved in the library if you select the option 'Add to catalog'.
- If you have the libraries pane selected (it does not mater which folder or item) then the model will be imported into your library
- Imported furniture can be recognized easily, because the names are in italic font.
- Imported Models not showing
- The model ID needs to be unique.
- If this is a SH3F fiel you have created from other SH3F assets then it is lekly you have not changed their ID
- This can be done via the Furniture Library Editor
- (Edit preferences --> Furniture ID:) set to `Editable`
- Edit the model ID
- Save and re-import the SH3F
- Cannot import models
- Sweet Home 3D Forum - View Thread - Uploading my own models from Tinkercad and Blender to Sweet Home 3D -
- I have created my own 3D model with Tinkercad, and I exported it as an OBJ file, but the furniture import wizard refuses to let me import it.
- Just open the MTL and remove the line "illum 0.0"
- illum is supposed to be followed by an integer not a decimal number.
- Sweet Home 3D Forum - View Thread - Import *obj - files created MS 3DBuilder not possible
- I tried to import furniture created with MS 3DBuilder. But SW3D displays only an error message that the *.obj-Files has a wrong format.
- OBJ and MTL files can be edited with any text editor.
- OBJ file specification
- MTL file specification
- Sweet Home 3D Forum - View Thread - Uploading my own models from Tinkercad and Blender to Sweet Home 3D -
- Export the whole 2D plan as an SVG
- Right click on the 2D plan
- Select 'Export to SVG format'
- choose where to save it.
- Export an object from the plan
- You cannot export directly from the library, use Furniture Library Editor for that.
- There will be 2 files created
- .obj - The vectors of the object
- .mtl - The materials file, stores colours and textures etc.
- How to
- Select the item you wish to export on the 2D plan
- Go to (3D view --> Export to OBJ format)
- Choose where to save it.
- Currently the export will strip any Sweet Home 3D specific code because it is saving it as a OBJ which cannot store these properties.
- Export all Models
- There is no native method to export all or even singular items from the library.
- You can copy the relevant files from
- Default Furniture Library: C:\Program Files\Sweet Home 3D\lib\Furniture.jar
- Imported Furniture (SH3F): C:\Users\username\AppData\Roaming\eTeks\Sweet Home 3D\furniture
- You can export all user imported models using the ExportToSH3F plug-in to a furniture library.
- Export a single object from the library
- This is a workaround
- Open the relevant SH3F (or JAR) file with Furniture Library Editor
- find the model you want to export
- delete all other models
- Save library in a different file
- You now have a library file with just one model in it with all of its properties saved
- Combined 2 models together to make one single OBJ
- Select multiple objects and export as OBJ
- This is easy and works as expected although as normal with a OBJ export Sweet Home 3D parameters are removed
- Select items you want to combined
- Export to an OBJ
- (3D View --> Export to OBJ format)
- Save
- You now have a new single model made from different models.
- Import OBJ and add options as required.
- 'CopyAsNewFurniture
- This strips all SH3F properties and more, I would not recommend uising this method
- Select 2 or more objects
- (Tools --> Copy as new furniture)
- Paste
- This object will not have any of the special tags present such as staircase, Door/Window...
- Export as OBJ
- (3D View --> Export to OBJ format).
- Save
- You now have a new single model made from different models.
- Import OBJ and add options as required.
- Select multiple objects and export as OBJ
- Remove unwanted models from default library to allow for distribution
- Sweet Home 3D Forum - View Thread - Remove default libraries from Sweethome
- Default library is stored in the furniture.jar file found in the lib subfolder of Sweet Home 3D installation folder. You can delete that file if you want, or move it elsewhere.
- You could edit the furniture.jar file with 'Furniture Library Editor' but this would get overwritten with updates.
- located at C:\Program Files\Sweet Home 3D\lib\Furniture.jar
- Sweet Home 3D Forum - View Thread - Remove default libraries from Sweethome
- SH3F Format
- Format Explained
- SH3F is a standard zip file with a different file extension
- In the root is a LICENSE.TXT (might be optional)
- Each language has a properties file in the root and it is this file where the extra information specific to SweetHome3D is stored which can be edited by the Furniture Library Editor such as door/window openings.
- There is a single folder that seems to be the same name as the zip fileneame (excluding extension). You might find these 2 dont have to match but the do.
- In side this single folder you will find more folders and each of these folders relates to a model.
- Within each model folder you will find the following
- MTL
- OBJ
- Textures
- So as you can see SweetHome3D is:
- OBJ and MTL files with a properties overlay
- has the convenience of including the textures
- includes the model icon for displaying a preview in the software
- category
- the model name, creator and of course this is all translatable.
- Can hold a single or multiple models (there is no separate format for single models)
- Example layout
/contributions/
/contributions/1DoorLowerCabinet/
/contributions/1DoorLowerCabinet/1DoorLowerCabinet1.jpg
/contributions/1DoorLowerCabinet/1DoorLowerCabinet2.jpg
/contributions/1DoorLowerCabinet/1DoorLowerCabinet3.jpg
/contributions/1DoorLowerCabinet/1DoorLowerCabinet.mtl
/contributions/1DoorLowerCabinet/1DoorLowerCabinet.obj
/contributions/ButterflyFrame/
/contributions/ButterflyFrame/Butterfly.jpg
/contributions/ButterflyFrame/ButterflyFrame.mtl
/contributions/ButterflyFrame/ButterflyFrame.obj
LICENSE.TXT
PluginFurnitureCatalog.properties
PluginFurnitureCatalog_fr.properties
- Sweet Home 3D Forum - View Thread - 3D models specifications?
- A detailed forum thread on on converting objects and references for the SH3F specification
- As for the SH3D specifics you may want to have a look at the FurnitureLibraryEditor (see download page) which will allow you to supply additional model information
- For instance: .obj (and other import) files do not support some more advanced features like window/door cut-out, but this can be added with the FurnitureLibraryEditor. If you need light sources in the model and other advanced properties, you may just need to dive a little deeper into the file specifications (see Sourceforge docs)
- SVG is used for customised cut-outs in walls (windows/doors) and ceilings/floors (staircases).
- Format Explained
- Create your own SH3F
- Sweet Home 3D Forum - View Thread - Create own SH3F file (Puybaret)
- From version 1.5, you can create a SH3F file containing the furniture imported in Sweet Home 3D catalog with the plug-in ExportToSH3F
Once you downloaded this plug-in, copy it in the plug-ins folder of Sweet Home 3D, which depends on your system as follows: - under Windows 7, this folder is C:\Documents and Settings\username\Application Data\eTeks\Sweet Home 3D\plugins
- under Windows 10, this folder is C:\Users\username\Application Data\eTeks\Sweet Home 3D\plugins
- under Mac OS X, it's the subfolder Library/Application Support/eTeks/Sweet Home 3D/plugins of your user folder
- under Linux and other Unix, it's the subfolder .eteks/sweethome3d/plugins of your user folder.
- Relaunch Sweet Home 3D, and you'll see the new menu item "Export imported furniture to SH3F..." in Furniture menu. At this time this will work, only if you installed Sweet Home 3D 1.5 with its installers. If you installed it with Java Web Start, it may not work for security reasons and you'll have to download the installer.
- About your second question, if you want to add some furniture to the program, the easiest way is to generate a SH3F file with the aforementioned plug-in, rename its PluginFurnitureCatalog.properties entry as com/eteks/sweethome3d/io/AdditionalFurnitureCatalog.properties, and add the modified SH3F file to the classpath of Sweet Home 3D.
- !!!Caution!!! Take care of the license of the models you export to a SH3F file. Almost all free models can't be redistributed, and the fact that Sweet Home 3D is free doesn't change anything to that. That's the reason why I had to create some models for the first versions of Sweet Home 3D!
- From version 1.5, you can create a SH3F file containing the furniture imported in Sweet Home 3D catalog with the plug-in ExportToSH3F
- Sweet Home 3D Forum - View Thread - Create own SH3F file (Puybaret)
- Make your own Furniture/Objects/Models
- This is for the programmers or the more enthusiastic person and is a good reference for me.
- For complex model designs you will need to use an external 3D design software such as
- MS 3D Builder (apparently this is different to MS 3D Paint)
- Sweet home 3D - Create basic models with SH3D | YouTube | RedTop Learning
- Create basic models using Sweet home 3D.
- Watch this if you want to make 3D models with Sweet Home 3D
- If you make an object transparent using a texture such as HalfTransparentGrey.png and then export and re-import it as another object, then that object will be permanently transparent.
- Combine several objects into a single model in Sweet Home 3D by using CopyAsNewFurniturePlugin, and then export it or save to library as required.
- The Furniture Library Editor apparently has the ability to add a door/window arch but I cannot figure this out.
- Make objects transparent
- Sweet Home 3D Forum - View Thread - d value in .mtl can be edited in sh3d
- If you want to make a color transparent, you can replace its material by a half transparent texture in Materials modification dialog box.
- Import as a texture the HalfTransparentGrey.png attached to this post and use it in the Material dialog box to replace the material you want transparent.
- Sweet Home 3D Forum - View Thread - How to import model of a cabinet with transparent glass panel?
- Sweet Home 3D Forum - View Thread - d value in .mtl can be edited in sh3d
- Draw a Glass Wall
- Sweet Home 3D Forum - View Thread - glass wall
- You can't draw glass walls in SH3D.
- The workaround is a as follows:
- Insert a door frame or a service hatch in your wall and give it the correct dimensions
- Download one of the glass boxes in the Attachments section
- Import the glass box
- Resize and insert the glass box in your door frame or service hatch.
- Sweet home 3D - Glass wall | YouTube | RedTop Learning
- How to make a part of the oval shaped wall entirely out of glass using Sweet home 3D.
- Sweet Home 3D Forum - View Thread - glass wall
- How to add a glass panel and glass door for Kitchen?
- Sweet Home 3D Forum - View Thread - How to add a glass panel and glass door for Kitchen?
- Download one of the glass/transparent boxes in the Attachments section
- If you change the dimensions, you can use it as a glass pane for a door or window.
- Sweet Home 3D Forum - View Thread - How to add a glass panel and glass door for Kitchen?
- how to make window with a glass 3d model in sweet home 3d #- 03 | YouTube | up see - how to make window with a glass 3d model in sweet home 3d
- Turn off window opening directions in Plan
- Sweet Home 3D Forum - View Thread - Window opening directions
- There is not an option in the GUI, If you want to turn off this drawing from a plug-in, it's not possible.
- You'll have to modify the furniture library SH3F file where these windows come from, removing the properties starting by doorOrWindowSash from the PluginFurnitureCatalog.properties file found in the SH3F file (see also this thread). For the windows in the default catalog, change the same properties in the DefaultFurnitureCatalog.properties file found in Furniture.jar file. This file can be found in the installation folder of Sweet Home 3D.
- There is a workaround to achieve this: Export the door or window and import it again as door or window. Since it now doesn't come from the furniture library it also doesn't have the extra properties to display the opening. Make sure you give it a recognizable name because it will look the same as the original furniture but without the display of the opening in the 2D view.
- Sweet Home 3D Forum - View Thread - Window opening directions
- I wouldn't use windows. Just create glass walls using boxes and glass.
- Sweet Home 3D Forum - View Thread - Window opening directions - by Keet
- If you are creating your own custom conservatory I wouldn't use windows. Just create glass walls using boxes and glass. Your model will be smaller and without the unneeded opening displays.
- To create glass use a box the size of the glass you need. Export the box and name it "Glass.obj". Edit the Glass.obj and Glass.mtl files like this:
- Edit the Glass.obj file and replace "usemtl bottom", "usemtl top", "usemtl left", "usemtl right", "usemtl back", and "usemtl front" with "usemtl Glass". This should result in having 6 times "usemtl Glass" in the Glass.obj file.
Save the file. - Edit the Glass.mtl file and remove everything under the top comment lines (#), then insert this block of code:
newmtl Glass
illum 2
Ka 0.0 0.0 0.0
Kd 0.009412 0.009412 0.009412
Ks 0.039062 0.039062 0.039062
Ns 1.960784
Ni 1.45
d 0.5
- Save the file.
- Import the Glass.obj file and you have a Glass object that you can resize to any format. You can still change the colour of the glass.
- You can use this same glass object for any other furniture you create that needs glass. You now also know how to change a property in existing furniture to glass.
- Sweet Home 3D Forum - View Thread - Window opening directions - by Keet
- Models come with pre-determined measurements
- their defaults can be set or altered in the Furniture Library Editor.
- Open / Close all windows at the same time?
- Sweet Home 3D Forum - View Thread - Open / Close all windows/doors
- Is there an automated way of opening/closing all doors or windows (to a certain literal degree), be it in the interface, or even search/replace some value in the Home.xml that is present in the .sh3d (ZIP) file?
- Just add the element <transformation> you found to each <doorOrWindow> element in the Home.xml file. This will work only for a given model.
- Editing an object
- if you just change colour you will replace all editable colours of all assets of the model.
- Too edit individual parts of the object (if possible) then you need to modify via (Modify furniture --> Color and texture --> Materials --> Modify)
- When you select an individual material in (Modify furniture --> Color and texture --> Materials --> Modify) the relevant part of the model will flash on the preview image.
- You can modify imported OBJ furniture stored in your library by right clicking on them in the library pane and selecting 'Modify furniture'. Native SH3F models cannot be modified like this.
- Rotating an object on the horizontal axis
- Sweet Home 3D Forum - View Thread - Rotation of windows along x, y and z axis
- Doors and windows can't be rotated around an horizontal axis. This is on purpose because Sweet Home 3D is able to make window holes only in vertical walls.
- If you want care about the hole that a window could make in a slopping surface, don't import it as a door or window, or if it's already in your catalog, add it to your home, export it to OBJ format and reimport the exported OBJ file as a furniture without selecting the Door or window option in the Furniture import wizard.
- If you want a hole, please reading the tip How to design a sloping ceiling with a window.
- I have done this to make my conservatory assets
- This article shows you how to change the orientatial of an object by using the import process (sneaky !!!)
- Window movements are maintained.
- You can combine objects together after import.
- Sweet Home 3D Forum - View Thread - Rotation of windows along x, y and z axis
- Can you explain the furniture 'Movable' option?
- When the base plan is locked, only movable furniture can be selected and moved in the plan.
- It's typically used for windows and sanitary.
- Furniture Library Editor
- Sweet Home 3D Forum - View Thread - Furniture Library Editor released - This is the forum thread for the software and has the latest
- This software allows you to add Sweet Home 3D specific code to models/furniture
- When you rename a model it's assets stored in the SH3F are renamed also. See Sweet Home 3D / Feature Requests / #1128 Furniture Library Editor - inconsistent intername file handling
- Copy and Paste
- Hidden assets are not copied unless you select them in the furniture pane
- My Colours I used
- Wood: #91530B
- Gold: #CCBA78
- Sweet Home 3D Default background colour: #A8A8A8
Staircases
Staircases are a special type of model in Sweet Home 3D
- How to customize staircases - Sweet Home 3D Blog - This is a good opportunity to explain how to use staircases in Sweet Home 3D and the new Invisible material option added in the version 5.2.
- Sweet Home 3D Forum - View Thread - Modifying Staircase to Prevent Floor Hole - This has great explanations and solutions.
- Sweet Home 3D Forum - View Thread - Stairway Holes - I was experimenting tonight with making holes between floors to accommodate custom stairways as regular (non-stair) objects.
- Sweet Home 3D Forum - View Thread - How to fix a hole in the floor
- To avoid the automatic cut-out of holes over a staircase:
- Select the staircase,
- Export selection as .obj.
- Import the .obj file without selecting the Staircase option.
- Draw the room on the floor above manually (to create a hole for the stairs).
- BTW: Make sure you leave enough headroom between the steps and the ceiling in the staircase. Not only is this a legal requirement many places, but banging your head in the ceiling above a staircase can hurt, badly. Grew up in an old house made for the vertically challenged. Permanent bump in the head.
- To avoid the automatic cut-out of holes over a staircase:
- Remove an unwated hole caused by stairs
- Sweet Home 3D Forum - View Thread - What happened to the floor?
- The easy way to fix this would be to add a box where you wish to cover the stairs (you have to paste it at the first level).
- The perfectionist way is to edit the staircaseCutOutShape in the home.xml in your sh3d file.
- Sweet Home 3D Forum - View Thread - What happened to the floor?
- Sweet Home 3D Forum - View Thread - Distribute elevation plugin - This is a plugin to make your own stairs from blocks.
- Sweet Home 3D / Feature Requests / #1132 Hide stairs with room properties
- Workarounds / Other solutions
- You can export the stairs model and re-import it not as as a stairs object and then make your holes in the floors manually
- Edit the SH3F model's cut-out in the object
- modify the stairs properties in the home.xml
- create level on the same elevation and add another floor (not tried this one)
- Use the box model and cover the hole.
- Workarounds / Other solutions
- how to make stairs with a glass 3d model in sweet home 3d | YouTube | up see
Doors and Door Frames
There are a few things about how doors and their frames work to get the best out of them.
- Doors
- When you drag a door into a wall, the white area (door cartridge) snaps into place in the wall and the door is sized correctly so the cartridge is exactly the same width as your wall. The door will be ratioed correctly so it looks nice and normal.
- Make sure that the door has snapped into place. sometimes if the door is much thick than the wall then snapping might not work 100%, so what i would do here is pull the door of, reduce it's width and replace it back into the wall. Remember that the white cartridge area should bridge the wall all the way through.
- When placing a door the white square bit is the cartridge (door, door and frame) the extra bits indicated by an area surrounded by a grey line is the potential area door furniture can possibly use.
- Door furniture are things like door handle or letter box.
- It makes a difference in which way you drag the door into the wall. This can be fixed by vertical and horizontal flipping.
- The depth of the door includes the lined areas not just the cartridge.
- Only reduce door depth if you want to recess it.
- To make my recessed external doors I made my door depth the exact same width as the exterior wall and then i moved the whole door including all of the lined area into the wall as well which gives a nice fit and a recessed door effect.
- The arc indicates which way the door will open and seems to always be the same side as the larger lined area.
- There is sometimes a very small lined area on the other side of the door and this will depend on the door you use. Again this is probably to allow for door furniture.
- When measuring for a door, make sure you know if the door object you are adding has a frame, not all doors have a frame.
- Sweet Home 3D Forum - View Thread - Doors "keep proportions" feature
- Q: Once opened in "modify openings" they get "keep proportions" permanently ticked on and that's the end - sizes get updated into something irrelevant and can't be adjusted.
- A: This is because it’s too complicated to compute the adjustment of the 3D model of this kind of objects without deforming it when only one dimension is changed. Just close the door, change its size and reopen it.
- Door and Door frame (combining 2 objects)
- You should choose a door with the door frame (or not) you want rather than trying to select a door and then put a door frame around it, however this is not impossible just a bit fiddly.
- There are no direct interactions between a door and a door frame. They will only appear to be a pair because they are placed next to each other and the objects act like layers.
- Calculate your door frame width and then add your door into the frame unless a precise size of the aperture (i.e. door width) is needed
- There is currently no way to set the aperture of a door frame
- You could work our the size of frame required to give a specific aperture (door width) from the figures of a newly created door placed in a newly created frame.
- Create a door frame
- Drag a door (without a frame) from the catalogue into the door frame
- You can now see how big the door is for a given frame width, record these figures.
- Make the door frame wider and then record these figures
- You should now be able to work out the ratio of aperture size to door width. You might find that there is not a ration but just additional width and height added on for the frame.
- Add a Door swing and arch
- Sweet Home 3D Forum - View Thread - Door swing in plan
- Unless you know how to program OBJ files, there's no way to add the doorswing to an imported door. However, there's an easy workaround.
- Insert a hatch into your wall, then insert the door into the opening of the hatch. Rotate it 45 degrees or so, and you have a custom open door.
- There's no way to specify a door swing in OBJ format. The OBJ format isn't that clever!
- If you want to achieve that with your own model, you should create a custom SH3F file containing your door model (use Furniture Library Editor if you want to), and add the following properties in the PluginFurnitureCatalog.properties file contained in the SH3F zipped file (where n is the number of the model).
- This has all of the relevant code for you to look at, if you want to make your own door, read this thread.
- Unless you know how to program OBJ files, there's no way to add the doorswing to an imported door. However, there's an easy workaround.
- This would be similar for adding a swing to a window.
- Sweet Home 3D Forum - View Thread - Door swing in plan
Conservatory
There is no native support for conservatories in Sweet Home 3D but there are workarounds such as the one below which allowed me to draw my full height PVC Double glazing conservatory.
I have made a conservatory.sh3f library with a few useful assets in, i will release it when i sort the licensing out
Create the conservatory room with a wall
- Draw your conservatory's floor plan out as you would any other room (pick your method)
- Use the measurements of your double glazing cassettes (Window height, Trim height, thickness) to make the wall.
- or use possibly a wall that is 0.1mm high. I think using the full wall height will allow the roof to work better and keep the measurements correct.
- You can always use these examples measurements that i have used for my UK 28mm cartridge double glazing conservatory.
- Window Height: 210cm
- Trim Height: 15cm
- Height: 225cm
- Thickness: 7cm
- Use the measurements of your double glazing cassettes (Window height, Trim height, thickness) to make the wall.
Create your glass pane
- Method 1 - Export Window/Door model as an OBJ
- This gives me the object as a standalone model but with the door/window arches stripped.
- Windows and doors are still articulated and can be moved.
- We need to create a glass pane without any opening window (optional - there might be conservatory assets available, but this is a quick workaround)
- Drag a windows/door eg `Window (91cm x 34cm x 174cm by eTeks)' onto your conservatory wall you made earlier
- Make the handle and any joints invisible by modifying the objects properties.
- Export this as an OBJ (3D view --> Export to OBJ format)
- Once you have exported the object, imported it using the wizard (Furniture --> Import furniture)
- Tick the box 'Door or window'
- Give it a decent description such as 'Conservatory - Glass Pane'
- Put in the exterior category
- You now have a glass pane with no window arc
- The window can still be rotated via it's properties.
- Drag a windows/door eg `Window (91cm x 34cm x 174cm by eTeks)' onto your conservatory wall you made earlier
- Method 2 - Export Window/Door model as a SH3F
- Design objects as required in Sweet home 3D
- use `Furniture Library Editor` to export default objects in sh3f format from furniture.jar
- Currently you can only export the whole library, so I will make a copy of furniture.jar and delete every model except the one I want top export and then save it as a different file
- This gives me the model with all of the SH3D properties such as door arches intact.
- The objects are not in their own folder so a little tidying might be required. file locations are in PluginFurnitureCatalog.properties
- Look in contributions.sh3f for a good layout
- Repeat this process for each model you want to export.
- create a new SH3F called conservatory.sh3f
- Import all of the models you just exported as sh3f
- You need to use the 'merge' feature, NOT import.
- Using `Furniture Library Editor`
- Alter the models default settings to match those in your design
- In Sweet Home 3D I built a wall that was the same as my real conservatory measurements (225cm(h) x 7cm(thickness)) and then dragged my newly imported models on to them.
- I then made a note the updated thickness value of the assets which were caused by magnetism snapping the model to the wall.
- I updated my conservatory.sh3f library with these new thickness, saved it and then re-imported.
- You do not need to do this step but I did so all assets matched my walls and did not need to be modified.
- Make sure all of the doors and windows are the same way in the preview.
- The Front View should always be what you see from the inside.
- Alter the models default settings to match those in your design
- Manually edit conservatory.sh3f and go through the following
- The SH3F is a zip file with a different file extension so pick one of the following:
- Open the file as is in WinRAR
- Change the file extension, unzip, edit hte files, then re-zip and then finally change the file extension back to SH3f
- Update language files in conservatory.sh3f
- If you make changes to the names and descriptions, these will need changing in the SH3F file or you can just delete the extra language files.
- Add the following files into the root of your conservatory.sh3f file
- README.TXT - Add any notes you need to here suach as where you downloaded the textures from.
- CHANGELOG.TXT - This is useful to keep users upto date and know what version they have.
- LICENSE.TXT - Fill in with the relevant license if you are distributing
- Edit the colours in the SH3F as required, such as adding glass effect (optional)
- The SH3F is a zip file with a different file extension so pick one of the following:
Assembling the conservatory glass panels
Now you have the assets you have just made, it is time to use them.
- Now go around your conservatory wall and populate it with the a combination of the following assets:
- 'Conservatory - Glass Pane' (from above, by eTeks) - use this to create large glass panes
- 'French window' (91cm x 34cm x 210cm by eTeks) - this can be used for single doors or windows
- 'Double French window' (132 x 34 x 210 by eTeks) - use this for double doors
- NB:
- Set all assets to have 0 elevation and all be the same height and width where required.
- Make sure magnetism is on
- Your 'wall' might have different proportions which is fine.
- Adding Roof, to follow.
Notes
- Conservatory model examples
- Sweet Home 3D Forum - View Thread - Lean-to conservatory - Thius was done with only Sweet Home 3D assets.
- Four Seasons Conservatory | 3D Warehouse - Conservatory 15' x 14', large one with a dude by Patrick F. Windows were not transparent when I imported it.
- Four Seasons Conservatory | 3D Warehouse - 15 x 11 Four Seasons Sunroom, shorter version by Patrick F. Windows were not transparent when I imported it.
- Conservatory In Bethesda, MD | 3D Warehouse - Large glass conservatory by Adam Patrick Ford - This imports the whole house, but the conservatory glass is transparent.
- Make the walls transparent
- You can make your conservatory walls and instead of installing models you can just make the walls transparent giving a sort of glass effect. (see wall section for instructions)
Roof
- Sweet Home 3D Roof Tutorial | YouTube | SBCODE - How to make a roof in Sweet Home 3D.
- Sweet Home 3d Velux Roof Window Tutorial | YouTube | SBCODE - How to create a simple Velux style roof window and then a more advanced version but with the window open.
- Sweet Home 3D : FAQ - How can I create a roof on top of a house?
- Sweet Home 3D supports the creation of ceilings seen from below, but doesn't propose some simple way to create roofs yet. Nevertheless, you can use various tricks to cover a house: if the roof is flat, you can draw rooms in a level matching that roof.
- If you want to add a sloping roof, you may assemble blue slate roof, red slate roof or polygonal roof 3D models available at the 3D models import page, as well as the ones available in 3D Models Contributions Tracking System like Krams036's models and OK Hoff's models.
- From the version 5.5, you may also assemble boxes and triangles of the Miscellaneous category that you'll flatten and rotate around their horizontal axis, like in the house demos available in the dialog box shown by the File > New from demo menu item.
- Finally, the Roof Generator plug-in developed by Dorin Vatavu with the help of Daniele Lombardi is useful to create roofs with various slope angles.
Wiring and Pipes
The wiring plugin notes will go here.
- How to quickly draw water pipes in Sweet Home 3D | YouTube | SBCODE
- This method might be redundant now because of the wiring plugin
- I quickly demonstrate how to draw water pipes in Sweet Home 3D. It is a manual process where I resize and colour a standard cube object.
- It can be useful to visualise the plumbing of your house when planning any your work that may need doing.
- This video shows my heating water pipes, hot cold pipes and radiator placement, and is a work in progress.
Textures
- Supported formats
- SH3T - Native 3D texture library
- External formats supported - BMP, JPEG, GIF, PNG
- Sweet Home 3D : Textures import
- Download and import texture images for Sweet Home 3D official download page
- Also a variety of external links to other resources.
- Sweet Home 3D Forum - List Attachments - Search the post attachements on the Sweet Home 3D forum for textures.
- Free Textures for blender, sweethome3d and others | Blogscopia
- Copy all textures from one PC to another
- Sweet Home 3D Forum - View Thread - copy the library with the textures that I created on my pc to another computer
- You have to copy the preferences.xml file too.
- Caution! Once preferences.xml is copied on the destination computer you'll will loose all the furniture and textures you imported on that computer. So create a backup of Sweet Home 3D directory first.
- Portable version is covered here as well.
- Sweet Home 3D Forum - View Thread - copy the library with the textures that I created on my pc to another computer
- How to view the textures catalogue
- I don't see texture catalogue in the catalogue panel. Also, if I import a texture, where do I get to see it?
- The catalogue at the top left of a Sweet Home 3D window displays only objects.
- The imported textures appear in the texture modification dialogue box displayed when you want to change the texture of furniture, wall sides, room floor and ceiling and 3D view ground and sky.
- Frosted Glass
- My Method
- Download this texture Wall texture png overlay, abstract | Free PNG - rawpixel (you must attribute)
- Import it to Sweet Home 3D and accept the new resolution of (512px x 341px)
- Give it a size of (30cm x 20cm)
- Modify one of your windows and change the glass to use this texture
- Set the scaling of the texture to be 1000%
- The effect is not bad and with some experimentation and maybe changing the opacity of stuff could look really good.
- Sweet Home 3D Forum - View Thread - Glass blocks
- Getting a frosted glass effect is not really feasible in Sweet Home 3D.
- This thread develops a frosted glass block that you can use. It is an OBJ and not a texture.
- Some frosted glass textures I found
- Glass Texture Images | Free Vector, PNG & PSD Background & Texture Photos - rawpixel
- Glass Texture · High resolution authentic textures & backgrounds. Vector, PNG & PSD formats. Paper, wood, marble, nature, industrial, vintage, grunge and more. Safe for commercial use.
- Some really good options here.
- Frosted glass texture Images | Free Vectors, Stock Photos & PSD - You can find & download the most popular Frosted Glass Texture Vectors on Freepik. There are more than 4,000 Vectors, Stock Photos & PSD files. ✓ Remember that these high-quality images are free for commercial use
- Frosted Glass Texture Png - Kitchen Cabinet Transparent PNG - 520x650 - Free Download on NicePNG - Download Frosted Glass Texture Png - Kitchen Cabinet for free. NicePNG provides large related hd transparent png images.
- Sweet Home 3D Forum - Attachment Search Form - Search for frosted glass
- Cotswold - Pilkington Glass - This image will be copyrighted and is here for my reference
- Glass Texture Images | Free Vector, PNG & PSD Background & Texture Photos - rawpixel
- My Method
Tutorials
Tutorials, tutorial series or ones that don't fit elsewhere.
- Sweet Home 3D : User's guide - Learn how to use Sweet Home 3D quickly and efficiently from this official easy to follow guide.
- Best video tutorials about Sweet Home 3D - Sweet Home 3D Blog - There are hundreds of Sweet Home 3D tutorials on YouTube! Short or long, mute or spoken in many different languages, good or less attractive, oldies or recent videos, unique ones or parts of a serial, popular or unknown...
After viewing most of them, I made the drastic selection below. - Get started with Sweet Home 3D on Linux - This tutorial will guide you through the first steps in designing with Sweet Home 3D.
- How To Import Autocad File In Sweet Home 3d?
- How to import Autocad/FreeCAD file into Sweet Home 3D
- And load of other stuff and tutorials
- SH3D Lesson 6 - Basement & Second Floor Levels | YouTube | TJ FREE - How to create a second floor.
- SH3D Lesson 12 - Create Custom Textures and Paint Colors | YouTube | TJ FREE
- How to Draw a Floorplan and get a 3D picture with SweetHome3D | YouTube | DrZzs
- Tutorial Series
- Sweet Home 3D YouTube Channel - Official tutorials here.
- Sweet Home 3D : Tips - Lots of official videos here.
- Sweet Home 3D Tutorials | YouTube | TJ FREE - Learn SweetHome3D in this free tutorial series. Sweet Home 3D is a great, free, professional 2D and 3D floor plan drawing software. You can download it for free on Window, Linux, and Mac.
- Sweet Home 3D | YouTube | SBCODE - All Sweet Home 3D Tutorials by SeanWasEre
- Sweet Home 3D | YouTube | RedTop Learning - More technical videos
- Move the whole project on the plan
- Sweet Home 3D Forum - View Thread - Moving entire plan within grid
- Chose Select all or Select all at all levels in Edit menu, then drag and drop your design.
- Select All at All Levels doesn't seem to be working, lots of items are still not selected on the list on the left. Other options? It’s probably because you locked the base plan. Unlock it first.
- Sweet Home 3D Forum - View Thread - Moving entire plan within grid
- Magnetism
- This helps you draw rooms with 90 angles and sticks assets to the grid lines. 15 degree angles are allowed.
- It helps placement of doors and assets by making them snap in place and resize as needed to correctly fit into a wall.
- How to control magnetism | YouTube - Many actions are helped by magnetism, in Sweet Home 3D. This tutorial shows its advantages and when to disable it.
- Creating a video walkthrough in SweetHome3D | YouTube | Loreto College Coorparoo
Resizing Assets
Once you have created an asset (objectys, lines, rooms etc...) in Sweet Home 3D you can only modify the object in the following ways:
- Use the mouse on the 2D plan
- Select the object and manipulate as required
- Edit Points (AdvancedEditing plugin required)
- Select the object you want to resize
- Goto (Plan --> Edit points)
- Alter as required
- Resize (AdvancedEditing plugin required)
- Select the object you want to resize
- Goto (Edit --> Edit Resize)
- Alter as required
- Object that do not have 4 sides will be wrapped in a square, which is then modified.
Notes
- This process can sometimes alter other assets on your paln if you are not careful.
- Sweet Home 3D Forum - View Thread - Modifying dimensions once after they have been added
- You can modify dimensions only with the mouse.
- If you want to enter a precise value, type <Enter> when you initially draw it. See included help for more information.
- Or Install AdvancedEditing plugin from the Sweet Home 3D : Plug-ins and tools